

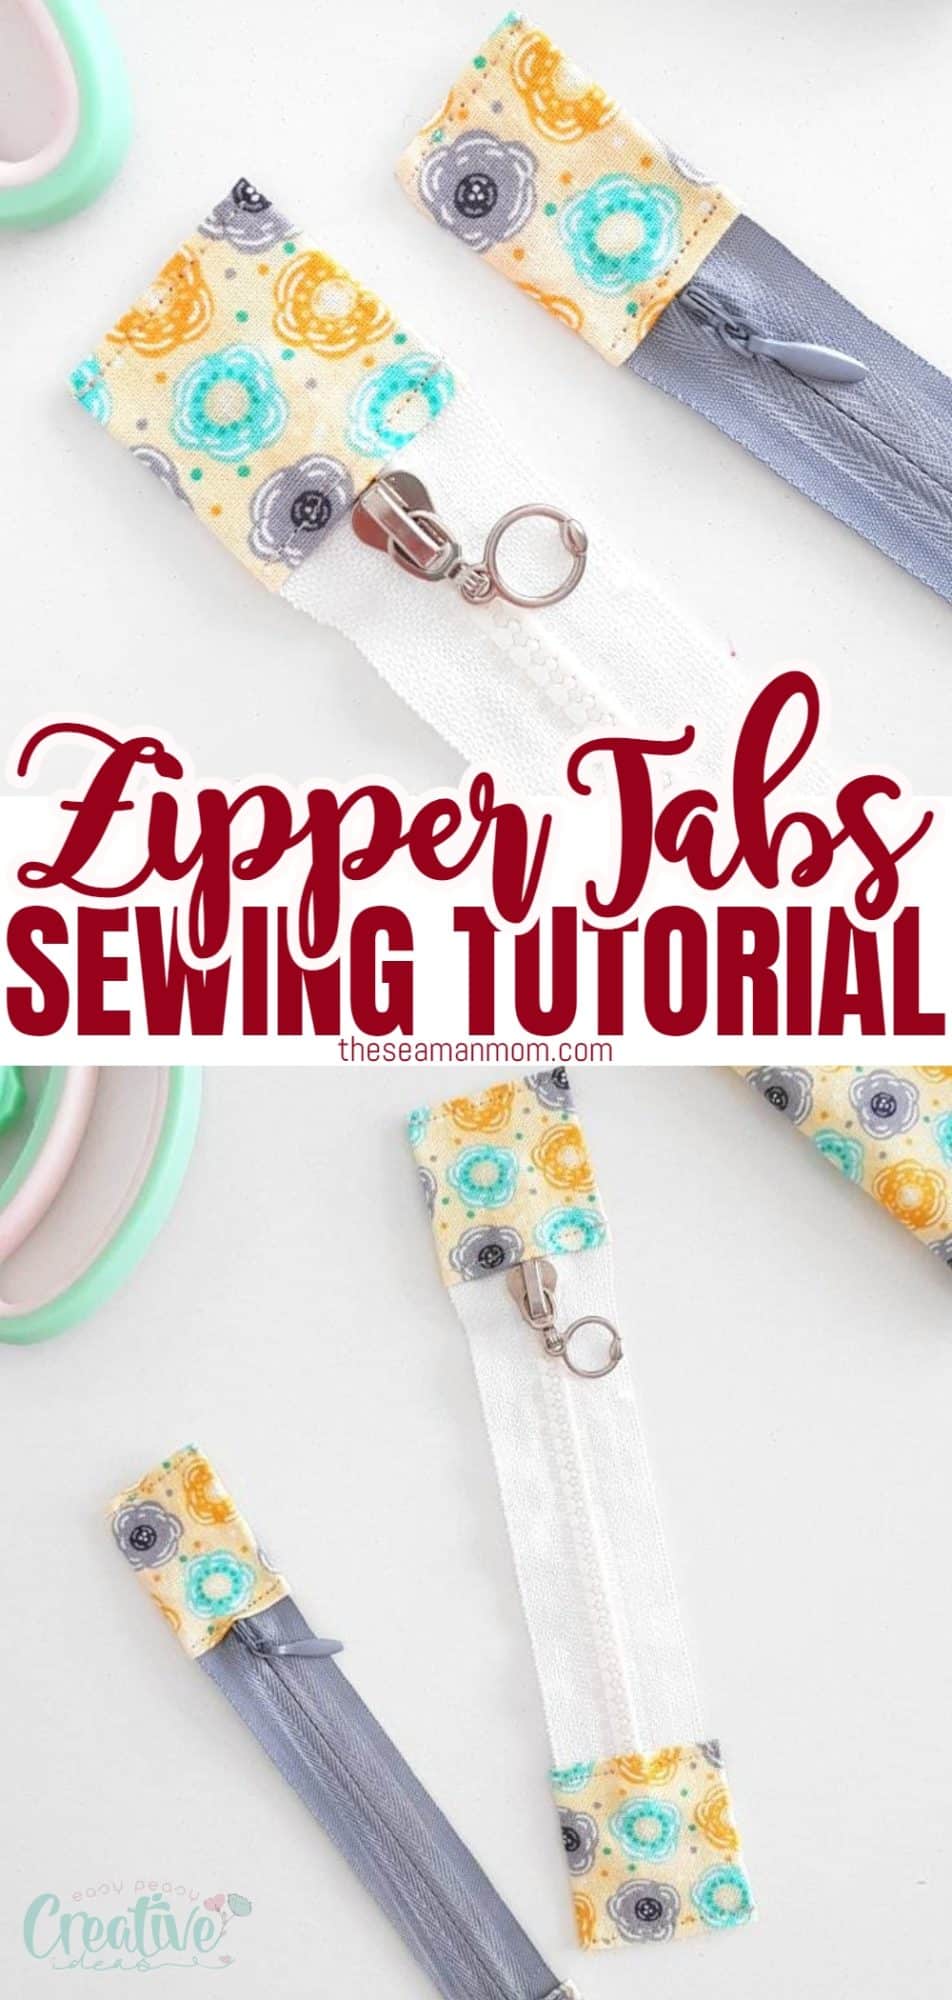
Zipper tabs tutorial
Article may contain Amazon & affiliate links. As an Amazon Associate I earn from qualifying purchases at no additional cost to you.
Zipper tabs are a fantastic solution for adjusting the length of zippers while adding a unique and personalized touch. In today’s tutorial, I will show you how to make zipper tabs and guide you through an incredibly simple and straightforward process. This way, you won’t have to spend ages searching for the perfect zipper. Say goodbye to the frustration and hello to effortless customization with zipper tabs!
How to make zipper tabs
Ever needed a zipper and didn’t find the size you were looking for? Well, it did happen to me a lot! The solution was to reduce it and sew a zipper tab at the end. But how to make zipper tabs? In this easy and simple zipper tabs tutorial I’ll show you how fun making a zipper tab is!
Other sewing tips you will love:
- How to adjust bobbin tension
- Elastic join tip to reduce bulk
- How to adjust the presser foot pressure
- DIY seam guide
- How to clip and notch seam allowances correctly
Zipper tabs can use up any fabric scraps, as it is a very small and quick project. Actually, you can get a zipper tab on in less than 15 minutes, even less as you get more experienced. They are a great way of shortening or lengthening zippers and add a personal touch. Even if you don’t actually need to shorten your zipper, a tab would still make your project truly stand out.
Tabs can be shorter or longer, depending on the final object design. If you only need a small opening, add a short zipper and longer tabs. If you just need some nice-looking ends, use short tabs, just enough to cover the zipper ends.
Can zipper tabs be used to adjust the length of a zipper?
Absolutely! With the help of some extra fabric, you can add length to your zipper. This could come in handy when working with zippers that are just a few inches too short for your project.
How long does it take to make a zipper tab?
The time it takes to make a zipper tab varies depending on your sewing skills and the complexity of the design. However, with some practice, you can make a zipper tab in less than 15 minutes. It’s a quick and easy project that is perfect for using up fabric scraps and adding a personal touch to your projects.
Are there any specific techniques for making perfect zipper tabs?
There are a few techniques that can help you achieve perfect zipper tabs. Here are some tips to keep in mind:
- Use interfacing: Adding lightweight fusible interfacing to the fabric before cutting out the tab will make it more stable and easier to work with.
- Ensure the fabric is pressed thoroughly throughout each step of the tab-making process, as well as at the end.
- For a more polished look, use thread that coordinates with your fabric for sewing the zipper tab.
- Practice using different fabrics: Experiment with different fabrics such as cotton, denim, or even leather to find what works best for you and your project.
Is it necessary to use zipper tabs even if the length of the zipper is correct?
It is not necessary to use zipper tabs if the length of the zipper is already correct for your project. However, adding a tab can add a nice finishing touch and make your project stand out. It’s always good to have some extra skills in sewing, and making zipper tabs can be a fun and useful skill to have. So give it a try and see how you can make your next project even more unique with a zipper tab!
What are some common mistakes to avoid when making zipper tabs?
- Not using interfacing: As mentioned earlier, adding interfacing to your fabric can make it more stable and easier to work with, resulting in a better-looking zipper tab. If the fabric is stable enough, there’s no need for interfacing. Cotton fabrics, especially quilting cotton, usually don’t need interfacing.
- Cutting the fabric too small: Be sure to add seam allowances when cutting out the fabric for your zipper tab. Cutting it too small may result in a sloppy-looking tab.
- Not pressing: Pressing the fabric often ensures a more professional and polished look. Be sure to press your zipper tab before, during and after sewing it for best results.
- Using the wrong type of thread: Using thread that does not match your fabric or is too thick can make your zipper tab look messy. Be sure to use the right type of thread for a polished-looking finish.
- Not practicing: Like any skill, making perfect zipper tabs takes practice. Don’t be discouraged if your first few attempts don’t turn out as expected. Keep practicing and you’ll soon master this useful sewing technique.
How durable are handmade zipper tabs?
Handmade zipper tabs can be very durable if made with proper techniques and high-quality materials. Be sure to use sturdy fabrics, and sew them with good tension and reinforcement stitches for added strength. By using the right materials and techniques, you can create a strong and long-lasting zipper tab that will hold up to regular use. Plus, handmade tabs add a personal touch to your projects that store-bought ones cannot and will match your projects perfectly.
Is it possible to make zipper tabs without sewing?
It is possible to make zipper tabs without sewing, but it may not be as durable as sewn tabs. You can use fabric glue or adhesive tape to secure the ends of the zipper, but this method will not provide the same strength and stability as a sewn tab. Sewing also allows for more creativity and customization.
Are there any special tools or equipment needed to make zipper tabs?
No special tools or equipment are needed to make zipper tabs. You can use basic sewing supplies such as scissors, a ruler, pins, and a sewing machine. However, if you want to add extra embellishments or decorative stitches to your tabs, you may need additional tools like an embroidery machine.
How to incorporate zipper tabs into a project:
- You can sew the tab within the seam – this method will not give you the best looking results as the zipper tab will be kind of squished inside the seam. Still looking better than a plain zipper though. Be careful to only use this on plastic coil zippers, and not on metal or plastic molded zippers.
- Exclude the tab from the seam – when sewing the seam, stop when you reach the zipper tab, move the needle past the tab then continue sewing to finish the seam. This will give a nice, neat finish to the zipper area.
- Leave the zipper longer than your project, on both ends and apply the second method highlighted above when sewing the seam. This method leaves the zipper tabs completely exposed, adding an interesting touch to your project, making it look pretty fancy. This is mostly used for cosmetic bags and pouches.
Reasons to use zipper tabs:
- A zipper tab can be a cute detail for small zipper pouches like pencil cases, coin purses or make-up pouches.
- Make it out of a nice contrasting fabric to add some pop of color to your project. It will also make it look a lot more professional.
- Side seams without tabs at the end of the zipper tape tend to look pinched and puckered and it’s extremely hard to make a nice finish. Tabs add a clean finish, make it easier to sew the seam and also look nicer.
For a patterned pouch that needs to open wide, consider leaving a longer zipper end and finish it with a nice tab instead of just leaving the metal stopper on. In this kind of tabs, sew around the tab to secure it. For extra enforcement or just as a nice design, you can also stitch the diagonals of the fabric square.
For a plain looking pouch made of solid-color fabric, a patterned zipper tab would make a very nice accent piece.
Tips and tricks to get a perfect zipper tab:
- Use medium weight fabric. Silk or other soft fabrics may frail or pucker and ruin your project very soon;
- Consider sewing reinforcing stitches for extra strength;
- If you incorporate the zipper tab in the seam of your project, go very slow when sewing over the zipper’s coil part. In case you’re hitting the zipper coil, the needle could break;
- If your zipper still has the metal stopper and you need to stitch over the area, remove the metal part before sewing and secure with thread;
- You can machine sew the zipper end, but hand sewing is easier and takes less time;
- For a sewn-in zipper, you must start with a zipper longer than your pouch opening. If it’s the same length and add tabs, the opening will be much shorter;
- It’s not necessary to measure each piece exactly, unless you really want to. You can just eyeball the fabric pieces and cut the extra bits later. You can also make a long strip of fabric if you’re working on more pouches, and cut each tab from it.
I’m really curious to see how you spice up your bags, pouches or anything that uses a zipper, so please let me know in the comments.
What materials do I need to make zipper tabs?
- zipper (works for both regular and invisible zippers)
- fabric scraps
- scissors or rotary cutter
- quilting ruler
- cutting mat
- fabric pen
- matching thread
- sewing machine
- pressing iron
How to make zipper tabs?
There are various ways of sewing zipper tabs and in this zipper tabs tutorial I’ll be showing my most used method. The measurements in this tutorial are for a 1″ wide zipper.
Cut the fabric
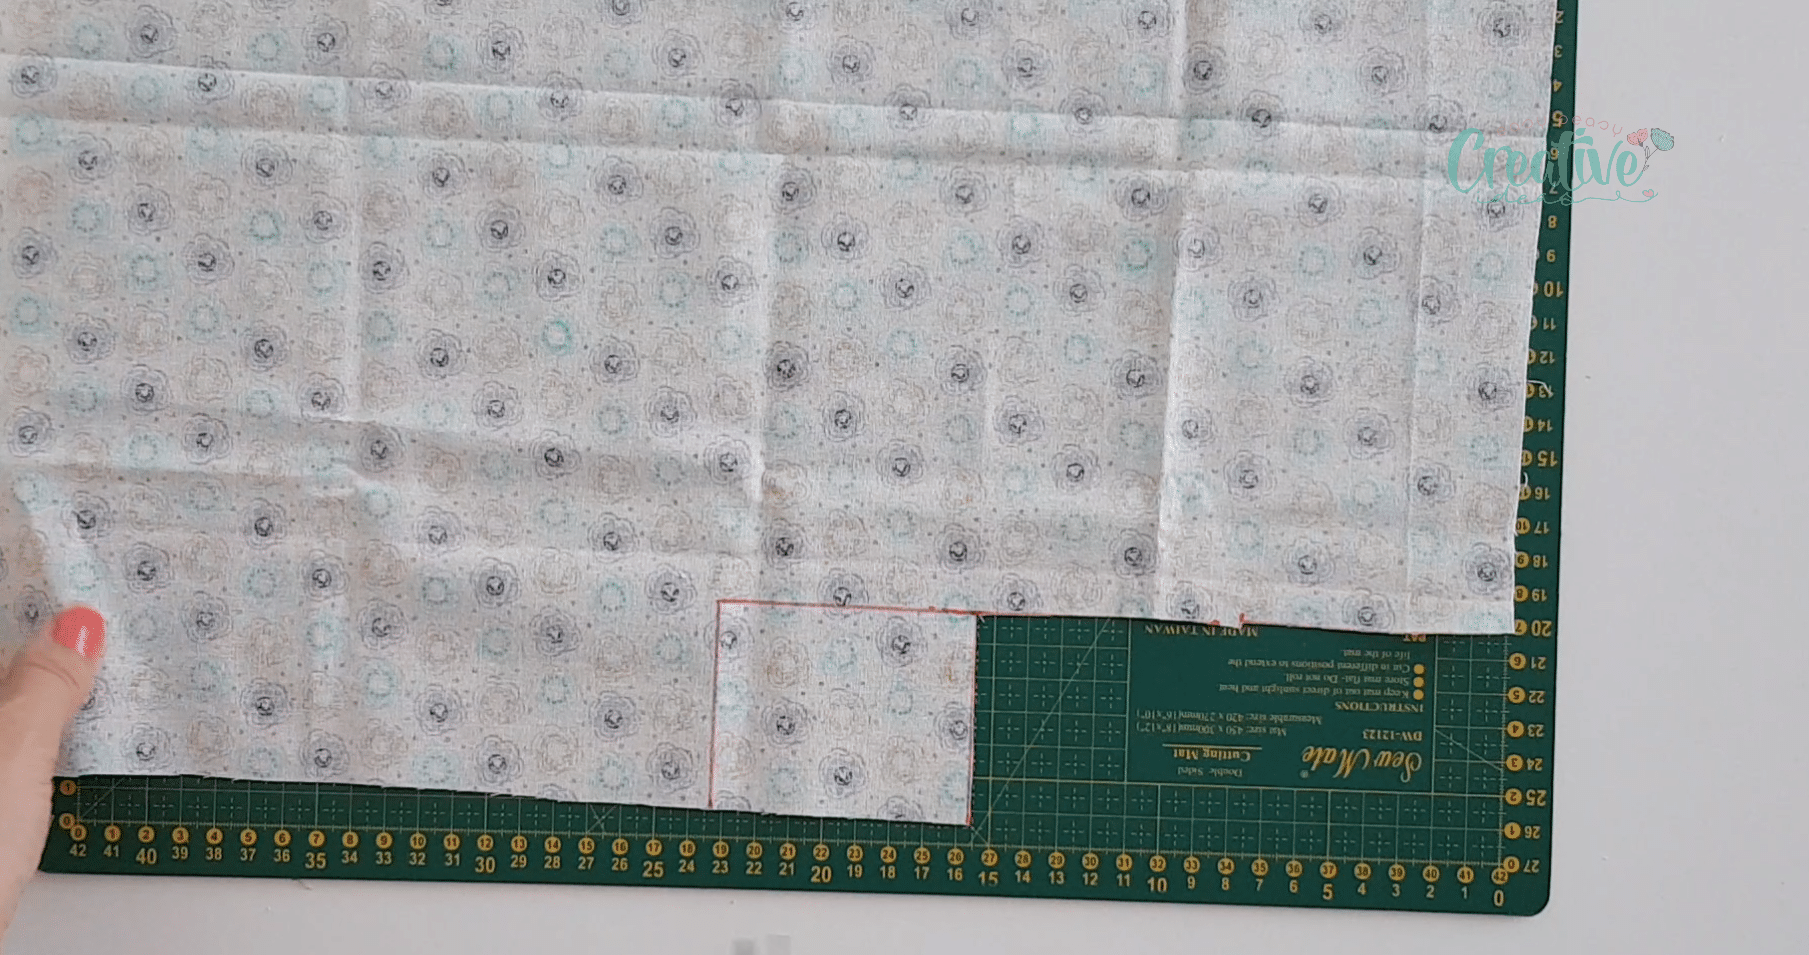
- Measure the zipper opening in your project and mark these measurements on the zipper.
- Cut a fabric rectangle of 3″ x 2 1/2″. So the width is 2 times the zipper width plus 1/4″ allowance on each side of the rectangle; if it sounds confusing, it will make more sense in the next steps). The length depends on the method you choose for inserting the zipper into your project. In my case, my final zipper tab was 1 1/2″ long by 1″ wide.
Make a tube
- Fold the rectangle in half, lengthwise and mark the crease.
- With the fabric wrong side up, fold each half towards the crease and press with the iron on steam.
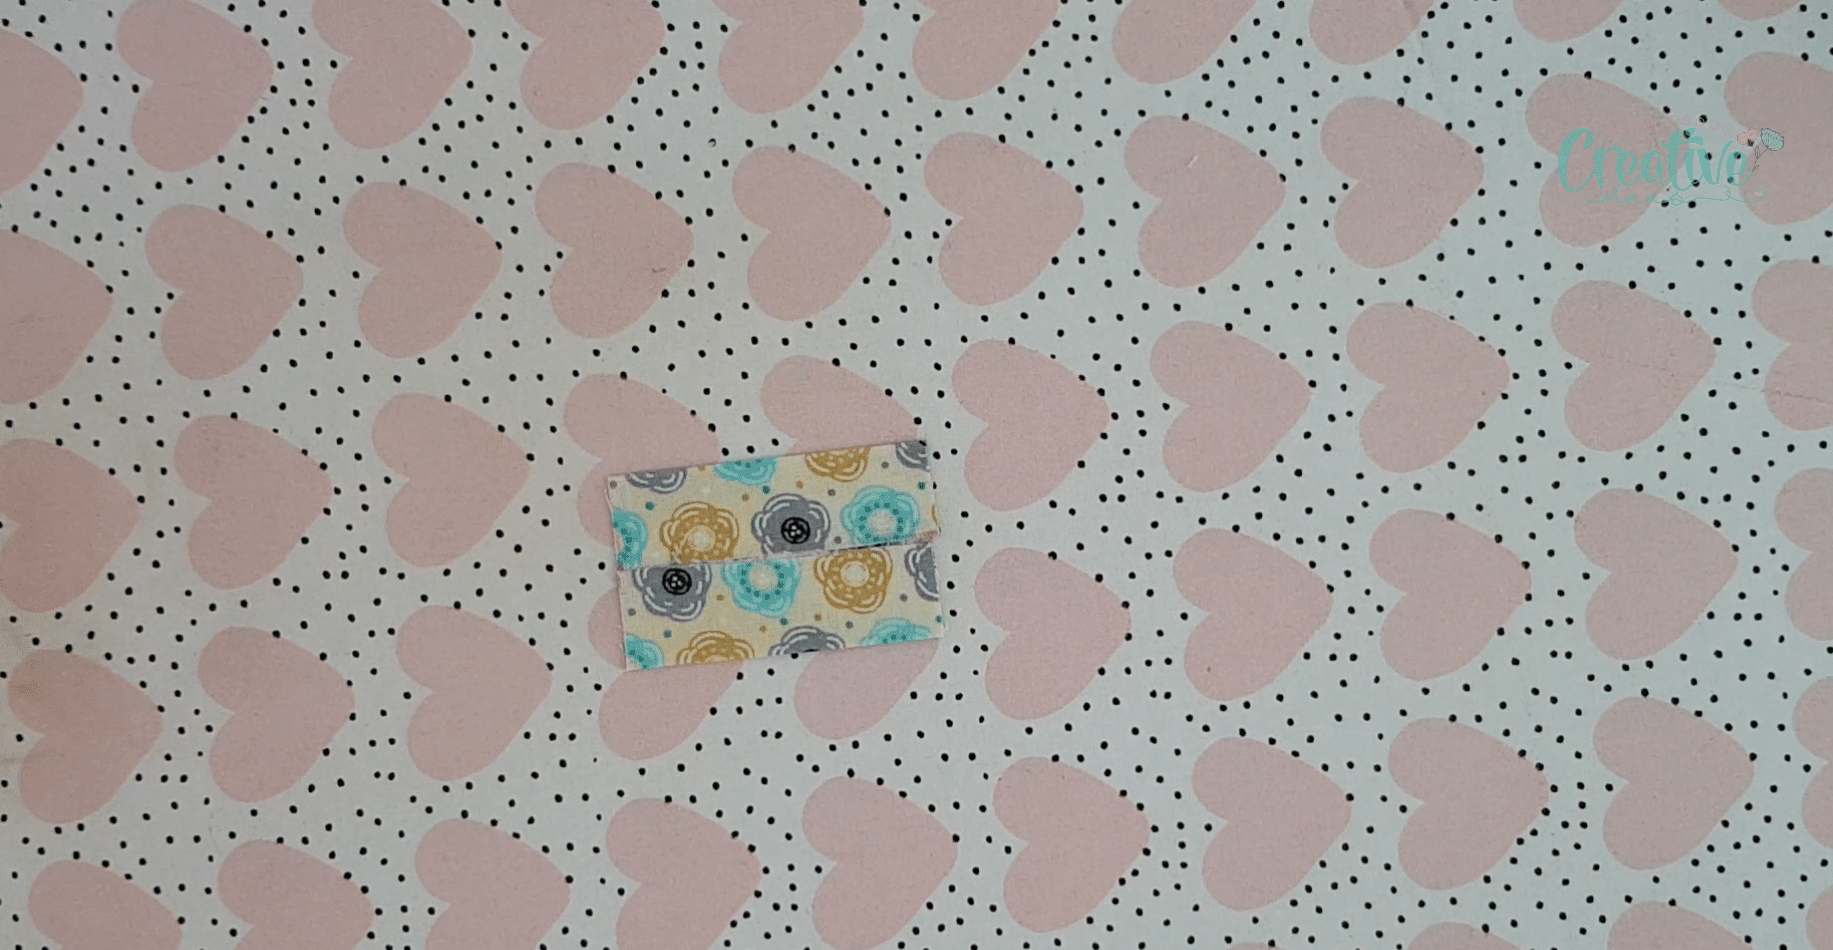
- Turn the strip to the other side and fold in half, widthwise.
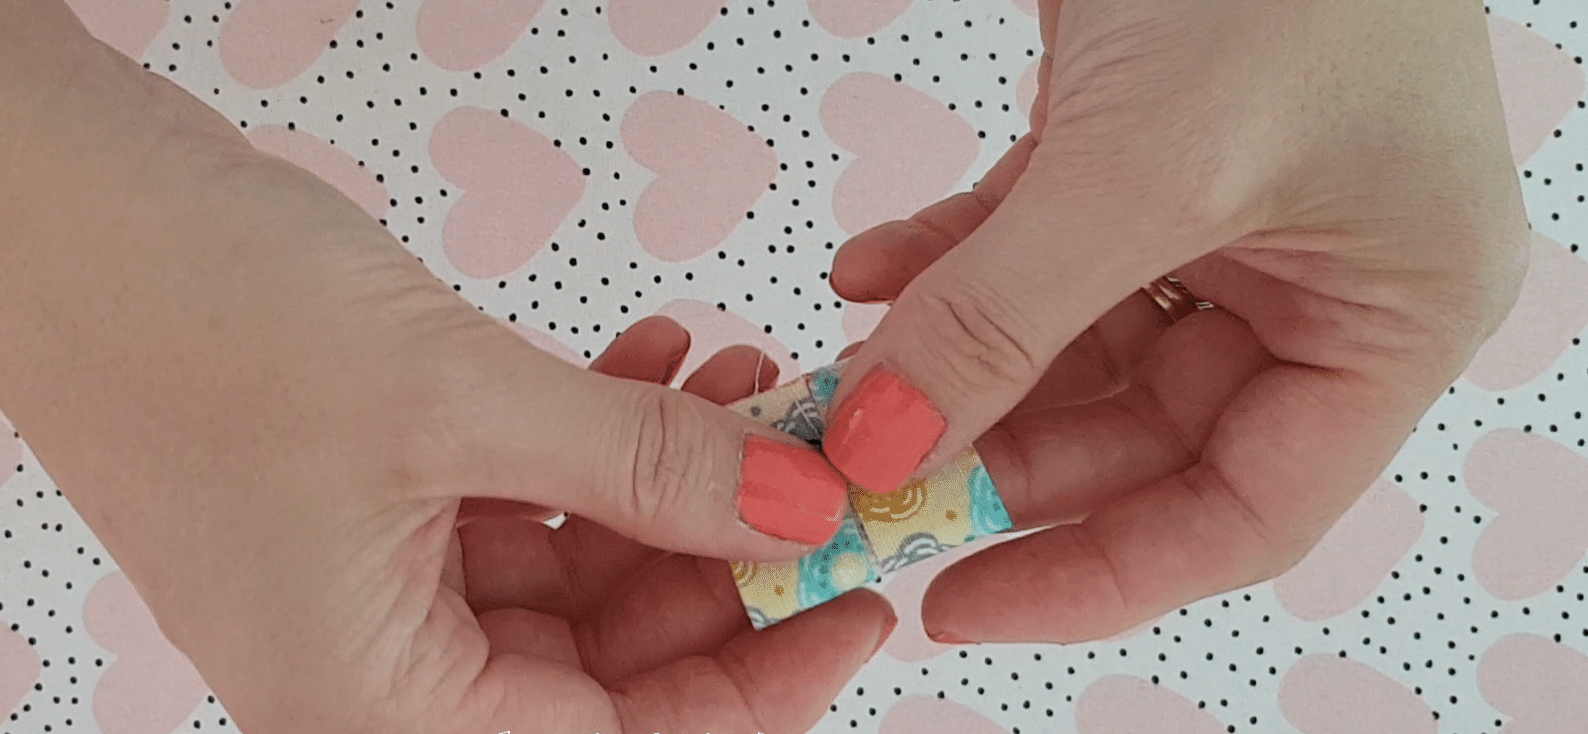
- Sew the raw edges together with 1/4″ allowance.
- Finger press the seam open (if the fabric is too stiff, press with your iron too).
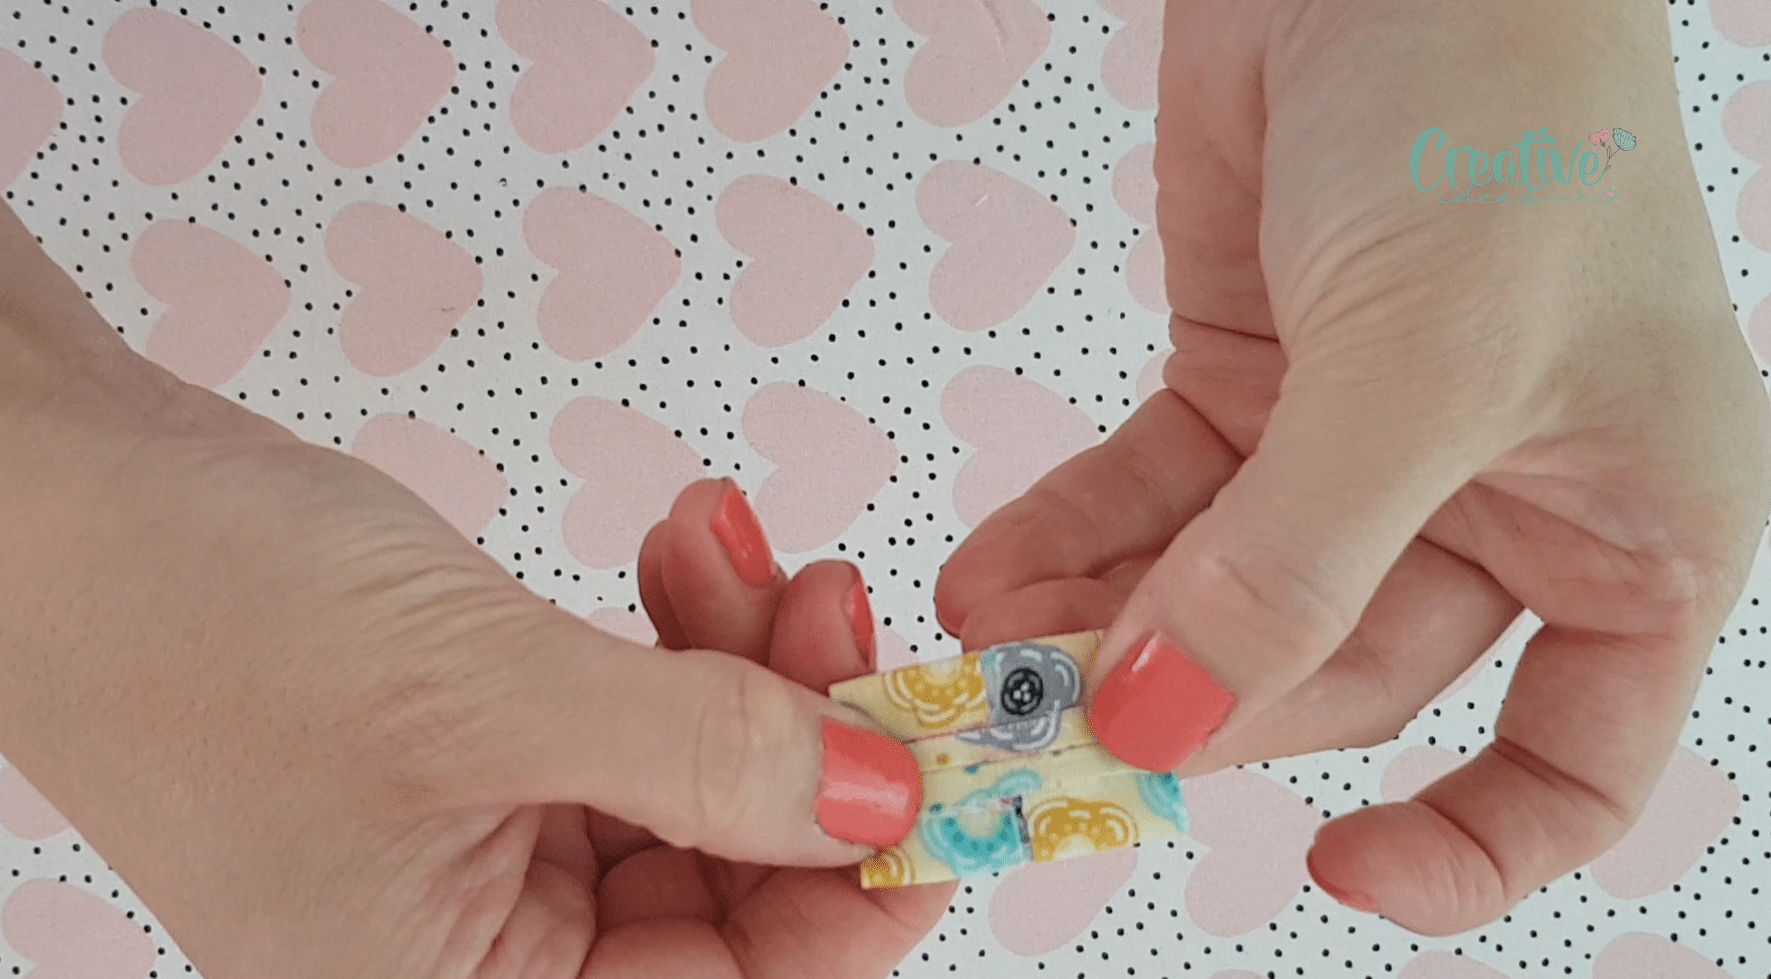
- Turn the little tube right side out, with the seam in the middle, and press well.
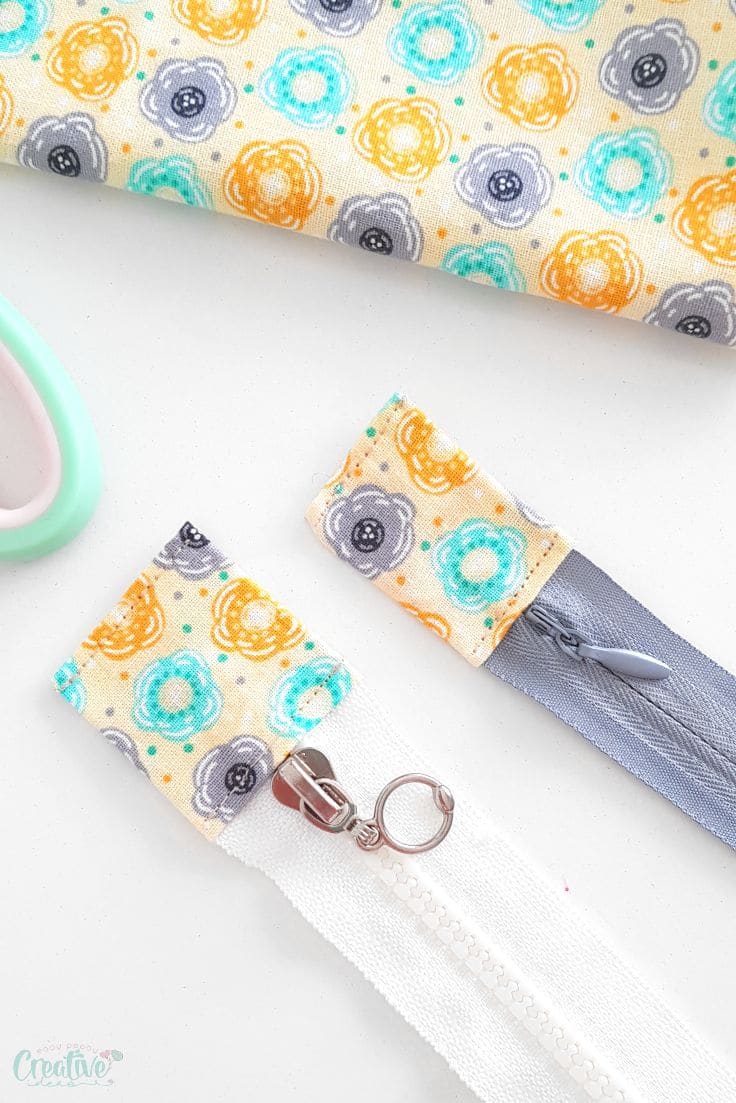
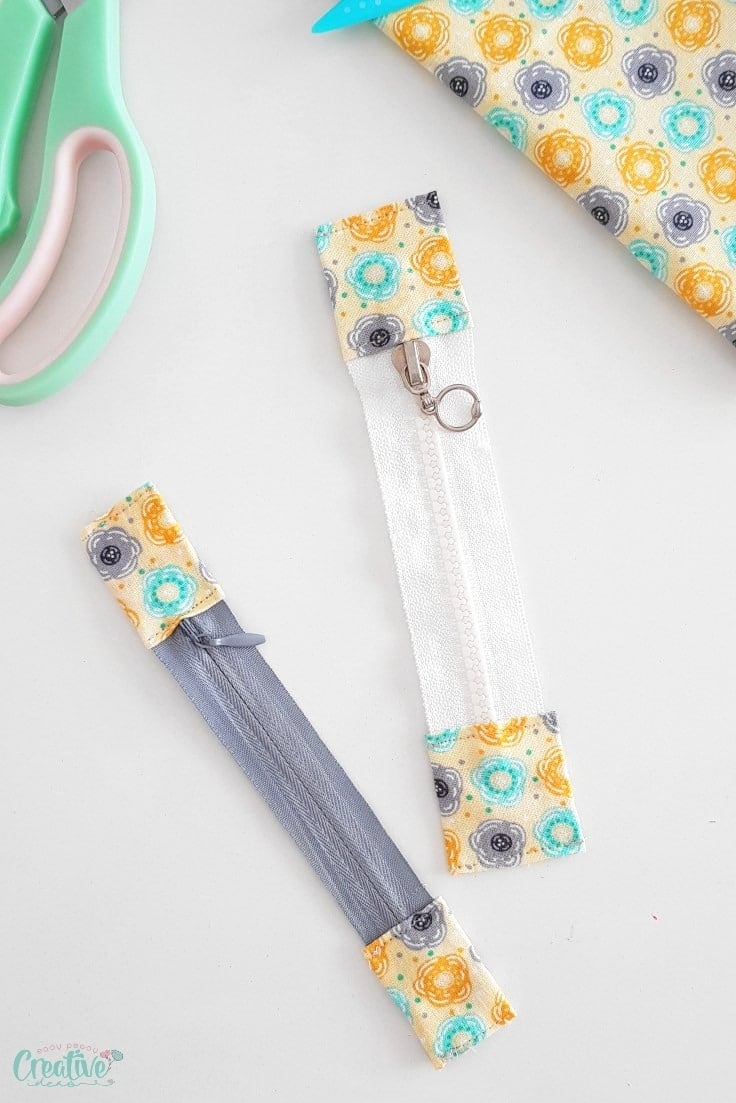
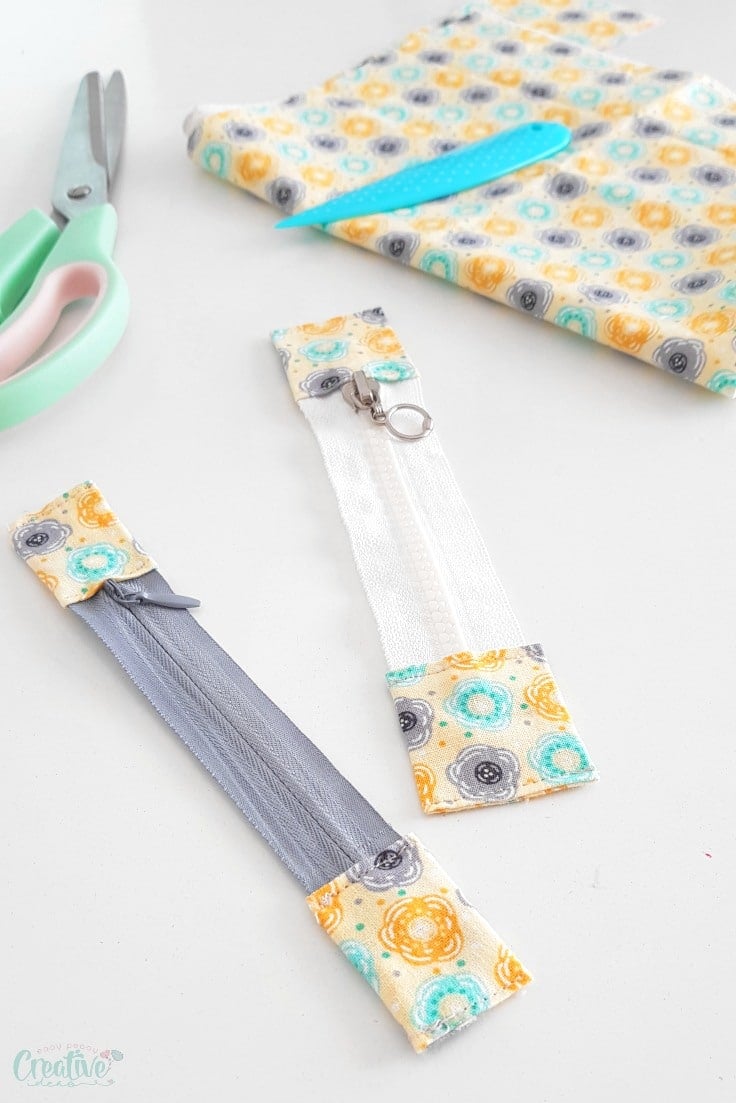
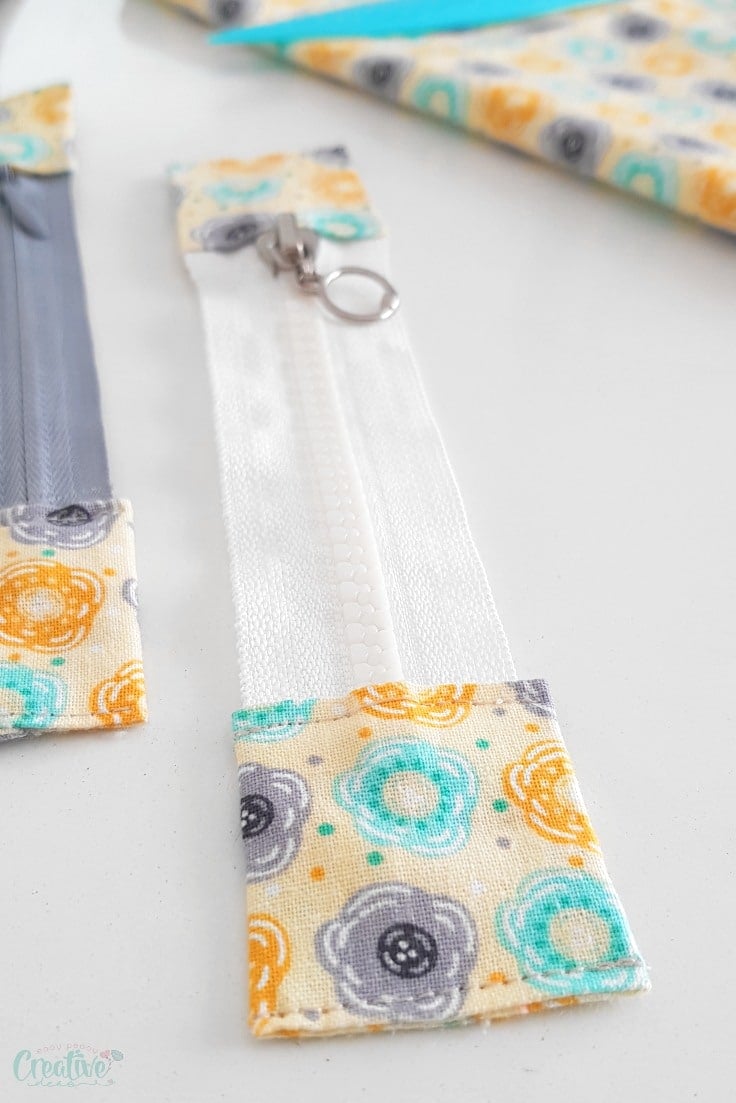
Insert the zipper in the tube
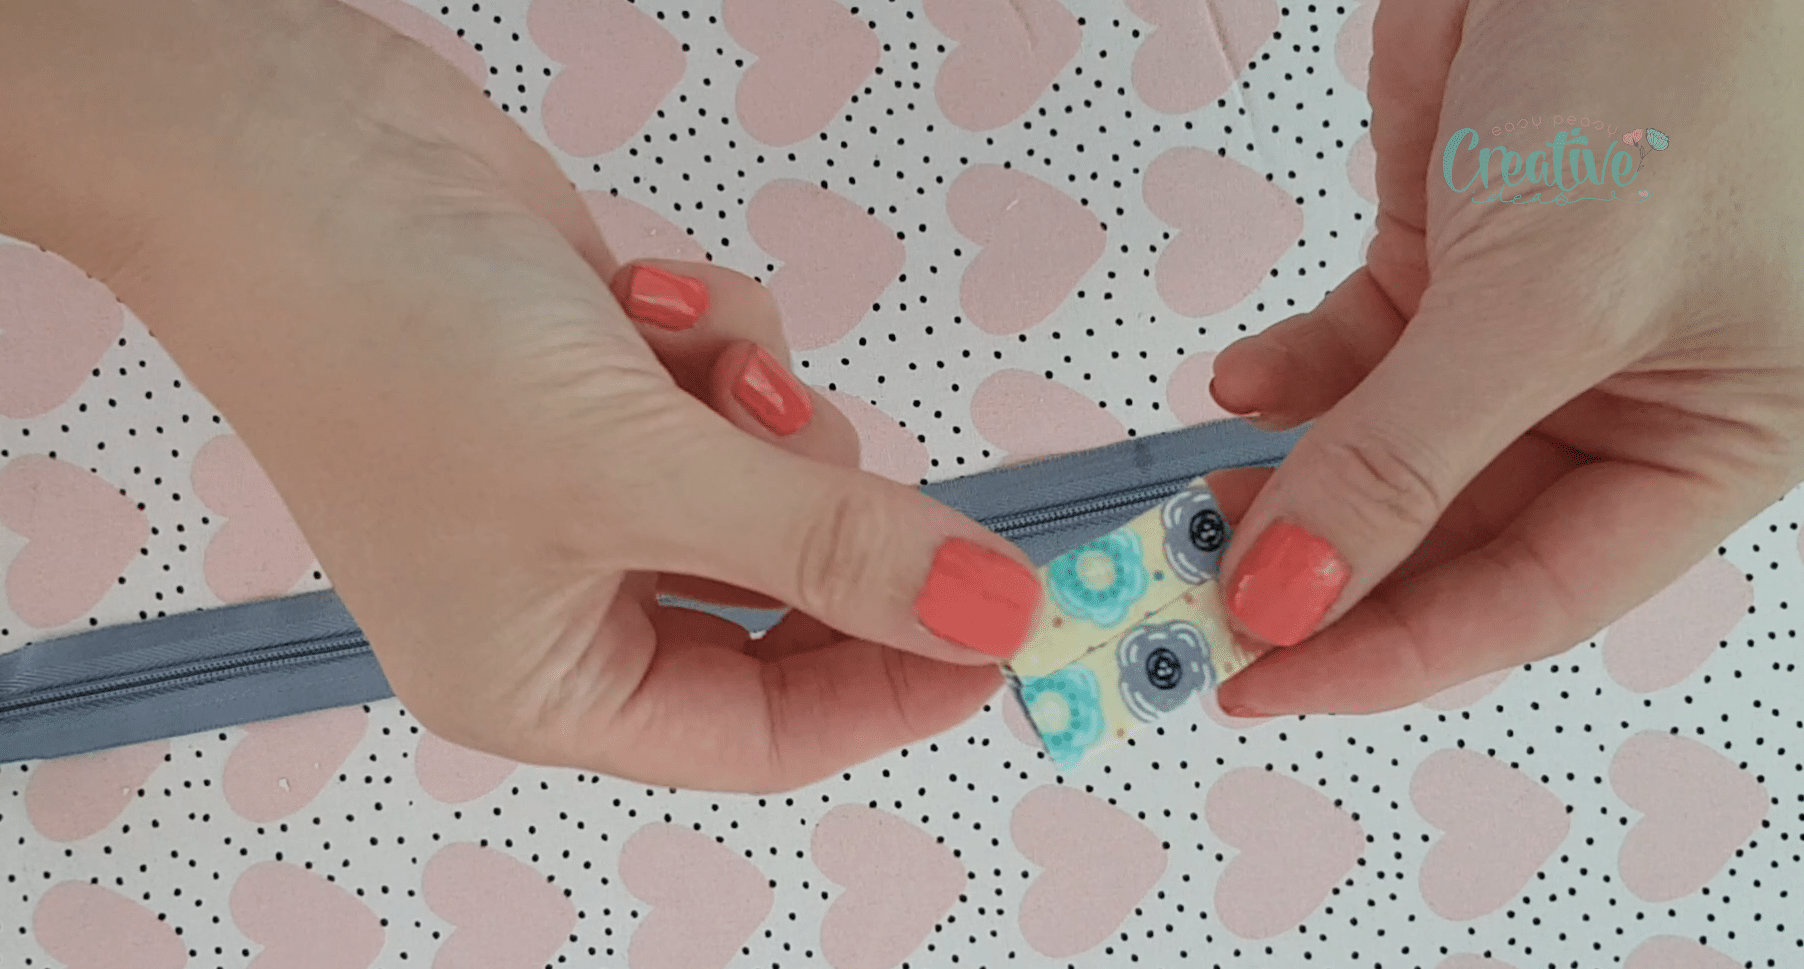
- With the tab seam down, insert the zipper into the tab and align the bottom end of the tab with the mark on the zipper. The zipper teeth should be on the right side of the zipper tab (the seam in the zipper tab should be on the wrong side of the zipper). Then pull the tab to slightly cover the mark. If the tab will be sewn within the seam of your project, pull the tab a little more. If the tab will be completely outside the seam allowance, then you need to pull it even more.
- Next step is to edge stitch the top of the tab.
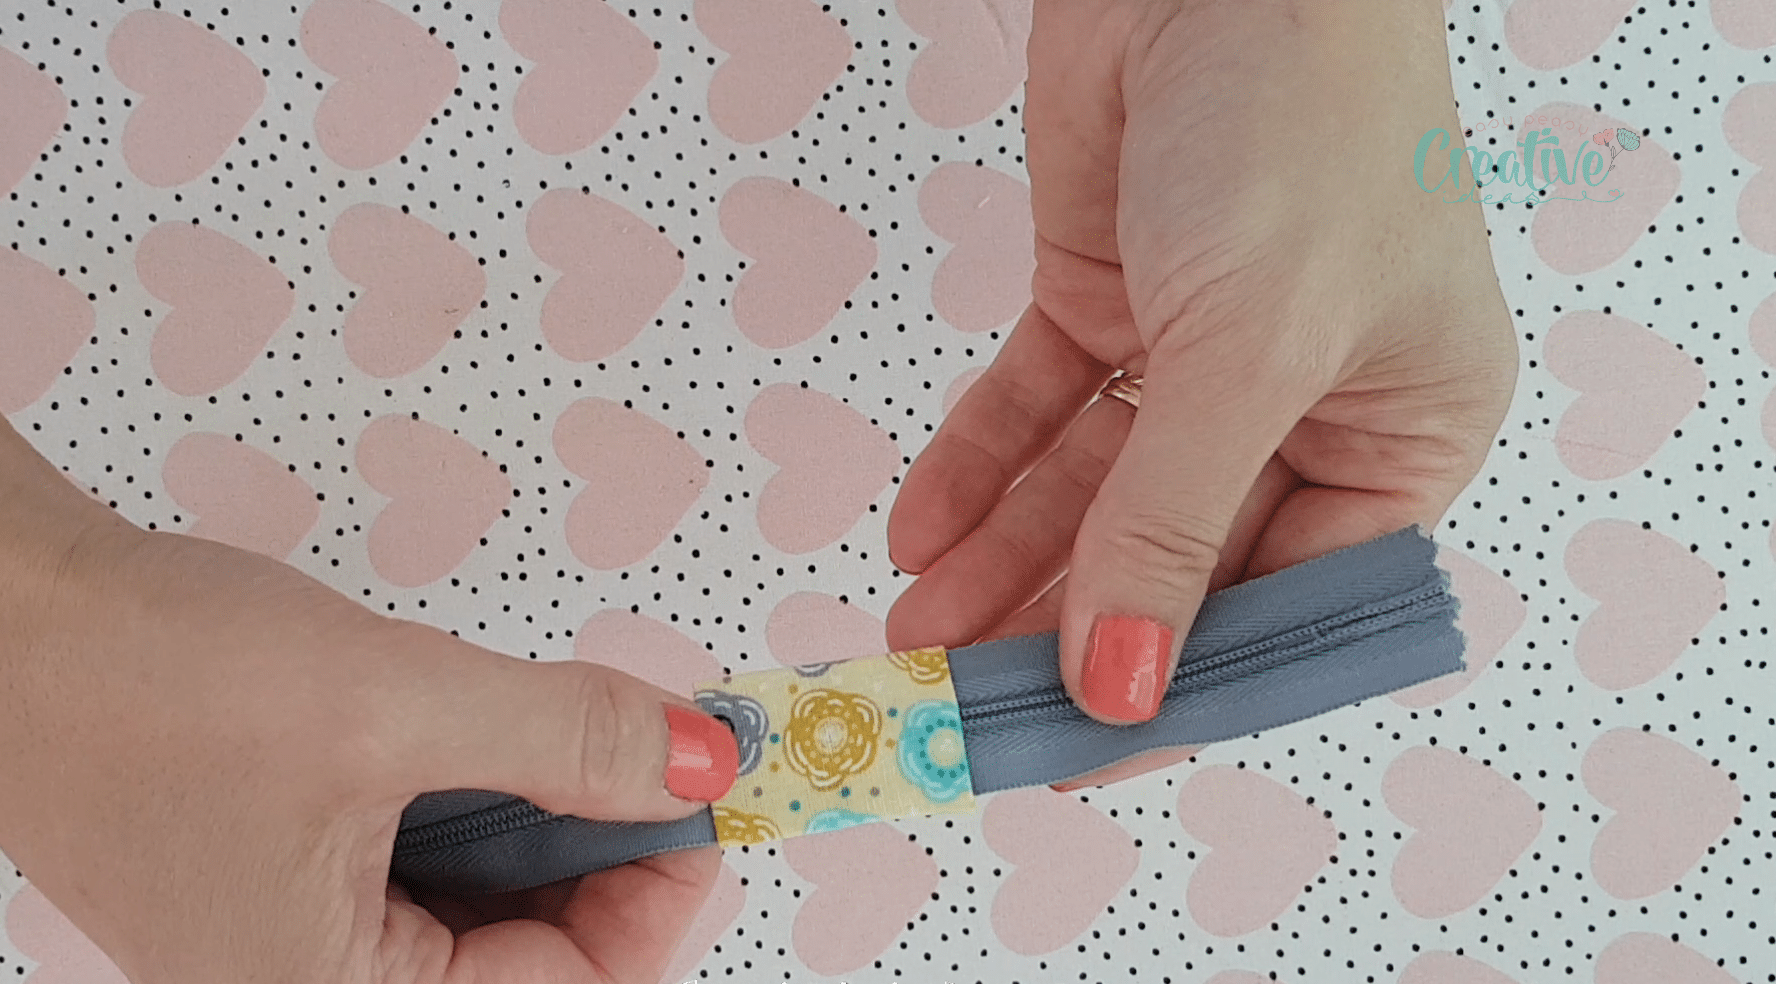
- Then pull the tab up and trim the zipper on the mark.
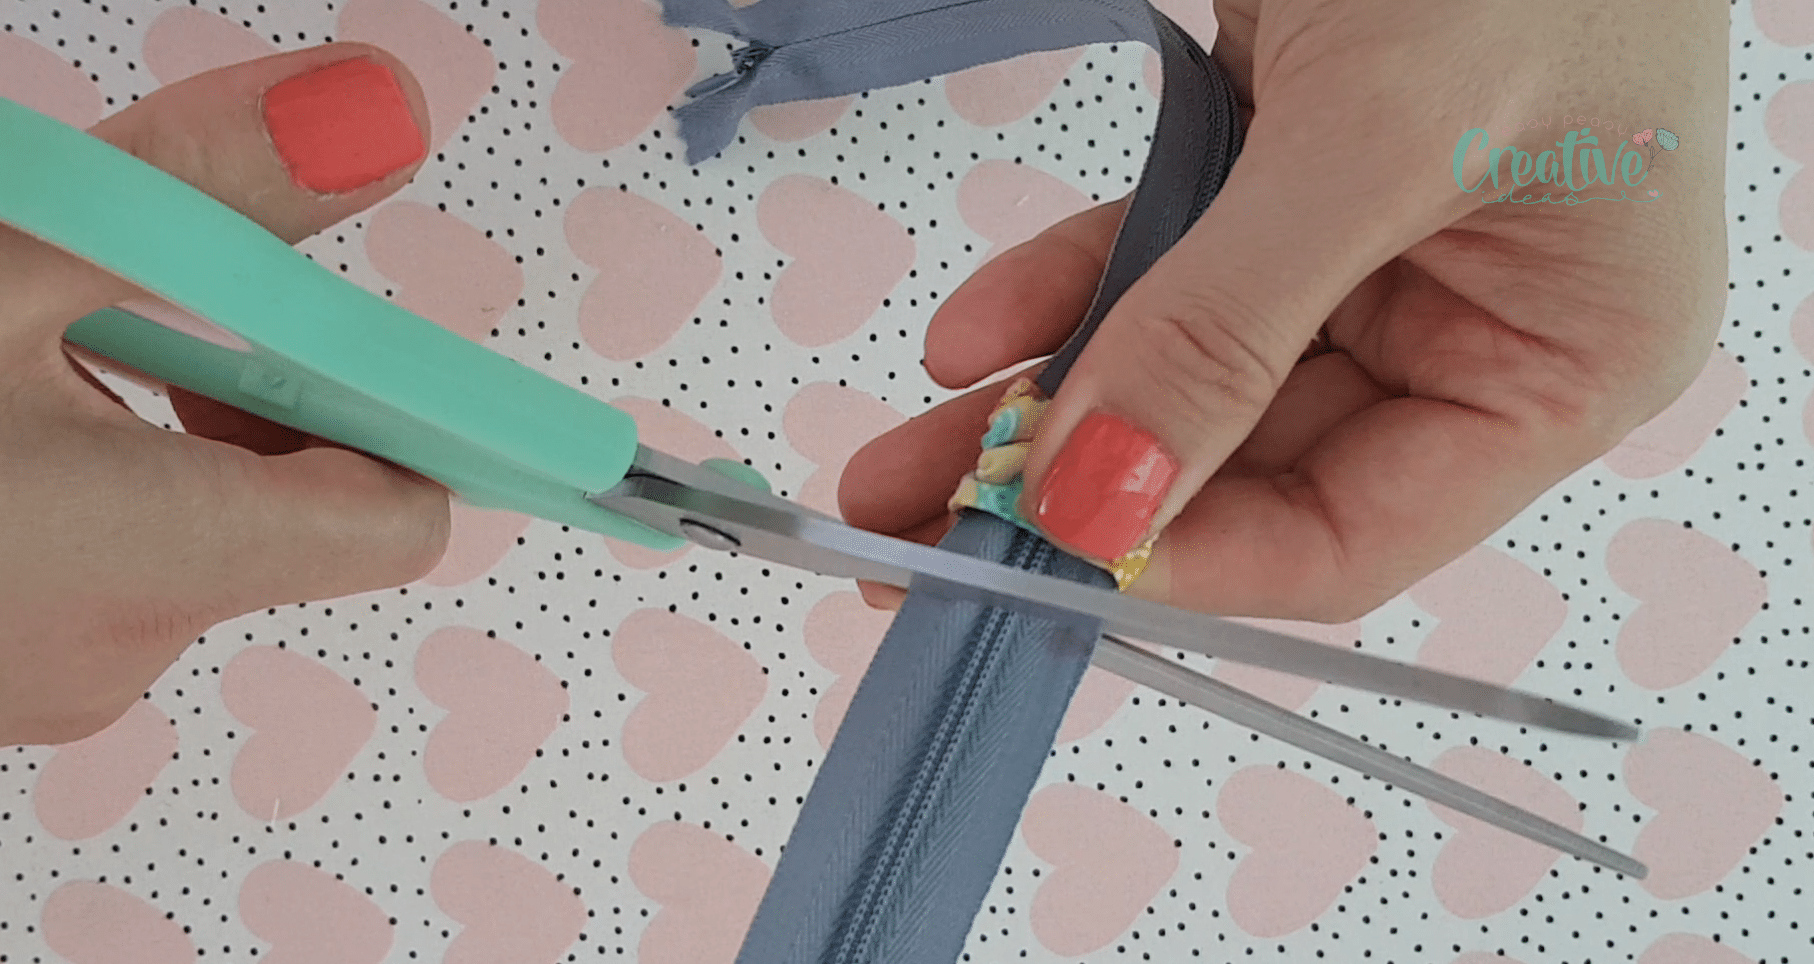
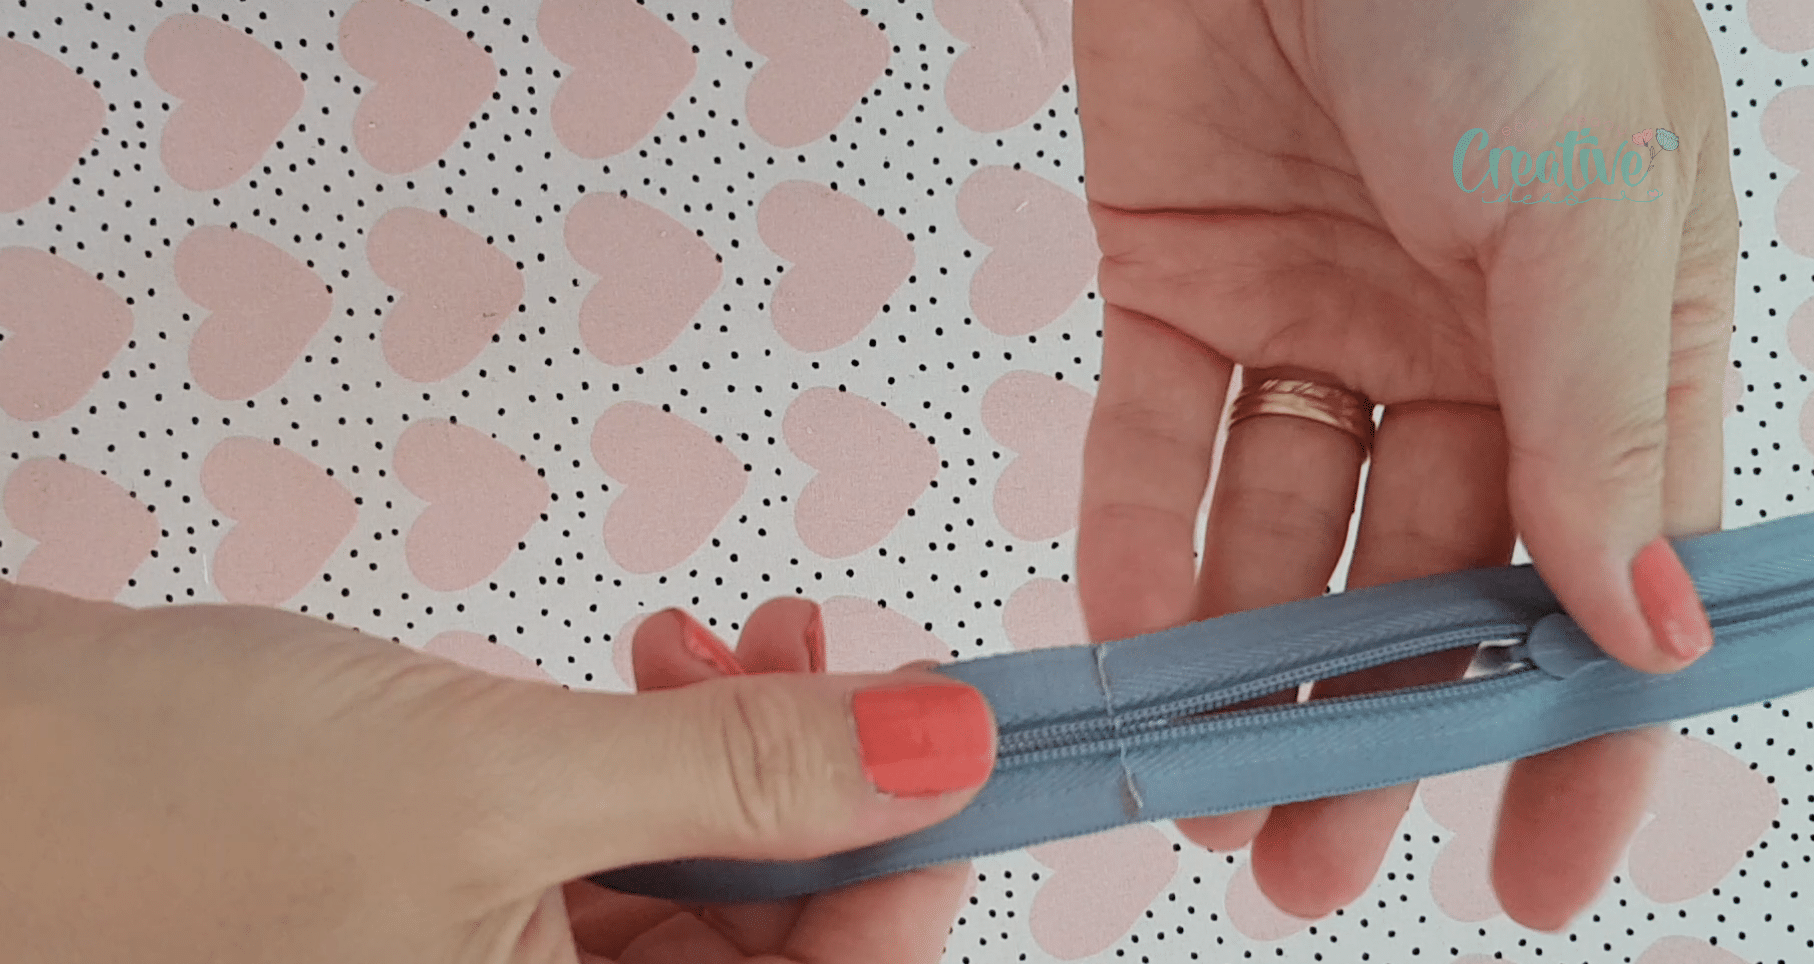
- Push the zipper tab back and edge stitch the bottom.
- Repeat for the other tab on the opposite end of the zipper (the zipper pull end). For this end you’ll first need to pull the zipper pull out of the way and secure the ends of the zipper by running a line of stitches just above the zipper end. It helps to temporary sew the zipper teeth by hand, just below the zipper pull.
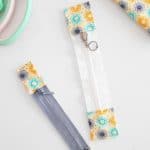
- And that’s it, you’re zipper tabs are done and your zipper is ready to be inserted into your project!
With just a few materials and easy steps, you can create custom zipper tabs for any project. So why not give it a try and take your sewing game to the next level?
Pin to save for later
Most popular sewing projects:


Print the sewing card
Zipper tabs sewing tutorial
Materials
- fabric scraps
- matching thread
Tools
- zipper works for both regular and invisible zippers
- scissors or rotary cutter
- pressing iron
Instructions
- Measure the zipper opening in your project and mark these measurements on the zipper.
- Cut a fabric rectangle of 3" x 2 1/2". So the width is 2 times the zipper width plus 1/4" allowance on each side of the rectangle; if it sounds confusing, it will make more sense in the next steps). The length depends on the method you choose for inserting the zipper into your project. In my case, my final zipper tab was 1 1/2" long by 1" wide.
- Fold the rectangle in half, lengthwise and mark the crease.
- With the fabric wrong side up, fold each half towards the crease and press with the iron on steam.
- Turn the strip to the other side and fold in half, widthwise.
- Sew the raw edges together with 1/4" allowance.
- Finger press the seam open (if the fabric is too stiff, press with your iron too).
- Turn the little tube right side out, with the seam in the middle, and press well.
- With the tab seam down, insert the zipper into the tab and align the bottom end of the tab with the mark on the zipper. The zipper teeth should be on the right side of the zipper tab (the seam in the zipper tab should be on the wrong side of the zipper). Then pull the tab to slightly cover the mark. If the tab will be sewn within the seam of your project, pull the tab a little more. If the tab will be completely outside the seam allowance, then you need to pull it even more.
- Next step is to edge stitch the top of the tab.
- Then pull the tab up and trim the zipper on the mark.
- Push the zipper tab back and edge stitch the bottom.
- Repeat for the other tab on the opposite end of the zipper (the zipper pull end). For this end you'll first need to pull the zipper pull out of the way and secure the ends of the zipper by running a line of stitches just above the zipper end. It helps to temporary sew the zipper teeth by hand, just below the zipper pull.
- And that's it, you're zipper tabs are done and your zipper is ready to be inserted into your project!
ABOUT PETRO
Hi, I’m Petro, author and founder of Easy Peasy Creative Ideas. Sewist, crafter, avid DIY-er, foodie, photographer, homemaker and mommy to one. I’m an expert at coming up with quick, clever sewing tips, recycling crafts and simple, easy recipes! You can find my ideas featured in reputable publications such as Country Living, Good House Keeping, Yahoo News, WikiHow, Shutterfly, Parade, Brit & Co and more. Thanks for stopping by and hope you’ll stay for a while, get to know me better and come back another time. Stick around for real fun projects! Read more…