
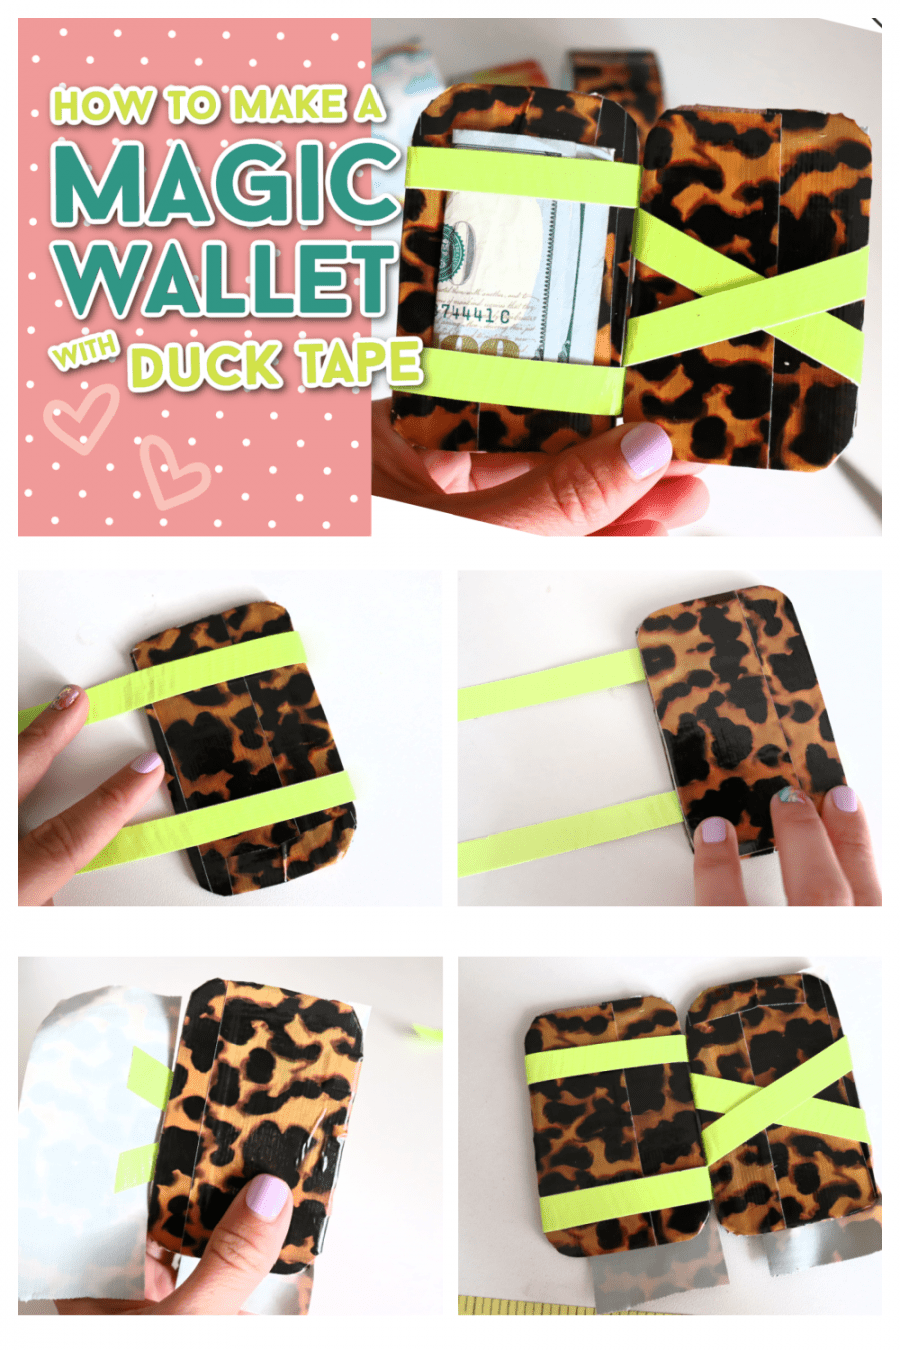
Want to impress your kids? Grab some supplies and create a Magic Wallet Duck Tape Project! They will be astounded by how cool this craft is!
Seriously, this magic wallet is so much fun! We made some camping and they were a perfect craft. Supply list is small so it’s easy to pack up and take on the go!
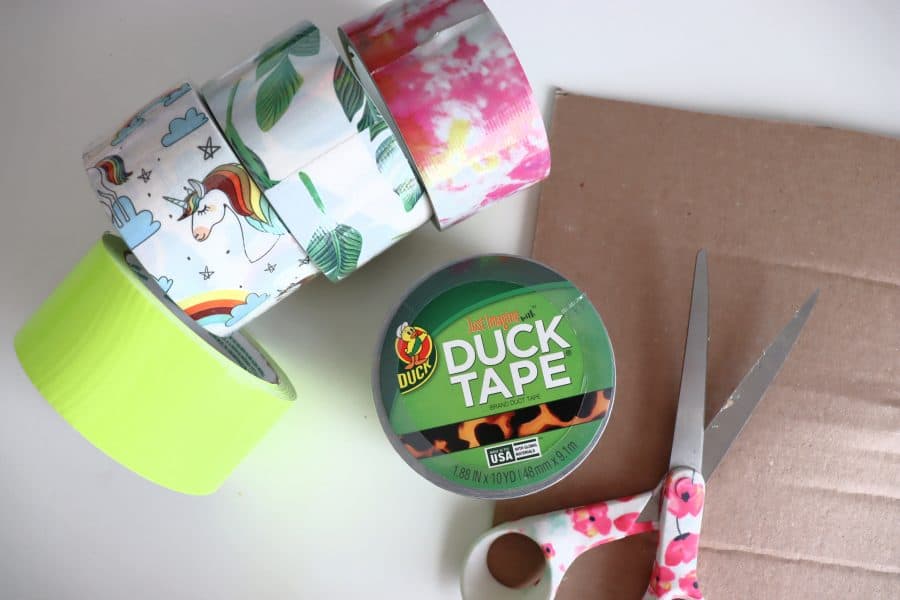
Supplies to make Duck Tape Wallet
How to make a Magic wallet
I created a youtube video-because it’s a bit easier to watch it in action. But I will still try to walk you through it step by step here!
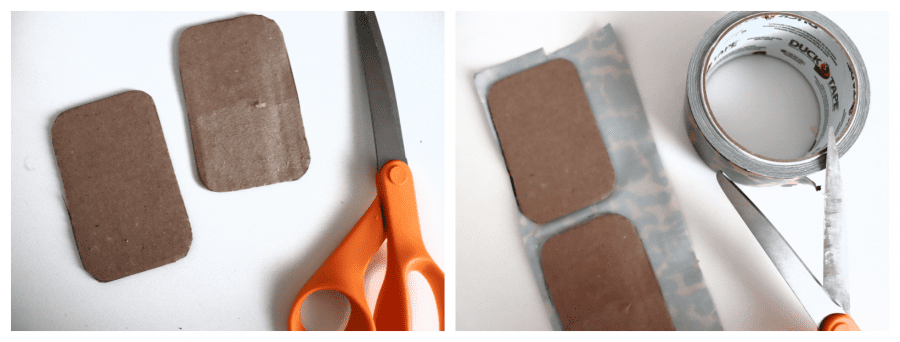
Step 1:
Cut out two pieces of cardboard. I used the altoid tin to trace the perfect shape. You want it a little larger than a debit card.
Step 2.
Cover both sides front and back with Duck Tape.
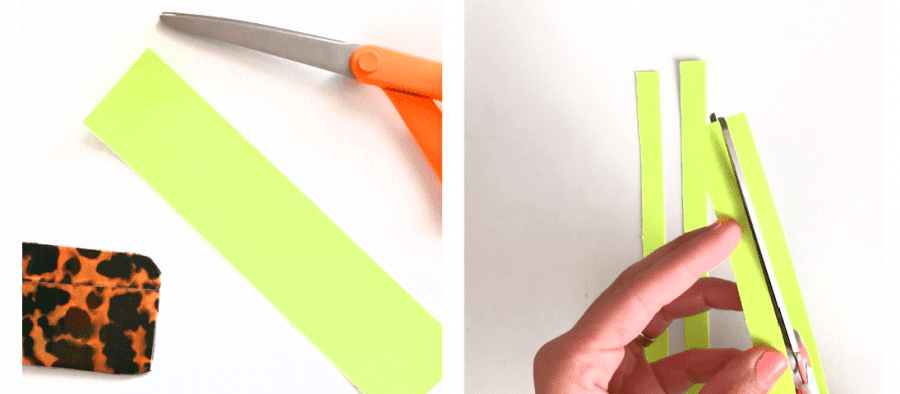
Step 3: Making strips.
Grab two pieces of duck tape – I did mine about 7 inches long.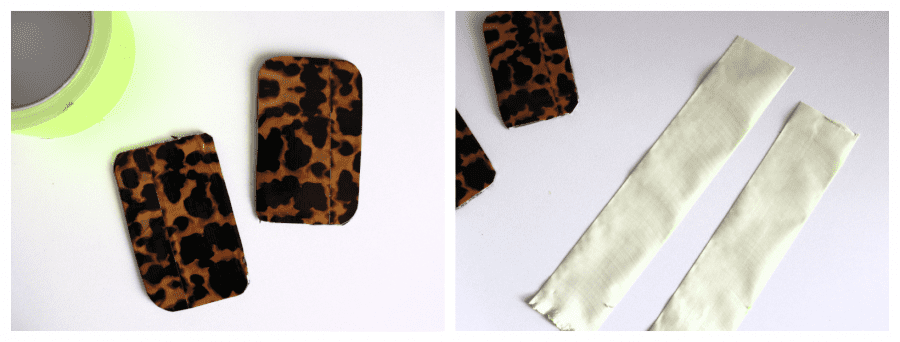
Lay them on top of each other sticky sides together. Cut the Duck Tape in half. And then cut each of those strips in half. (So you have 4 in total)
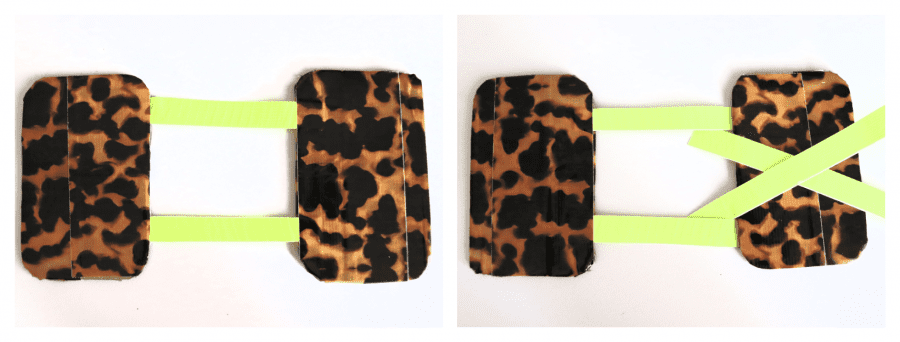
Step 4: Assembly.
Lay two pieces of duct tape on the side of one of the cardboard pieces. They overlap about 1/2 on top of the cardboard. Add a strip of duct tape to hold them in place and trim off excess.
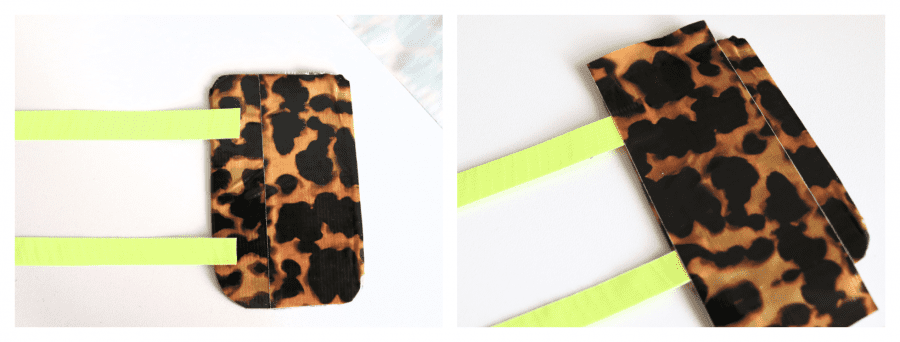
Flip cardboard over and lay the strips across the back. Lay the second piece of cardboard on top.
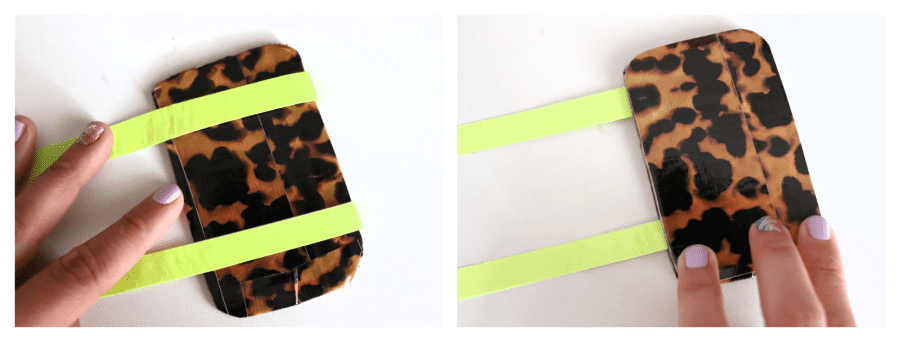
Trim the strips (1/2 to 1 inch) Add a piece of Duck Tape and tape the strips to the top piece. Trim off excess tape.
When you open it up. It should look like the picture on the left. Take your next two strips and make an X. You are going to cross them and place them underneath the straight tabs. You want to make sure that the X straps will stay underneath the straight pieces. If the straight piece went all the way across it, the other side of the X will still be underneath.
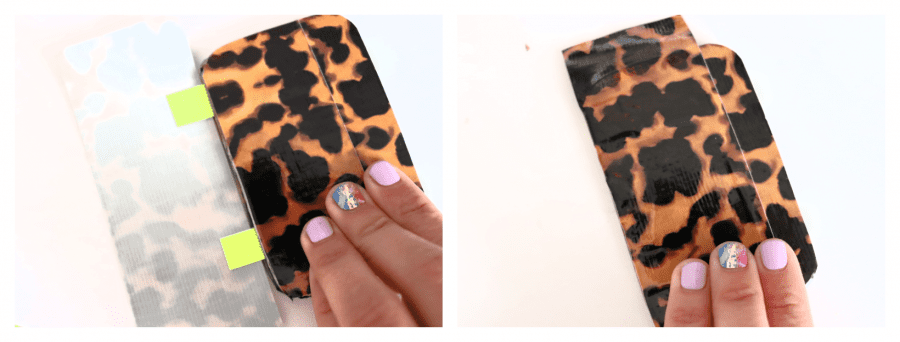
Fold up the card. (the piece on the left on top.) Pinching the strips so they say put! Trim off the edges (1/2-1 inch). You are going to tape up one side of the strips to the top piece with another piece of duck tape.

Flip over and tape the other side. So one strip side is essentially getting taped to the top cardboard. and the other strips are getting taped to the bottom cardboard. Opposite sides. Trim off excess!

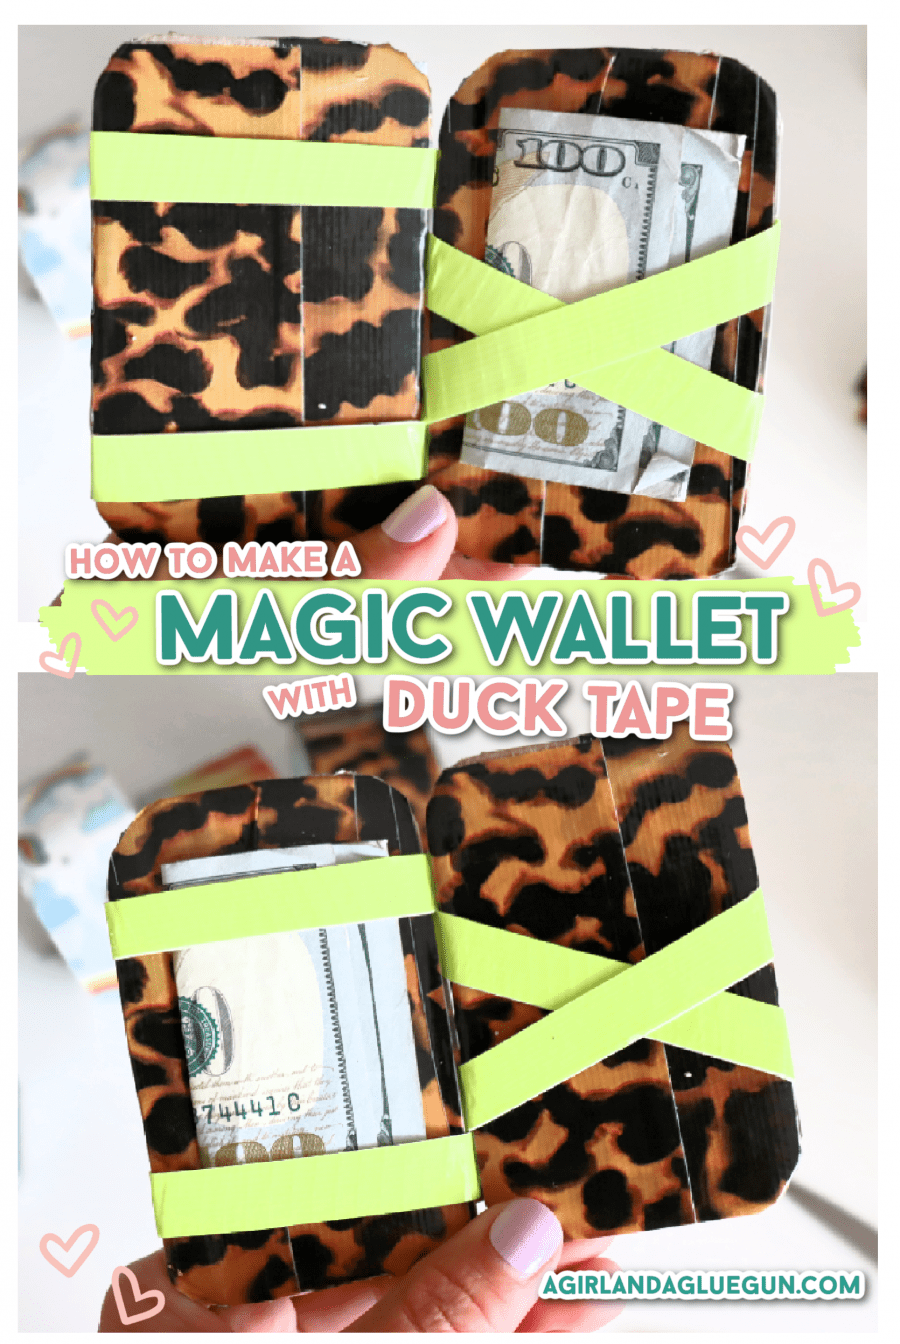
How the Magic Wallet Work
Place in money or card on one side. The wallet opens front and back. When you alternate sides the item switches from straight strips to cross strips!
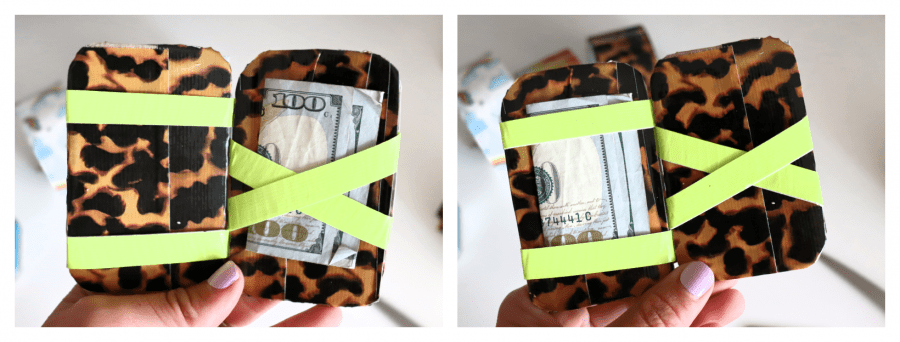
It’s really fun to see! Once you get down making one, you can make a dozen!
If you are willing to share this fun project on social media- I appreciate it! It helps others find my fun posts!
and if you need some other fun tape projects I have a few favorites!
Leave a Reply