
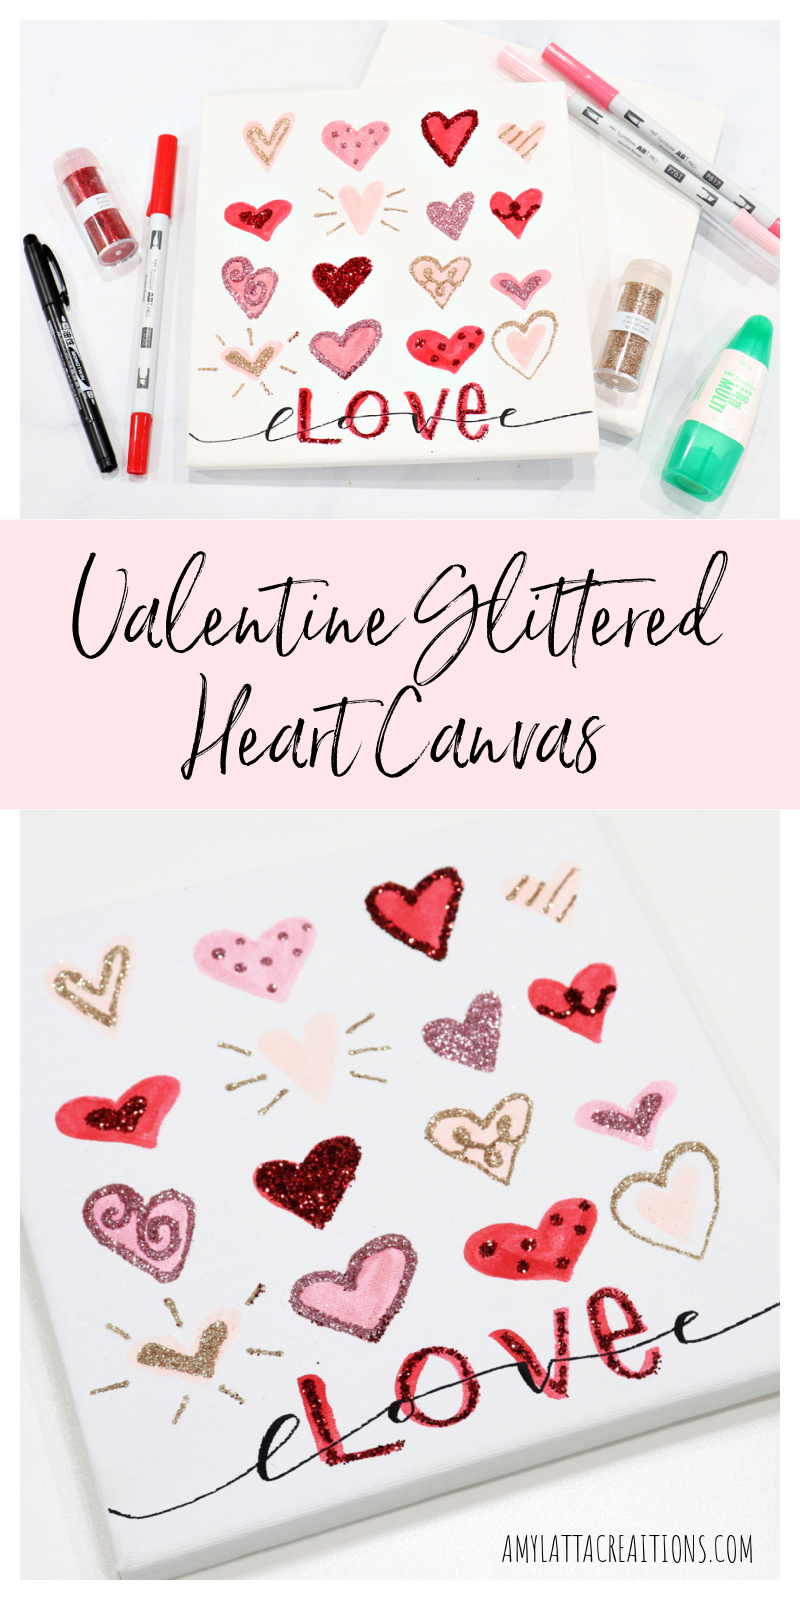
Valentine Glitter Heart Canvas
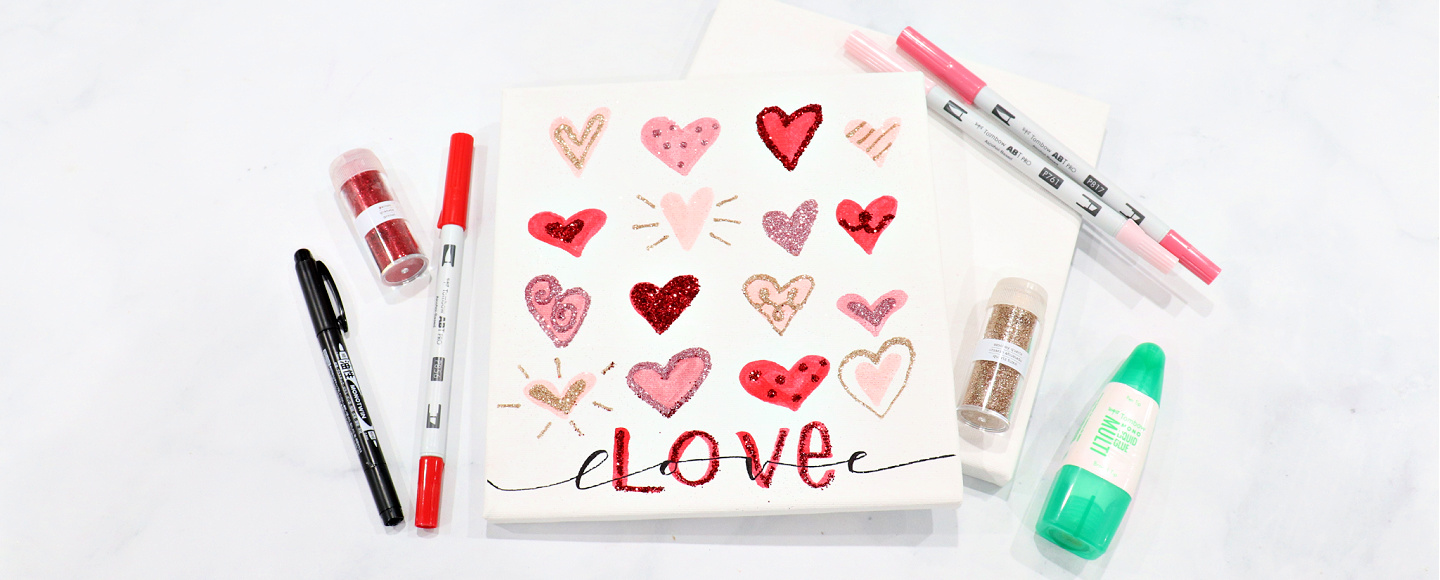
Recently, I had the fun opportunity to teach a class with Michaels Stores and Tombow USA to create a Valentine Glitter Heart Canvas that makes a great piece of festive decor. In case you missed it, here’s how you can make your own at home…take a look!
You’ll need:
a blank canvas (mine is 8×8″)
Tombow ABT Pro Markers in your favorite shades of pink and red
glitter
Tombow MONO Twin black permanent marker
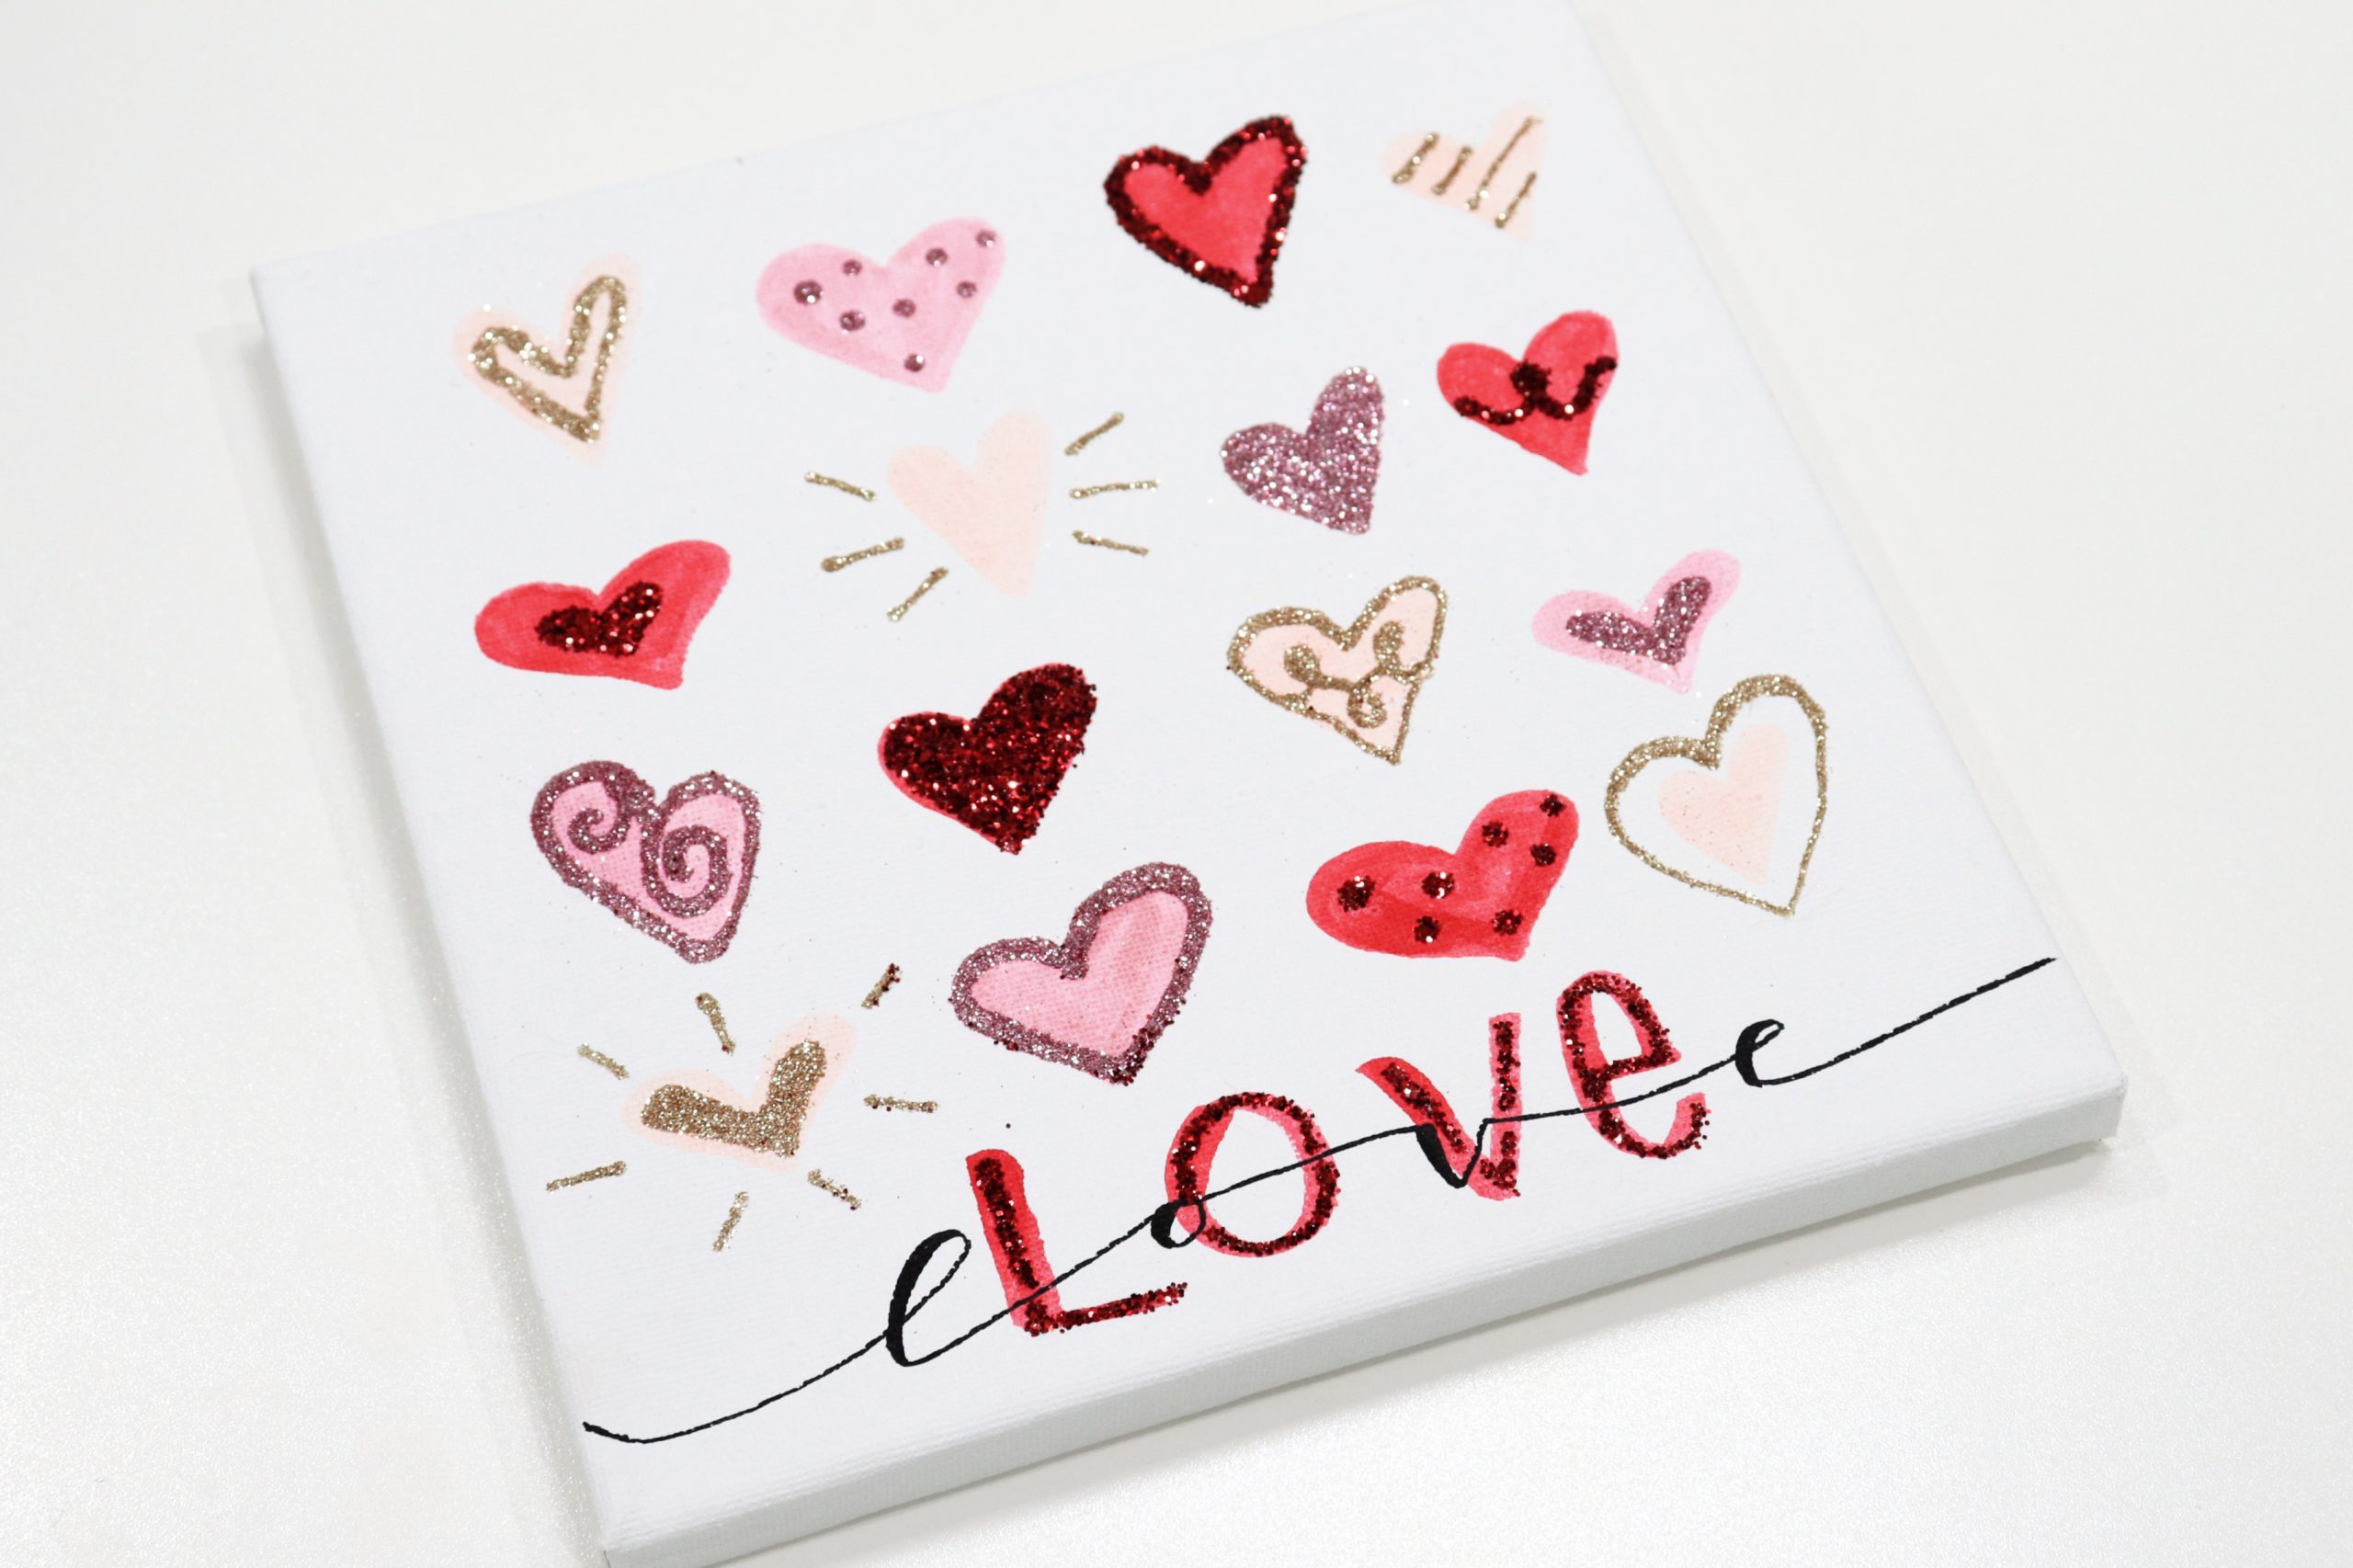
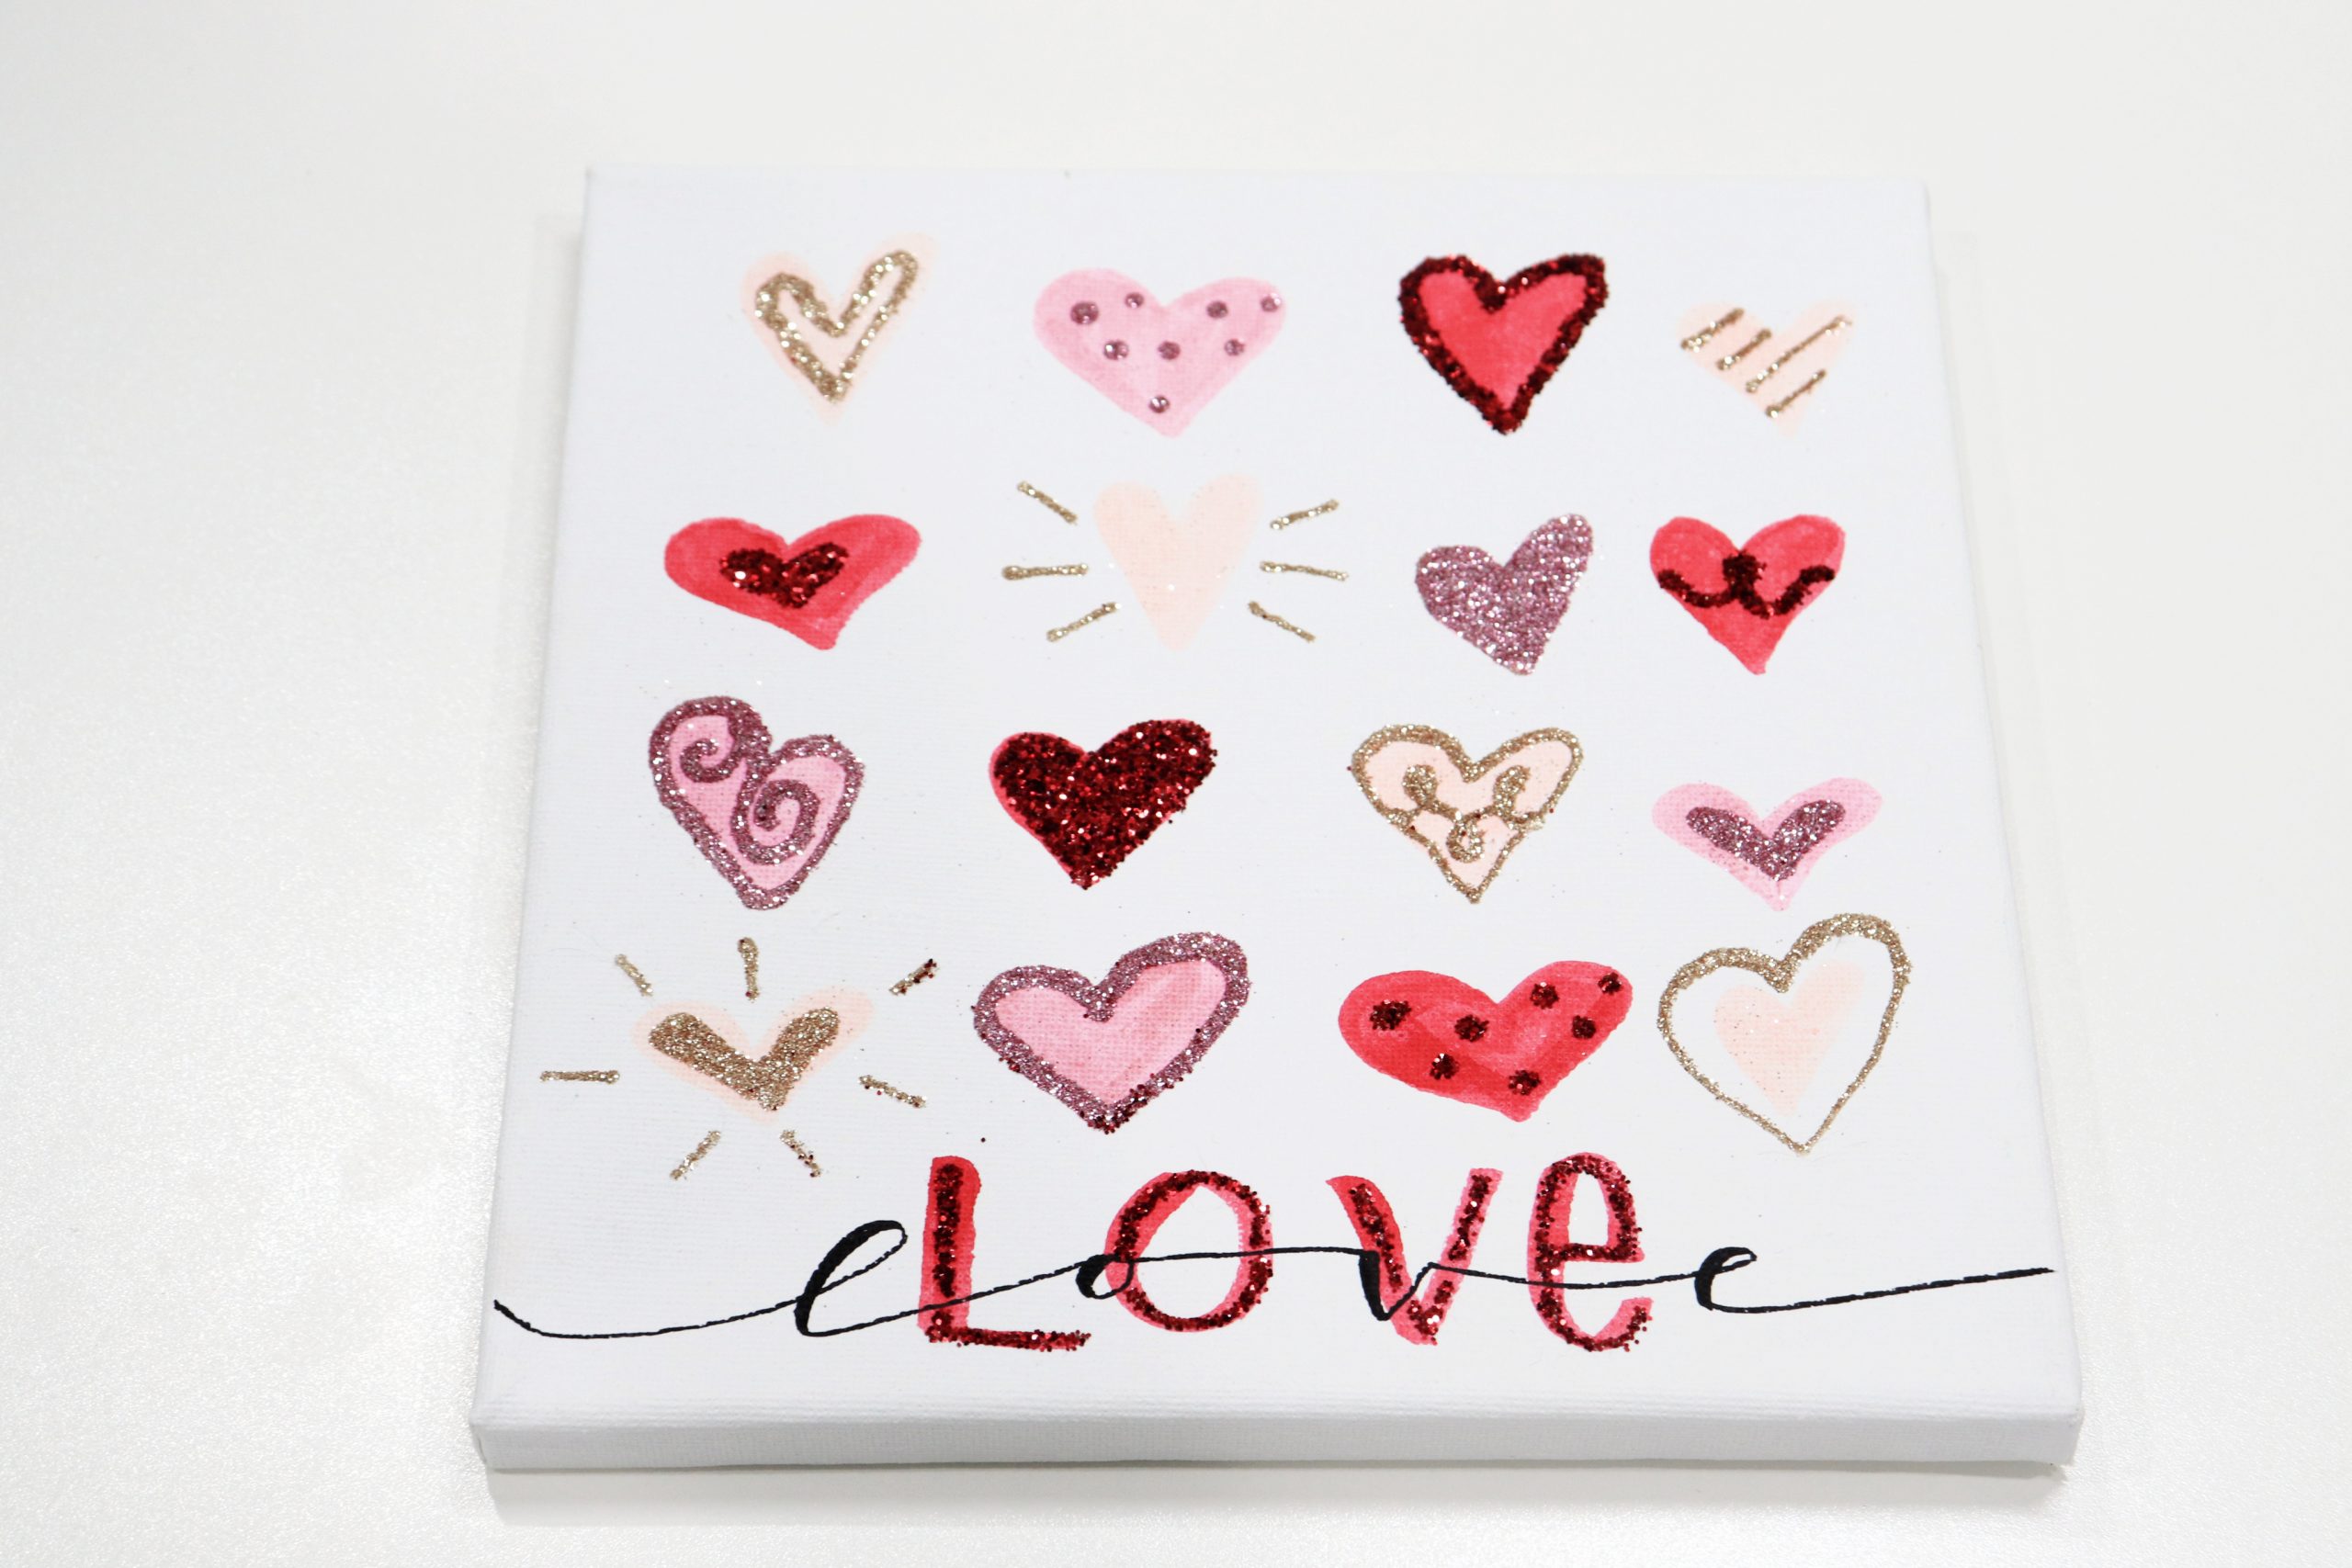
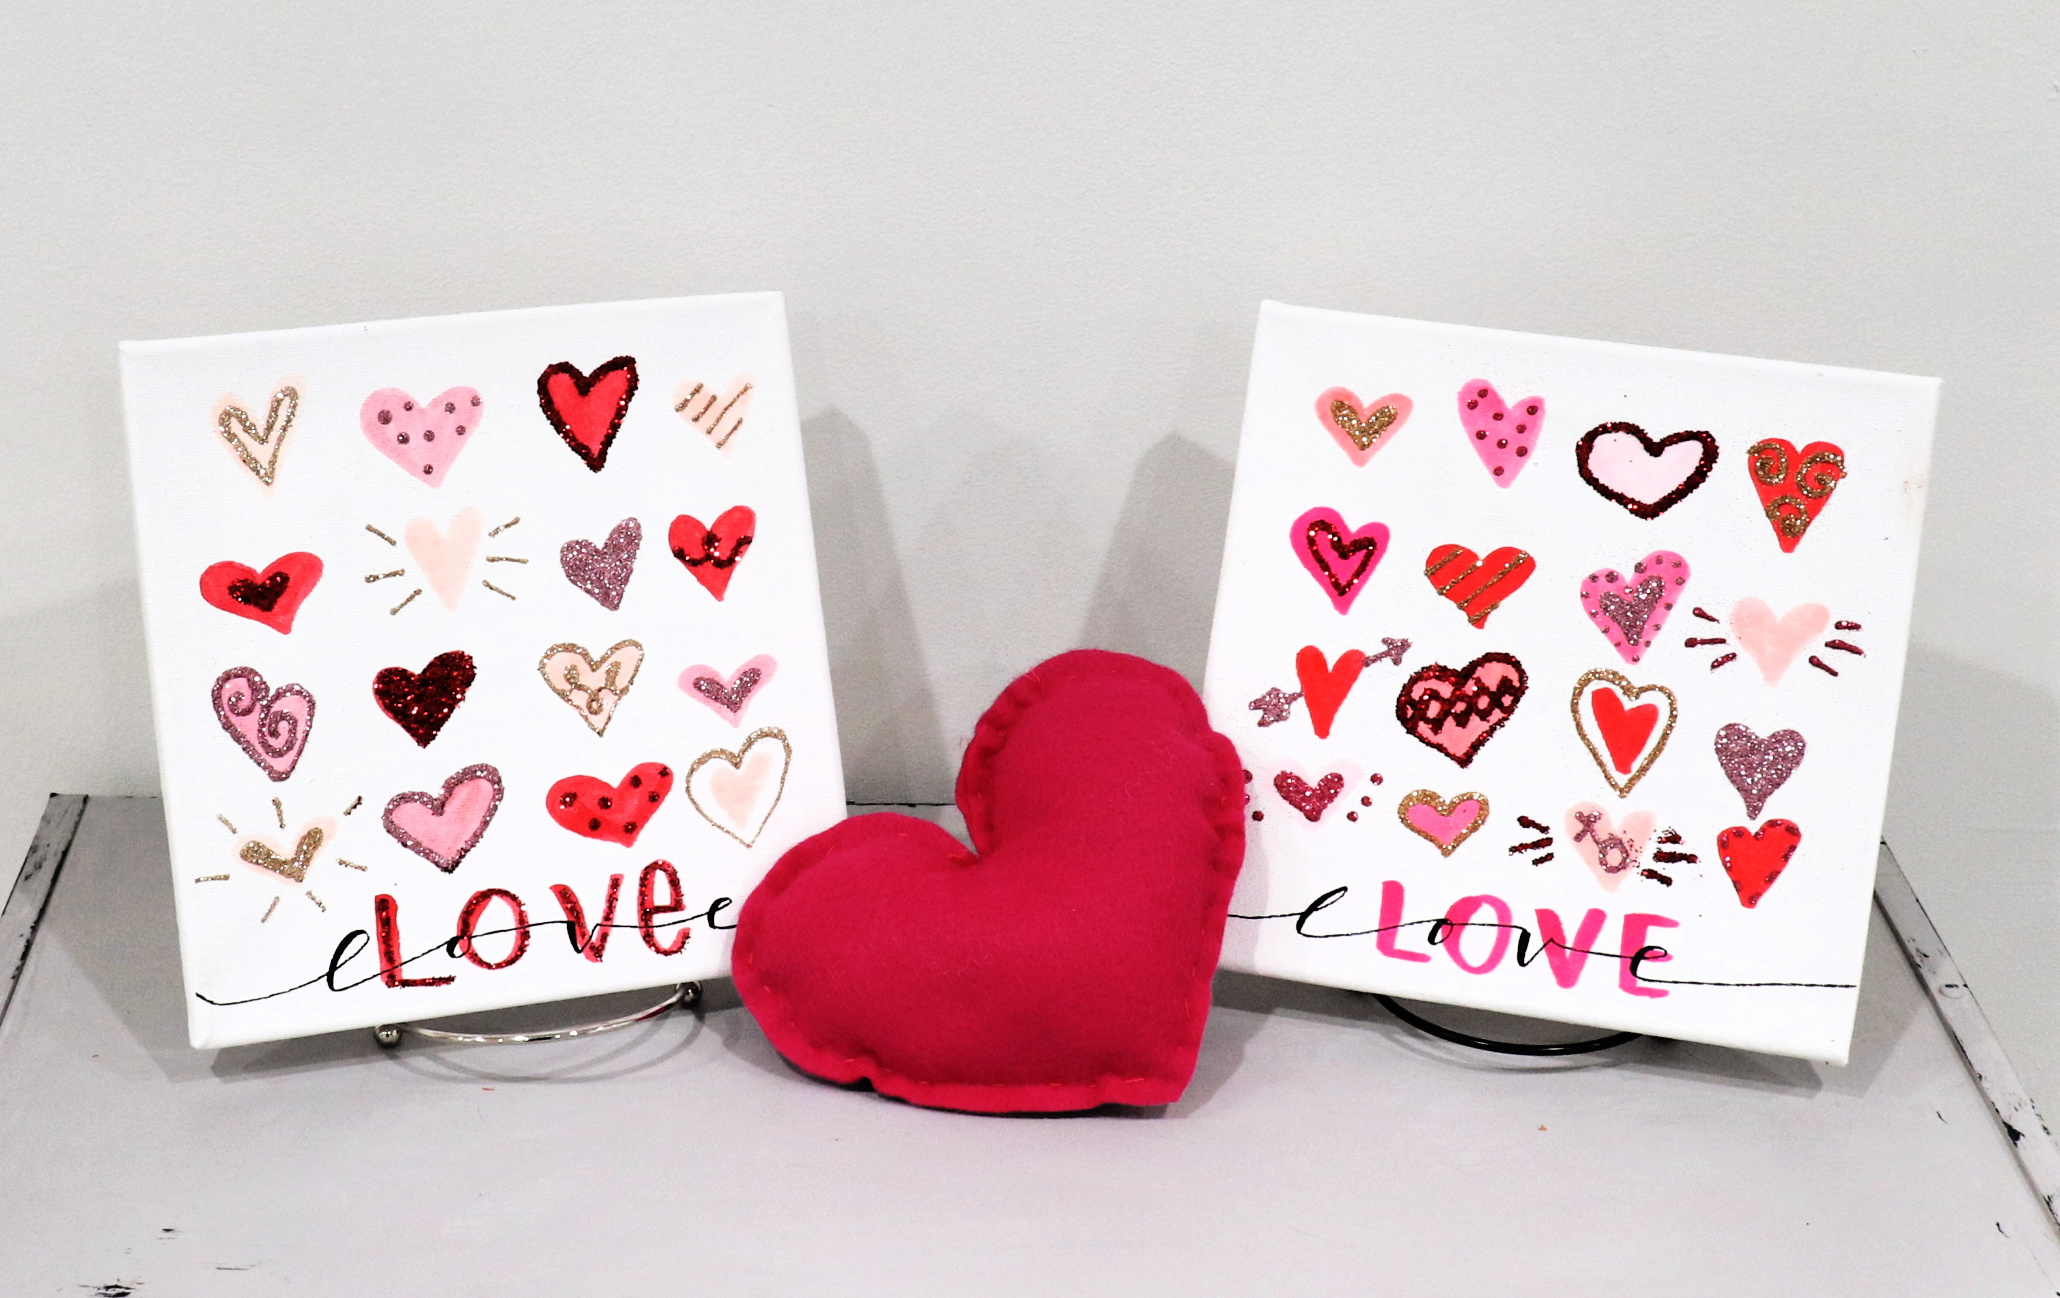
Step 1: Draw hearts on your canvas with the ABT Pro markers.
I did four rows of four hearts each, but you can adjust this to best fit the size of your own canvas. Try to vary the colors as well as the shapes/styles of the hearts. Make sure to leave some space at the bottom of the canvas if you’d like to add words like I did.
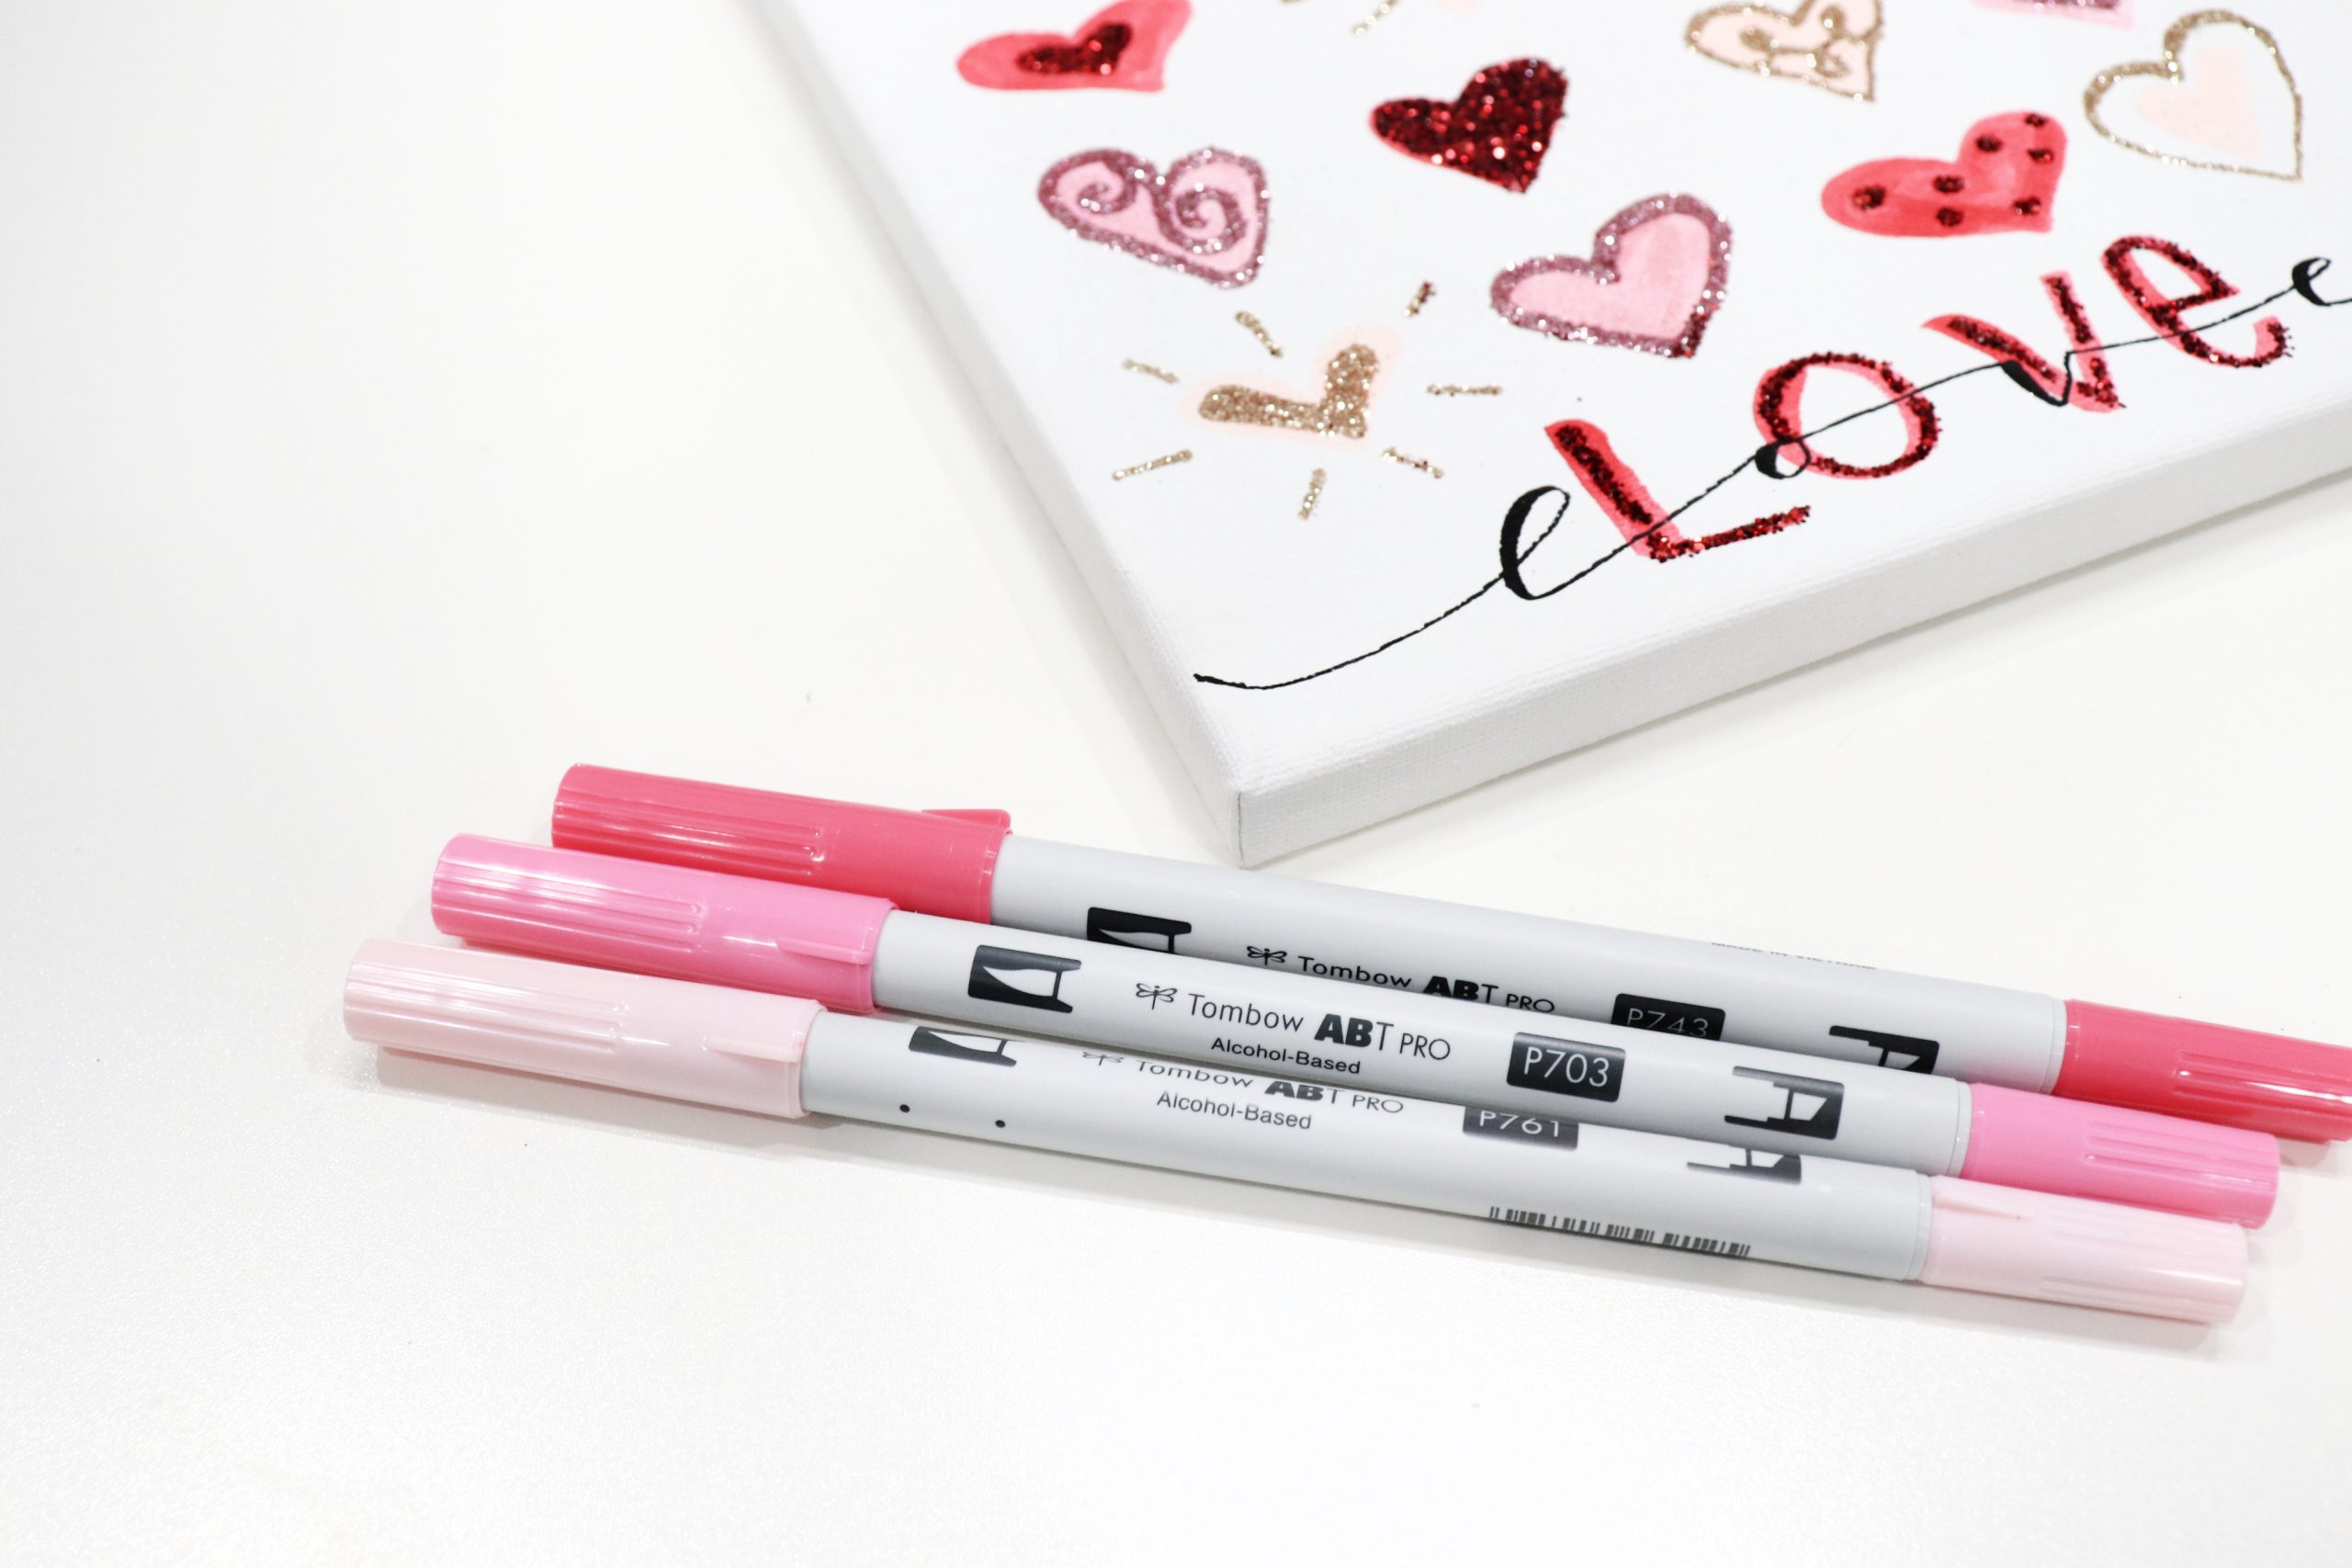
Pro tip: These markers should always be stored horizontally when not in use!
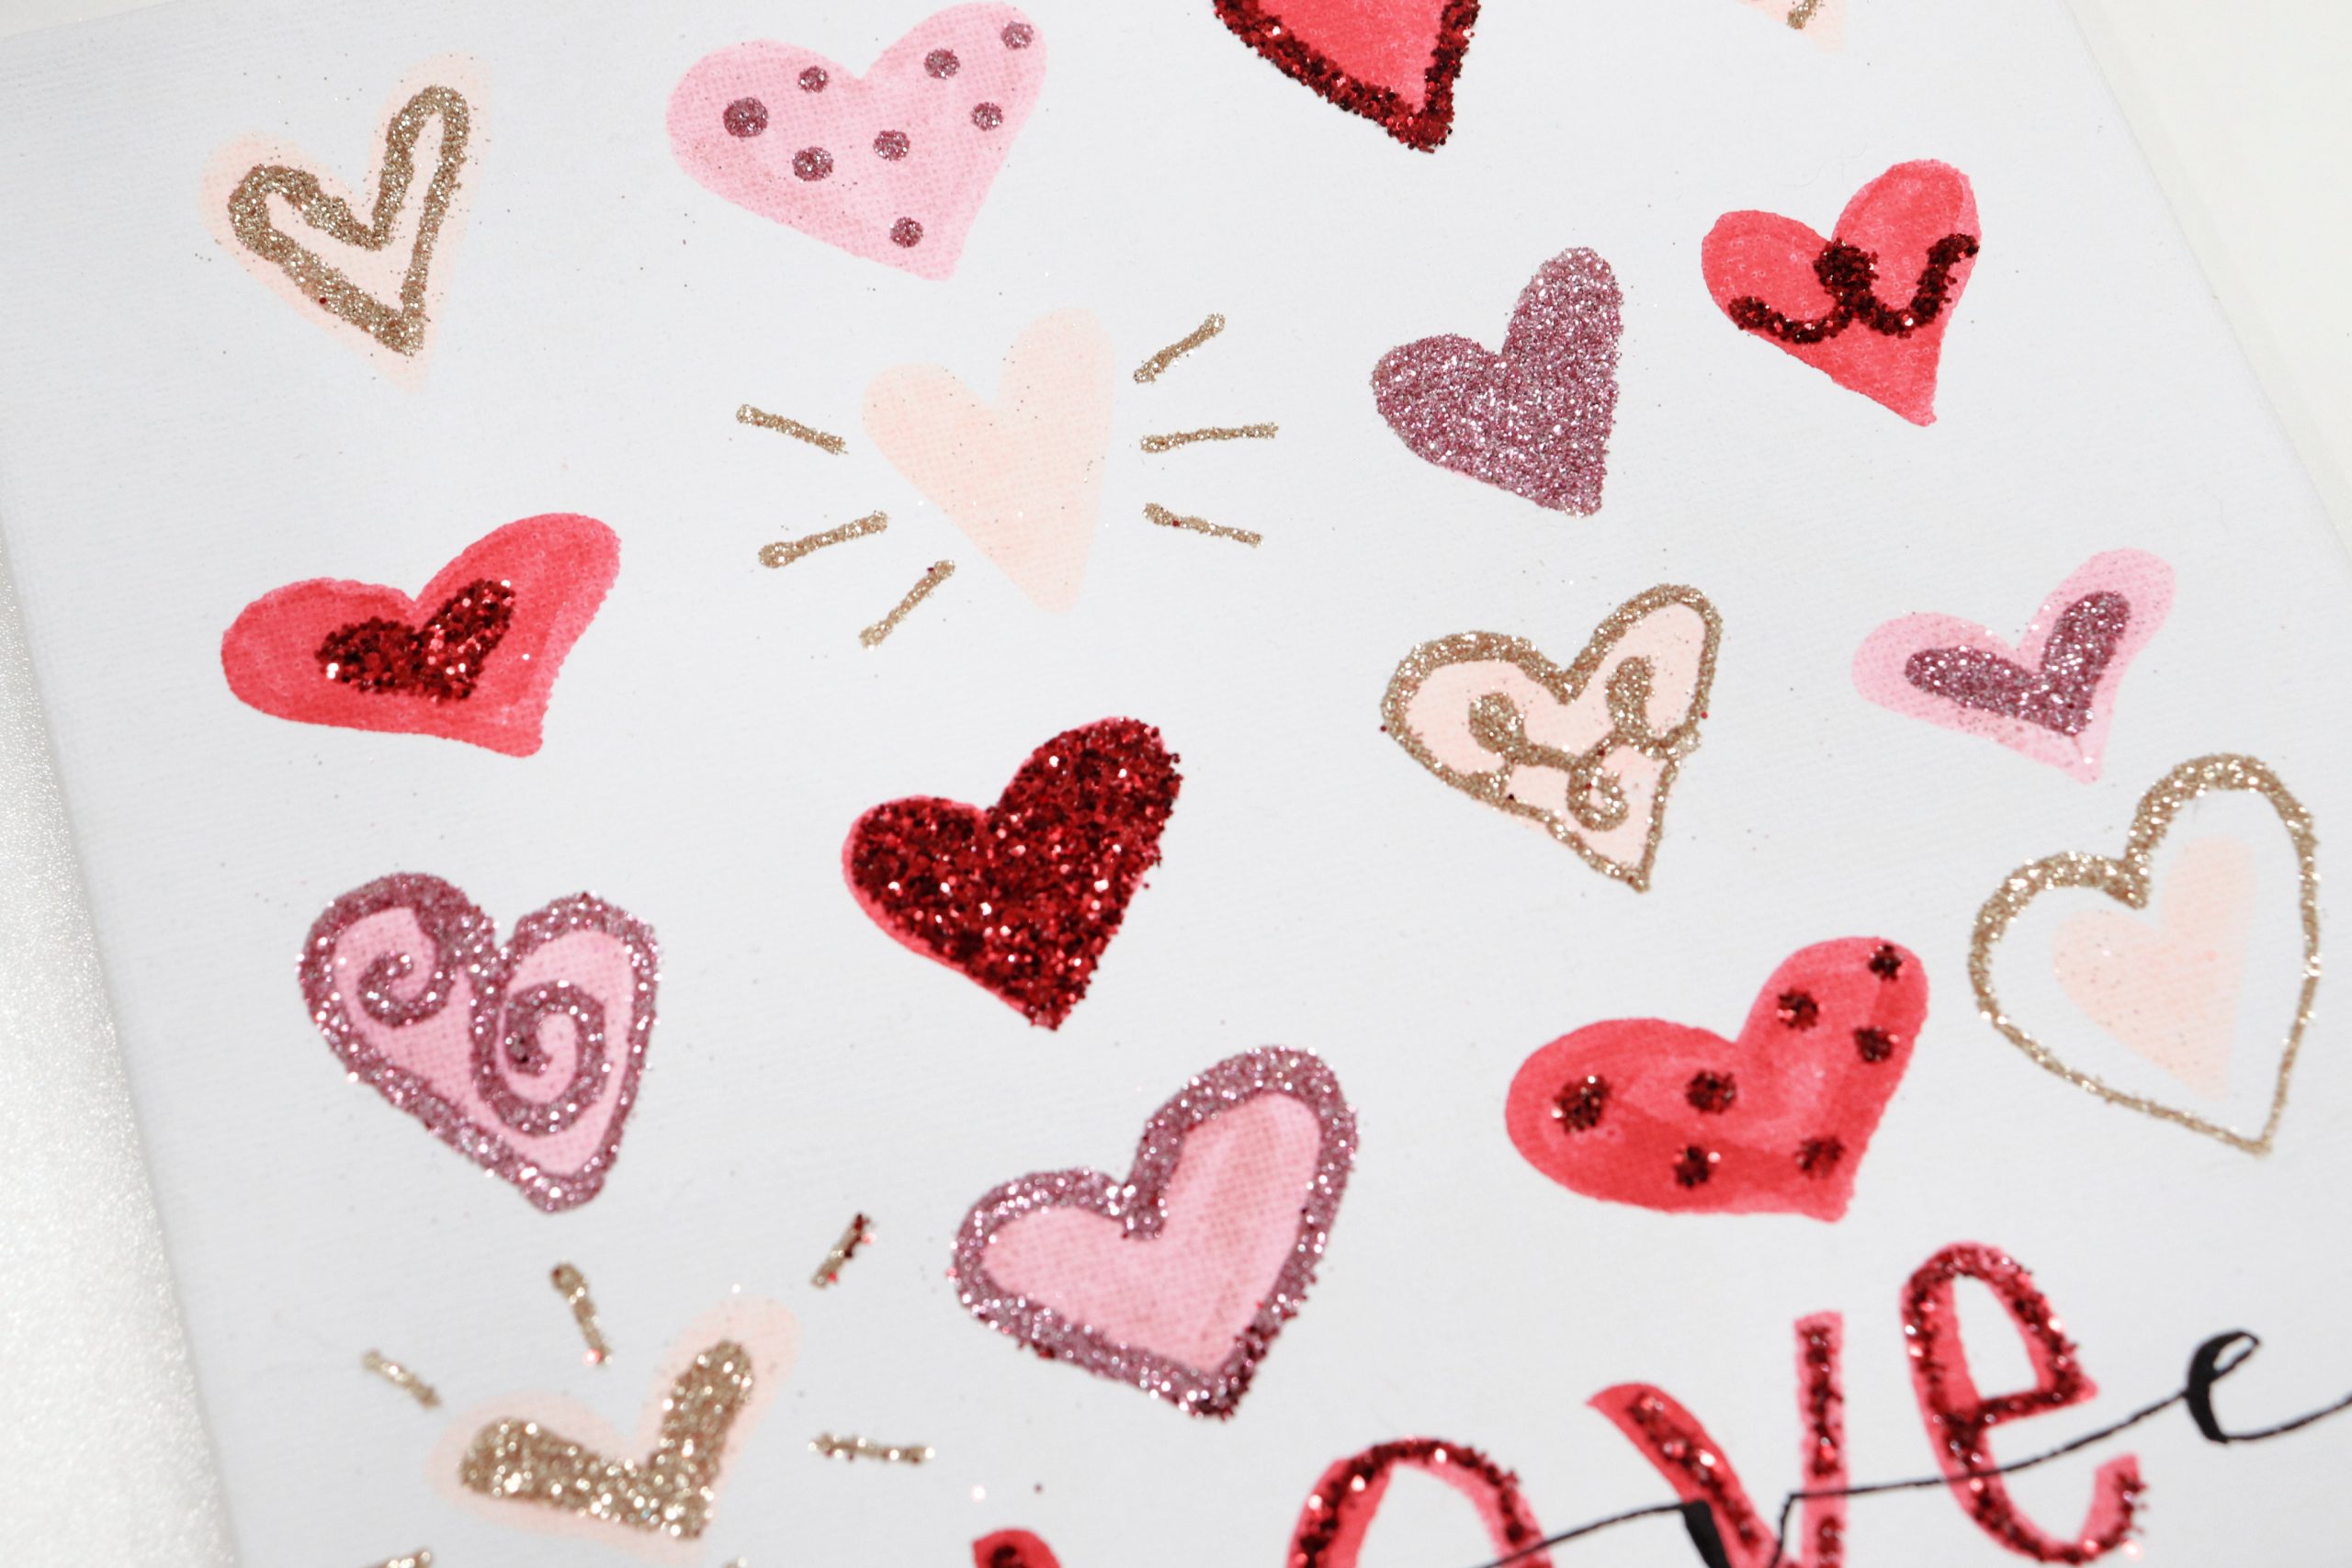
Step 2: Use the pen end of the liquid glue to draw embellishments on the top left heart.
You can choose any type of embellishment you like. Try outlining it, drawing a smaller heart inside, adding an arrow, adding polka dots, or filling in the entire shape with glue.
Step 3: Sprinkle loose glitter on top.
It helps to contain the mess if you place scrap paper under your canvas first, then gently turn the canvas and tap the excess glitter off. Then, you can funnel the extra back into the container.
Repeat steps 2 and 3 one heart at a time until each one is embellished.
Try a variety of glitter colors and embellishments to make each heart truly unique! If you don’t have glitter, or don’t enjoy working with it, you can also add embellishments with glitter pens, metallic pens, or even just another color marker.
Step 4: Print the word “LOVE” across the bottom of the canvas.
Use any color of the ABT Pro markers you like. I used all caps for one of my canvases, and did a lowercase “e” on the other. The style is totally up to you.
Step 5: Use Faux Calligraphy to write “love” across your printed word.
I used the Monotwin marker for this and stretched my letters out to cover the whole width of the canvas. For a quick tutorial on Faux Calligraphy, check out this post.
Now your canvas is ready to display or give as a festive gift!
I’ve loved seeing images of the projects created by students who took this class, and I hope that if you try it too, you’ll share your photos with me. Stop by the Amy Latta & Friends Facebook Group and drop your pics so we can all be inspired! Happy creating!


2 Comments