This post is sponsored by Tulip.
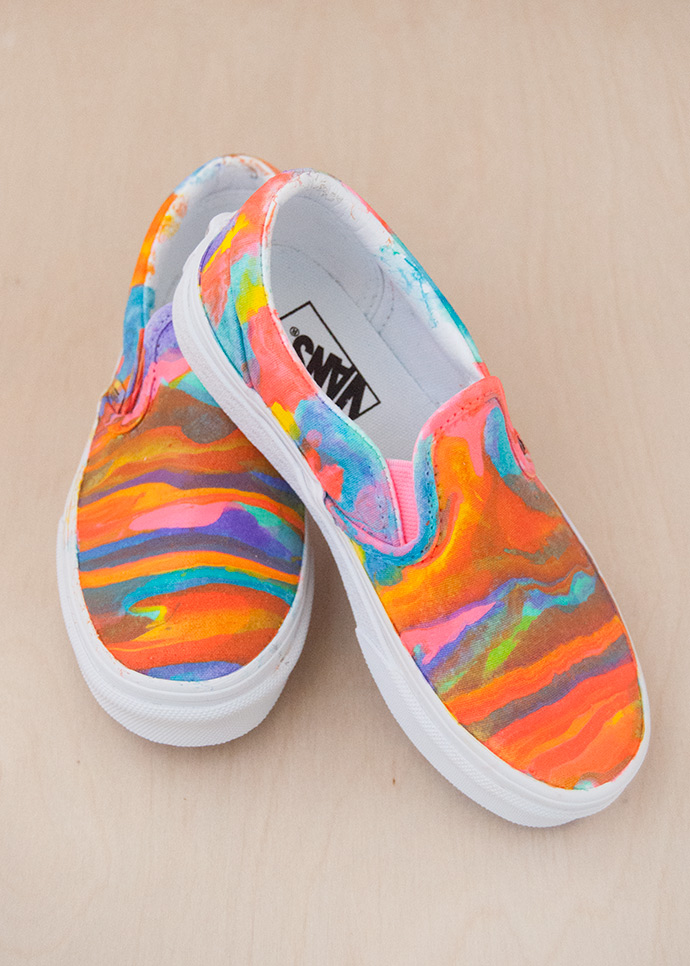
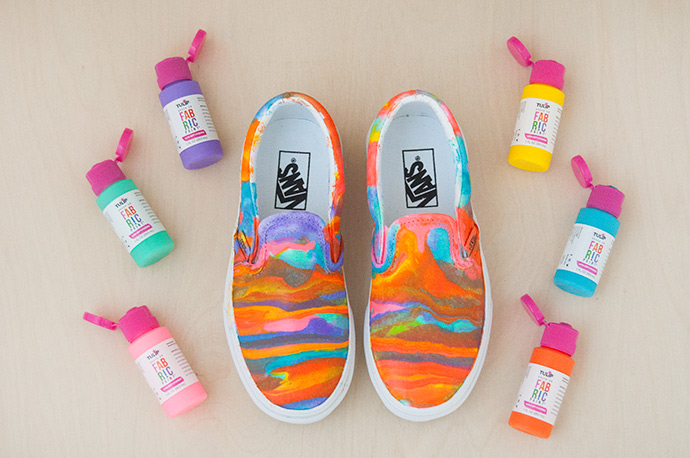
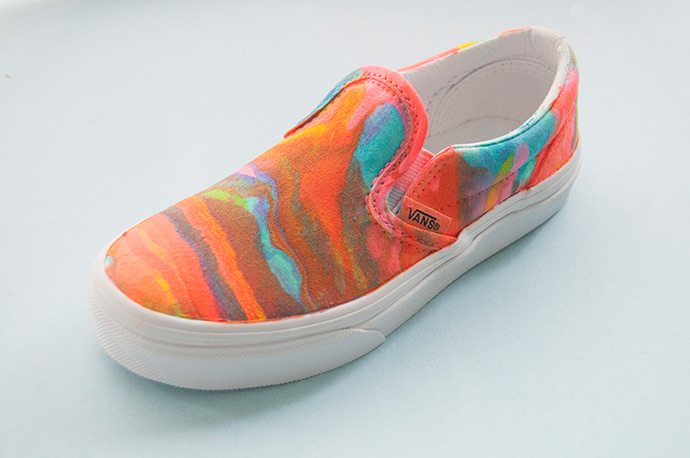
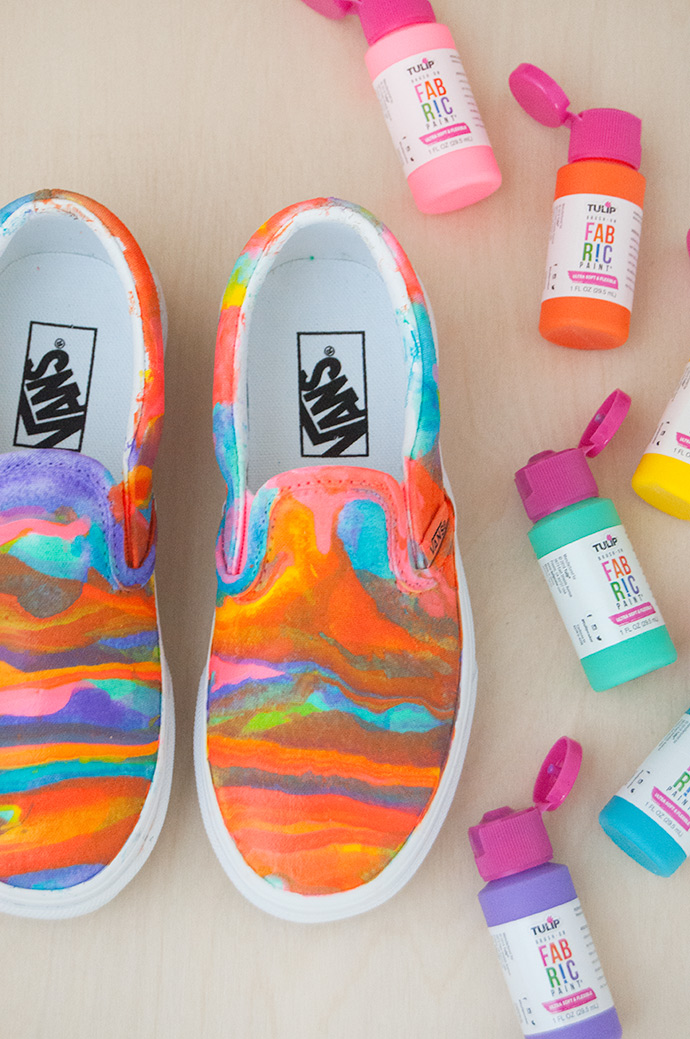
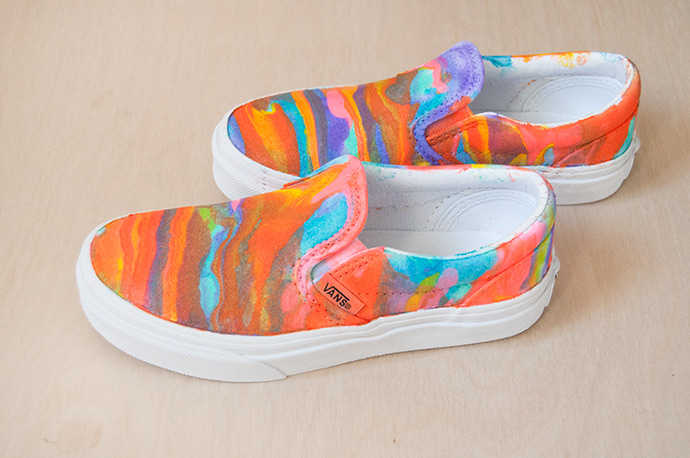
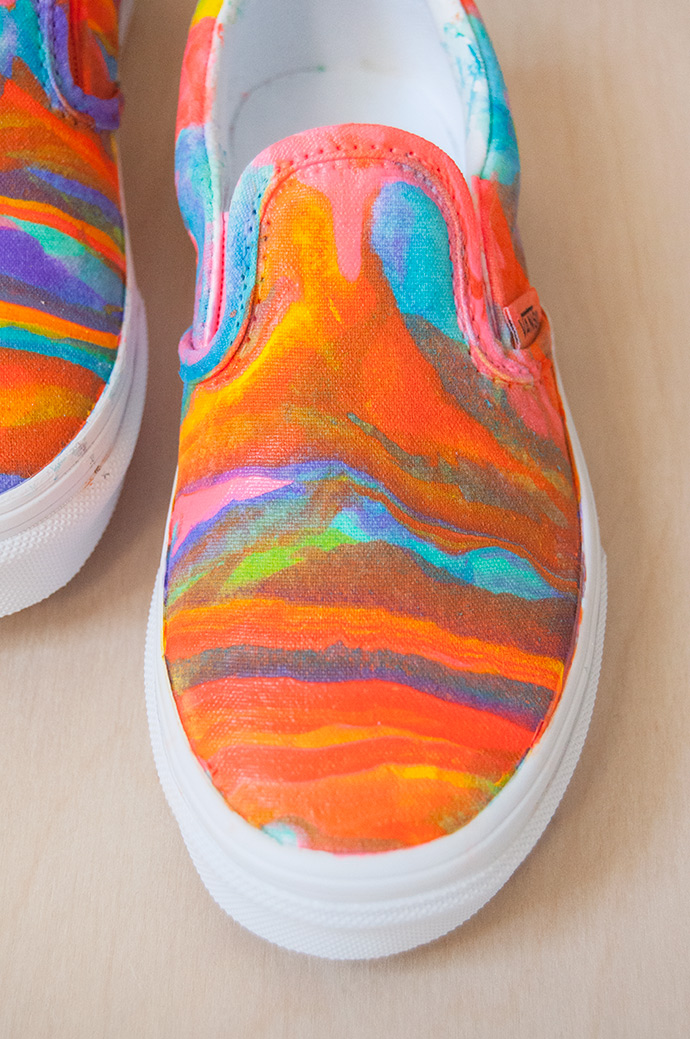
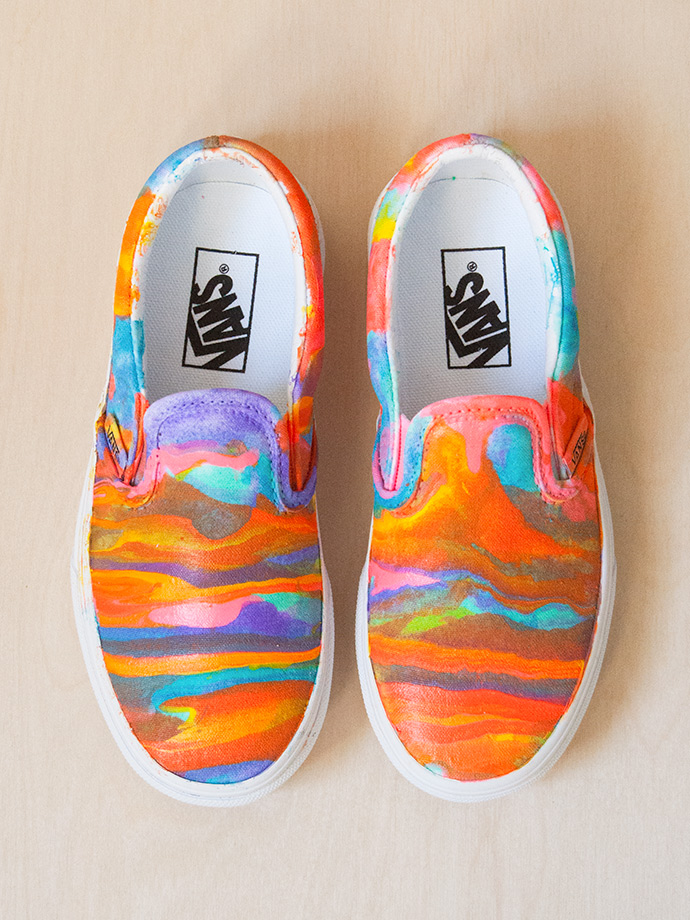
Looking to add some color to a pair of plain shoes? You’ve come to the right place! Today we’ll be putting a spin on the popular “acrylic pour” technique, but we’ll be using Brush-On Fabric Paint from Tulip! Part of the rainbow color collection, it’s impossible to not have fun mixing and matching color combinations for these shoes. Our finished shoes remind us of a sunset!
The fun thing about this paint pouring technique is that you never really know what pattern you will get, or what colors will be the most dominant. It’s a little bit like tie dye in that sense, except that you don’t have to wait to see the surprise – it reveals itself right in front of your eyes as you pour! Watch the how-to video below and keep reading for all our handy tips and tricks.
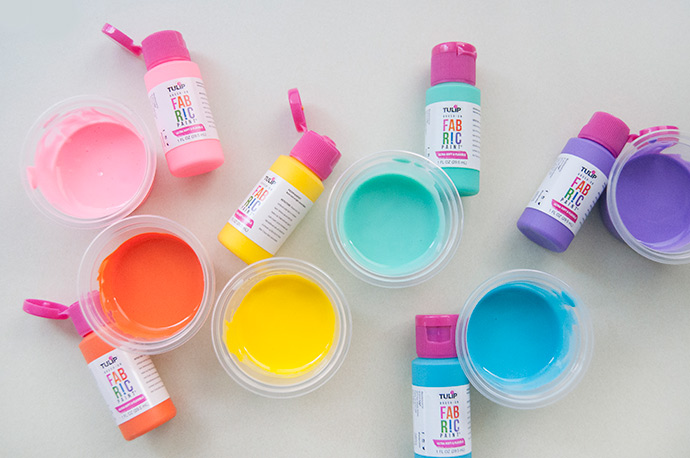
what you need:
- Tulip Brush-On Fabric Paint
- White canvas shoes
- Painter’s tape (best quality possible)
- Plastic/paper cups
- White glue
- Popsicle sticks
- Shallow cardboard box
how-to:
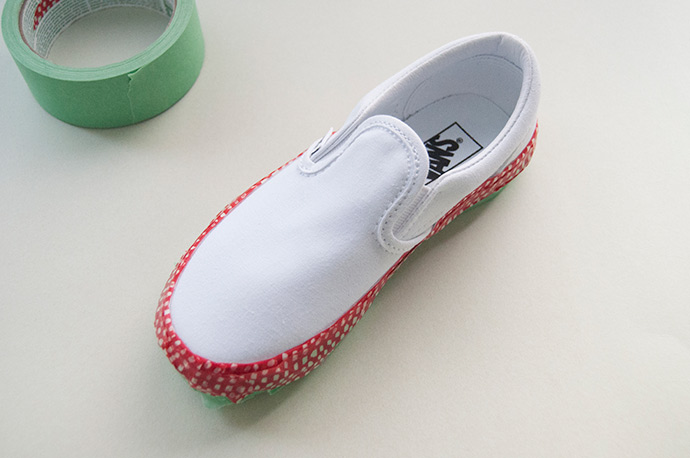
Step 1
Apply painter’s tape around the rubber sole of the shoe, ripping multiple small (approx 1”) pieces around the curves to make sure the seal is as tight as possible. Cover the entire sole, including the very bottom with painter’s tape. Fill the shoe with a plastic bag crumpled up.
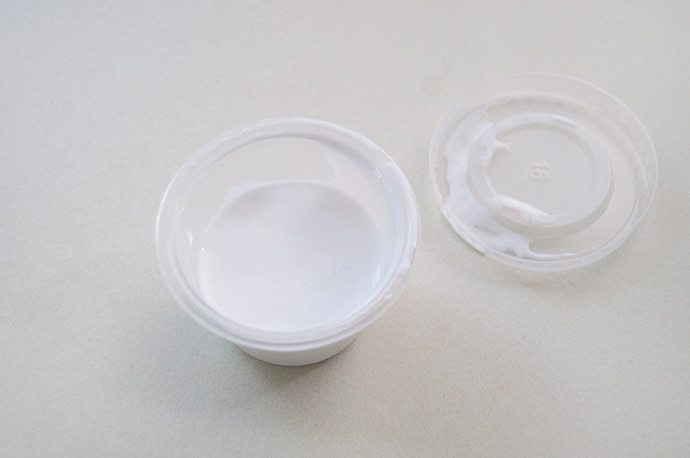
Step 2
In a cup, mix 1 part glue and 1 part water. We will add this to the paints to help make them more pourable.
Step 3
Select your paint colors and shake well. Pour each into a small plastic cup. Pour a little bit of the water-glue mixture into each paint color, about 4 parts paint to 1 part glue-water. You want to make it more pourable, but not too runny either, so start with a little, stir, and add more if needed. Once you experiment a little, you get an idea of what consistency you need – runnier than BBQ sauce but thicker than chocolate syrup.
Step 3
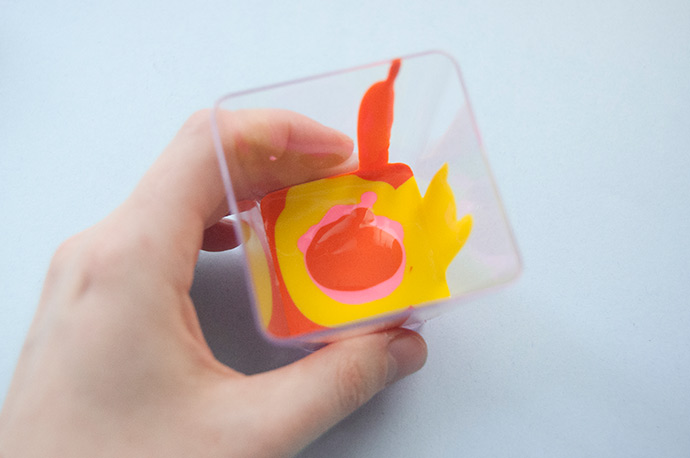
Grab another cup or two and pour your paints into them, forming layers that look like a bullseye, alternating between colors a few times. We did 3 colors in 1 cup, and the 3 other colors in another. When you do this, if the colors mix together and look watery, that’s a good sign that you added too much glue-water mix to your paint and you might want to redo step 2.
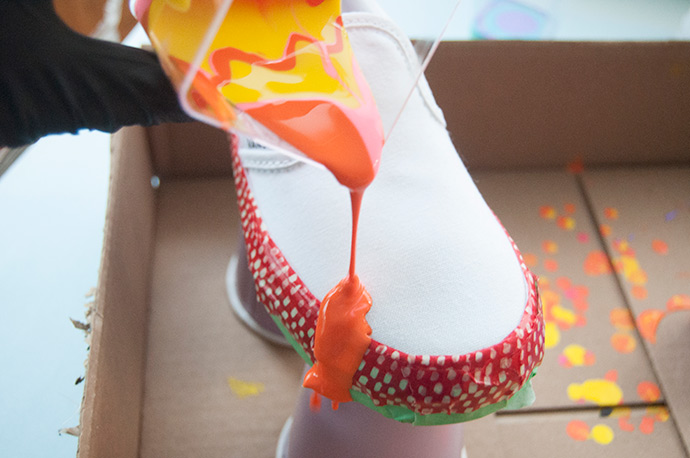
Step 4
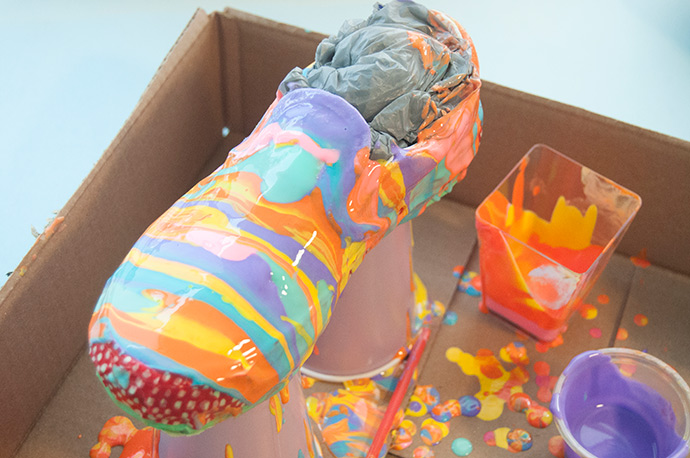
Set up two upside down cups in a shallow cardboard box and then it’s time for the fun part – pouring! Pick one of your mixed cups to start with and pour it slowly over part of the shoe.
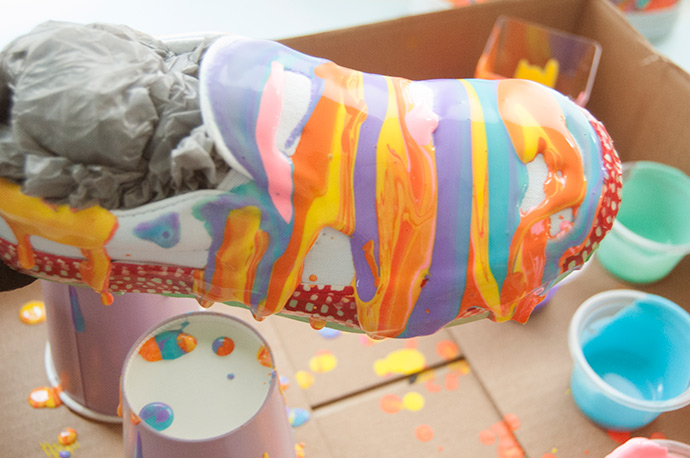
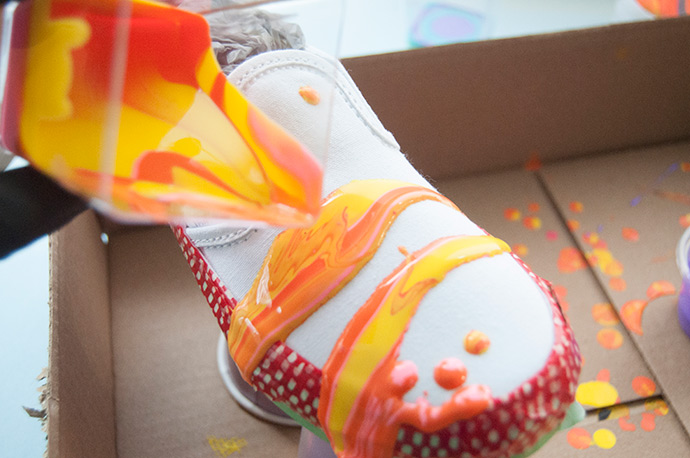
Switch to the other cup of paint, pouring again over different parts of the shoe. You’ll need to work fairly quickly as the paint starts to blend and drip.
Step 5
Continue switching between the two cups to cover the shoe. You can also use the cups of single color paint to help fill in any gaps, if you had any leftover paint. Use a popsicle stick to help push or blot any paint onto small uncovered spots.
Step 6
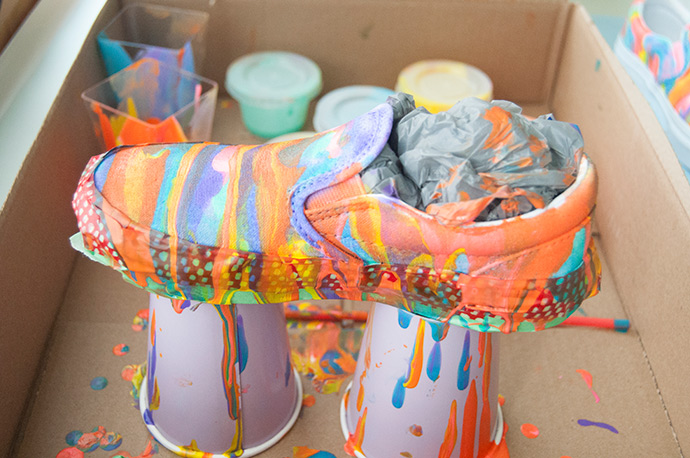
Set the finished shoe on the two cups to drip and dry overnight. In the morning, when the paint looks absorbed into the canvas, carefully remove the tape, being careful if the paint is still wet. If any paint leaked under the tape, wipe it off with a wet cotton swab or scrape any dried paint with the edge of a pair of scissors.
Step 7
Set aside to finish drying.

Happy crafting!