Give your loved ones a fun Valentine’s Day surprise with this mini photo Gallery Valentine’s card. Feature your favourite happy snaps in sweet heart shaped frames.

This clever Valentine card has a cute surprise hidden inside, all is revealed when you pull the little tab to expand the mini photo gallery nested inside like a Russian doll.
We’ve included a handy printable template that will help you assemble all the parts with precision. The only part you’ll need to contribute is your favourite cute photos of the special people in your life.
Kids will enjoy decorating the heart shaped frames with drawings or messages. The perfect Valentine gift for a grandparent or a loved one that is far away.

Double sided tape and glue dots make this project easier to assemble, but if you don’t have those supplies handy, craft glue will suffice.
Printing the templates directly onto the coloured paper will make this a super quick papercraft project, just make sure you fold the printed side towards the inside to hide any markings.
More Valentine’s Day Crafts:
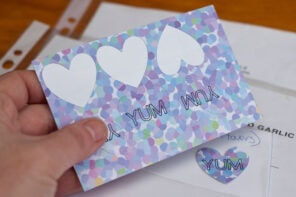
Celebrate Valentine’s Day with a pocket sized photo gallery

You will need:
- A4 Cardstock – multi colours
- Printer
- Scissors
- Art knife
- Cutting board
- Clear adhesive tape
- Glue dots
- Glue tape
- 6 photos
- Marker pens
How to:
1. Print the three template pages at 100%, using a different coloured piece of cardstock for each page.

2. Cut out each of the card layer pieces as well as the pull-tab.


3. Fold the card layer pieces and the pull-tab, along the broken lines.

4. Using adhesive tape insert photos of loved behind the cut out hearts of each card layer.

5. Place glue dots on the right hand side corners of card layer 3, below the upper fold and above the lower fold. Fold and seal closed card layer 3.


6. Glue the top and bottom long horizontal tabs of card layer 3, and fold closed.


7. Place glue dots on the right hand side corners of card layer 2, below the upper fold and above the lower fold. Place card layer 3 inside card layer 2. Fold and seal closed card layer 2.


8. Glue the top and bottom long horizontal tabs of card layer 2, and fold closed.

9. Place glue dots on the right hand side corners of card layer 1, below the upper fold and above the lower fold. Place card layer 2 inside card layer 1 (the largest). Fold and seal closed card layer 1.


10. Glue the top and bottom long horizontal tabs of card layer 1, and fold closed.

11. Gently pull out the card layers 2 and 3 out from the left side opening of card layer 1. Glue the pull-tab piece to the left hand side of card layer 3.


12. As a final step bedazzle your Valentine’s Day Card with extra decoration. You can now continually open and close the Valentine’s Day card displaying hidden photographic delights for your beloved friend.


 Melissa is a content creator and hyper creative artist.
To see more of Melissa’s work, follow these links-


That mini photo gallery is very cool!