


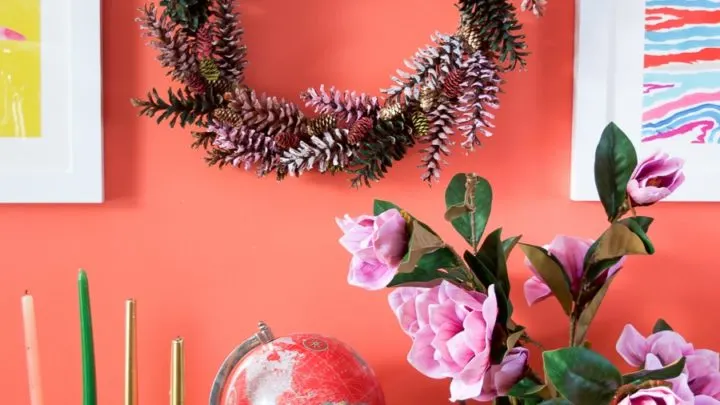
I always seem to have a pocket full of pine cones. Almost every day, I go for a coffee in my local park where I can’t help picking up pretty dropped pine cones. I used some of my collection to craft a gorgeous painted pine cone decoration for my gallery wall.
Not only do I have a thing about painted pine cone crafts but I also love to craft angel wings. I’ve created map angel wings and I have even crafted upcycled shuttlecock angel ornaments.
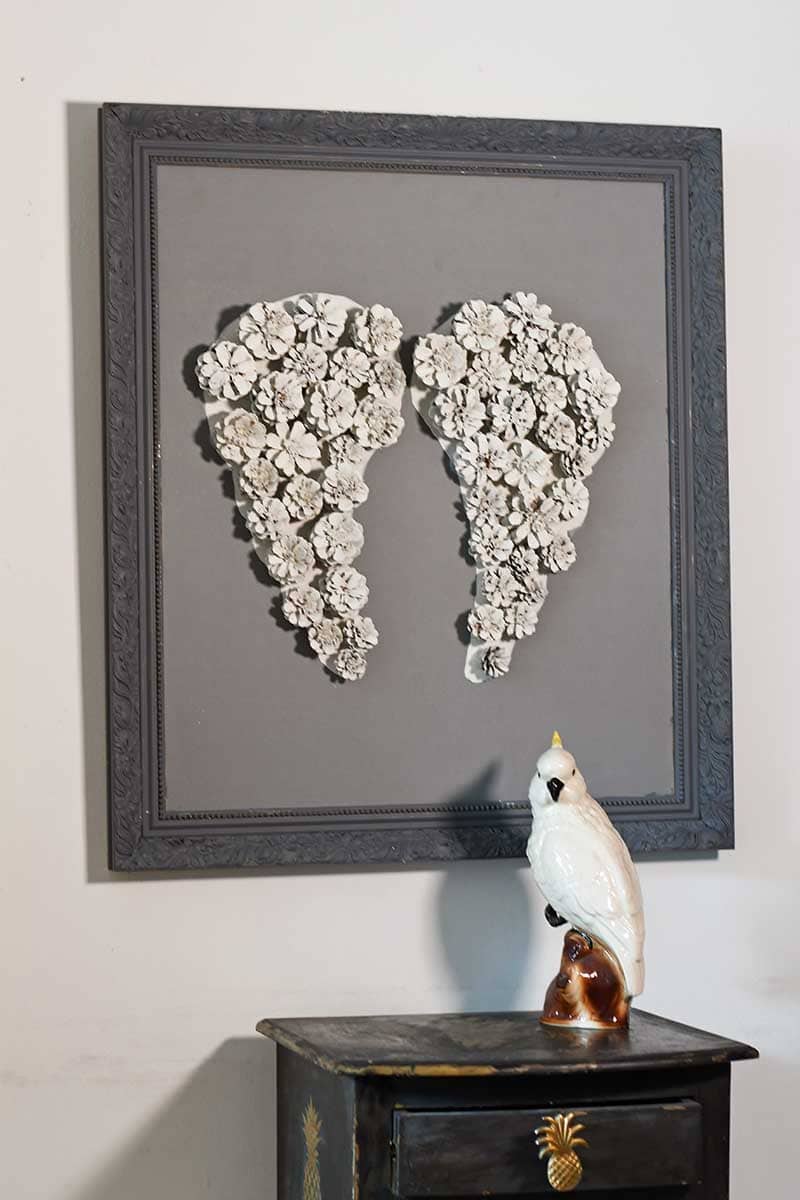
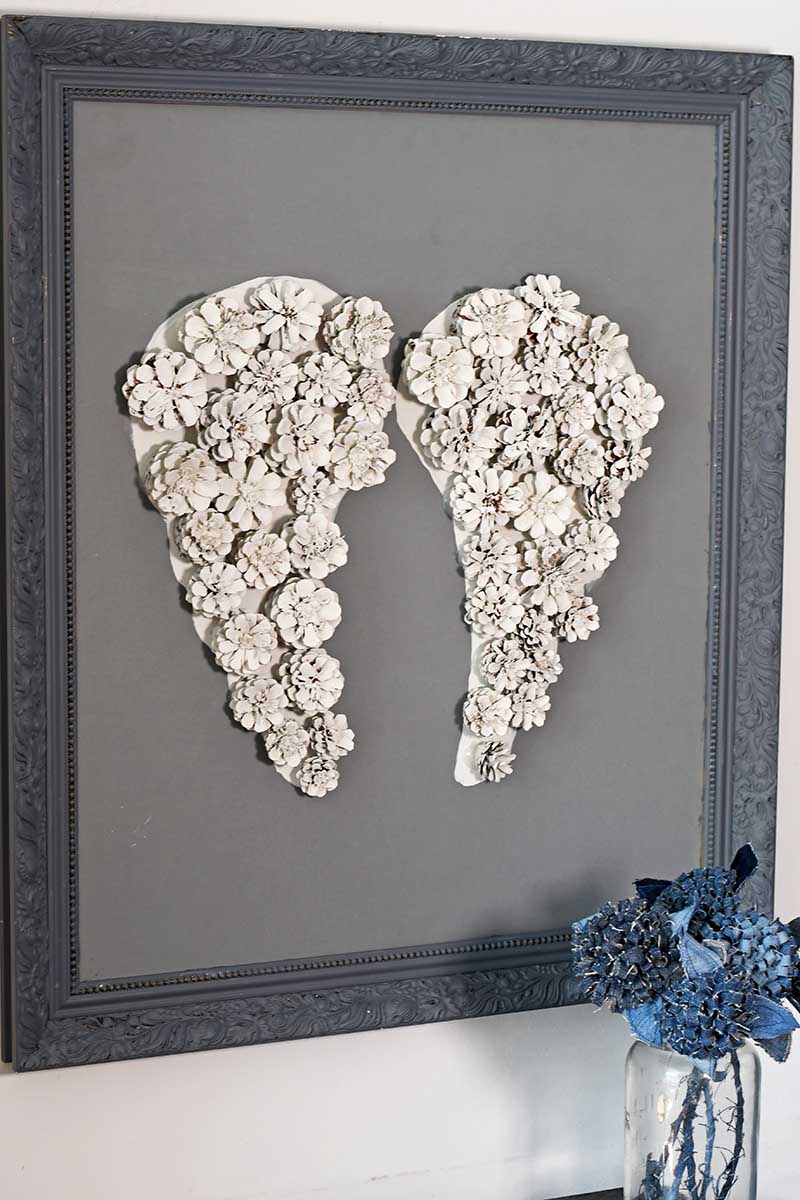
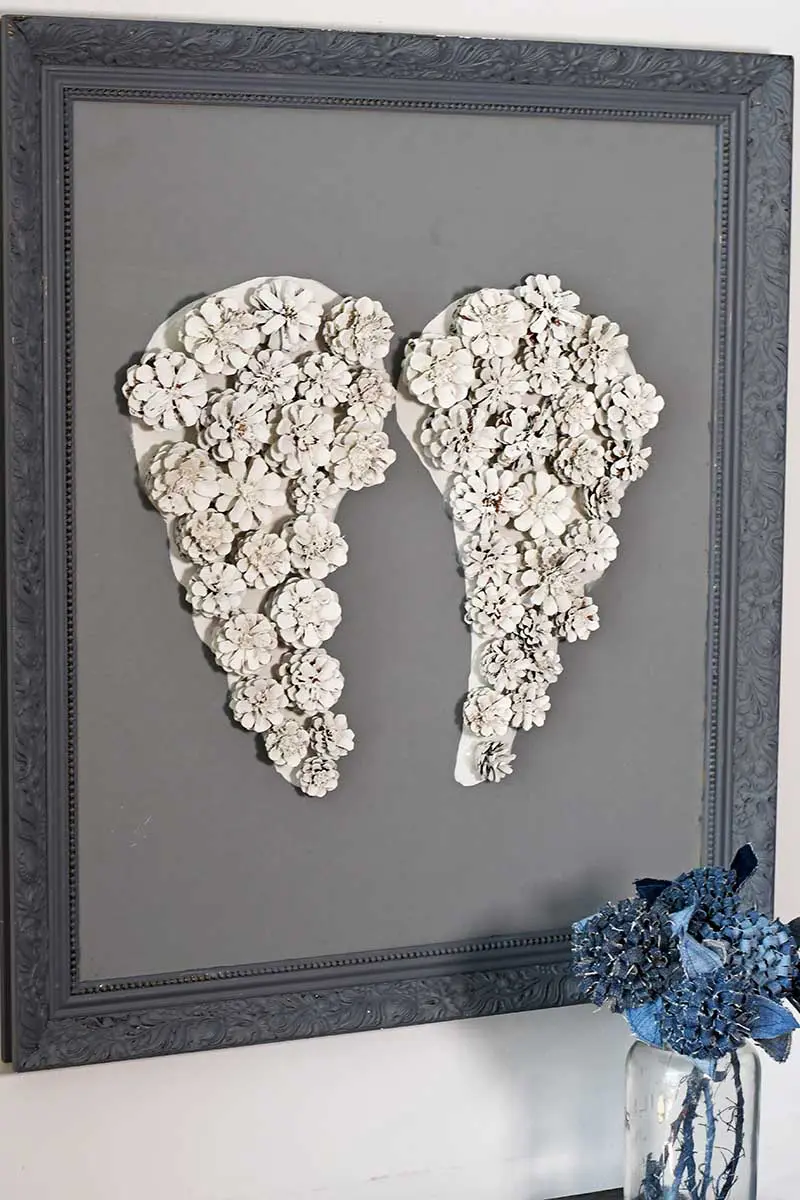
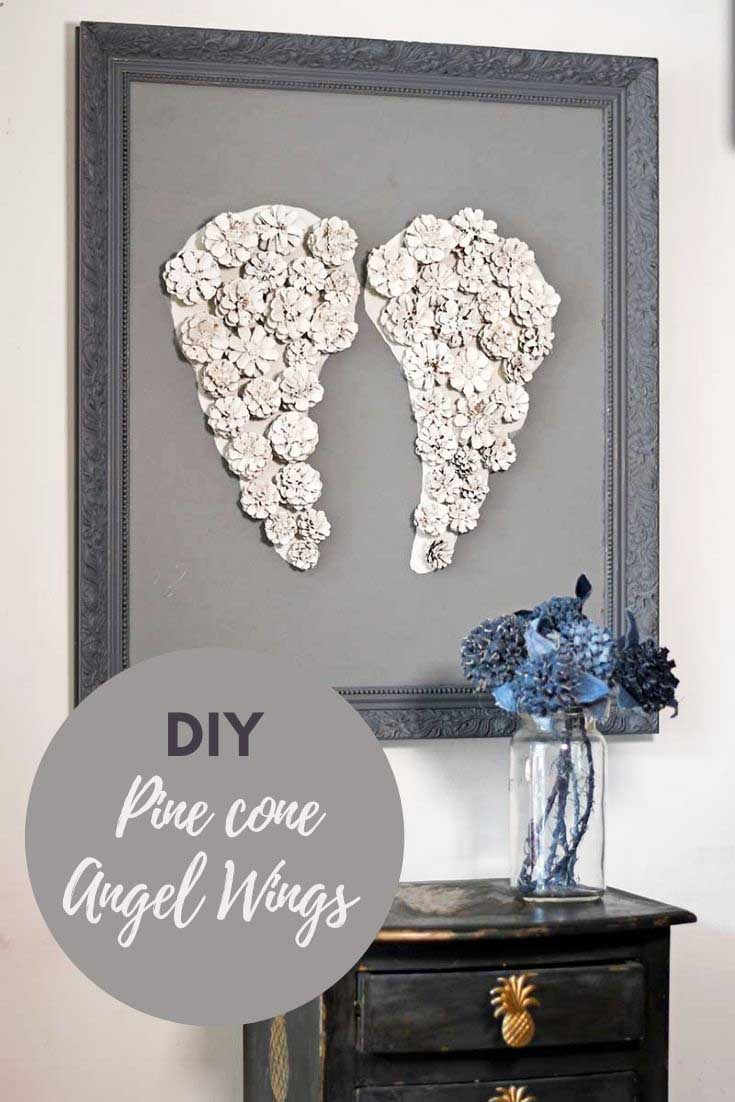
I mashed these two crafting themes together to make a lovely pair of pine cone angel wings for my gallery wall.
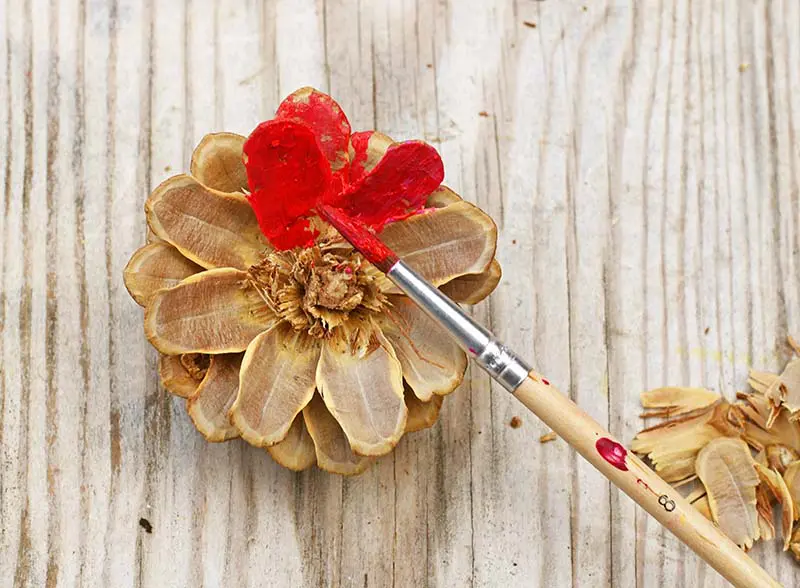
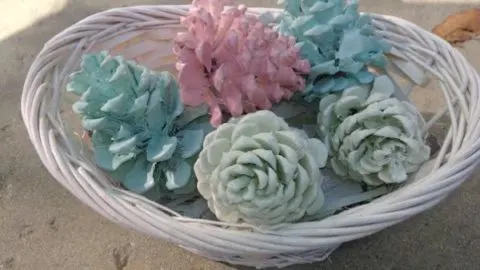
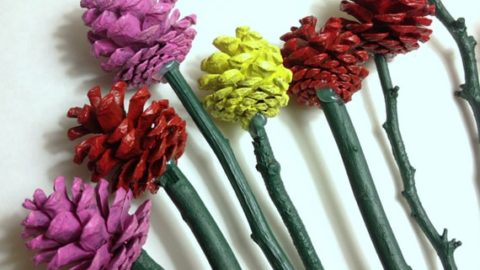
This pine cone craft involved using lots of pine cones of different sizes. Then cutting them to look like flowers before painting them.
After the pine cone angel tutorial, there is a round-up of some other wonderful pine cone craft ideas.
There are more Christmas nature crafts here.
How To Paint Pine Cones For Crafting
There are several different ways to paint a pine cone, by hand, with spray paints or dipping in the paint.
Personally, I like to bleach my pine cones before painting. This lightens them a bit but it doesn’t make them go white. All I do is put the pine cones in a large jar with 50/50 diluted bleach and leave them for 24 hours.
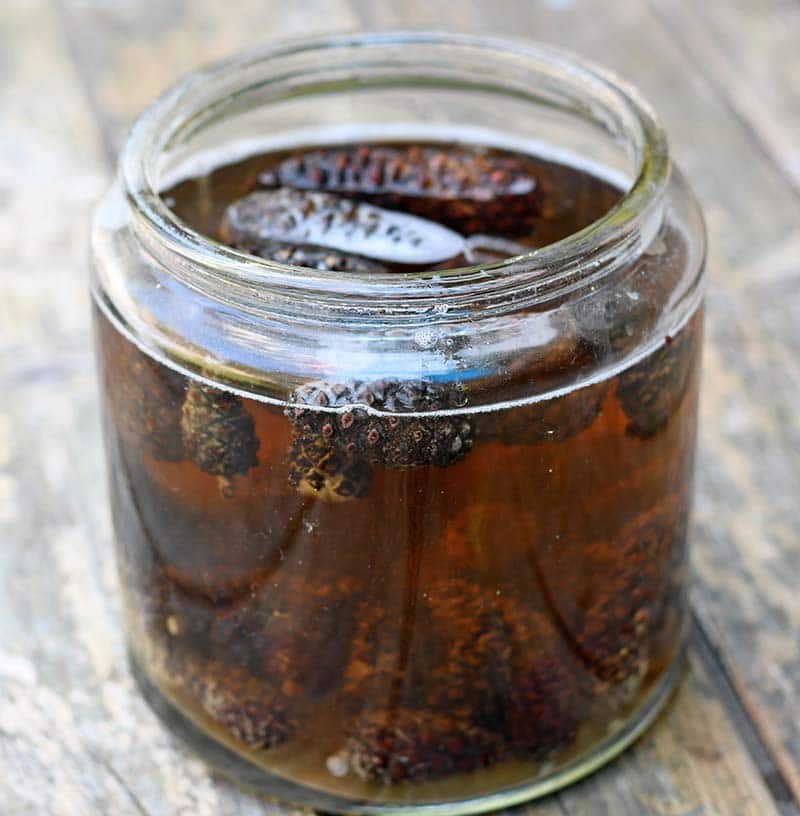
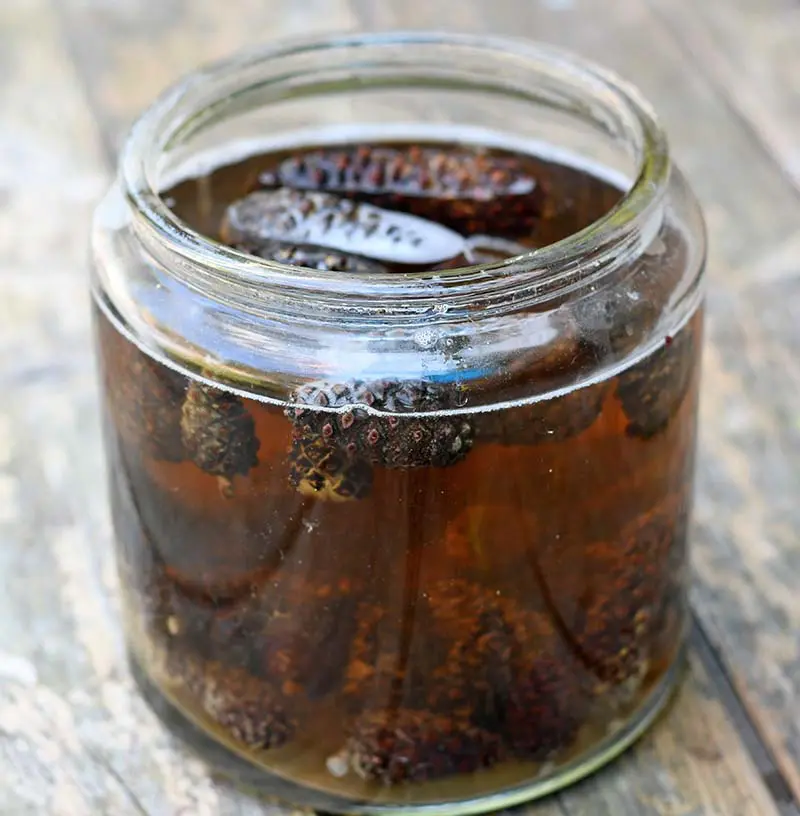
The pine cones will close up whilst soaking in the bleach. Just remove the pine cones from the jar and rinse off the bleach. Then leave them to dry, either in the sun or a warm place. As the pine cones dry they will open up again.

Painting by hand
Bleached pine cones are easily painted by hand using a small paintbrush and craft acrylic paint. This works well when you want to paint them
For example, when creating pine cone flowers, the center can be a different colour to the outer scales (petals). Also, the edge of the scales can be lightened with paint.


Spraying Pine Cones
If you just want to change the pine cone to one colour than the easy option is to spray paint them. This ensures a more even coverage.
Quick-drying spray paints are advantageous over other paints as the pine cones won’t get too wet. If pine cones get too wet and don’t dry quickly they will start to close up again.
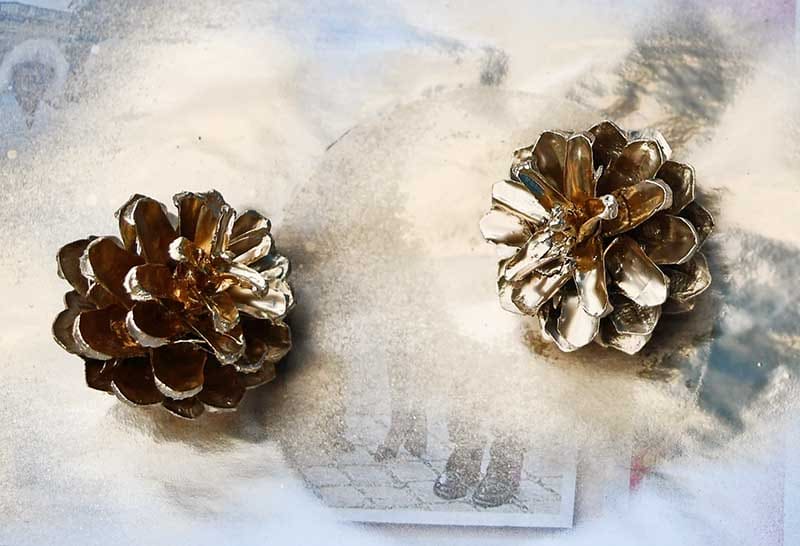
I’ve spray painted pine cones gold before to make fall mason jar decorations. I’ve also spray painted them green before making mini pine cone Christmas trees.
Dipping Pine Cones
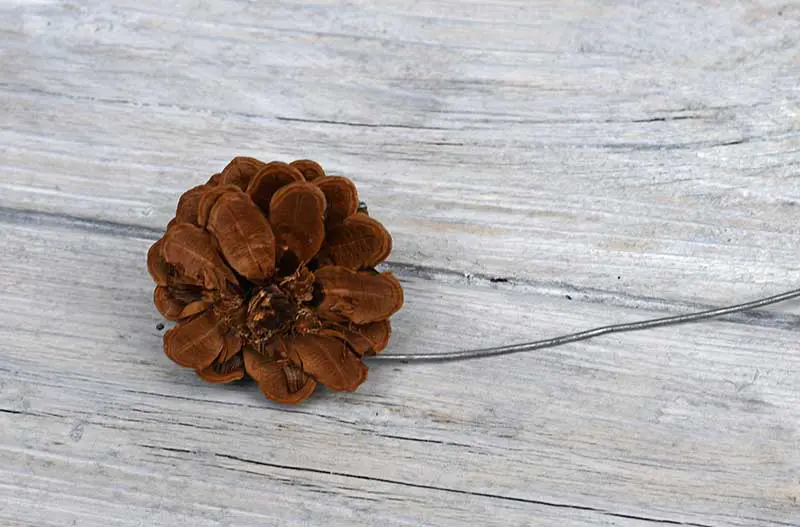
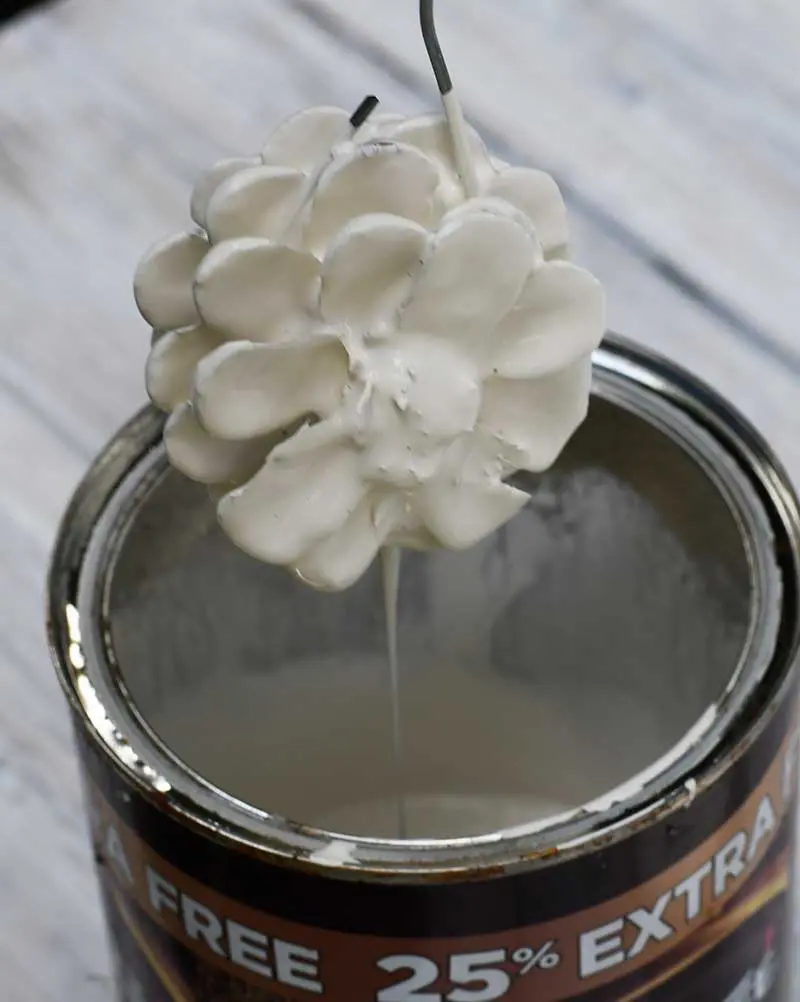
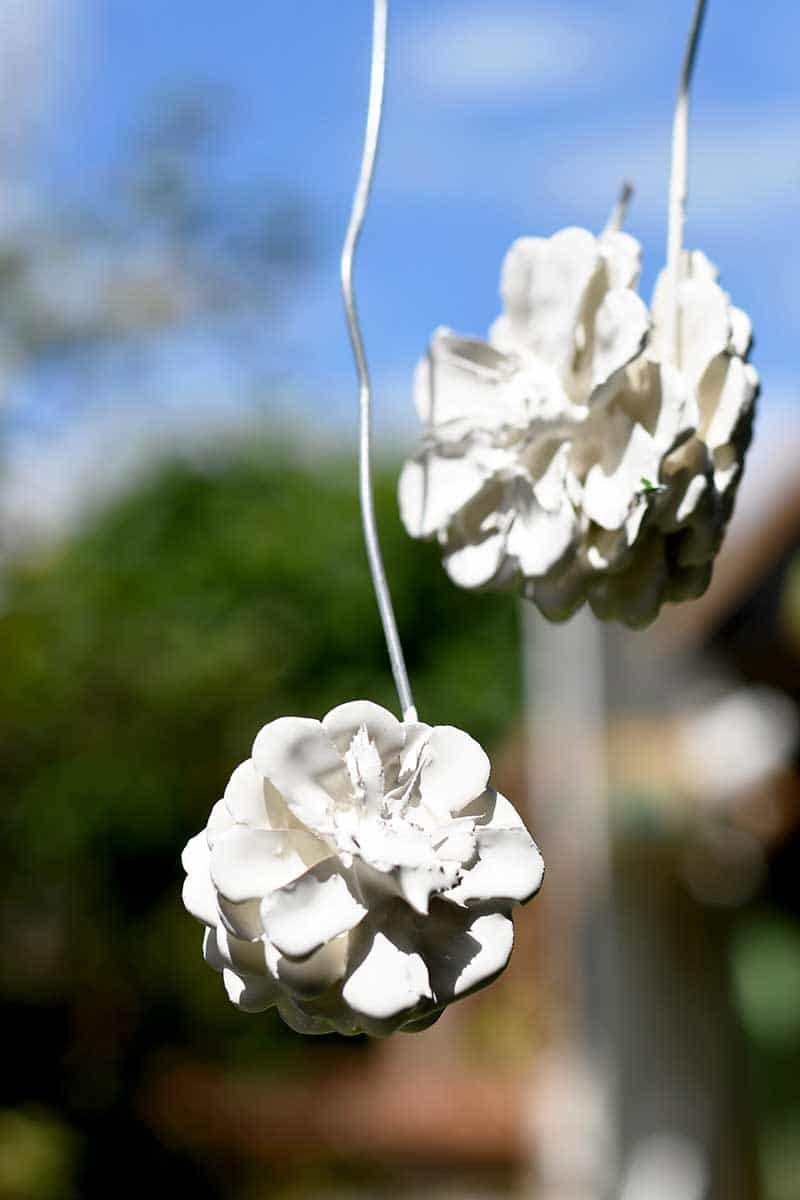
This is the method I used for the crafted pine cone angel wings. I hooked wire around the pine cone and then dipped it into a pot of leftover diluted latex wall paint. The pine cone was then left in the sun to drip dry.
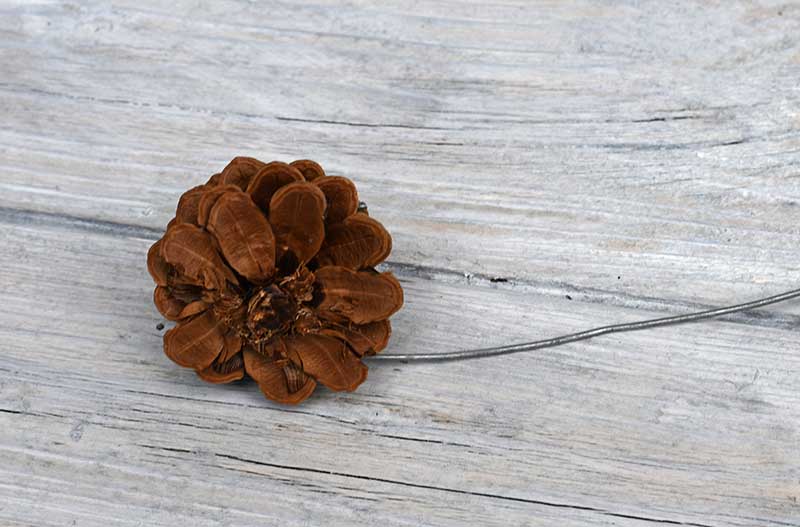
I used diluted paint as this is quicker to dry than thick paint and thus there is less chance of the pine cones closing up. Also, it helps to do this on a sunny day so that they can dry quickly.
I recommend using wire around the pine cones and not string. Pine cones are light, the wire can be used to push them into the pot of paint. If the pine cones were just on a string they are likely to float on the top and not get covered.

Even though this method is a bit messy, the pine cones do get covered entirely and I like the way they look.
We’re a participant in the Amazon Services LLC Associates Program, an affiliate advertising program designed to provide a means for us to earn fees by linking to Amazon.com and affiliated sites. As an Amazon Associate, I earn from qualifying purchases.
How To Make The Angel Wings
What you need
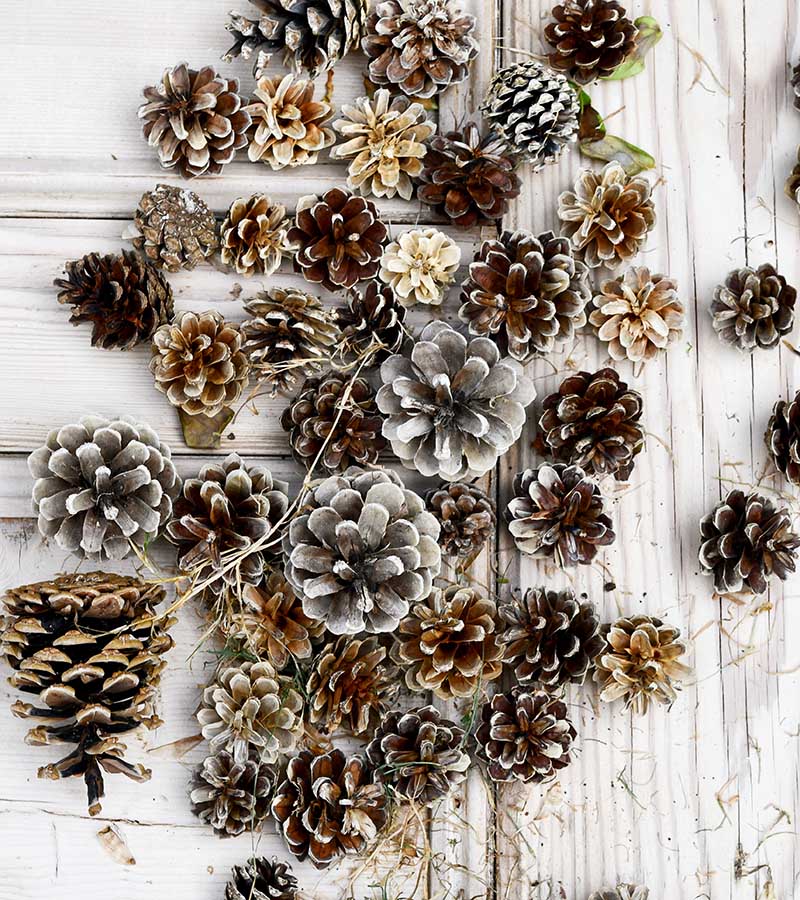
- A large collection of pine cones in various sizes ( I used about 50 pine cones)
- Foam board in a frame
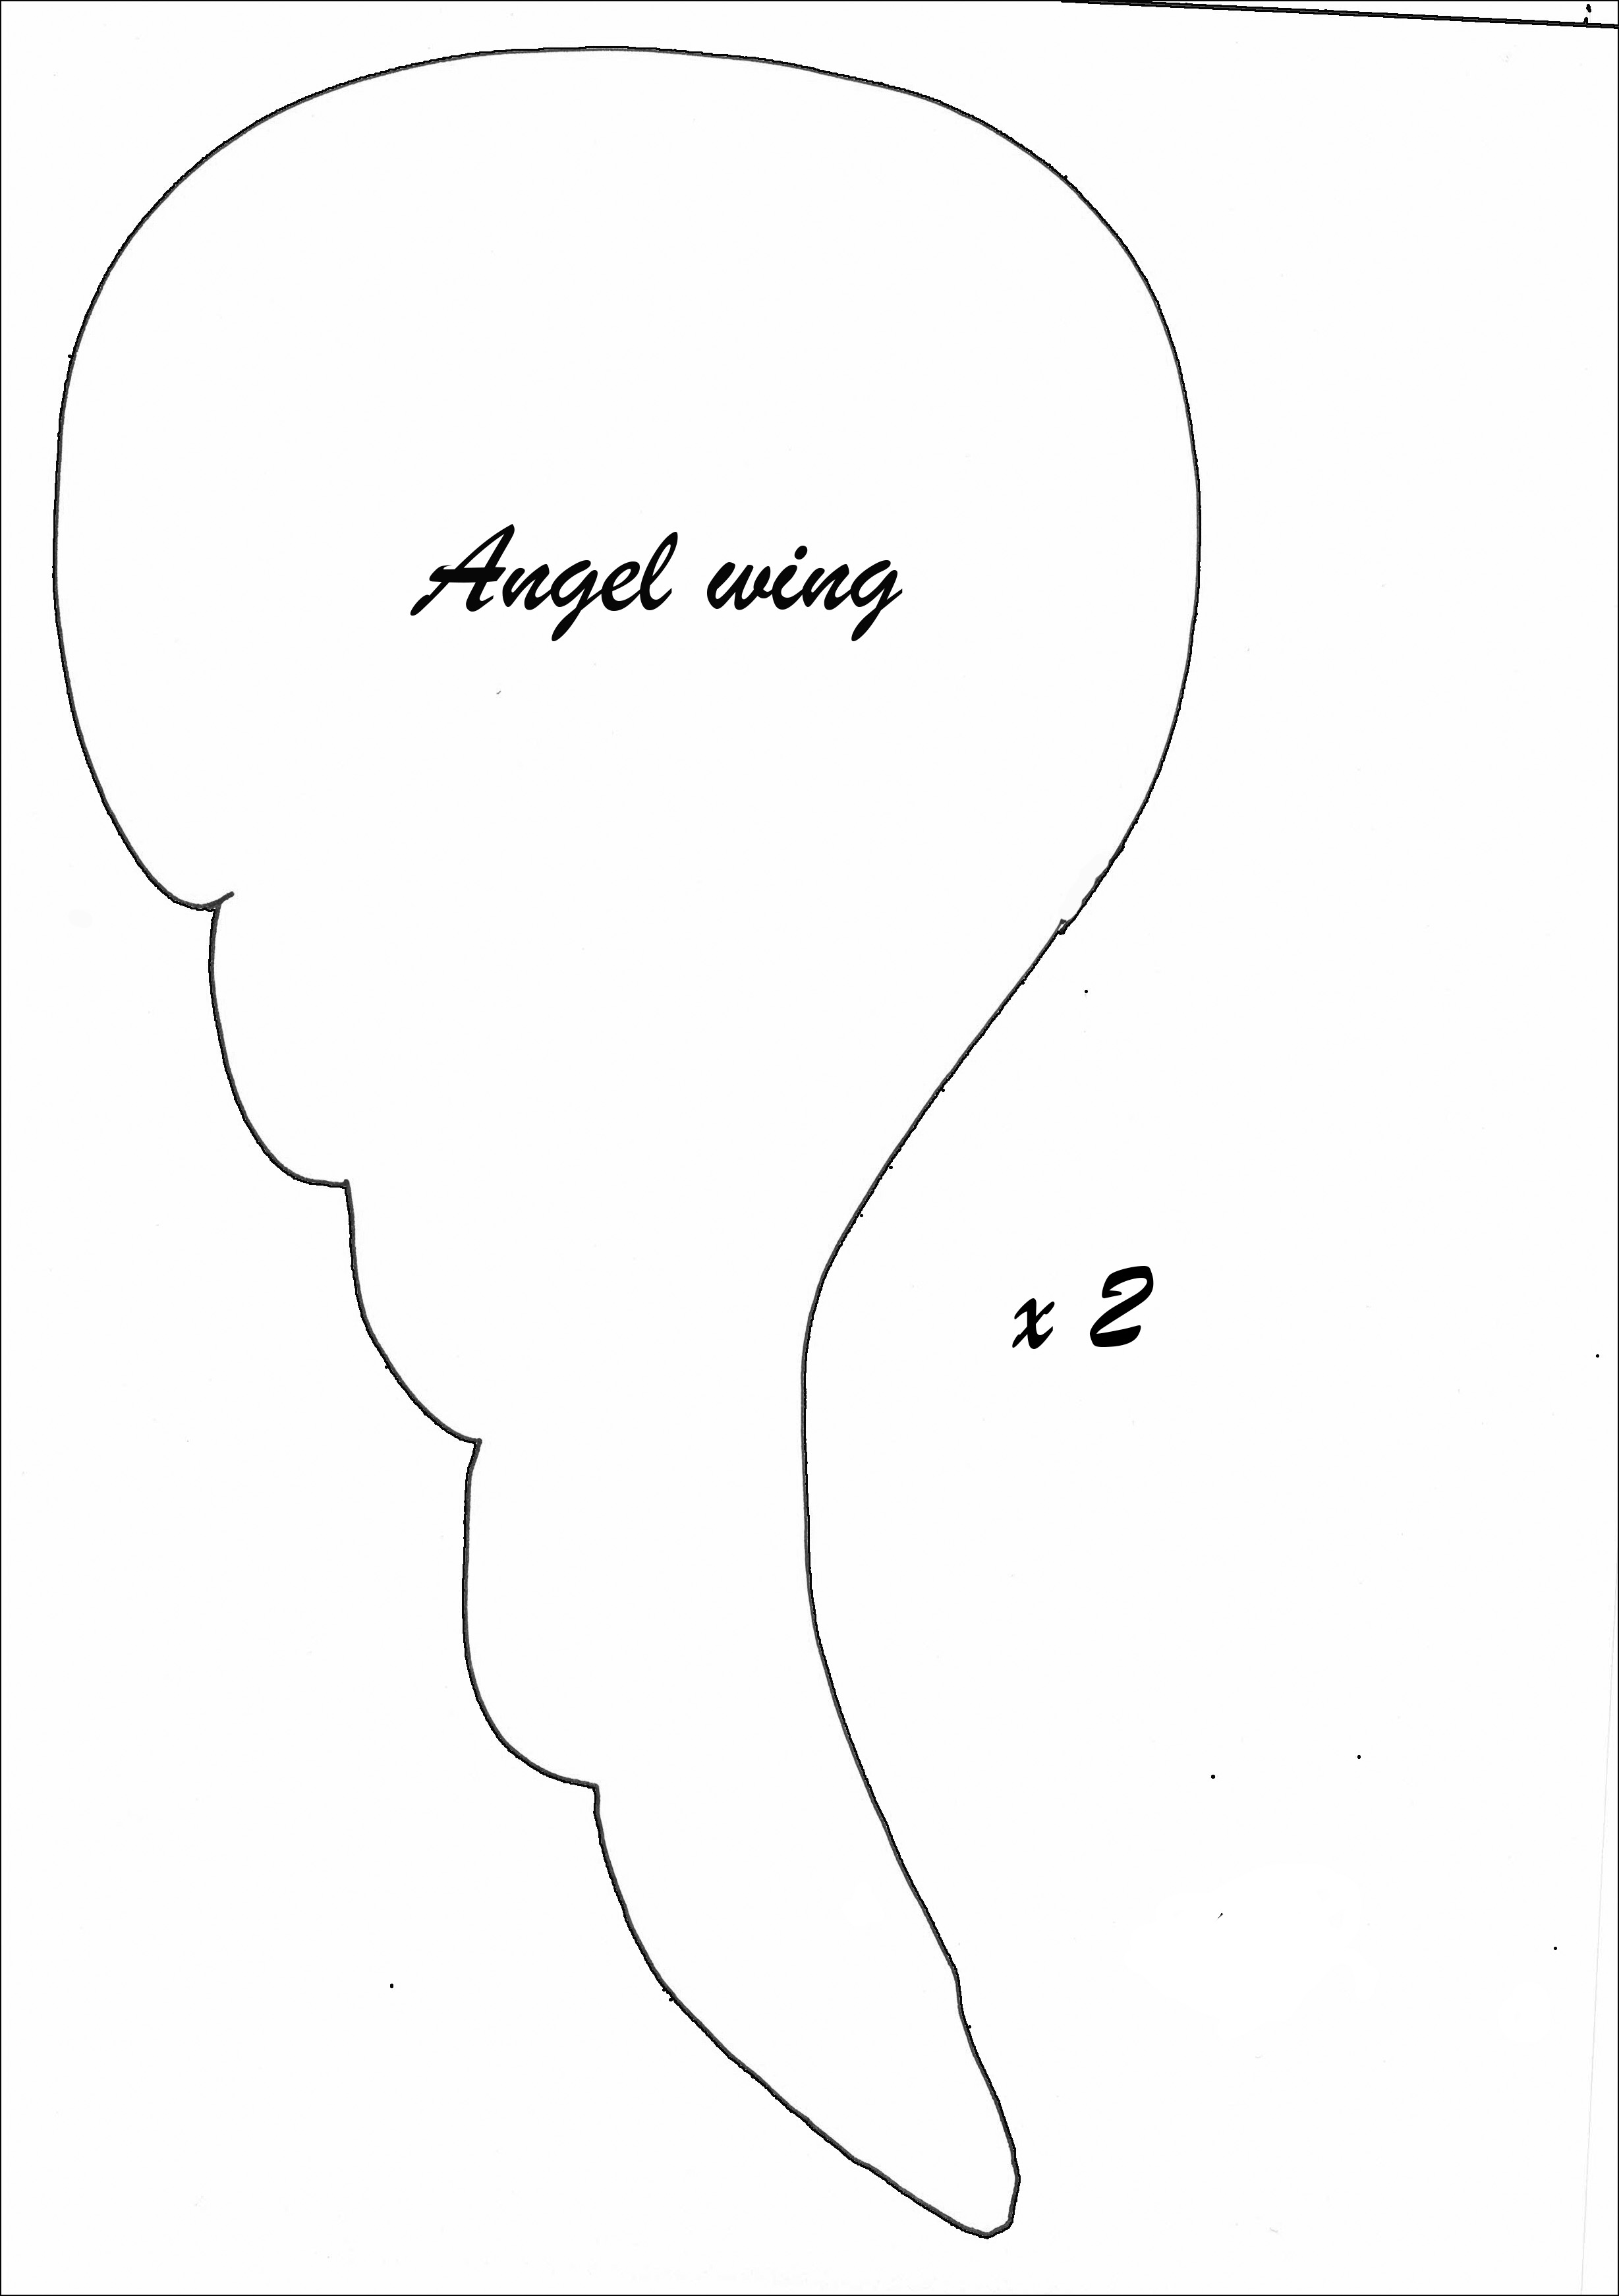
- Angel wing template – download for free
- Garden secateurs
- White pencil
- White acrylic craft paint – or I just used some leftover wall paint I had.
- Garden wire
- Hot glue gun and sticks
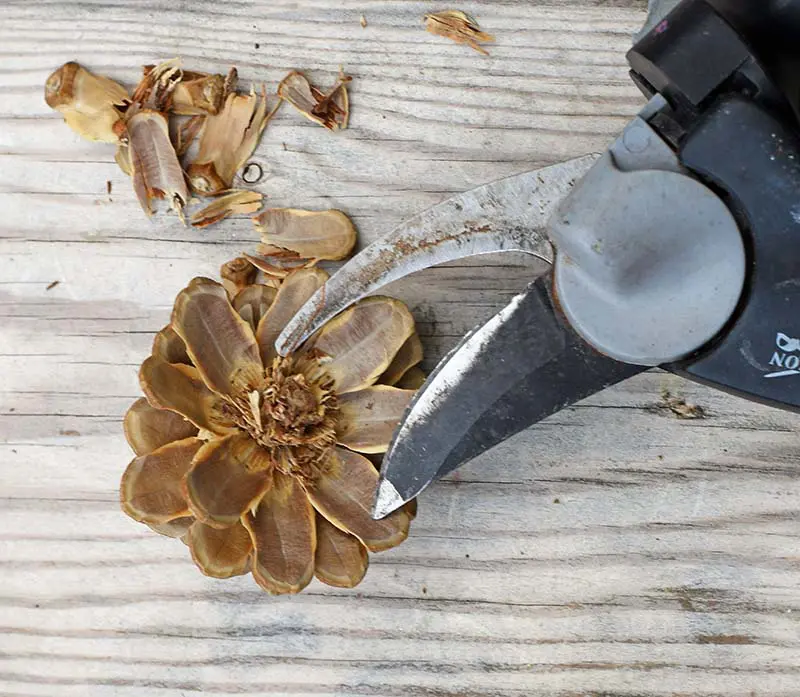
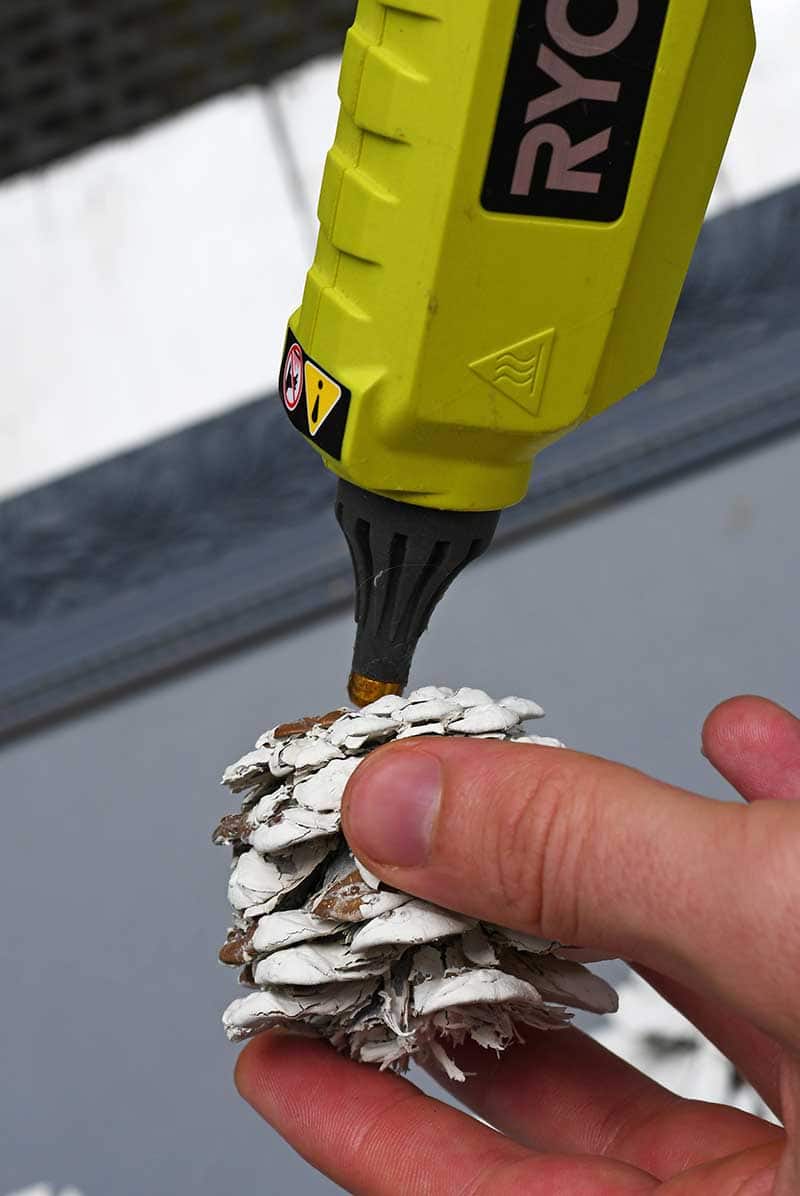
- First, cut the top 2-3 rows of pine cone scales to make them look more like flowers. I use a pair of garden secateurs for this.

2. Next, paint all the pine cones using one of the methods above. I dipped my pine cones and left them hanging in the sun to dry.

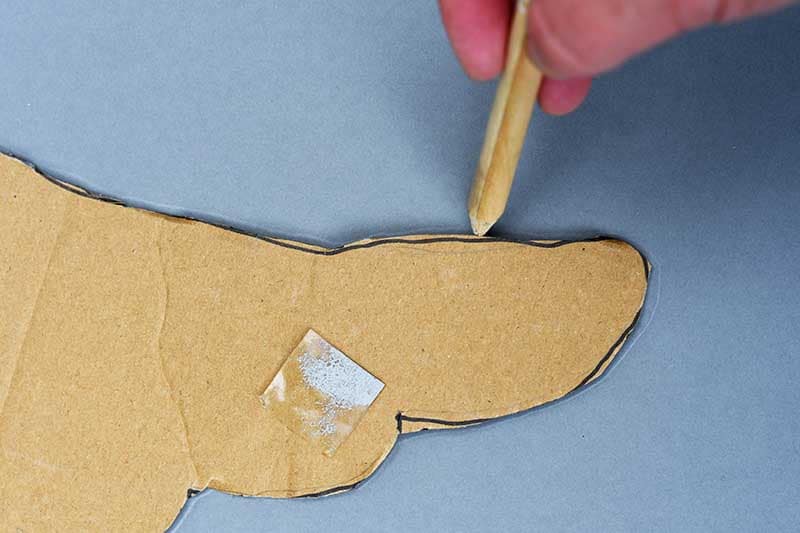
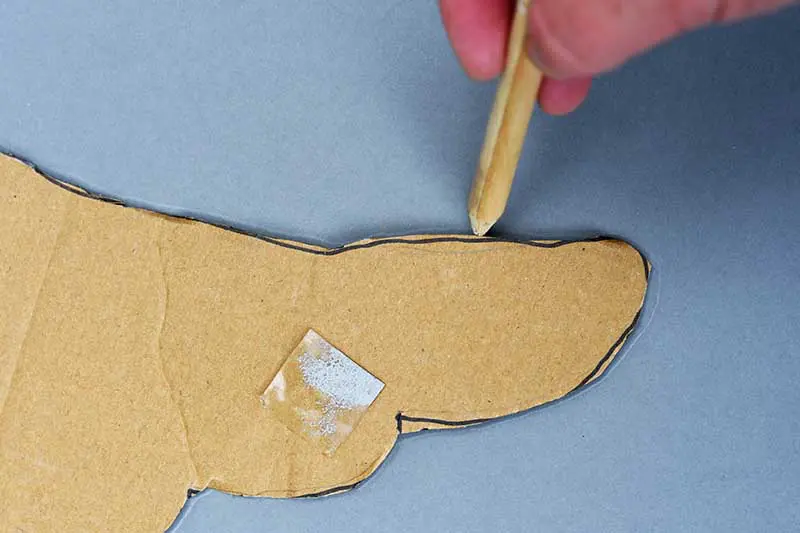
3. Next, either draw your own angel wings on cardboard and cut them out or use my template. Then place the cut-out angel wing on the center of the picture frame and draw around it with a white pencil.


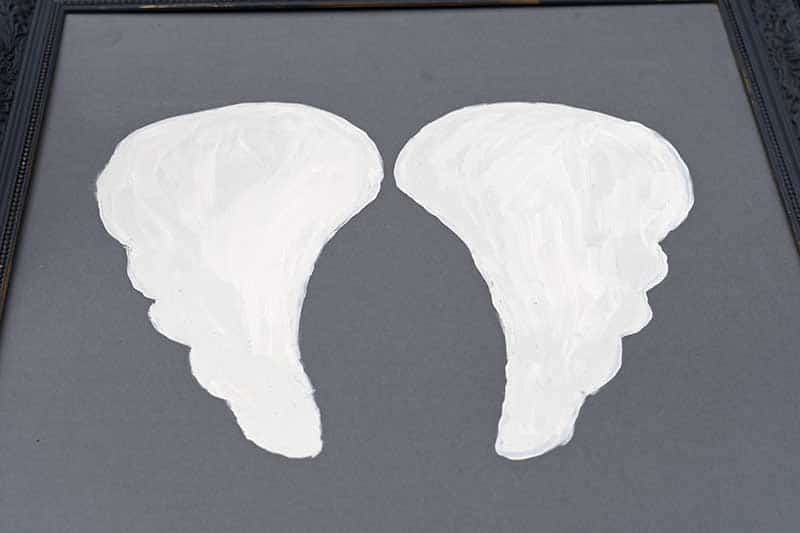
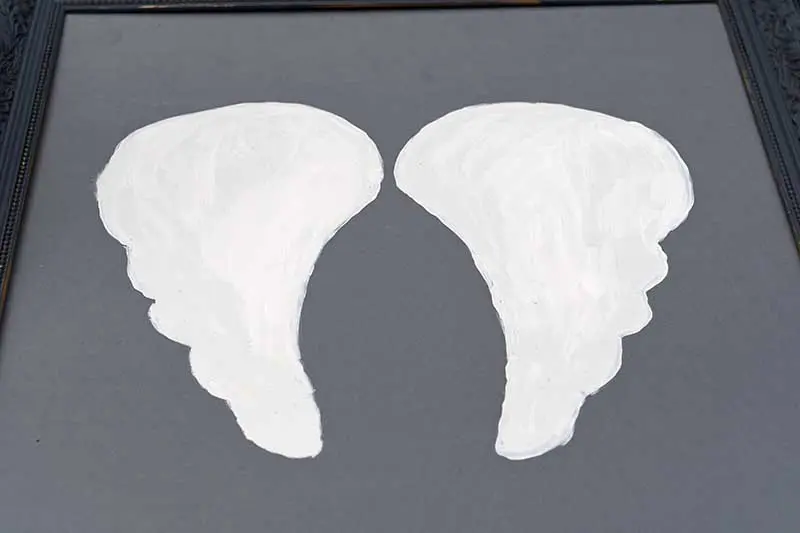
4. Then, paint the drawn out angel wings the same colour as the pine cones.
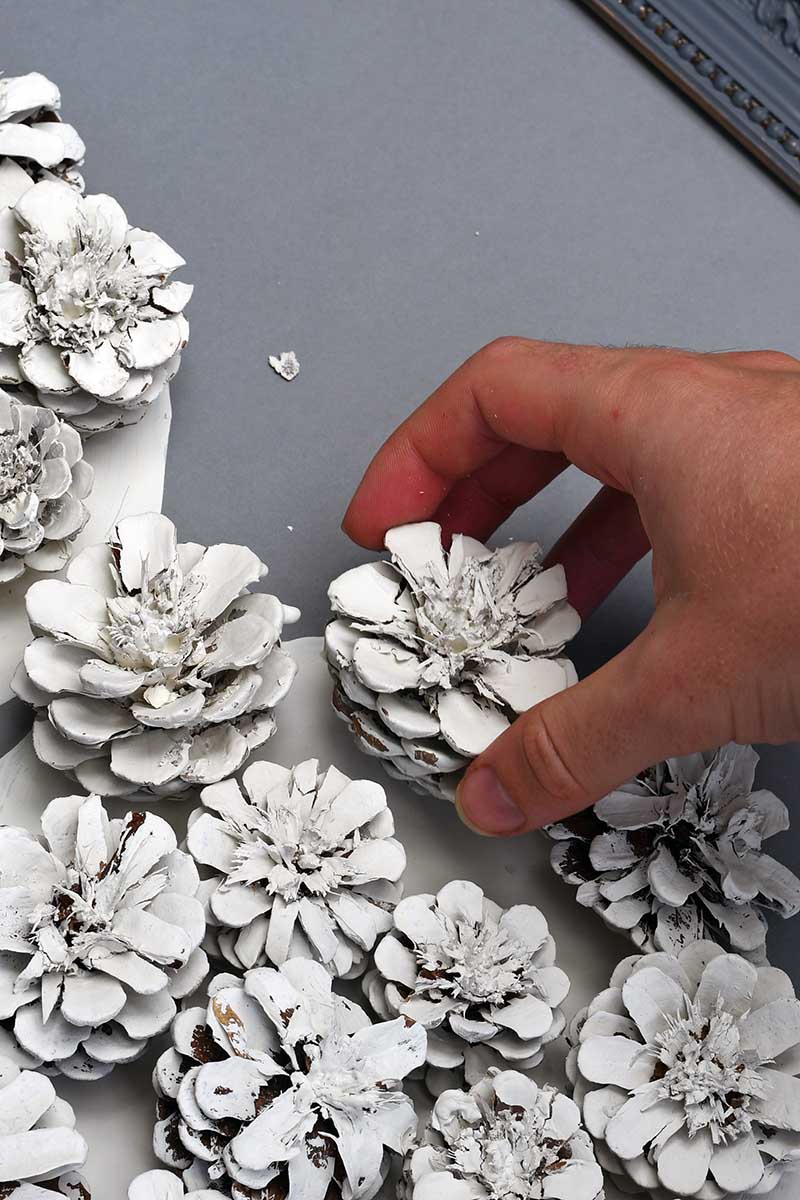
5. Gather up all the painted pine cones and start laying them onto the angel wings. Play around with the arrangement. I tend to put the larger pine cones at the top of the wings and the small pine cones on the tips.
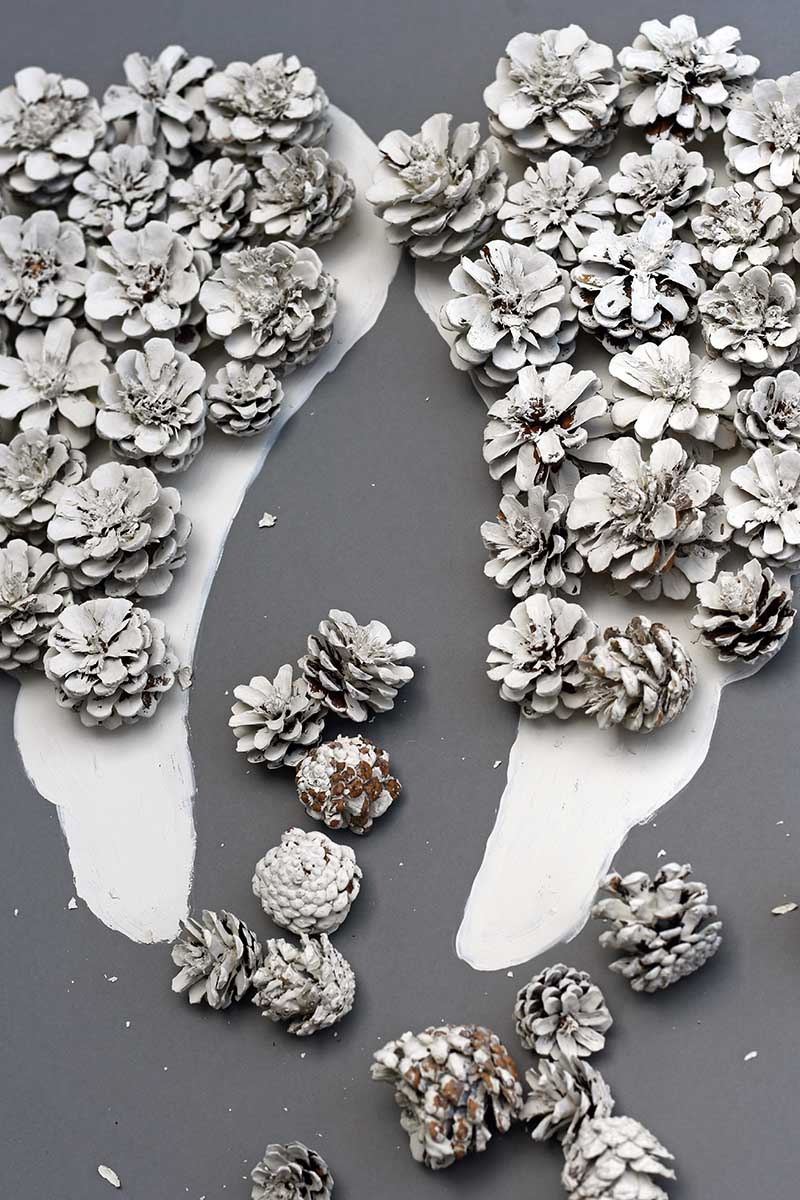
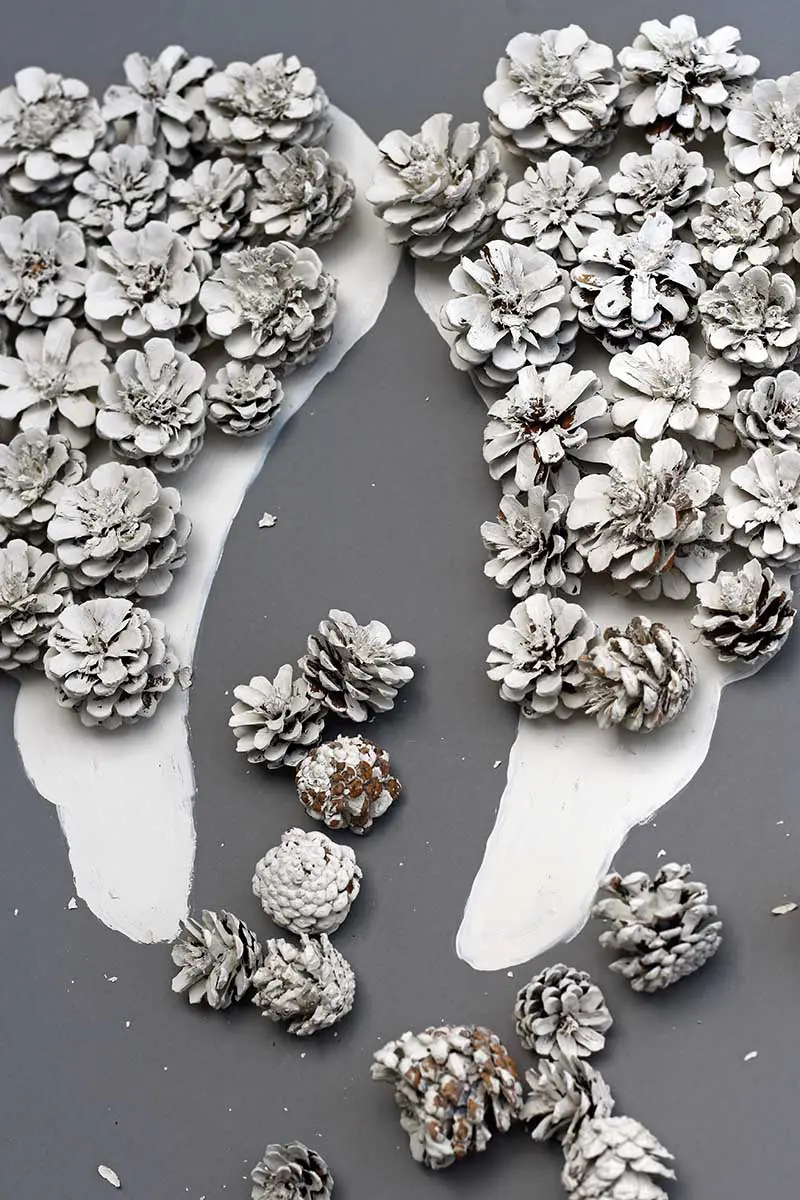
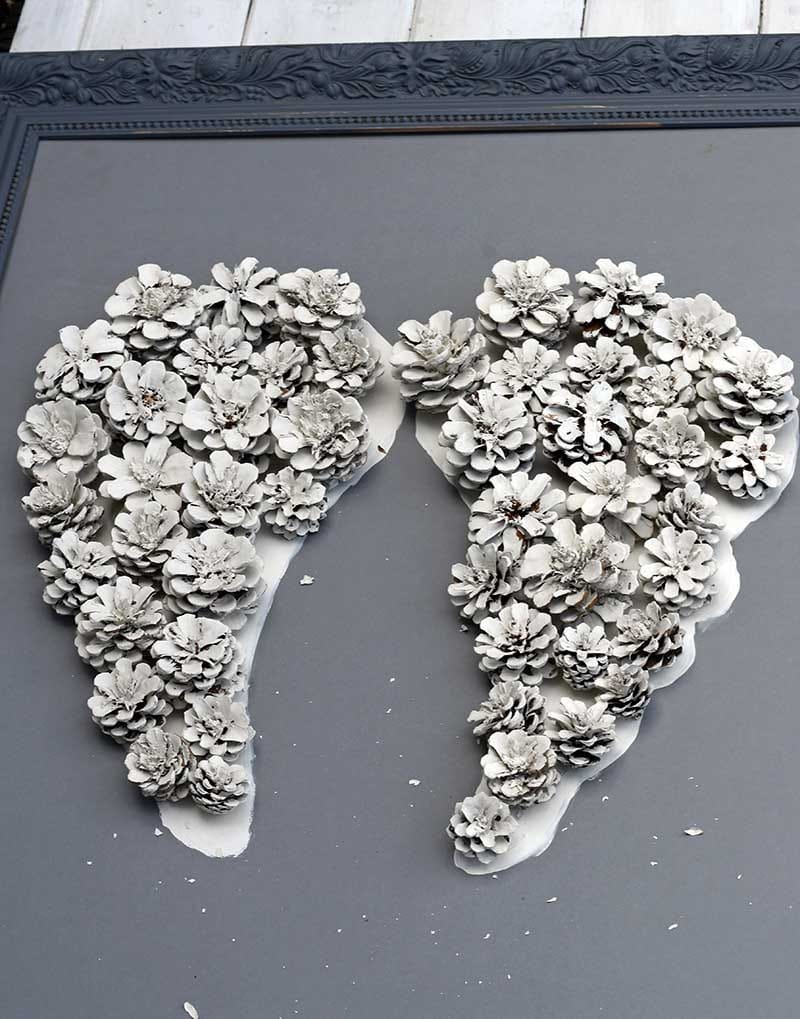
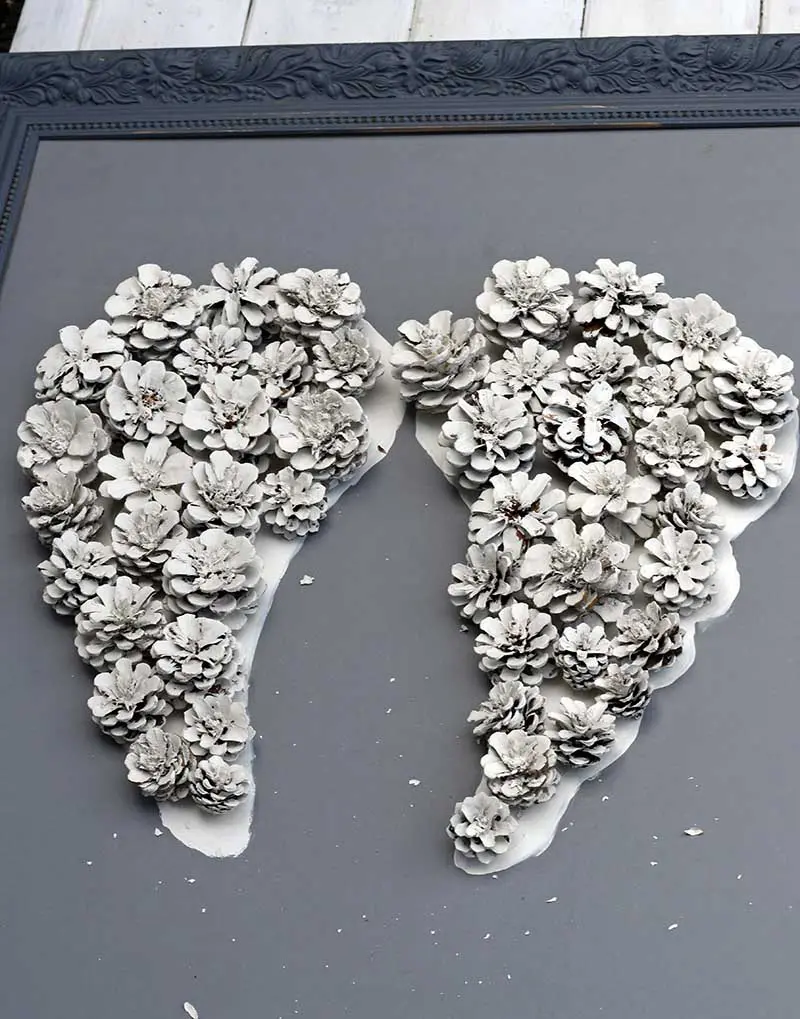
6. When you are happy with the arrangement of the pine cones, stick them to the board using a hot glue gun. Lift up the pine cones one by one, cover the base of the cone with hot glue and then stick them to the board.


All that is left to do now is to hang up the pine cone angel wings. As there is no glass on the frame, the picture is surprisingly light, as pine cones are very light.

If like me you love pine cones, there are some wonderful vintage pine cone illustrations on Pictureboxblue. These would also look fabulous framed on the gallery wall.

Painted Pine Cone Crafts
A collection of fabulous crafts and DIYs that use painted pine cones.

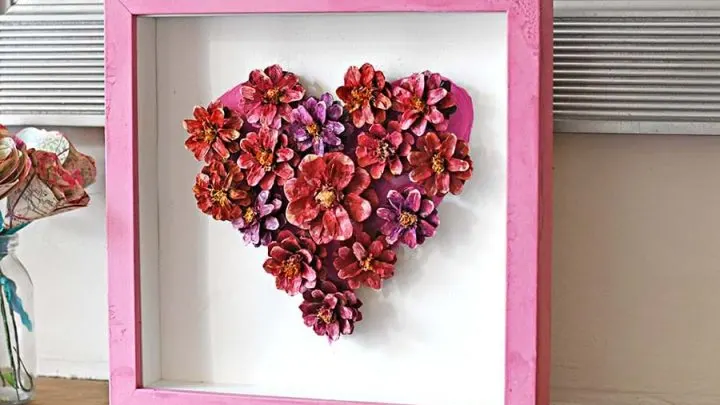
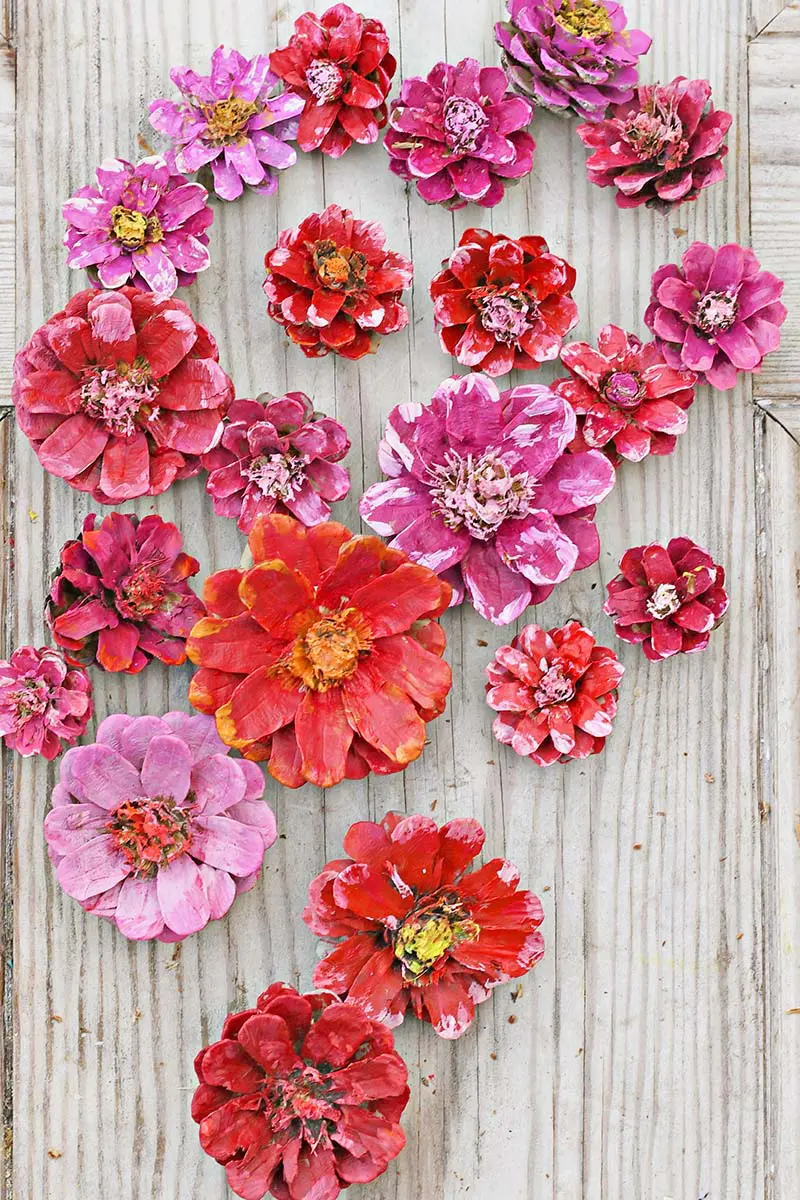
How To Make A Pinecone Flower Heart Decoration
These pine cones are painted to look like flowers then arranged into a heart shape for a unique Valentine's decoration.

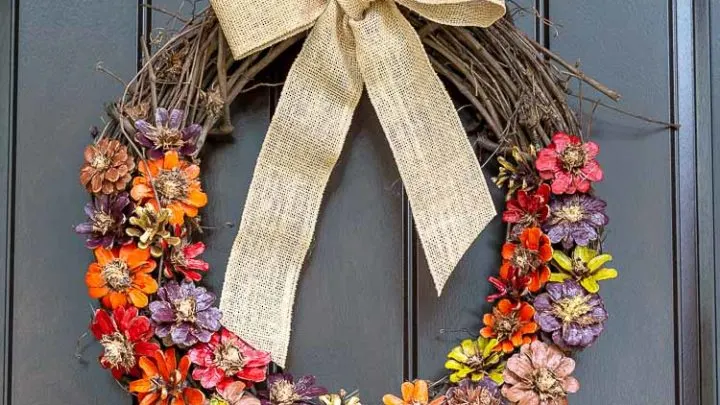
Make a Pinecone Flower Wreath for Fall
This is a gorgeous wreath. I love the handpainted pinecone flowers in rich autumnal colours.
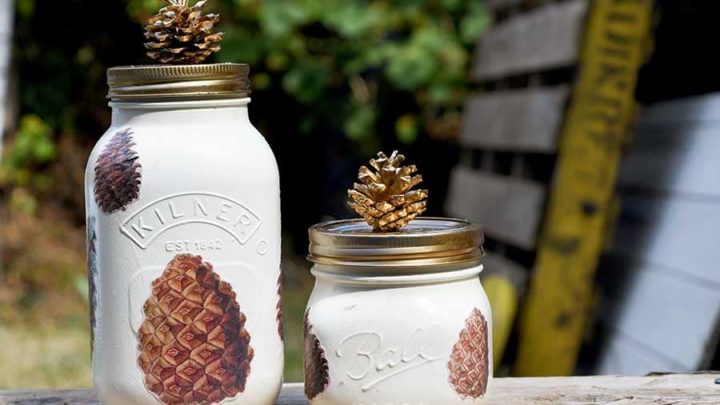

How To Use Pine Cones For A Unique Fall Mason Jar
The pine cones are spray painted gold to create some fun fall decorated mason jars. The post includes free pine cone clip art.

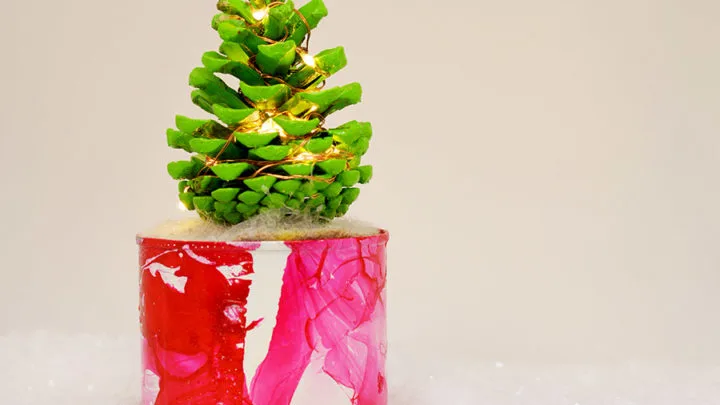
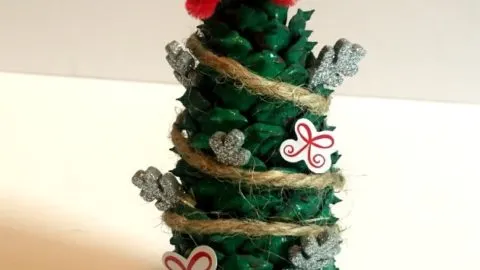
How To Make Pine Cone Christmas Tree With Lights
This mini Christmas tree would be a fun decoration for a desk or kids room.
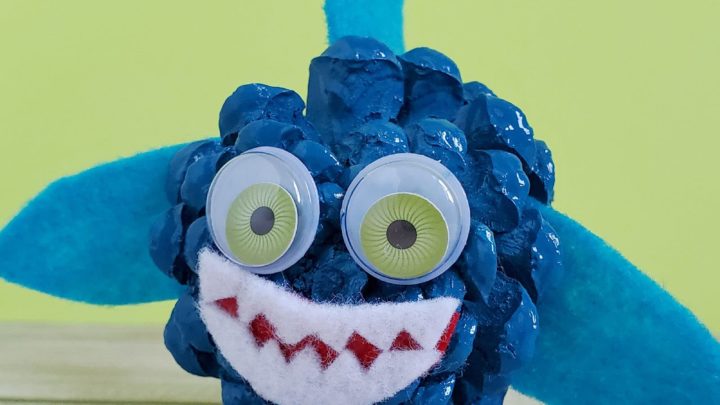

Pine Cone Shark
I have seen a lot of animals made from pine cones but this is definitely my first shark. The pine cone was spray-painted blue to create this fun creature.

Painted Pinecone Wreath
Another pretty painted pine cone wreath. This time the pine cones are left whole and arranged beautifully.

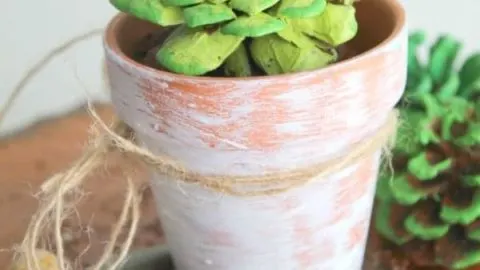
How to Make Painted Pine Cone Succulents for Just Pennies
Not only do painted pine cones make lovely flowers but they can also be painted to look like succulents.

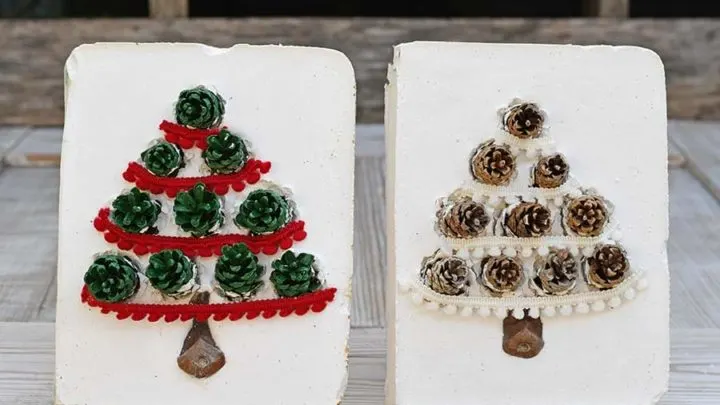
How To Make Unique Pinecone Christmas Crafts
A pine cone Christmas craft with these cute mini Christmas tree tiles.

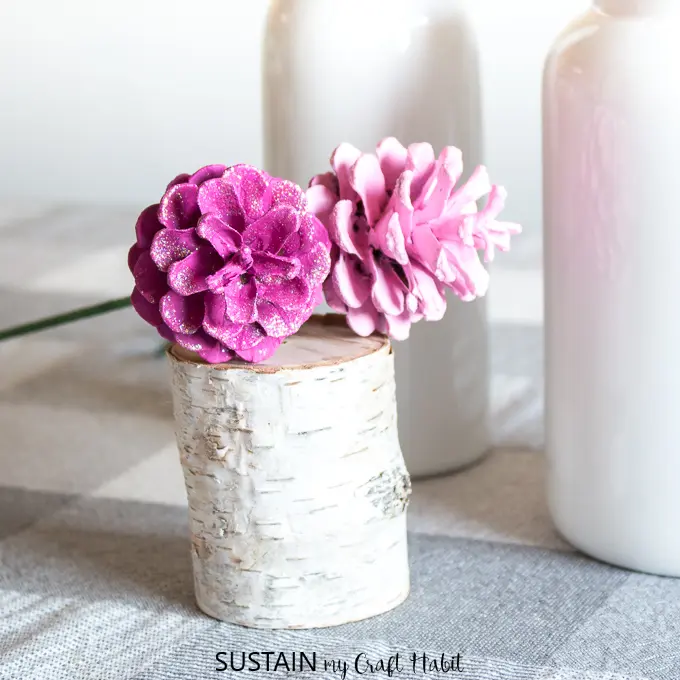
So simple and pretty!!! Learn how to make Pine Cone Roses
These pink pine cone roses look so pretty and I lovely the extra glitter touch.
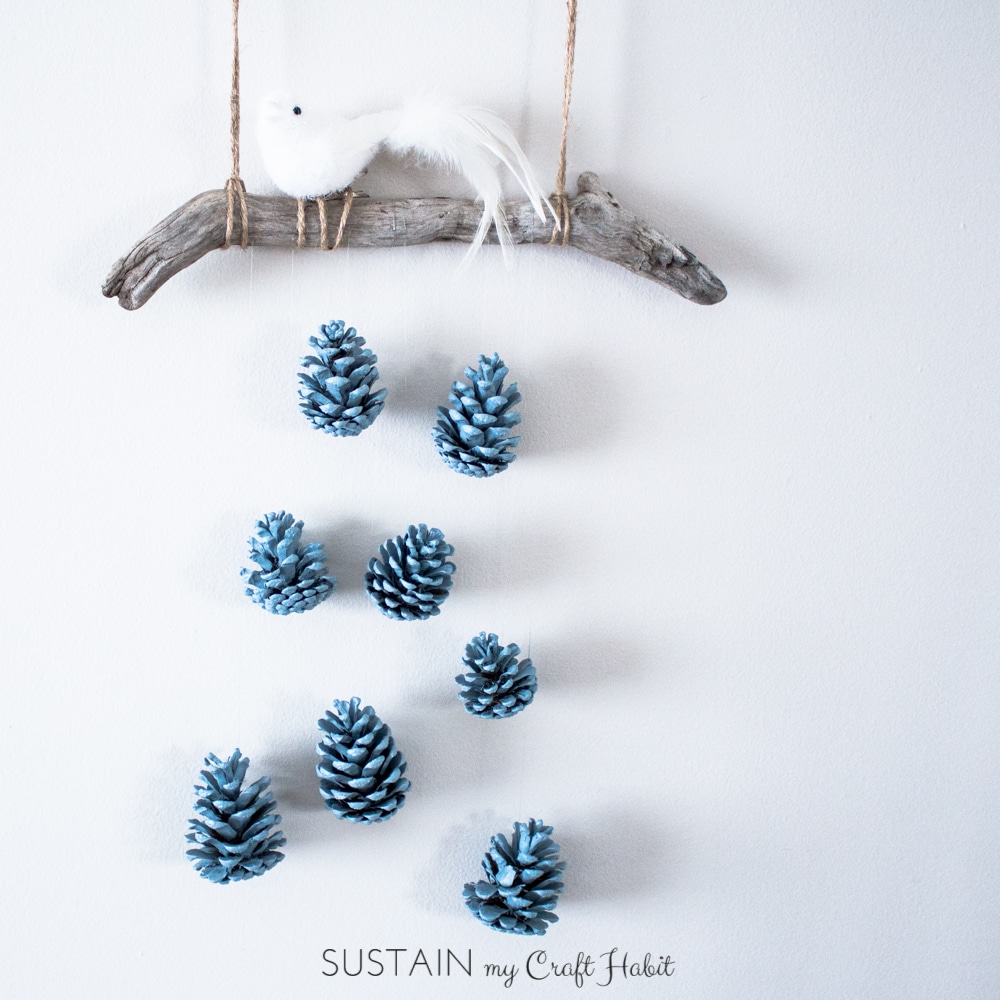
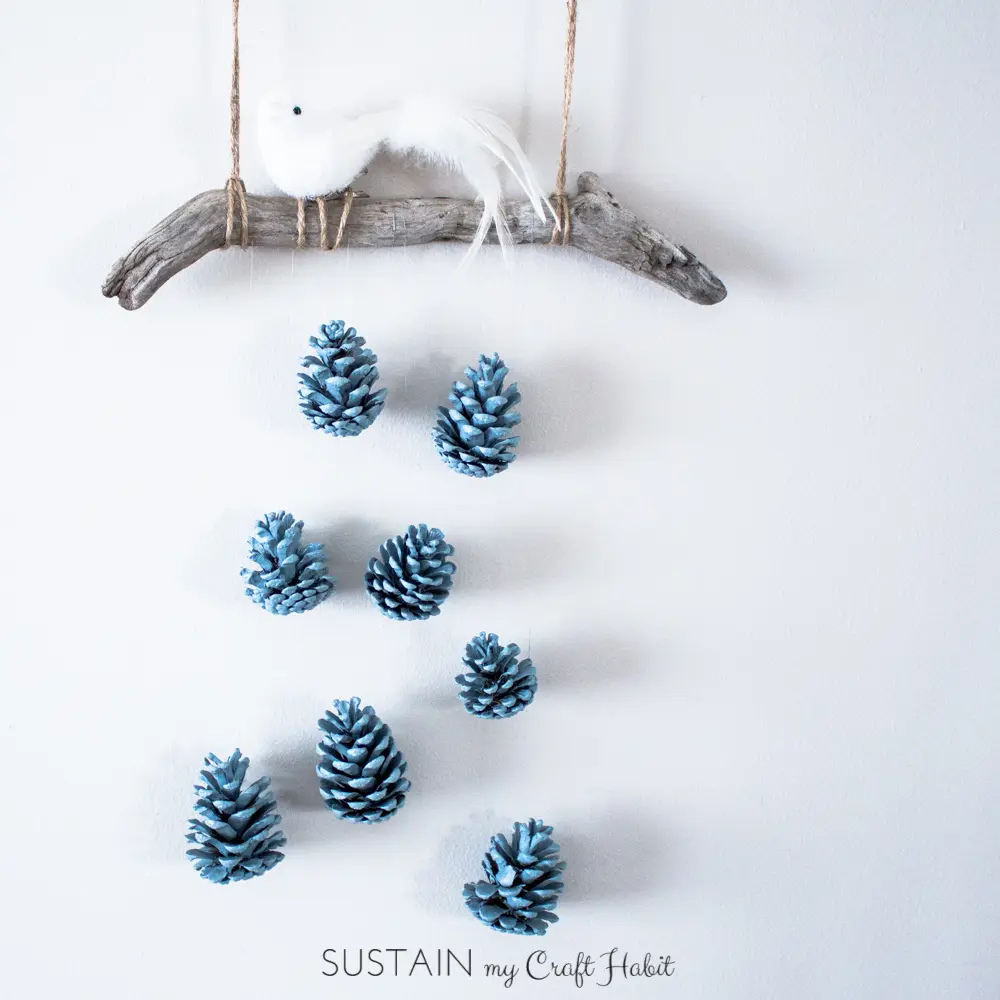
DIY Wall Art: Rustic Pinecone Wall Hanging
I actually think that it is the beautiful blue colour that the pine cones have been painted that really make this wall hanging. It is a lovely winter decoration.


DIY Santa Holiday Wreath
These pine cones are painted red to create this fun Santa themed Christmas wreath.
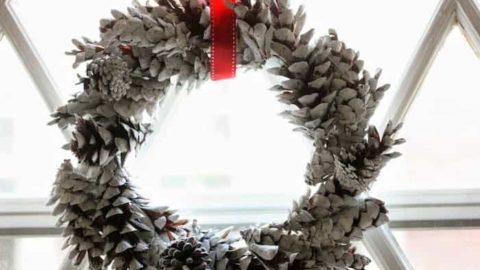

How to Make a Pinecone Wreath for Pennies
Painting the pine cones in this wreath white, makes them look frosty and snowy.
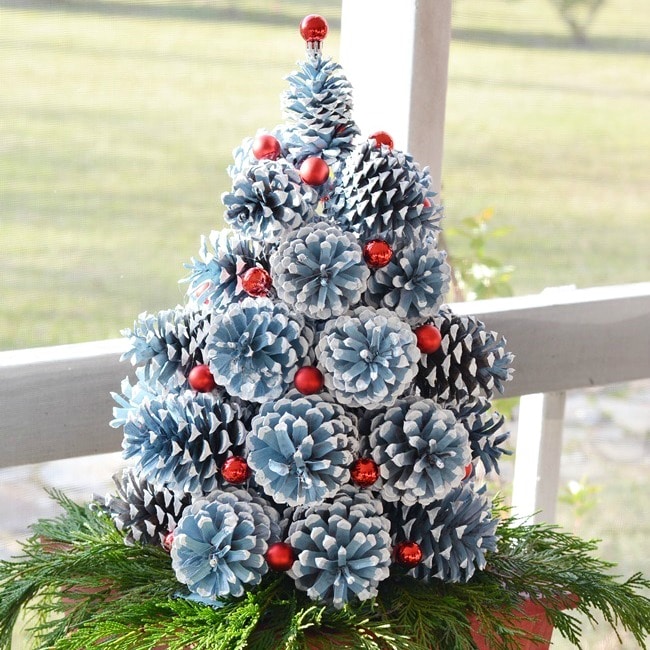
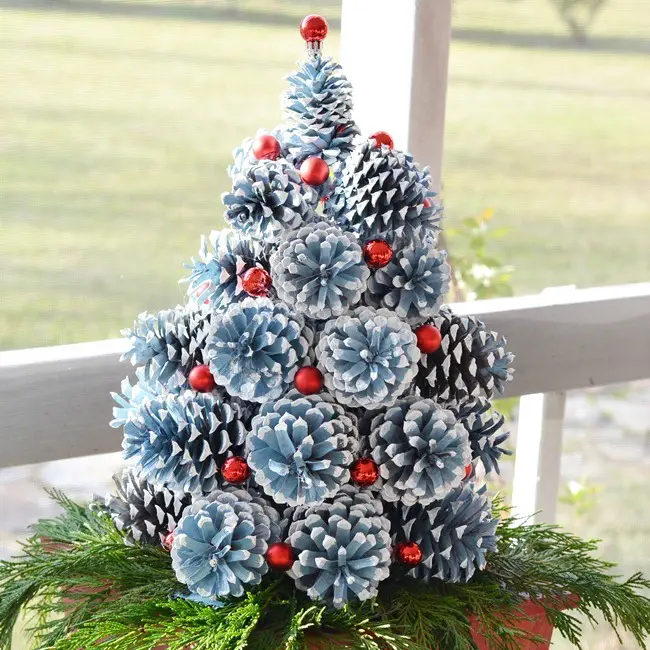
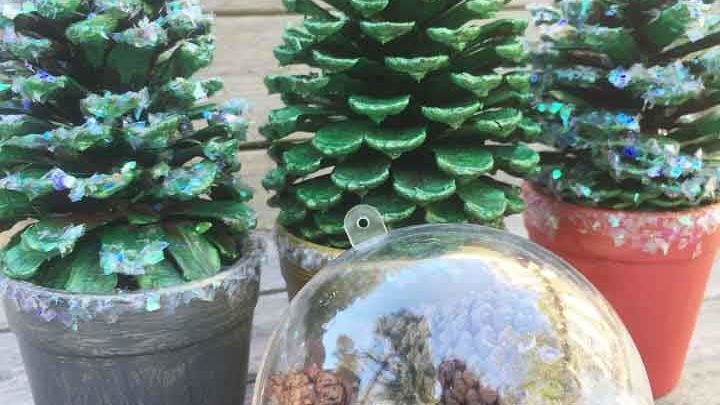
How to Make Pine Cone Christmas Trees
The pine cones used to make these gorgeous frosted Christmas trees are painted with a combination of spray paints and hand painting.
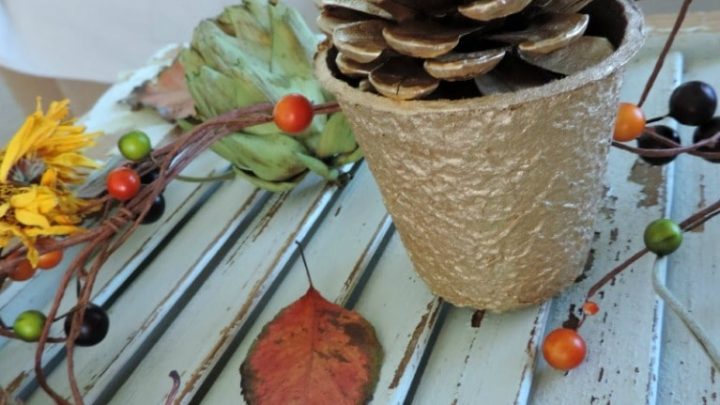

Thrifty Gold Pine Cone Topiary
These gold pine cone pots are a lovely tablescape decoration.
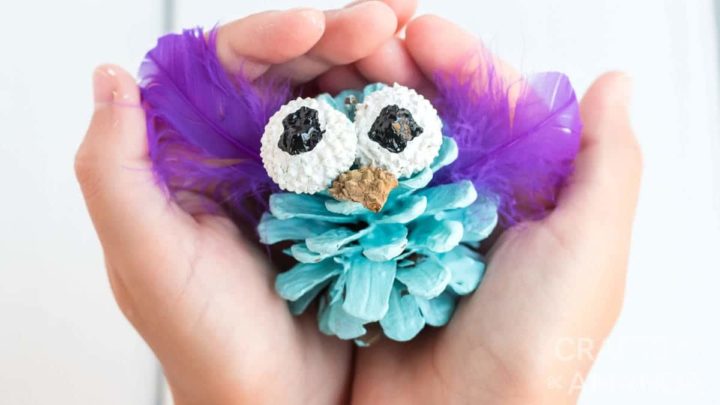
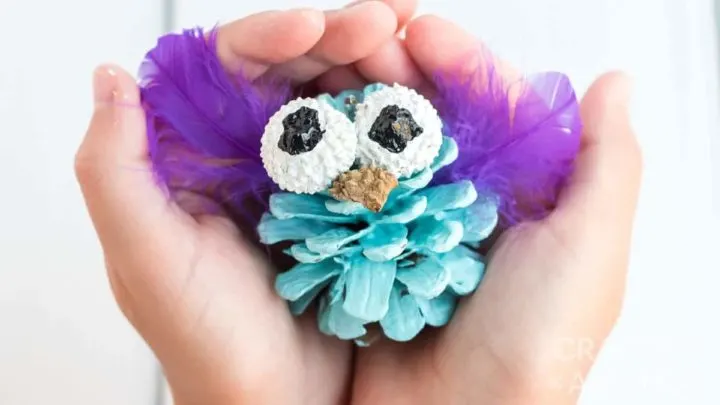
Pinecone Owls
Acorn tops and pine cones are combined to make these cute little colourful owls.

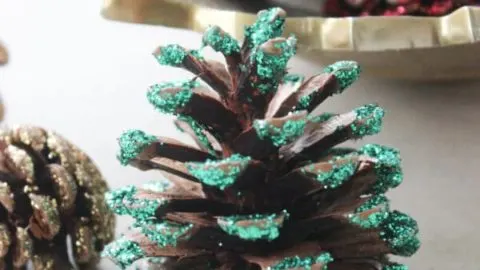
How To Glitter Pinecones With Your Kids
Another fun pine cone craft to do with kids. Painting pine cones with glitter, rather than paint.

How To Paint Pinecones In Bright Colors
These lovely bright coloured pine cones are painted by dipping on wire.

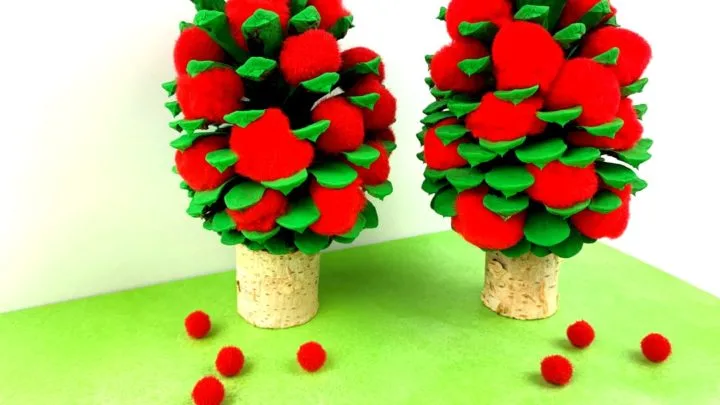
Pine Cone Apple Tree Craft for Kids
I like the clever use of wine corks as trunks for these super cute pine cone apple trees.

How To Make Pine Cone Christmas Trees
Another painted pine cone Christmas tree idea. This time closed pine cones are used and they are hand painted.
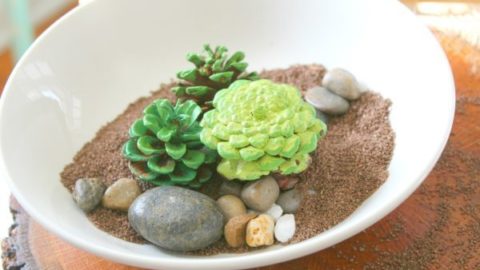

Pine Cone Succulent Garden
More painted pine cone succulents to make a garden.

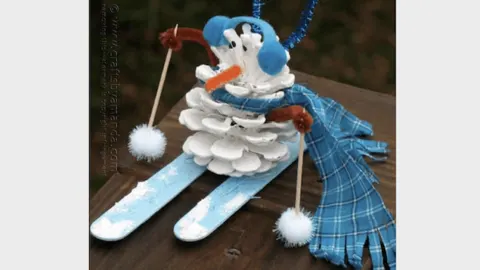
Pinecone Snowman!
This skiing pine cone snowman would make a lovely Christmas decoration.
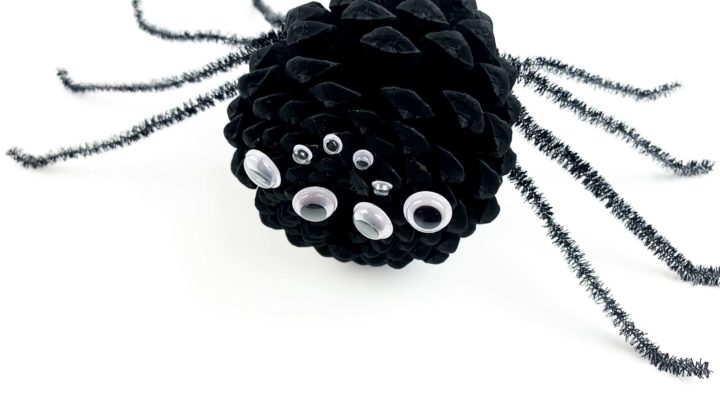
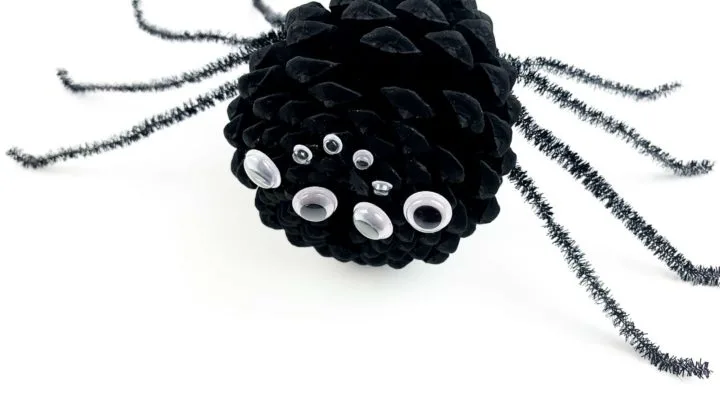
Pine Cone Spider Craft for Kids
This is a fun Halloween craft for kids, making black pine cone spiders.


Festive Pinecone Bird Christmas Ornament
This is a fun craft for kids, the birds are painted in festive colours for a Christmas ornament. Also, the tutorial shows you how to make your own homemade spray paint for the pine cones.
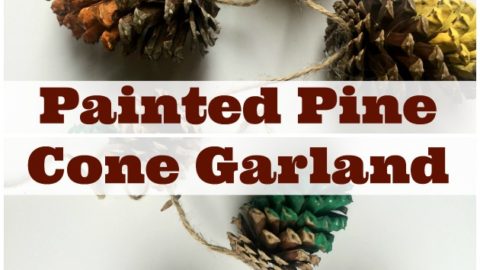
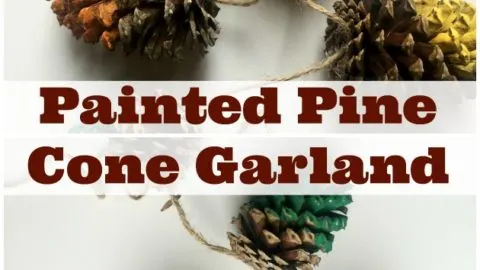
How To Make Pine Cone Garland
A fun way to display painted pine cones is in a lovely colourful garland.

Pinecone Roses from Rhonda at Mrs. Greene
How about a lovely bunch of colourful hand-painted pine cone roses!

Holiday Pinecone Crafts
Even more pine cone tabletop Christmas trees.


I also collect the fallen acorns in my local park and paint them for crafts too.
If you are looking for more craft ideas don’t forget to check out my collection of cool craft ideas for adults. There are also more pine cone craft ideas here.
Naush Samama
Monday 12th of October 2020
I love pinecone crafts. Tons of possibilities with them. Love how your wings turned out. Stunning. Thank you for sharing it with us at Meraki Link Party. Naush
Claire Armstrong
Tuesday 13th of October 2020
Thank you, they re a fun free crafting resource.
Michelle Leslie
Sunday 11th of October 2020
You have such a wonderful imagination Claire. Love the unique texture or interest the pine cones give the angel wings. I'll have to go hunting for some pine cones soon ;-)
Claire Armstrong
Monday 12th of October 2020
Thank you, there are so many of pine cones in my park I just had to make something with them.
Donna @ Modern on Monticello
Wednesday 7th of October 2020
Thanks for sharing this wonderful project! It is beautiful. Every fall I collect the small pine cones from my yard and look for ways to use them. So I certainly appreciate how wonderful this project is. Thanks for visiting and sharing this week with us at #HomeMattersParty
Claire Armstrong
Wednesday 7th of October 2020
Thank you, there is just something appealing about pine cones and they are fun to craft with.
Kasia
Wednesday 7th of October 2020
Hey Claire, I love these pinecone projects! So many ideas, it's amazing. I may have a go at making one or two. I do like the rustic wall art hanging as well :) Thanks for sharing!
Claire Armstrong
Wednesday 7th of October 2020
Thank you, pine cones are a great free resource for crafting with. Have fun crafting with them.
Jennifer Dynys
Tuesday 6th of October 2020
You are a pinecone craft rock star!! So many amazing projects here! Thank you for sharing at Embracing Home and Family!
Claire Armstrong
Wednesday 7th of October 2020
Thank you, I just love crafting with nature and the things around me.