
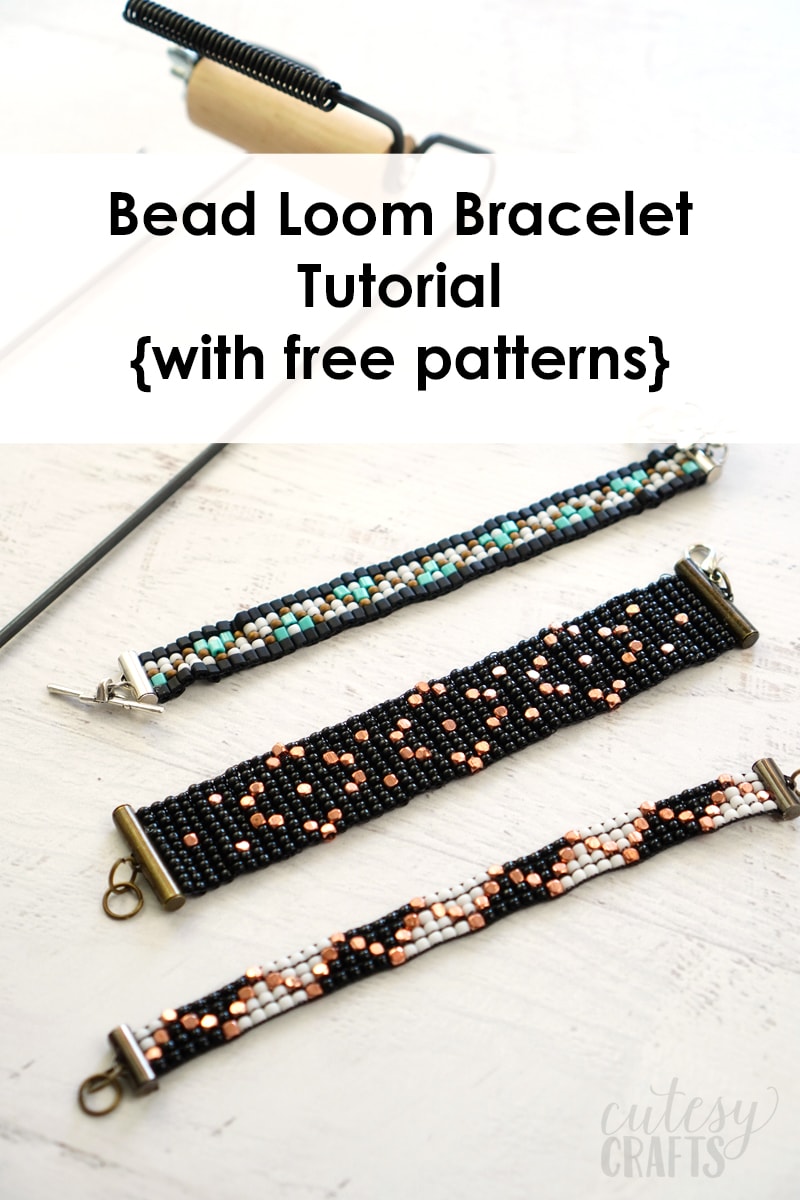
The first time I saw a bead loom bracelet, I knew I had to learn how to make them! There are lots of ways to learn how to make bead loom bracelets, and I thought I’d show you one method today. I even made my own bead loom bracelet patterns to share with you. I hope you enjoy making them as much as I did.
(This post may contain affiliate links, which means I may receive a commission, at no extra cost to you, if you click a link and purchase something that I have recommended. As an Amazon Associate I earn from qualifying purchases.)
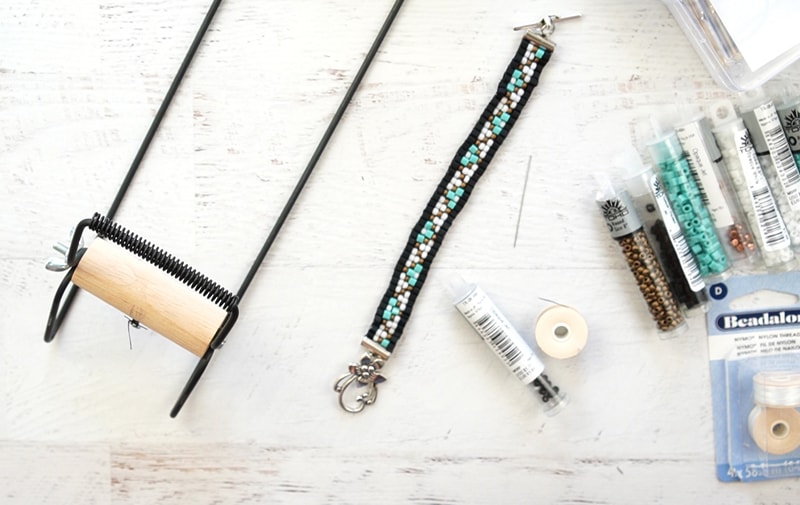
Bead Loom Supplies
To make these bead loom bracelets, you’ll need:
- Bead Loom Bracelet Patterns (Instructions to download are at the bottom of this post.)
- Bead Loom
- Beading Needle (came with loom)
- Thread
- Glue
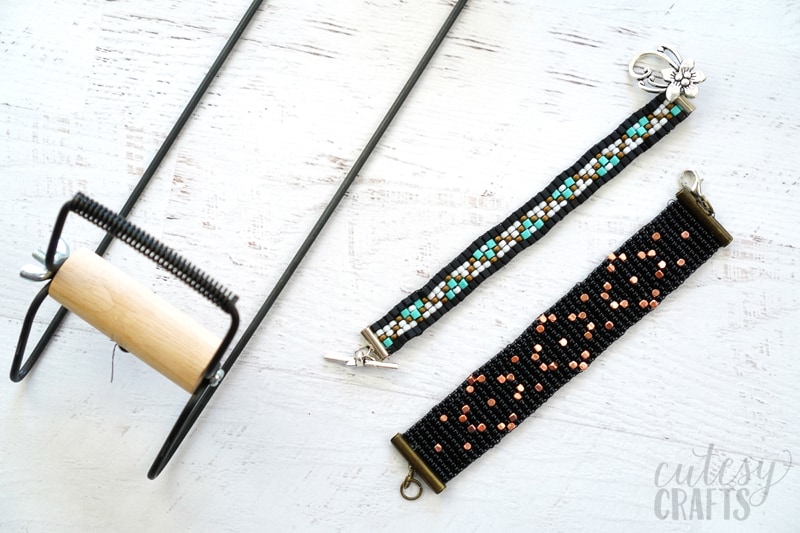
- Slider Clasps ( I used 1/2 inch sliders for 4-5 beads across, and 1 inch sliders for 11 beads across.)
- Jump Rings and Lobster Clasps
- Size 8 Round and 3mm Cube Seed Beads (Colors and amount needed are listed on each pattern.)
Bead Loom Patterns Video Tutorial
First off, I’m just going to say that I find it MUCH easier to teach (and learn) via video, so I made a video to walk you through each step. You can watch that below. (If you’re using an ad blocker, you may need to turn it off to see the video.) If you’d rather see photos and descriptions, I have those too.
How to Make Bead Loom Bracelets
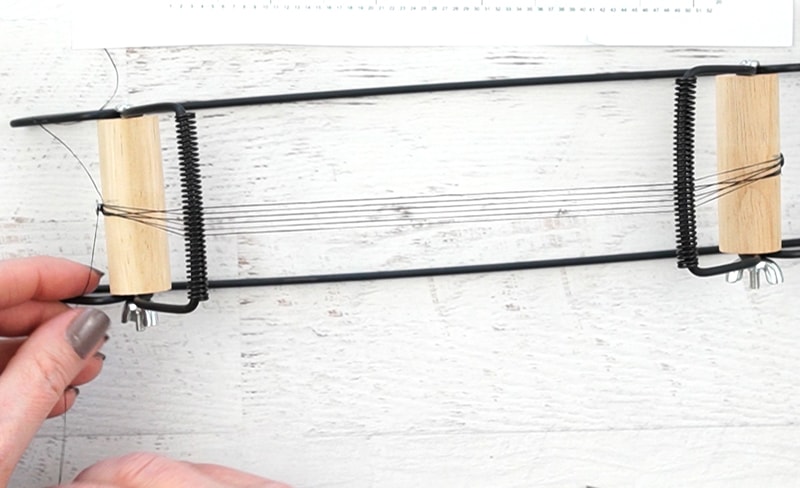
First, tie your thread in a double knot to one nail on the loom.
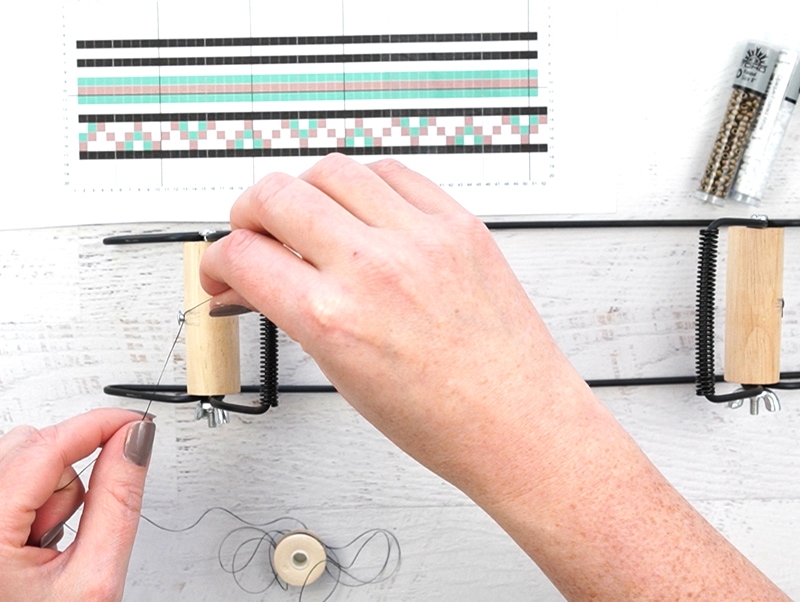
Gently stretch the thread across the loom, putting in a groove on each side as you go. Wrap the thread around the other side of the loom one time.

Bring the thread back across the loom, putting it through the groove next in line on each side, and wrap it around the first nail. Continue until you have one more thread than row of beads in your pattern. (For example, if you have a pattern that is 5 beads across, string 6 rows of thread.) Tie the thread off on the nail you stopped at and cut a tail a few inches long. Make sure the strings are tight. You can unscrew the dowels to loosen them and turn slightly to make it tighter.
Cut a piece of thread about the size from your fingers to your shoulder and tie it onto the first strand that is going across the loom. Leave a tail about a few inches long and slide the knot as close to one side as you can. Thread the needle on the other end of the thread.

Start on one end of the pattern and string the beads on. Bring the thread and beads UNDER the thread across the loom, to the opposite side of where you tied it on.
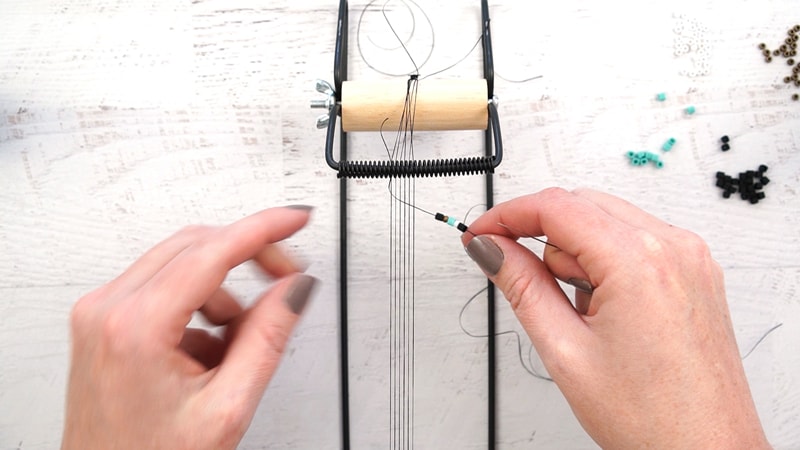
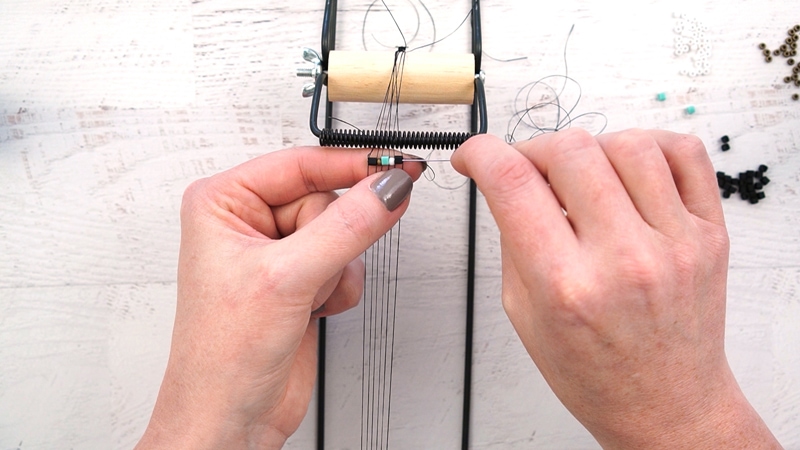
Push the beads up through the spaces between the threads on the loom.
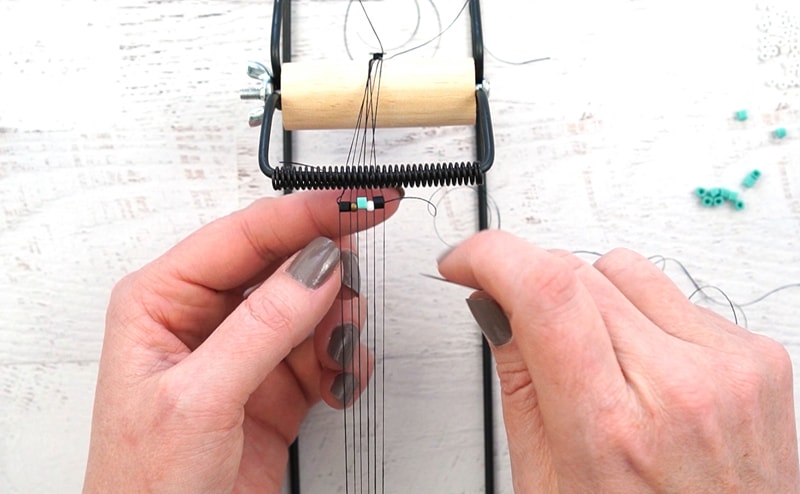
Turn the needle around and push it back through the beads, making sure it goes over the thread. Hard to explain, but definitely watch the video.
If you run out of thread before you’re done, weave the excess back and forth between previous rows until it feels secure. Bring the needle back up between one of the rows and snip off the excess. Do the opposite to start a new thread. Again, the video will make much more sense.
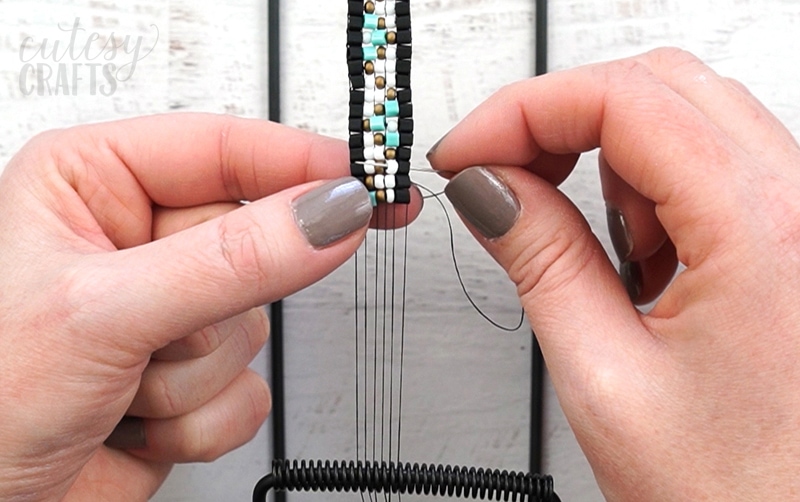
When the bracelet is long enough, carefully cut it off the loom, keeping the strings as long as possible. Tie all of the strings together in double knots to secure the beads on the ends.
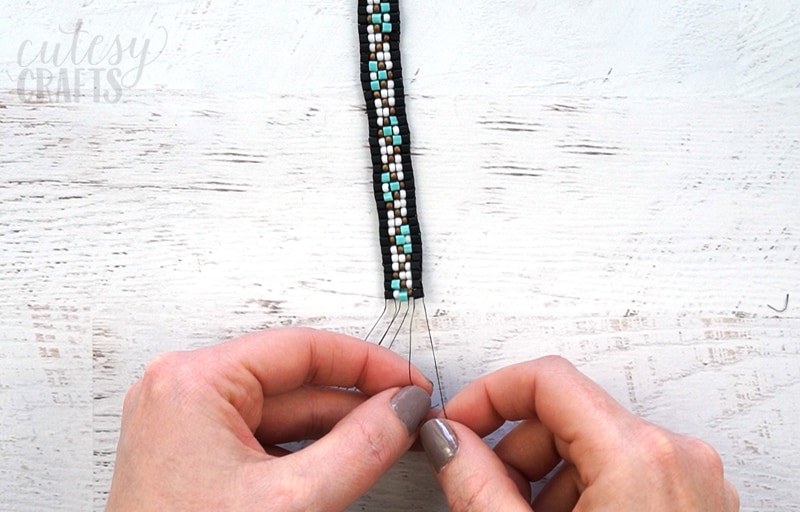
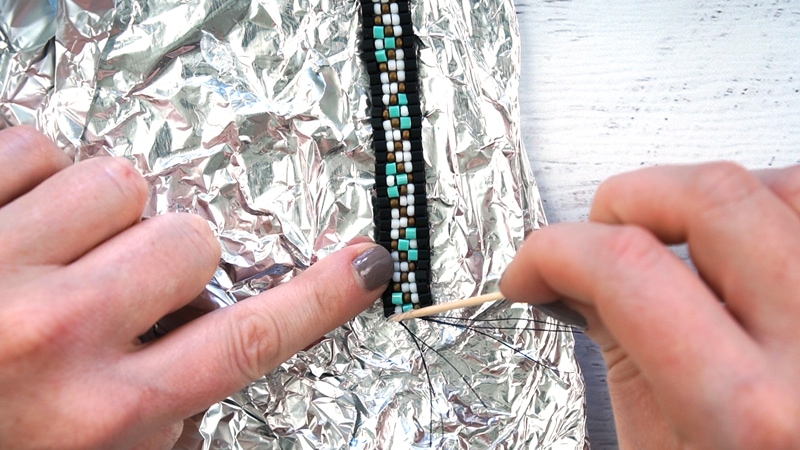
Put some strong glue on all of the knots to secure them. Let the glue dry, and then cut off the excess thread. Be careful not to cut through the knots.
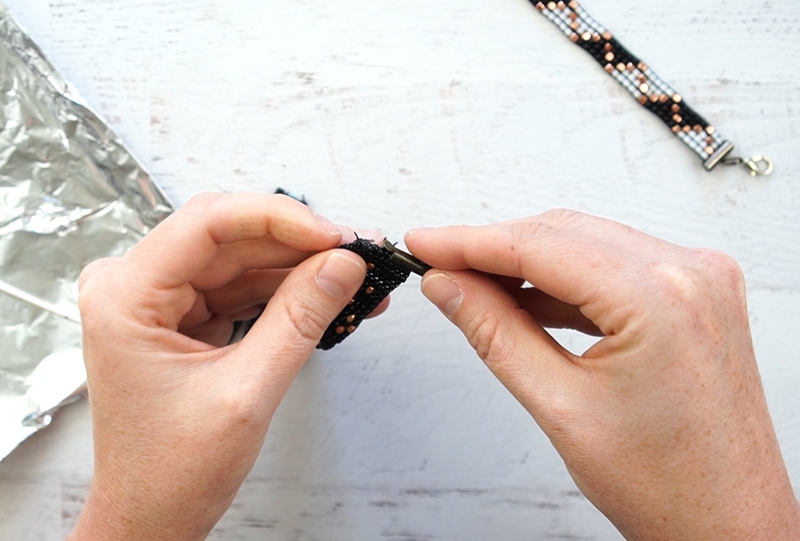
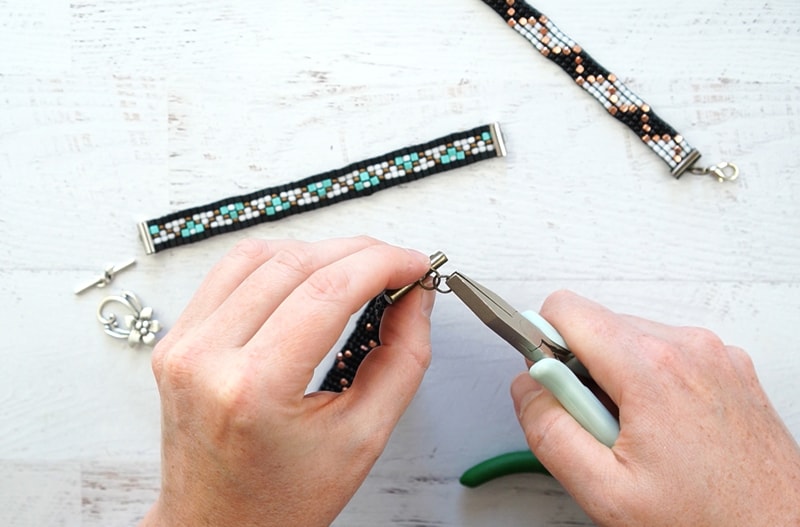
Smear a little glue on the inside of the slider clasp and slide it onto the bracelet. Close the ends.
Add a couple jump rings and a lobster clasp, and you’re done! You can add more jump rings to make them bigger or even a chain to make it adjustable.
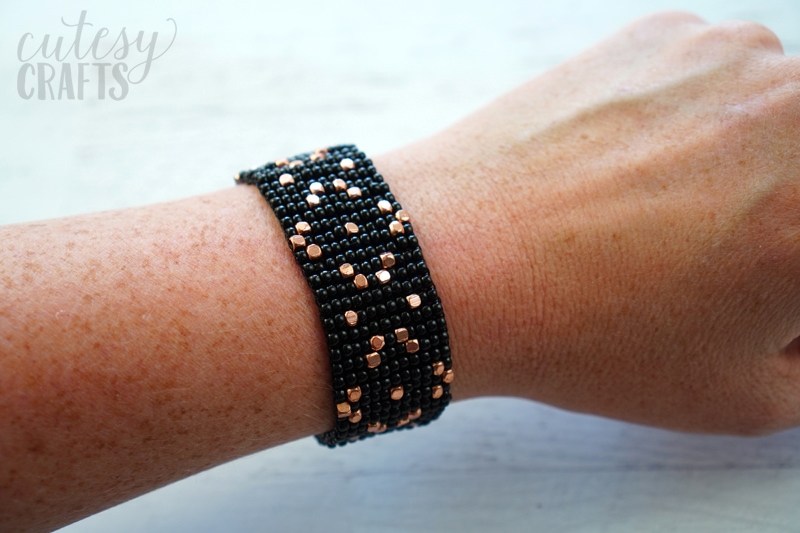
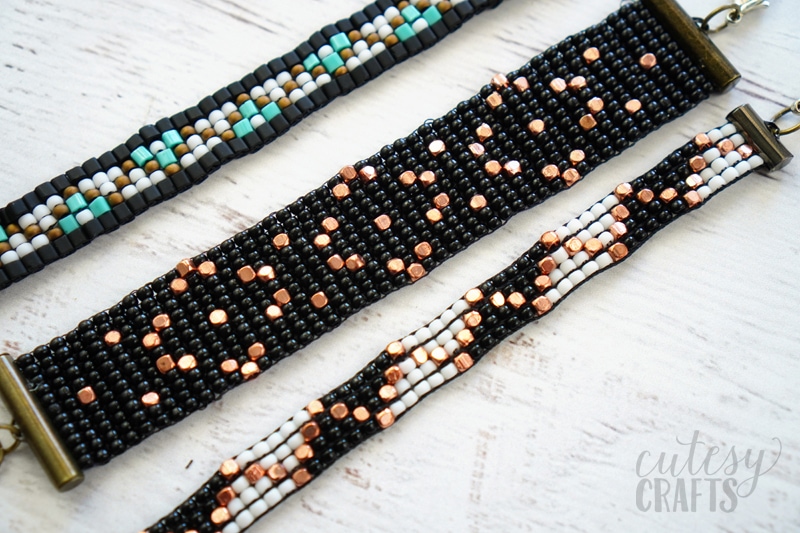
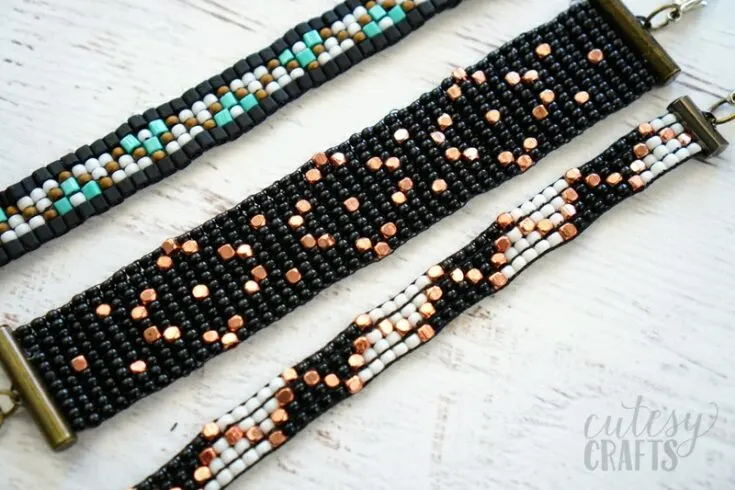
Aren’t they pretty? I think the thick black and copper one is my favorite. I can’t wait to wear it somewhere.
Beginner Free Bead Loom Patterns Download
Click here to download the free patterns. Each pattern will tell you which color beads were used and how many of each. Enjoy!
Bead Bracelet Patterns FAQ
A bead loom is a tool used to connect beads together by weaving them. Like a regular weaving loom, there are strings strung across and you use another string, weaving in and out, to string the beads together.
Yes, you can bead without a loom by doing different stitches instead.
Start a bead loom bracelet by tying the thread to one end of the loom, stringing it across back and forth across the top, and then tying a knot at the end again to finish.
Bead Loom Bracelet Ideas

Materials
- Bead Loom Bracelet Patterns
- Bead Loom
- Beading Needle
- Thread
- Glue
- Slider Clasps
- Jump Rings and Lobster Clasps
- Size 8 Round and 3mm Cube Seed Beads (Colors and amount needed are listed on each pattern.)
Instructions
1. Thread the loom. First, tie your thread in a double knot to one nail on the loom. Gently stretch the thread across the loom, putting in a groove on each side as you go. Wrap the thread around the other side of the loom one time. Bring the thread back across the loom, putting it through the groove next in line on each side, and wrap it around the first nail. Continue until you have one more thread than row of beads in your pattern.
2. Cut a piece of thread about the size from your fingers to your shoulder and tie it onto the first strand that is going across the loom. Leave a tail a few inches long and slide the knot as close to one side as you can. Thread the needle on the other end of the thread.
3.Start on one end of the pattern and string the beads on. Bring the thread and beads UNDER the thread across the loom, to the opposite side of where you tied it on.
4. Push the beads up through the spaces between the threads on the loom.
5. Turn the needle around and push it back through the beads, making sure it goes over the thread.
6. When the bracelet is long enough, carefully cut it off the loom, keeping the strings as long as possible. Tie all of the strings together in double knots to secure the beads on the ends.
7. Put some strong glue on all of the knots to secure them. Let the glue dry, and then cut off the excess thread.
8. Smear a little glue on the inside of the slider clasp and slide it onto the bracelet. Close the ends.
9. Add a couple jump rings and a lobster clasp, and you're done!
Olivia
Sunday 4th of February 2024
Please add me to the mailing list.
Jessica @ Cutesy Crafts
Monday 5th of February 2024
You can subscribe here: https://cutesycrafts.com/subscribe
Lisa
Saturday 22nd of April 2023
Great patterns, easy to follow.
Susan Wagnon
Saturday 17th of December 2022
Love your patterns and my grandkids will love it, thanks for all that you do and all that you share.
Carol
Sunday 7th of August 2022
I enjoyed watching your tutorial. I didn't know that you could mix bead sizes on one bracelet until I saw it with my own eyes. Are all beads size 8/0 -- some round and some squared?
Thanks for the tutorial.
yesenia neal
Friday 4th of February 2022
I been trying to do beads loom. But I'm mess it up. I see how you do it. If it 4 string the bead got to be 6
Jessica @ Cutesy Crafts
Wednesday 16th of February 2022
You need one more string than bead. So if you have 6 beads across, you would need 7 strings.