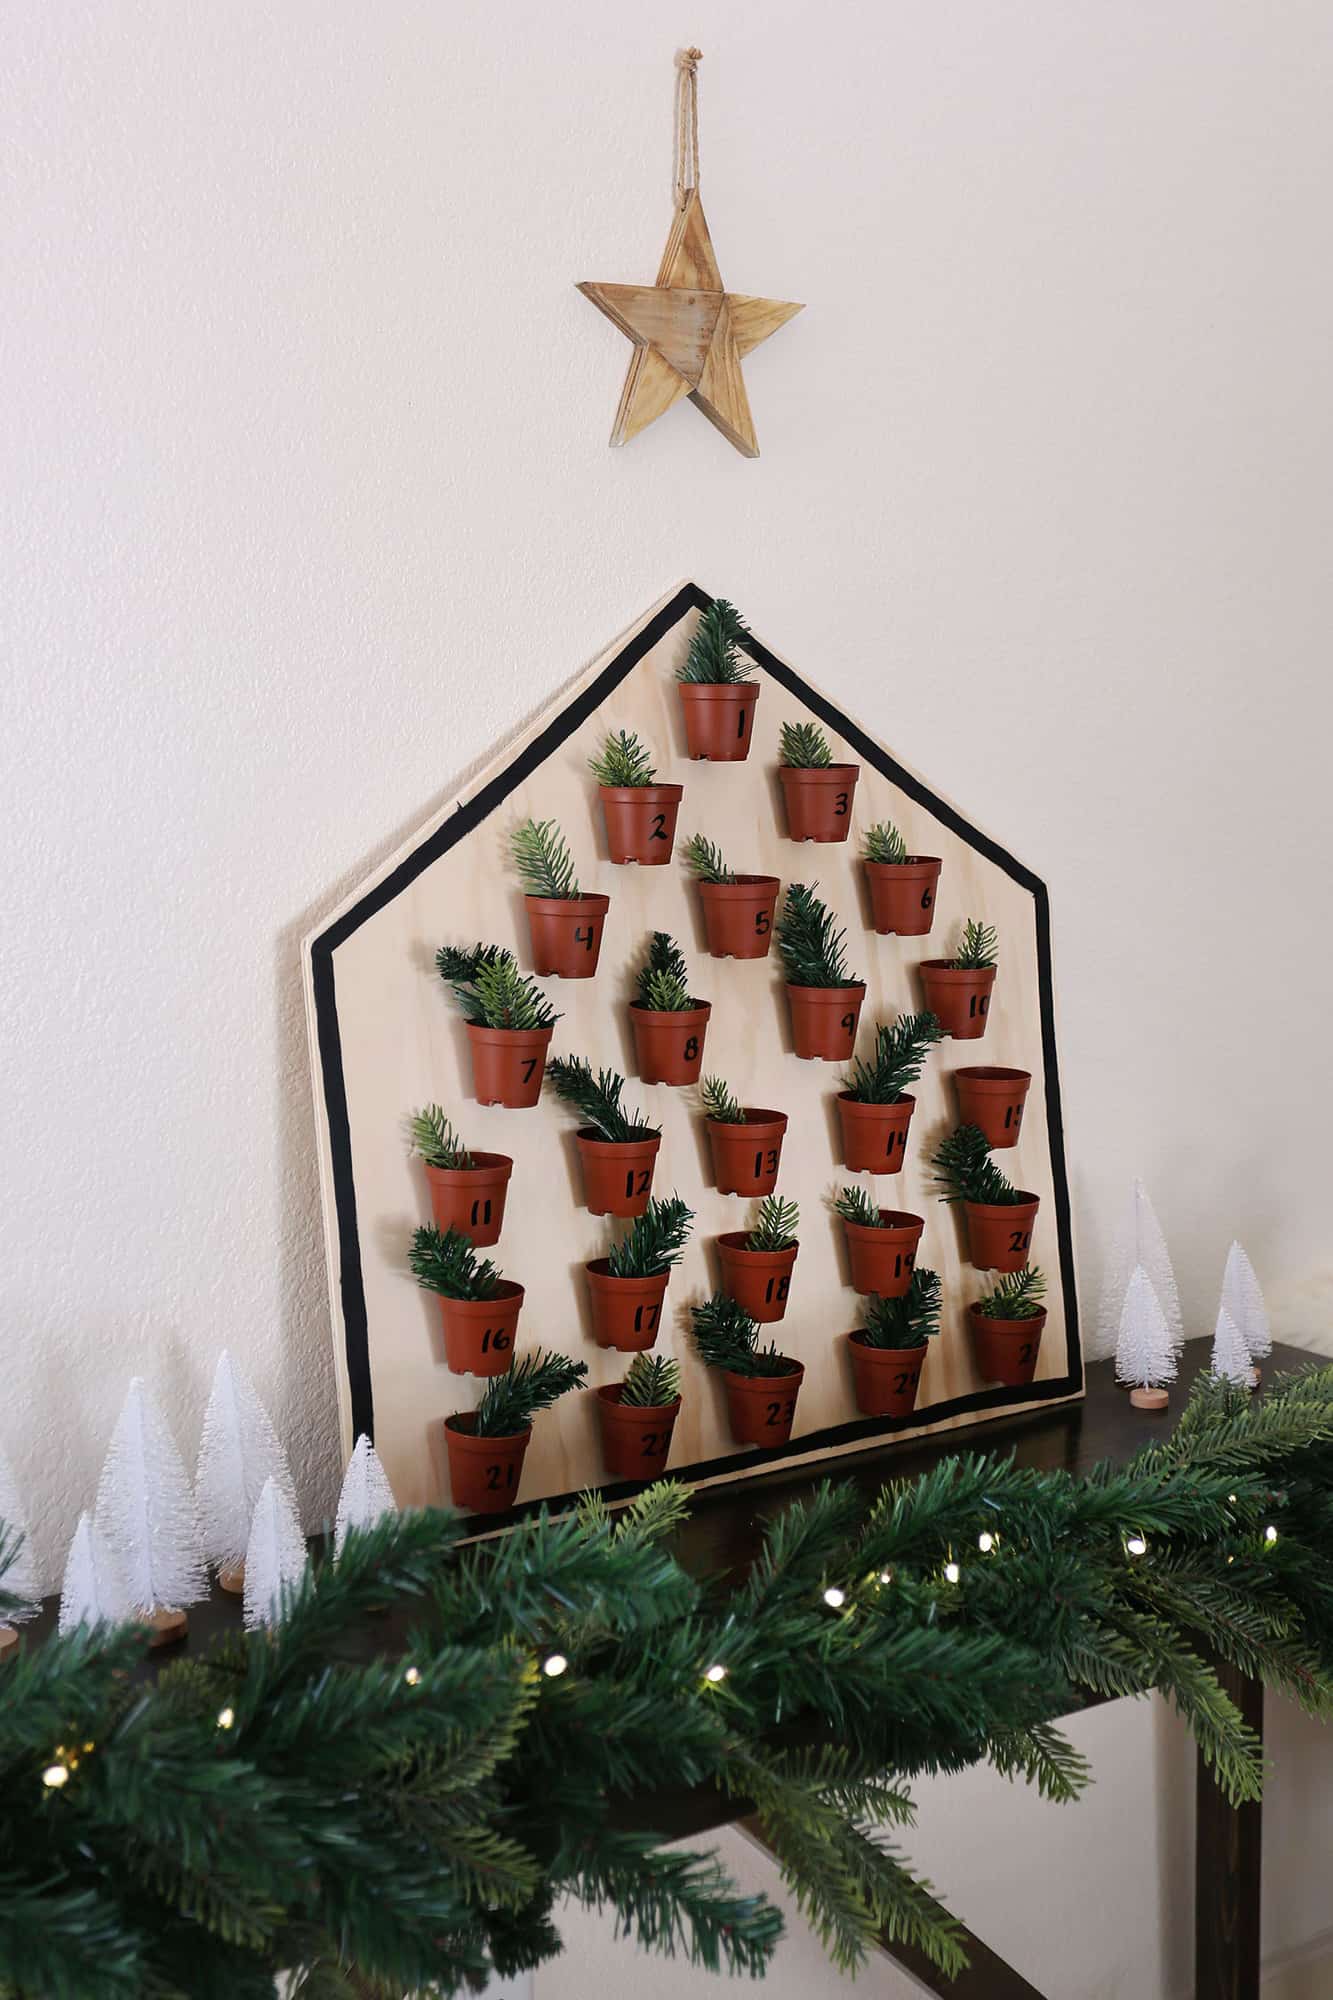
 I’m gearing up for the holidays over here and nothing gets me more excited than an Advent Countdown! It’s just a fun and simple way to celebrate every day leading up to Christmas. Today, I’m sharing an easy-to-make Advent calendar I created with my love of houseplants in mind. 🙂
For this post, I worked with The Home Depot. Yes, all the DIY supplies I used are from my local store. But what some of you may not know is The Home Depot has a HUGE selection of holiday garlands and other decor items. The two-toned artificial garland you see in this project is from there, and I actually have three Christmas trees up in my house right now that are also from The Home Depot. They have a huge selection and lots of options that fit many different styles. They’re also hosting a DIY Holiday Workshop on their site- you can check out more Advent calendars and other projects at this link.
 I plan to fill the little pots of my Advent calendar with small tins of different kinds of loose tea, as I am an AVID tea drinker this time of year. I will also pop a few packets of hot chocolate in there for good measure. But you could absolutely personalize the items in the little pots to whatever you and your family might enjoy. I think adding small, individually wrapped candies would be really fun and tasty. You could also add small slips of paper that contain messages or directions of simple holiday activities you do throughout the month; things like “watch Home Alone” or “bake gingerbread cookies.” It’s totally up to you!
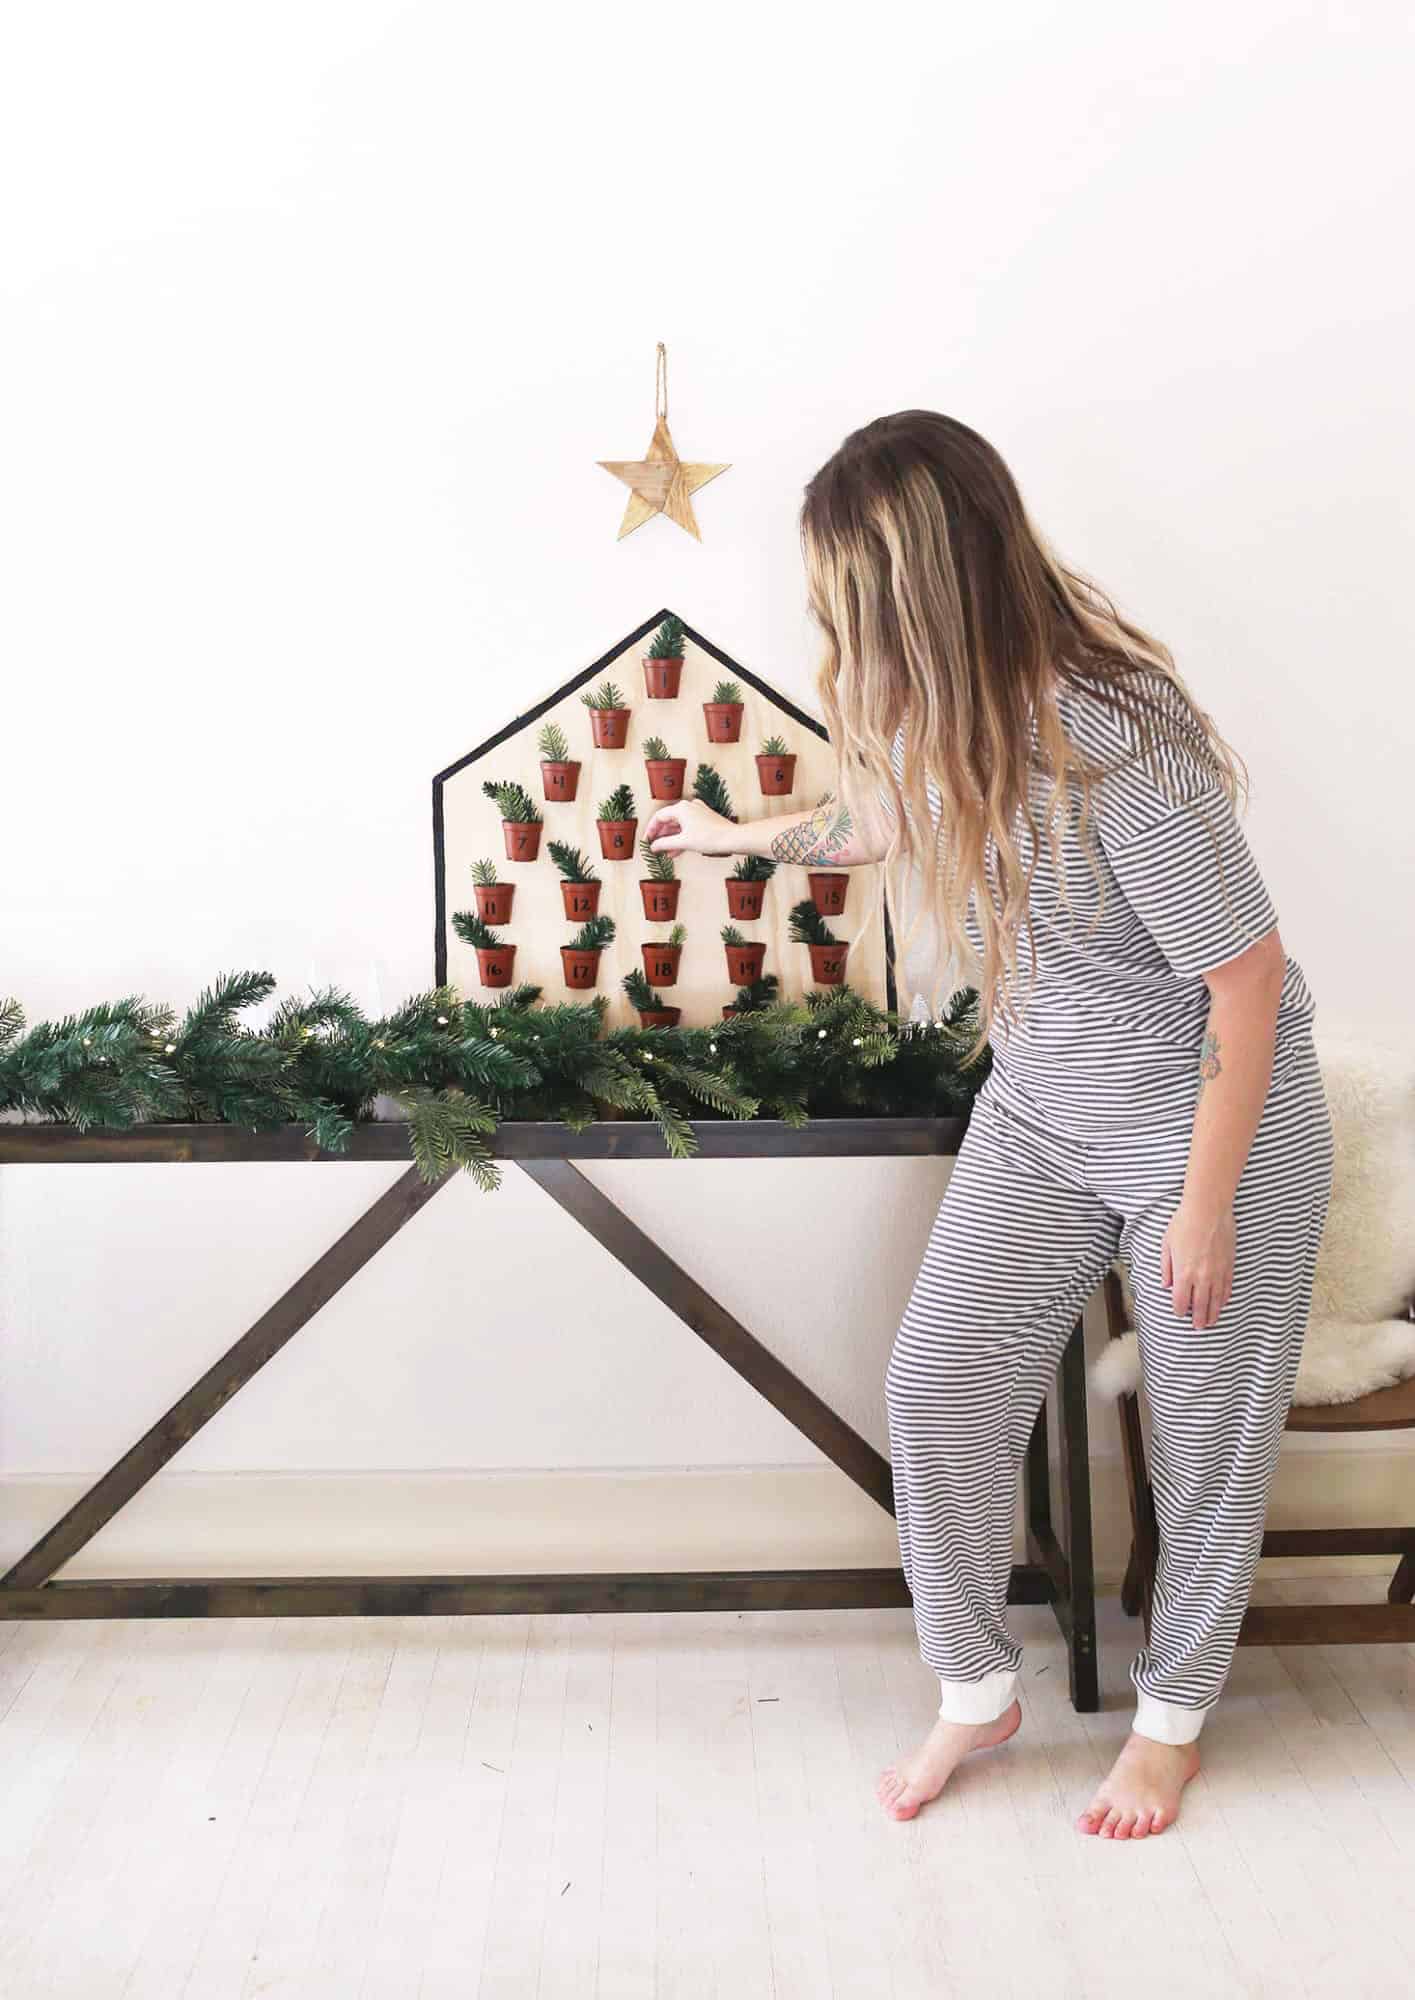
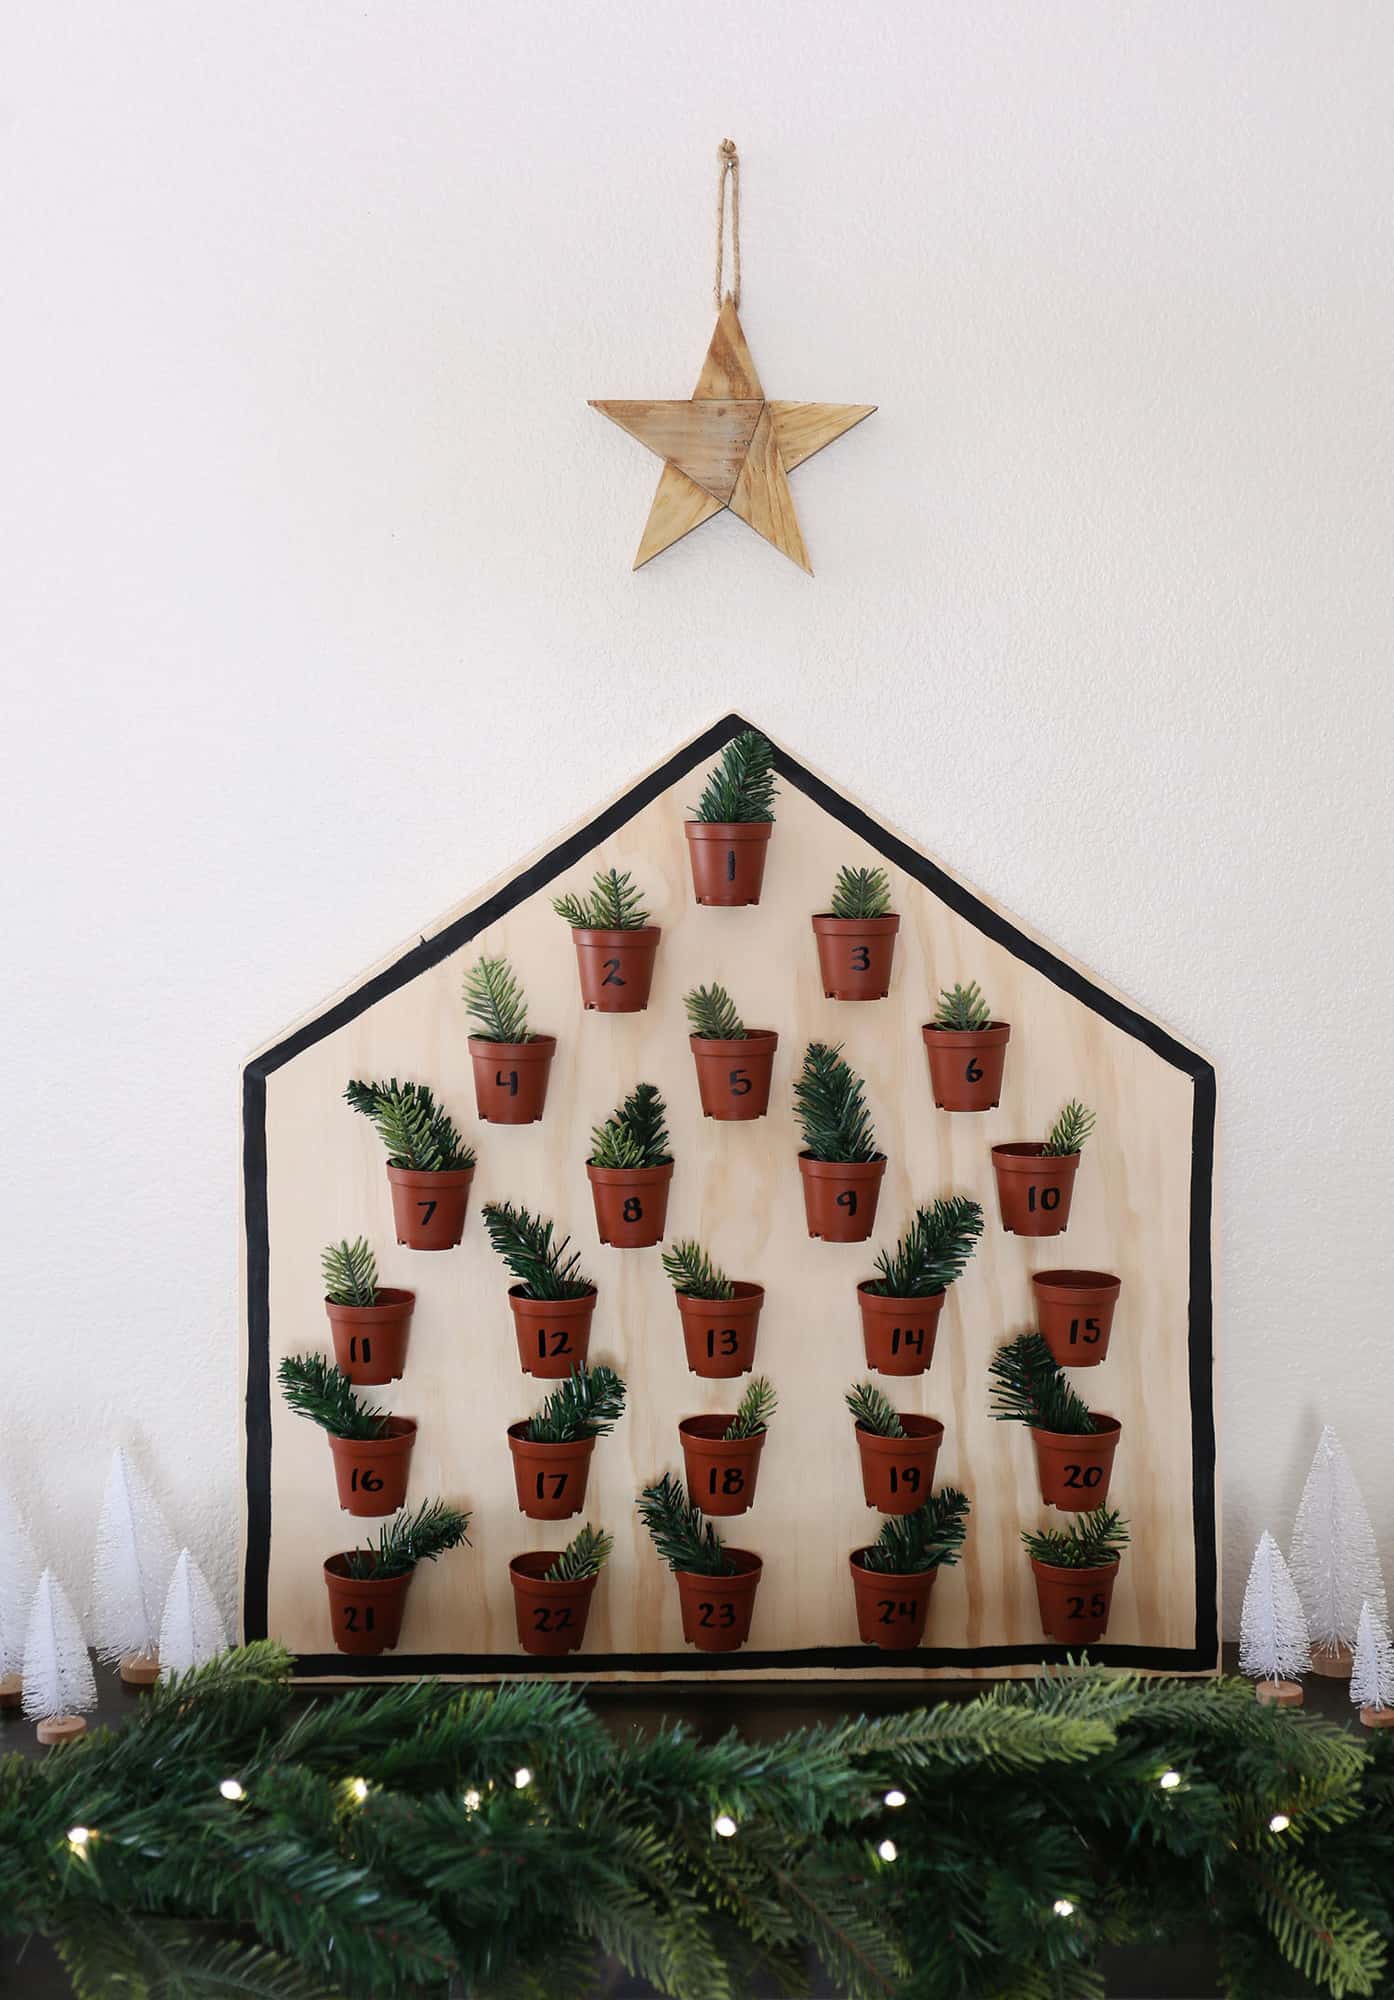
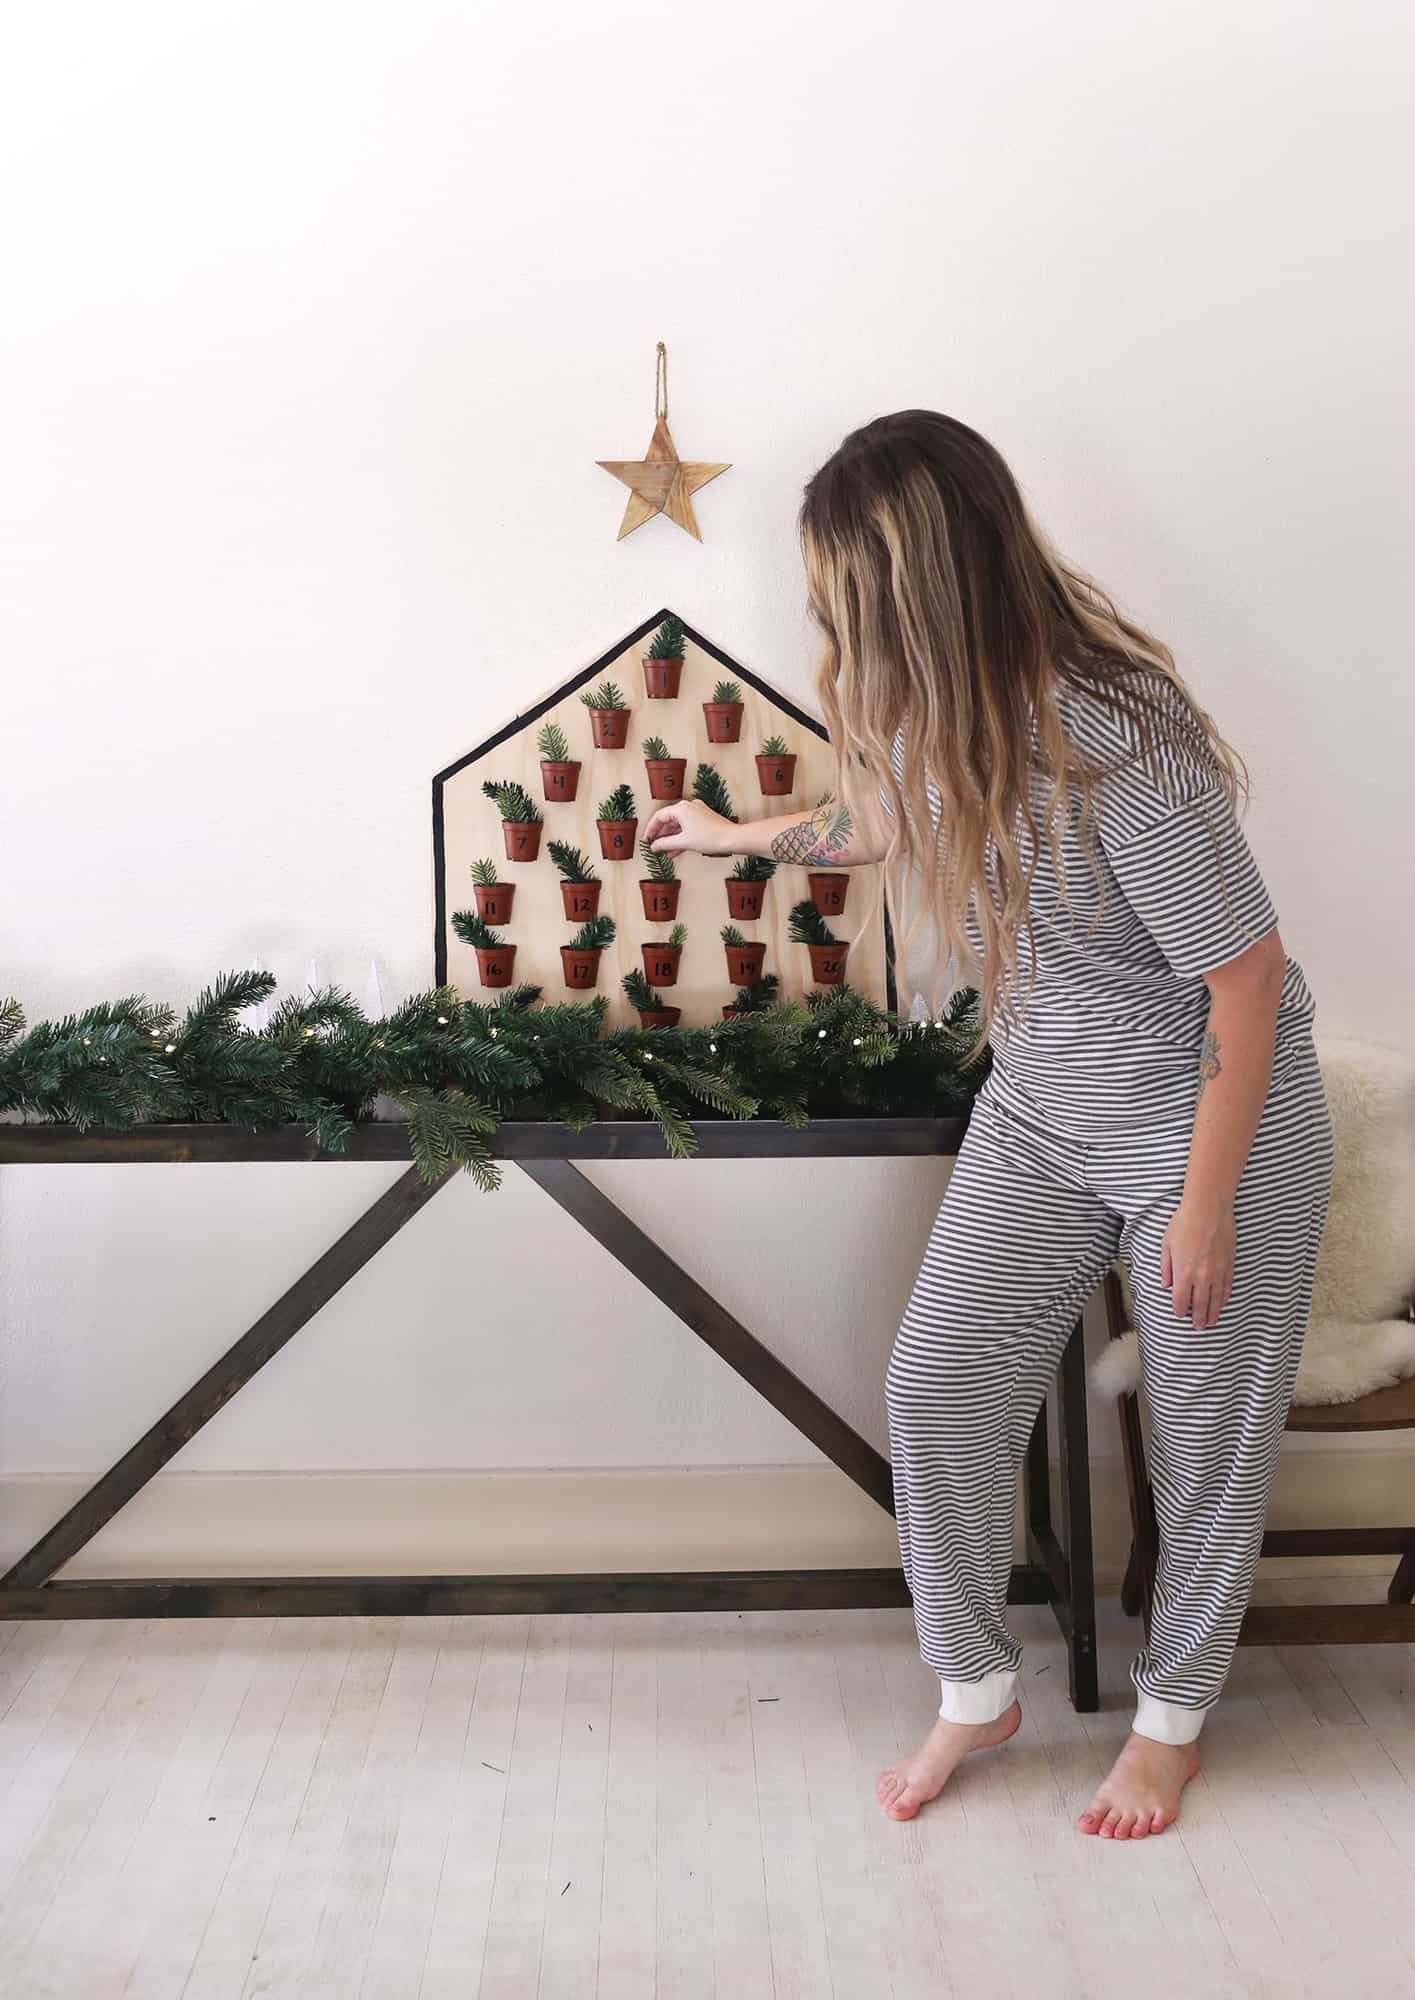
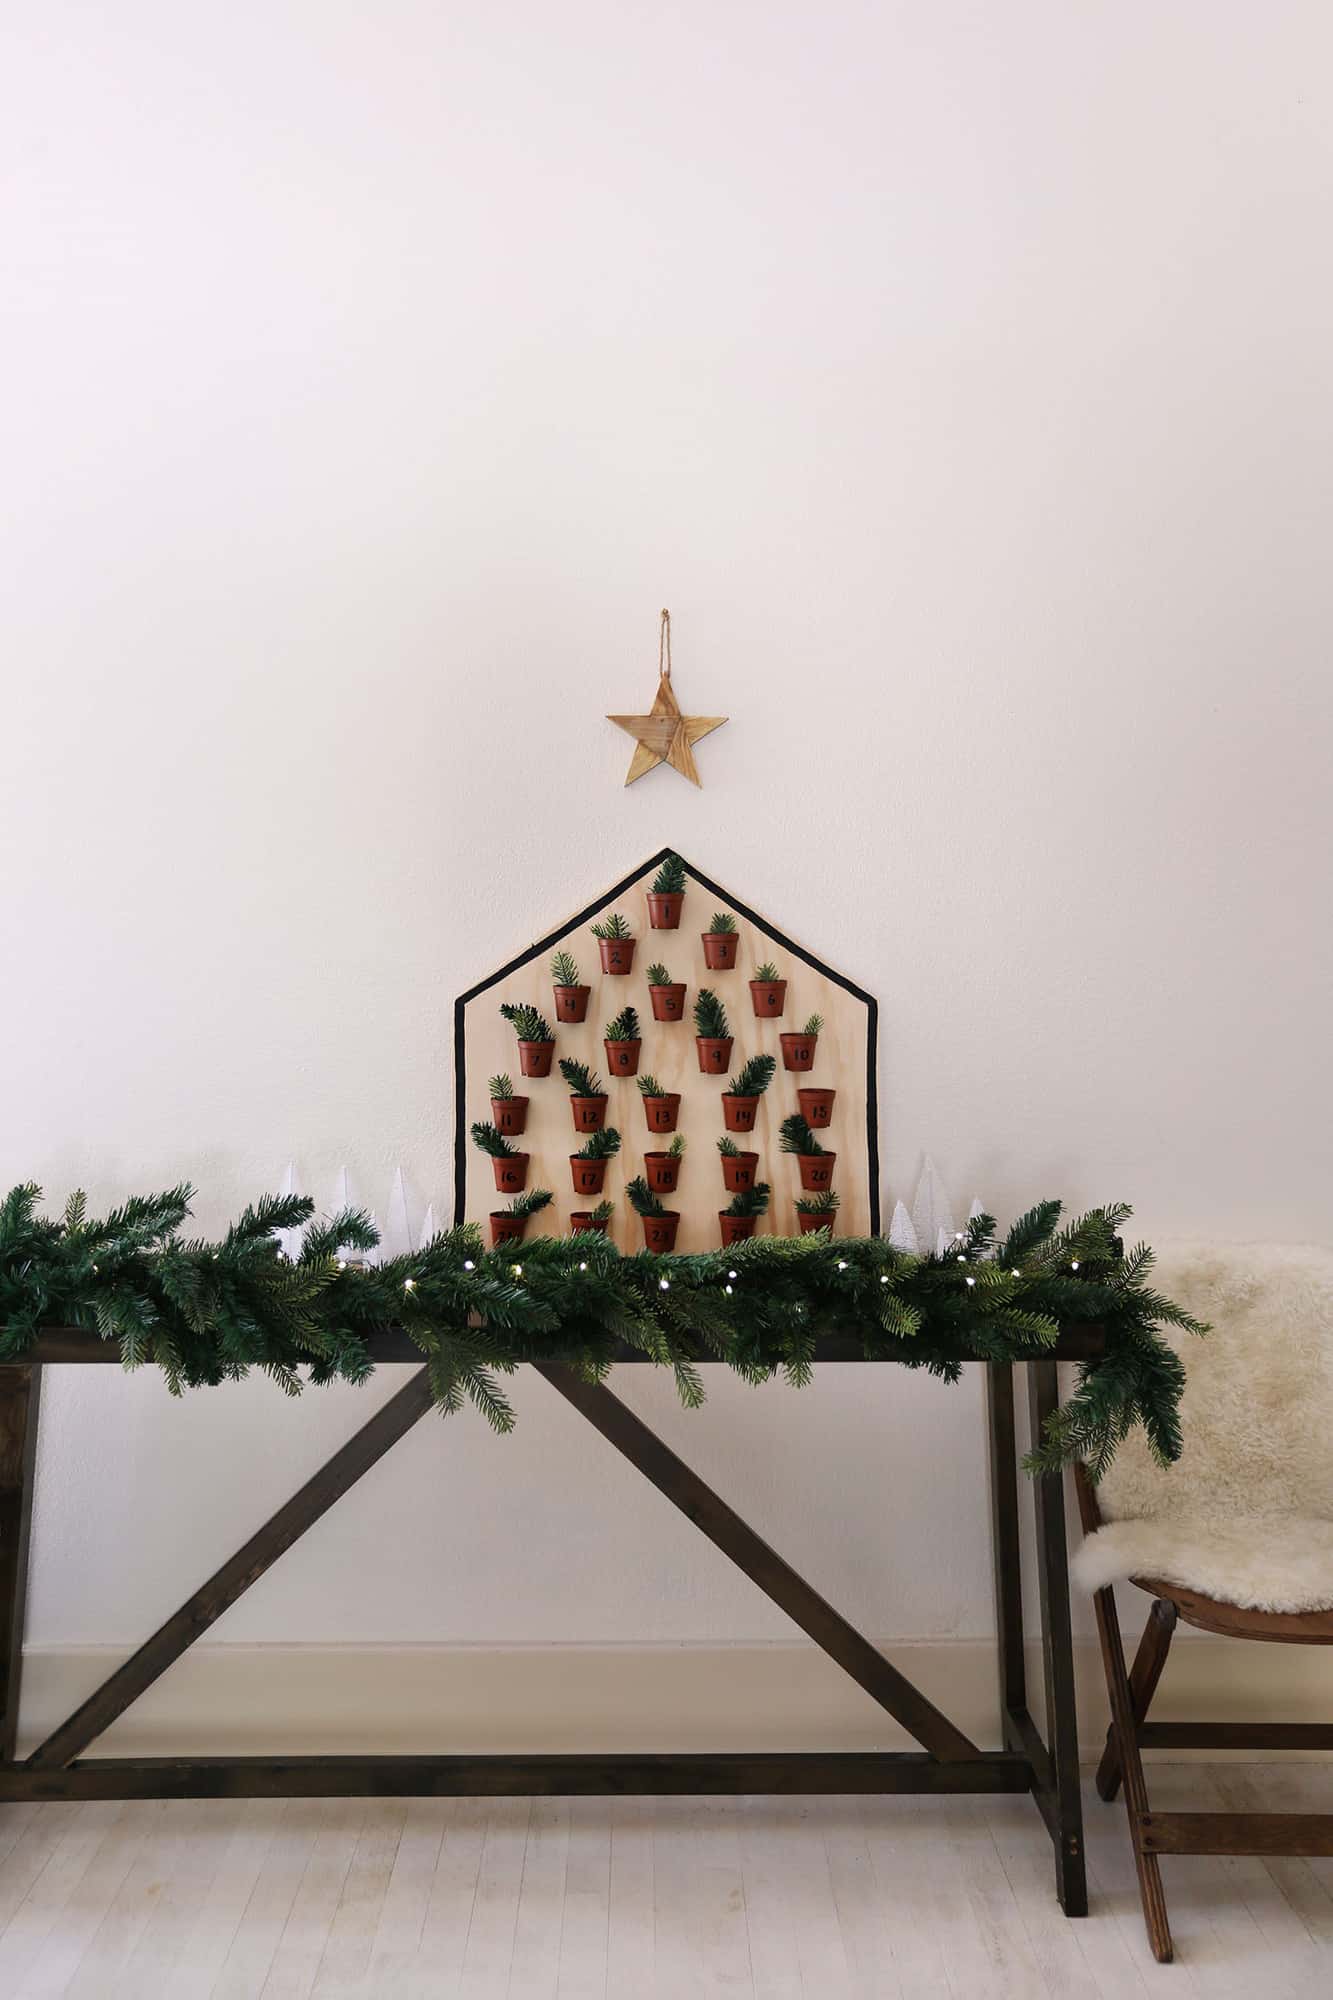
 Here’s how I created this houseplants Advent calendar, with tips of other ways you could customize it more.
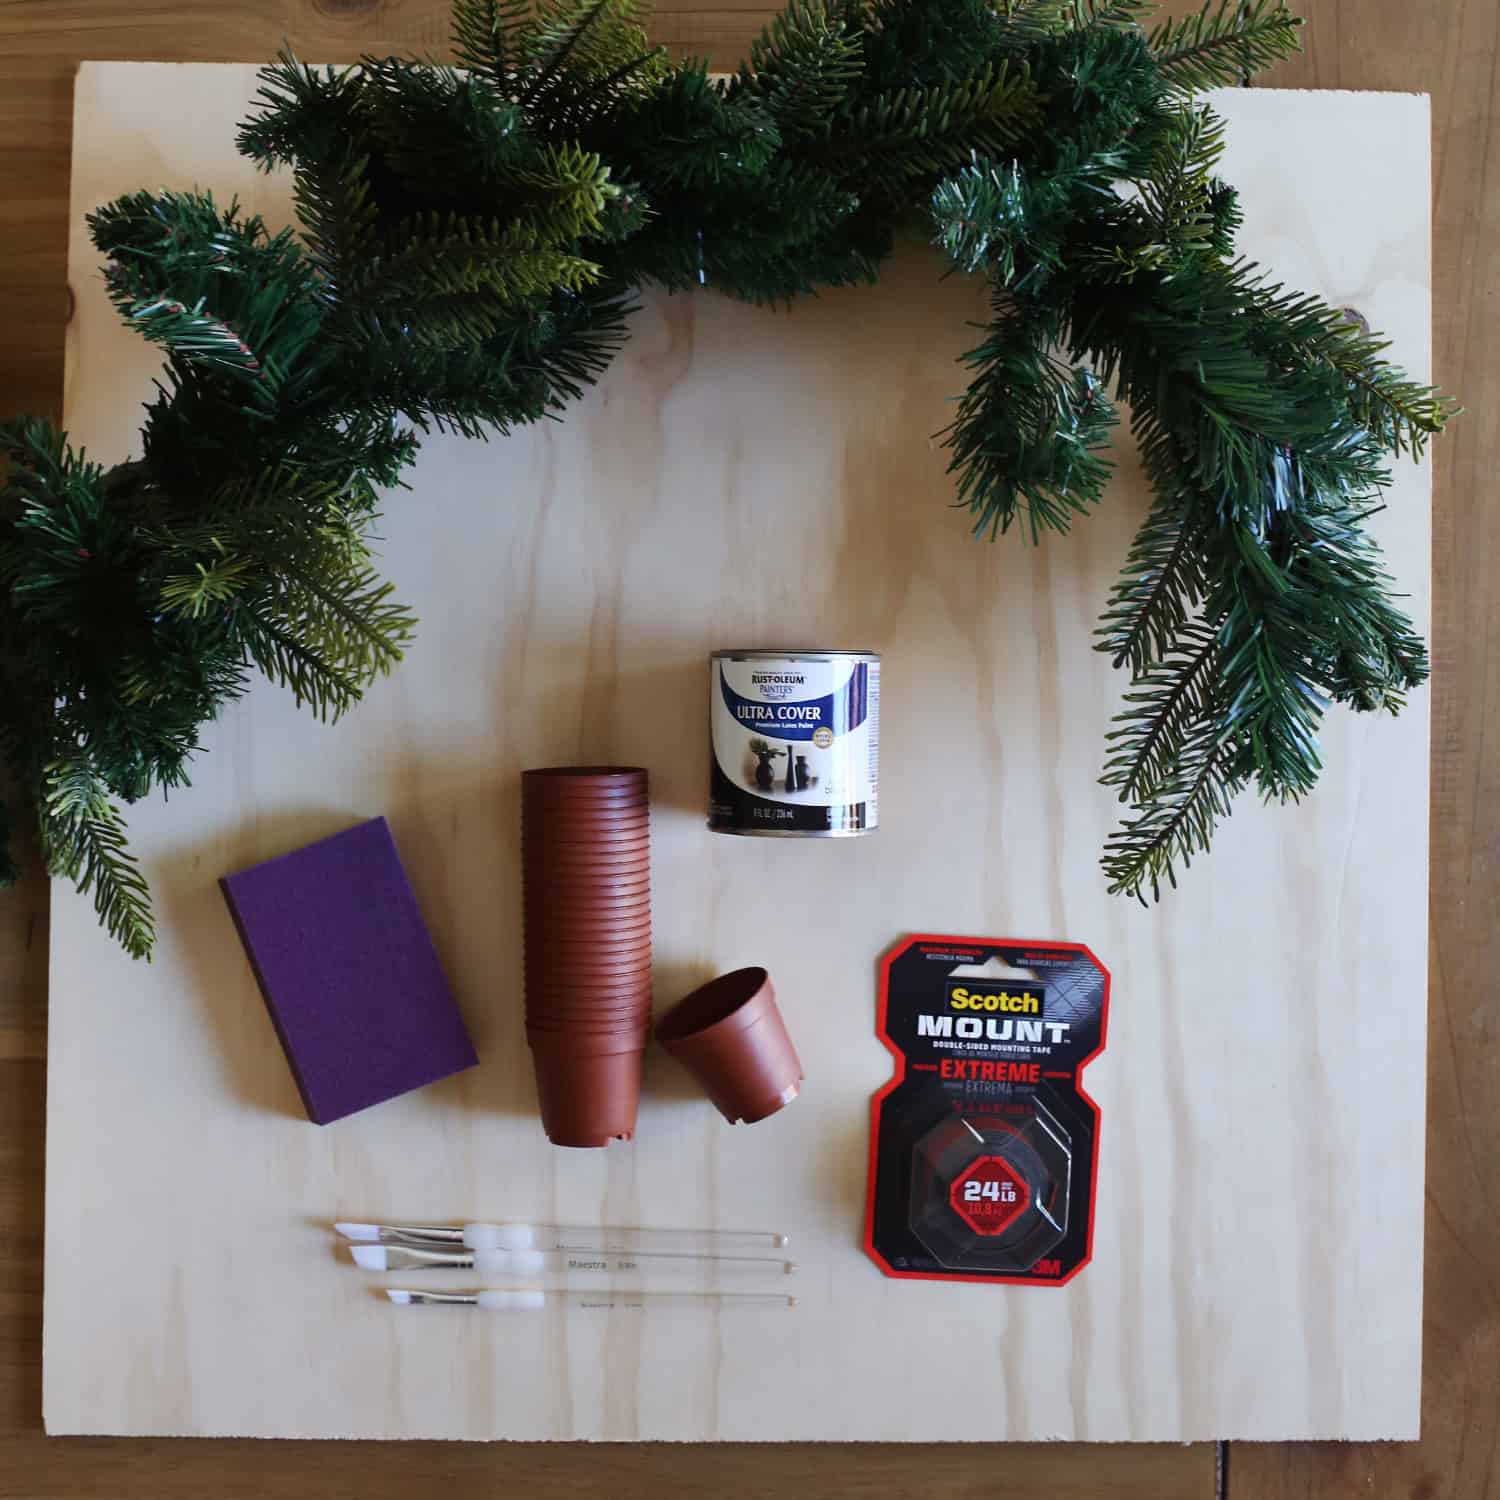
Supplies:
-2×2 plywood
-black paint
-mini plant pots
-double sided mounting tape
-Sharpie black paint pen
-artificial garland
-paint brushes
-saw + fine sandpaper or sanding block
You may also need wire cutters depending on the type of garland you use. If the stems are plastic you may be able to easily snip with quality scissors, but if they are filled with wire you may want a pair of wire cutters.
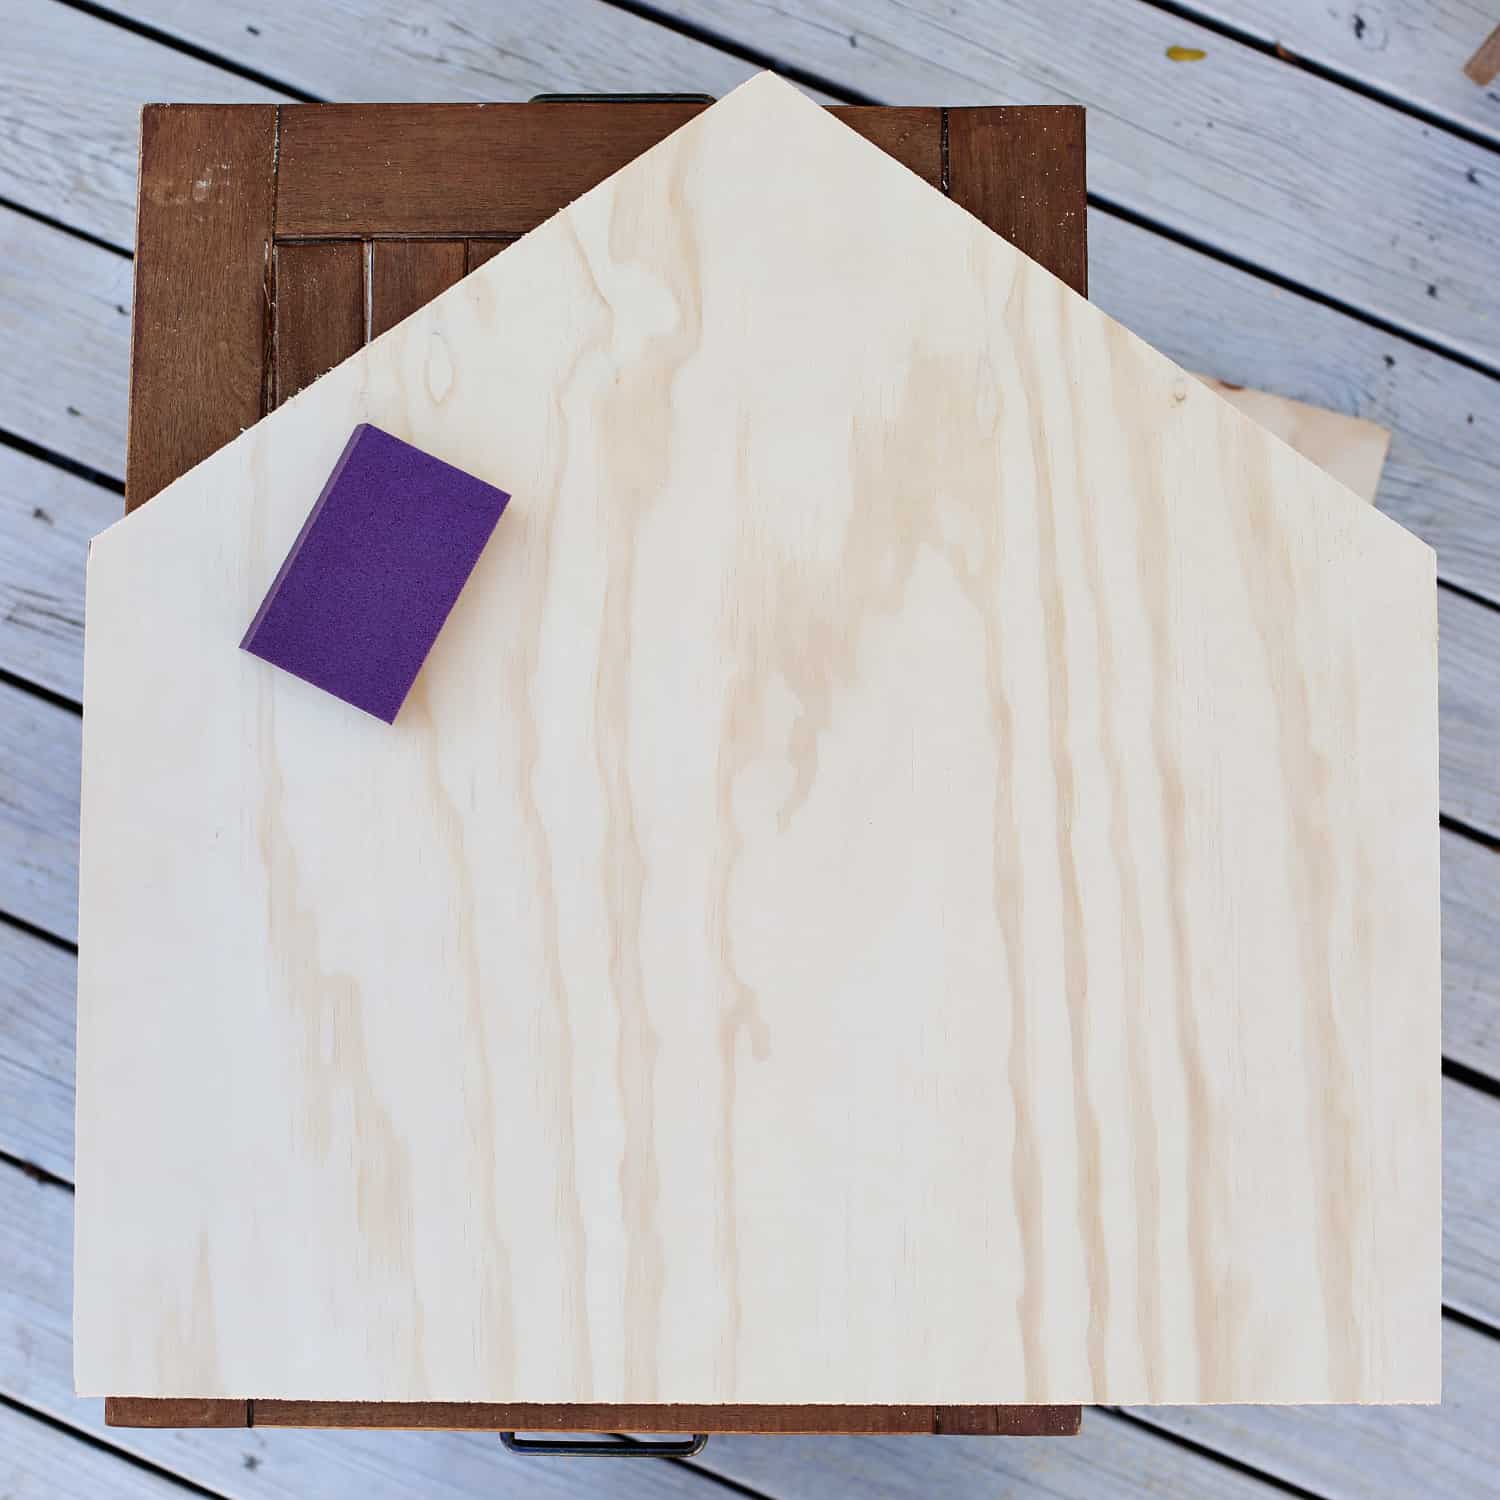 Step One: Cut the plywood into a house shape and sand the edges well. If you don’t have or aren’t comfortable using a saw, you could also leave the plywood the square shape it comes in and simply paint a house shape, or any design you like.
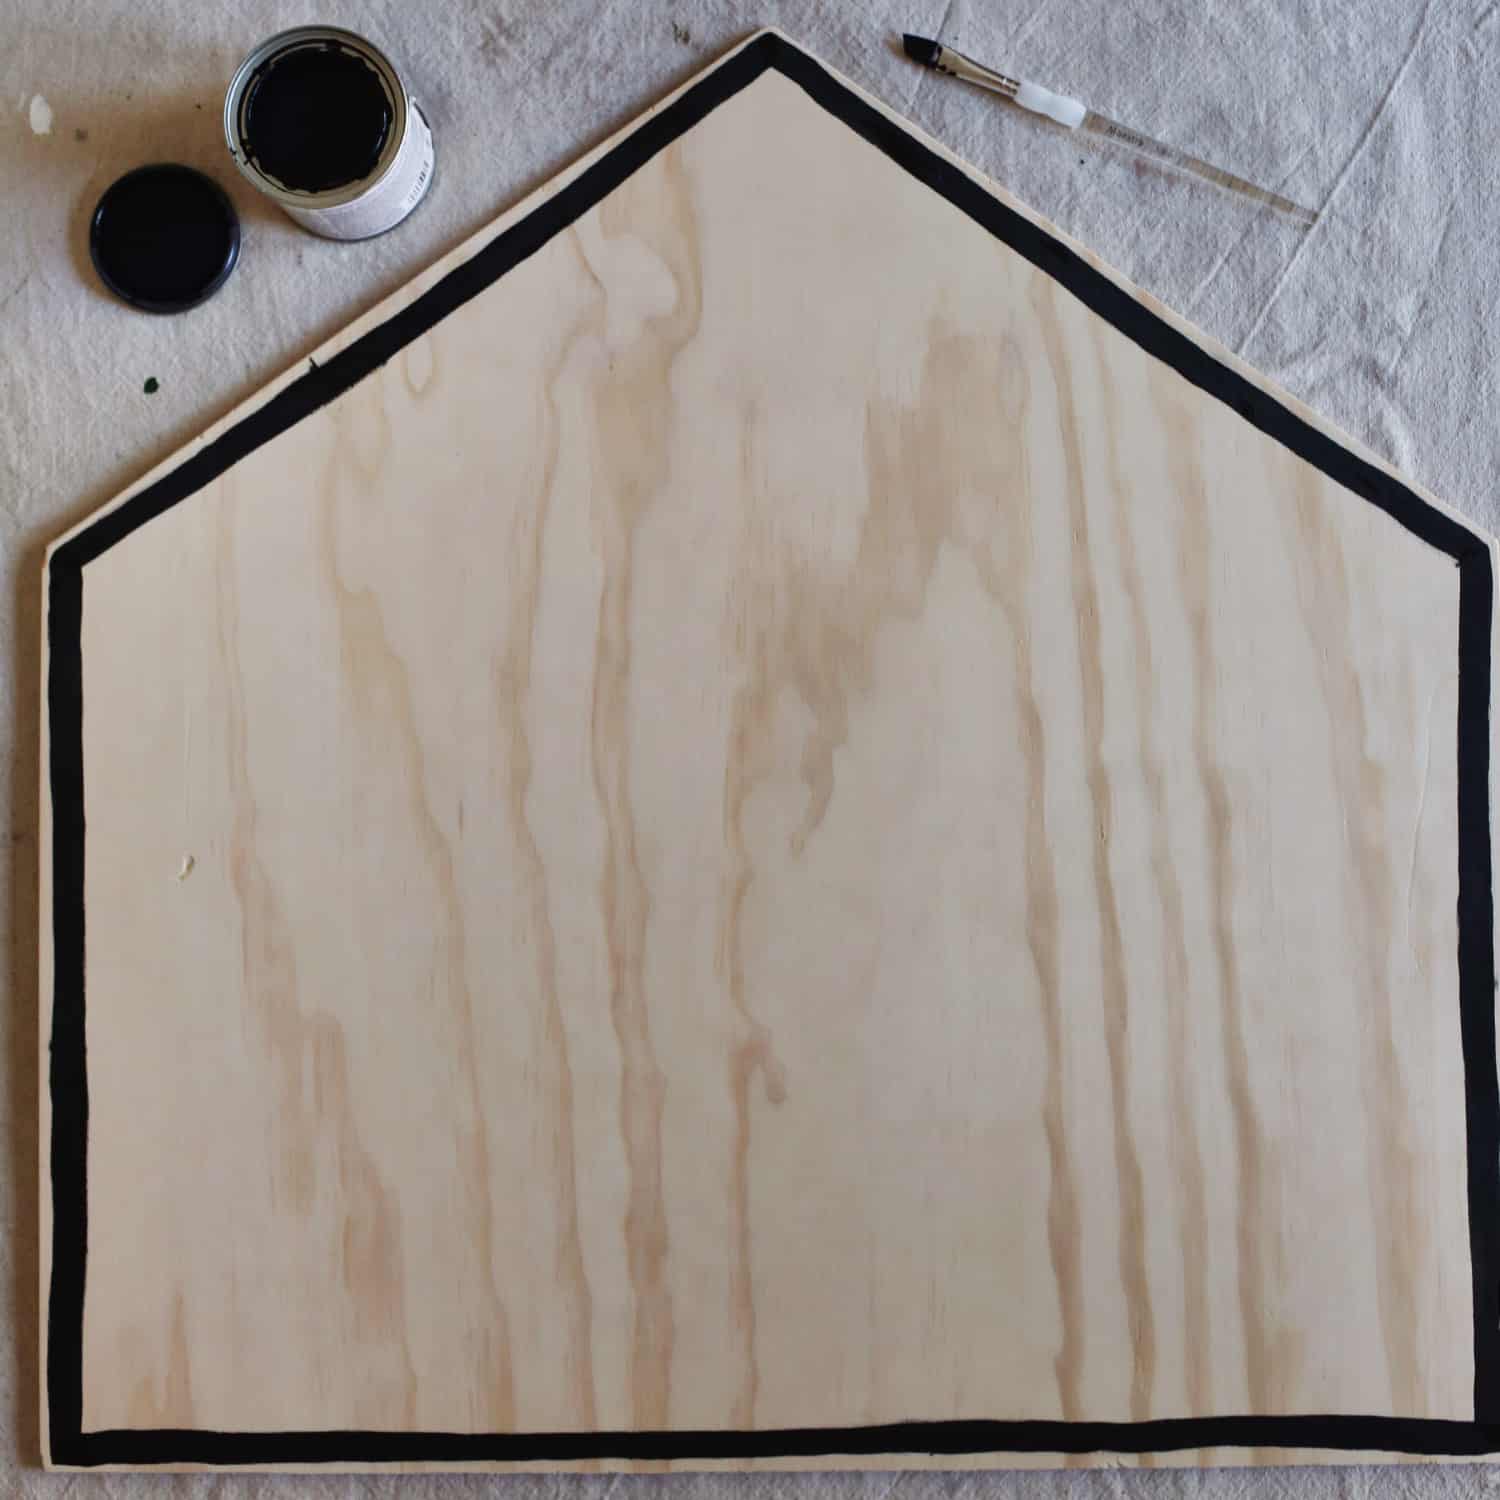 Step Two: Paint the house outline, or whatever design you prefer, and allow to fully dry.
 Step Three: Plan out where you will add the little pots and mark the spots with a pencil. Then use your double sided mounting tape to adhere the pots to the wood.
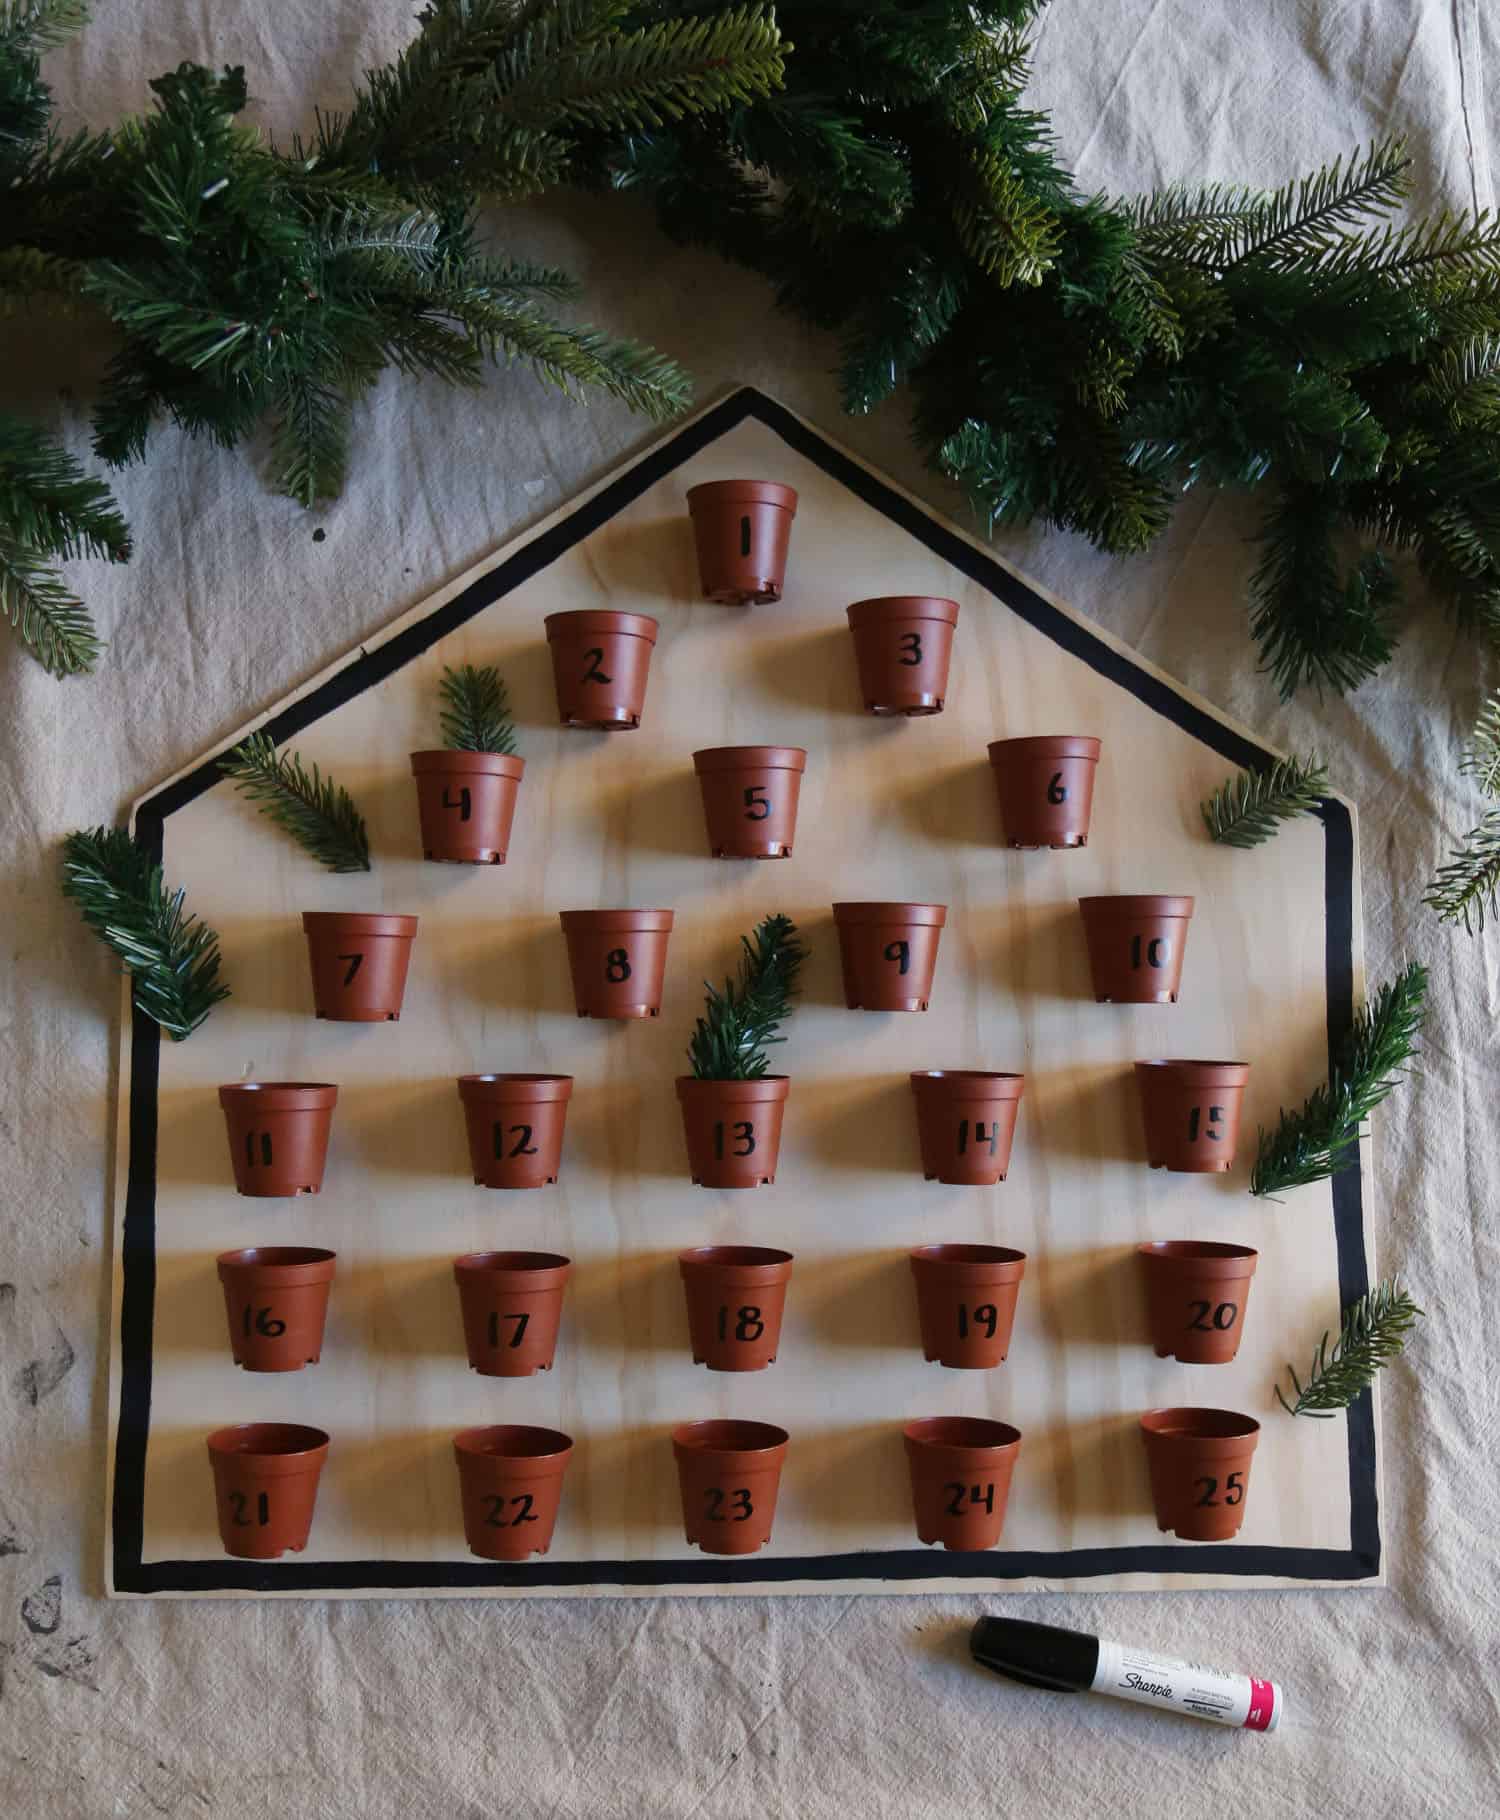 Step Four: Use the paint pen to add numbers to the pots. Snip off pieces of the garland and add them to the pots along with any tea tins, candies, or slips of paper you are using with your Advent calendar.

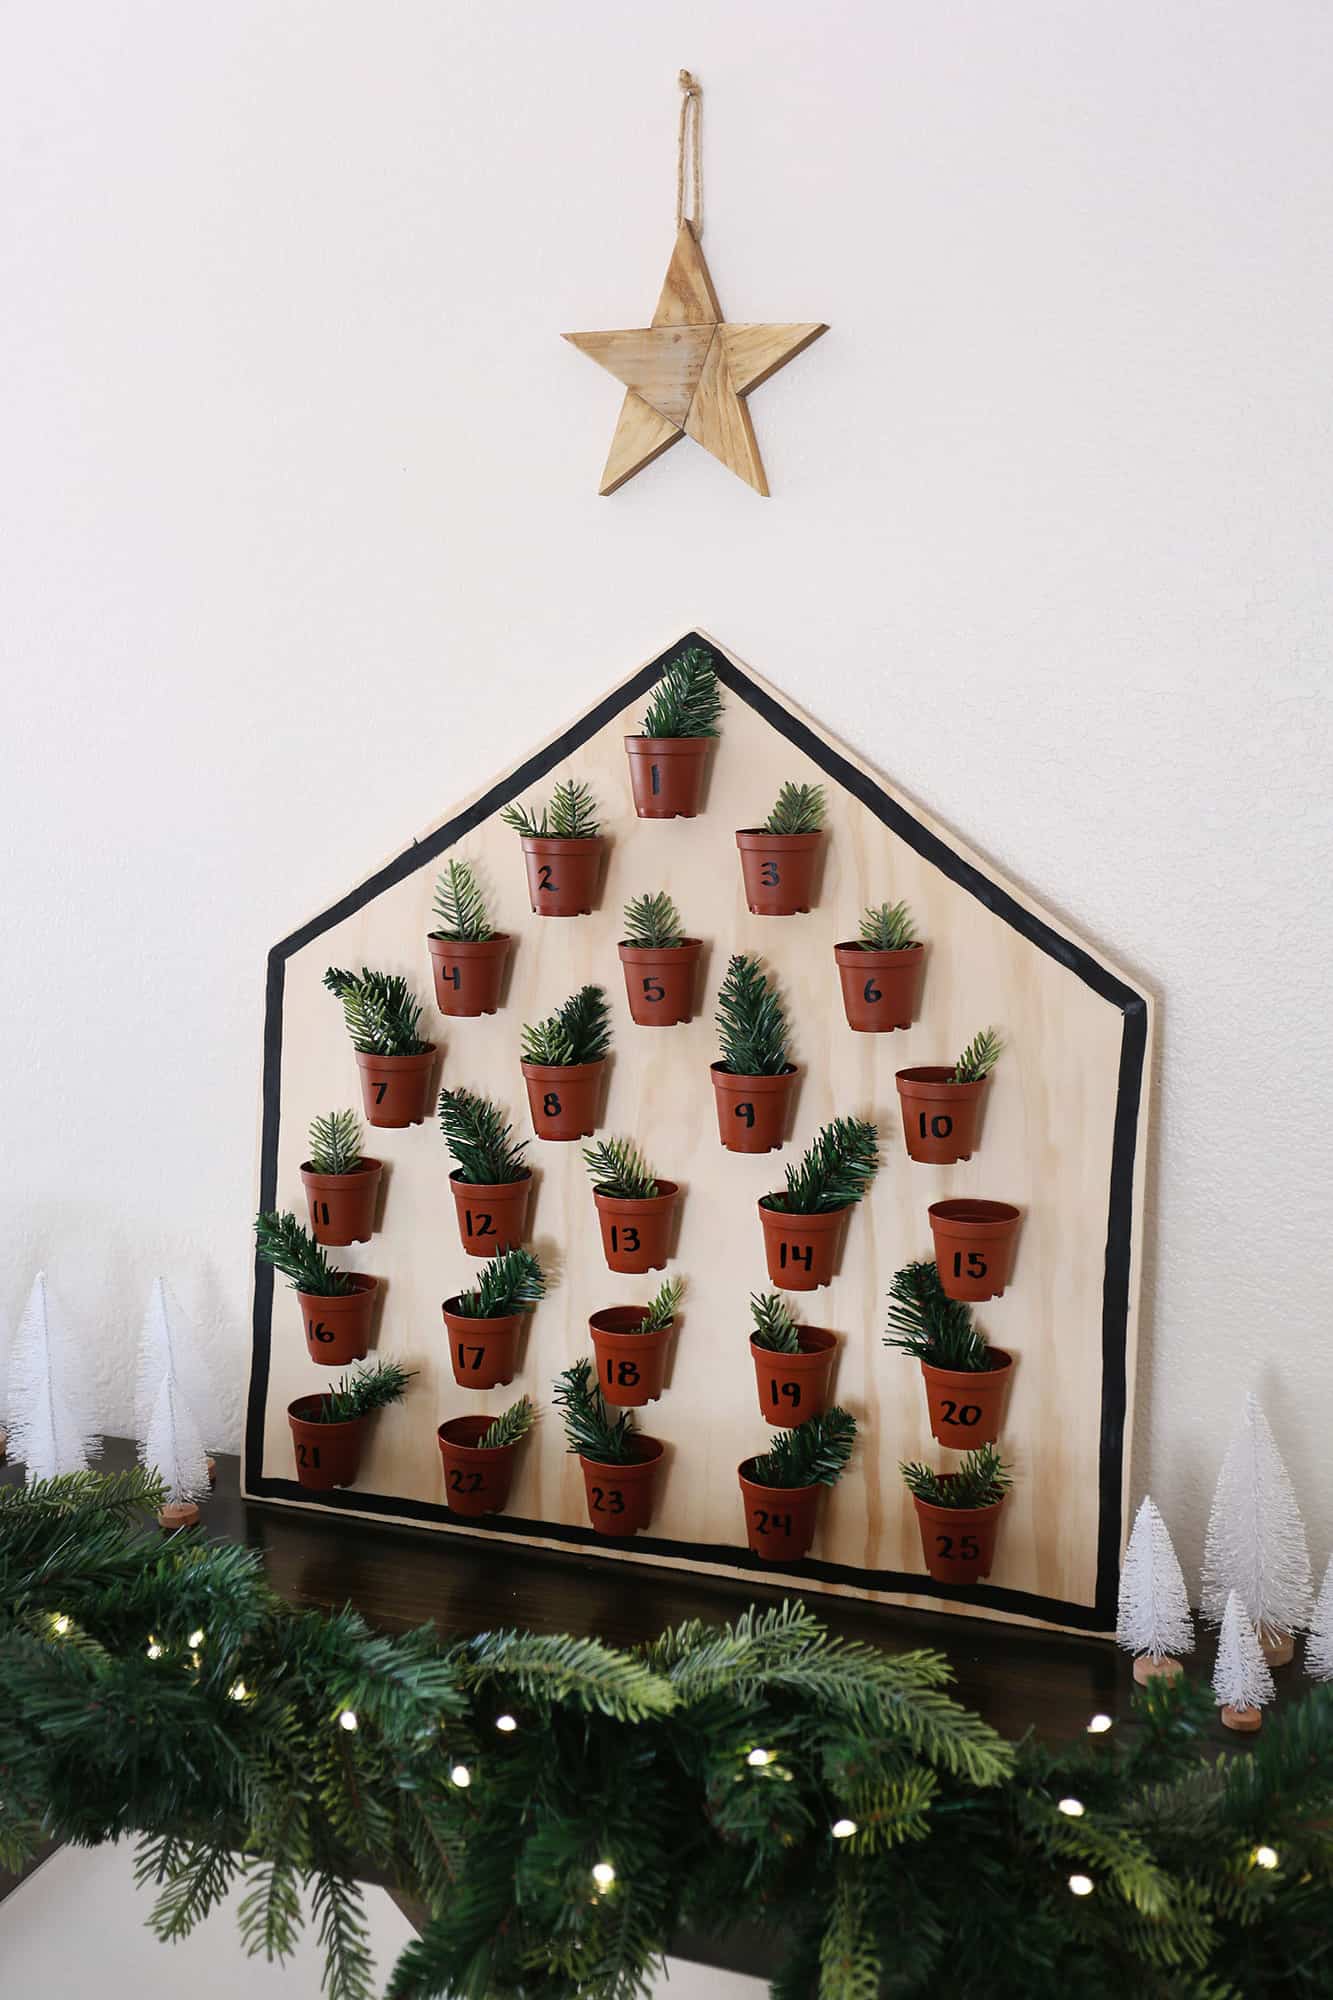
 I used a thin piece of plywood for my Advent calendar, so this project turned out pretty lightweight. If you want, you could add some picture hanger hardware to the back and hang it in your home, but I’ve decided to leave mine sitting on a side table along with the rest of the garland from the project. Cozy! Next time I might have to add this embroidered pillow!
 What does your Advent calendar look like??? Thanks for letting me share mine! xo. Emma
Credits // Author and Photography: Emma Chapman. Photos edited with A Color Story Desktop.


Wow, I love it! would always say ÿes” for greens (:
Where did you guys get that console table? I’ve been on the hunt for one like that.
Hi! It’s from Article 🙂
I love your calendar!
So adorable!!!
Love any way to bring more plants into the home! I traditionally do the Bonne Maman jam advent calendar. I love the striped pjs…. would love to know where to find those!
Thanks! And I don’t remember on the PJs to be honest, I’ve had them a while. I think I got them from boohoo or maybe F21.