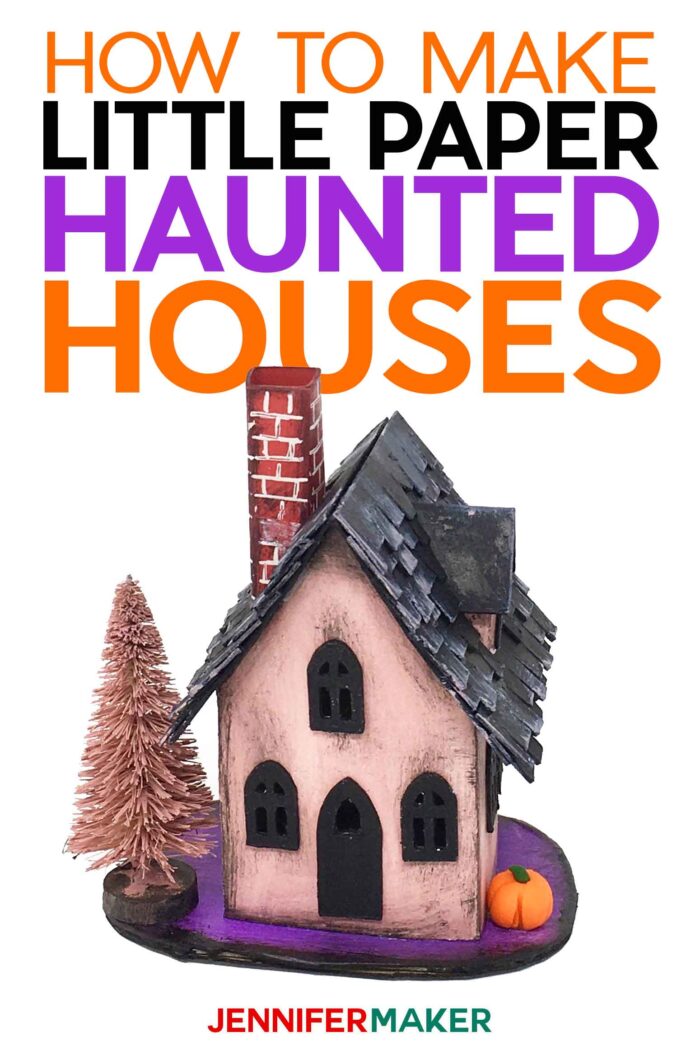
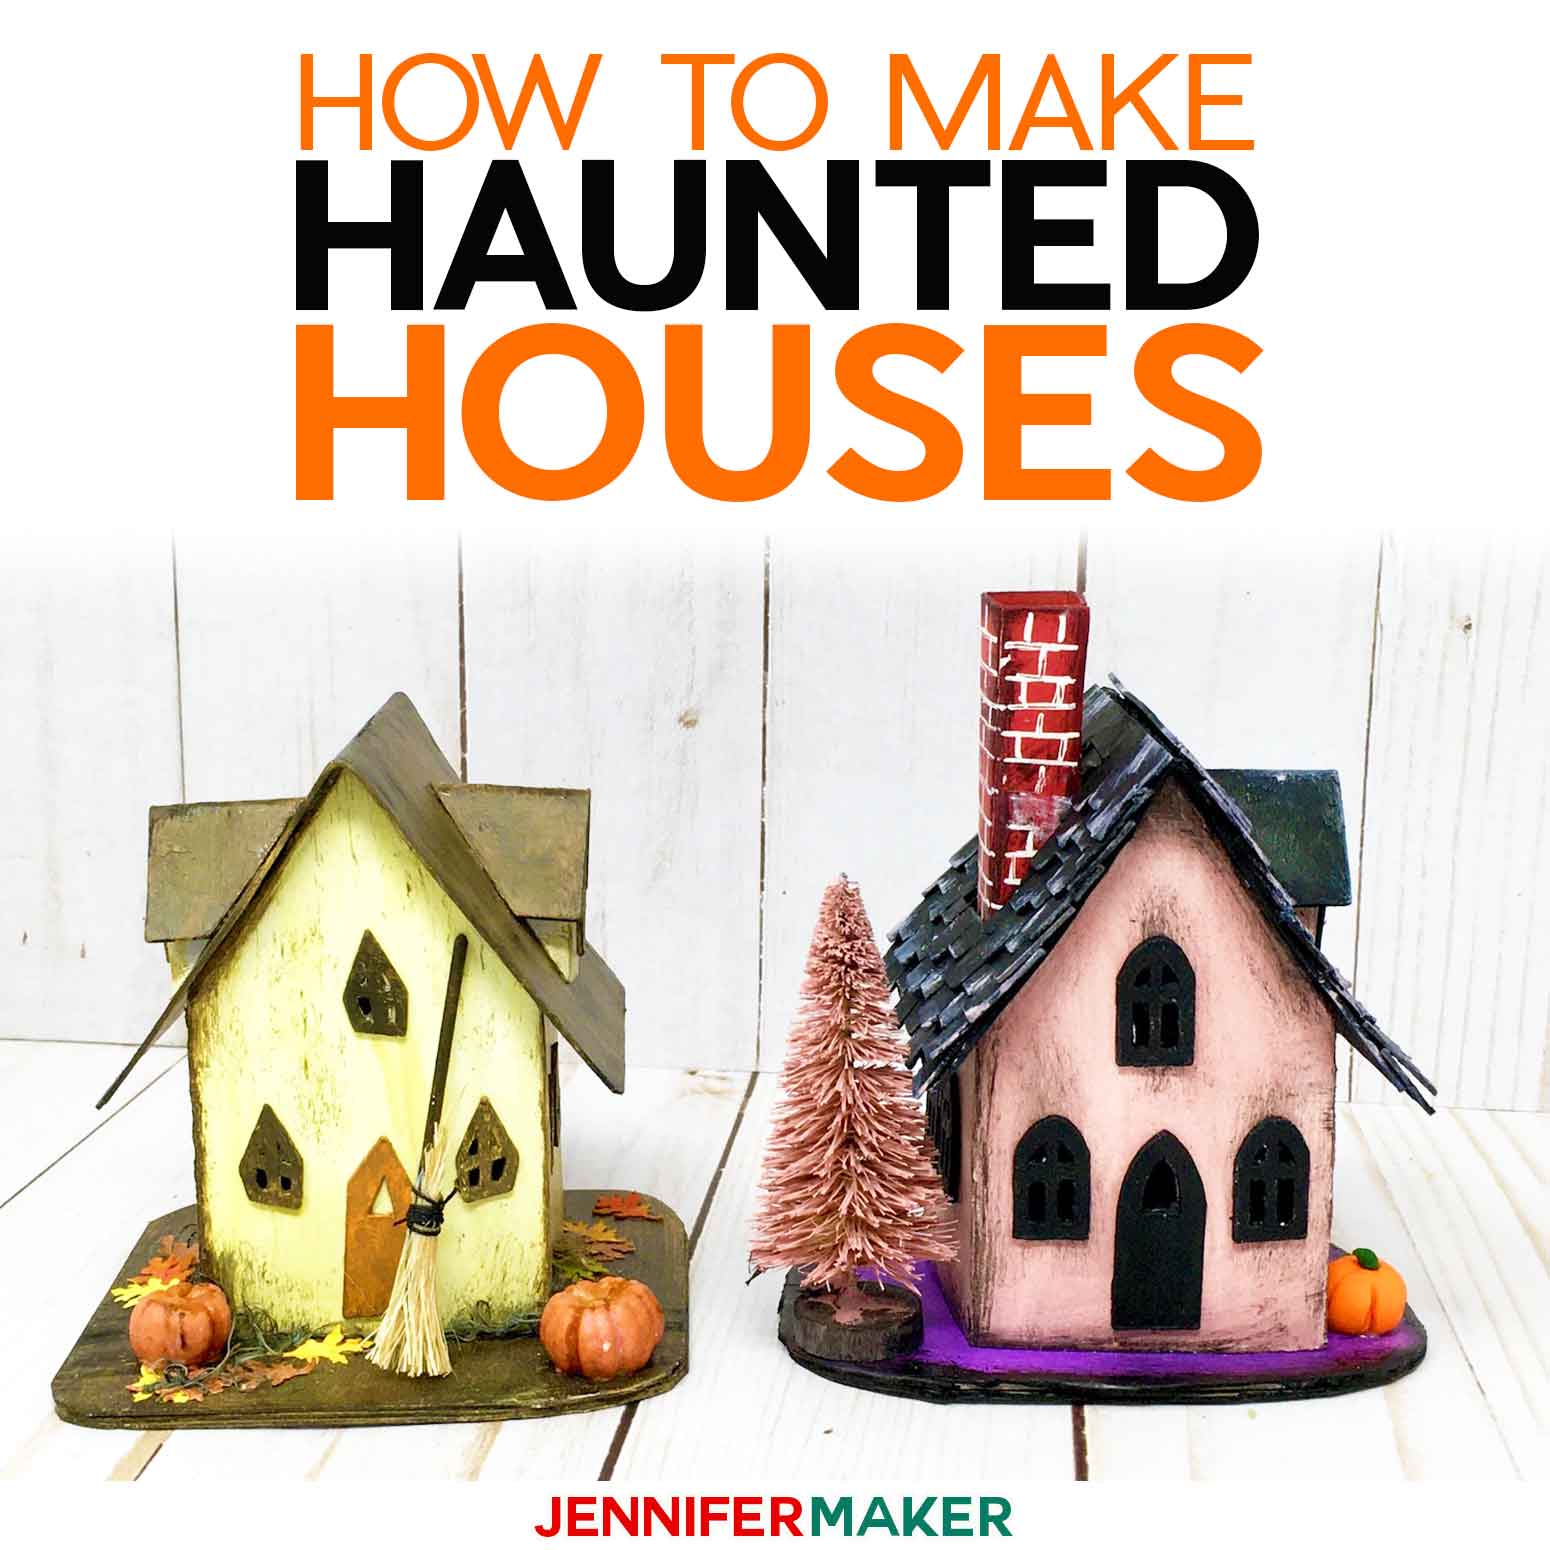
Decorate your home for Halloween with this fun and easy paper haunted house you can cut on a Cricut!
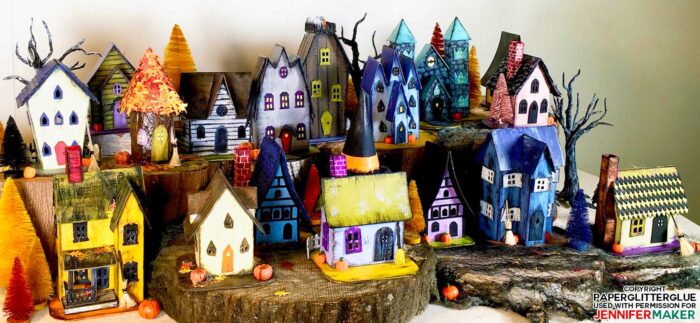
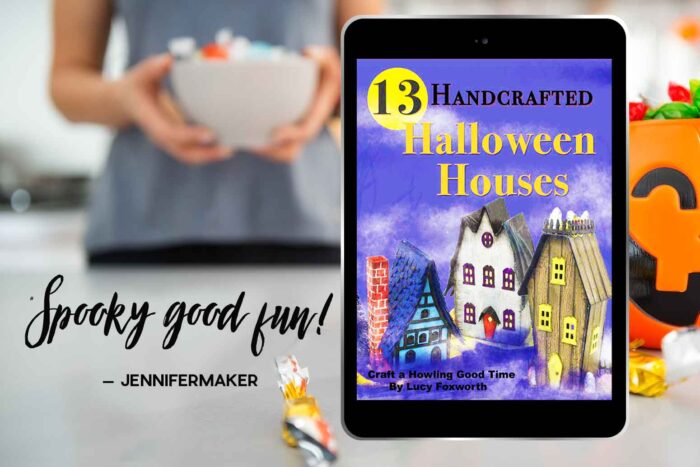
Halloween is coming and my crafty friend Lucy Foxworth is back to show us how to make Halloween Paper Haunted Houses! This is a fun Halloween decor craft you can make with your cutting machine. Imagine an entire Halloween village on your mantle or table, and all handmade by you! This house is the first of 13 houses you can make for a whole spooky house town. You can learn how to make the other houses in Lucy’s “13 Handcrafted Halloween Houses: Craft a Howling Good Time” guide, and this first house pattern and tutorial she’s offering free to us on my blog! So I’m going to turn the page over to Lucy who will show us how to make this fun paper haunted house.
Hello, I’m Lucy and I love to make little houses. Halloween houses in particular. I started a craft blog several years ago, but I didn’t know how to make patterns or how to share patterns with my readers until Jennifer taught me in her CUT ABOVE SVG Design Course. Since then, I’ve made many patterns and designs that I can share on my blog which is also one of my favorite things.
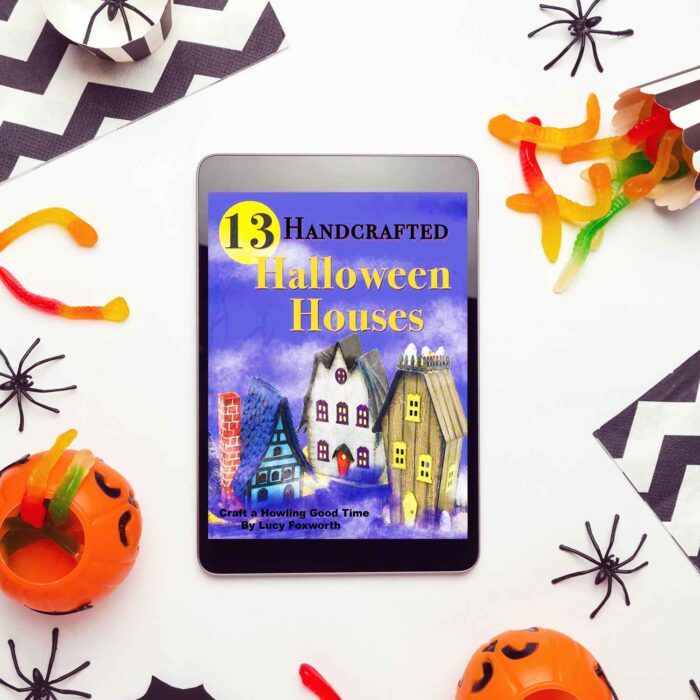
Today I have a free pattern I’d like share with you! This is Esmeralda’s Quaint Cottage from my new Halloween Houses book, “13 Handcrafted Halloween Houses.” Even though Esmeralda’s Quaint Cottage is a simple house to make, it still has spooky potential — perfect for the Halloween season.
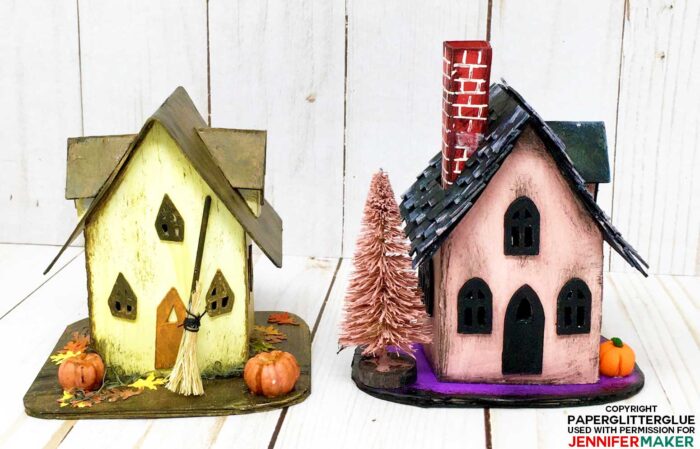
It makes the perfect cottage on the edge of my Halloween Town!
Learn how to make all 13 of these spooky little Halloween Houses in my e-book with patterns and detailed tutorials:
Ready to make your own adorable Halloween paper haunted house? This step-by-step tutorial shows you exactly how to do it. This post contains some affiliate links for your convenience (which means if you make a purchase after clicking a link I will earn a small commission but it won’t cost you a penny more)! Read my full disclosure policy.
Materials to Make a Halloween Paper House (Esmeralda’s Quaint Cottage)
See my Amazon shopping list for this project here!
- Cardboard – 30 pt cardboard is what I use, but you can make this house out of cardstock as well
- Glue – Aleene’s Fast Grab Tacky Glue is my favorite for construction of the house
- Gesso primer
- Acrylic paint – Tim Holtz Victorian Velvet and Black Soot Distress Paints
- Embellishments
- A way to cut your house pattern (I used the amazing Cricut, but you can use another cutting machine or even scissors)
- Cricut Fine-Point Blade
- Cricut Scoring Stylus (Explore) or Scoring Wheel (Maker)
- Green Cricut StandardGrip mat (for cutting cardstock)
- Purple Cricut StrongGrip mat (for cutting cardboard)
- Design #244 – The free haunted house templates (available in our free resource library— get the password toward the bottom of this post)
Halloween Paper Haunted House
Materials
Tools
Instructions
Step 1: Get the Pattern for the Halloween Paper Haunted House
First, this pattern, Esmeralda’s Quaint Cottage with Gothic Windows, is available in three formats - SVG cut file, printable PDF file, and DXF cut file. Download them free from JenniferMaker’s resource library (they are design #244).
Here's what the SVG file looks like when uploaded to Cricut Design Space. The score lines should already be set for you and pre-attached to their base layers:
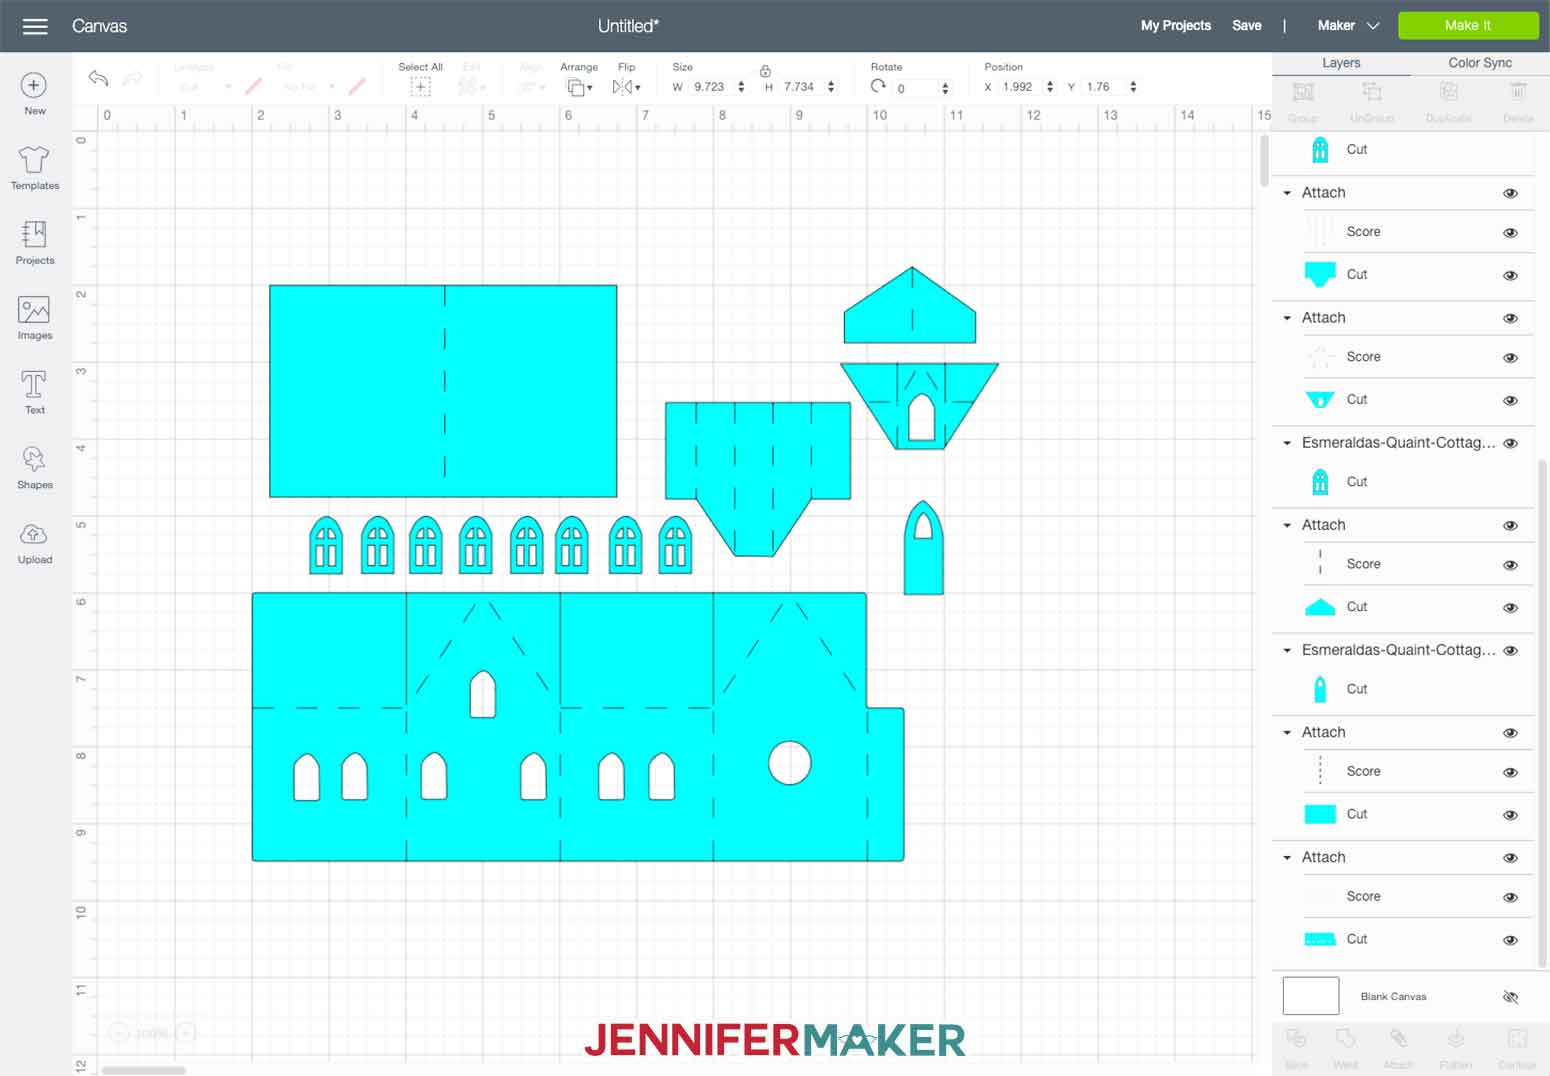
Step 2: Cut out Esmeralda’s House pattern
For this step, I use my Cricut cuting machine to cut out the pattern from cardboard. It is so much easier than doing it with scissors. And you can cut out the cutest little windows which is challenging by hand (not impossible, but challenging).
The PDF file is the easiest place to see the score lines:
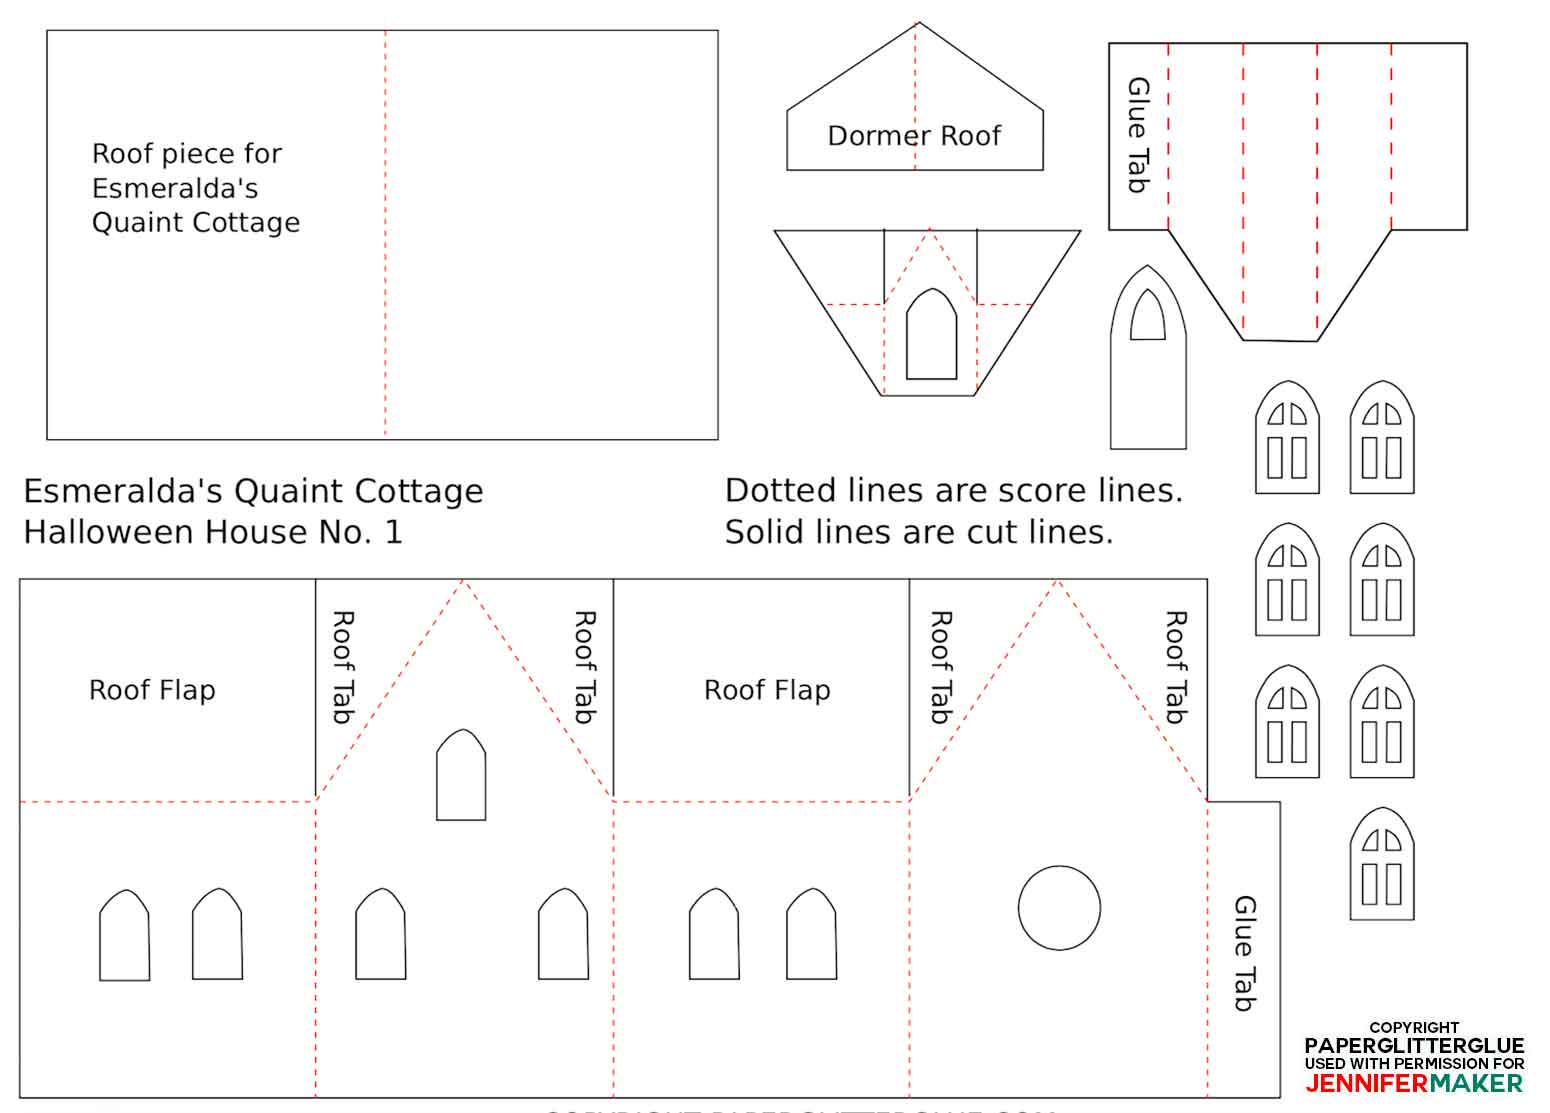
I cut my pieces out of cardboard and used the scoring wheel on my Maker to score them. But you can also cut them from cardstock and use the scoring stylus on an Explore or Maker to score them.
Step 3: Prime the cardboard house pieces
Next, prime the cardboard house pieces. I find it easier to prime and paint the cardboard house before assembly. The main disadvantage is that you will need to touch up some areas after you glue the house together.
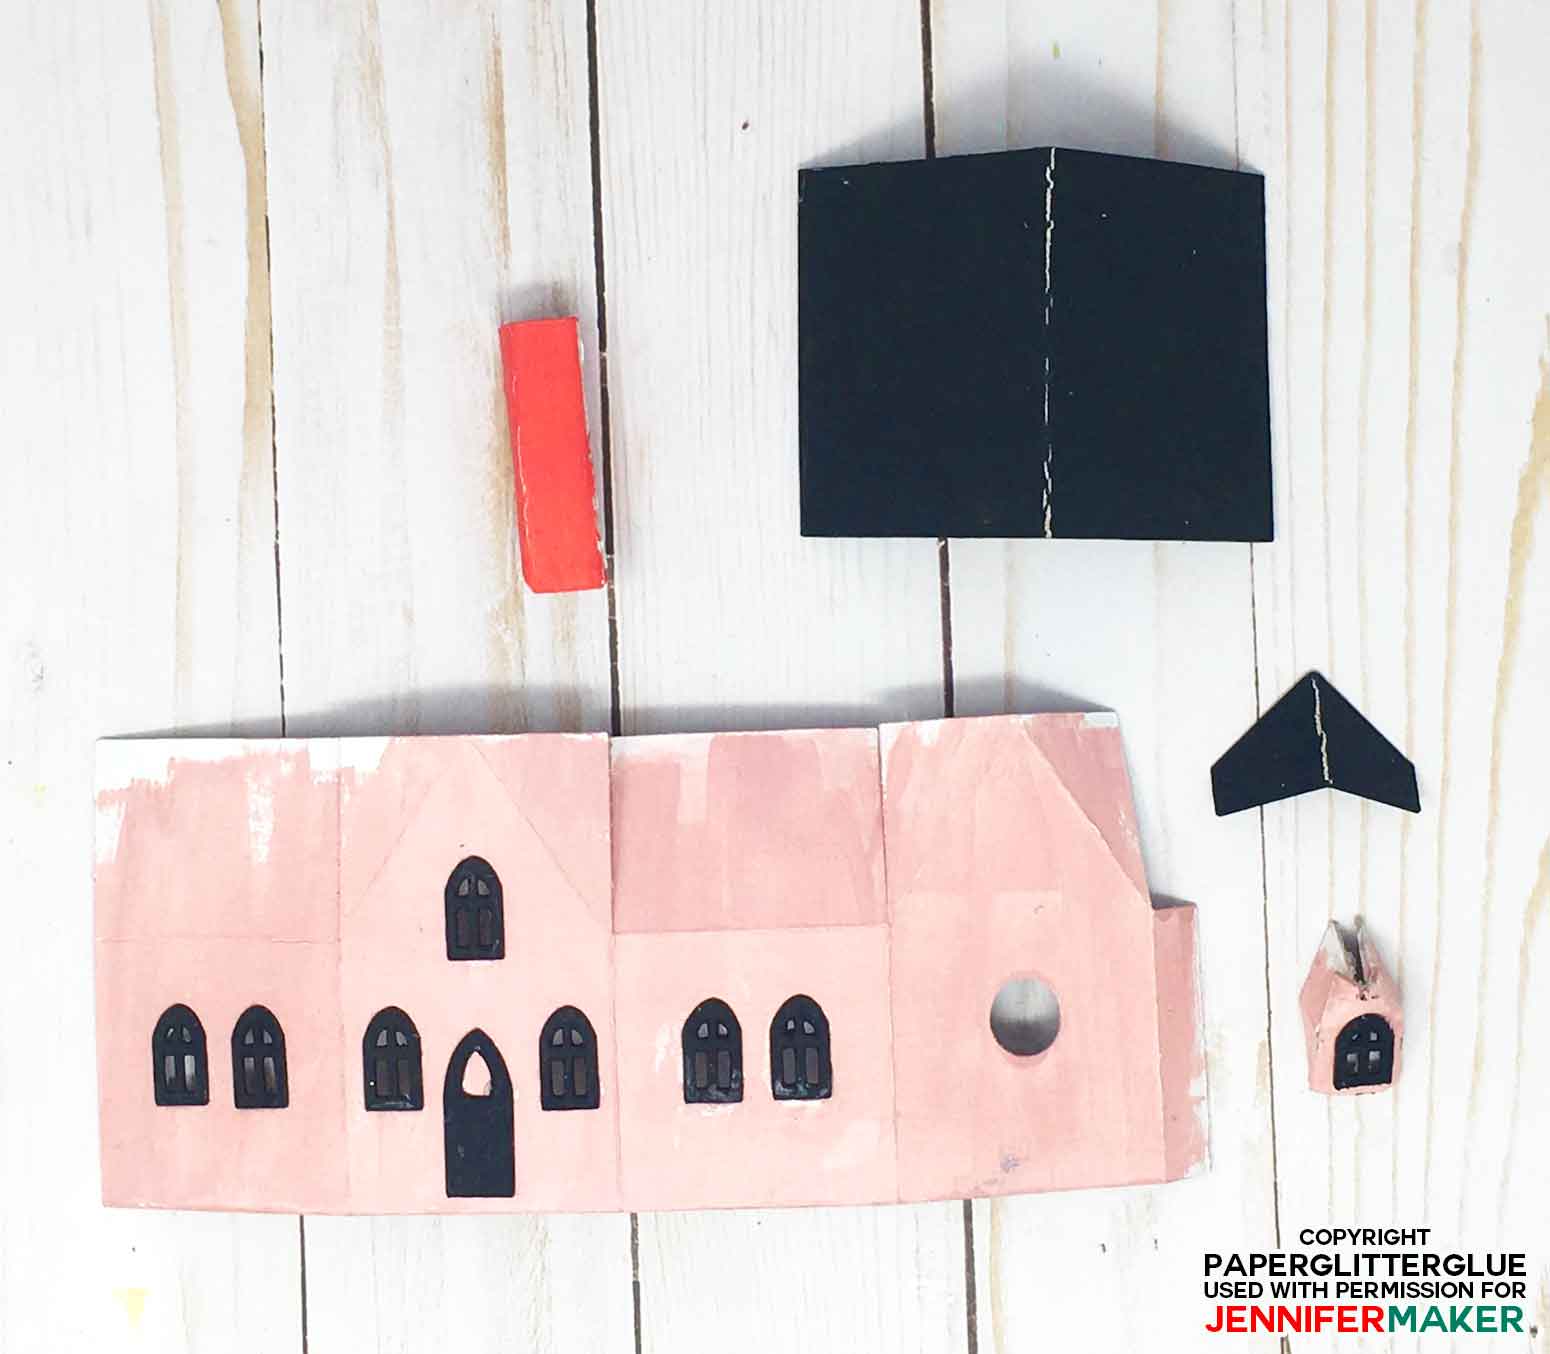
Step 4: Paint your miniature Halloween House
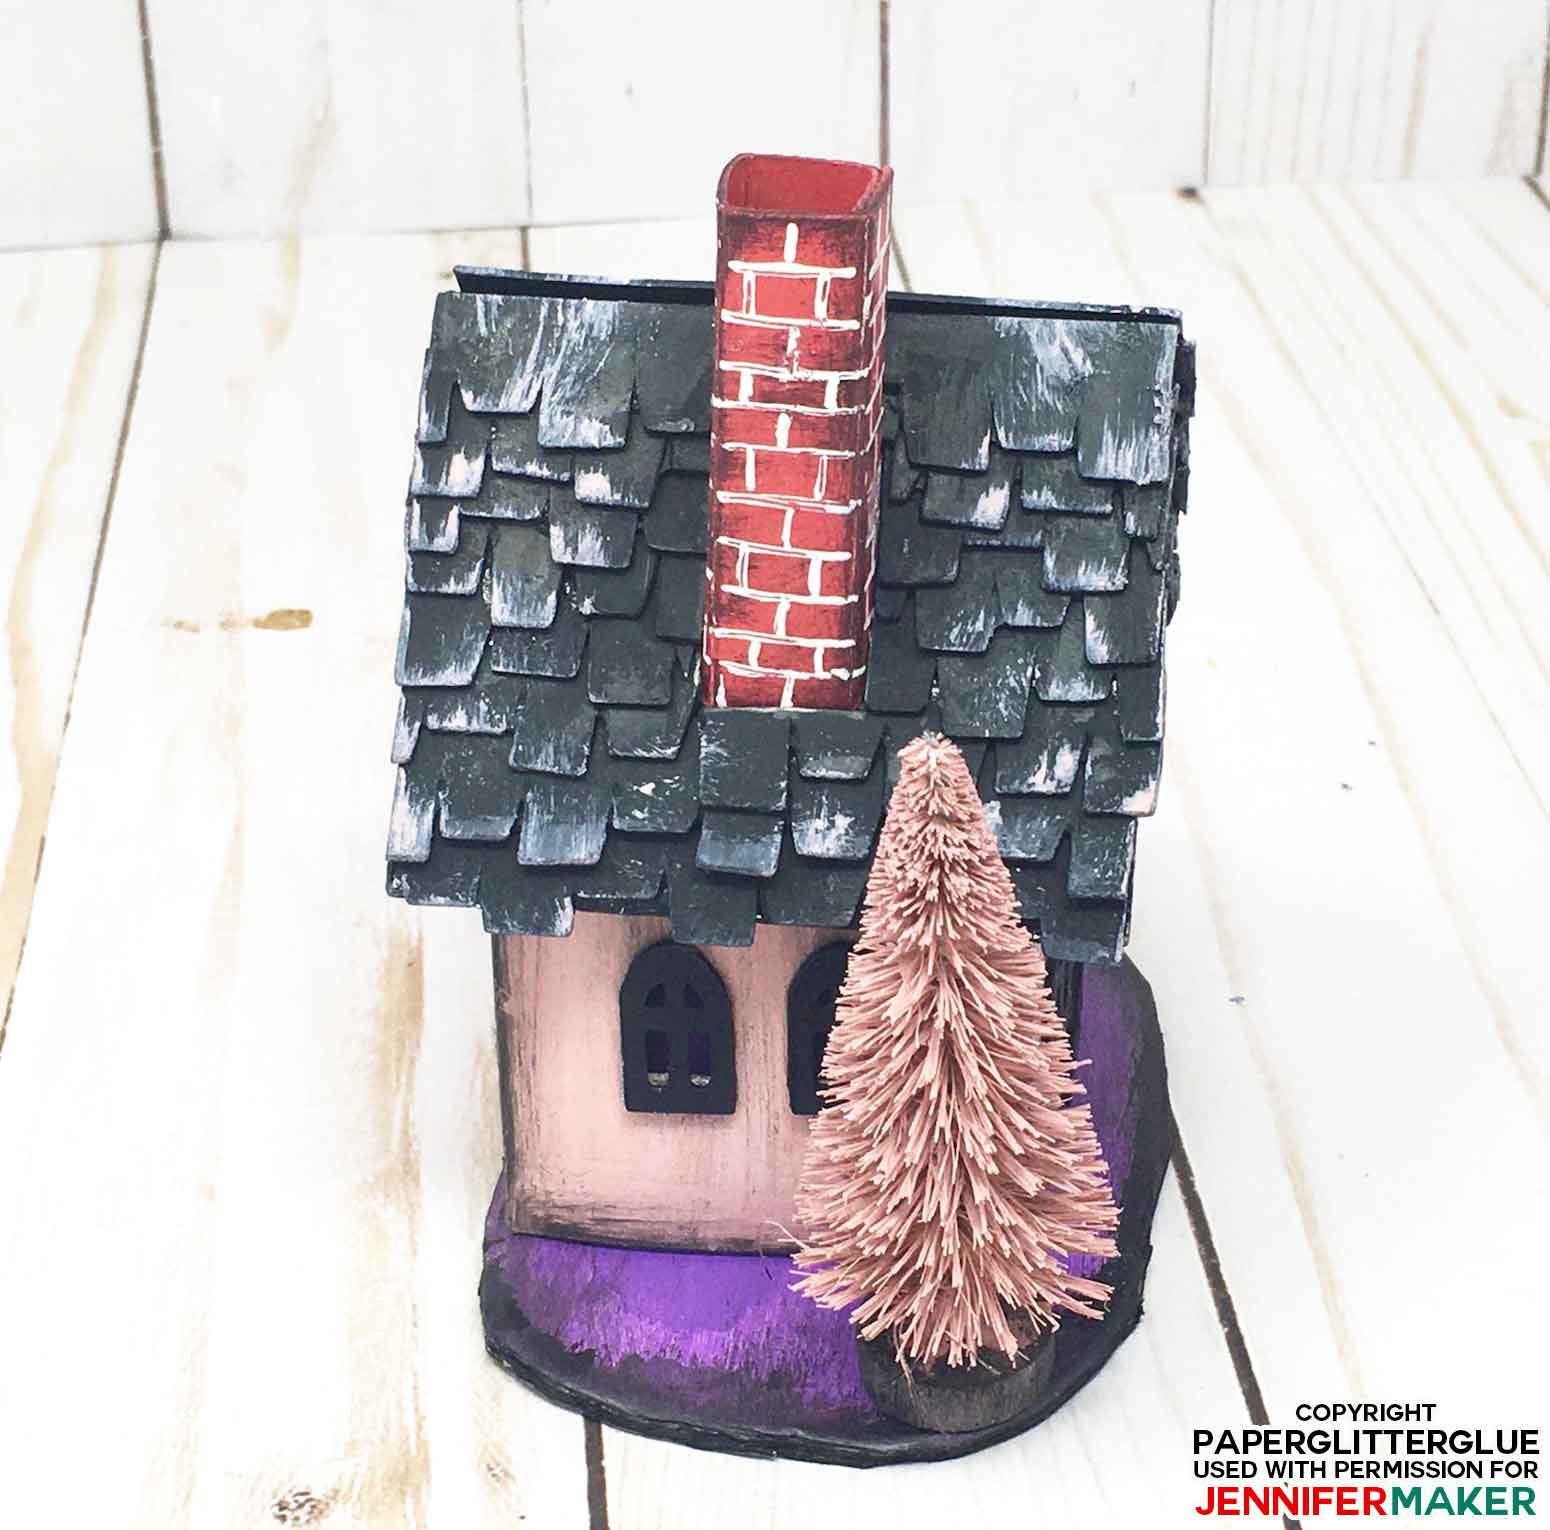
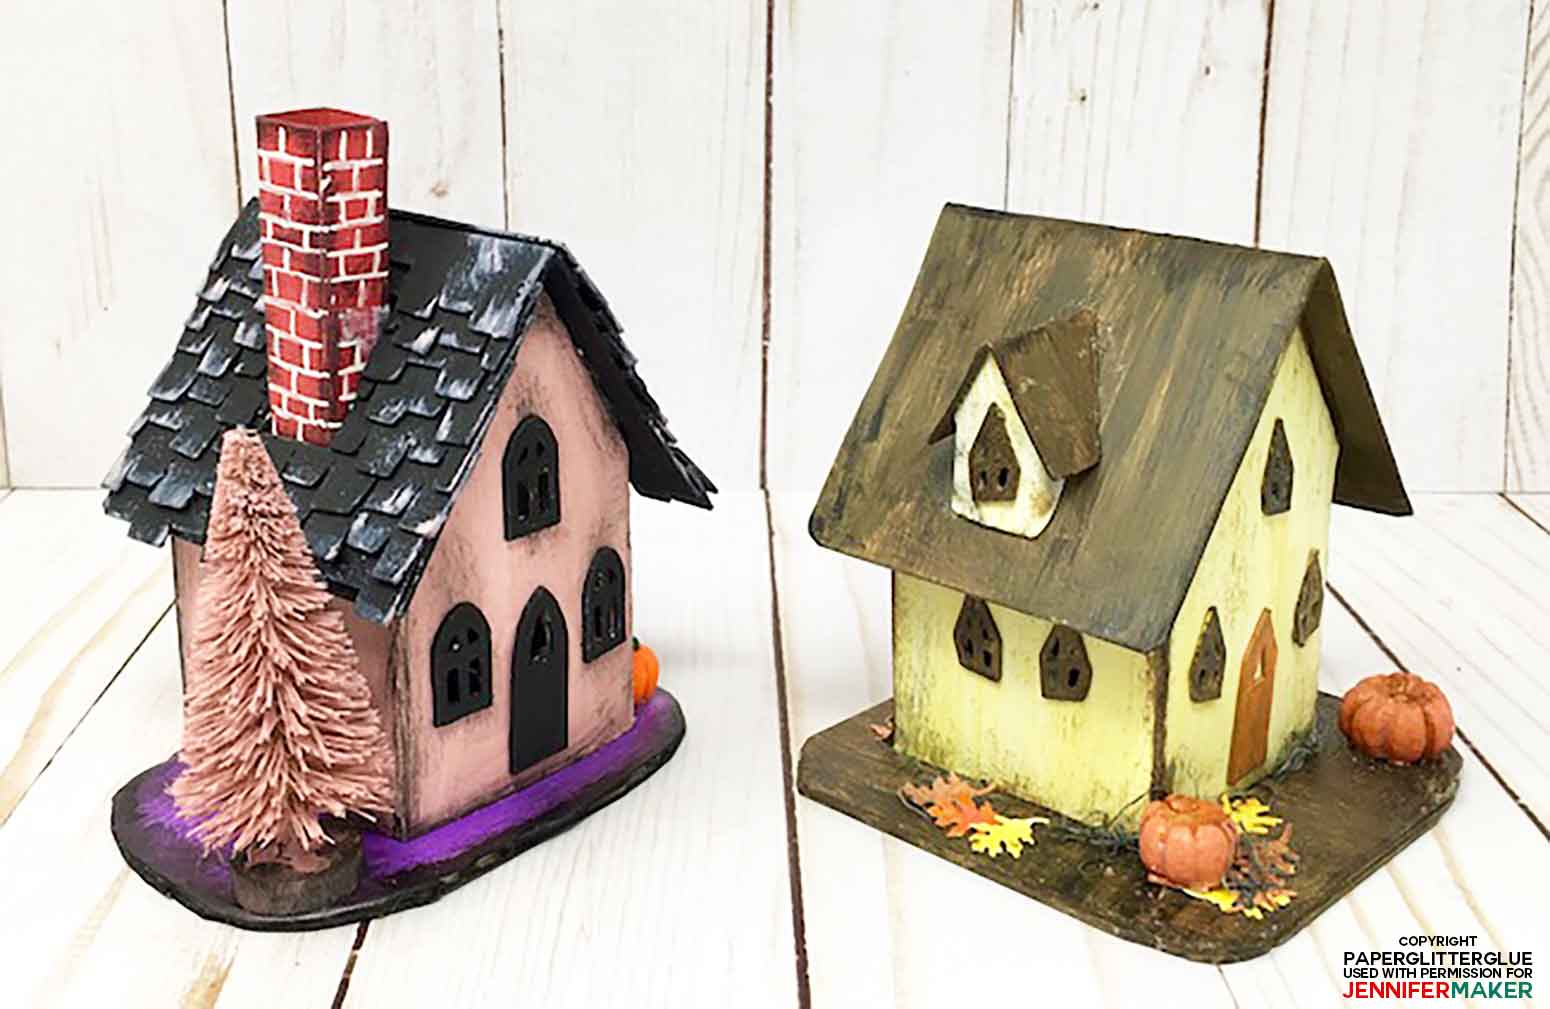
I chose at dusty rose color with black windows for this particular Halloween house. For this version, I added a chimney and a dormer. For one of version of this house, I put a dormer on both sides of the roof and painted more fall colors.
When you paint before the gluing the house together, the cardboard corners open up a little and you have to touch them up.
Step 5: Glue Your Haunted House Together
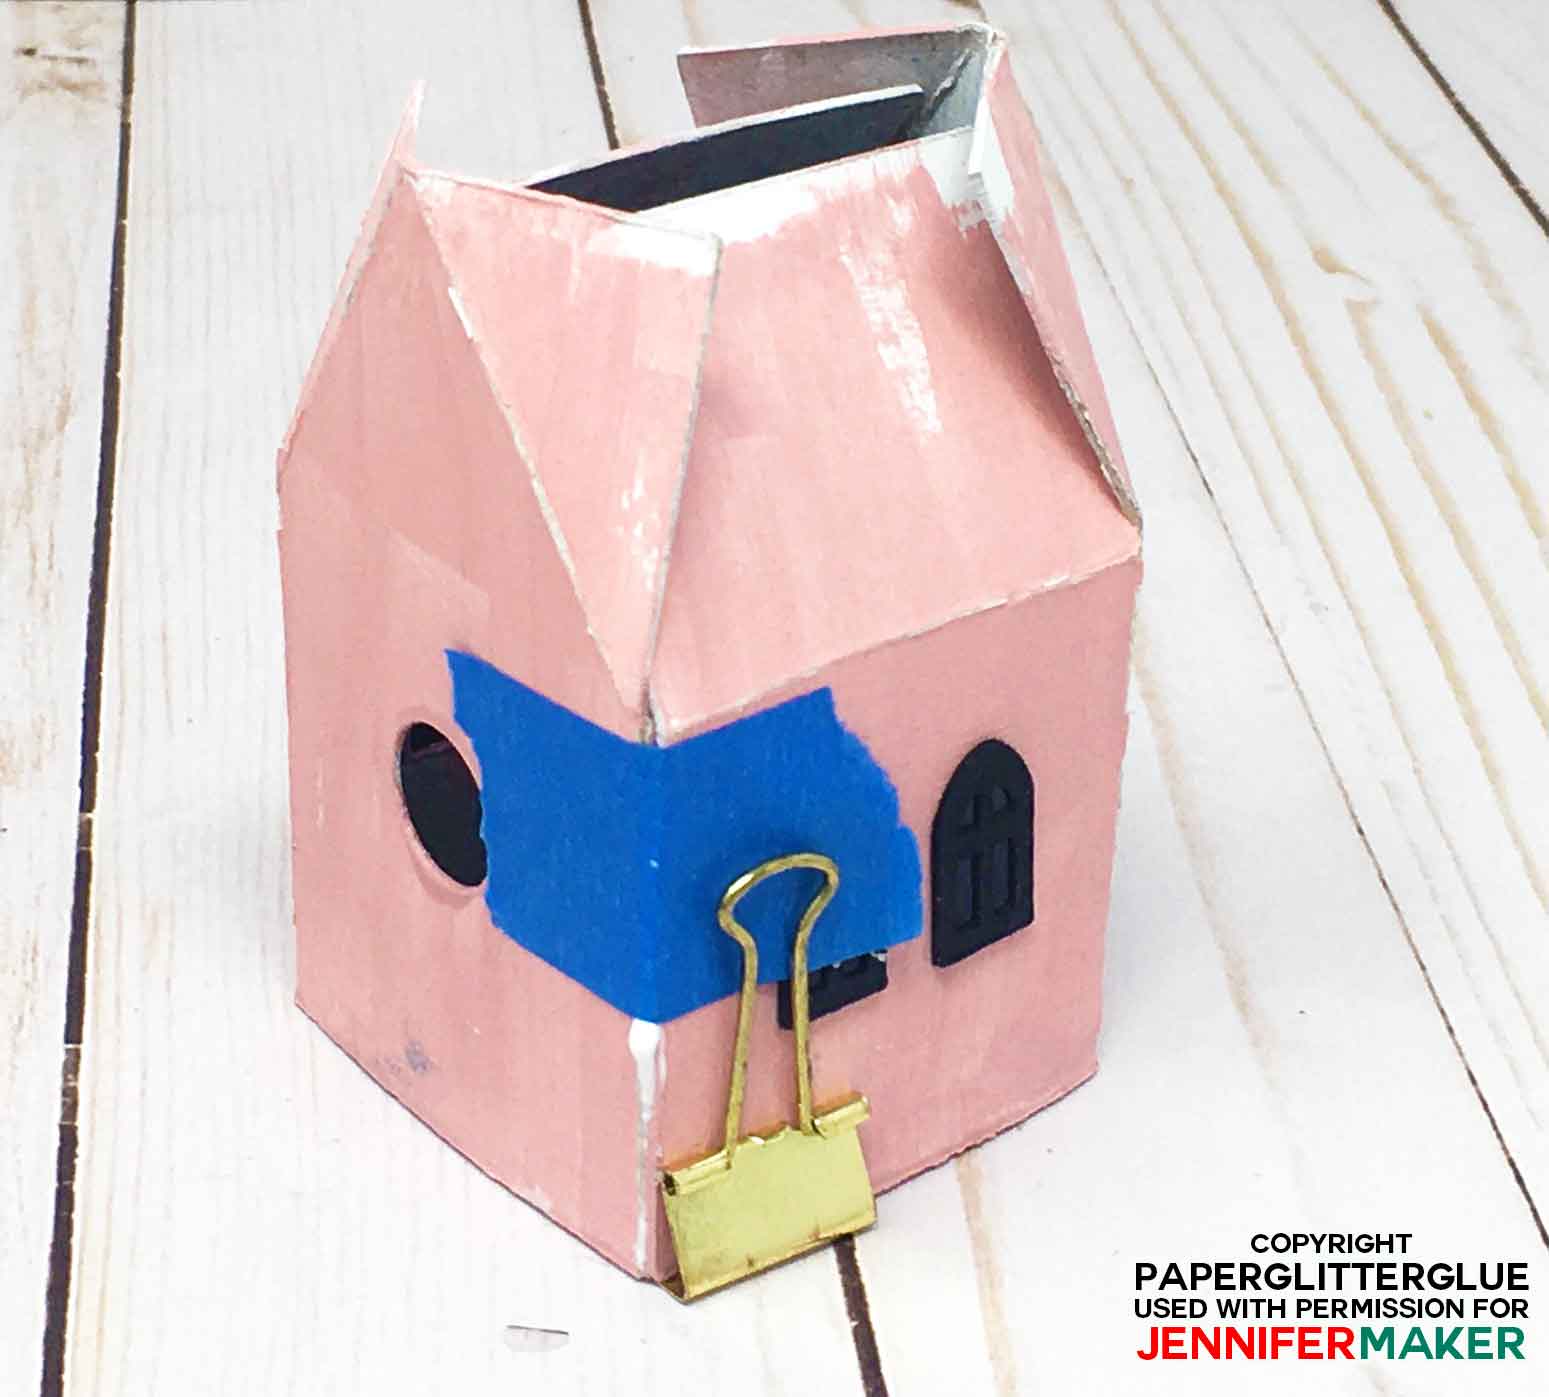
The actual house construction of this house is very easy. To assemble your little house, fold along all the score lines to make sure they fold the way you want them to. Make sure you bend them to at least 90 degrees. It is easiest to fold along the score line towards you first. Then, fold the way the house is going to be assembled.
Next, apply glue to the glue tab along the side. This is one place where I think the type of glue matters the most. Here I always use the Aleene’s Fast Grab tacky glue. It really does hold better and faster. Make sure the bottom edge of the glue tab and the house itself are lined up well.
Then, while the glue is drying, it helps to apply a binder clip to the bottom edge and a bit of painter’s tape to the top to hold it firmly as the glue dries. Again - check to make sure the bottom edges line up.
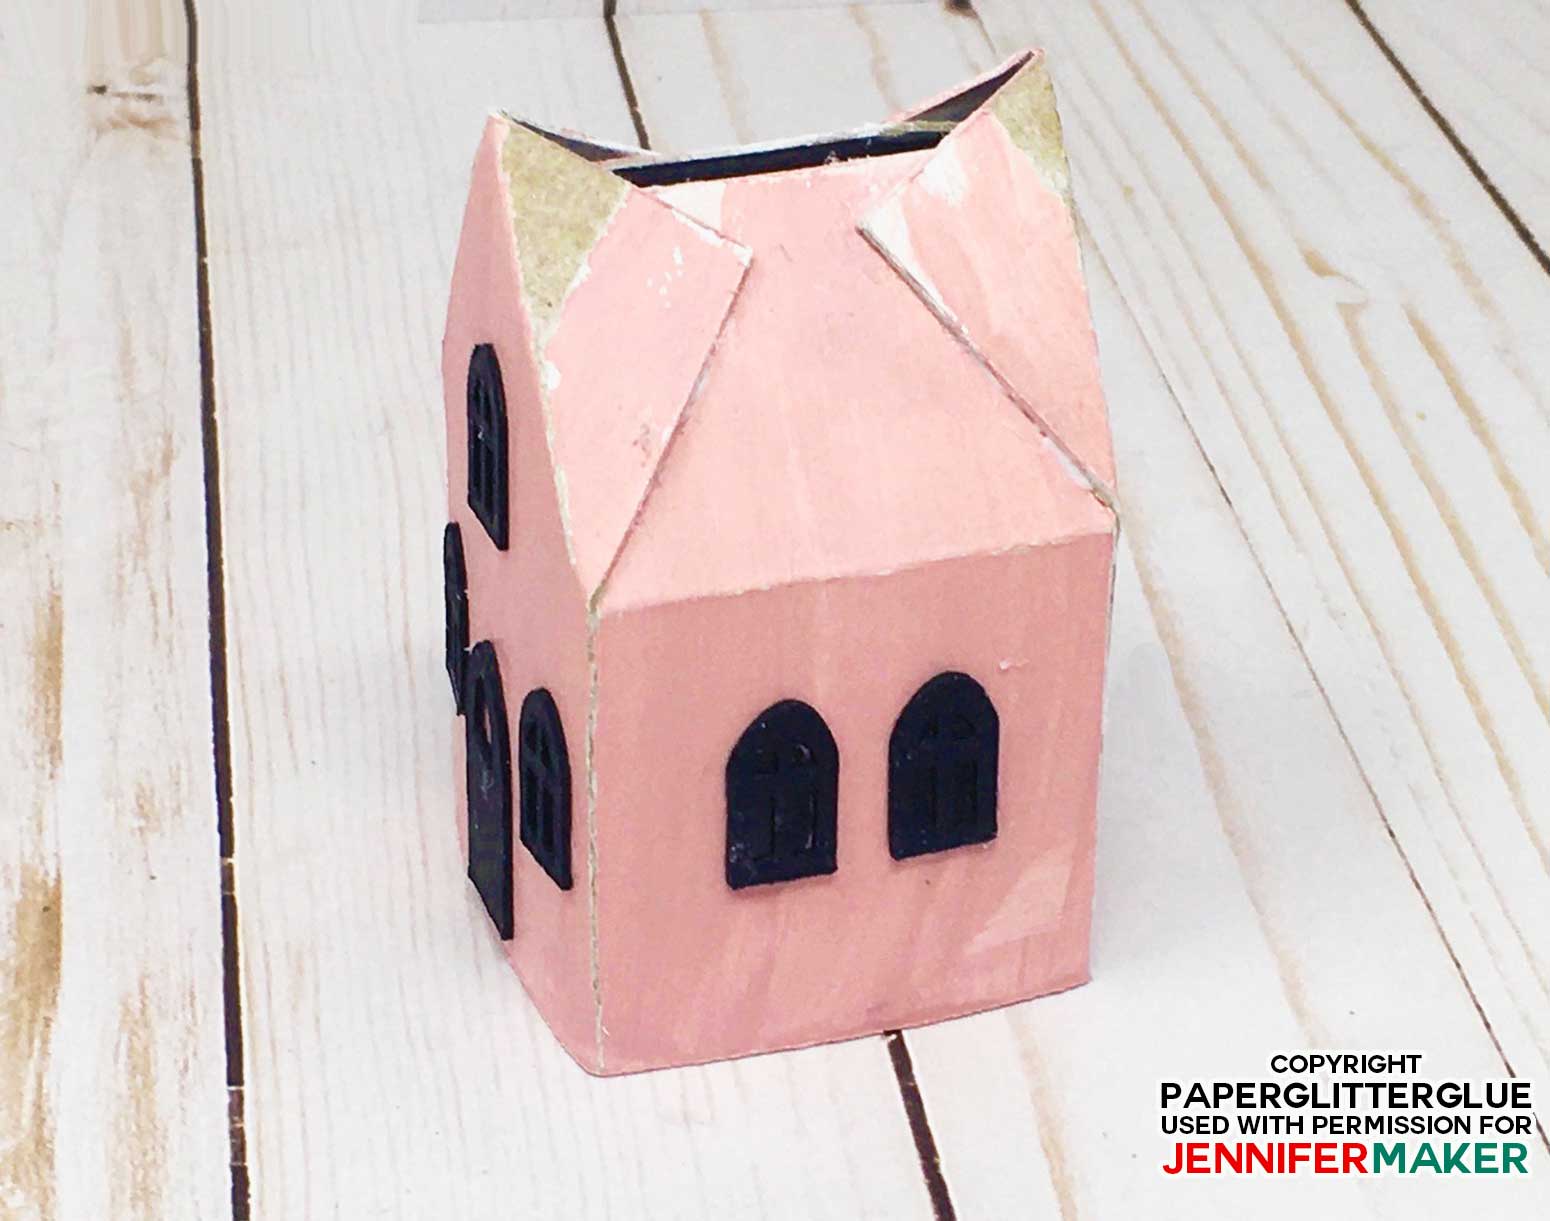
After gluing the side together, glue the roof tabs to the roof flaps.
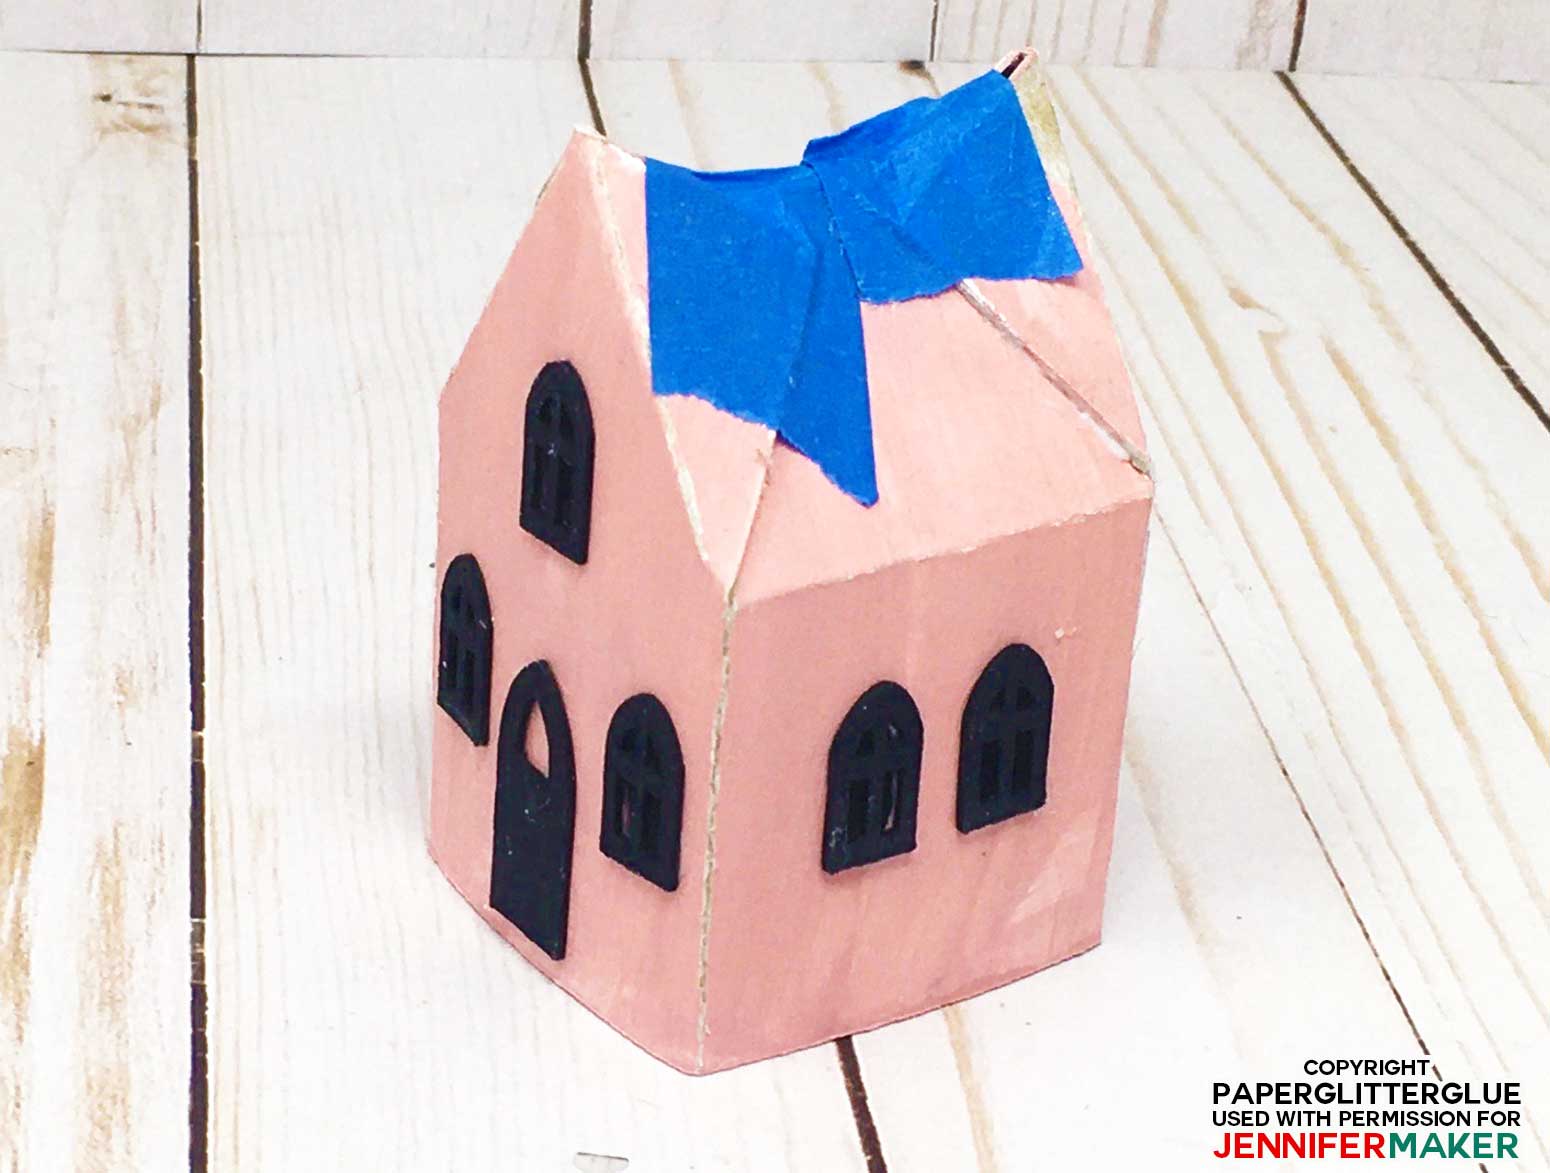
Here's how it looks when the tape is removed.
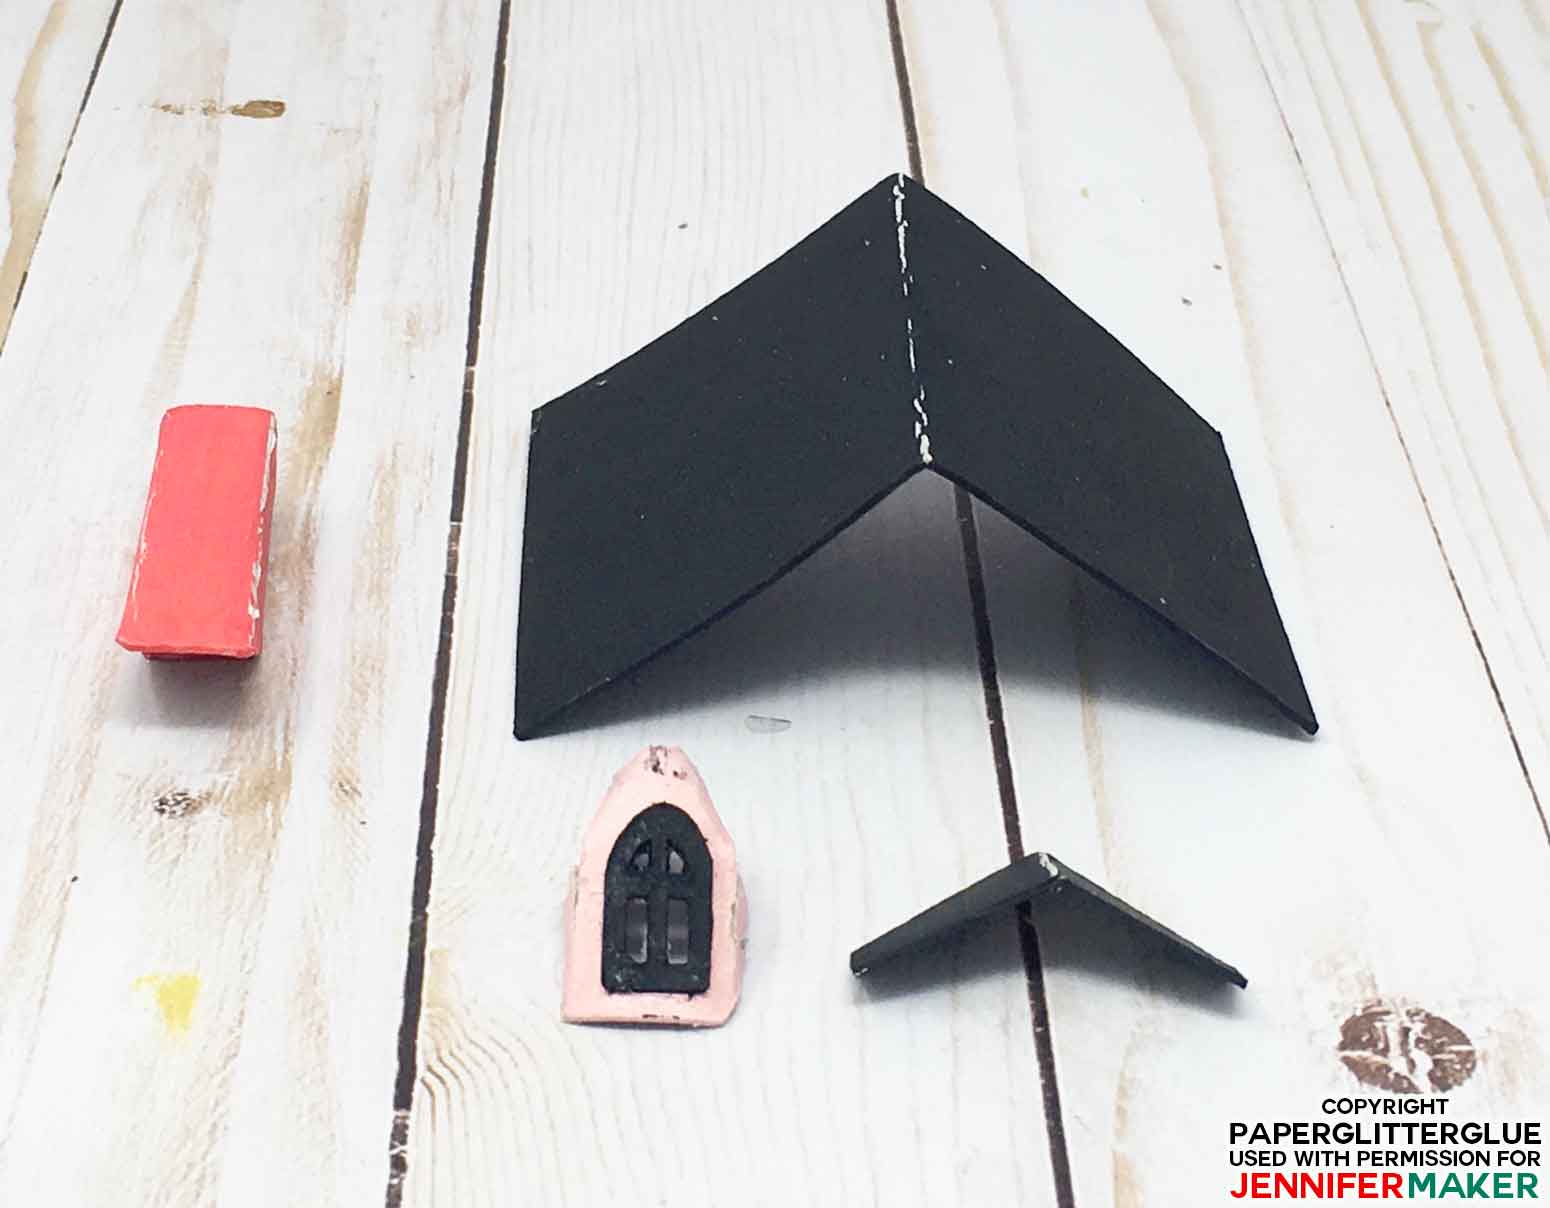
The dormer is constructed just the same way as the roof is constructed on the house. Glue the roof tabs to the triangular roof flaps.
To construct the chimney, just fold along the score lines and glue along the glue tab.
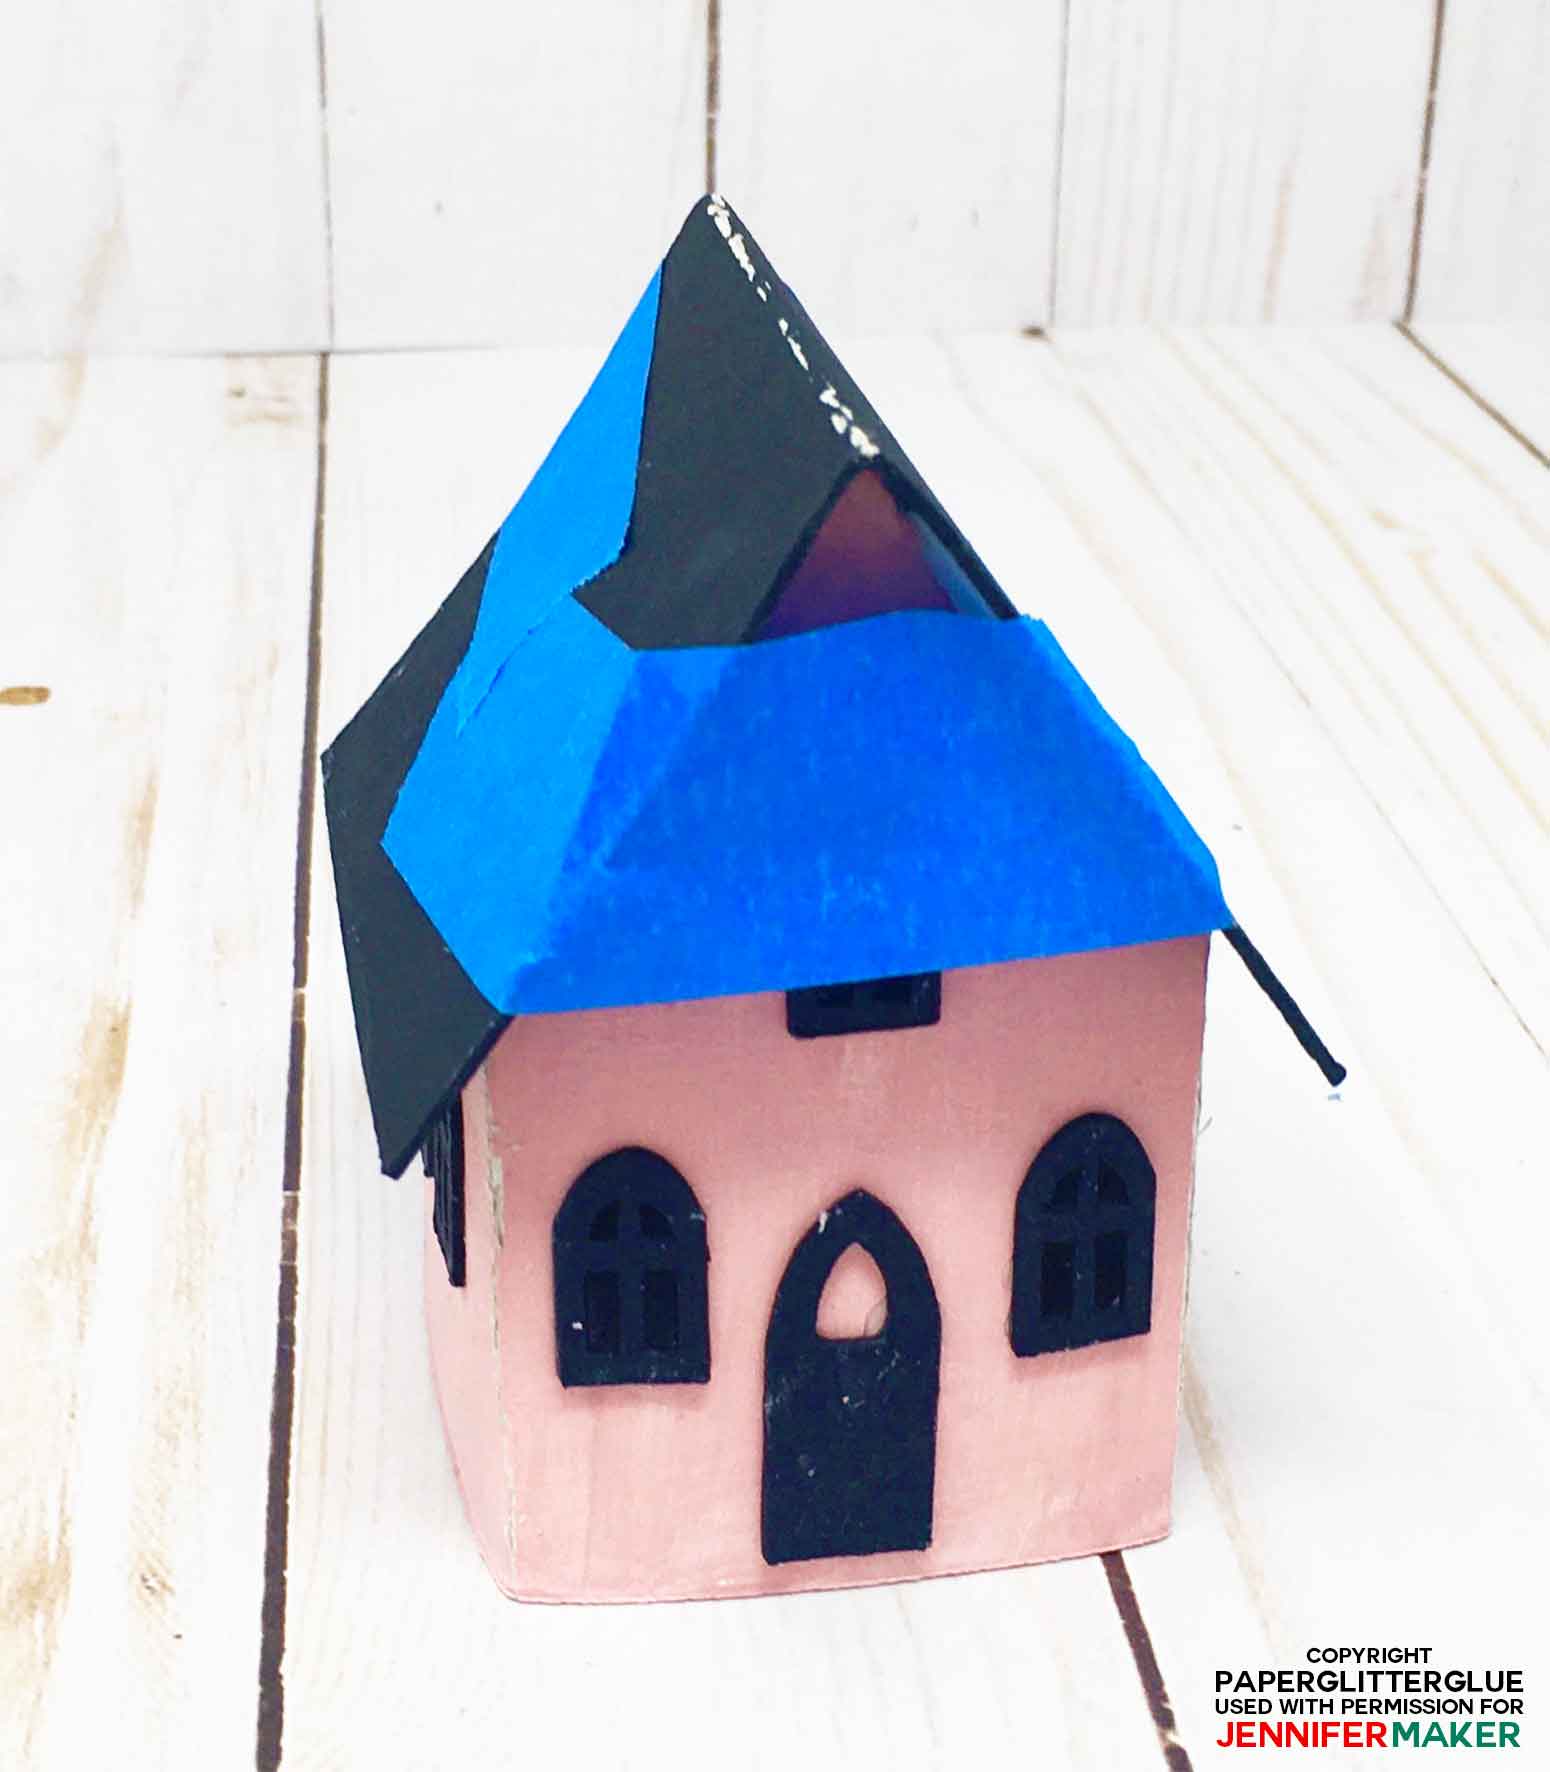
Step 6: Glue on the roof
Once the paper haunted house roof tabs are firmly glued down, glue on the roof.
Apply a thick bead of glue along the edge of the roof. Center the roof over the house so that the overhang is about 1/4 inch on the front and back of the house.
Use painter’s tape to hold the roof in place while the glue dries.
Step 7: Add the chimney and/or dormers
Apply a thick layer of glue to the base of the chimney or dormer and place on the roof. Hold in place until the glue sets. The angle of the roof makes it a little challenging to use painter’s tape. The little house below shows the chimney surrounded by shingles. There are five different shingle patterns in the 13 Handcrafted Halloween Houses book.
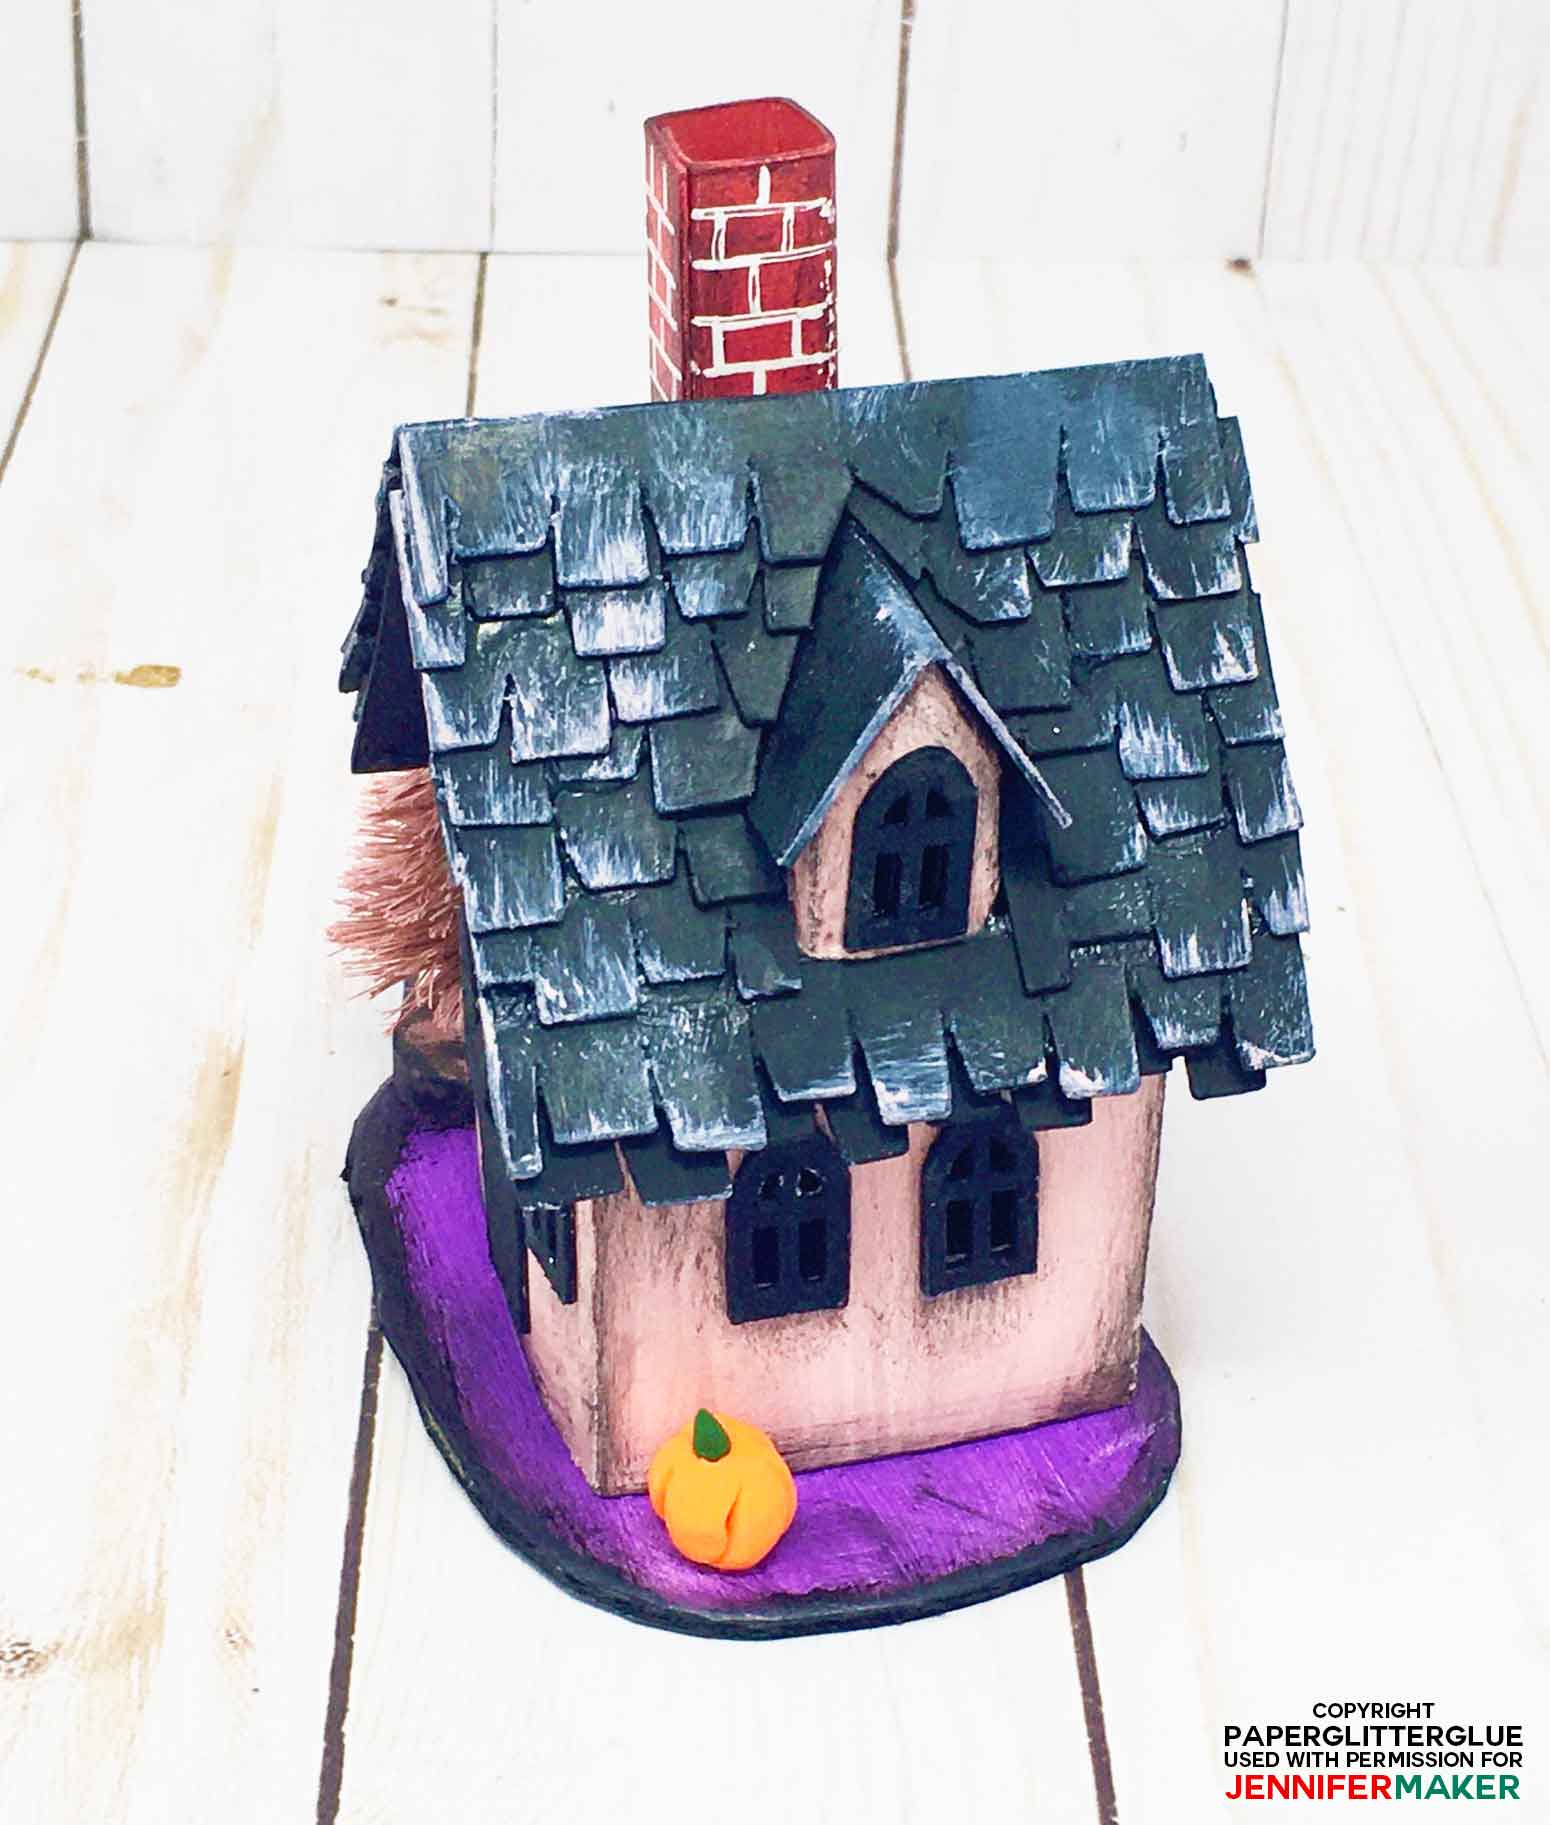
The other side of Esmeralda's cottage roof shows the placement of the dormer.
Step 8: Touch up paint and add distressing, if desired.
Now is a good time to apply any touch up paint if needed at the corners. You can see on some of the photos above that the crease on the roof needs to be touched up. I like to add distressing - streaky, contrasting paint on the edges that makes it look kind of spooky. You can read more about distressing techniques on Halloween houses on my Paper Glitter Glue blog.
Step 9: Make a cardboard base
Since the house is small, it’s easy to make a base. Just cut 2-3 layers of cardboard about 3 inches square. Glue them together. Round the corners if you like - that's what I generally do. You can make the base bigger if you want to add more landscape details. I simply added some miniature pumpkins and a bottlebrush tree to this particular house.
Step 10: Decorate Your Little Halloween House
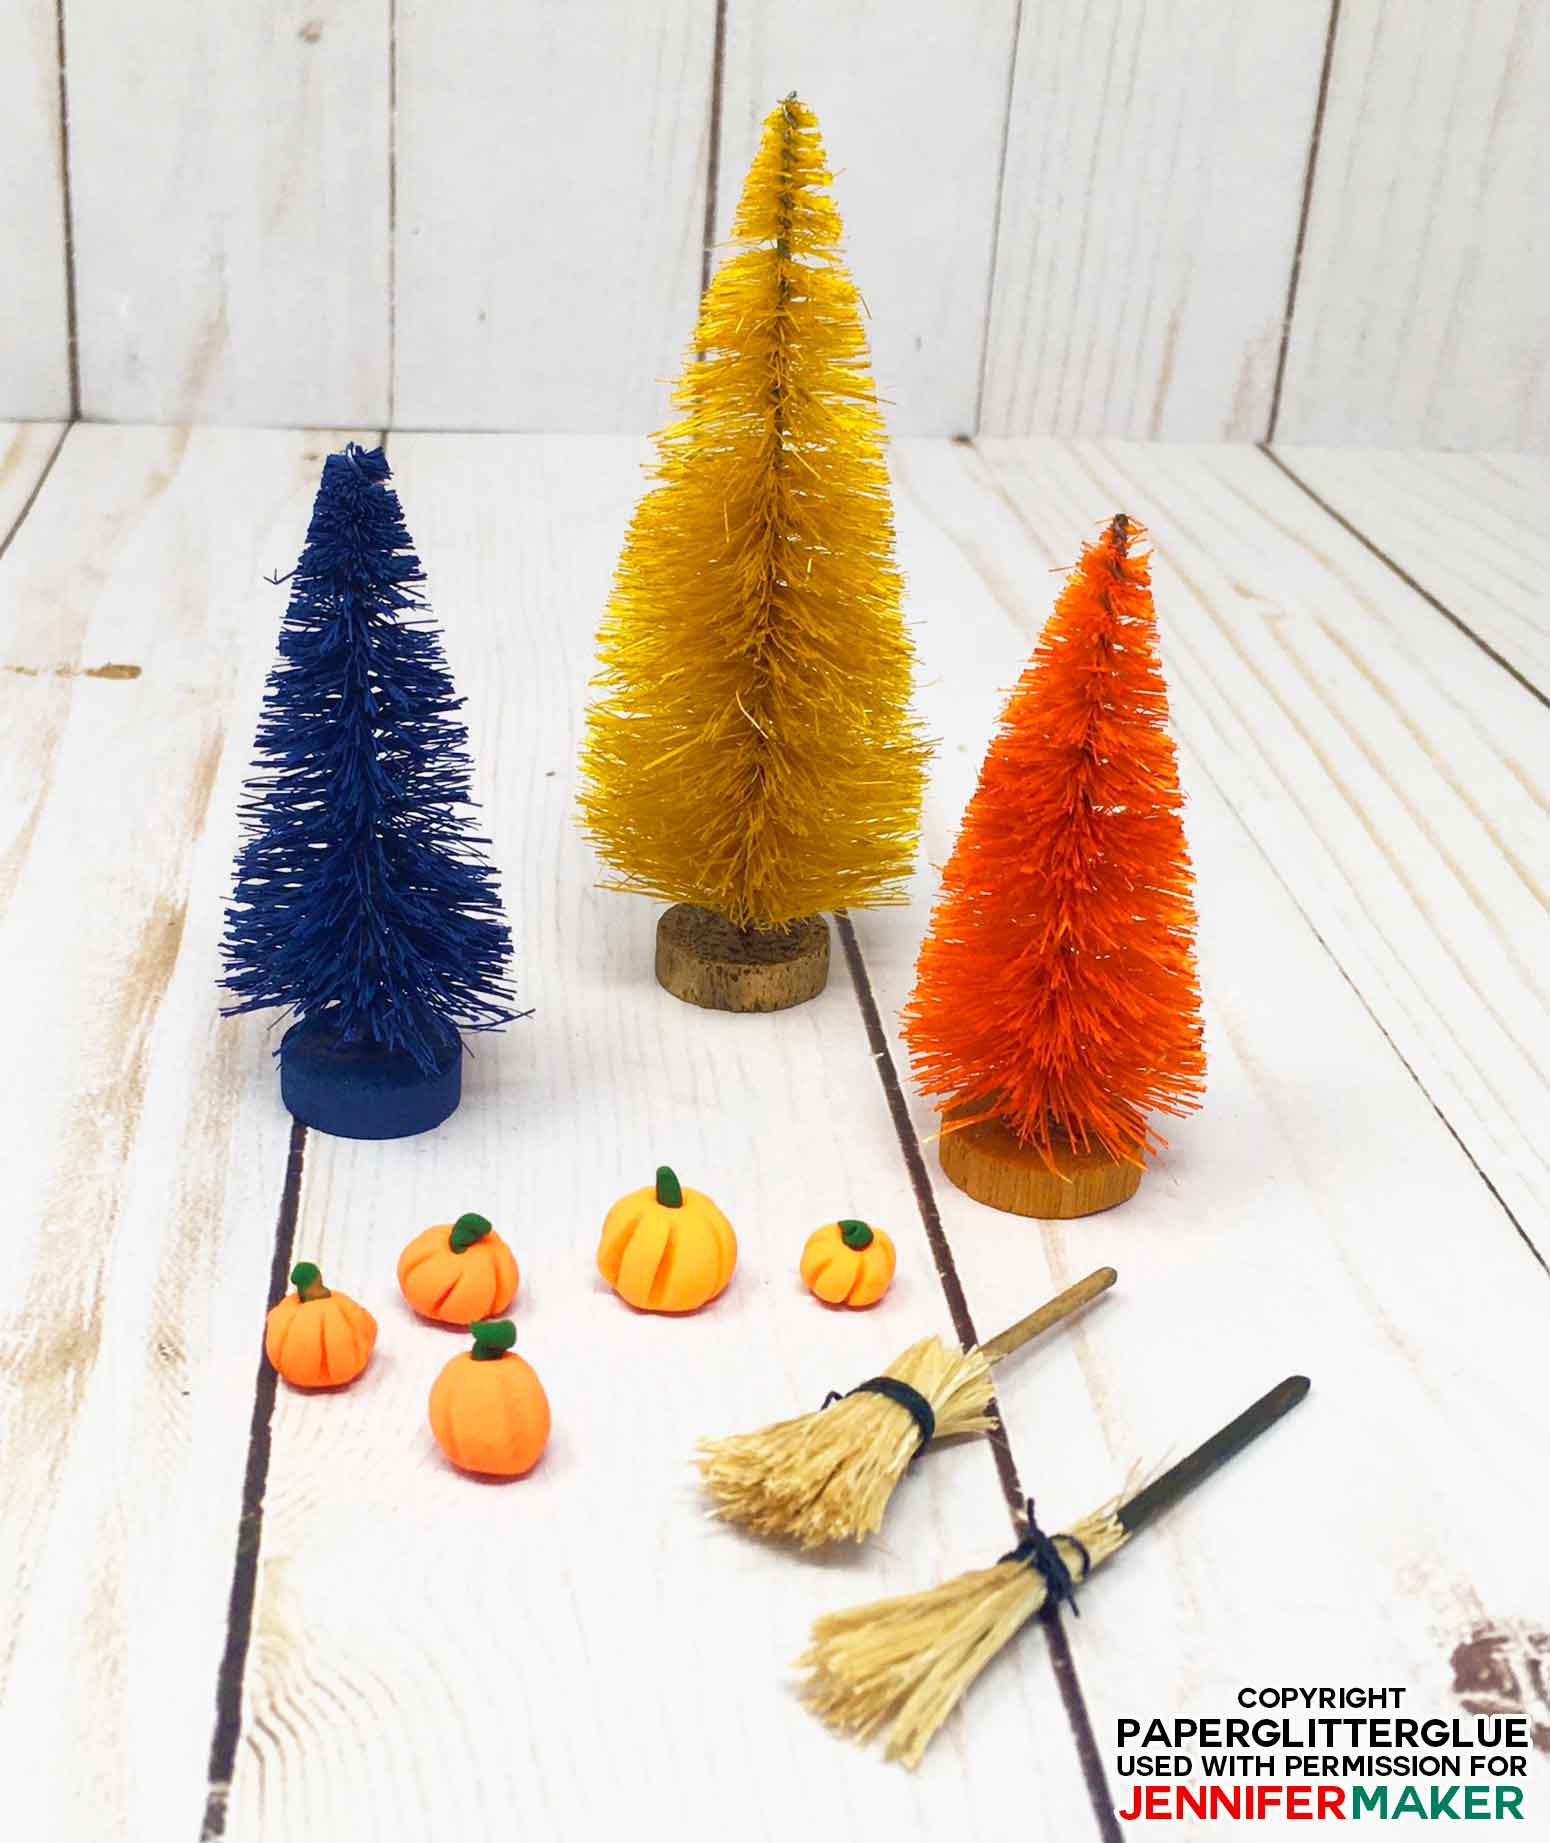
This is the fun part - decorating the little house. I tend to decorate my houses with just a few details because I like the house to be the star. On some of the other houses in the 13 Halloween Houses book, I added fences and tombstones.
Here are some simple embellishments for the Halloween houses.
On some of the other houses in the 13 Halloween Houses book, I added fences and tombstones.
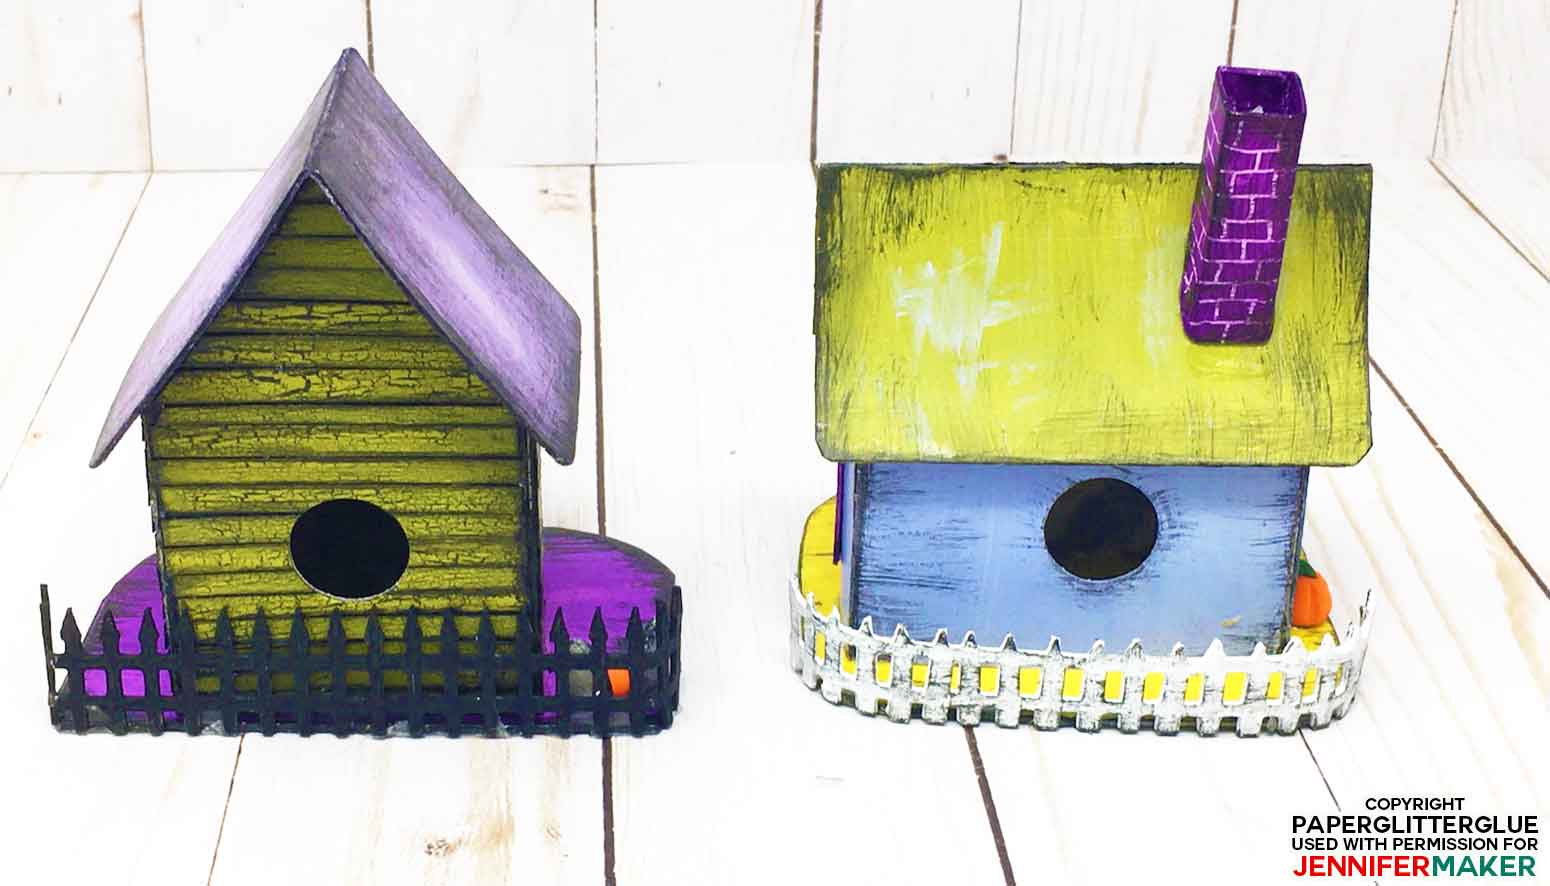
There are so many options for decorating your little houses. You can use your imagination and go crazy decorating your little houses.
I hope you have fun making the Esmeralda's Quaint Cottage. If you would like to make an entire village, check out my book, 13 Handcrafted Halloween Houses, and learn how to make ALL of these little houses:

Recommended Products
As an Amazon Associate and member of other affiliate programs, I earn from qualifying purchases.

Get the free Halloween Paper Haunted House SVG!
Love,

Want to remember this? Save the Halloween Paper Haunted House Tutorial to your favorite Pinterest board!