I am obsessed with inexpensive DIY projects that completely upgrade the look and feel of a space. This easy DIY flat panel door makeover totally fits the bill! You won’t believe how simple it is to update a flat panel door in just one weekend.
Look at what I started with. Ohmygosh.
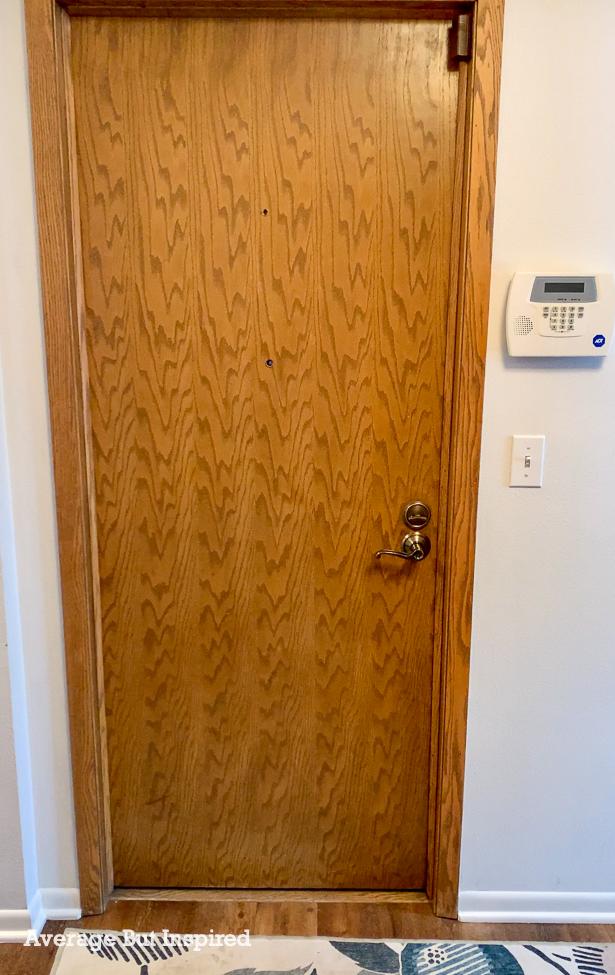
This flat panel door leads out of the mudroom and into the garage. It was so brown. And so boring.
It is a fire door, and those are pricey to replace, so I decided to keep it and give it a fresh new look.
Supplies Needed for a Flat Panel Door Makeover
This post contains affiliate links. To read my full disclosure policy, please click here. Also, thank you to Brinks for gifting me the new deadbolt and lever you see on my door.
I’m breaking the supply list into sections for every part of the door makeover. Don’t be intimidated!
Supplies used to trim out the flat panel door
- 3/4″ pine screen trim (see instructions below for measurement information)
- Miter box and hand saw
- Wood glue
- Ryobi brad nailer
- Level
- Tape measure
- Pencil
- Permanent marker
Supplies used to paint the door
- Krud Kutter
- Sandpaper
- Caulk
- Stain blocking primer
- Sherwin-Williams SnapDry paint
- Painters tape
- Paint brush
- Roller
New door hardware
How to Do an Easy Flat Panel Door Makeover
This door makeover process will add a gorgeous new look to your space. I am sure you will not believe how this door makeover will breathe new life into your home!
How to Update the Flat Panel Door with Trim
First things first, update the flat panel door with inexpensive trim. I used 3/4″ screen trim, but you can use fancier trim if you like!
Step One: Determine the Trim Lengths
First up, decide how long you want the trim pieces to be.
When closed, my door measures 31″ wide x 80″ high.
I cut my screen trim pieces as follows: TOP rectangle = 23″ wide x 36″ long on top; BOTTOM rectangle = 23″ wide x 24″ long on bottom. In all I cut 8 pieces of screen trim: 4 measuring 23″ long, 2 measuring 36″ long, and 2 measuring 24″ long.

You may want to adjust these measurements depending on your door’s overall dimensions.
Step Two: Cut the Trim
I cut the screen trim by hand, using a hand saw and miter box. The screen trim is quite thin, so it’s very easy to cut this way. A miter saw would totally work. I was too lazy to drag it out of the basement and set it up.

On the back of each piece you cut, write the placement for that piece. For example, “top left” for the piece that goes on the left side of the top rectangle.
Step Three: Determine Trim Placement on the Door
Mark off the center of the door, both vertically and horizontally.
Then, roughly decide where you want the trim rectangles to go, and lightly mark those spots on the door.
Using the level, draw the exact placement line of the bottom of the rectangle that goes on top.
Step Four: Attach the First Piece of Trim
Run a thin line of glue on the trim piece meant for the bottom of the top rectangle, and press that onto the line you’ve drawn on the door.
Follow up with a few brad nails.
Step Five: Attach a Side Piece of Trim, and Repeat the Process
Now that the first piece is in place, use the level to draw a plumb line on the side. Then repeat the glue and brad nail process to attach that piece.
Work your way around the rectangle until it’s complete.
Then repeat steps 3-5 on the bottom rectangle.
With this, the flat panel door will no longer be flat! It will look a little strange at this point, but once it’s painted, it will be beautiful!
How to Paint the Door After Adding Trim
To make your flat panel door makeover look its best, make sure to give it a good paint job. That includes careful prep work!
Doors get a lot of use, so make sure to clean prior to doing anything else. I use Krud Kutter to get rid of all of the gunk.
Caulk the seams of the newly-added trim, as well as the gaps between the trim and the door. You can also fill in any dents or gouges in the door with wood filler.
Then, prime with a primer that’s formulated for your type of door. Since I was painting a wood door, I used a stain blocking primer. I chose to use a water-based primer because I can’t stand the smell of oil-based primers!
After the primer dries, paint the door! I used a fast-drying door paint from Sherwin Williams called SnapDry. I painted in January, so I didn’t want to leave the door open longer than I absolutely had to!
This paint dried quickly and covered well with two coats. I had it tinted to Benjamin Moore Waller Green – the same color used on my Dated Oak China Cabinet Makeover.
Update the Door Hardware For a Modern Touch
Finally, consider updating your flat panel door with new hardware! The hardware on my door was definitely from the 1970s, so I was glad to streamline the deadbolt and lever with new ones.
The Brinks Push Pull Rotate lever I installed is super cool because it opens three different ways: push it, pull it, or rotate it like a traditional handle or lever. I love how easy it is to open the door when my hands are full now!
I also love how modern this door looks now. This flat panel door makeover added a lot of style to my mudroom for a very low price! I’d love to hear what you think of it; drop me a comment in the box below!
Laura says
Loving this DIY!
I have a metal door. Will this look as nice with the wood trim? How could i attach the trim to it?
Bre says
Hi, Laura! Thank you! OK – so for a metal door, I’d get composite trim so there’s no woodgrain – just very smooth. (UNLESS your metal door has a faux woodgrain finish – then you could do wood trim). You could attach it to the door with construction adhesive instead of brad nails. For a less permanent solution, you could even attach thin magnetic adhesive to the back of the trim and attach it that way! Like build the frame in its entirety, paint the door and the frame, and then pop the frame on there with the magnets!