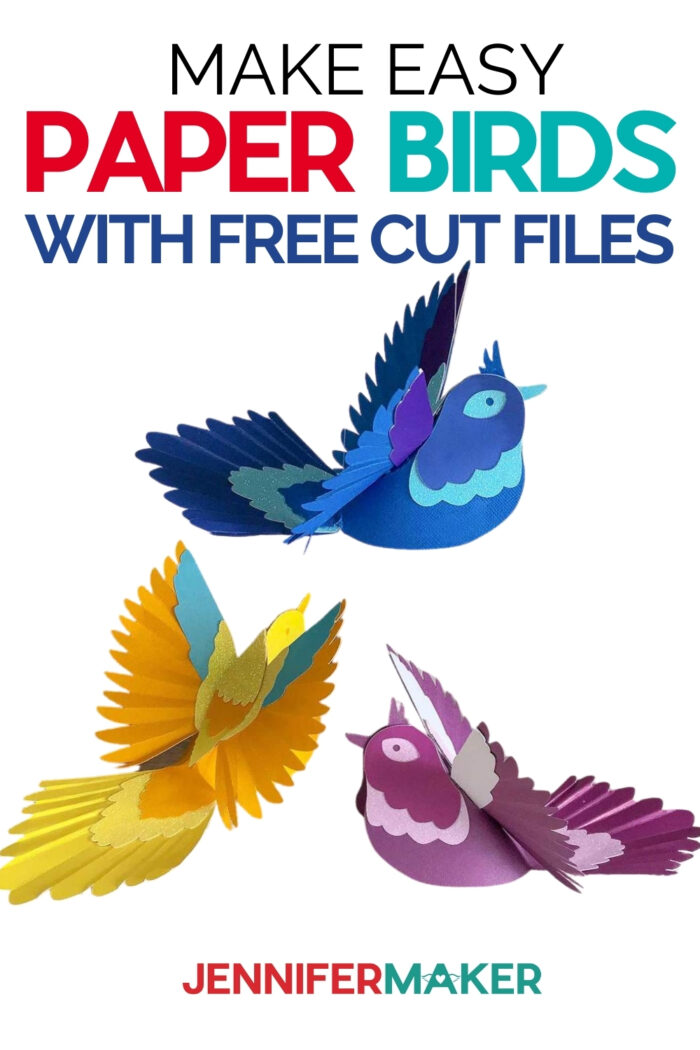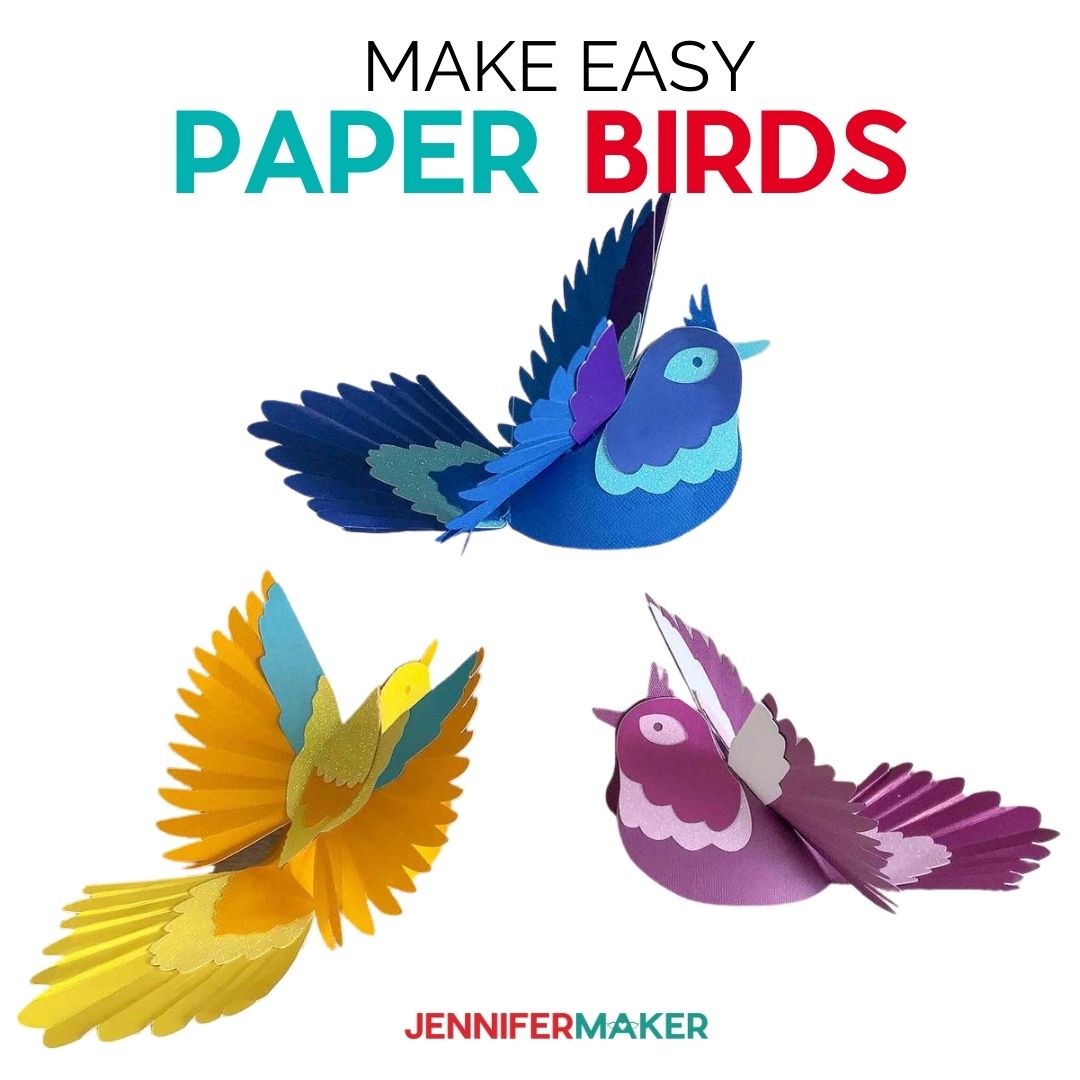
Learn how to make Easy 3D Paper Birds
Earlier this year my daughter, Alexa, released her 3D Paper Animals designs. That project was so popular, but I never wrote up a tutorial because the design was created as a fun puzzle for you to figure out on your own. So I am sharing another animal design with a complete tutorial included. Wouldn’t it be wonderful to have these colorful Paper Birds hanging from the ceiling of a craft room? I think it would be wonderful to create a little bird corner and include my Paper Birdhouse Luminary.

Let me show you how easy it is to make your own colorful Easy 3D Paper Birds! This post contains some affiliate links for your convenience (which means if you make a purchase after clicking a link I will earn a small commission but it won’t cost you a penny more)! Read my full disclosure policy.
Materials to Make Easy 3D Paper Birds
- 12″ x 12″ Cardstock (I used Textured Cardstock, Glitter Cardstock, Shimmer Cardstock, and Brushed Metallic Cardstock)
- Tacky glue
- Cutting Mat (LightGrip or StandardGrip works)
- (Optional) Cricut Scoring Stylus (If you have a Cricut Explore or Maker)
- (Optional) Cricut Single QuickSwap Scoring Wheel (If you have a Cricut Maker)
- A way to cut your paper (I used the Cricut Maker cutting machine but they can also be cut on a Cricut Explore)
- Design #239 – My free Paper Birds SVG/DXF/PDF design files (available in my free resource library—get the password by filling out the form at the bottom of this page)
How to Make Easy 3D Paper Birds
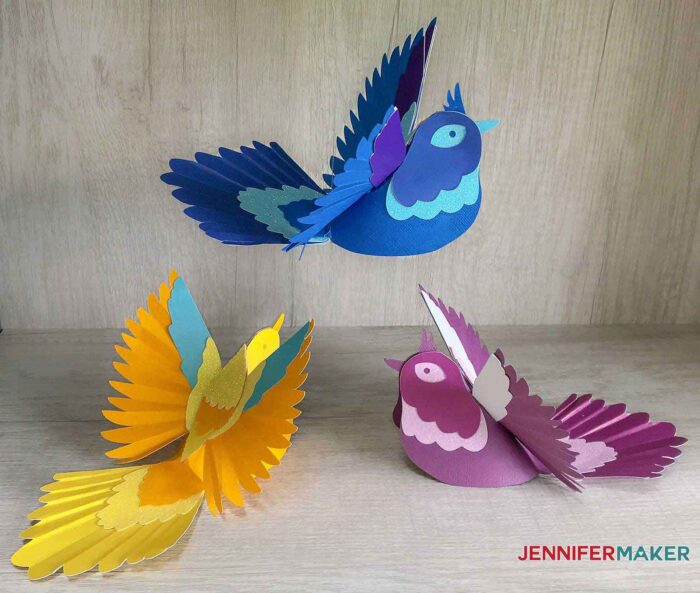
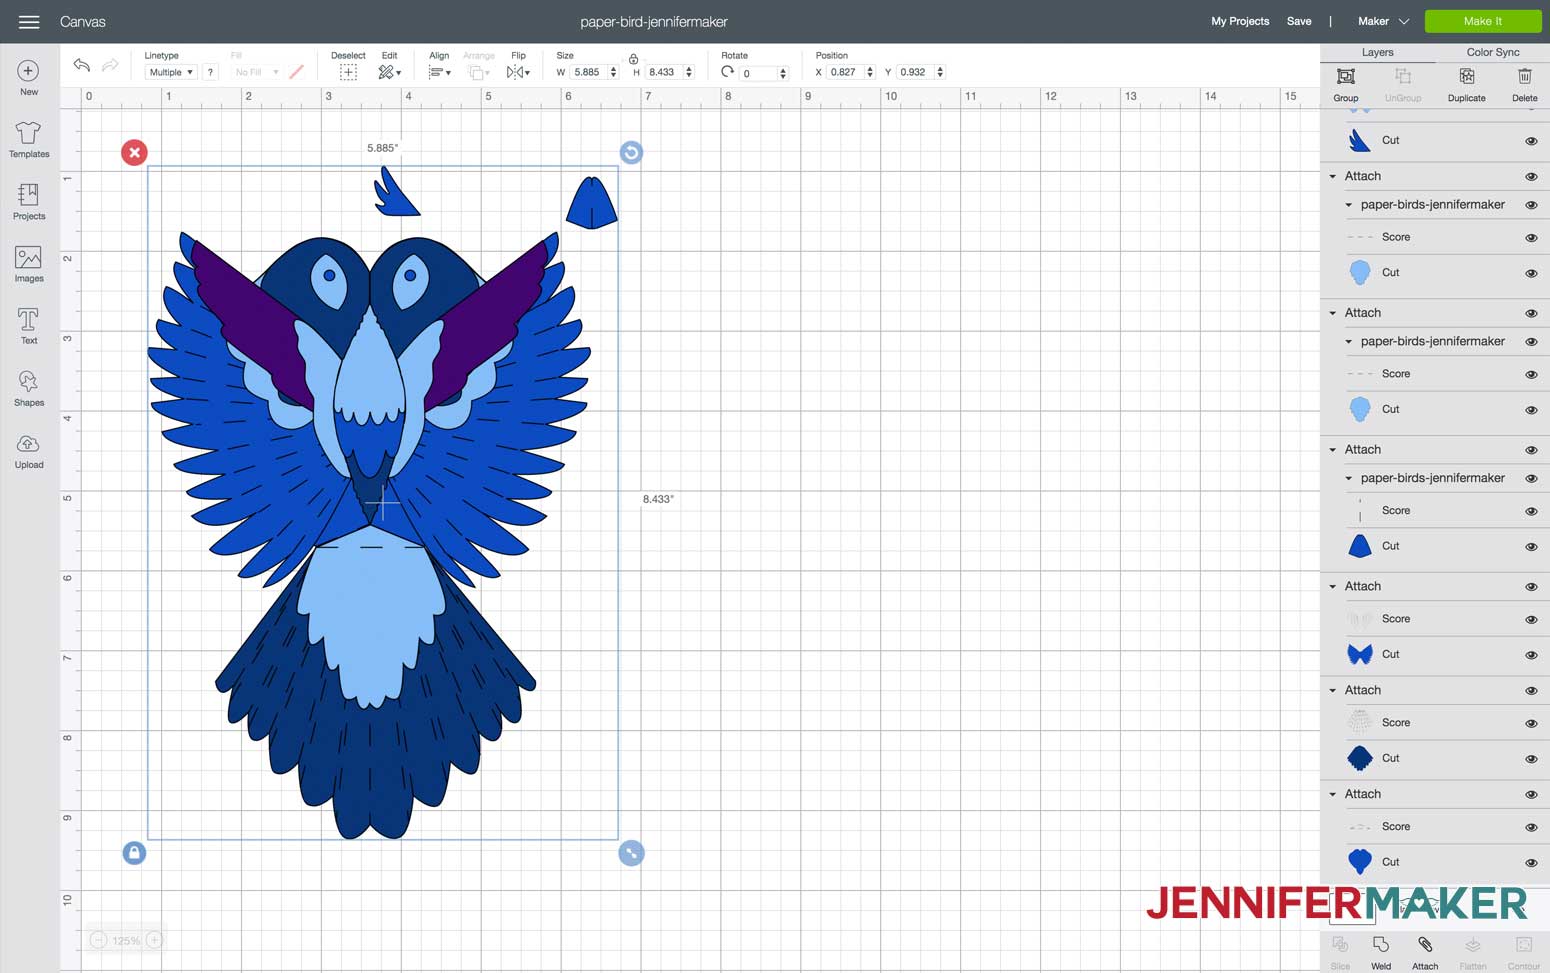
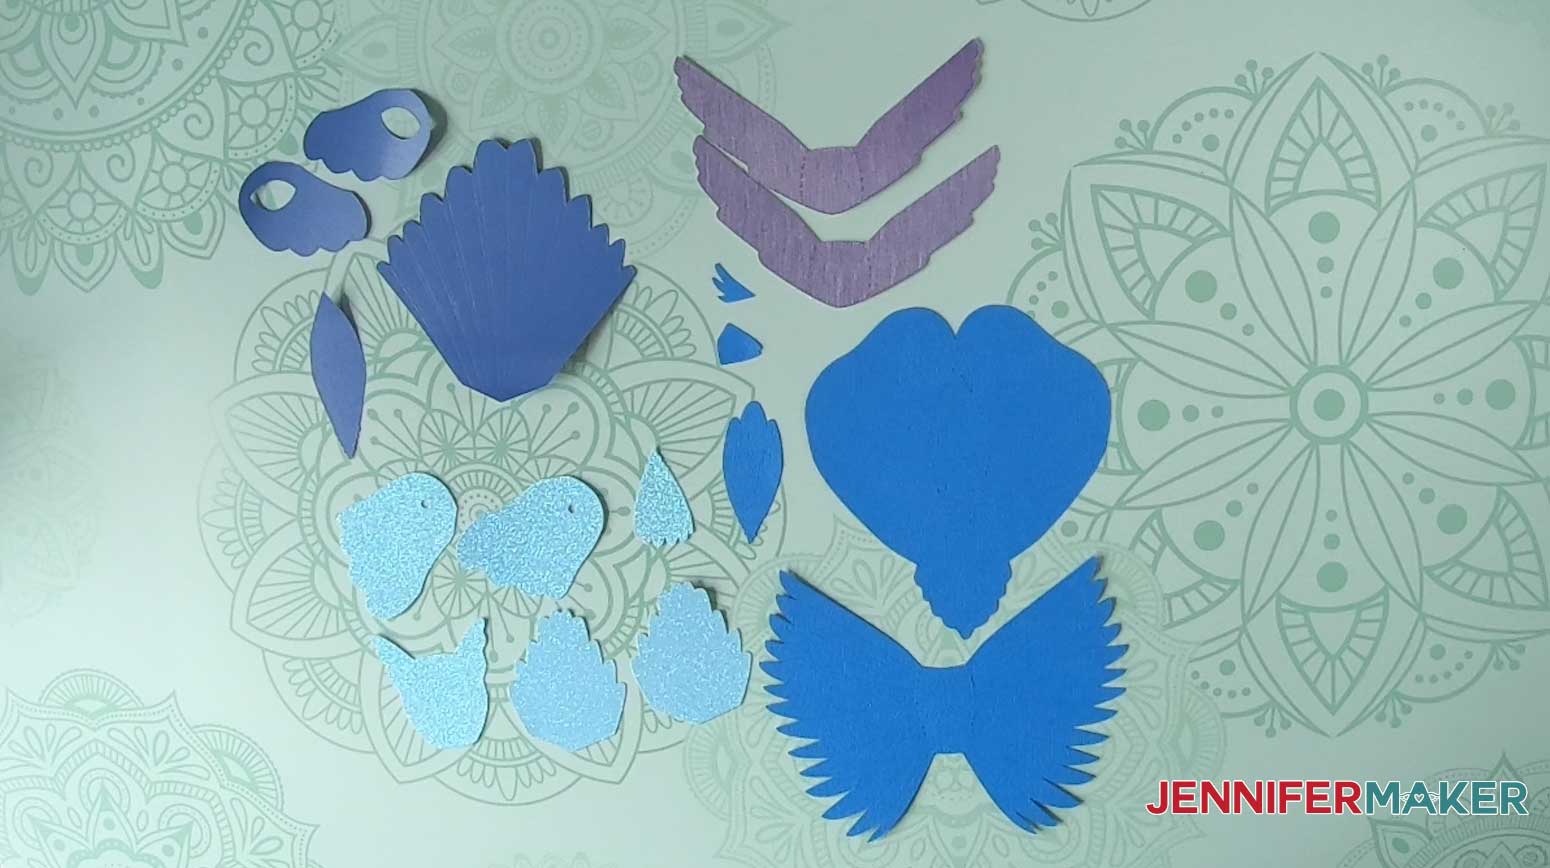
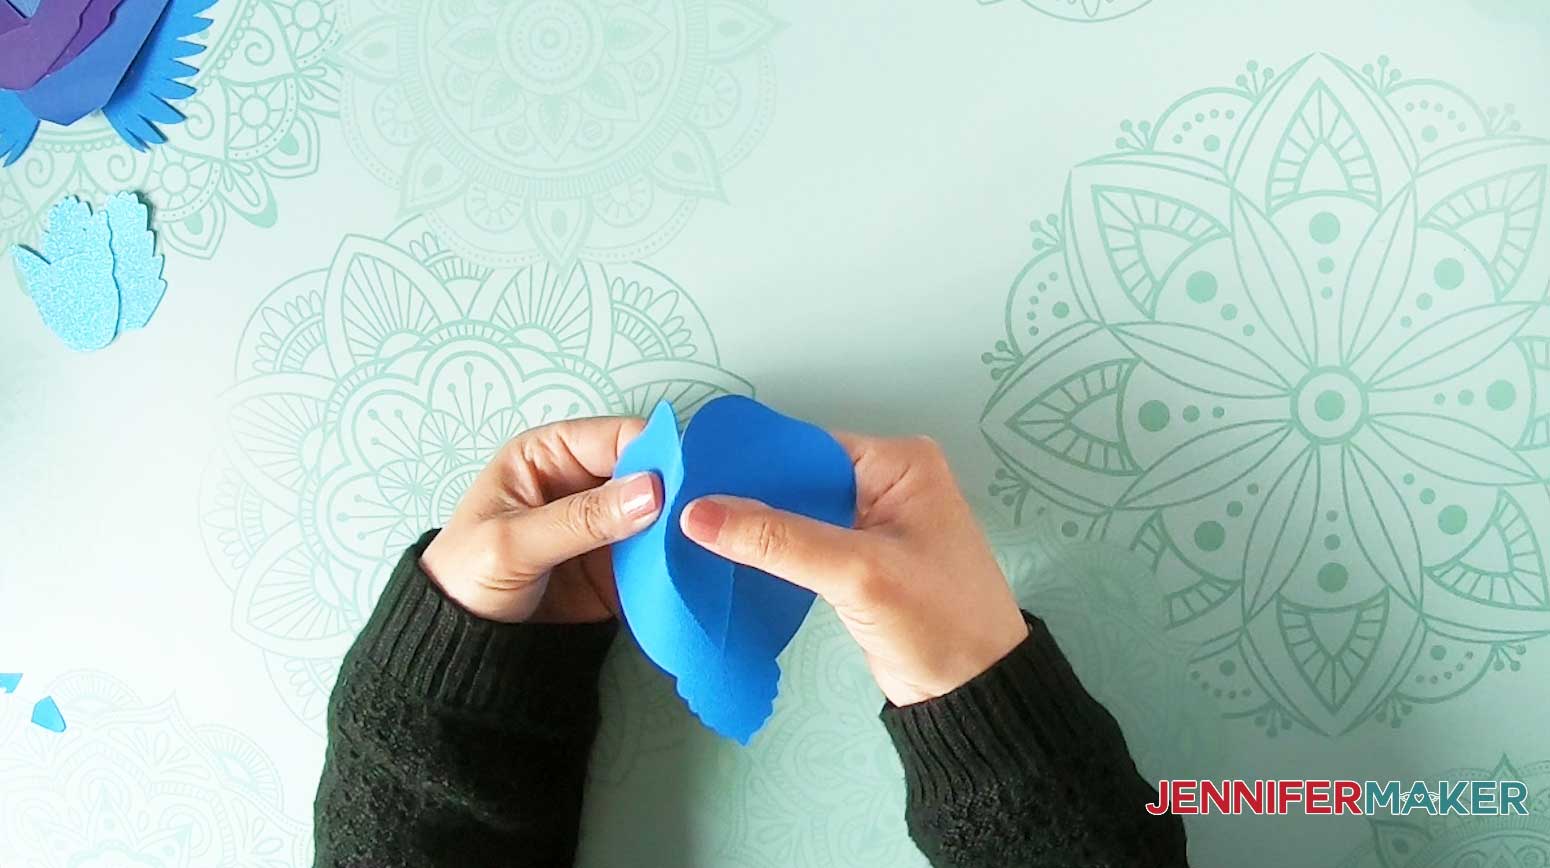
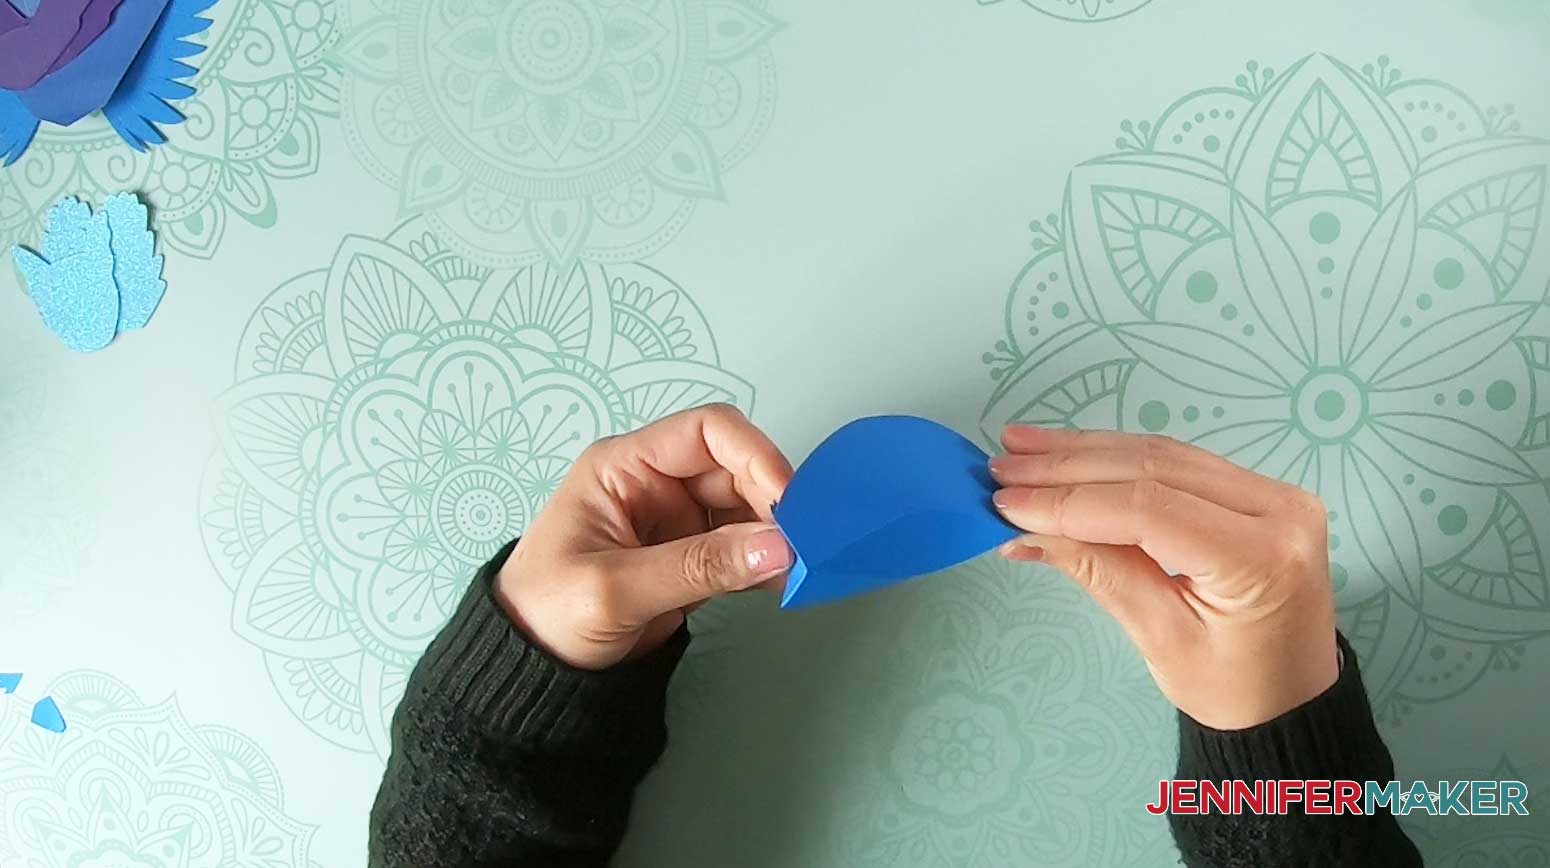
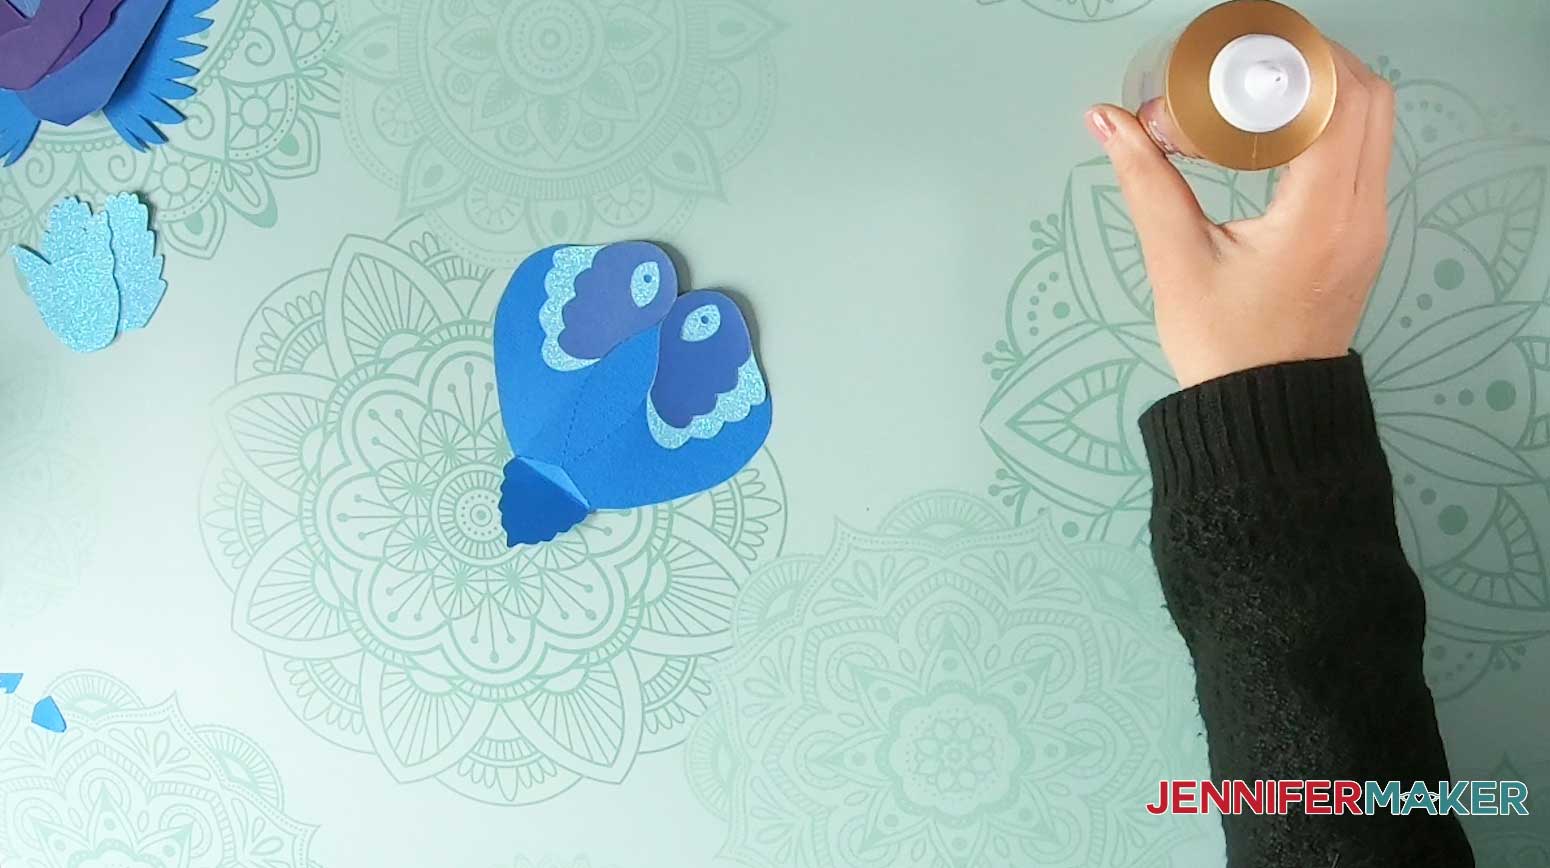
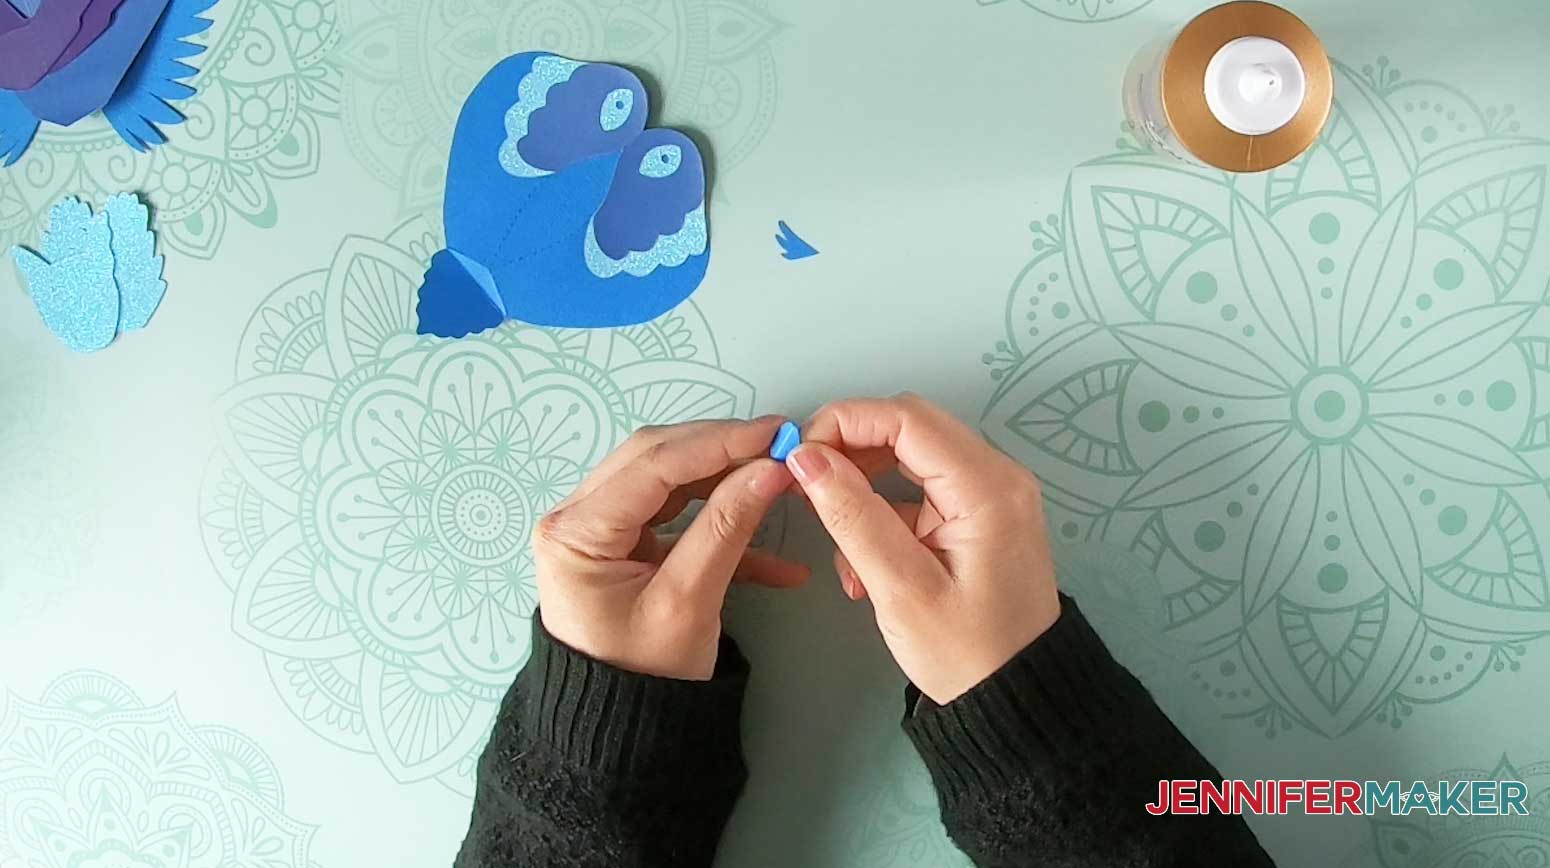
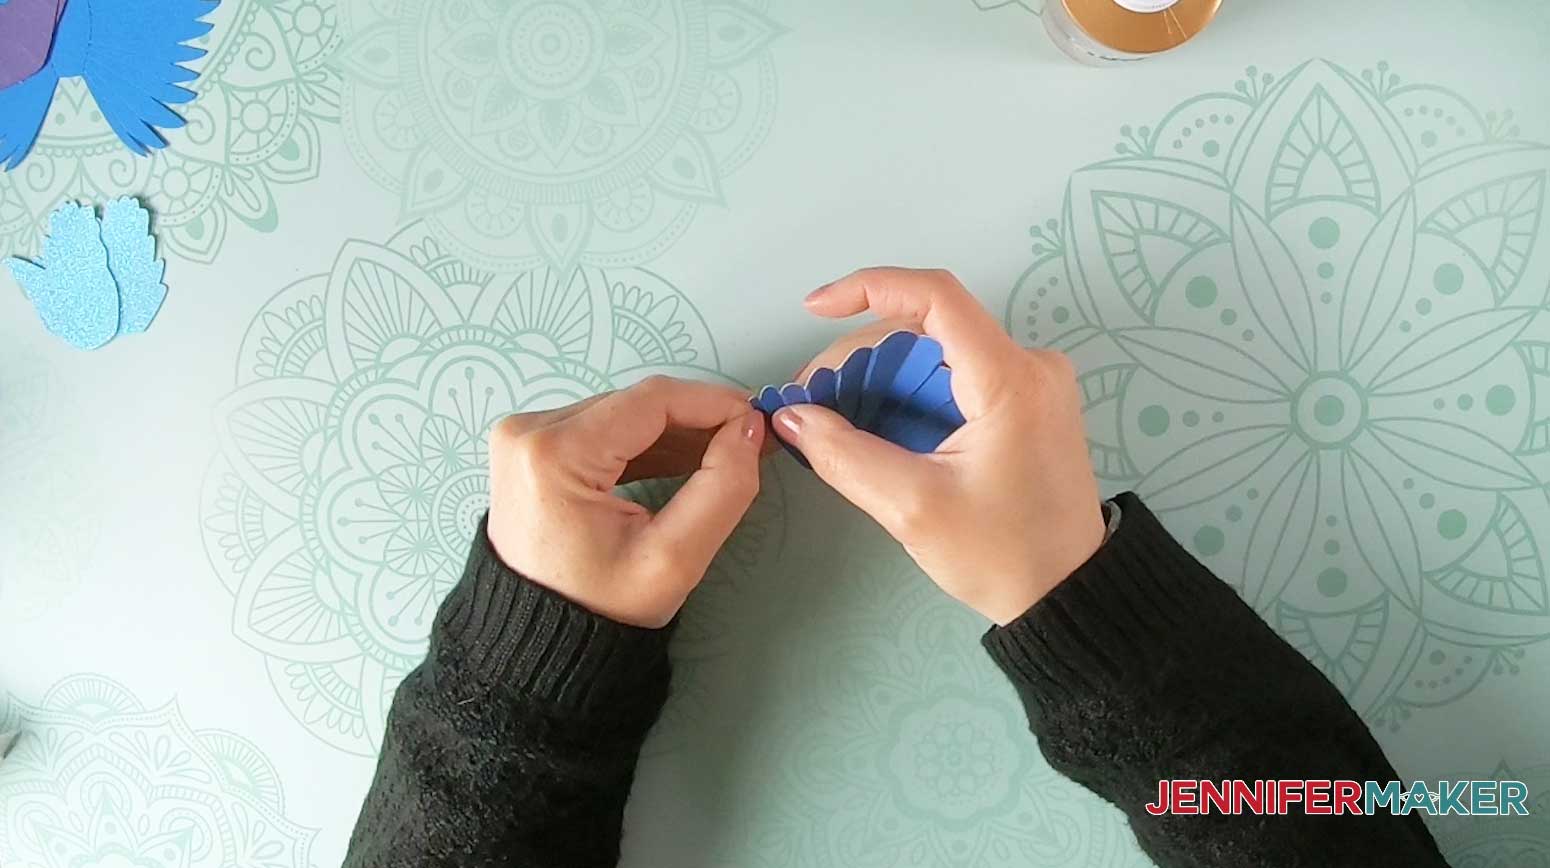
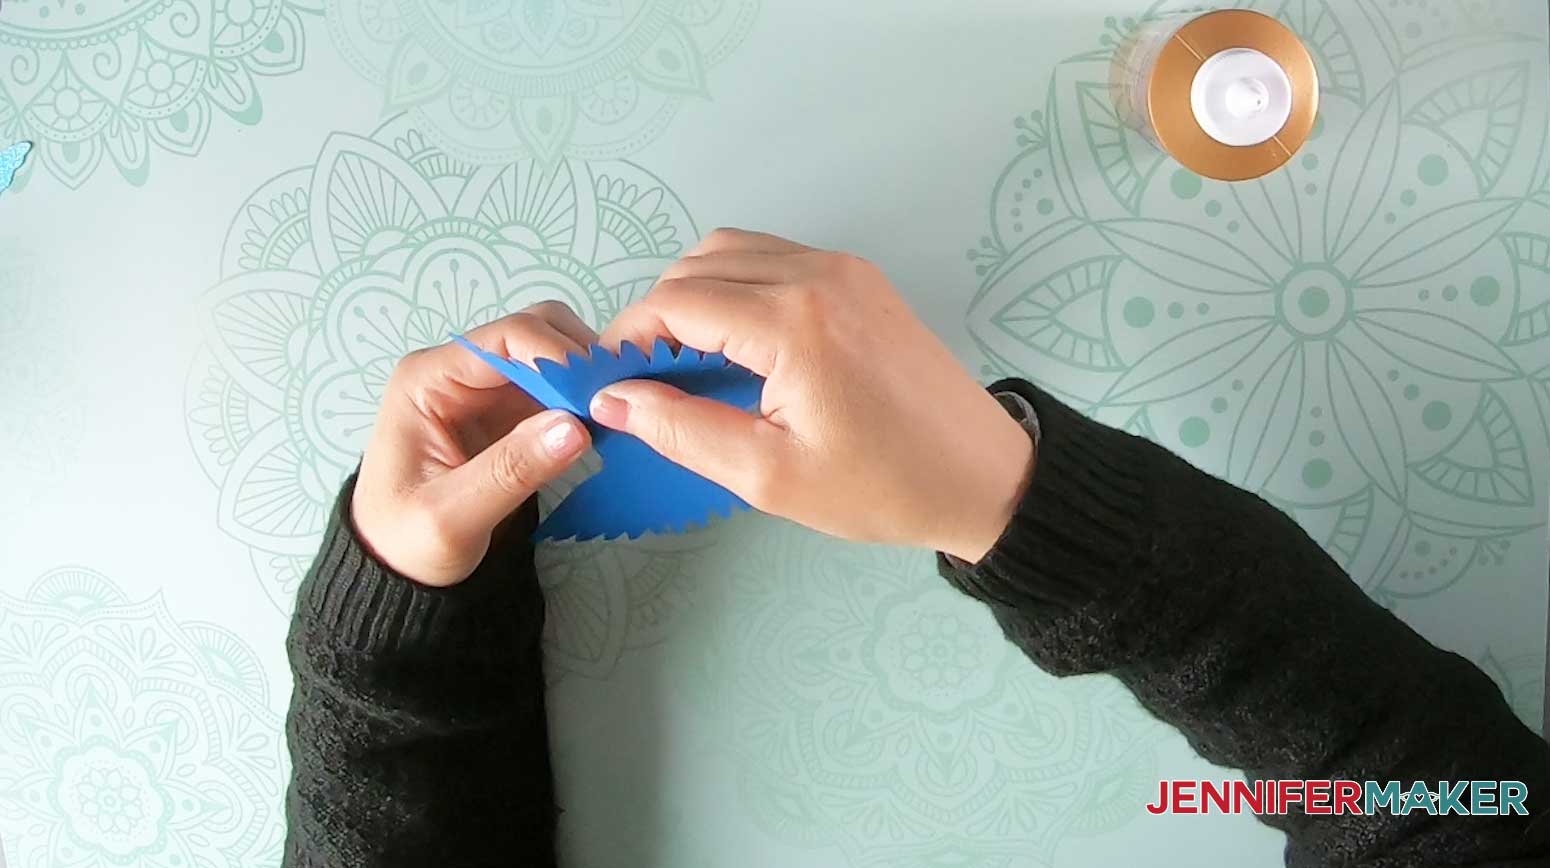
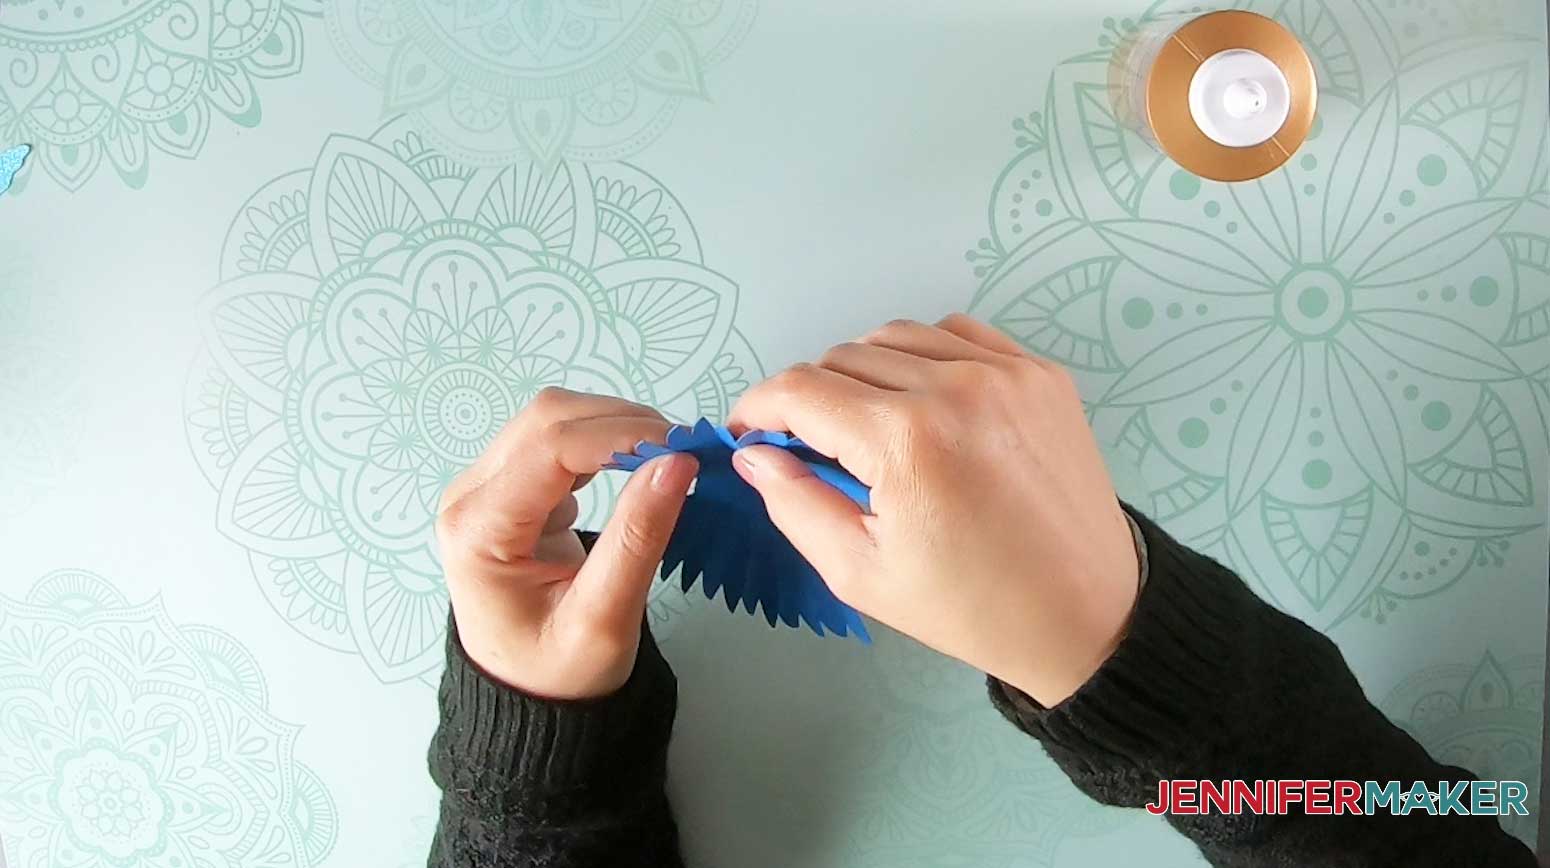
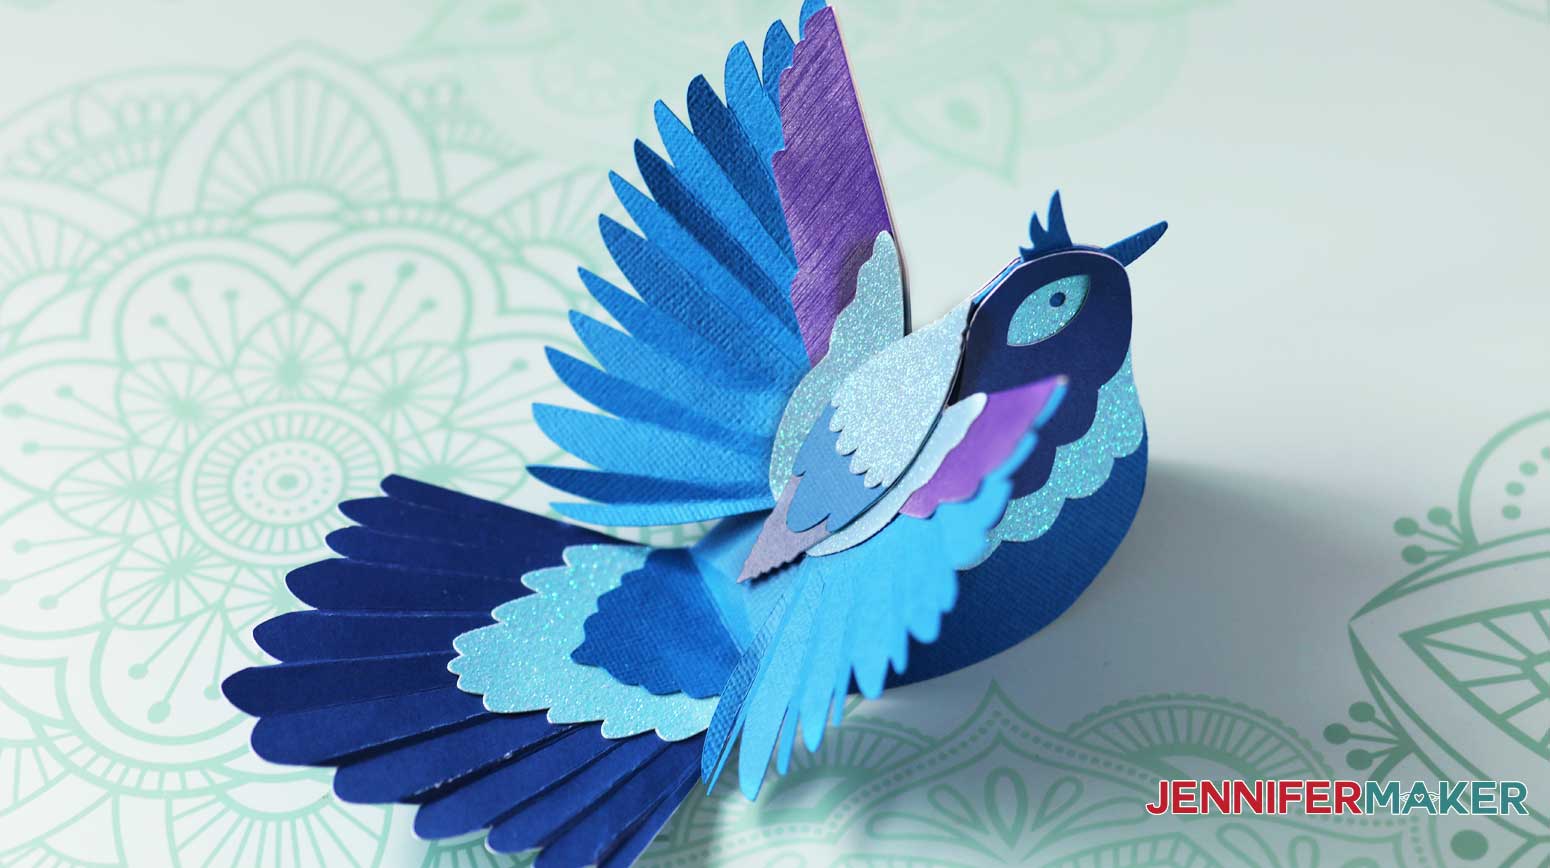
These Easy 3D paper birds can sit unassisted on a shelf or be hung to add a fun pop of color. First, download Design #239 which is my free easy paper birds SVG/DXF/PDF from my free resource library. Tip: If you're not sure how to upload an SVG cut file to Cricut Design Space, watch this helpful video training series I made. If you're on an iPhone or iPad, here's how to download and upload SVG files to the Cricut Design Space app. The 3D paper birds design file is set up to make one bird measuring approximately 5” wide x 7” long. Adjust the size of your file, if needed. Once you have the size adjusted to your measurements, you are ready to prepare the file for scoring and cutting. First, ungroup everything. In the paper birds file, there are several layers that need to be changed from Cut to Score. The first layers (the layers with no color) of the wings, tail parts, and beak are the ones that need to be changed. After changing them, select the layers in each group and attach them. If you want to use different paper and color combinations, you may want to designate different colors of the cut layers. Need help with the scoring lines? Check out my tutorial on Cricut Scoring, Grouping, and Attaching! Now they are ready to be cut. This is what the file looks like in Design Space when you’re ready to cut: Click "Make It" and you will be prompted to select your material settings and place your paper on your cutting mats. This design is set up to cut on four different mats. I used four different types of cardstock, Textured, Glitter, Shimmer, and Brushed Metallic. But you can choose to use regular cardstock or you can combine the pieces so they cut on the same mat. Follow the prompts to load the mat and tools into your Cricut and cut. (See this tip to help prevent curling or ripping as you remove the cardstock from the mat.) These are the pieces you’ll assemble when you’re done cutting: First, fold the body along the score lines into a 3D shape. On the body piece, fold the left and right score lines to form the sides of the body. Fold down the tail feather. Fold to form the head. You should now see the body top and sides formed. Flatten the body again and glue each crown layer into place in this order, repeating on each side: Glue the first crown layer to the body. Glue the second smaller crown layer on top of the first layer. This is what the crown should look like. Now, fold the beak in half. You’ll want to tuck the ends of the optional crest and the beak in between the two sides of the bird and glue in place. First, apply glue to the crest piece. And glue it in place to the body. Next, glue the beak in place: Now, fold the tail along the score lines. I find it easiest to start in the middle by folding the tail in half INWARD along the score line. I now work my way outward. There are two score lines for each feather section. One score line gets folded INWARD while the other gets folded OUTWARD. This creates dimension to the feathers. See how I did it here: Repeat for each of the two decorative tail pieces. The score line on one tail piece is folded UPWARD and the other tail piece is folded DOWN along the score line. Glue the decorative pieces to the tail. Note, one goes on TOP of the tail and the other is glued on the BOTTOM of the tail. Make sure the triangular piece is glued well and folds nicely. Now we prepare the wings. Fold the wings along the score lines accordion-style. This gives the feathers dimension. Then fold the wings upward along the perforated score lines. Fold the long decorative wing pieces along the perforated score lines and layer one on top of the wing and one below, and glue into place. Now we attach the wings to the back. Fold the wings up, and apply glue along the flat section on the underside. Align the wings against the back of the 3D body and glue into place. Finally, we layer and glue the decorative back pieces into place like this: We’re done! Arrange and bend the wings and tail however you like. You may wish to use glue to hold them in place if you want them a certain way. Your bird will stand upright on its own. To hang your bird, I recommend threading fishing line into the perforated holes behind the head and along the base of the tail. This will help balance your bird when you hang it. Here's what your bird will look like when it's assembled: Special thanks to the JenniferMaker Design Fairy Team, specifically Design Fairy Kelly, for helping me design this beautiful bird.
Easy 3D Paper Birds
Materials
Tools
Instructions
STEP 1: GET MY EASY 3D PAPER BIRDS DESIGN FILES
STEP 2: PREPARE YOUR 3D PAPER BIRDS DESIGN FILE FOR CUTTING
STEP 3: CUT OUT YOUR EASY 3D PAPER BIRDS DESIGN
Gently remove each layer from the mat.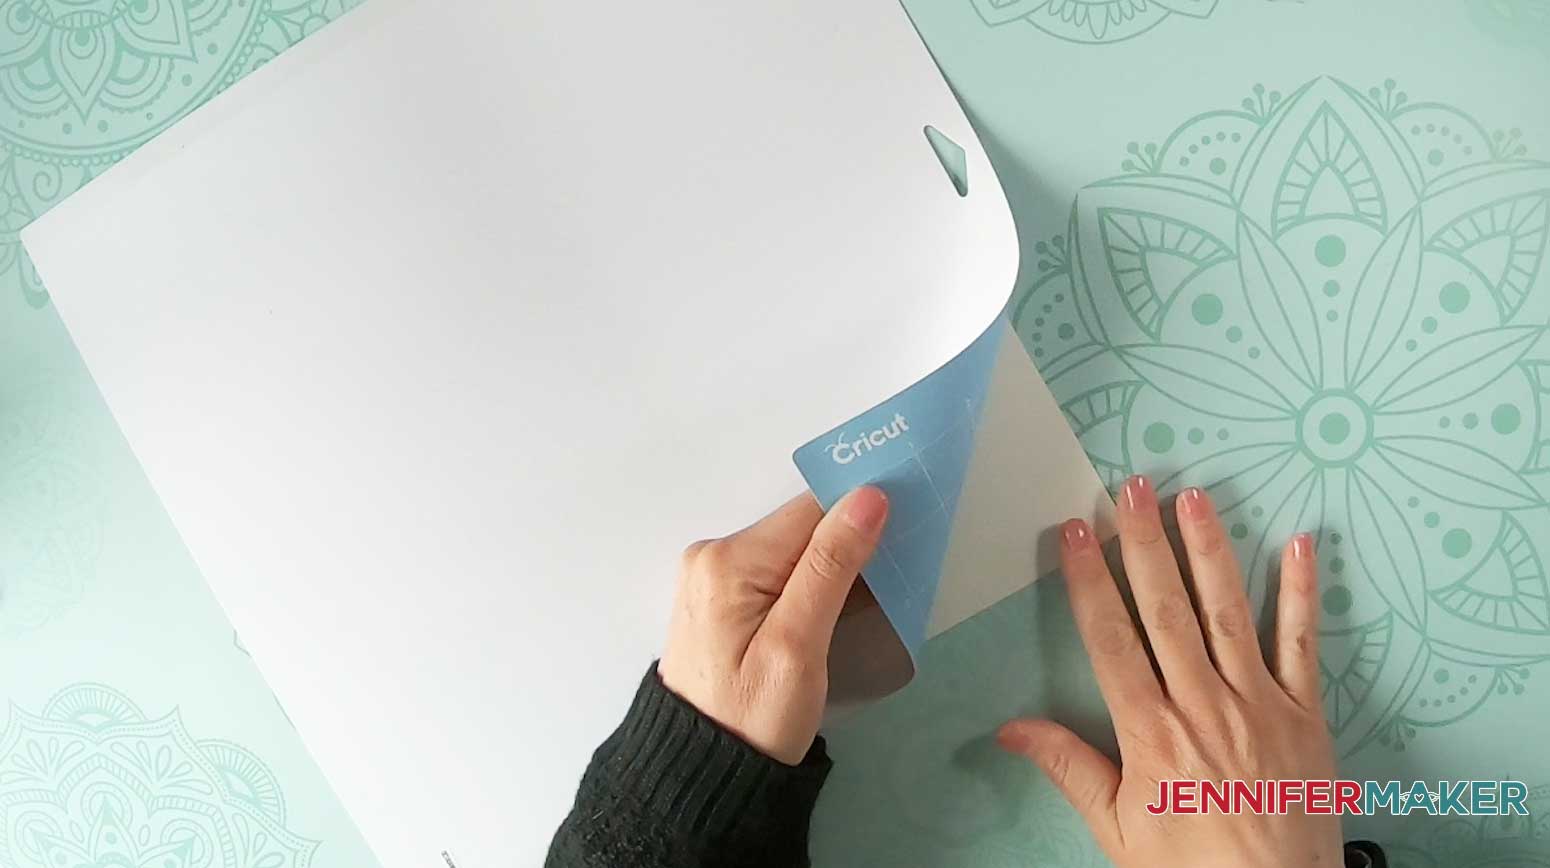
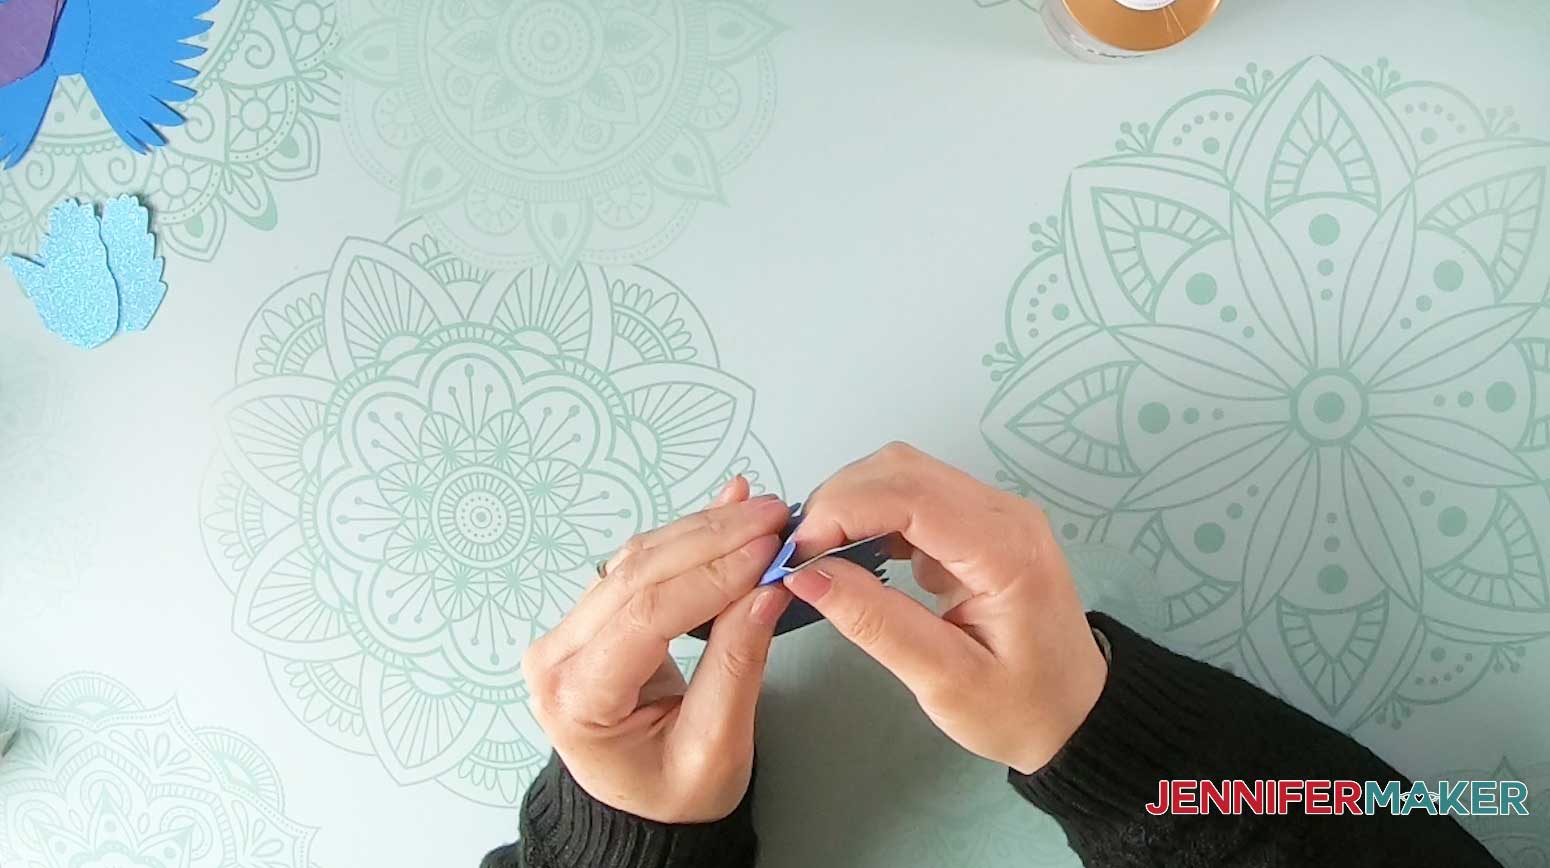
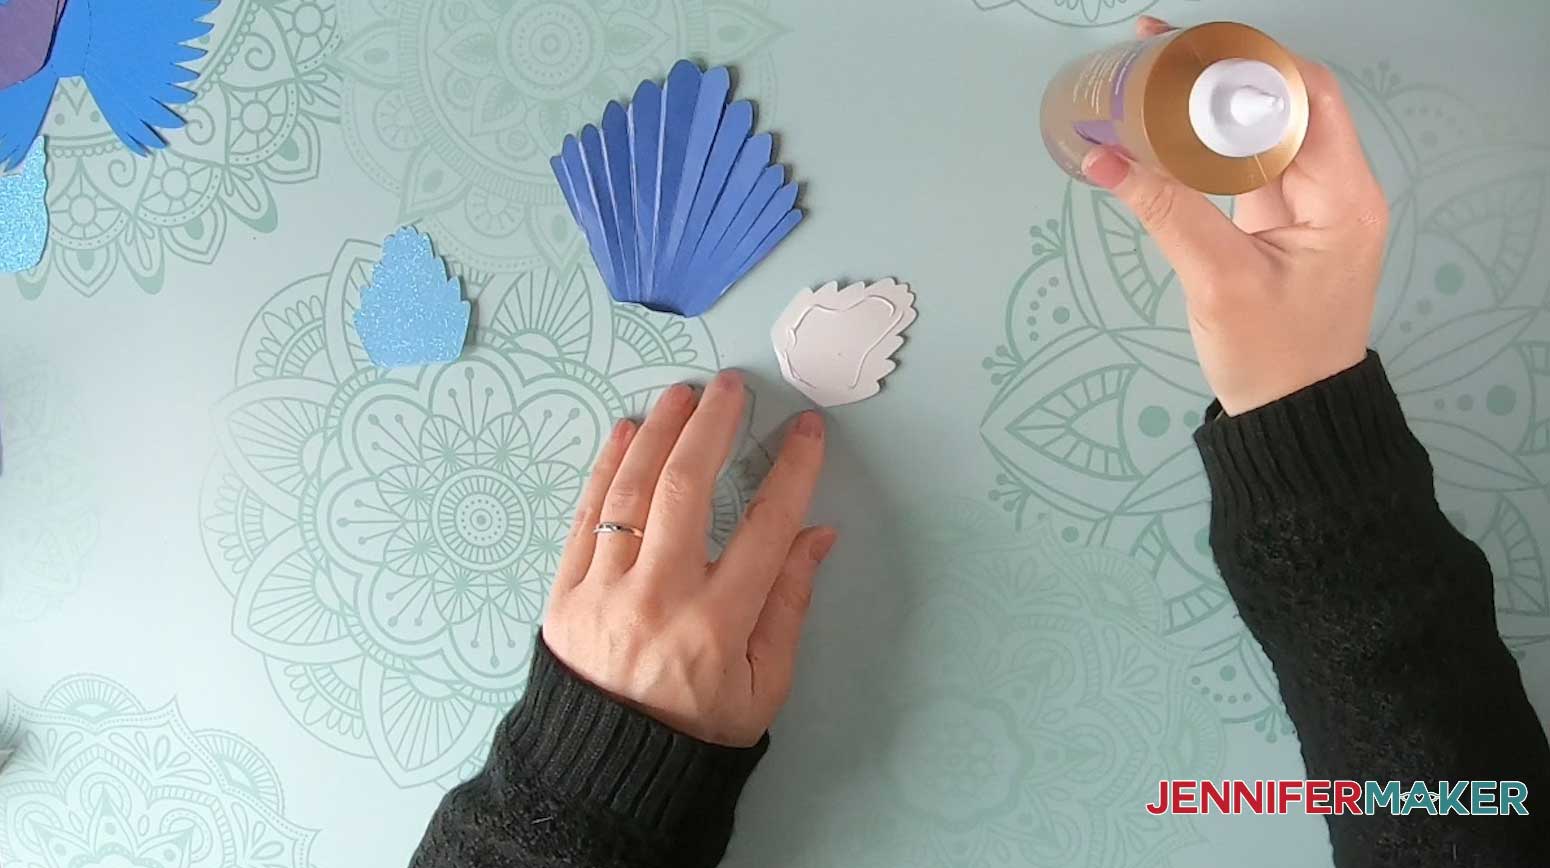
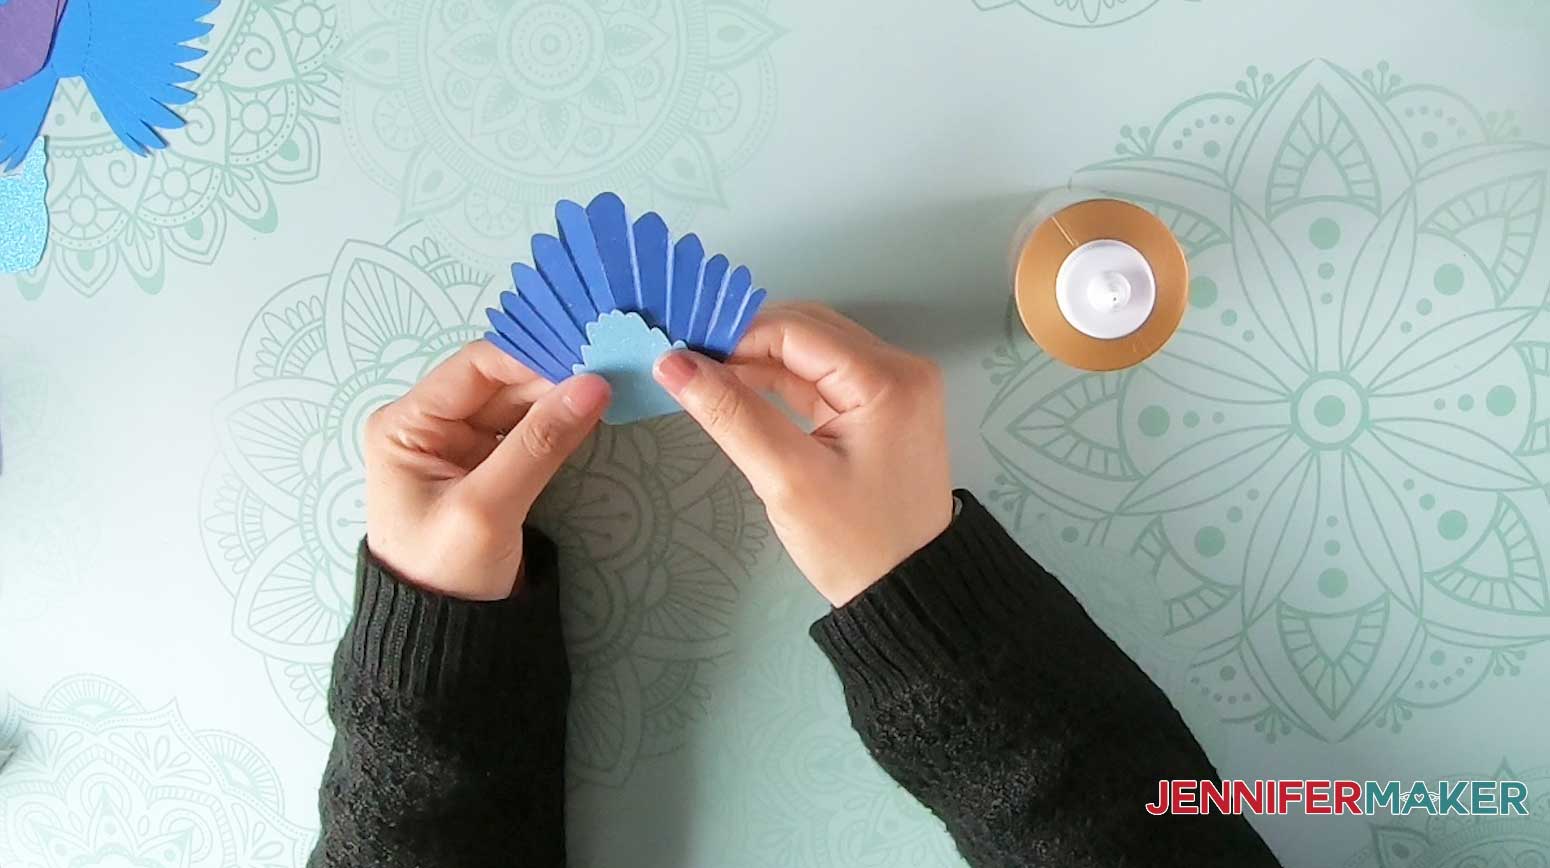
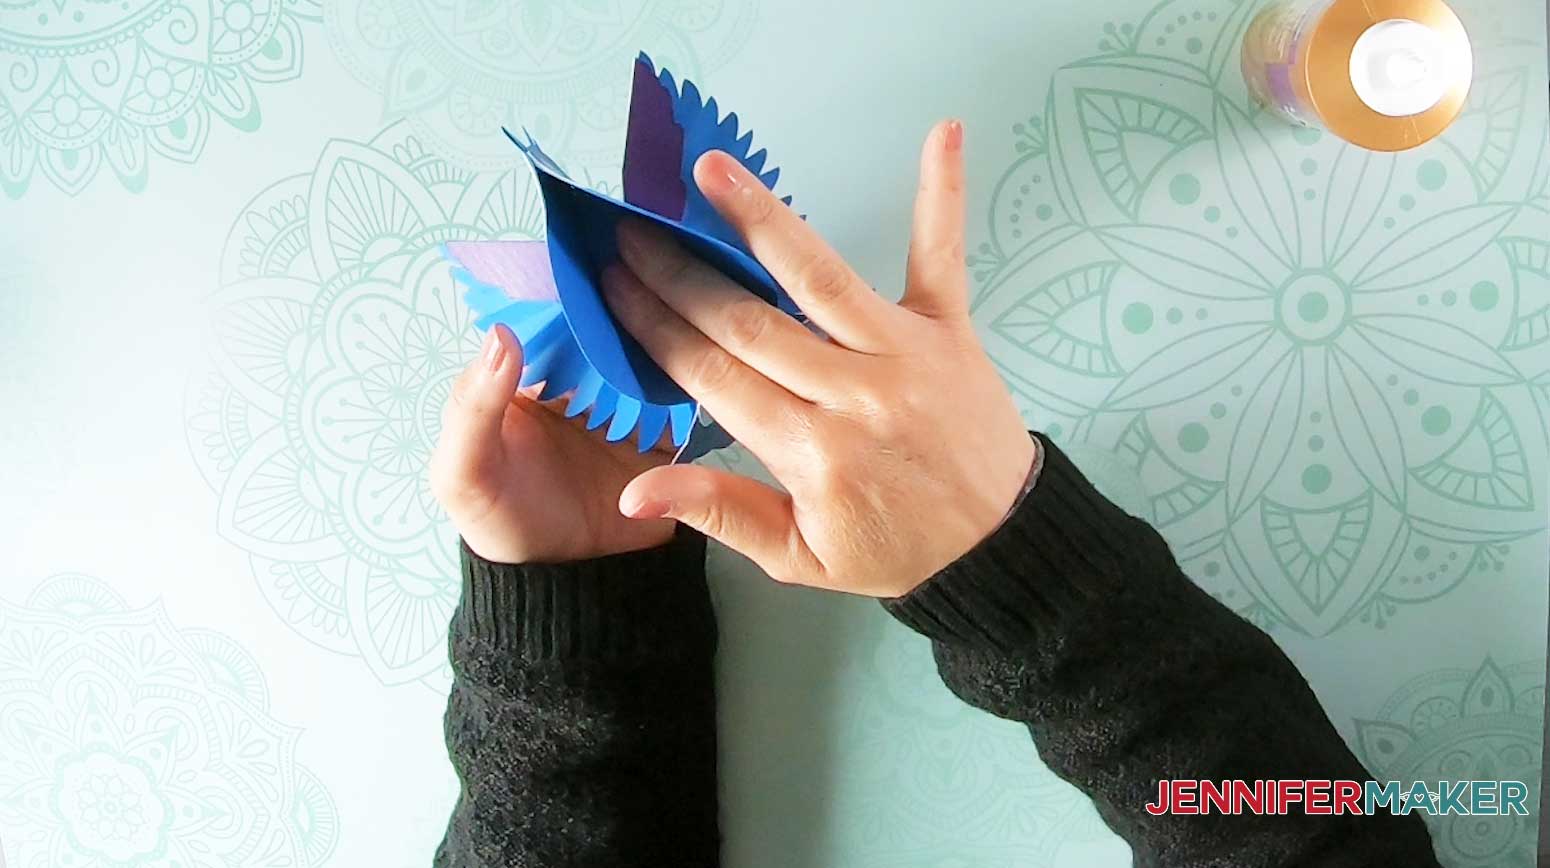
STEP 4: FOLD AND GLUE THE BODY AND TAIL


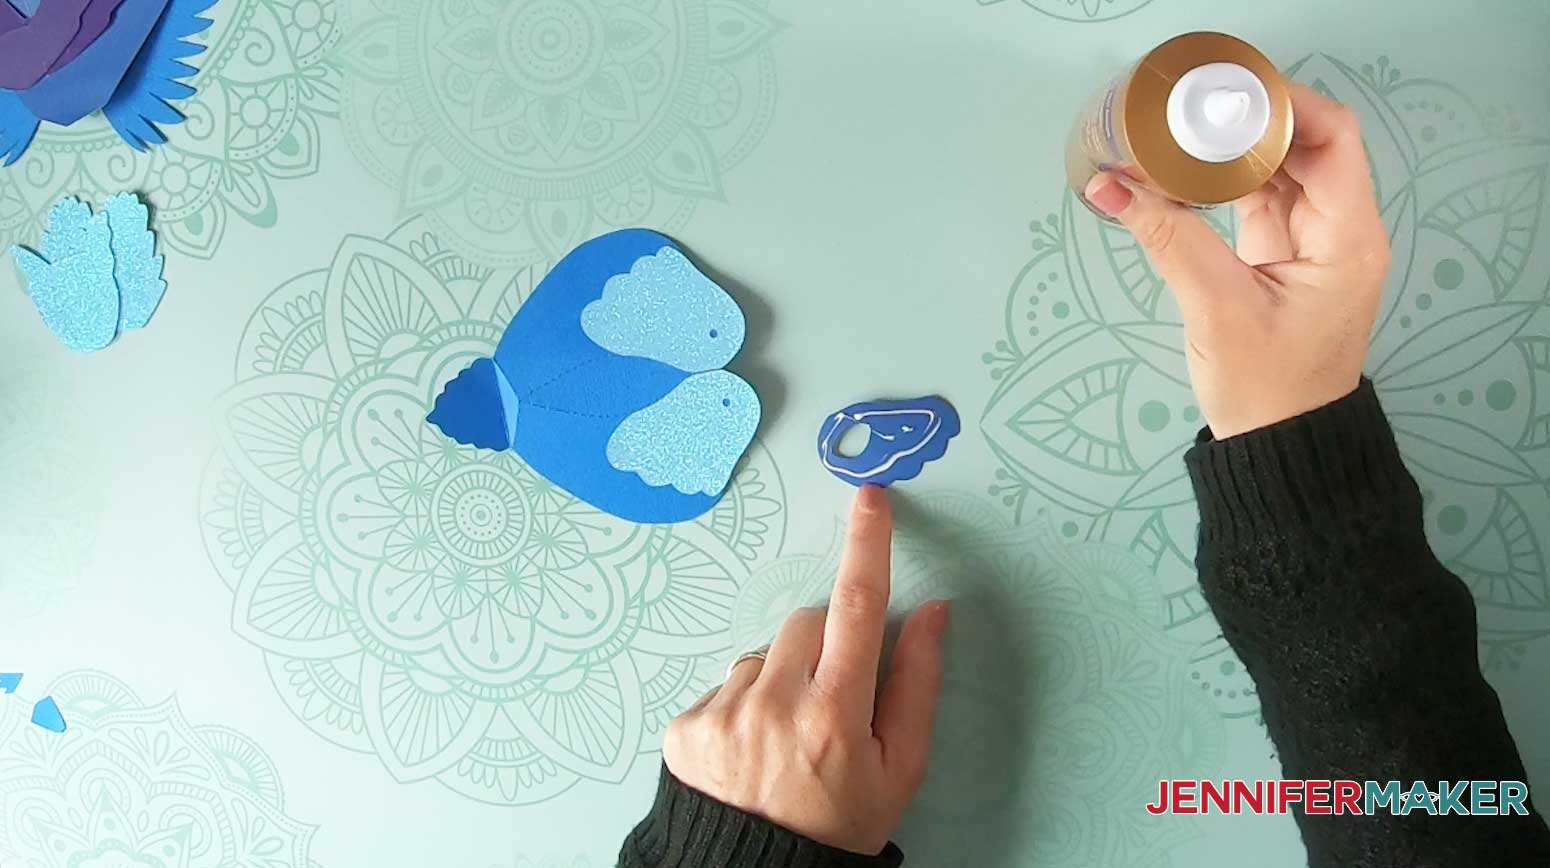
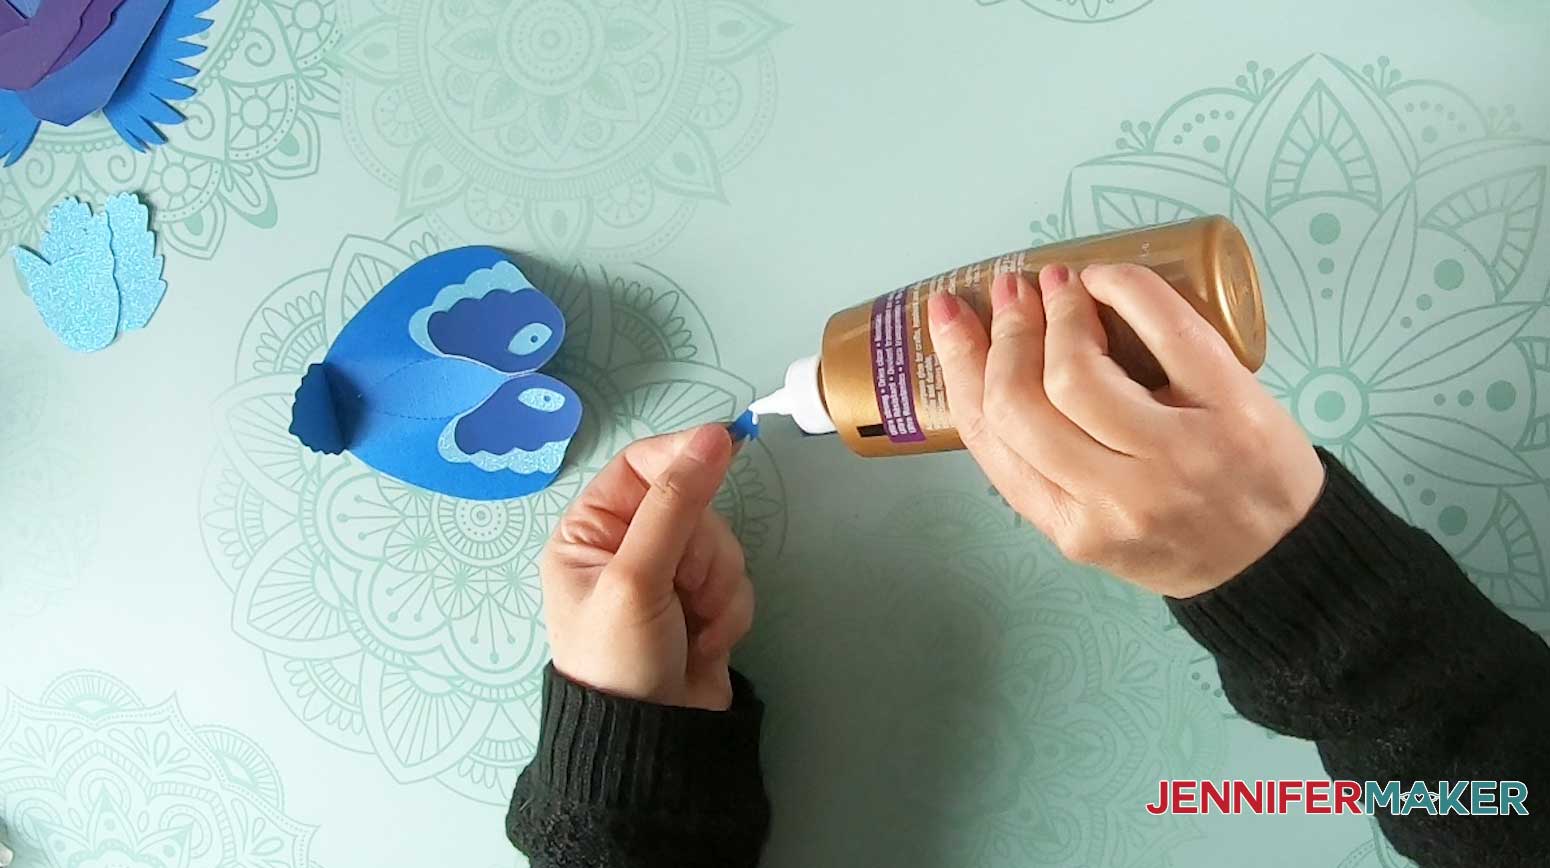
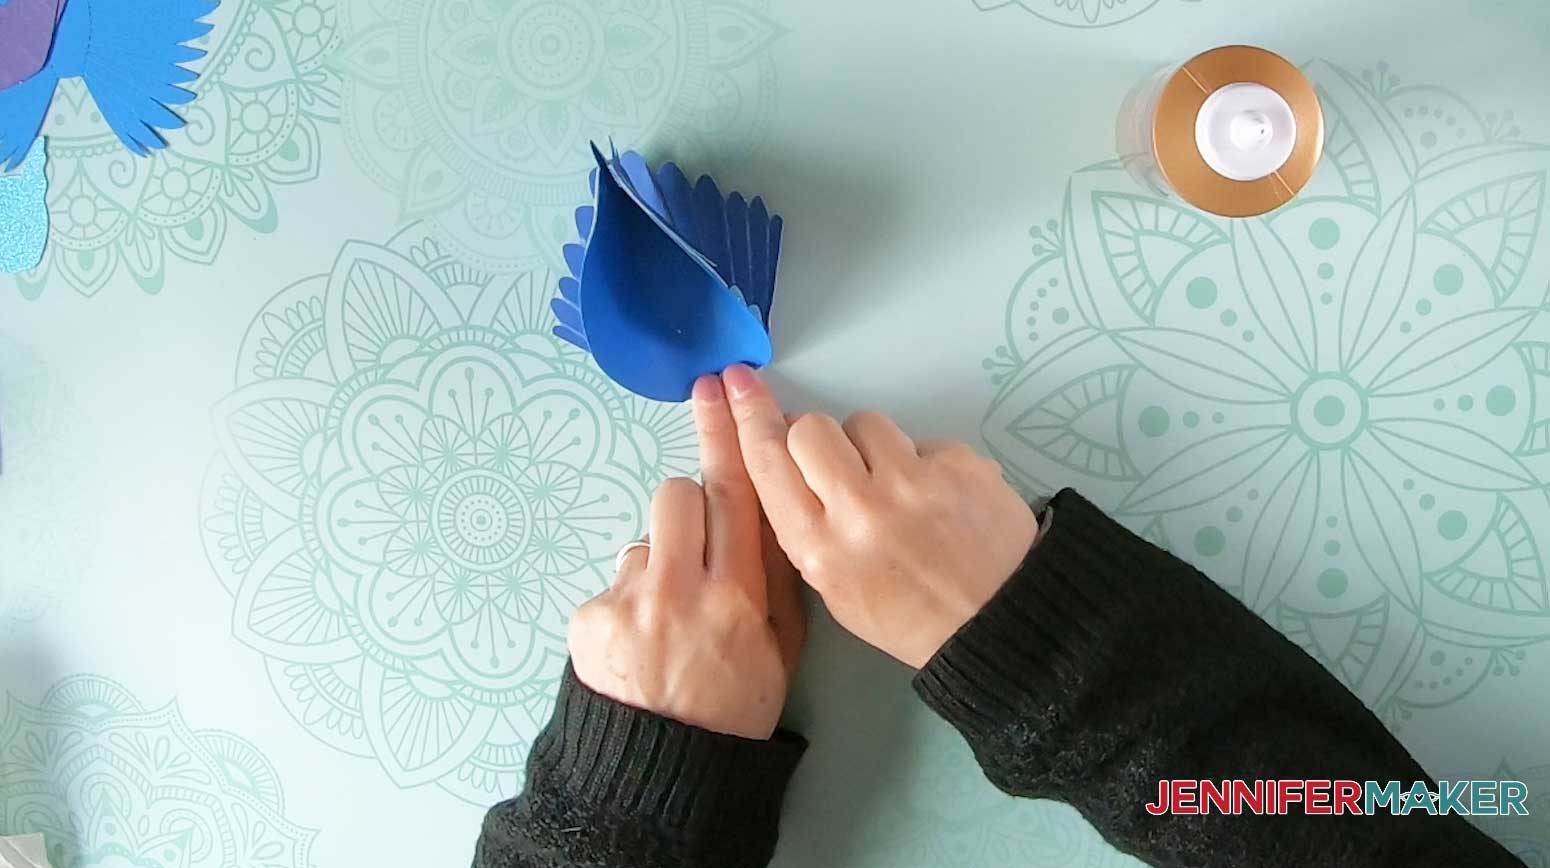
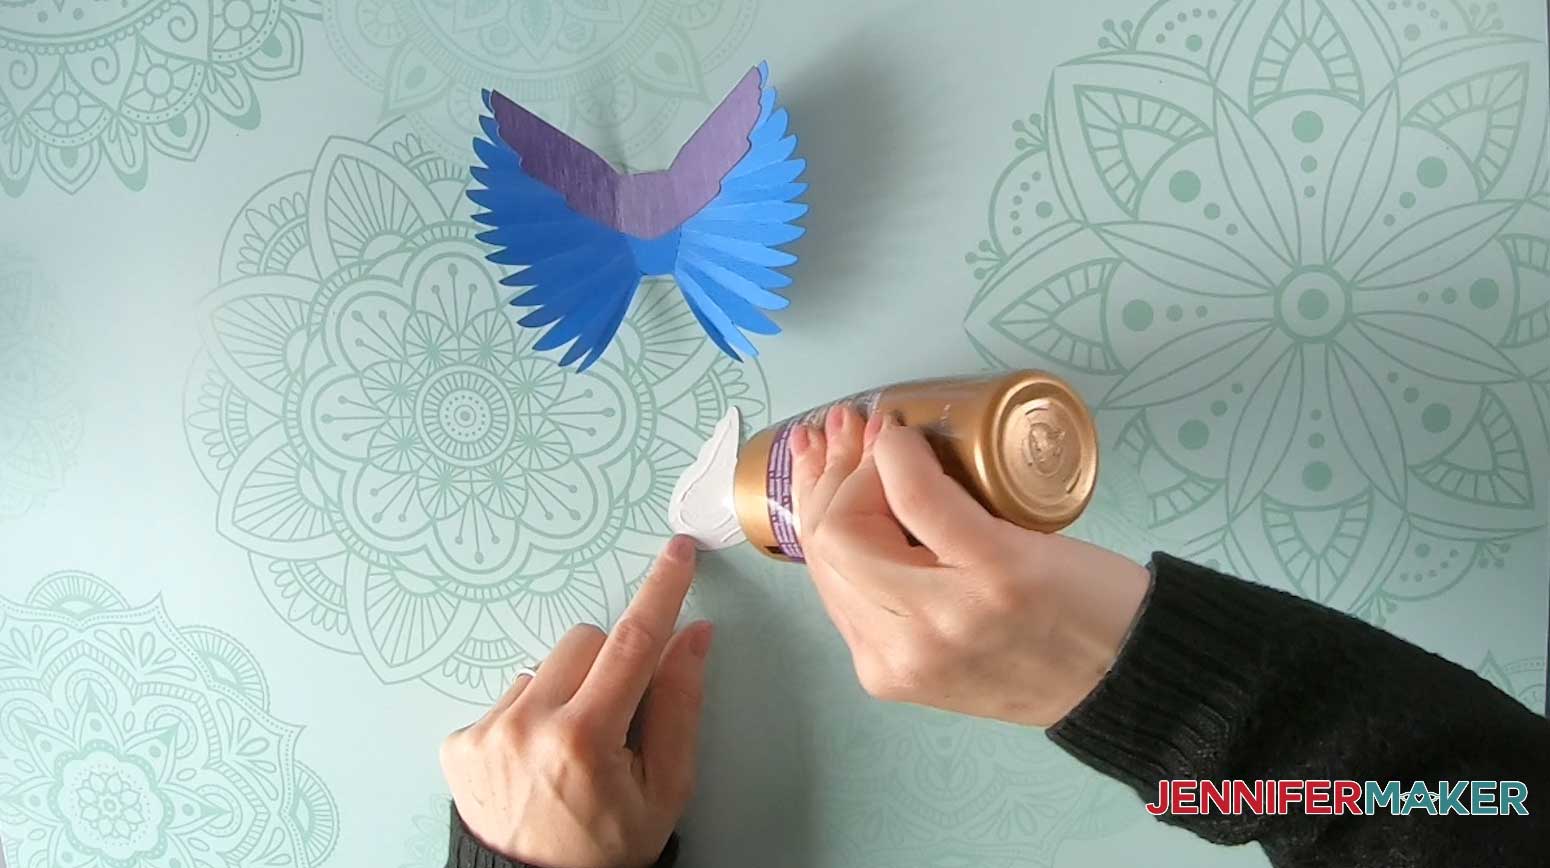
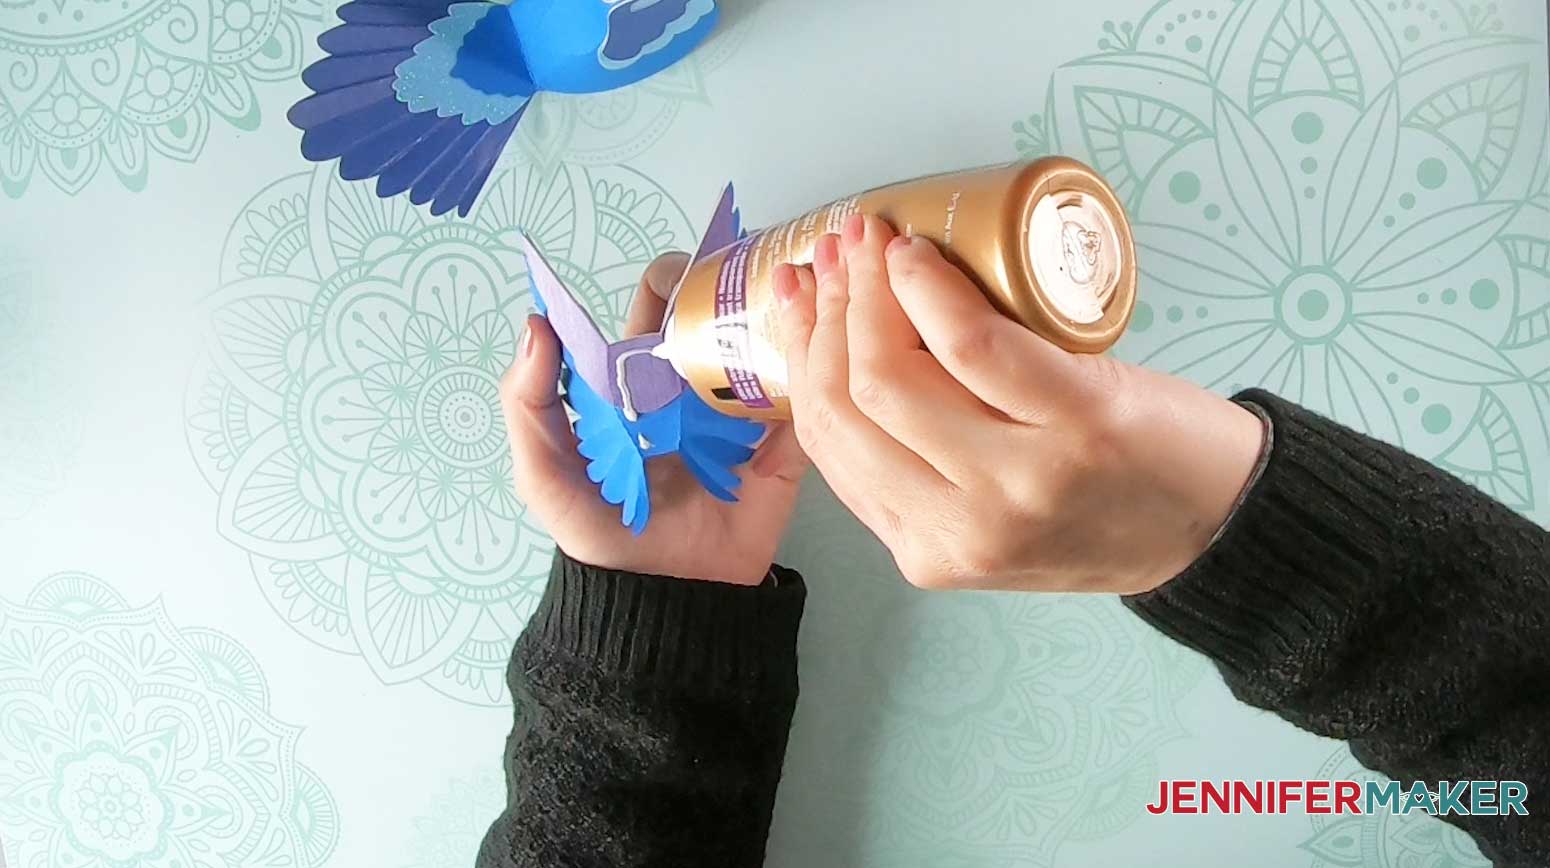
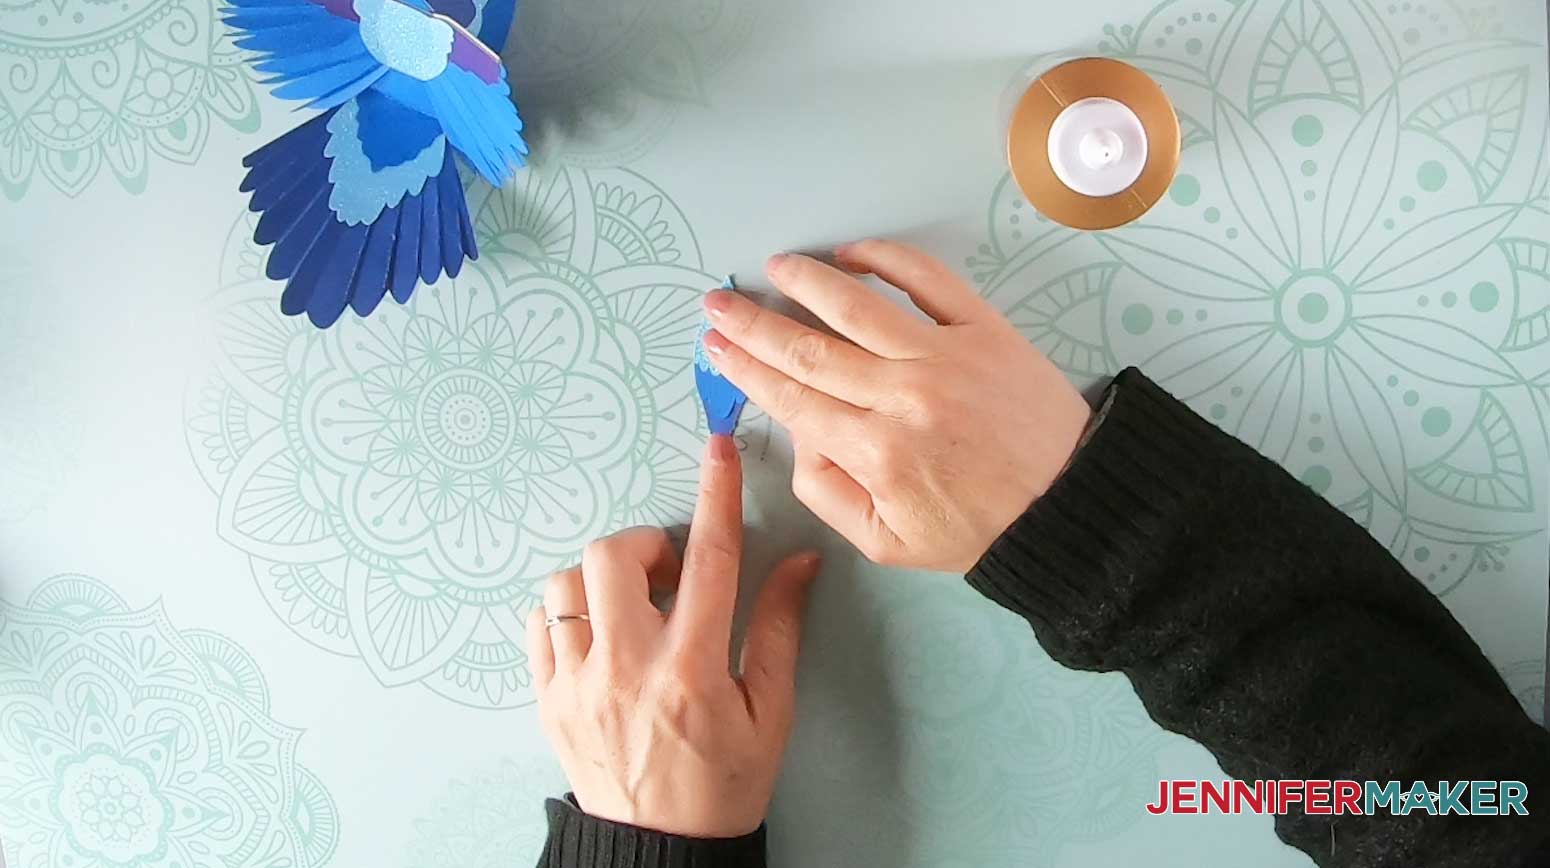
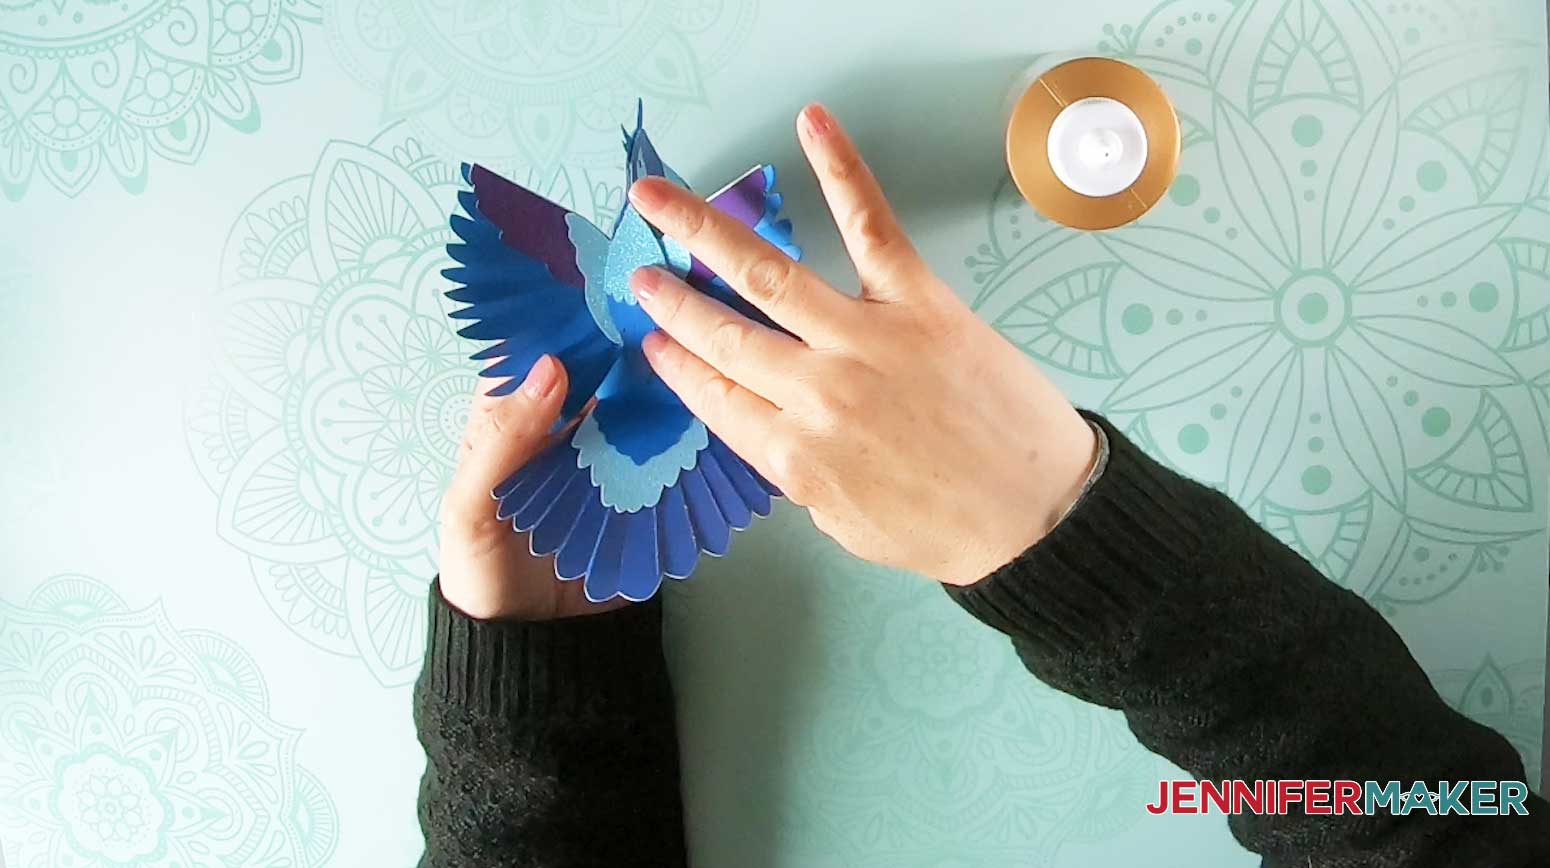
Add an extra dab or two of glue along the head or under the beak to help hold the bird’s shape, if necessary. Hold in place until the tacky glue dries.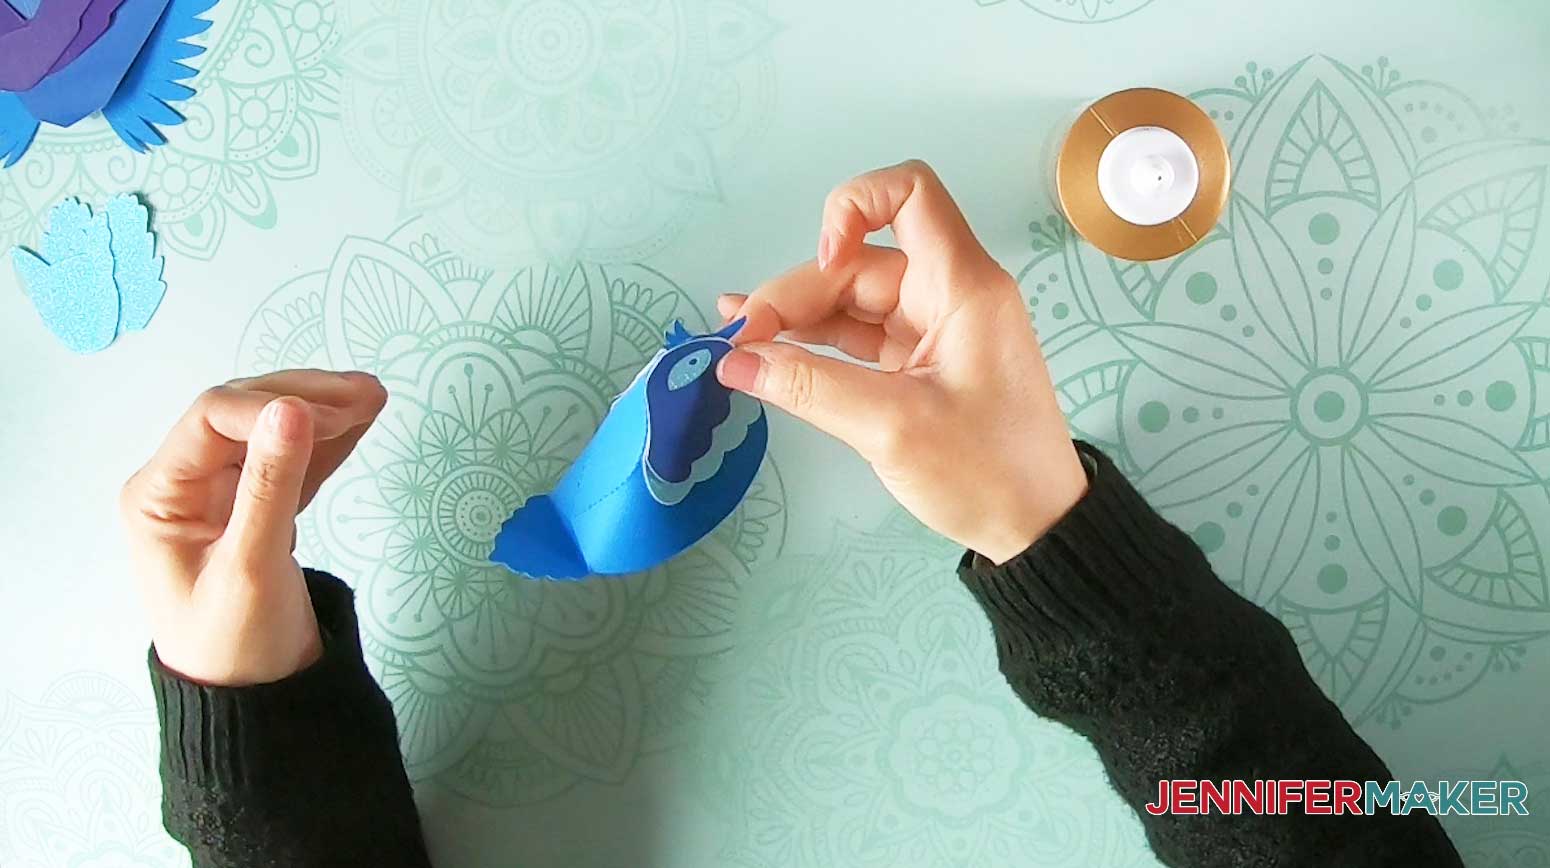


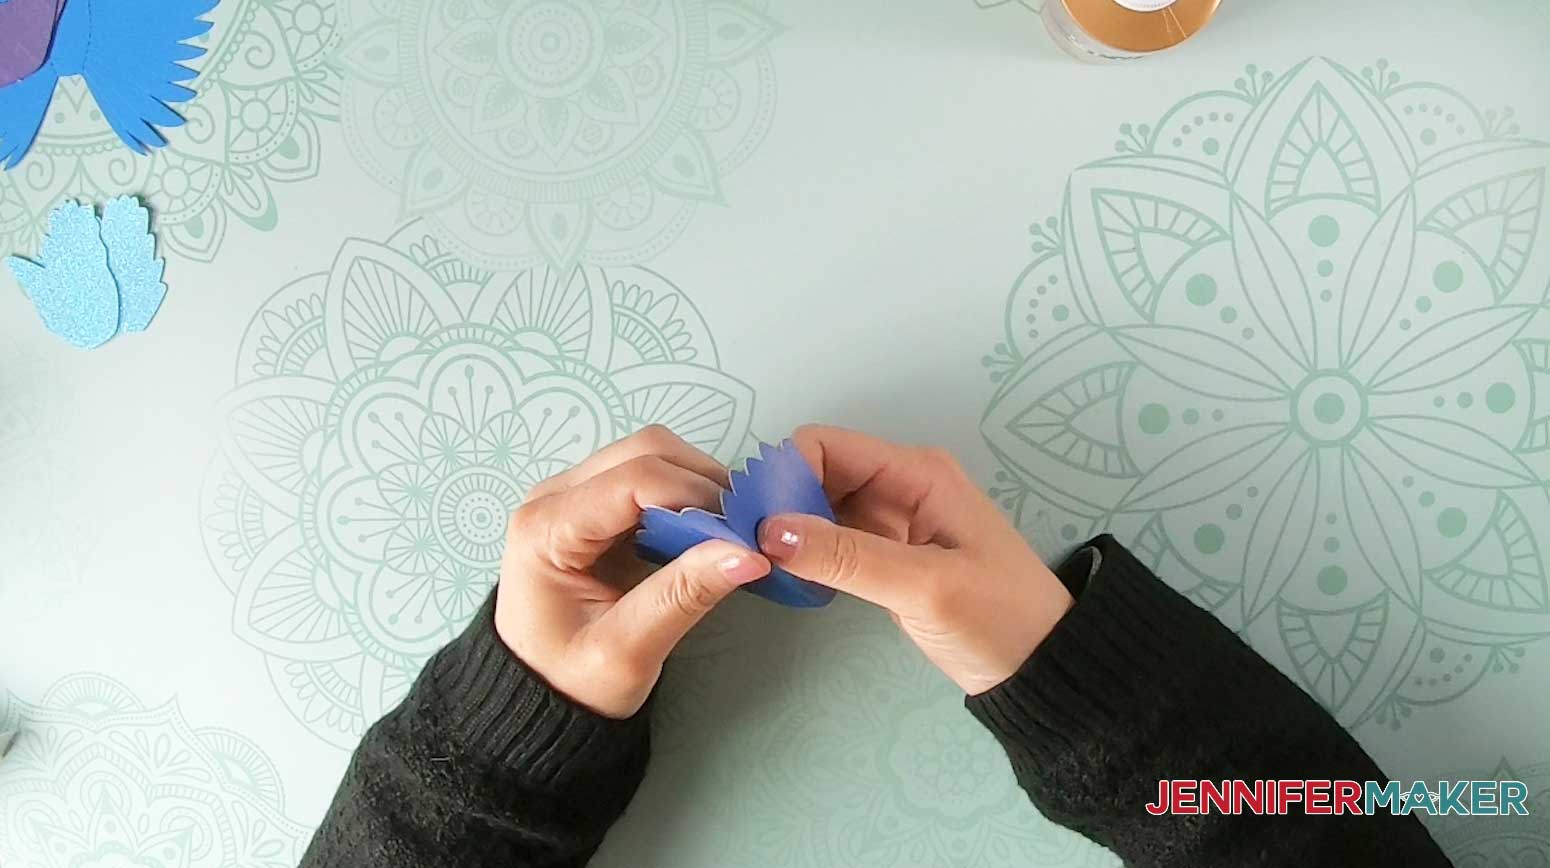
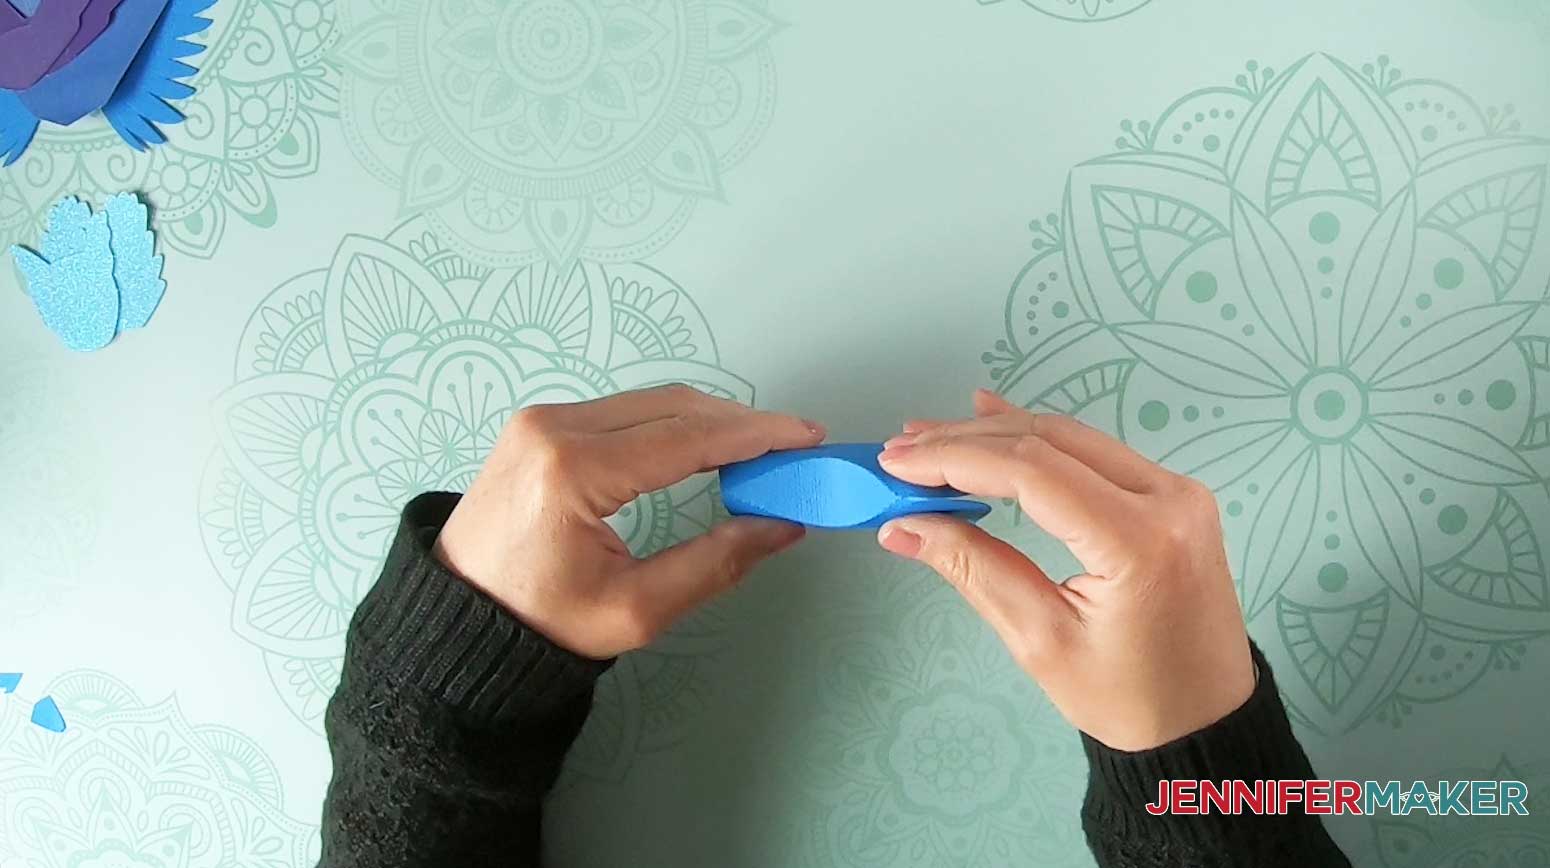
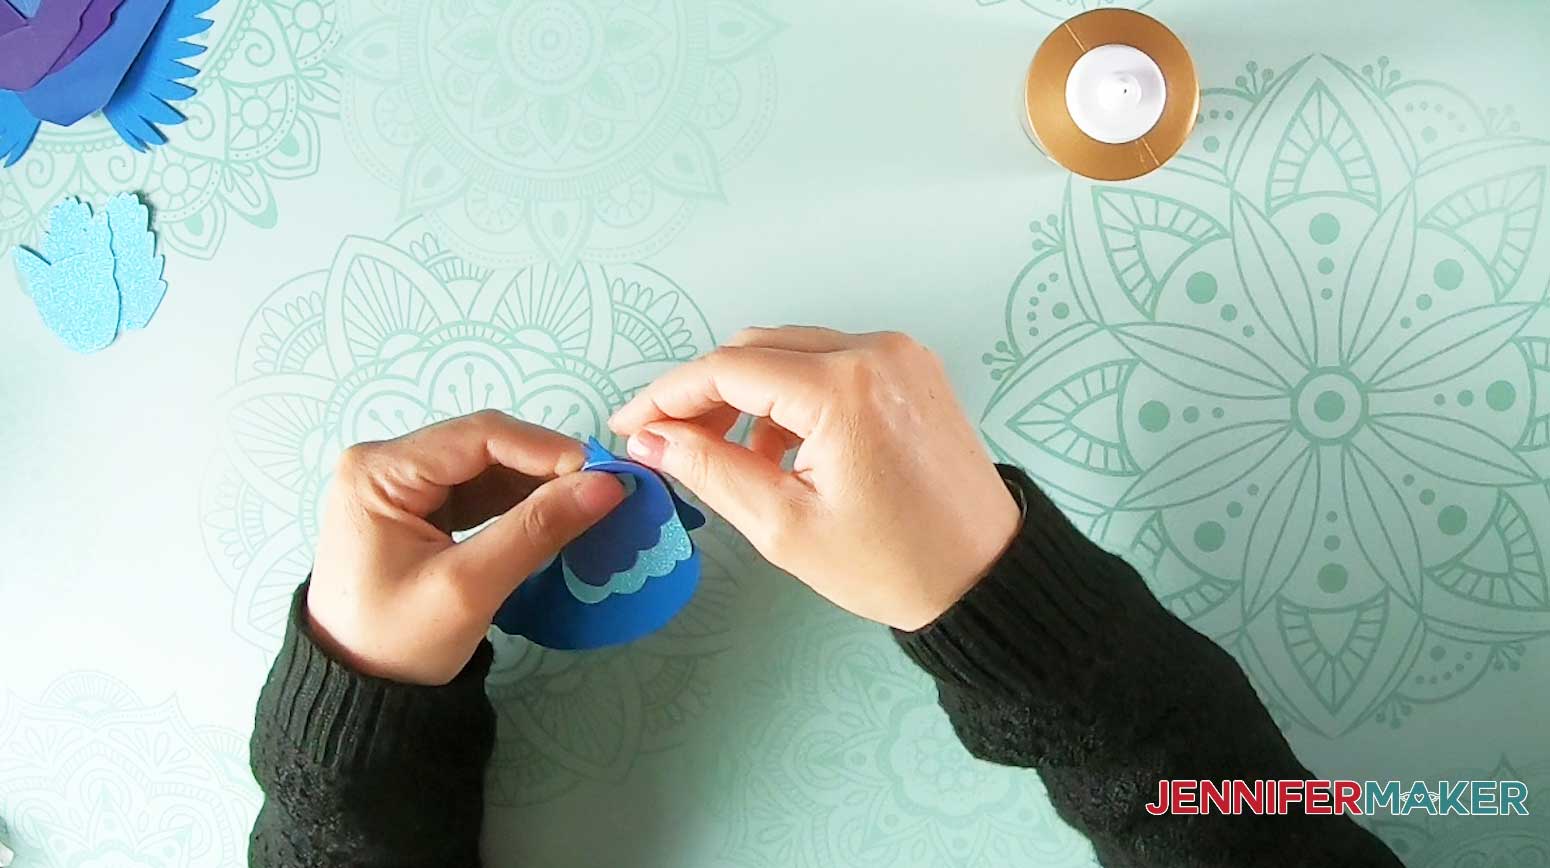
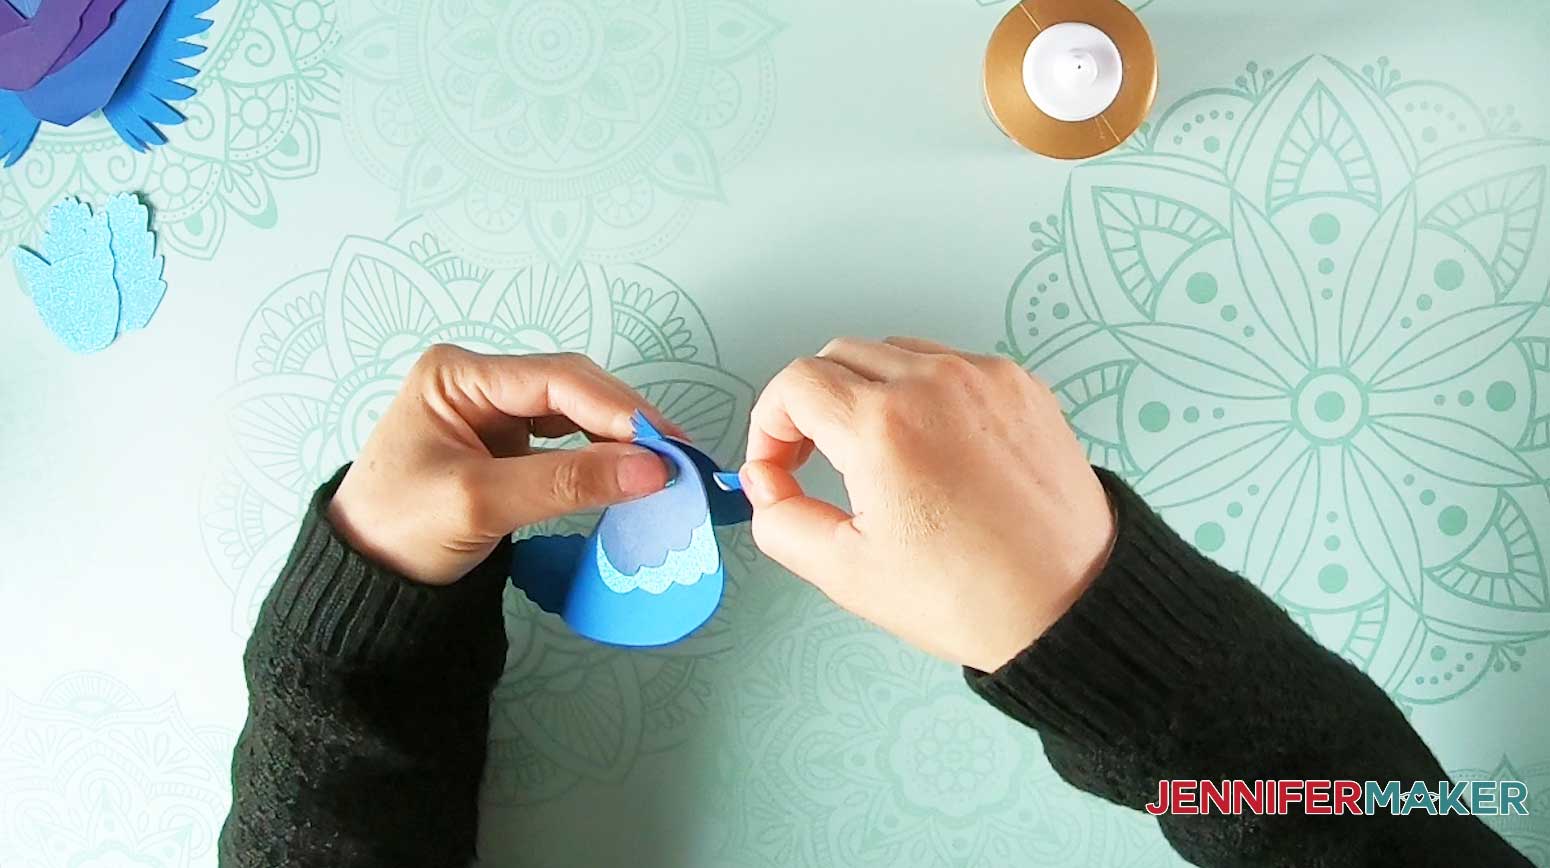
When the tail feathers are folded, fold the triangular end at the base of the tail UPWARD along the score line. 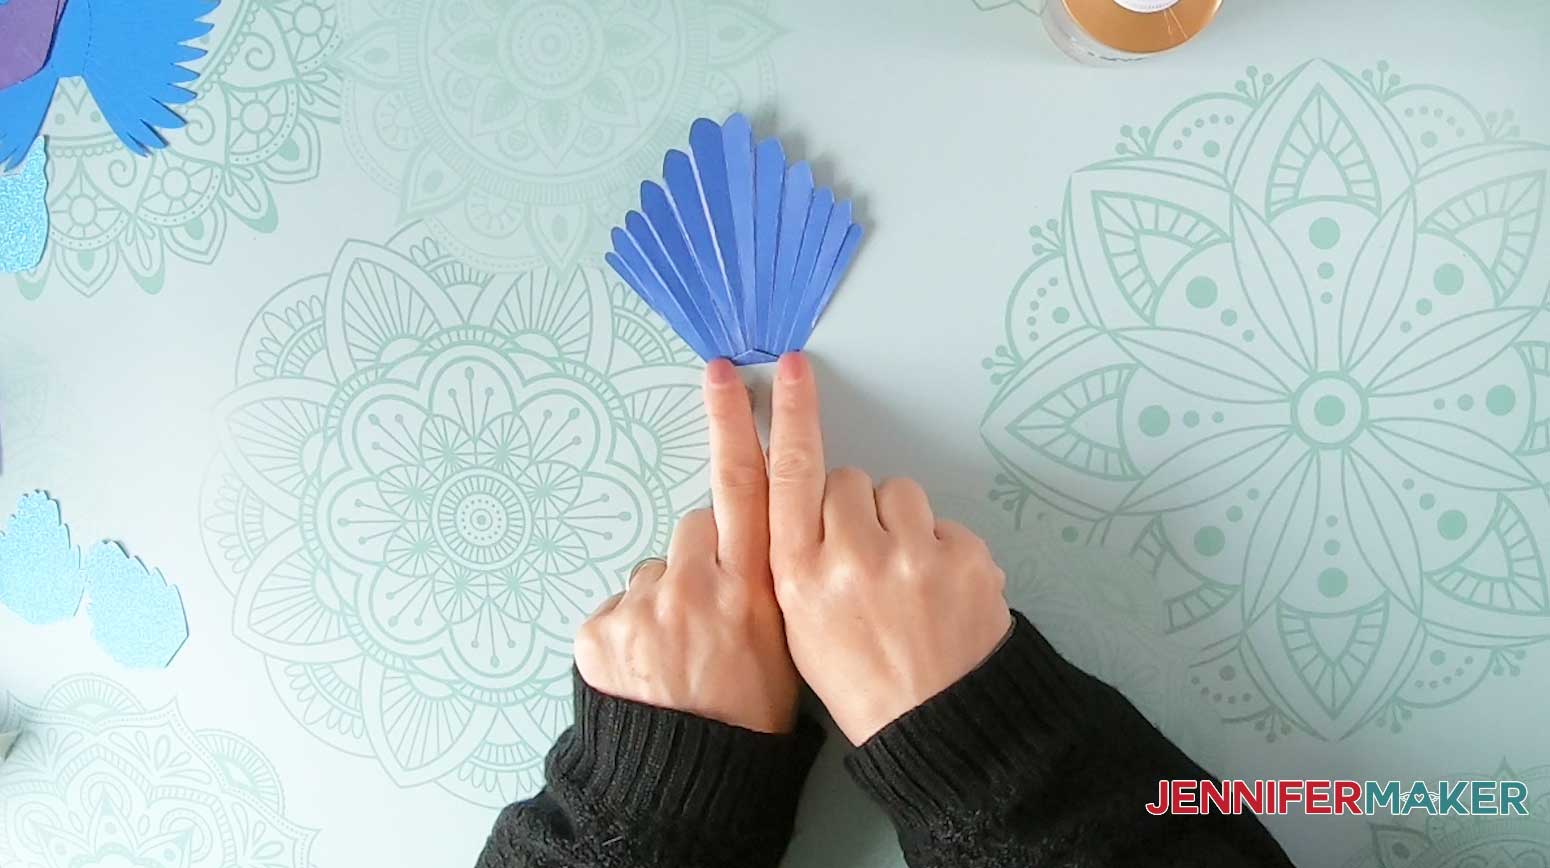

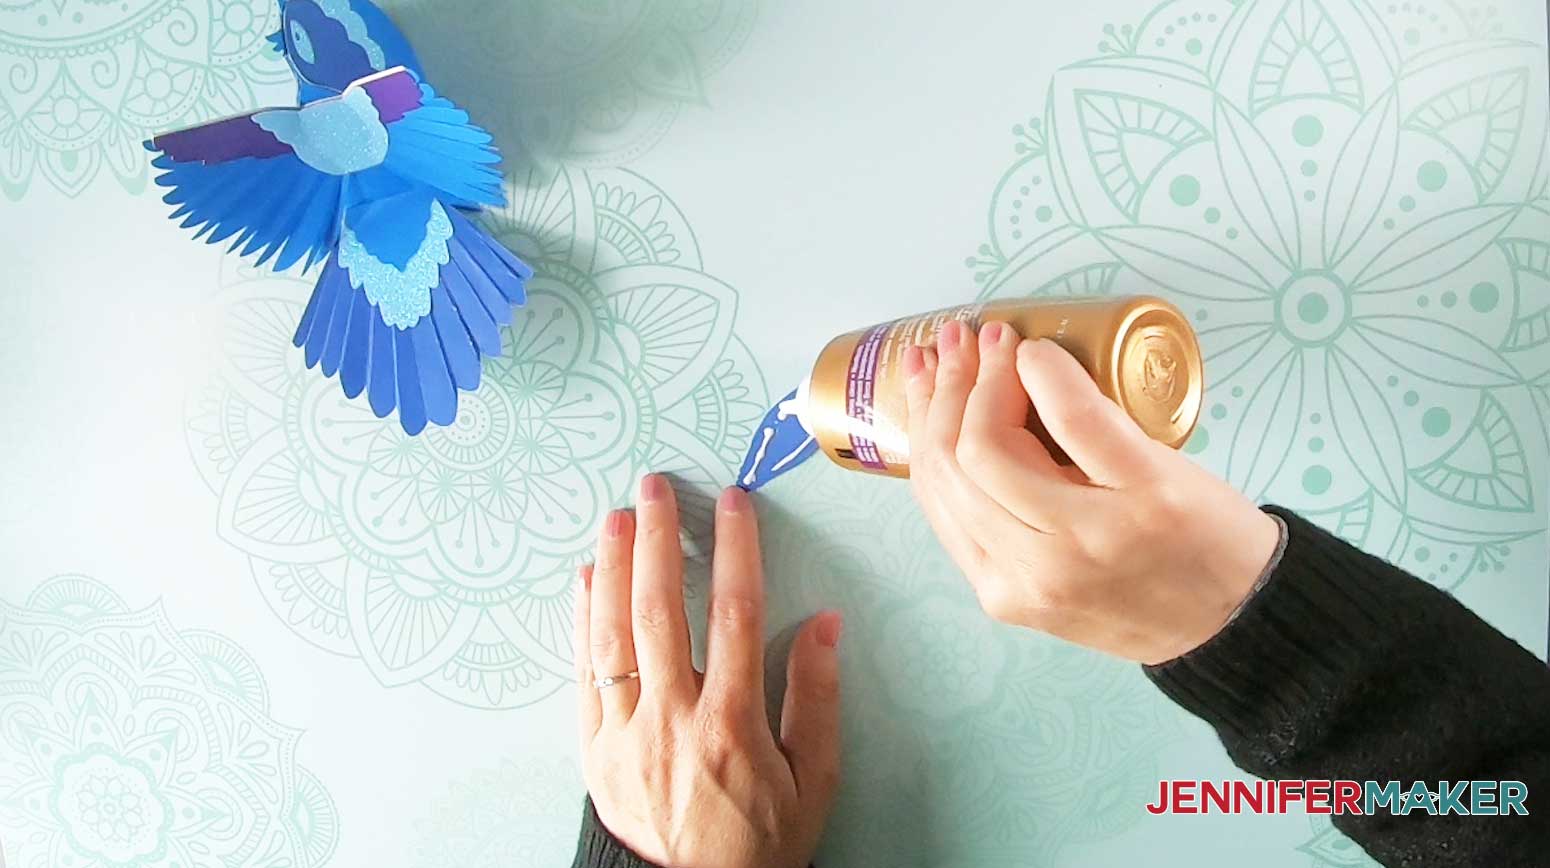
Next, we attach the tail to the body. Apply glue to the underside of the tail on the body, and also on the triangular part of the tail sections like this:
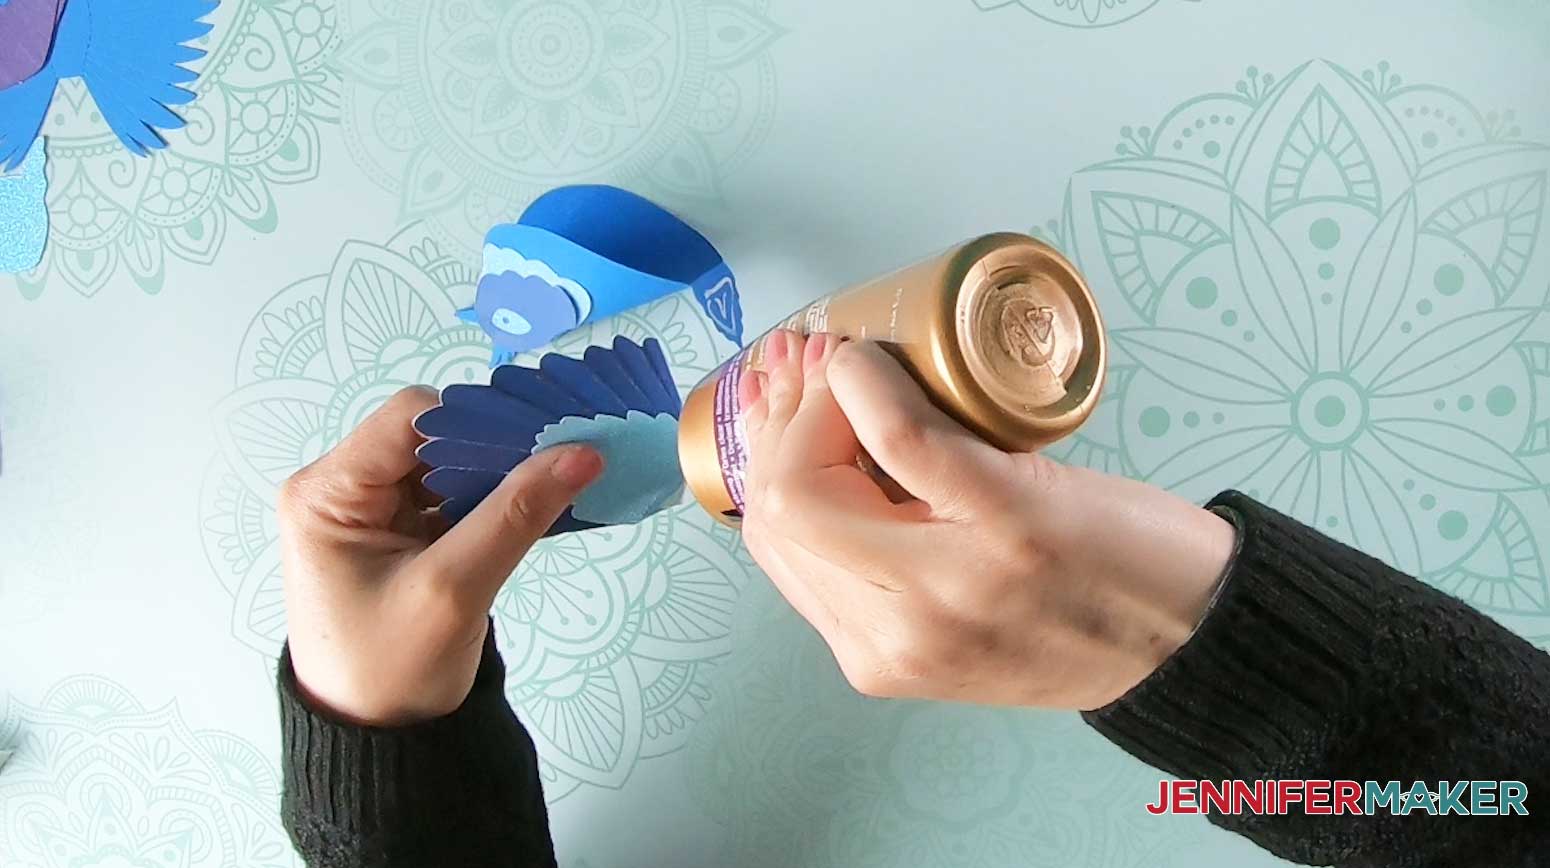
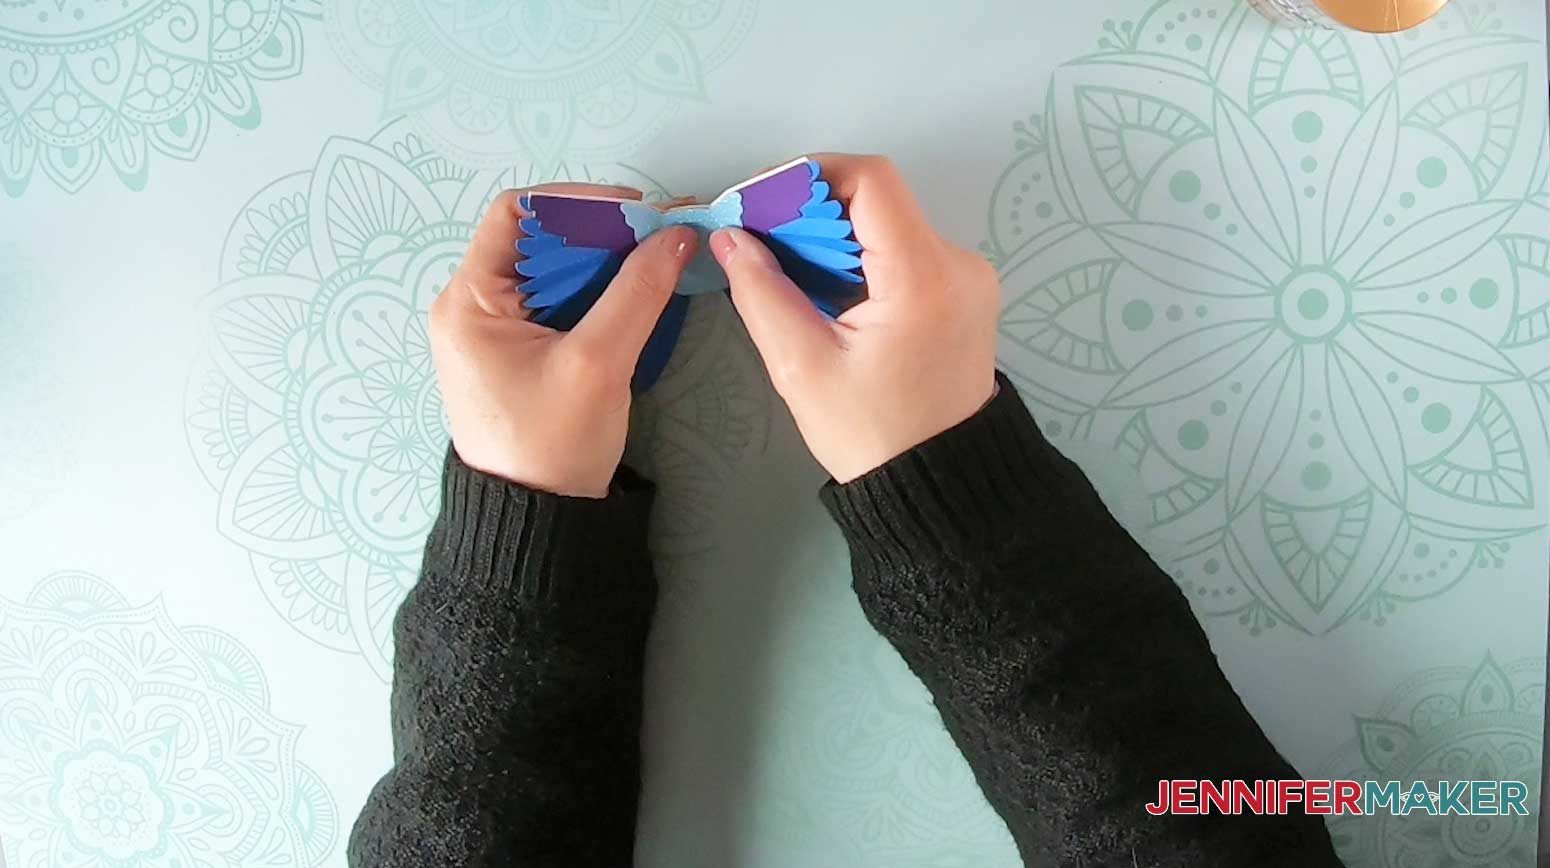
Press the tail pieces together and fold the triangular piece under the body and tuck into place. Hold the tail and triangle until the tacky glue sticks.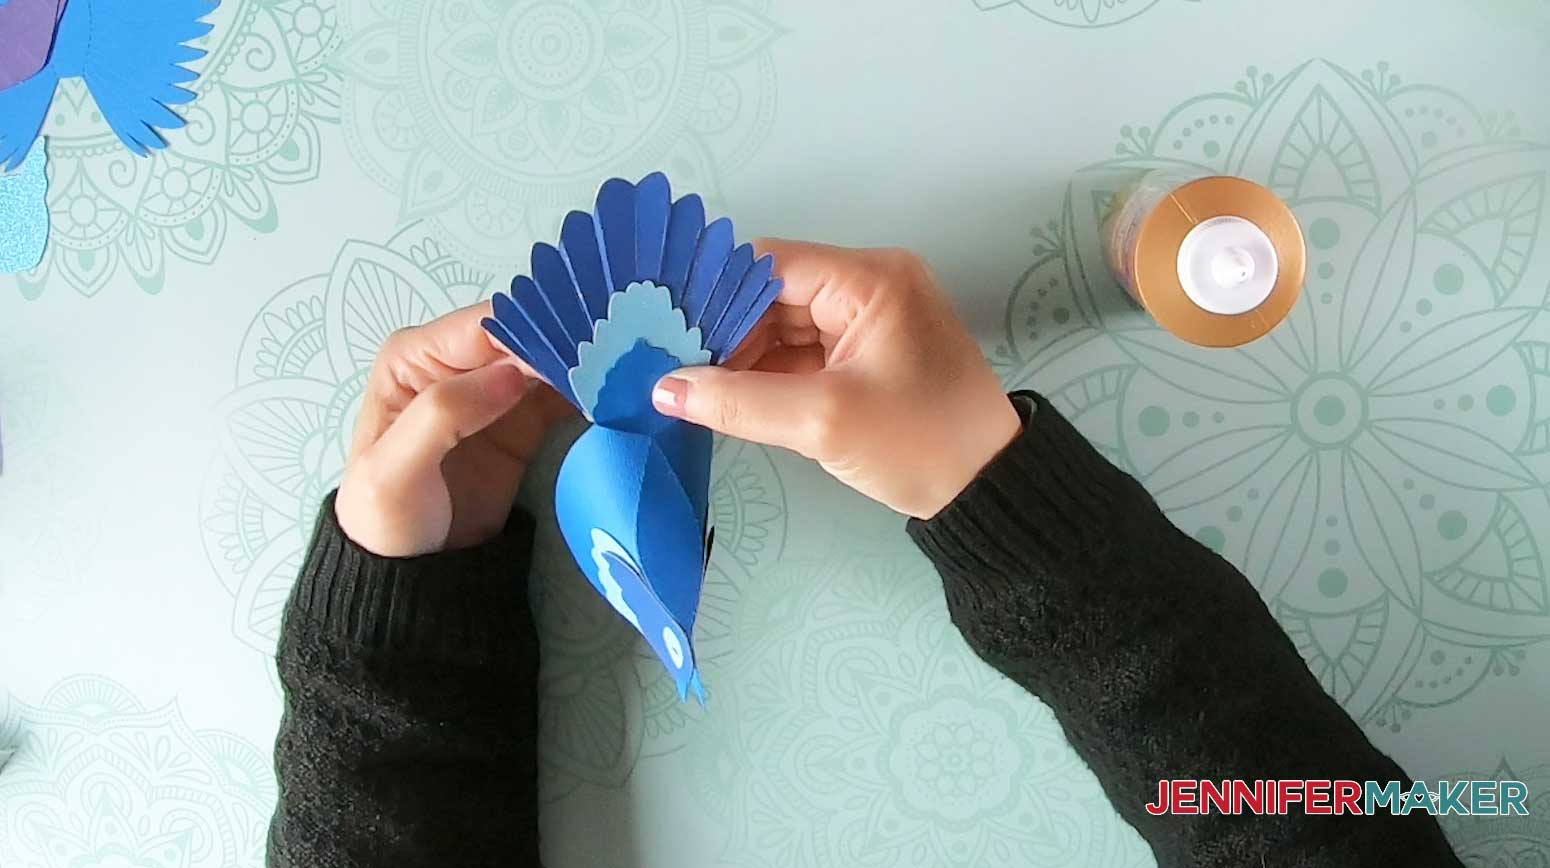
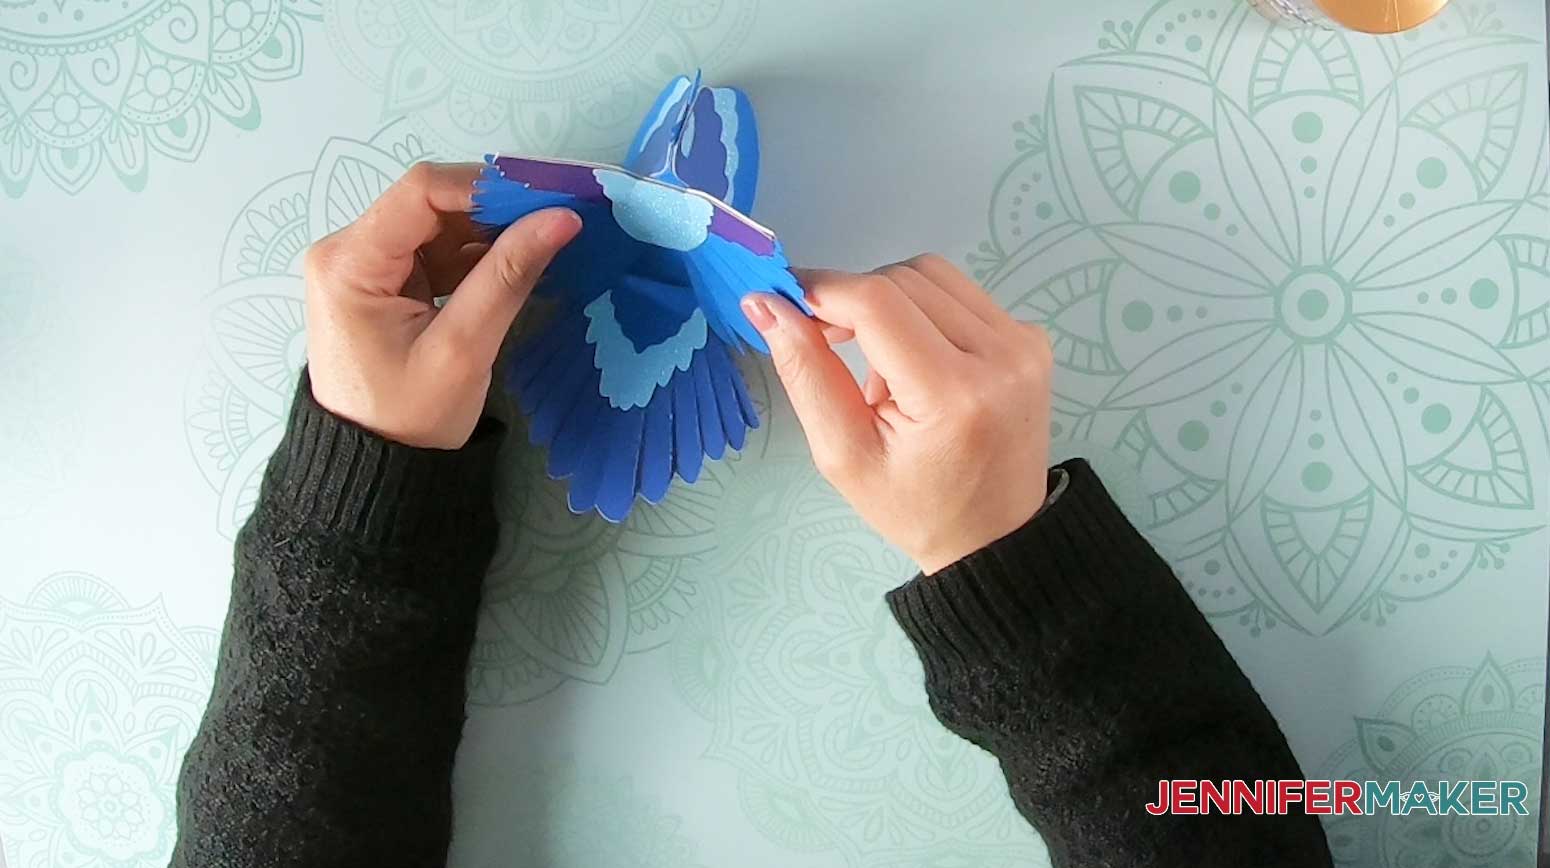
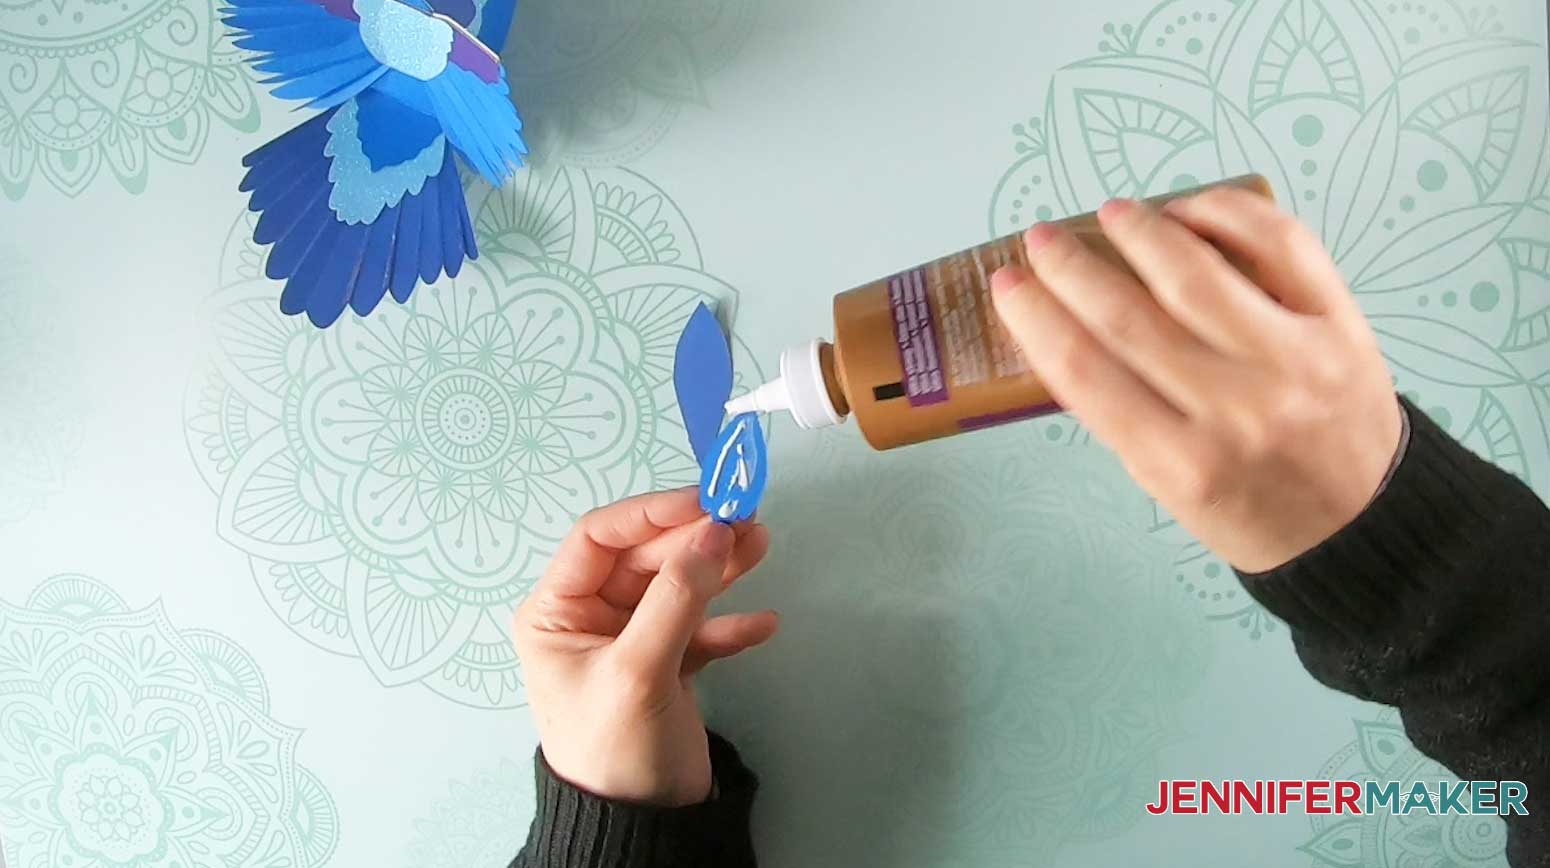
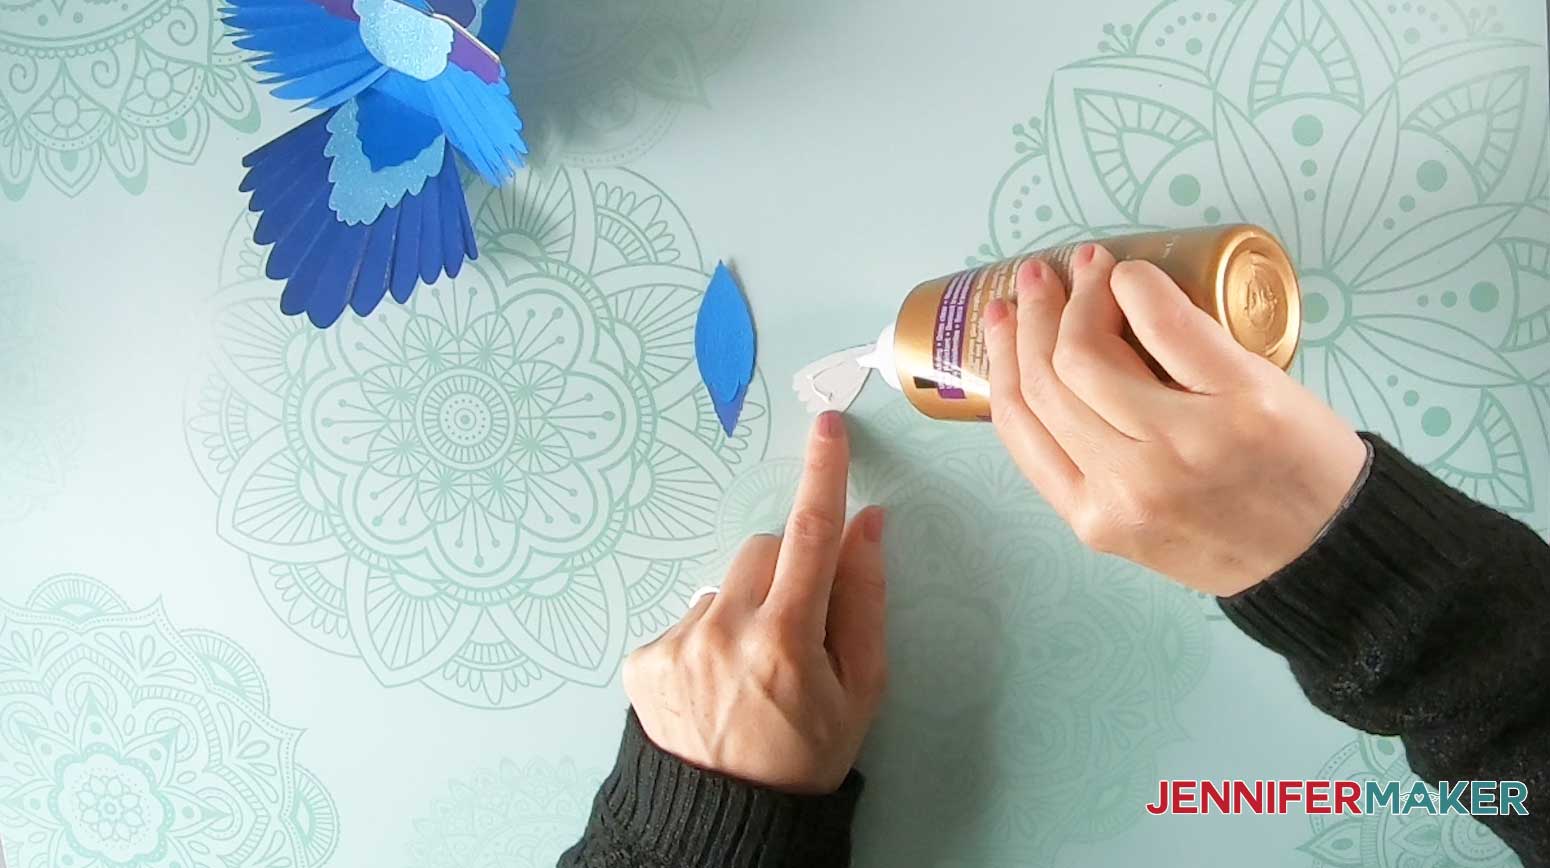
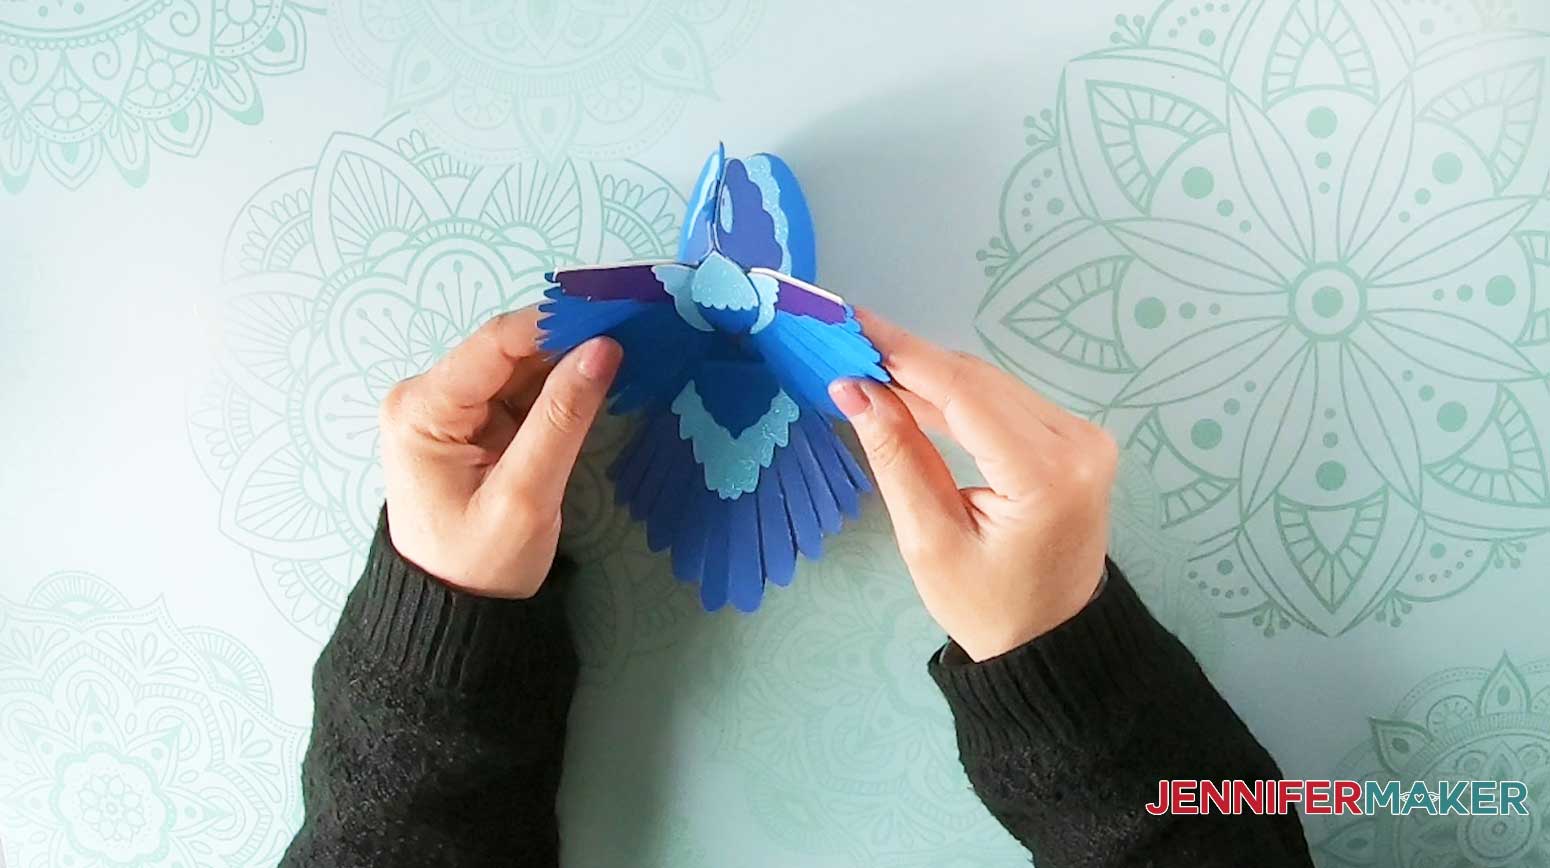
STEP 5: FOLD AND GLUE THE WINGS AND BACK
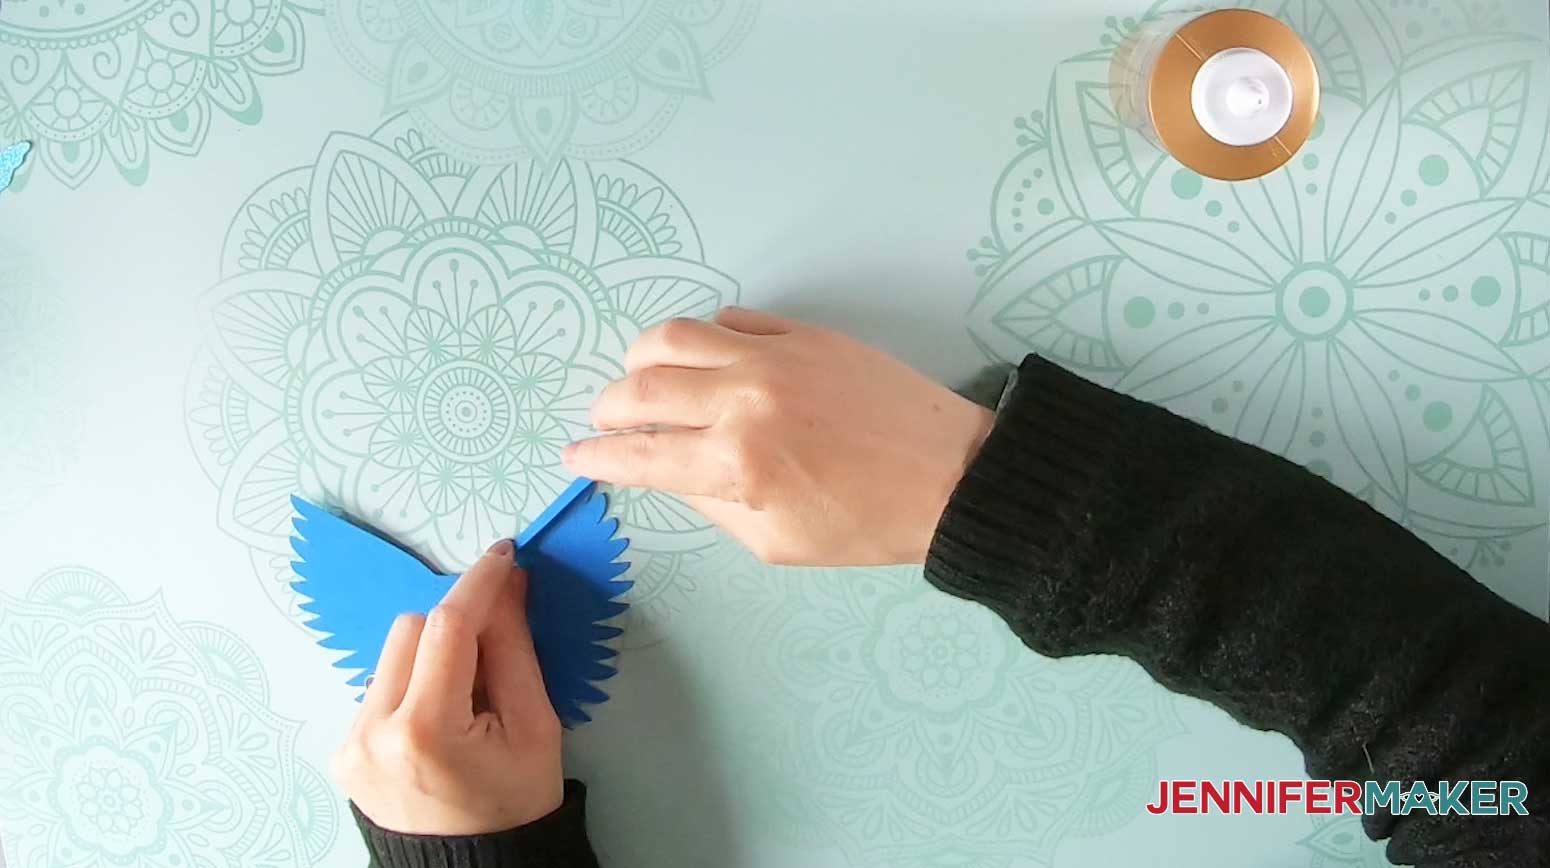

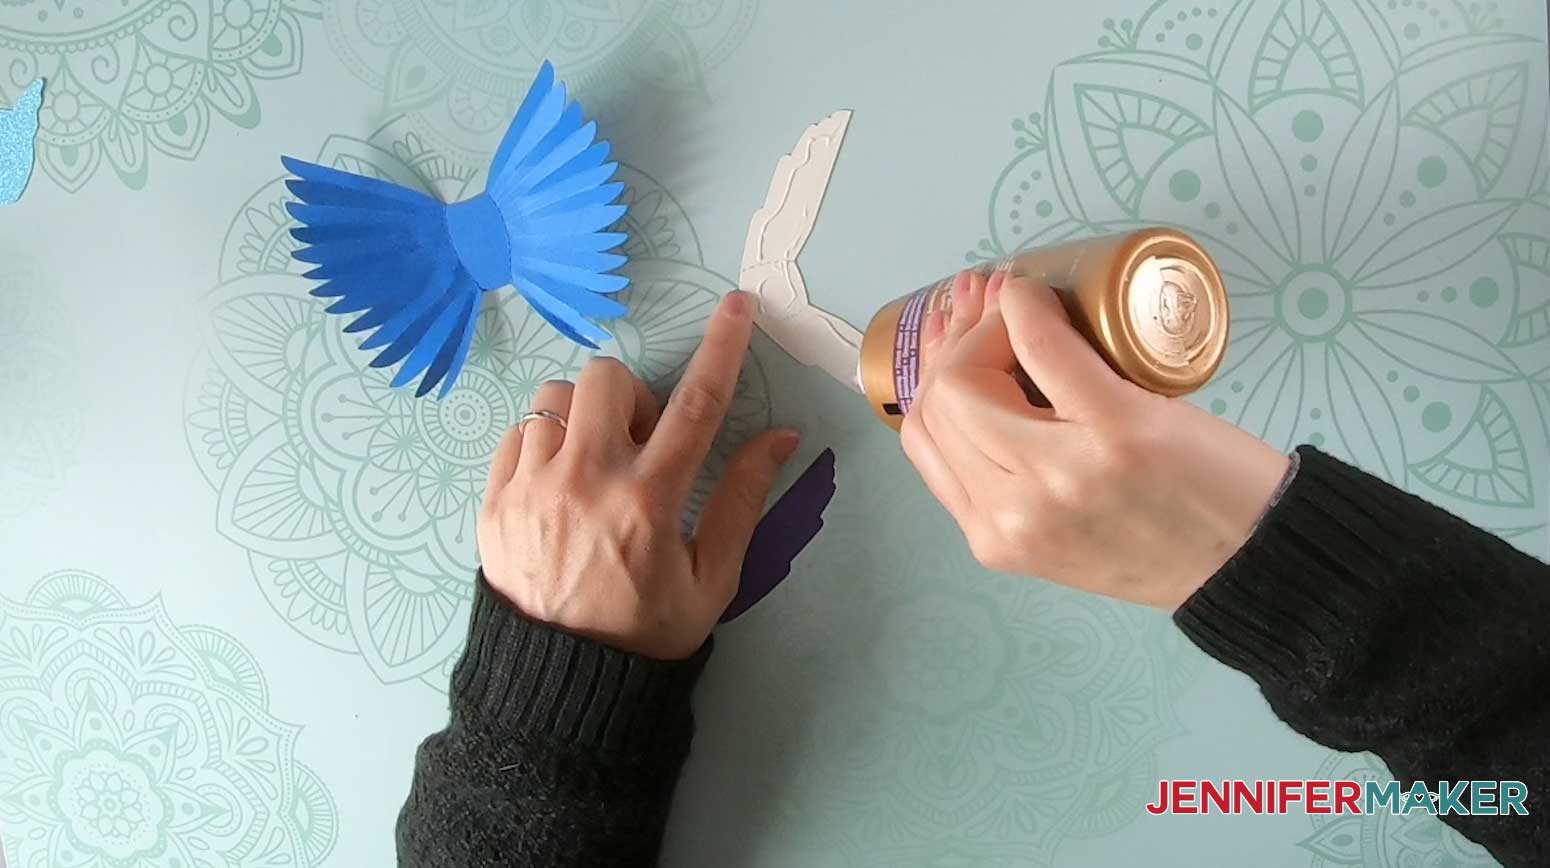
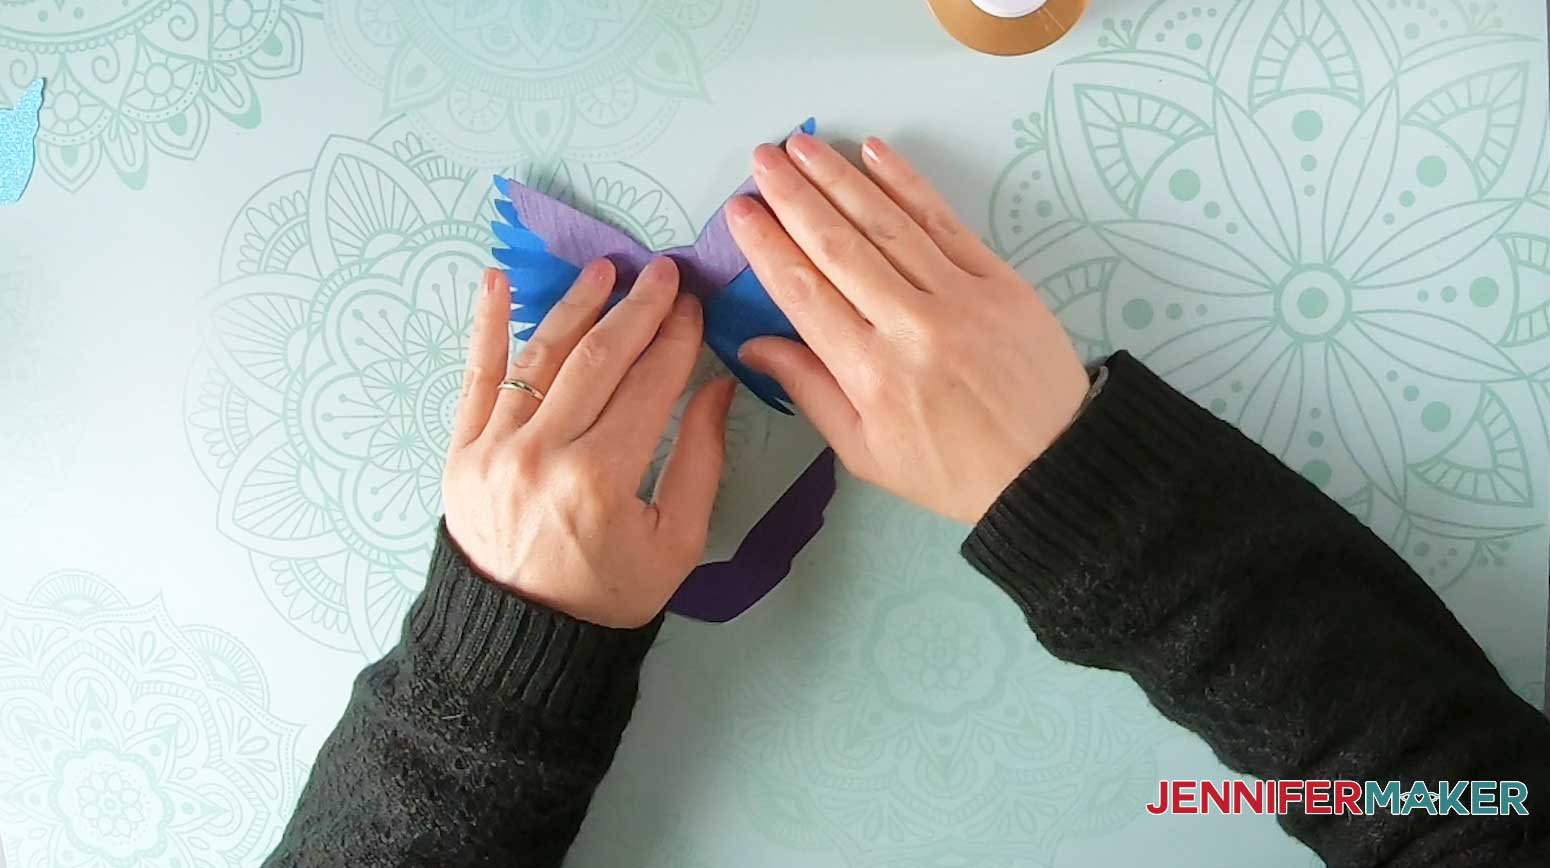
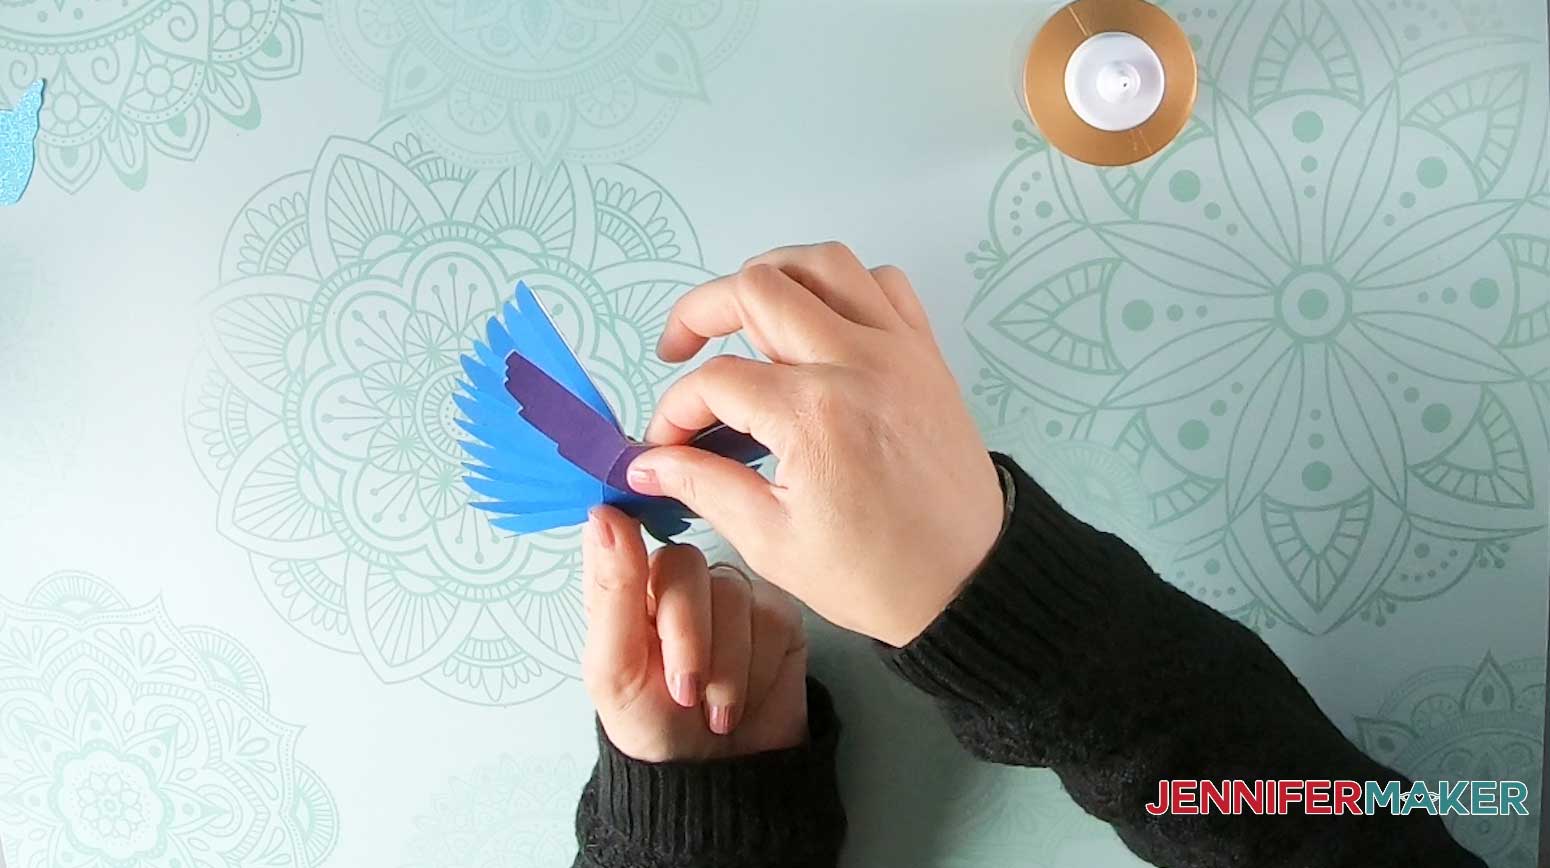
Fold the final, top wing piece along the perforated score line and glue on top of the wing.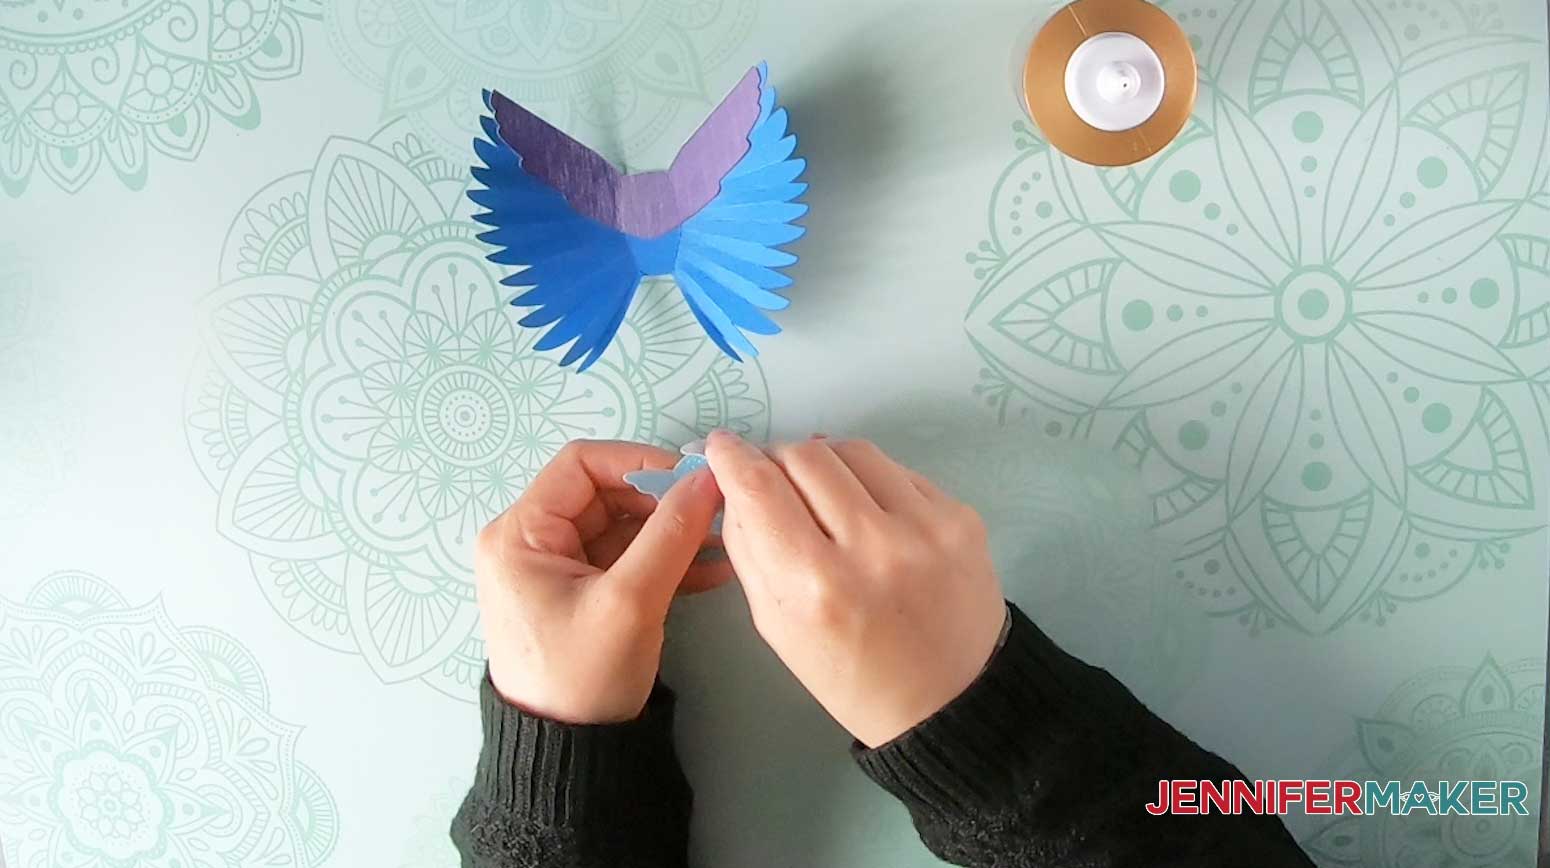
STEP 6: SHOW OFF YOUR PAPER BIRDS
Notes
ACKNOWLEDGMENTS
Get my free SVG files to make Easy 3D Paper Birds
I’d love to see your colorful Easy 3D Paper Birds. Please share a photo in our Facebook group or tag me on social media with #jennifermaker.
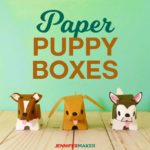
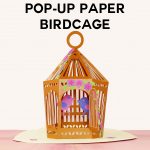
If you’re interested in animal designs, take a look at my other projects:


Love,

Want to remember this? Save this Easy 3D Paper Birds tutorial to your favorite Pinterest Board!