
Wooden Bead Ornament: Star
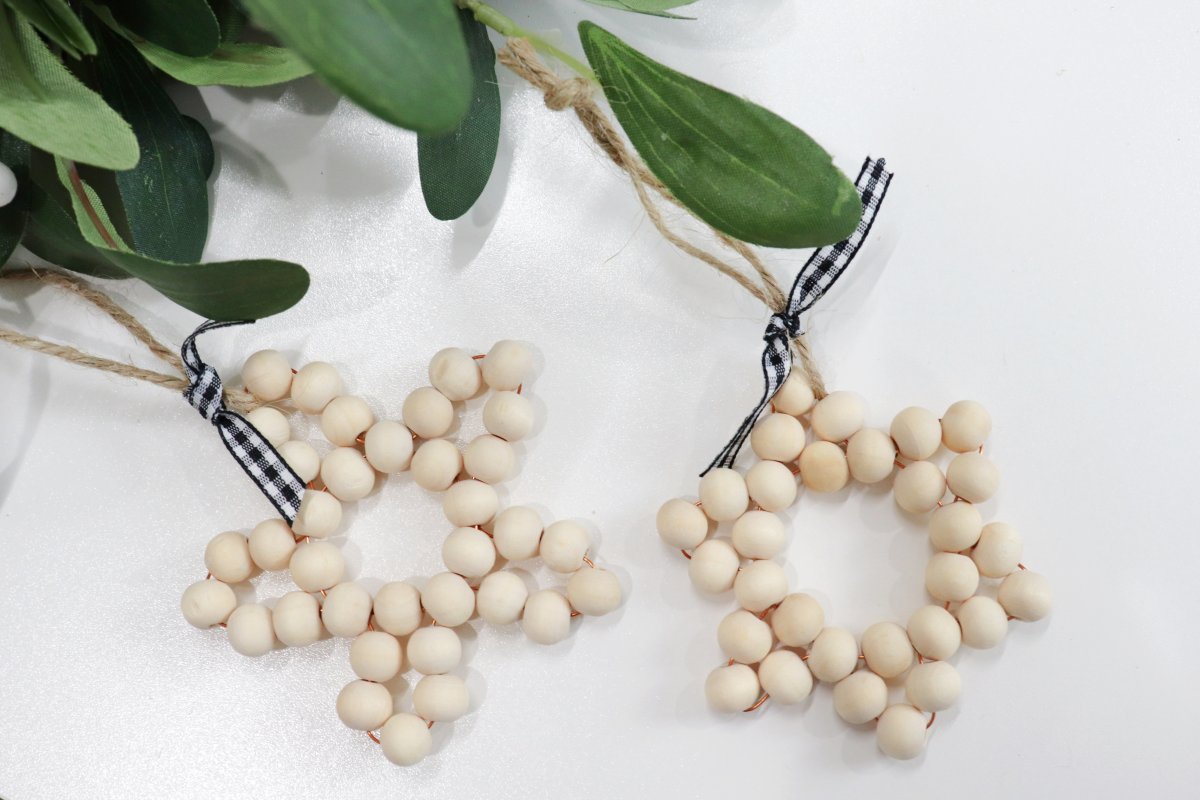
Friends, I hope you’ve enjoyed the different wooden bead ornaments in this little series as much as I have! Today, I want to share with you the final one; Wooden Bead Stars! At first, these might seem a little more complicated than the others, but once you get the hang of the technique, they’ll take you five minutes or less to create. Plus, just by making a few small alterations, you can have several different variations. You can make either a 5 or a 6 pointed star (depending on whether you start with 10 beads in your circle or 12), and you can make larger or smaller points, depending on whether you use three or five beads for each one. Here’s what you need to get started.
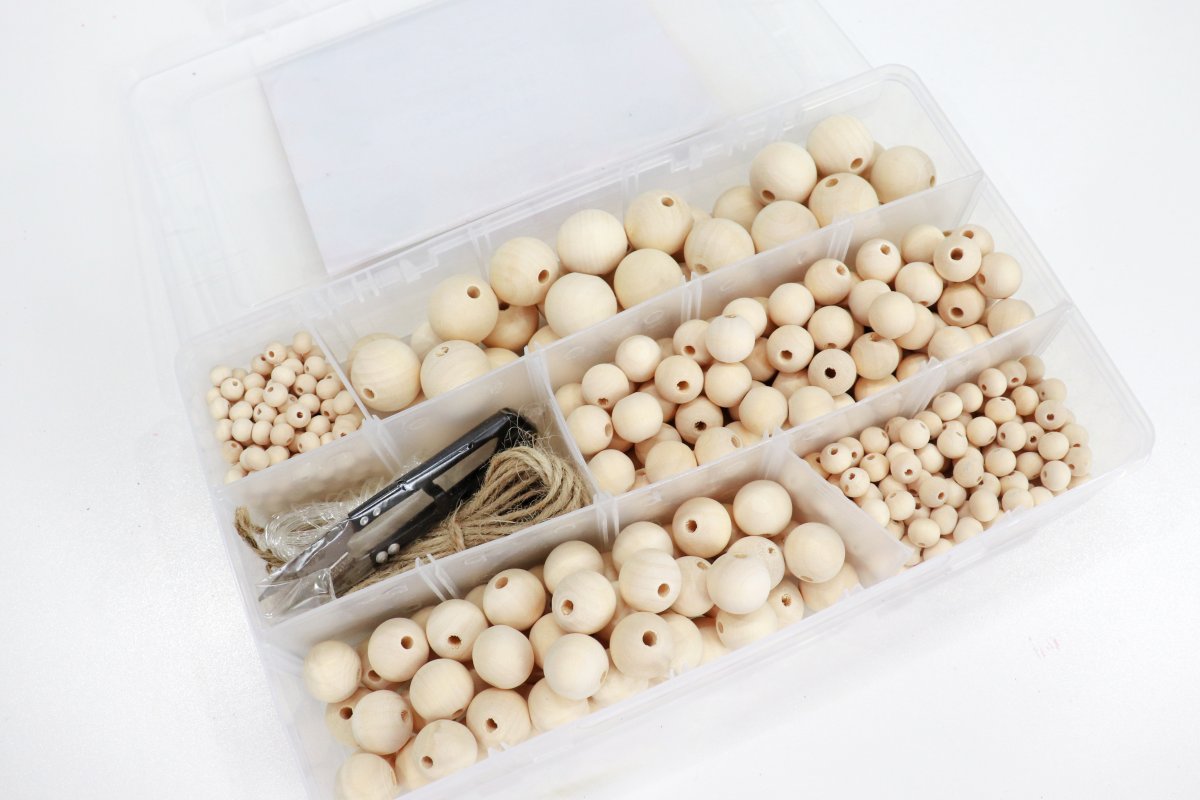
You’ll need:
20 gauge wire and wire cutters
wooden beads (mine were 20mm, but you can use any size)
jute/twine/string
ribbon (optional)
scissors
I got my beads and the twine from the Incraftables Wooden Beads Set. It comes with five different sizes of wooden beads, elastic cord, and jute. This is the base supply kit I used for all four kinds of my wooden bead ornaments. If you want to try it out, use the code AMY15 to save on your order.
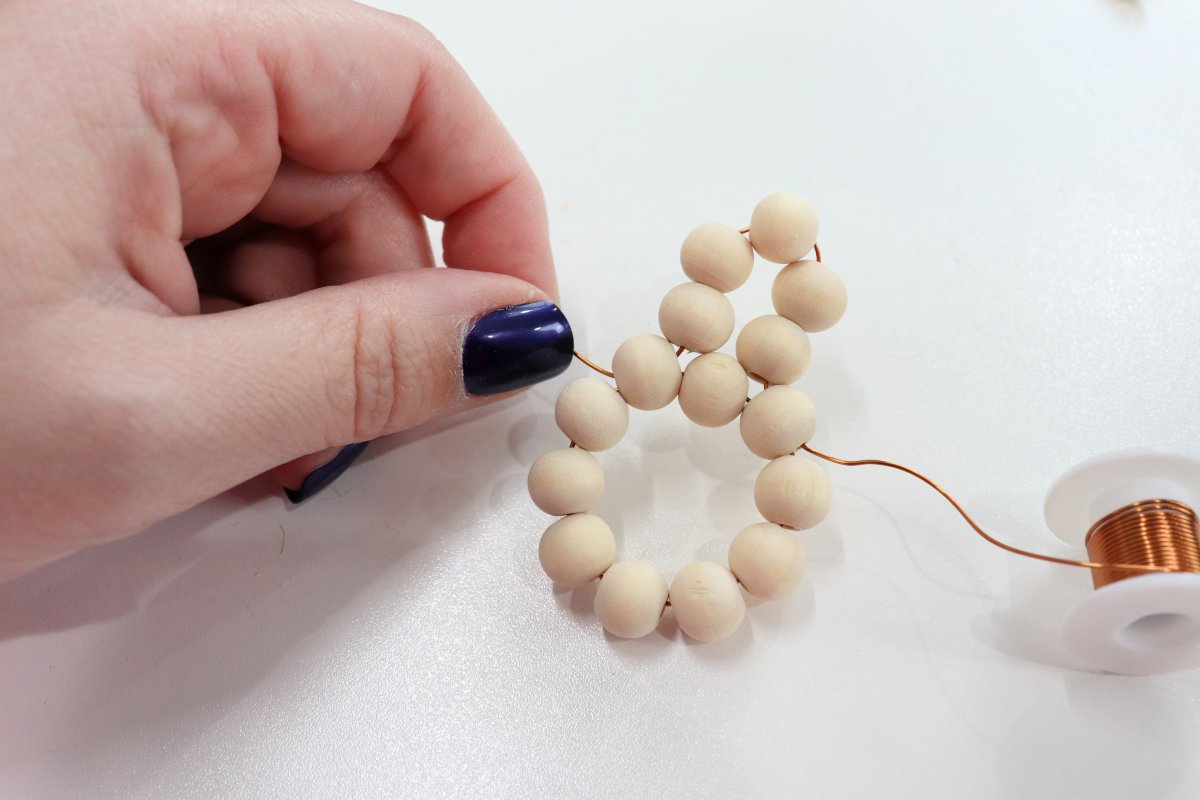
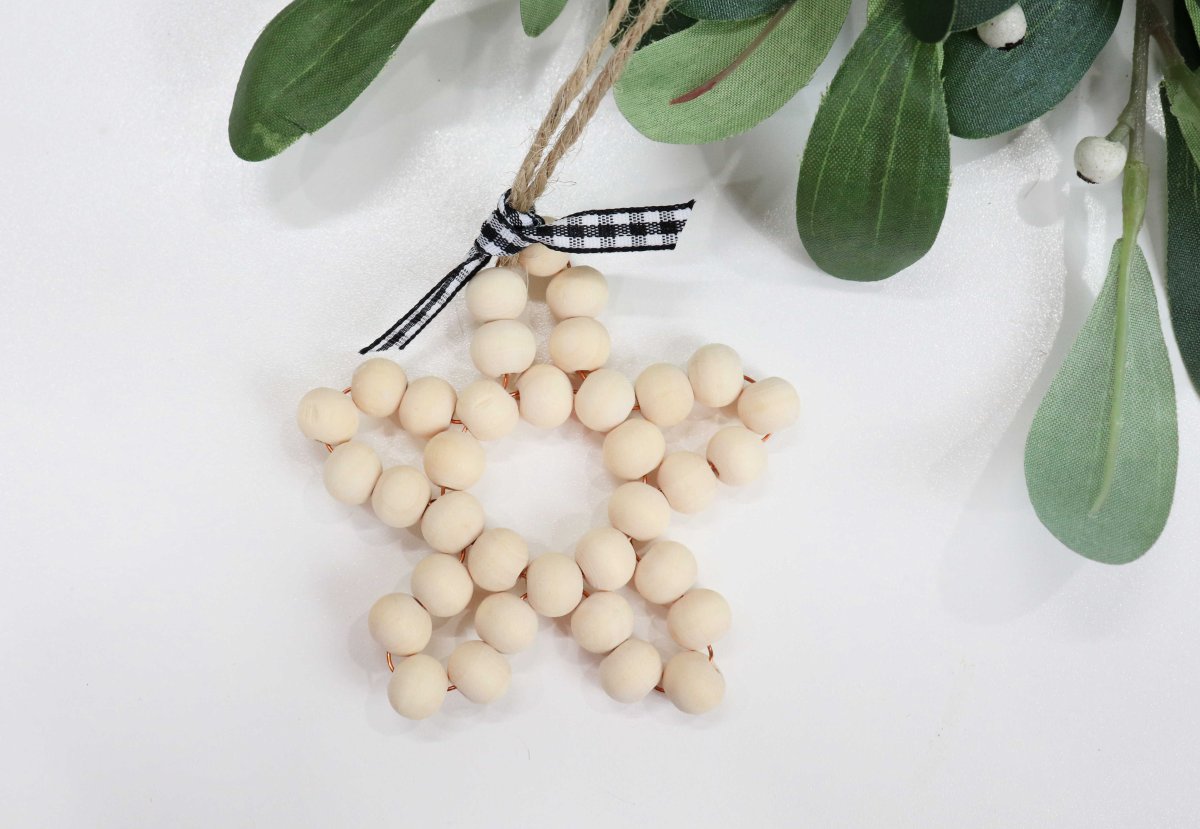
Step 1: String 10 (or 12) beads onto your wire.
Using 10 will give you a five-pointed star; 12 beads will give you a six-pointed star. I slid the beads pretty far down so I had lots of excess wire to work with for creating the points.
Step 2: Thread the wire back through the first bead to form a circle.

Step 3: Form your first point.
To do this, thread 5 (or 3) beads onto your wire. Skip over the next bead in the circle, then thread the wire back through the bead next to that. See in the image how the wire goes up, over, and around one bead and threads into the next? That’s the goal.
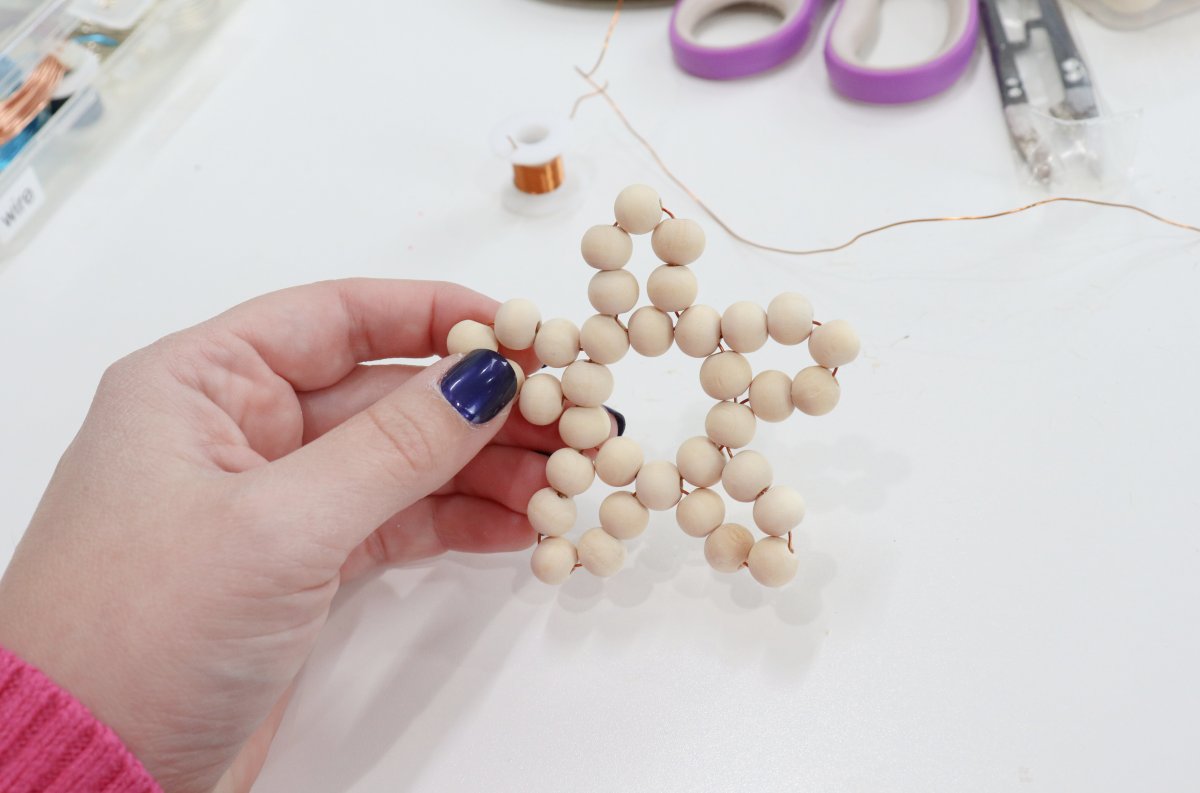
Step 4: Form your other points.
Continue around the circle repeating the same pattern. Thread beads on your wire, skip the next one in the circle, and thread the wire through the one next to that. The end result, if you started with 10 beads, will give you a five-pointed star. Cut the wire and twist the two ends together. This part will be hidden in the back.
Step 5: Use twine or string to add a hanger.
If you like, you can also add a piece of ribbon or other decoration.
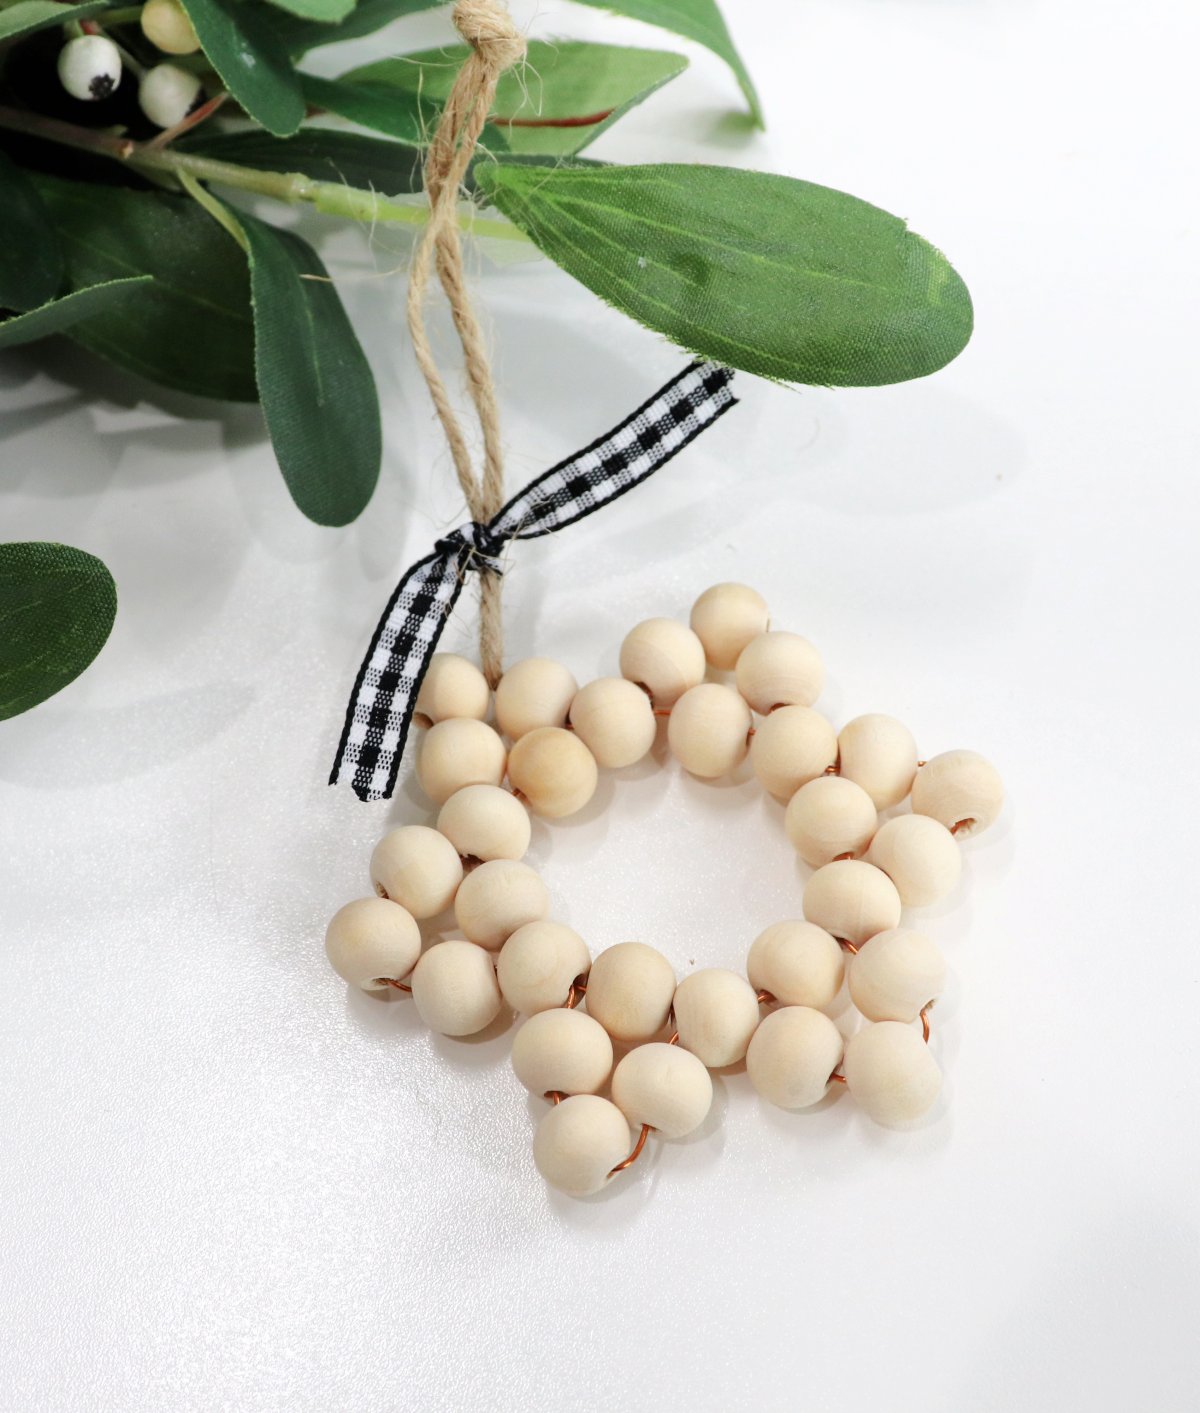
Here is a look at the same project, but using 12 beads in the circle and only 3 beads (instead of 5) for each point. You can play around with these variations any way you like to create your favorite look. You can also experiment with using larger and smaller beads.
However you make them, these wooden bead star ornaments are sure to look wonderful on your tree. They also make great package tie-ons for gifting.

What do you think? Which version is your favorite? If you try these, be sure to share your photos with us in the Amy Latta & Friends Facebook Group so we can all be inspired! Also, don’t forget to show us your decorated trees! See you there.
Be sure to check out the other wooden bead ornaments in the series:


This came at the perfect time. My granddaughter and I get together an make ornaments every year. This is perfect!