

Go on and gather some natural eastern white pinecones and we’ll show you how to make these gorgeous tabletop pine cone Christmas trees for the holidays and even beyond.


DIY Pine Cone Christmas Tree
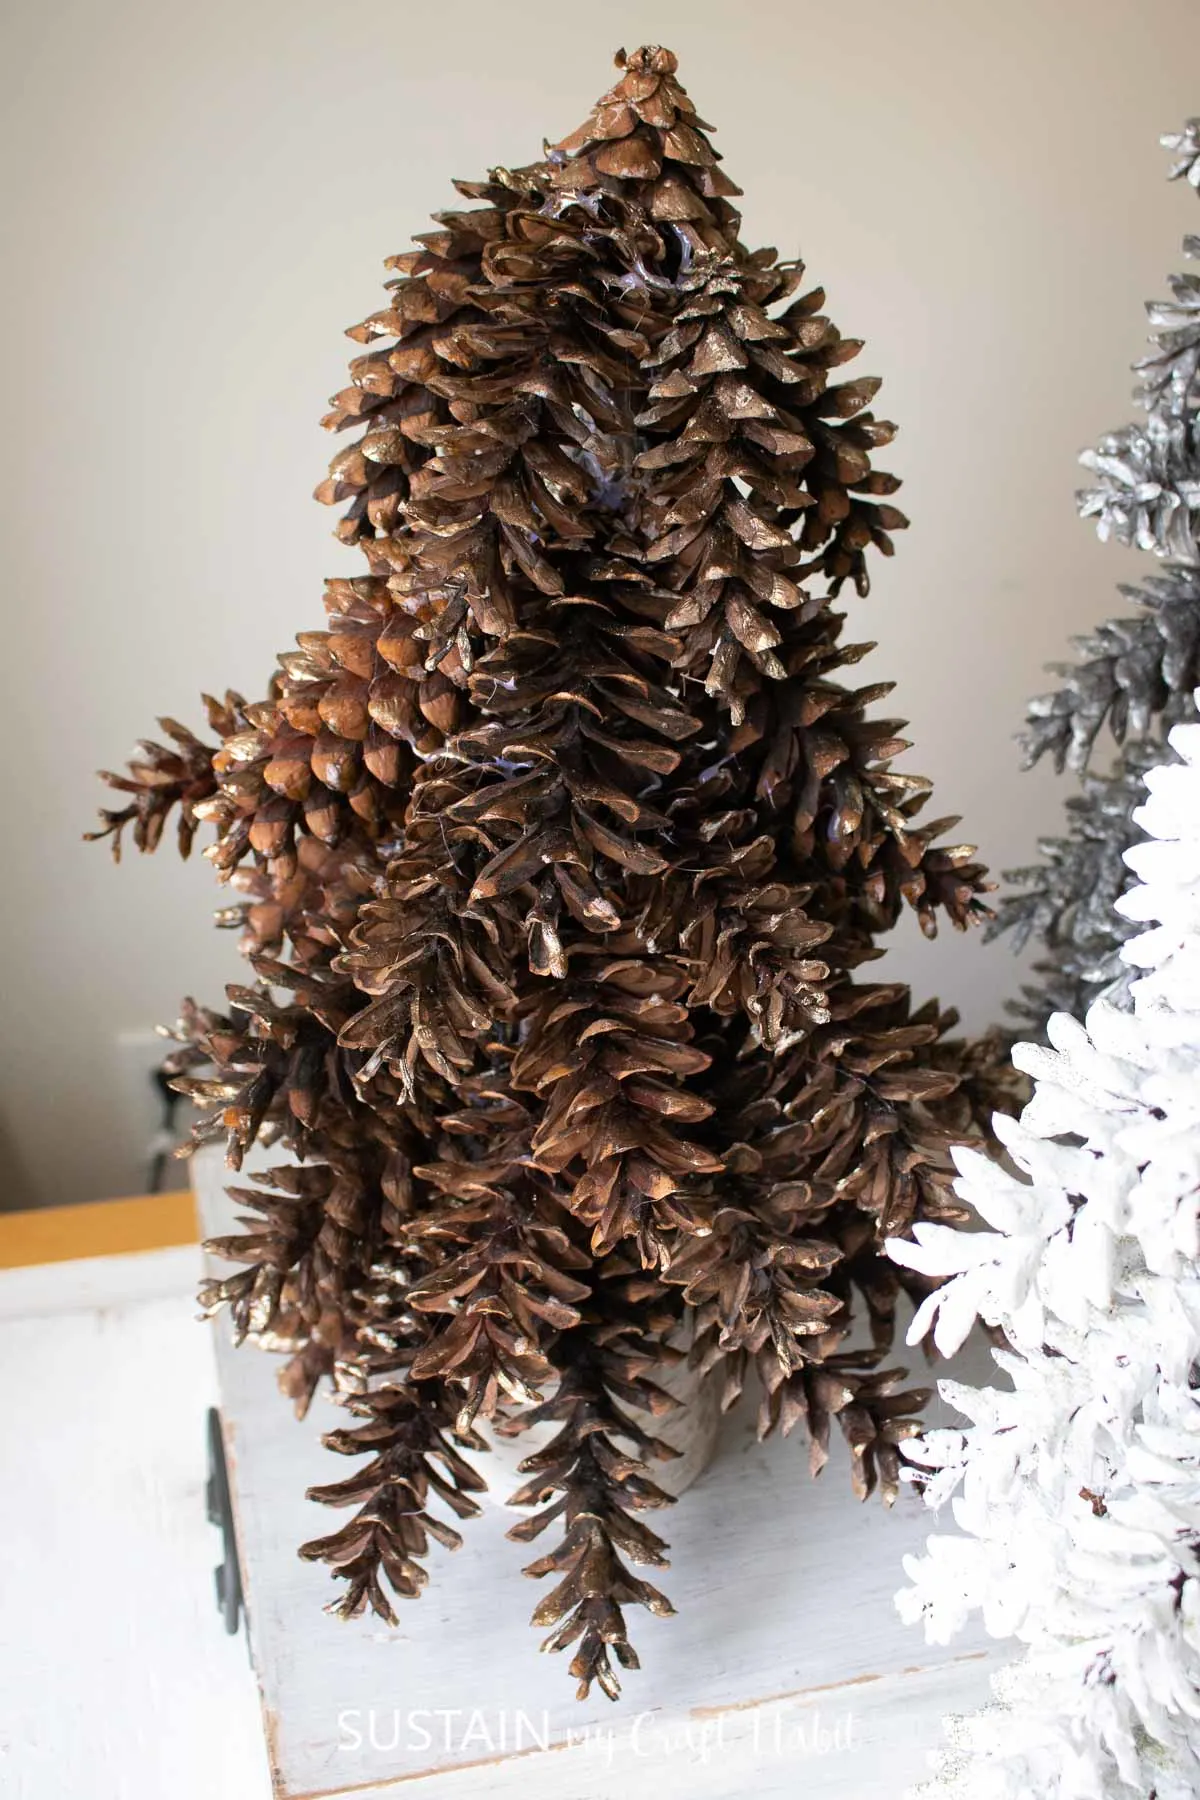
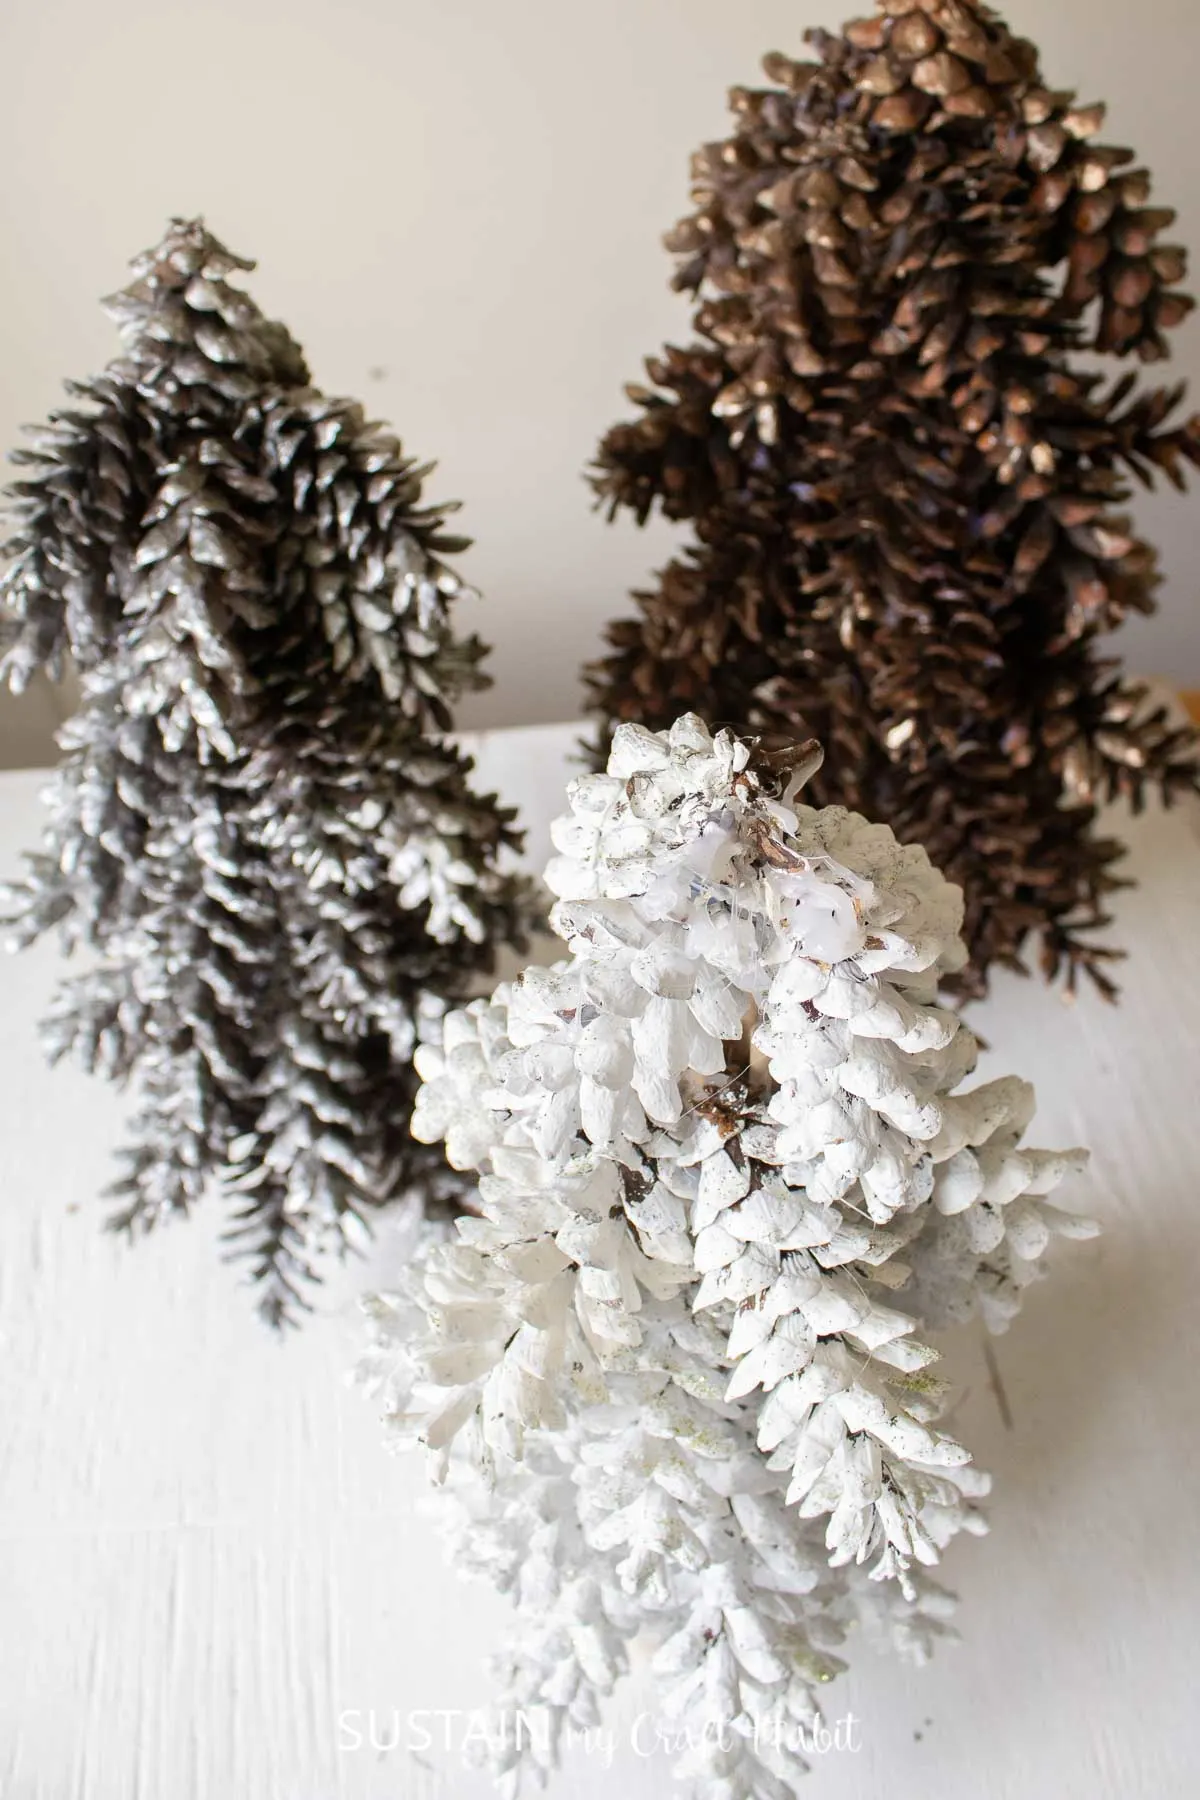
Our beautiful, crafty mom created these lovely table top trees using pine cones she collected in the forests near her country home. Her gorgeous pinecone Christmas trees are on display on her fireplace mantel year-round and they are quite simply stunning.

Whether you wish to make one or several to display in a grouping, we’re certain you’ll love the result!
I shared the tutorial for making these easy table top pine cone Christmas trees on a recent Facebook Live which you can catch here. It was so fun to make these although I was feeling the pressure to do my mom justice with her design!
Materials Needed
Disclosure: This post contains affiliate links for your shopping convenience. Should you choose to purchase through them, we will make a small commission at no extra cost to you. You can read our full disclosure here.
- acrylic paint in white or metallic silver or gold
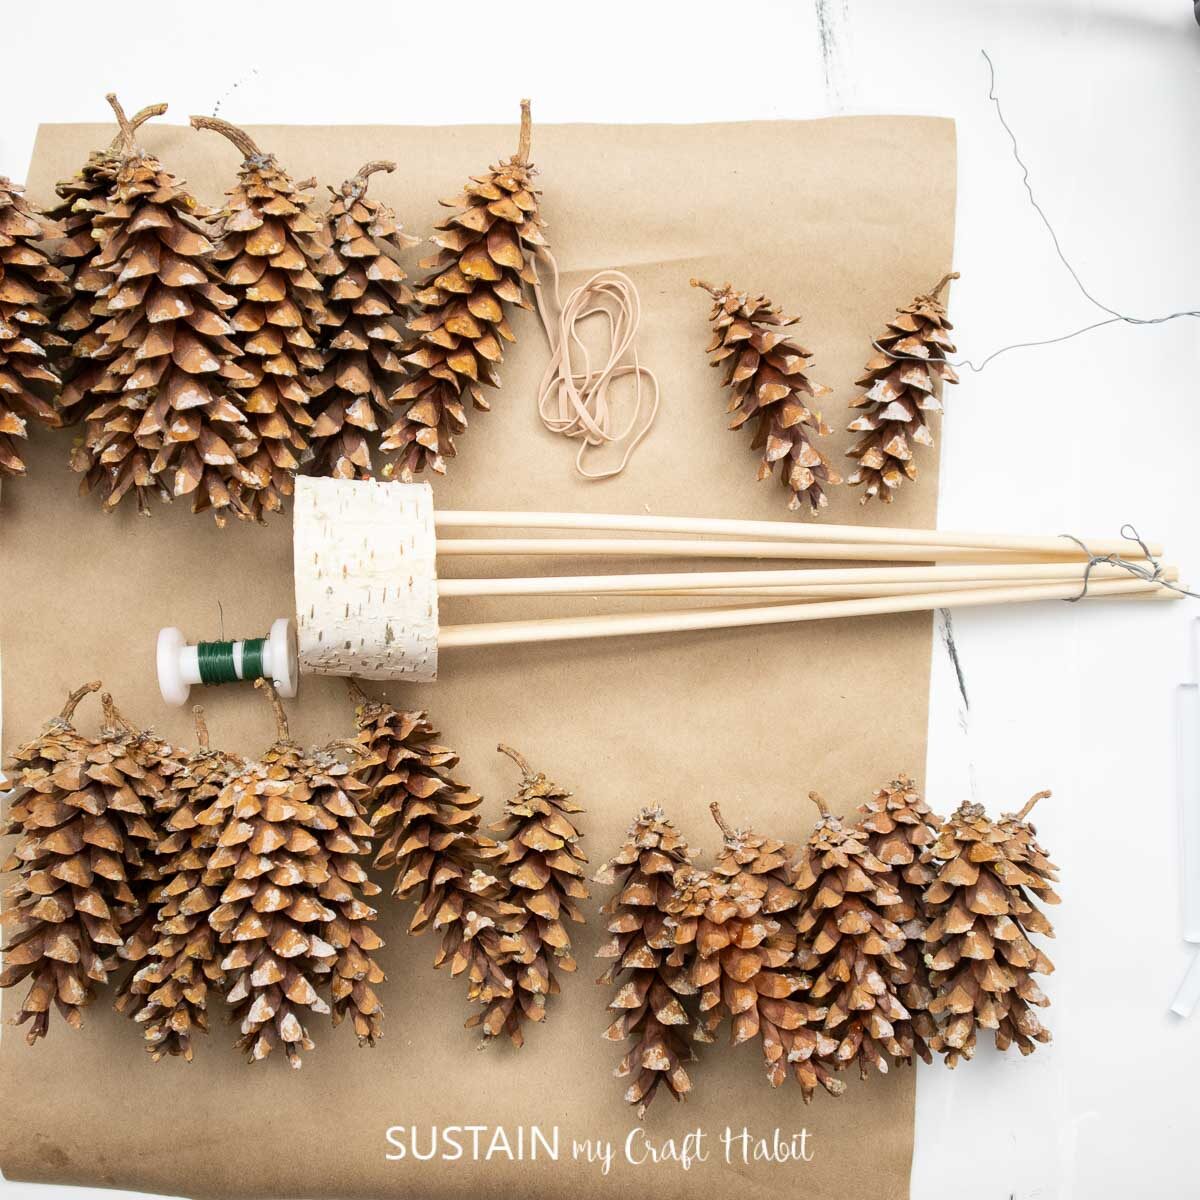
- craft ready eastern white pine cones (about 40 pinecones ranging in size from 4″ to 6″)
- 6 wood dowels cut to 6″ high, 1/4″ thick
- birch branch for the base (3″ diameter x 2″ high) with six holes pre-drilled to fit th wooden dowels
- fine gauge floral wire
- rubber bands
- Tree Topper Ornament like a wooden star or ornament (optional)
You can collect your own pinecones or purchase them directly from our Etsy shop. You can see how we clean our pine cones for crafting here.


How to Make a Tabletop Pine Cone Christmas Tree
If you want to catch the video of making this craft in action, watch the Facebook Live video here or keep reading to get the step-by-step instructions below.
Painting the Pine Cones
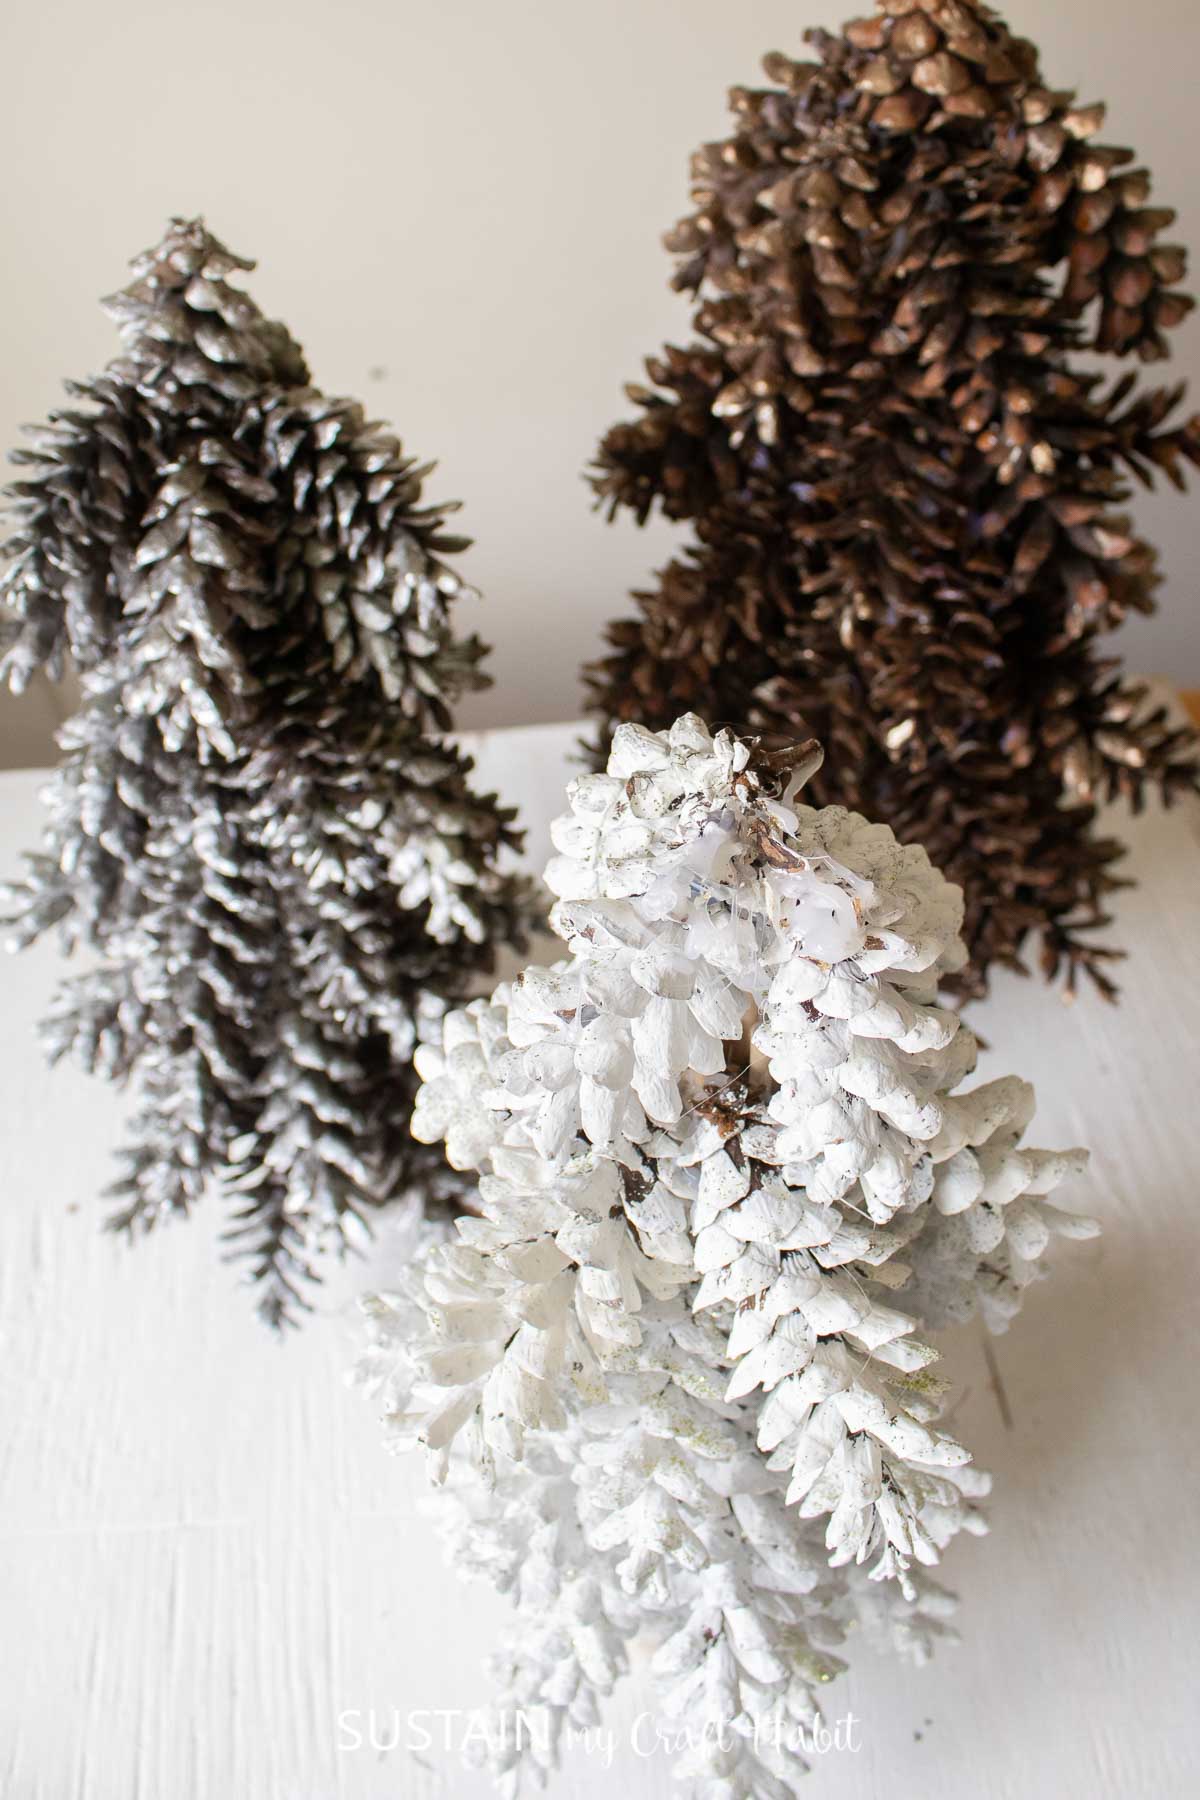
You could do this craft using natural pinecones or paint them ahead of time in any color of your choosing. We did some trees using white painted pinecones and others using silver spray painted pinecones. If painting, be sure to allow enough time for the paint to dry fully before asembling the trees.
Assembling the Pinecone Trees
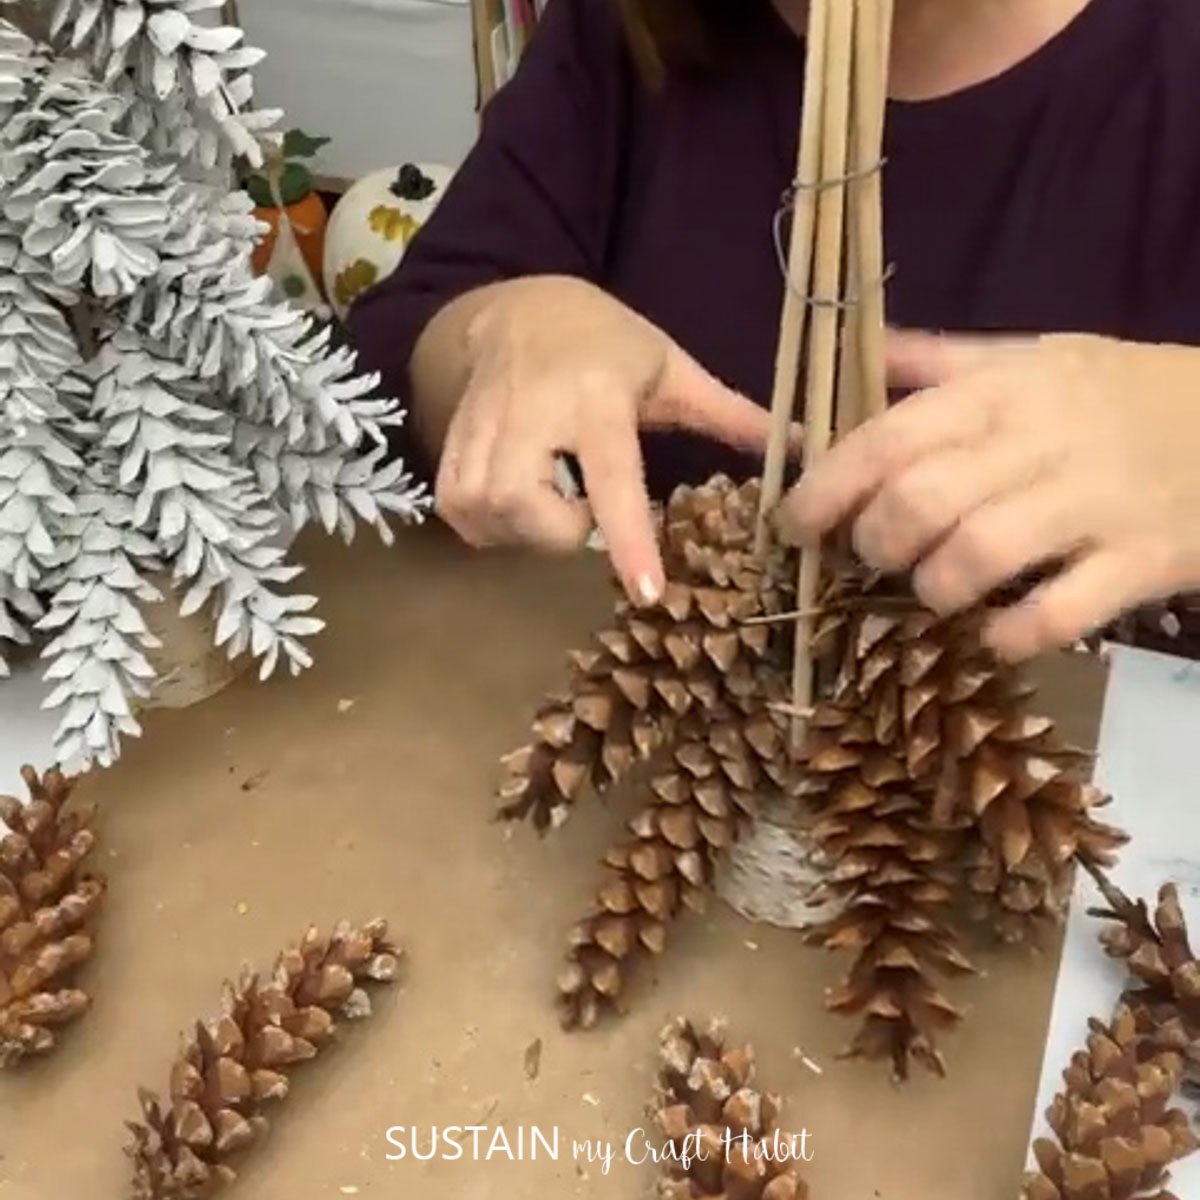
Drill six holes in the birch branch base starting with the center hole first and then drill holes evenly around the base.
Insert the wooden dowels into the pre-drilled holes and with the floral wire, wrap the wood dowels at the top to create a cone shape.
Next wrap a rubber band around the dowels towards the bottom and place a row of pine cones around the base with the rubber band holding them in place. Insert the wide end of the pinecone in under the elastic bands.
Crafting Tip: use larger pinecones for the bottom switching to smaller pinecones as you work your way up to the top.

Take some floral wire and secure the bottom row of pine cones in place, tightening the wire.

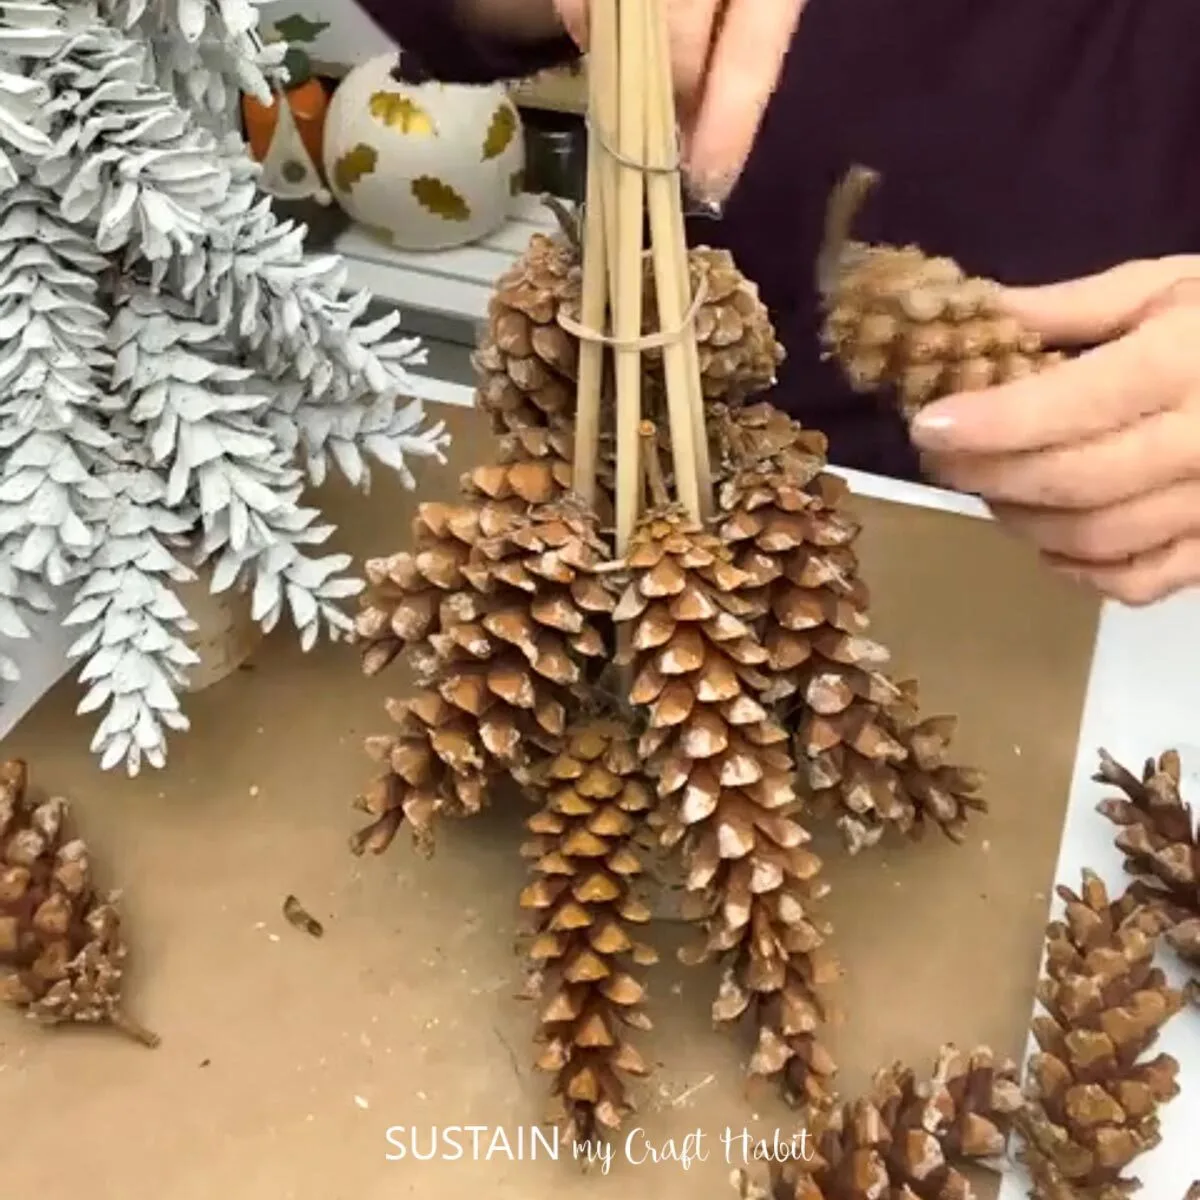
Repeat steps 4 and 5 all the way to the top of the cone.


For the top layer of pine cones use the hot glue gun to help secure them temporarily until you can secure with floral wire.
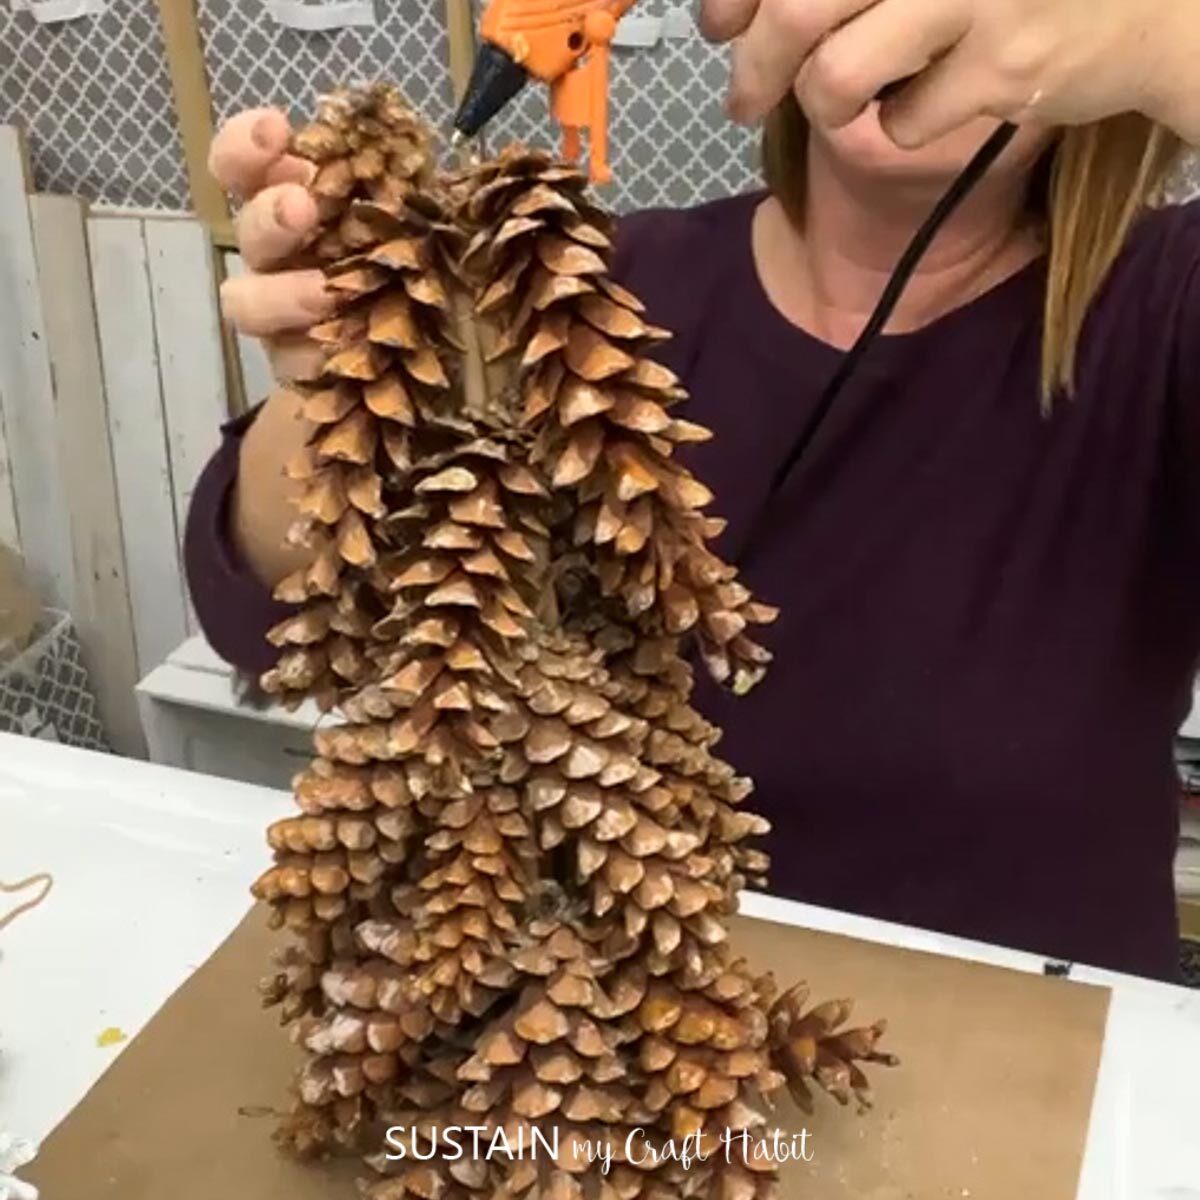
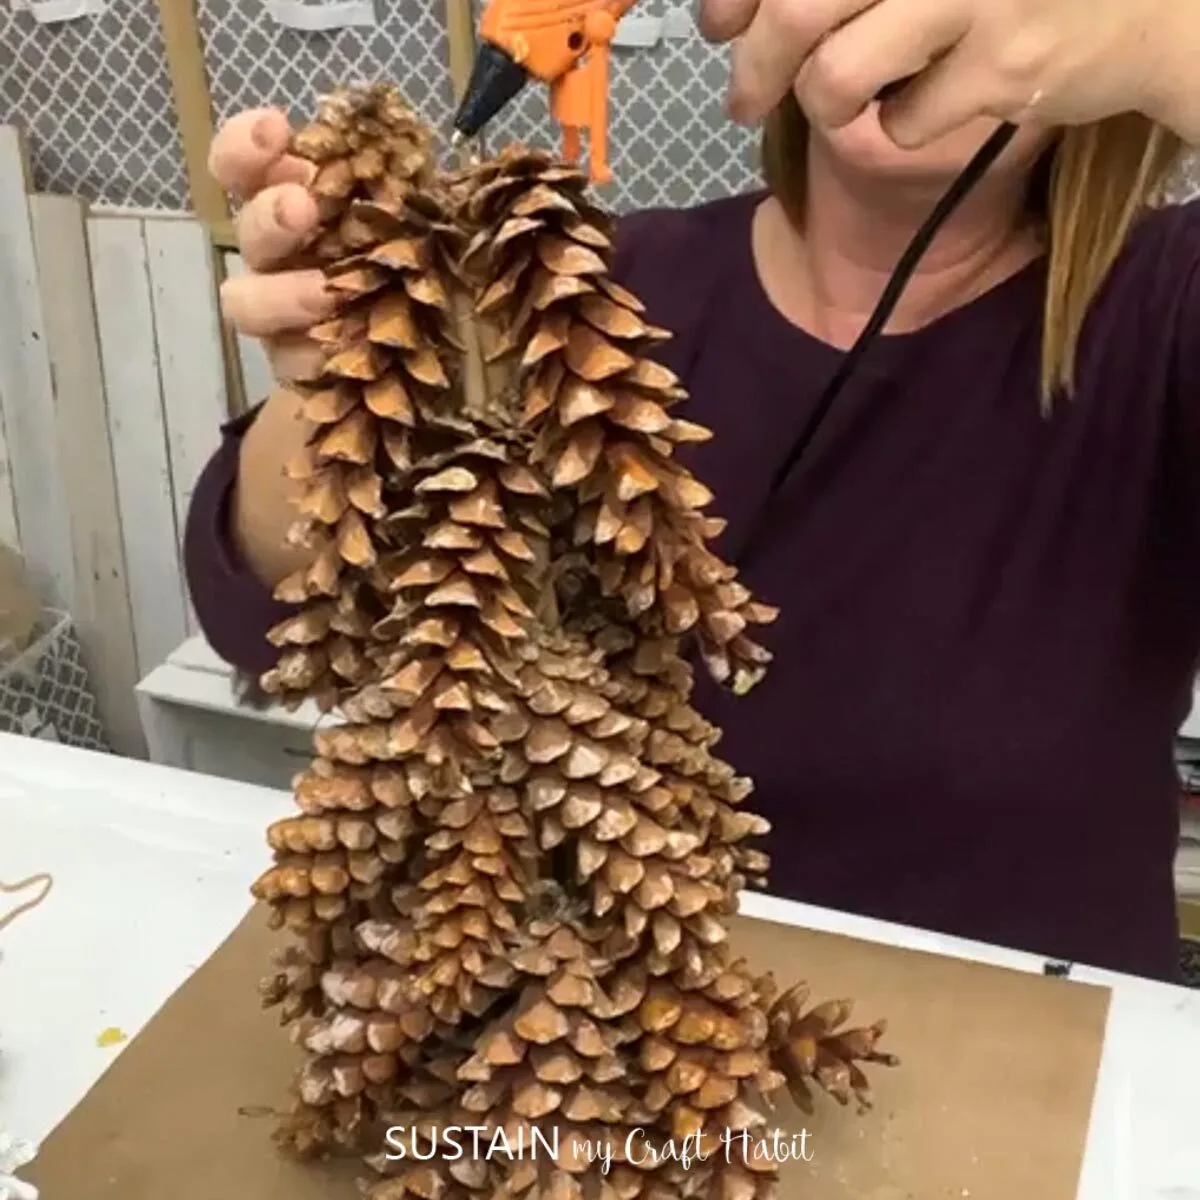
If you wish, place a decorative tree topper to the top of the tree using a hot glue gun.
Aren’t these pine cone Christmas tree just perfect? You’ll love having just one on display or create a whole little forest of them for your fireplace mantle!


More Pinecone Craft Ideas
If you love crafting with pinecones as much as we do, you’ll LOVE these other lovely projects we’ve made with pinecones.
- Upcycled Picture Frame Door Decor
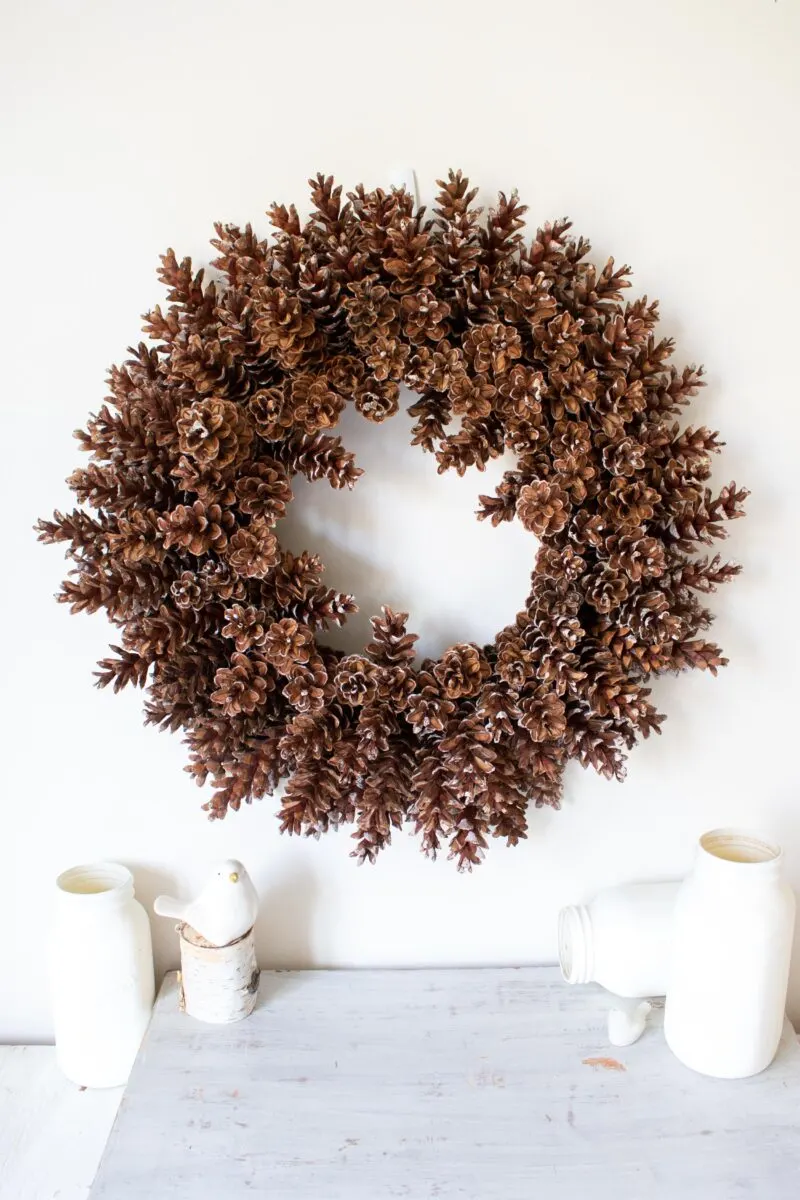
- Pinecone Wreath (without wire or glue)
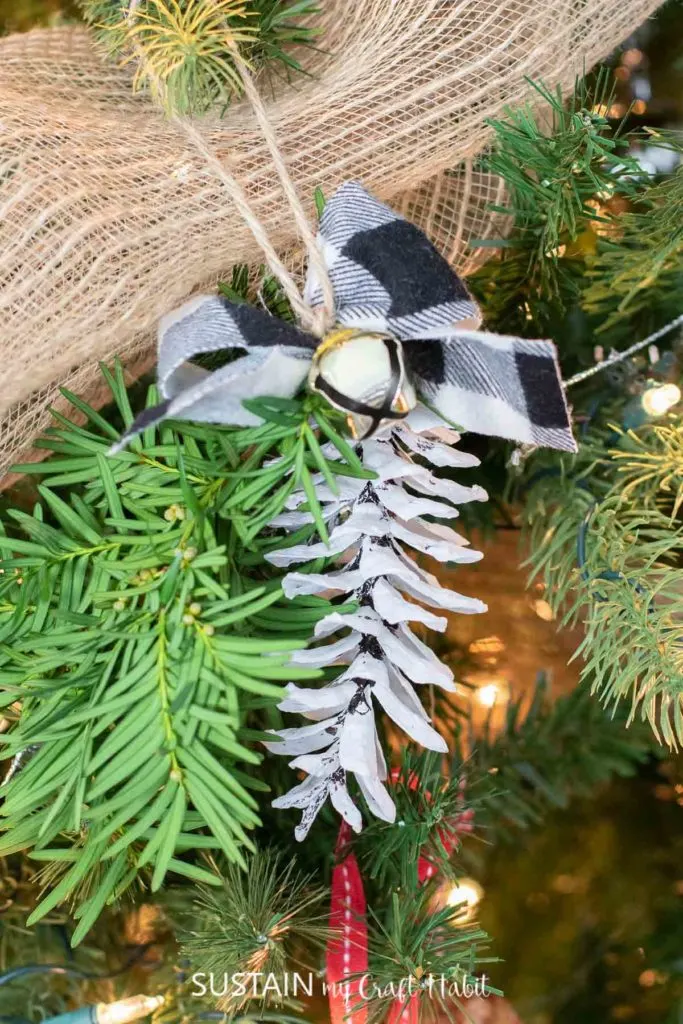
- Painted Pinecone Christmas Ornaments
- Pine cone Flowers
- Rustic Pinecone Wall Hanging


We’d love to hear from you! Have you ever crafted with pinecones and what have you made?
Like it? Pin it for later!


Easy DIY Pine Cone Christmas Tree
Materials
- acrylic paint in white and metallic silver optional or leave pinecones natural (unpainted)
- eastern white pinecones approx. 40
- 6 1/4" thick wooden dowels cut to 6 inches each
- 3 inches birch branch for base 3" diameter x 2" high, with six holes drilled
- Fine Gauge Floral Wire
- Rubber Bands
- Tree Topper Ornament optional
Instructions
- If desired, paint the pine cones with an acrylic paint in any color of your choosing and let them dry fully before proceeding.
- Drill six holes in the birch branch base to fit the wooden dowels starting with the center hole first and then evenly around the base.
- With the floral wire, wrap the wood dowels at the top to create a cone shape.
- Next wrap a rubber band around the dowels towards the bottom and place a row of pine cones around the base with the rubber band holding them in place.
- Take some floral wire and secure the bottom row of pine cones and tighten the wire.
- Repeat steps 4 and 5 all the way to the top of the cone.
- For the top layer of pine cones use the hot glue gun to help secure them.
- Place a decorative tree topper with the hot glue gun if desired.