what you need:
- Pinecones
- Cardboard (thin, cereal box weight)
- Pencil
- Scissors
- Scrap paper
- White tacky glue
- Black marker
- White cardstock
- Black string
how-to:
Step 1
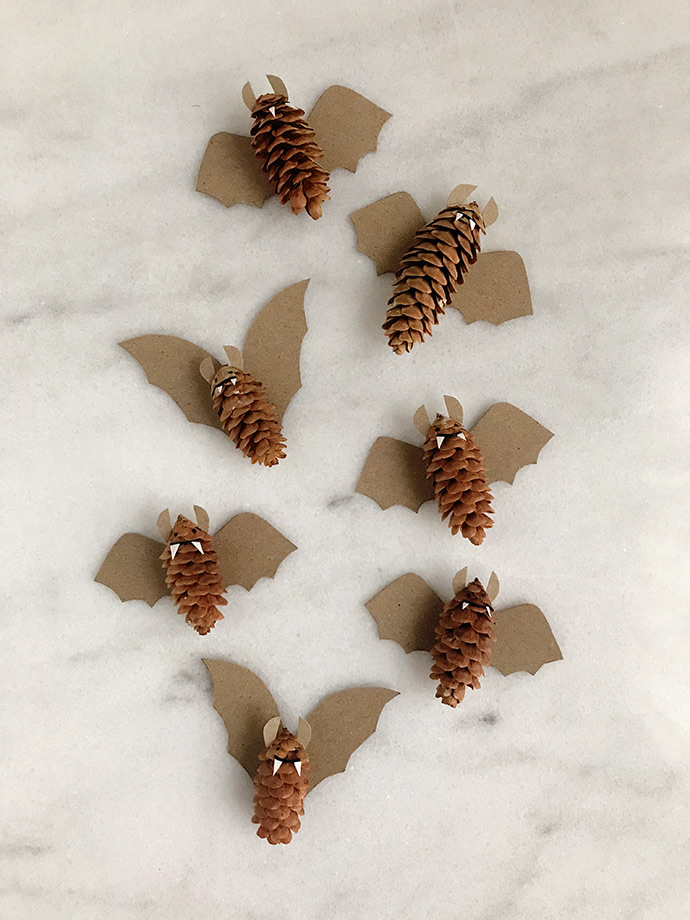
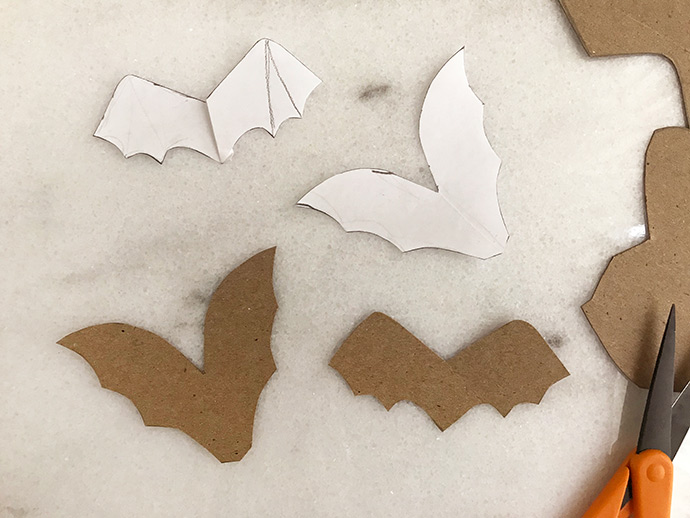
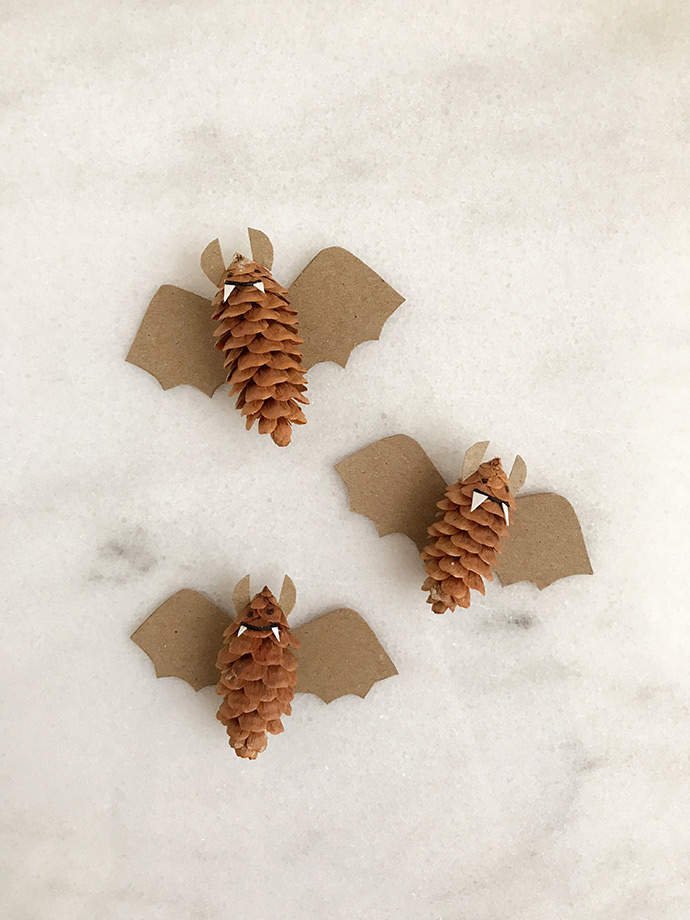
On a scrap of paper, use a pencil to sketch out the wings for your bats. The size and shape will vary depending on the size of pinecones you have, so adjust them until you’re happy with them. It can be helpful to do an image search online for something like “cartoon bat” to get an idea of wing shapes. Cut out the scrap paper template and trace this onto cereal box cardboard as many times as needed. Cut out.
Step 2
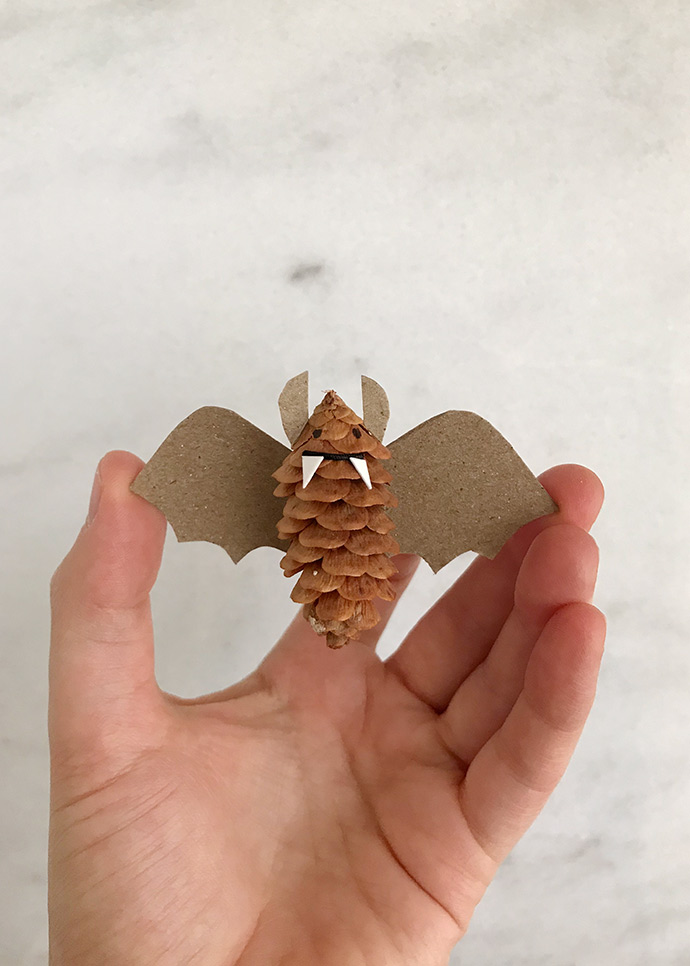
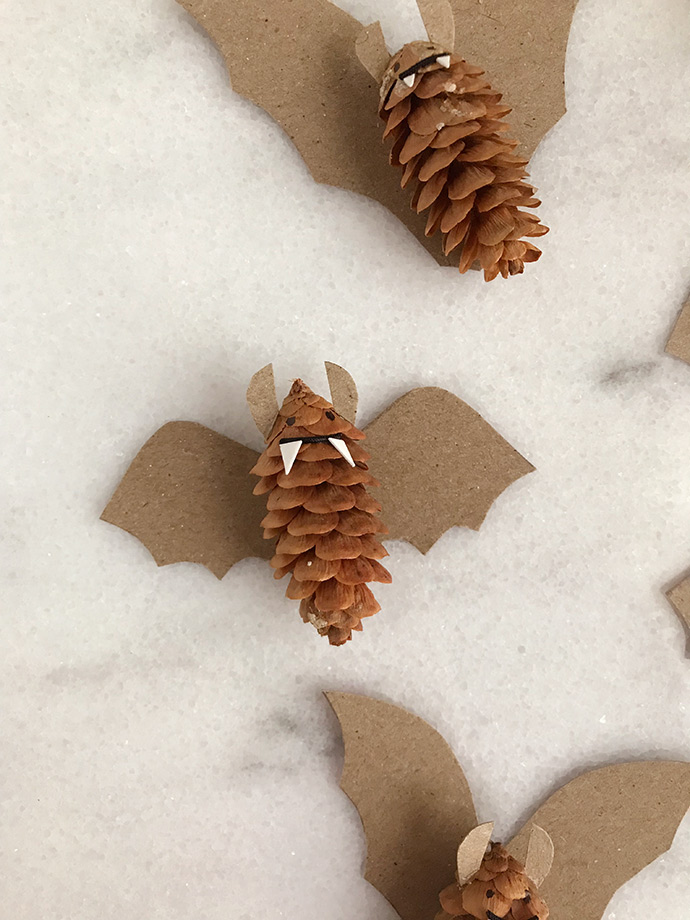
Use white tacky glue to attach the pinecone to the center of the cardboard wings.
Step 3
Take some more brown cereal box cardboard and cut two small slightly pointed ears. Use small dabs of glue to secure them to the top of the pinecone. This can be a little finicky if you’re using small pinecones as I did here – I suggest holding the ears in place with the pinecone upright for a couple of minutes while the white glue dries slightly, otherwise, the ears may slide or fall. You can also choose to use hot glue, but I find the strings it leaves behind can be a pain to get rid of and such small dabs of hot glue tend to dry really quickly. Another option to consider for smaller kids is using the extra-large pinecones, so that the ears (and other face details) are larger and easier to work with.
Step 3
Cut a short piece of black string or cord and use white glue to attach it to the front of the pinecone as a small smile.

Step 4
Cut two small white triangles from white card and glue onto the pinecone as tiny little fangs. These ones are so small that I used tweezers and that helped a lot – see the note above for tips on making this easier for little ones. You can also leave off the fangs completely, or paint them on with a brush or paint marker.
Step 5
Finally, draw on two dots using a black marker as the eyes.

Happy crafting!