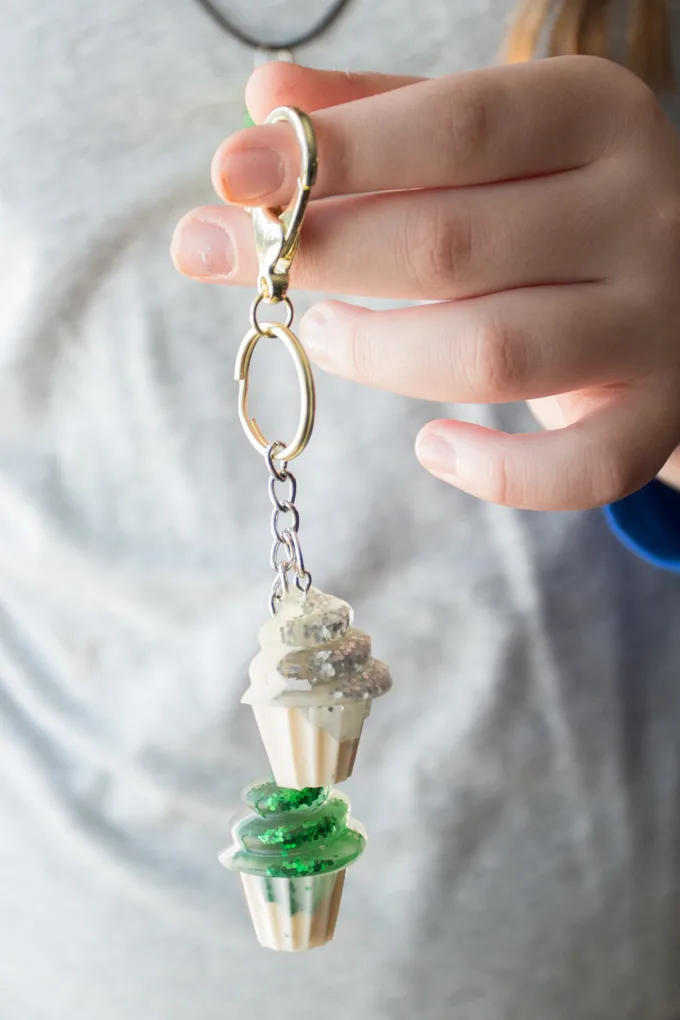
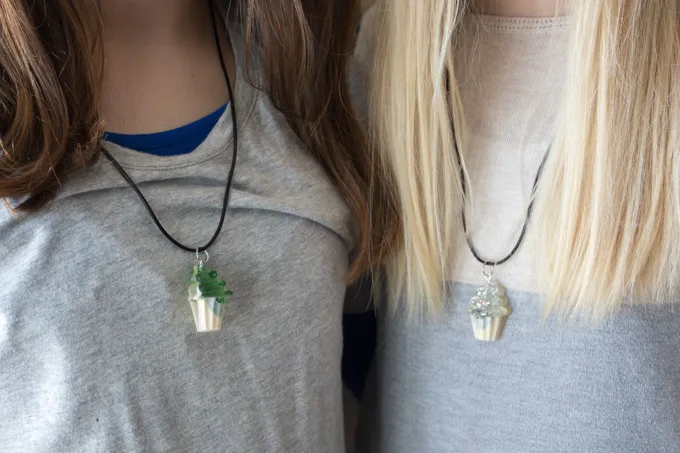
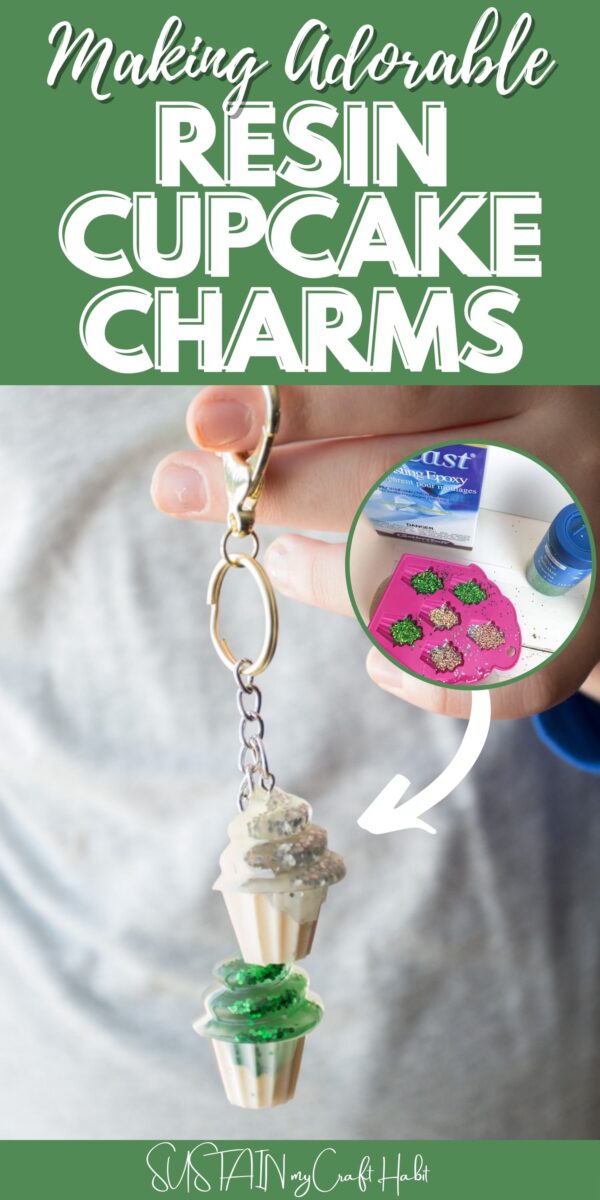
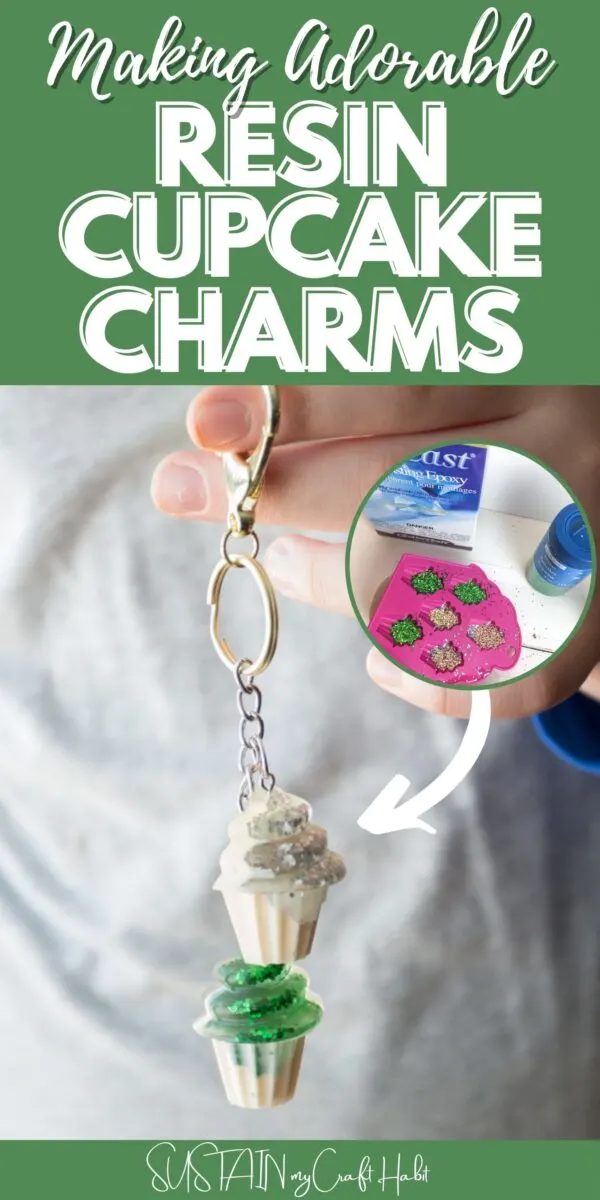
Who wouldn’t smile at a set of these adorable cupcake resin charms strung on a backpack, purse or on a set of house keys? With their glitter filled colorful frosting top and smooth bottom, these resin cupcakes are just too cute to not make for someone special.

Super Sweet Cupcake Resin Charms
Gift giving was my motivation to make these adorable resin cupcakes after finding this mini cupcake silicone mold at the craft store. I couldn’t find the same silicone mold online but I love these other seasonal and holiday themed options! I have plenty of nieces in the family that would love their own set of resin cupcakes.
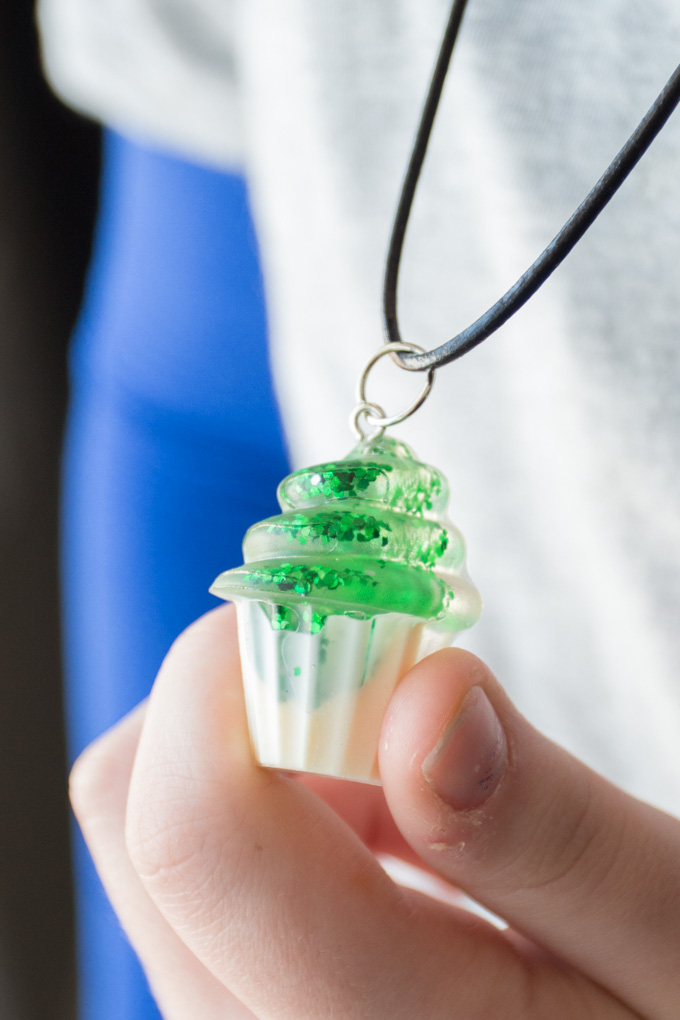
For some of the resin cupcakes, I even turned them into necklace pendants by adding small metal eyelets to the top and stringing them on a necklace for a fun and playful fashion statement.

Materials Needed:
Disclosure: This post contains affiliate links for your shopping convenience. Should you choose to purchase through them, we will make a small commission at no extra cost to you. You can read our full disclosure here.
- Cupcake silicone mold
- EasyCast Clear Casting Epoxy
- Glitter (silver, green or color of your choice)
- FastCast
- Measuring cups, wooden stir sticks, gloves, paper towels
- Pendant and/or keychain hardware
How to Make Resin Cupcake Charms
Be sure to read all the instructions and work in a well ventilated area prior to using the EasyCast and FastCast resins.
The First Resin Pour
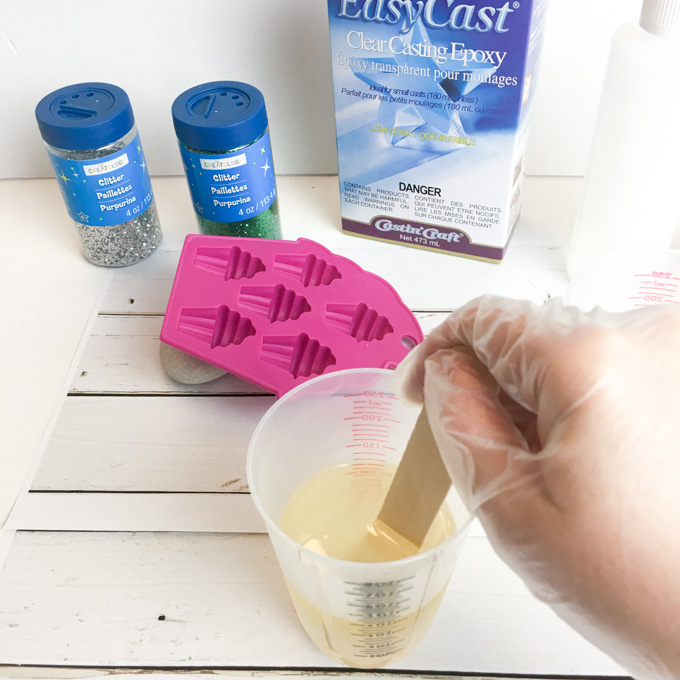
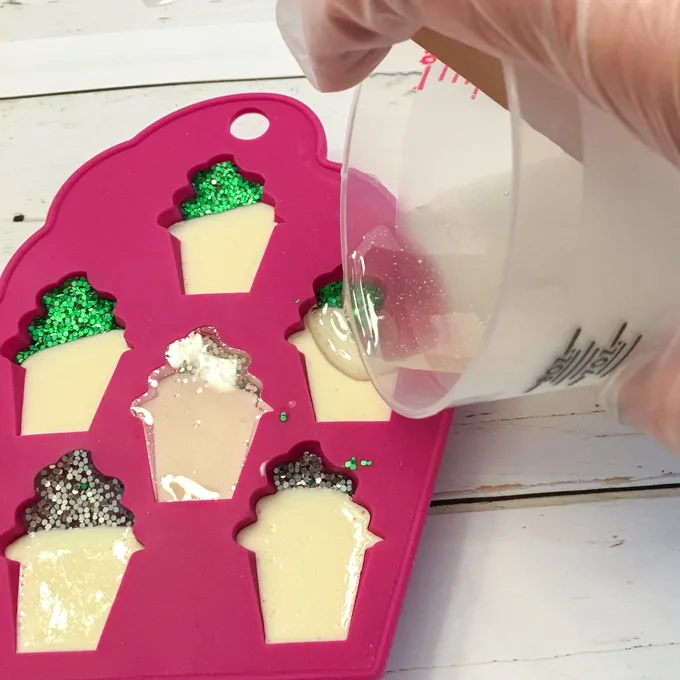
To prepare the resin for pouring, mix equal amounts of resin and hardener in a measuring cup. One and a half ounces of each should be sufficient for this project. Stir the two parts together for 2 minutes scraping the bottom and sides with the wooden stir stick.
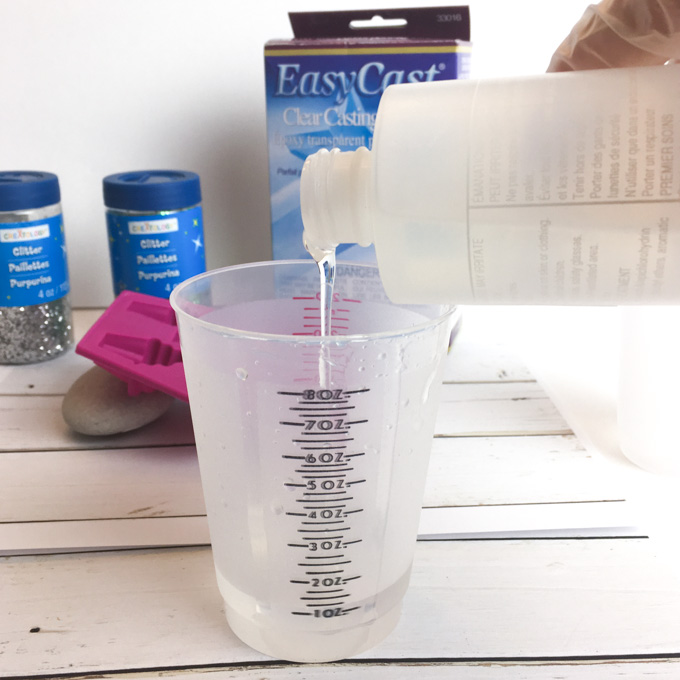


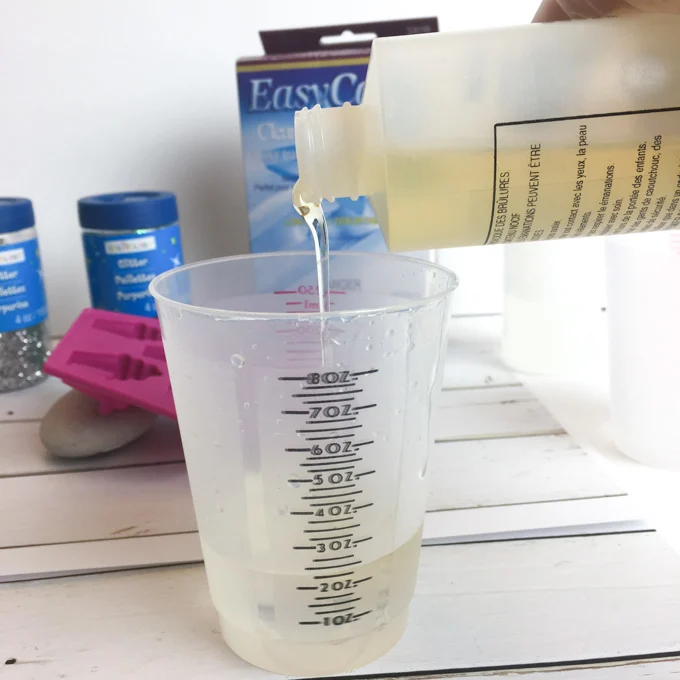
Pour the mixture into a second measuring cup and continue stirring for another minute. Your resin will then be ready to pour.

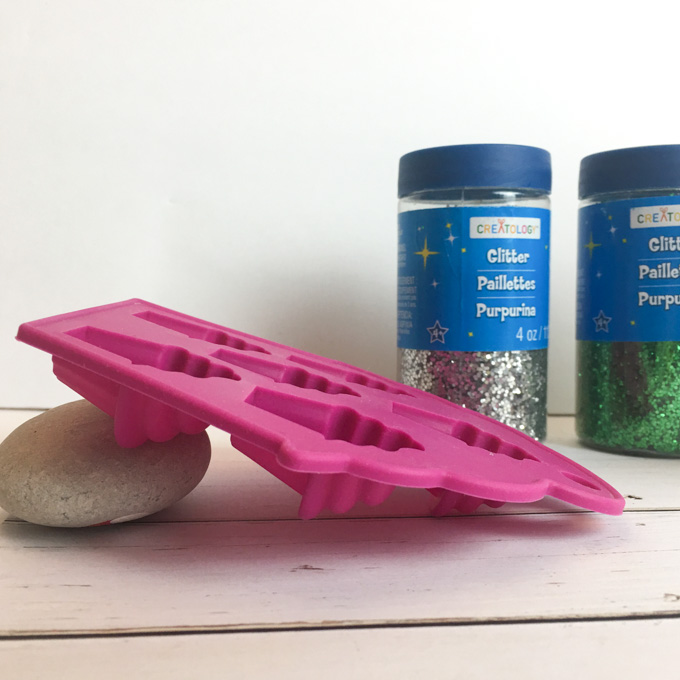
Prop your silicone cupcake mold up on one end (I just placed a stone under mine).

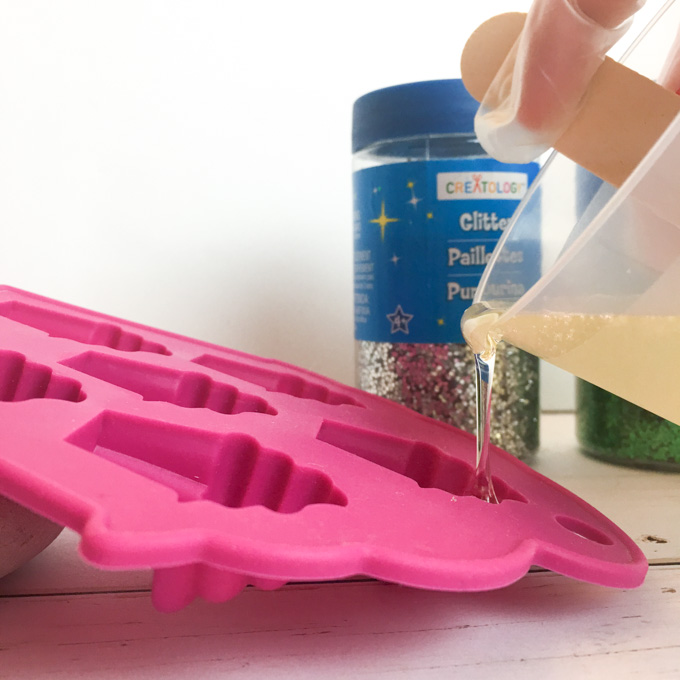
Carefully pour with mixed EasyCast resin into the bottom third of each cupcake well. Be careful not to overfill – you don’t want to cover the base of the cupcake.

Let the resin rest for about 15 minutes and then blow off any bubbles that rise to the surface.
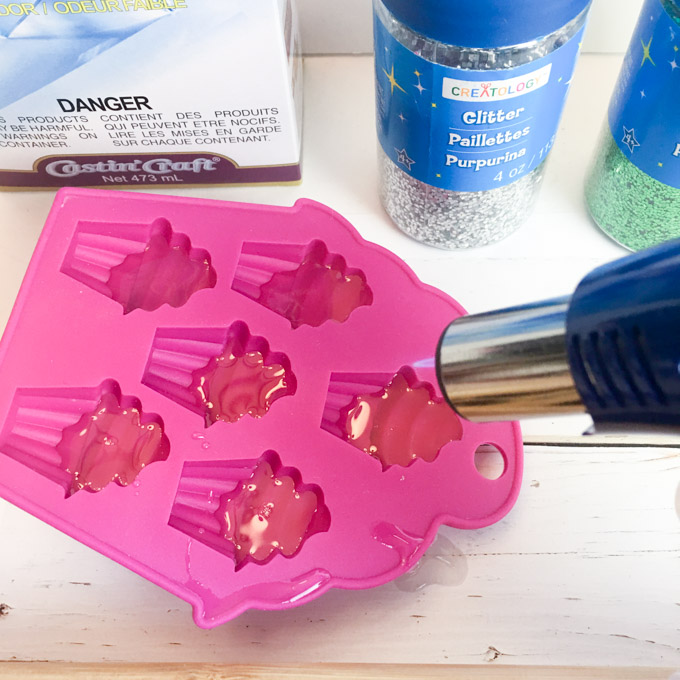

Sprinkle a layer of glitter in the colours of your choice over the resin.
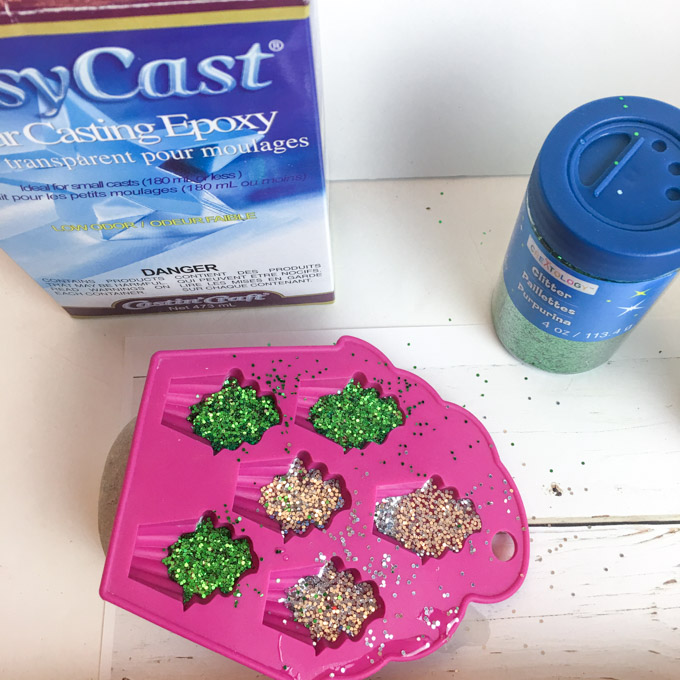

Cover and let cure overnight.
The Second Resin Pour
For the “cup” of the cupcake, I used FastCast casting resin. Follow the instructions in the package to mix the FastCast resin. It’s a similar process to the EasyCast resin but with much shorter mixing times.
Turn the mold around and prop up the opposite end.
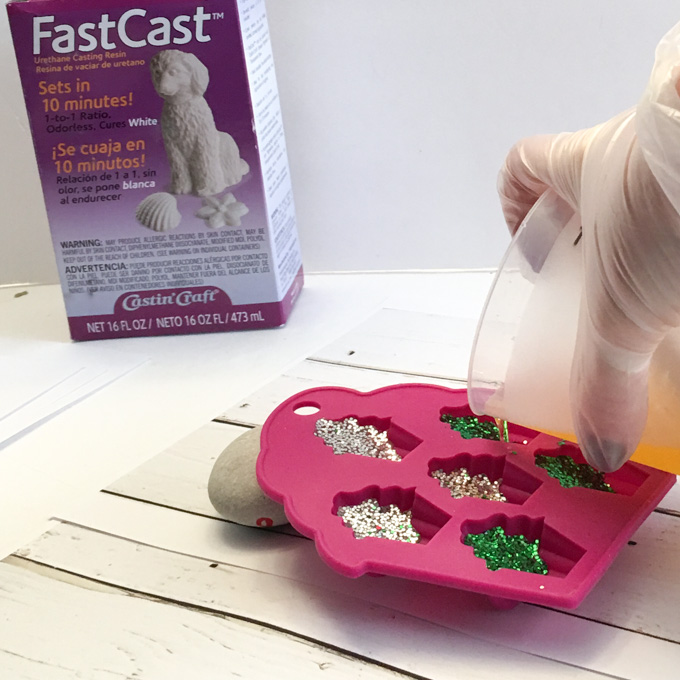
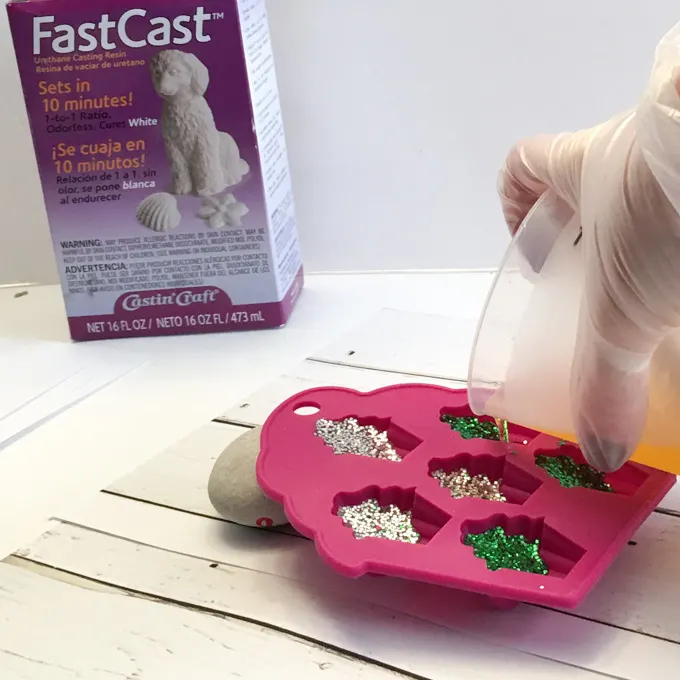
Work quickly and pour the mixed FastCast onto the bottom third of the cupcake mold. Don’t overfill as you don’t want to completely cover the glitter!

Within a couple of minutes the clear FastCast resin mixture will start to turn white. The resin will be fully cured within 10 minutes and ready to move on to the next step.
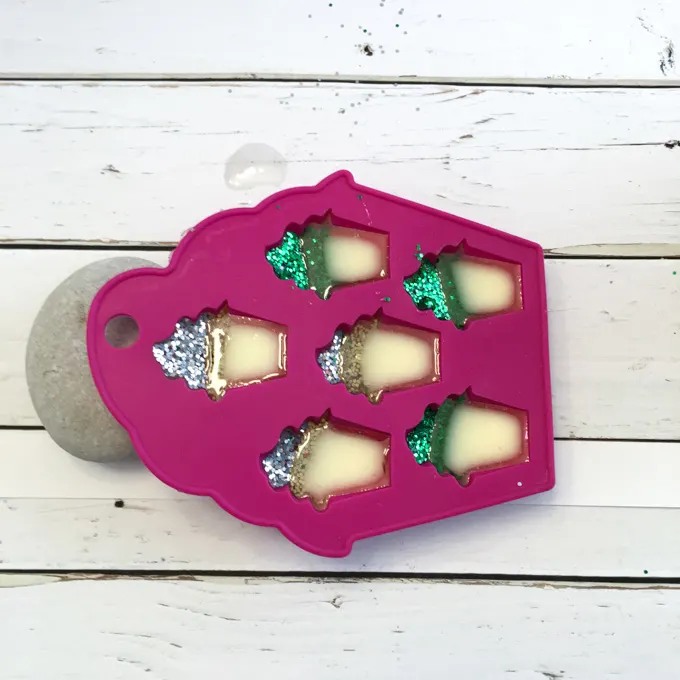
The Third Resin Pour
Finally, set the cupcake mold flat on your working surface. Mix one another small batch of the EasyCast resin and fill the cupcake molds. Blow off any air bubbles and let cure completely overnight.

Finishing the Resin Cupcake Charms
Once fully cured remove the cupcakes from the mold. They turned out so cute!
Drill a small hole on the top of each cupcake.
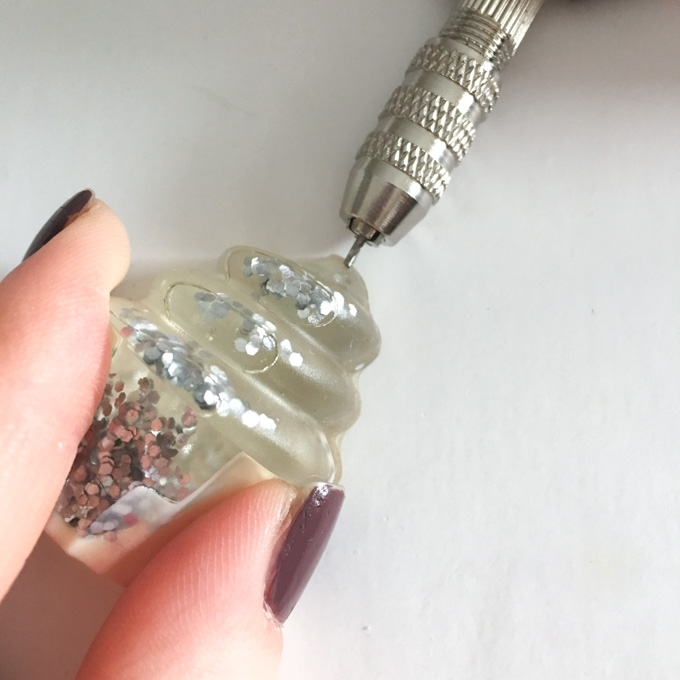
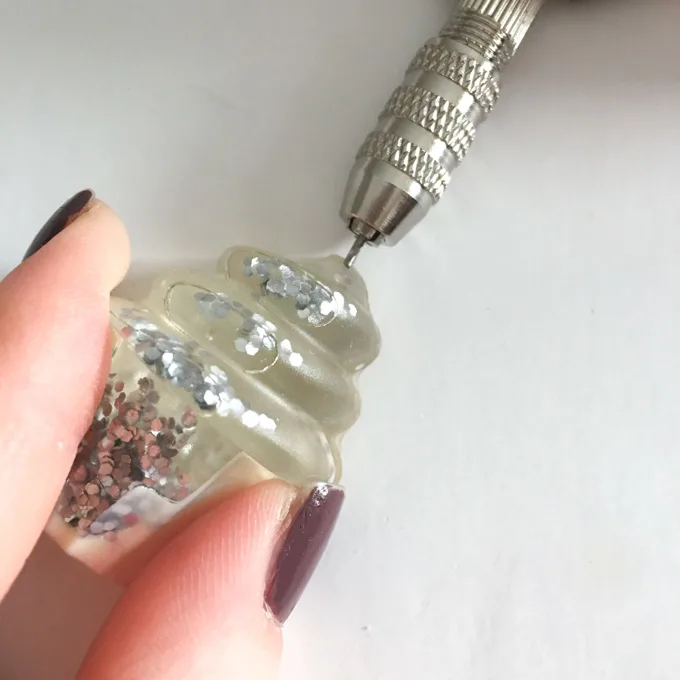
Add in a small eyelet screw and a 10 mm jump ring.
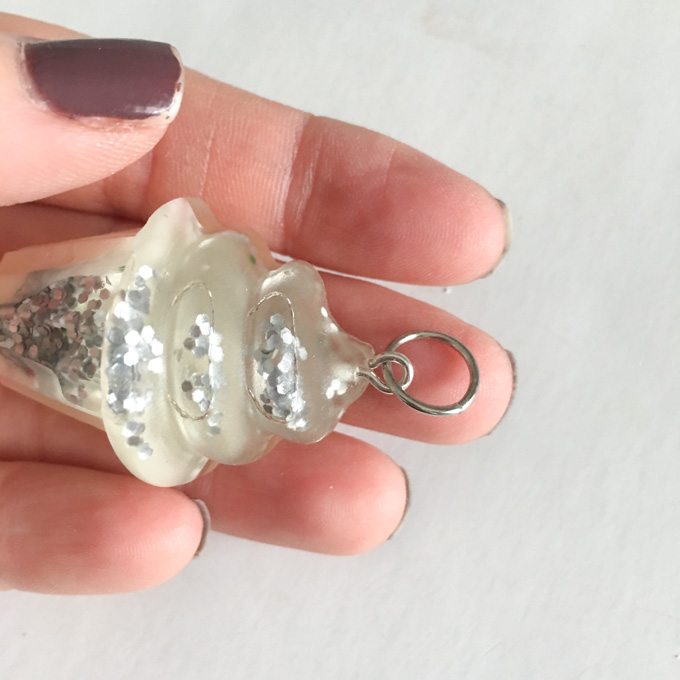

You can simply add the charm onto a necklace as these little besties chose to do.

Or, you can add a couple to a small chain and lobster clasp or key chain ring.


This project originally appeared on the Resin Crafts Blog.
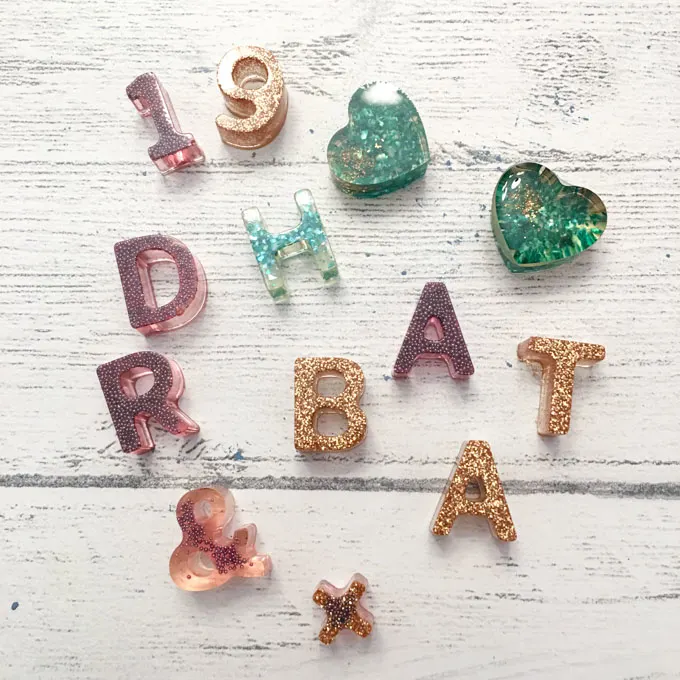
More Resin Charms to Make at Home:
We’ve made similar resin crafts over the years with other types of silicone molds. Here are just a few of our favorite resin charms:


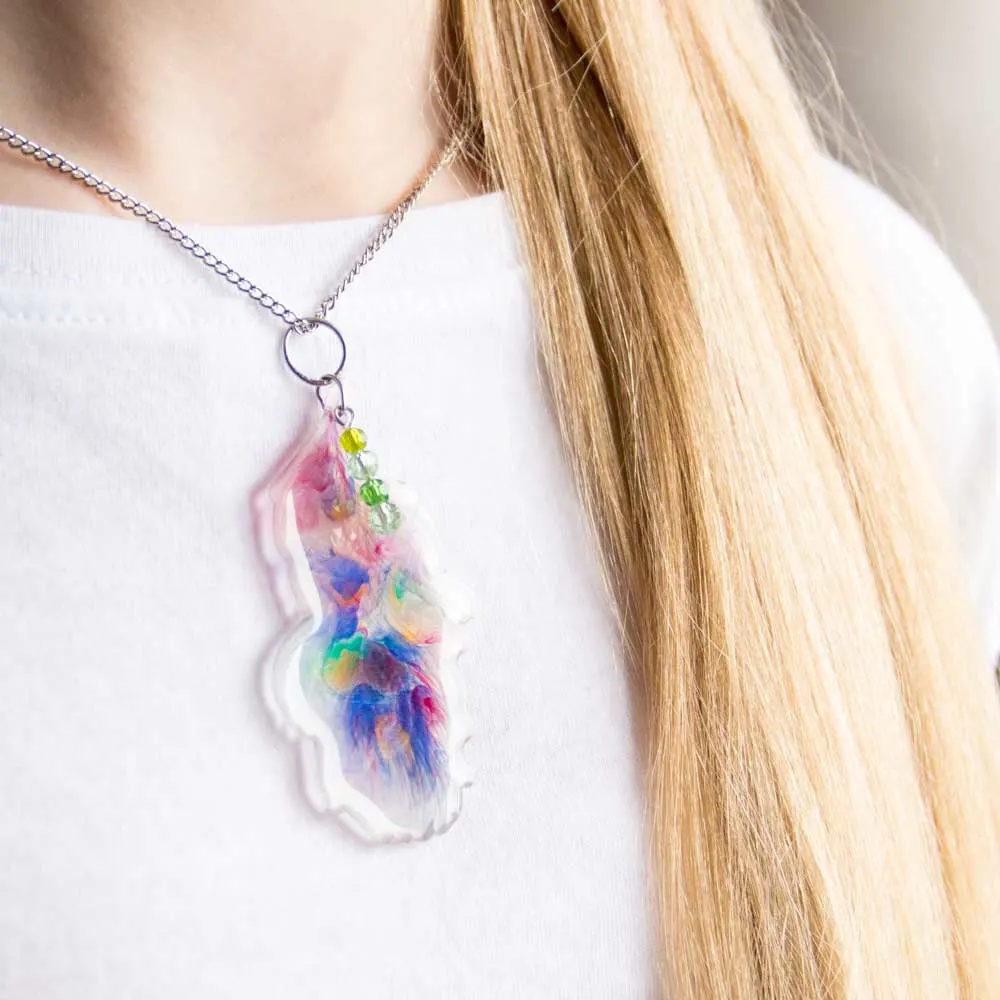
Resin Feather Pendant 


Like it? Pin it for later!


Making Adorable Cupcake Resin Charms
Materials
- cupcake silicone mold
- EasyCast Clear Casting Epoxy
- Glitter silver, green or color of your choice
- FastCast
- Measuring cups wooden stir sticks, paper towels, gloves
- Pendant and/or keychain hardware
Instructions
The First Resin Pour
- To prepare the resin for pouring, mix equal amounts of resin and hardener in a measuring cup. Stir the two parts together for 2 minutes scraping the bottom and sides with the wooden stir stick.
- Pour the mixture into a second measuring cup and continue stirring for another minute.
- Prop your silicone cupcake mold up on one end.
- Carefully pour with mixed EasyCast resin into the bottom third of each cupcake well.
- Let the resin rest for about 15 minutes and then blow off any bubbles that rise to the surface.
- Sprinkle a layer of glitter in the colours of your choice over the resin.
- Cover and let cure overnight.
The Second Resin Pour
- For the “cup” of the cupcake, I used FastCast casting resin. Follow the instructions in the package to mix the FastCast resin.
- Turn the mold around and prop up the opposite end.
- Work quickly and pour the mixed FastCast onto the bottom third of the cupcake mold.
- Within a couple of minutes the clear FastCast resin mixture will start to turn white. The resin will be fully cured within 10 minutes and ready to move on to the next step.
The Third Resin Pour
- Finally, set the cupcake mold flat on your working surface. Mix one another small batch of the EasyCast resin and fill the cupcake molds. Blow off any air bubbles and let cure completely overnight.
Finishing the Resin Cupcake Charms
- Once fully cured remove the cupcakes from the mold.
- Drill a small hole on the top of each cupcake.
- Add in a small eyelet screw and a 10 mm jump ring.
- You can simply add the charm onto a necklace or keychain ring.