


Say hello to the first of three very festive projects with my favourite little machine, the Cricut!
You guys know how much I love working with wood on the Cricut Maker! If you’ve been following here for a while, you’ll know that I made some cute cloud lights a while ago using Basswood on my Cricut Maker machine, and knew I would have to create something just as fun come Christmas. Well, enter this very cute (and easy!) decorative Christmas village. Read on for how I made it.

You need:
- Cricut Maker 3 Machine
- Knife Blade
- Strong Grip Mat
- Thin Basswood sheeting
- Glue gun
- Tape

Cutting Wood On The Maker
As I mentioned when I first cut wood on this machine, Cutting wood on the Maker is super easy, with just a few new things to get used to.
- You need to insert the knife blade into the machine, and then calibrate it using these instructions. This was very easy!
- Move the white star wheels on the roller bar all the way to the right to give clearance for thick materials and to prevent them from leaving track marks on your material.
- Ensure that the material you use is only 27.5cm/11 inch wide, and align it with the top left corner of the adhesive area on the machine mat to prevent it from passing under the large rubber rollers on the roller bar.
- Tape the material down to the mat on all four sides to prevent slippage while cutting.

Creating My Design
For this project I found a Christmas House project in the Design Space app and I modified it slightly to suit the wood look. I love that there are so many existing projects that you can do a simple tweak to in order to get exactly what you want.

1
Start by selecting and setting up your design in the Design Space app.I then set my wood up on the strong grip mat, taping it down on all four sides to stop slipping.After loading the mat into the Maker, I went through the Design Space process and selected Make It.

2
Once the machine is finished cutting, it’s useful to check to ensure the wood has
been cut all the way through. There is an option that pops up in the app to do
extra cuts if it hasn’t fully cut, something you can’t do if you take it out of the
machine, so make sure to check.

3
Once I was happy with the cuts, I took the mat and wood out of the machine and then pressed the house sections out of the larger piece of wood. I always keep any scraps too so I can use them for future projects.

4
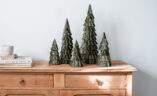
Using the glue gun, I then glued the house together, making sure to keep the glue to the inside of the house so that it wasn’t too obvious. Once I was done putting them together, I styled them on a console and added in some battery operated tea light candles so that they would shine from the inside. I absolutely love how these turned out!

Voila!


This post is in collaboration with Cricut.


