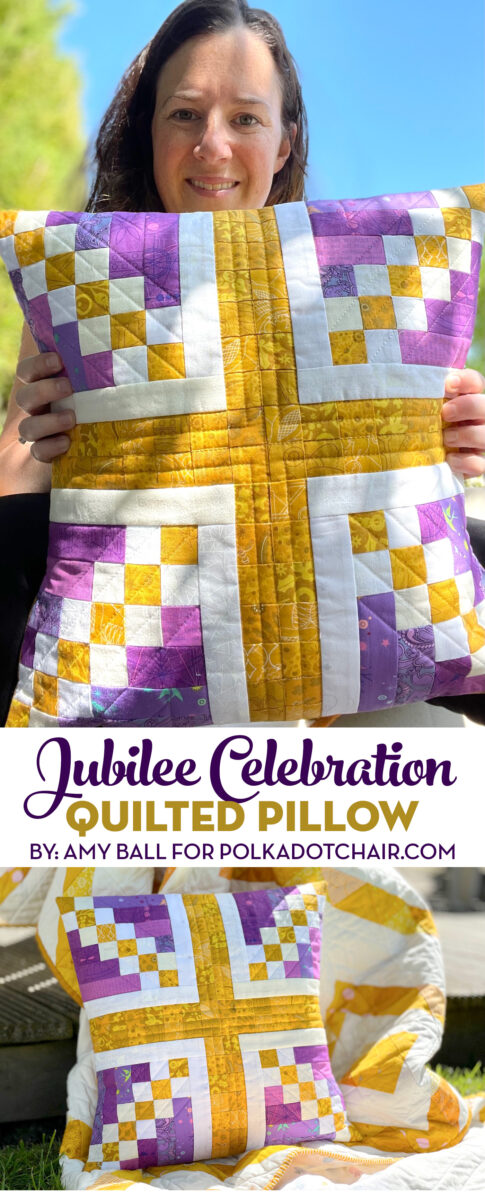
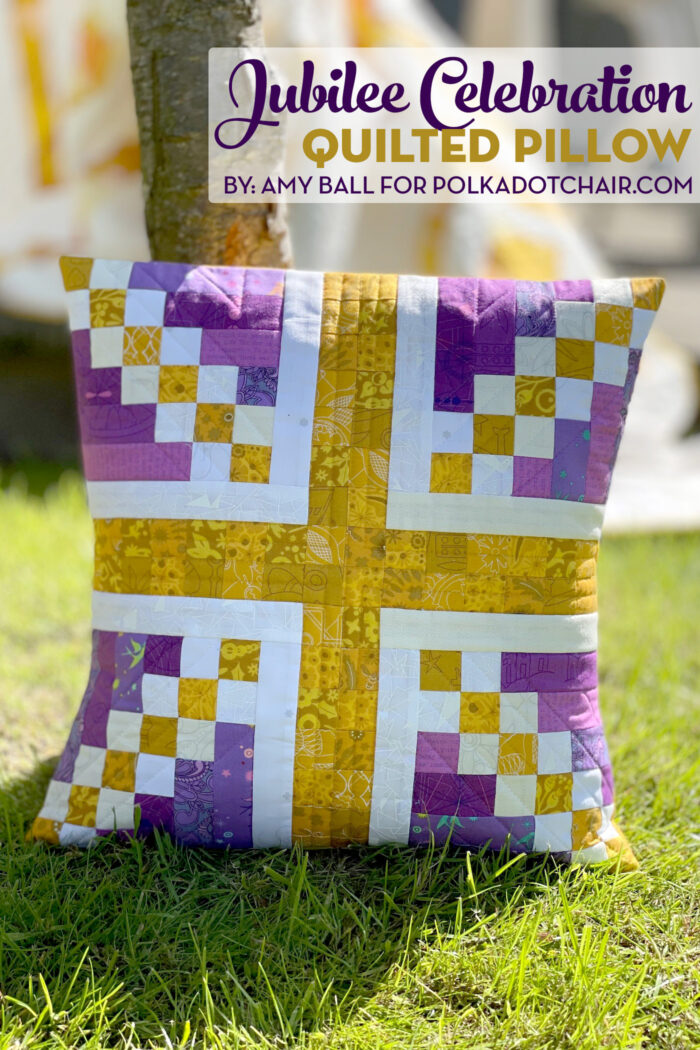
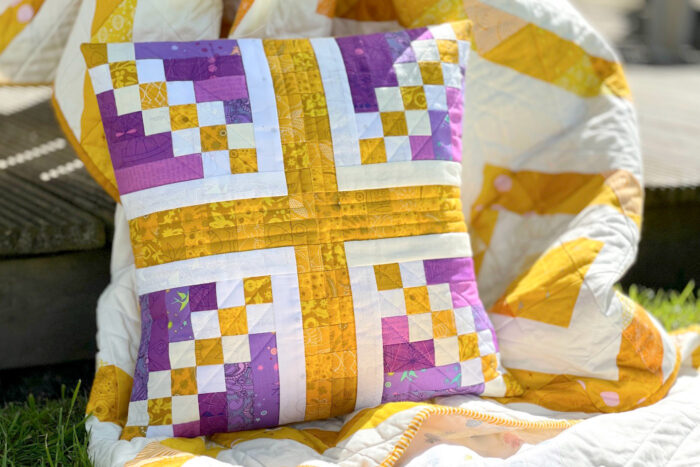
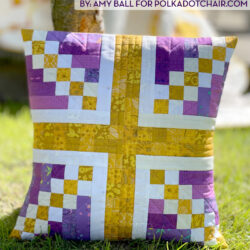
Jubilee Celebration Quilted Pillow Pattern
The May Pillow of the Month pattern is designed for a celebration! It’s a patchwork pillow designed to celebrate the Queen’s Jubilee. Our amazing contributor Amy Ball is from the UK and I absolutely ADORE her take on the Union Jack in patchwork pillow form! As soon as I saw it I added this pillow to my “to make list”.
I think you are going to love the pillow of the month pattern for May! It’s a unique quilt block designed by Amy Ball that is inspired by the Union Jack. Our family loves to visit London and I’m so excited we have plans to return this summer. Two of my kids have completed semesters in London as well, it’s safe to say that it’s a place that holds a special place in our hearts.
Amy has been designing a quilted pillow pattern for us each month. You can see some of her other pillow patterns here:
- January: Patchwork Plaid Pillow
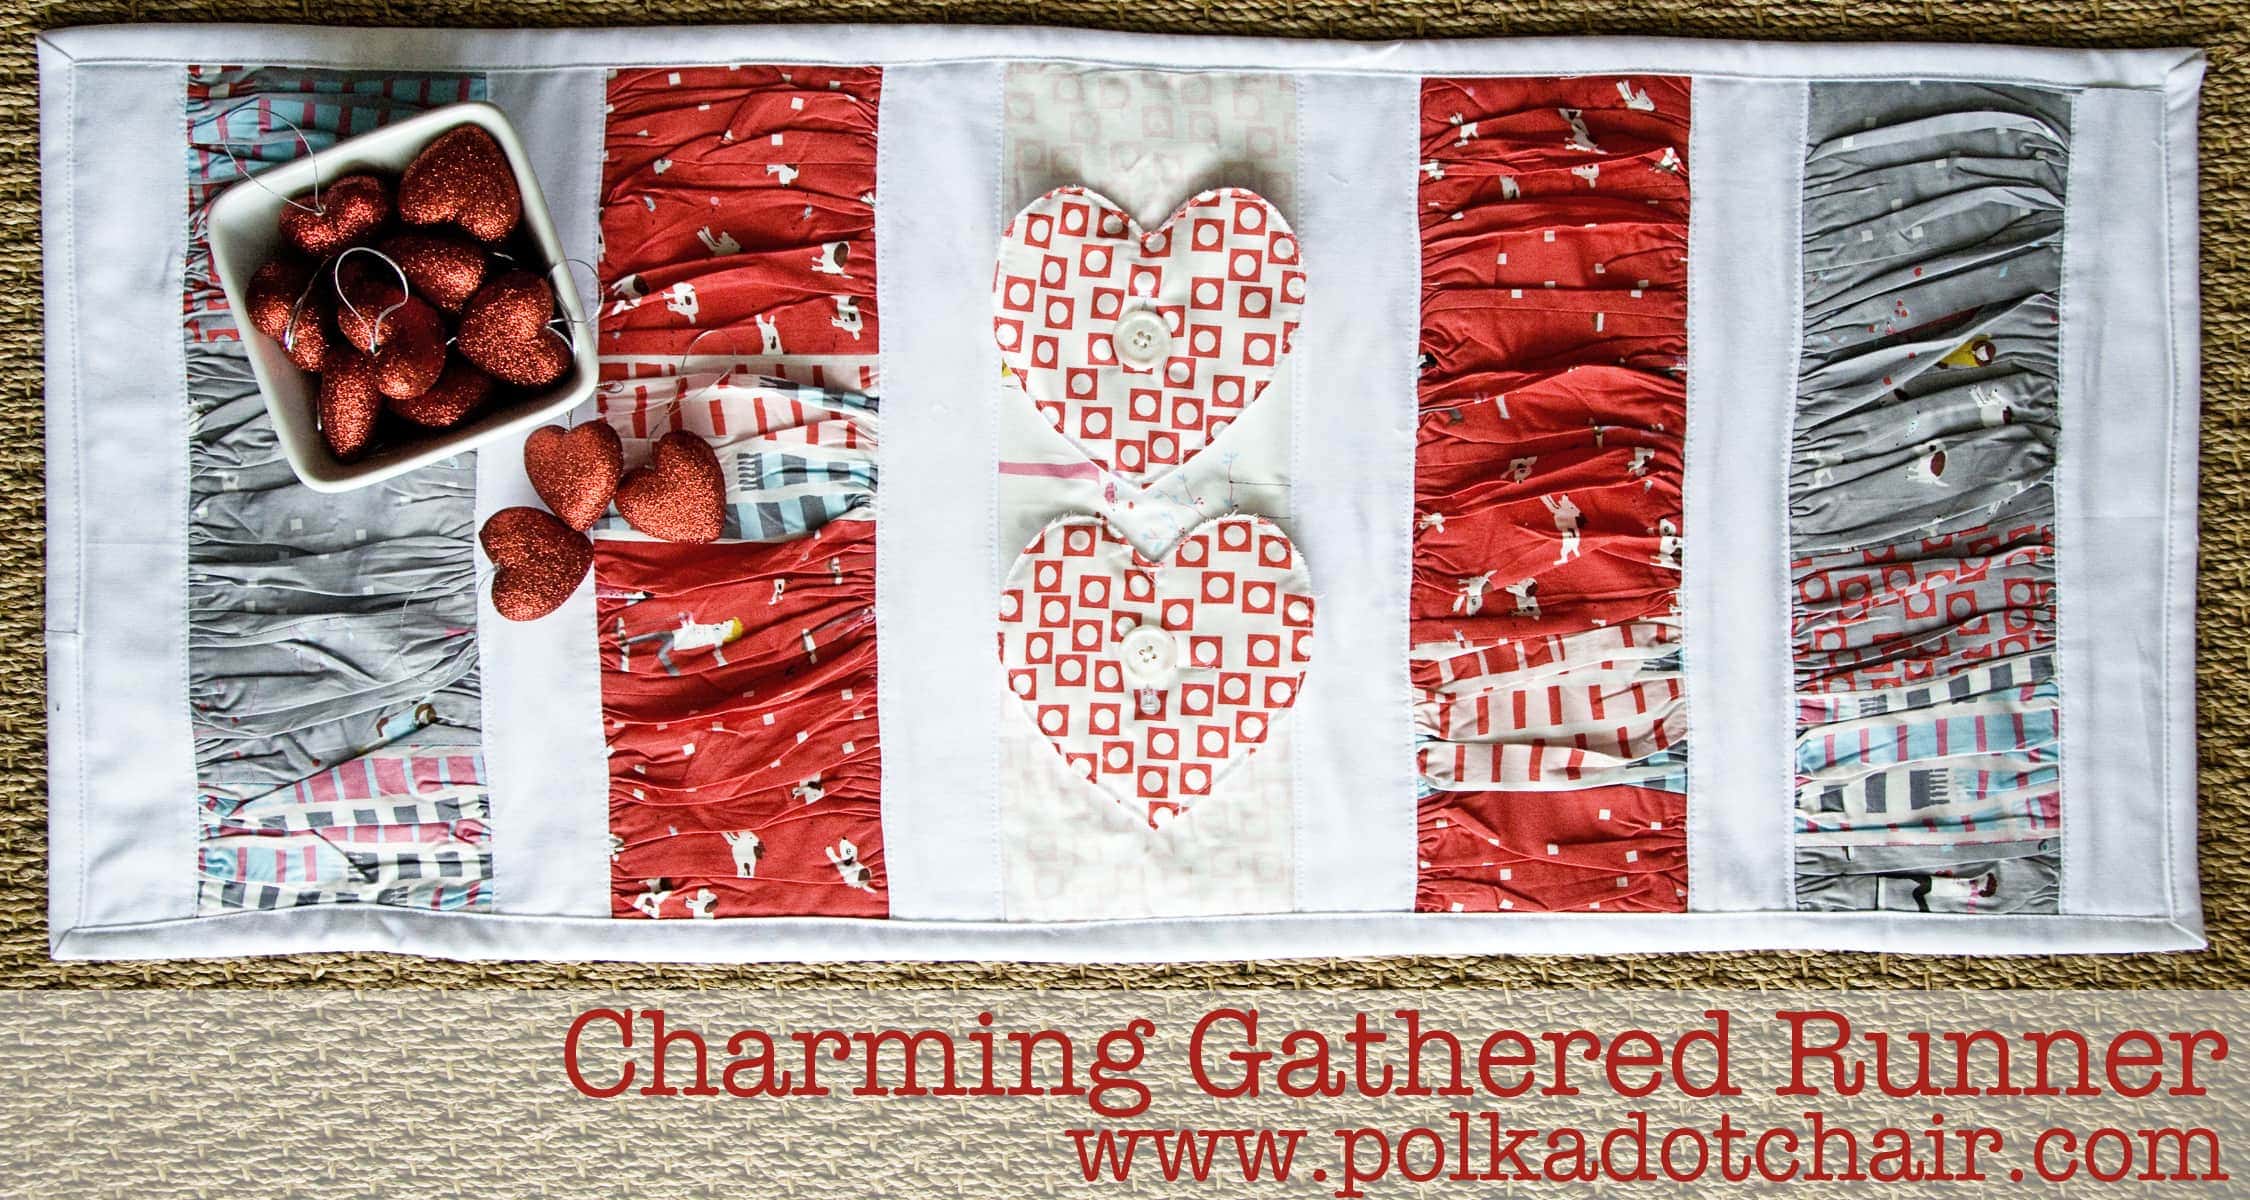
- February: Heart Quilted Pillow
- March: SLEEP Pieced Letters Pillow Pattern
- April: Patchwork Beehive Pillow
- May: Queens Jubilee Celebration Pillow Pattern
- June: Moroccan Tiles Pillow
- July: Prism Paw Quilted Pillow Pattern
- August: Strawberry Fields Patchwork Pillow
- September: Improv Patchwork Pillow Pattern
- October: Twin Pines Quilted Pillow Pattern
- November: Peeking Reindeer Patchwork Pillow
- December: Christmas Presents Pillow
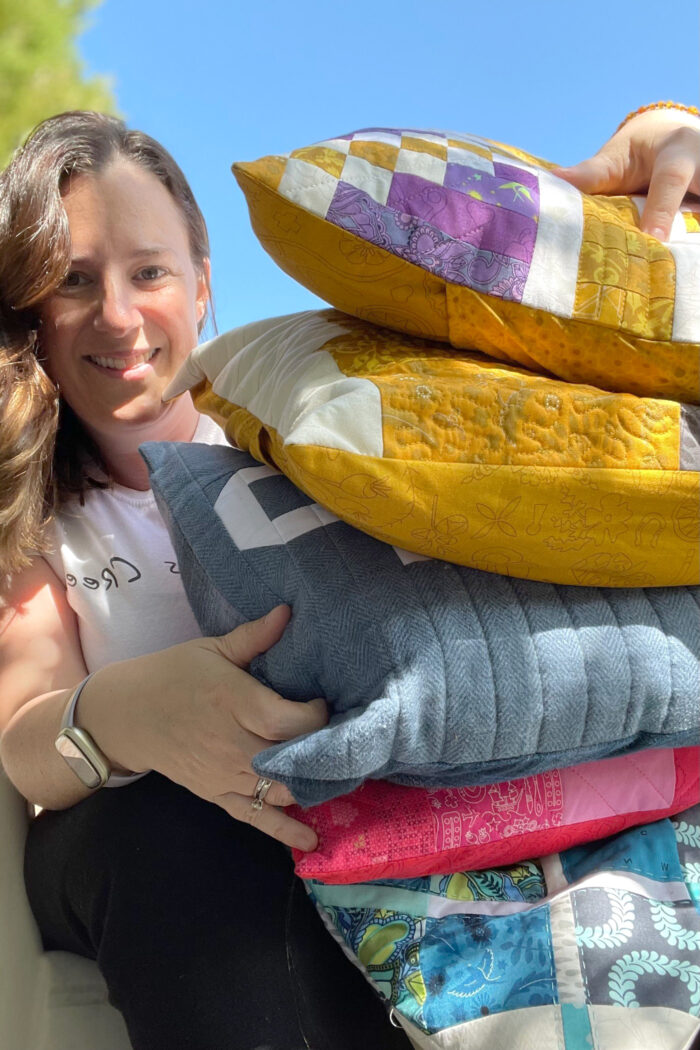
Look at all of them stacked up! I wonder as the year goes on how many more she will be able to hold!
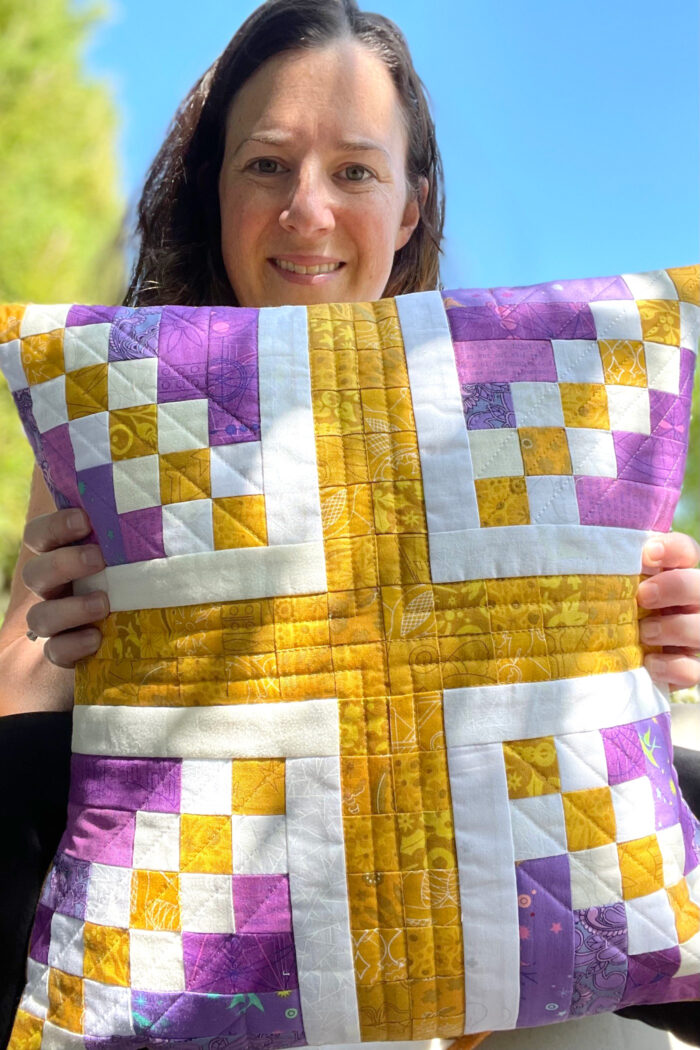
Queens Jubilee Quilted Pillow Pattern
This year Queen Elizabeth II becomes the first British monarch to celebrate their Platinum Jubilee after 70 years of service. The Platinum Jubilee Central Weekend takes place in early June with events and activities taking place all over the UK and beyond…which leaves just enough time to make a patchwork Jubilee Celebration pillow!

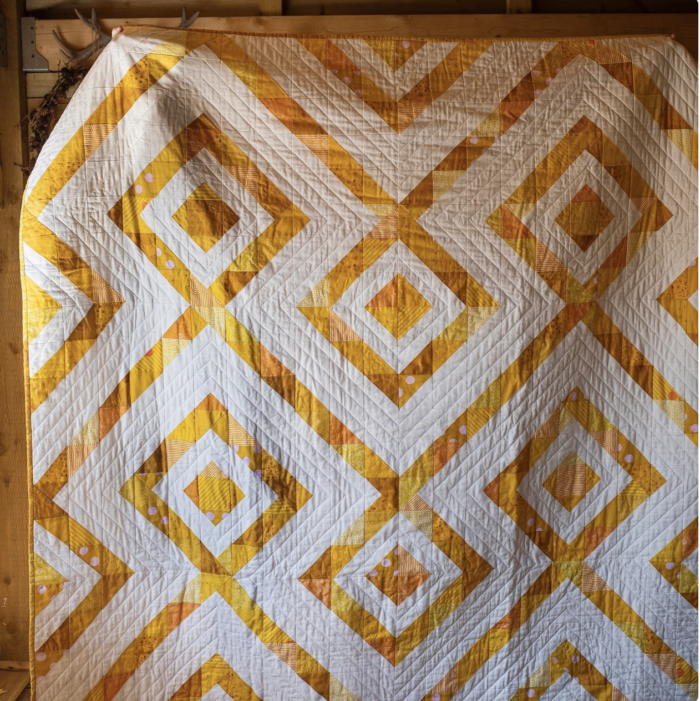
I’ve chosen to use non-traditional (but still regal!) colours but if you want the full Union Jack vibes, you can swap the purples for deep blues and the golds for bright reds.
Supplies:
- Fabrics:
- Selection of gold scraps or 1 gold fat eighth
- Selection of purple scraps or 1 purple fat eighth
- Selection of white scraps or 1 white fat quarter
- Light backing fabric 1 fat quarter
- Pillow back fabric 0.5 yards
- Other:
- Batting 18” x 18”
- Cushion pad: 16” x 16”
Jubilee Celebration Pillow Pattern
Equipment
supplies
- 1 Fat Eighth Gold Fabric You can also use a variety of gold fabric scraps
- 1 Fat Eighth Purple Fabric You can also use a variety of purple fabric scraps
- 1 Fat Quarter White Fabric You can also use an assortment of white or low volume prints
- 1/2 Yard Fabric Pillow Back
- 1 Piece Batting At least 18" x 18"
- 1 Pillow Form 16" x 16"
Instructions
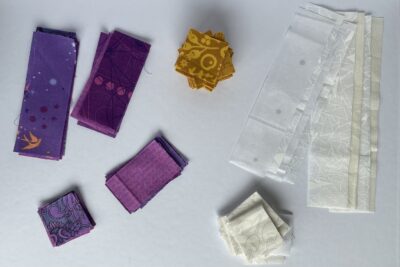
Cutting:
- From gold fabric cut:1½” square (84)
- From purple fabric cut:4½” x 1½” (8),3½” x 1½” (8), 2½” x 1½” (8), and 1½” square (8).
- From white fabric cut: 7½” x 1½” (4), 1½” x 6½” (4), and 1½” square (40).
- From Pillow back fabric cut:16½” x 10½” (2).

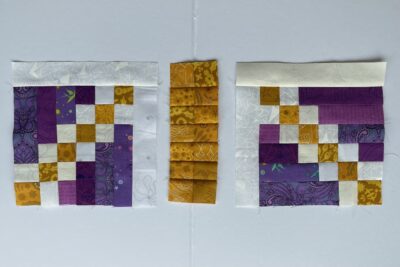
Block Construction: Use a ¼” seam allowance unless otherwise stated.
- As this patchwork pillow is constructed from lots of long thin pieced strips, I highly recommend pressing very carefully and using pins when you start piecing the strips together as they can easily become mis-shaped.
- Take one gold 1½” square, one white 1½” square and one purple 4½” x 1½” rectangle. Sew together in this order and press.
- Take one white 1½” square, one gold 1½” square, another white 1½” square and one purple 3½” x 1½” rectangle. Sew together in this order and press.
- Take one purple 1½” square, one white 1½” square, one gold 1½” square, another white 1½” square, and one purple 2½” x 1½” rectangle. Sew together in this order and press.
- Take one purple 2½” x 1½” rectangle, one white 1½” square, one gold 1½” square, another white 1½” square and one purple 1½” square. Sew together in this order and press.
- Take one purple 3½” x 1½” rectangle, one white 1½” square, one gold 1½” square and another white 1½” square. Sew together in this order and press.
- Take one purple 4½” x 1½” rectangle, one white 1½” square and one gold 1½” square. Sew together in this order and press.
- Next, take the rows from steps one to six and sew them together in order, using the photo as a guide, being careful to match up seams where they meet.
- Repeat steps one to seven to make three more corner blocks.
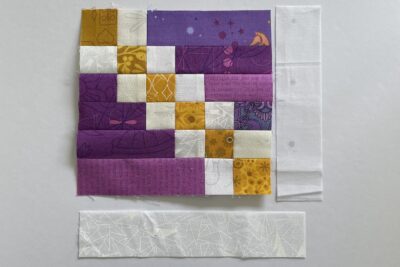
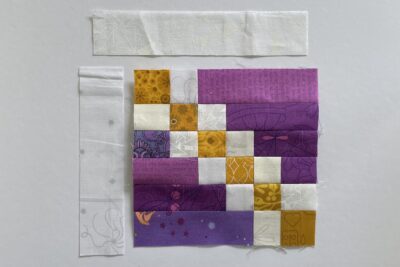
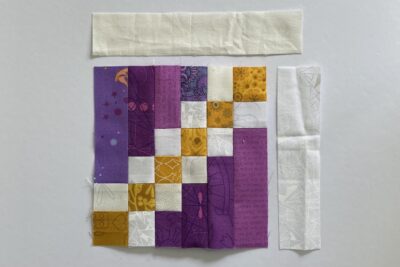
- Take your first corner block and position it so there is a gold square in the top left corner. Sew one white 1½” x 6½” rectangle to the right edge and press. Then sew one white 7½” x 1½” rectangle to the bottom edge to complete the block. Press well.
- Take your second corner block and position it so there is a gold square in the top right corner. Sew one white 1½” x 6½” rectangle to the left edge and press. Then sew one white 7½” x 1½” rectangle to the bottom edge to complete the block. Press well.
- Take your third corner block and position it so there is a gold square in the top left corner. Sew one white 1½” x 6½” rectangle to the left edge and press. Then sew one white 7½” x 1½” rectangle to the top edge to complete the block. Press well.
- Take your fourth corner block and position it so there is a gold square in the top right corner. Sew one white 1½” x 6½” rectangle to the right edge and press. Then sew one white 7½” x 1½” rectangle to the top edge to complete the block. Press well.
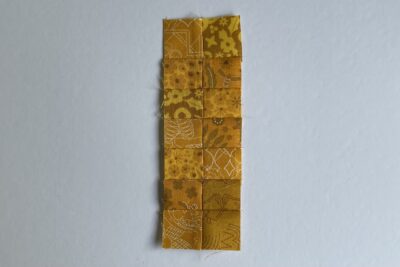
- Take fourteen gold 1½” squares. Sew them together in pairs and then sew the pairs together to create a short scrappy strip. Repeat to create a second one.
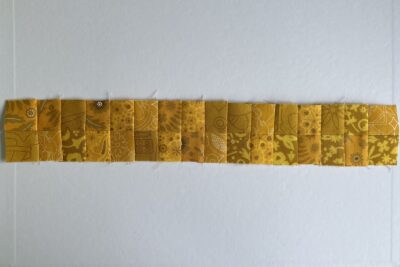
- Take thirty-two gold 1½” squares. Sew them together in pairs and then sew the pairs together to create a long scrappy strip.
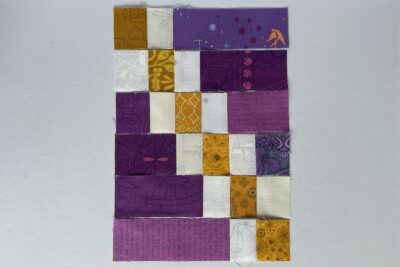
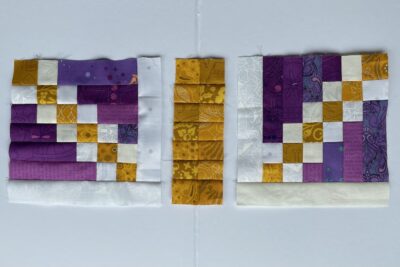
- Take the corner blocks from steps nine and ten. Sew them together with one of the short scrappy strips from step thirteen in the centre. Press well. Use the photo as a guide to make sure your corner blocks are positioned correctly.
- Now take the corner blocks from steps eleven and twelve. Sew them together with the other short scrappy strip from step thirteen in the centre. Press well. Use the photo as a guide to make sure your corner blocks are positioned correctly.
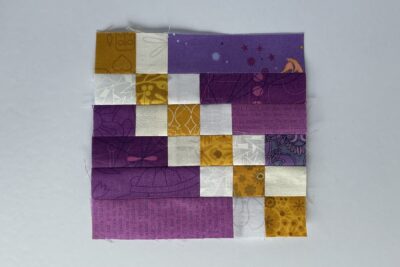
- To complete the patchwork pillow front, sew the units from steps fifteen and sixteen together with the long scrappy strip from step fourteen in the centre. Press well. Use the photo as a guide to make sure the units are positioned correctly.


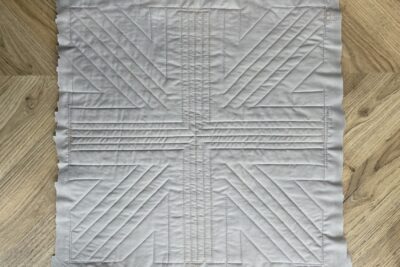
Quilting:
- Now it’s time to make a quilt sandwich. Place your light backing fabric square (right side facing down) with your batting on top, then add the patchwork pillow front with the right side facing towards you. Make sure all the layers are smooth and flat then baste the layers together using your preferred method.
- Quilt as desired. I have used straight line quilting in gold, white and purple to coordinate with the pillow front. In gold I quilted five lines even spaced across the central strips and then a single diagonal line down the centre of the gold diagonal squares in each corner. In white I quilted diagonal lines down the centre of the two rows of white diagonal squares in each corner. In purple I quilted more diagonal lines echoing the gold and white lines but added horizontal/vertical lines too, to create quilted triangles on the purple sections. Other quilting ideas: diagonal straight lines across the whole pillow front, vertical straight lines across the whole pillow front, or hand quilting echoing the design features.
- Once you have finished quilting, trim off excess backing fabric and batting, and square up your pillow block if required.

Finishing:
- Take one pillow back 16½” x 10½” rectangle and hem one long edge by pressing the raw edge to the wrong side by ¼” then again by another ¼”. Press well and sew. Then repeat for the second pillow back 16½” x 10½” rectangle.
- Pin or clip the pillow back pieces to the quilted block, right sides together, all around the four side.
- Sew around all four edges using a ¼” seam allowance, securing the start and finish with some back-stitching.
- Trim the corners, turn the pillow cover the right way out, carefully poke out the four corners and then press.
- Stuff with an 16” square pad and enjoy your new Jubilee Celebration pillow…perhaps with a jam scone and a cup of tea!
About the Designer

Amy lives in the north of England with her husband and son. When she’s not sewing and quilting, Amy can usually be found baking or reading. You can find her on Instagram @amyatthegate
Also by Amy:
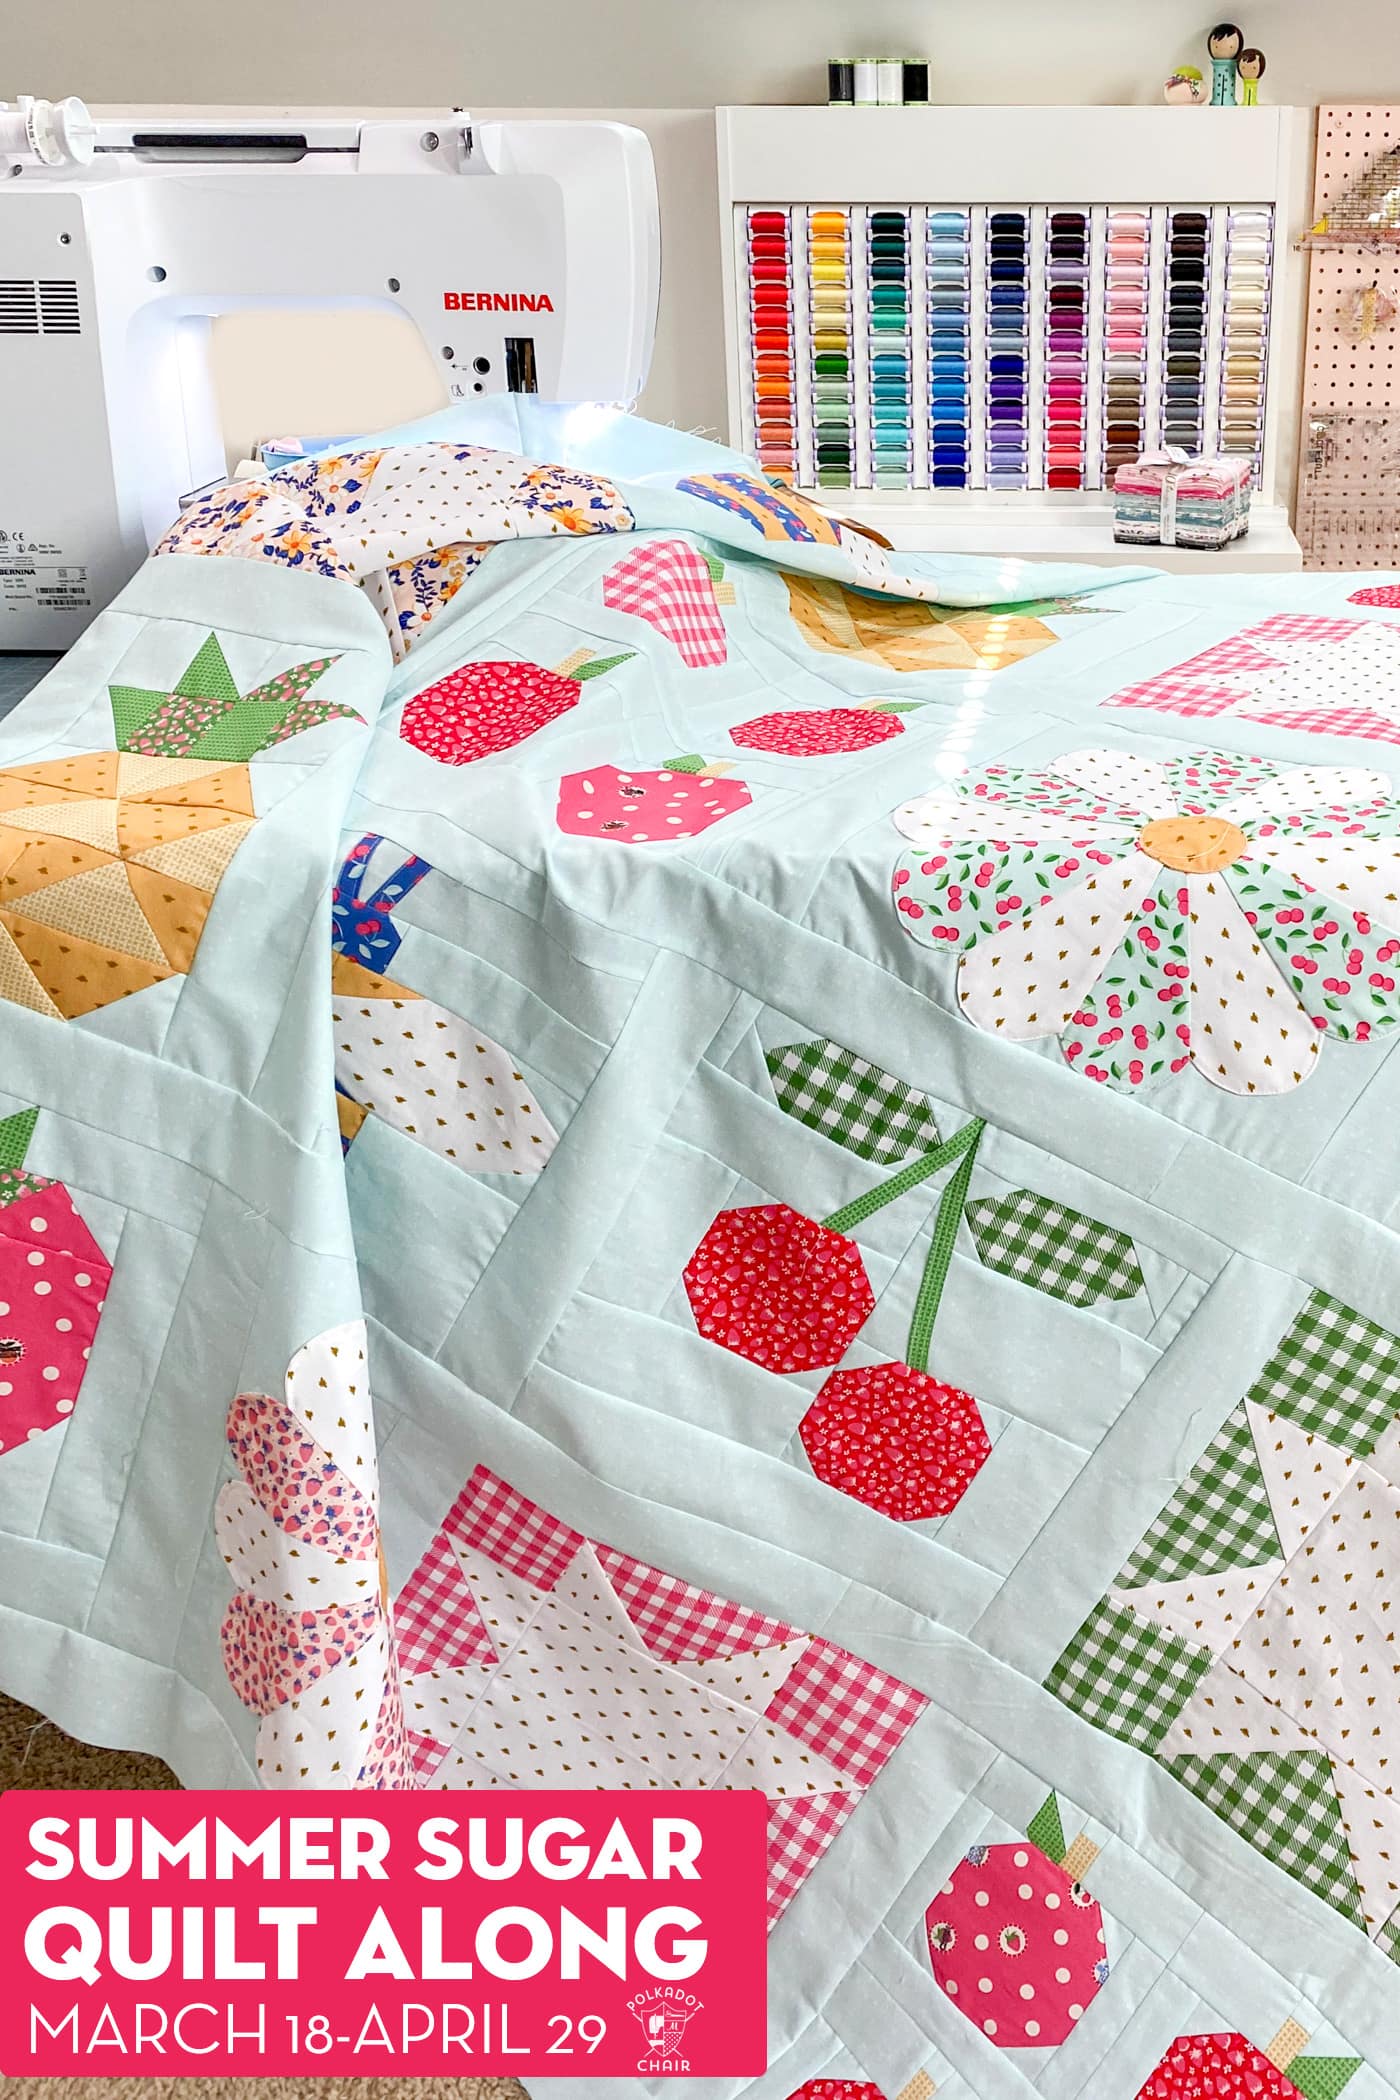
Summer Braids Patchwork Quilt pattern
Straight Line Quilting | How-To Guide

Seams Perfect: Online course – create spot-on patchwork seams with precision and confidence.