This is a sponsored post written by me on behalf of Cricut. All opinions are 100% mine.
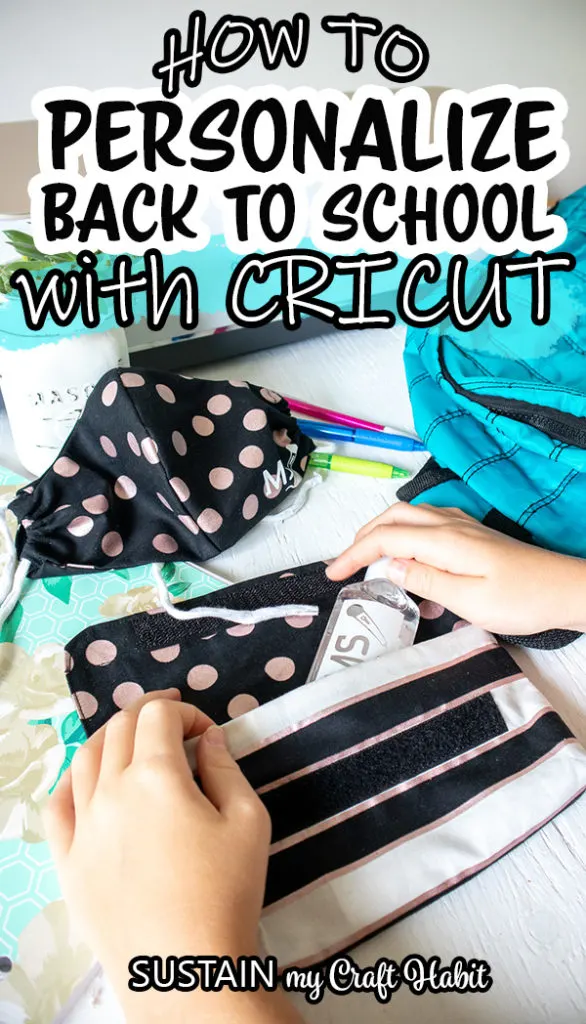
This year more than ever we want the kids to be able to keep track of their stuff at school. As I start preparing my kids to return to class, I’ve found some creative ways to personalize back-to-school with Cricut.

Personalizing Back-to-School Classroom Necessities
After being out of class since March, my kids are more than excited to get back to school. Meanwhile, as a mom, I’m feeling a mix of excitement and nervousness over what school will be like for my little ones. Some things are for certain, however: personalizing their items will be extra important.
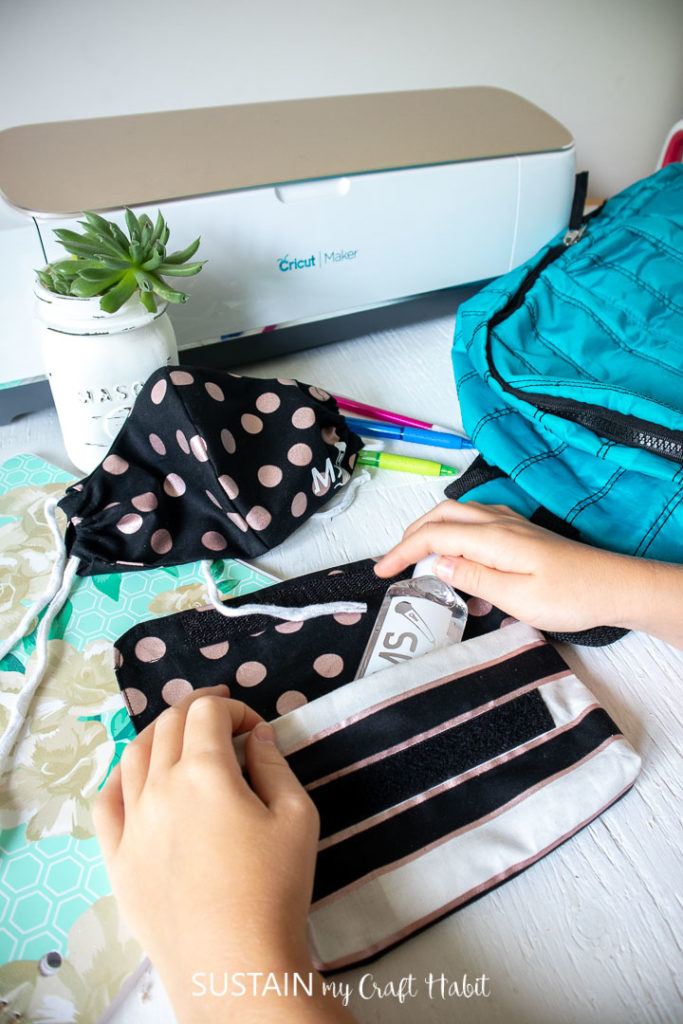
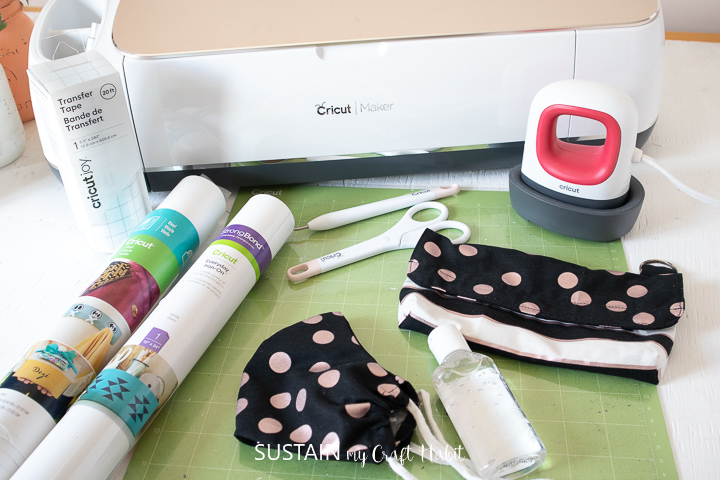
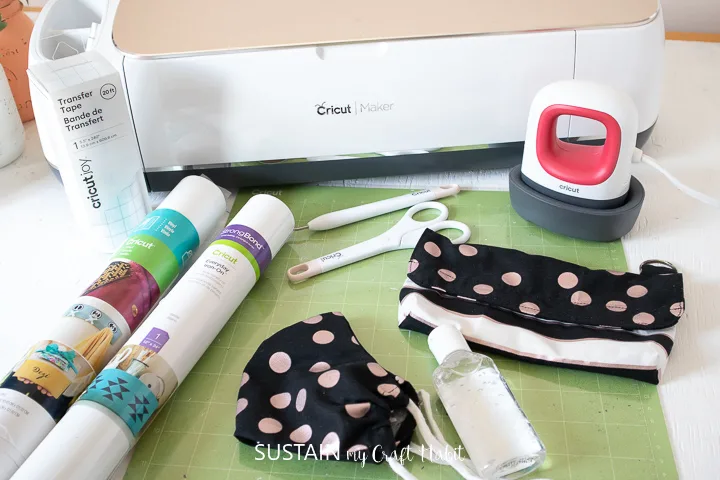
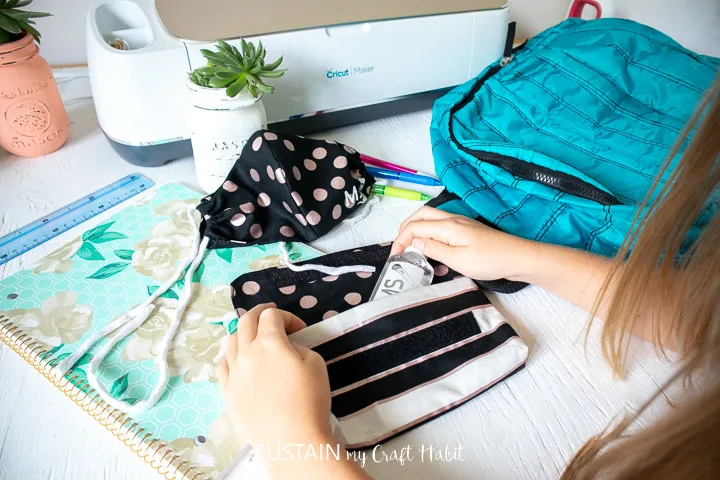
This is where my Cricut Maker and Easy Press Mini comes to the rescue! With ease, I’ll be able to make essentials such as masks, pouches and labels at a fraction of the cost of buying them all.
Moreover, I’ll be able to personalize each of my child’s classroom necessities. Not only will it help with tracking their items, but also will add a fun, personal touch for this year’s odd back-to-school.

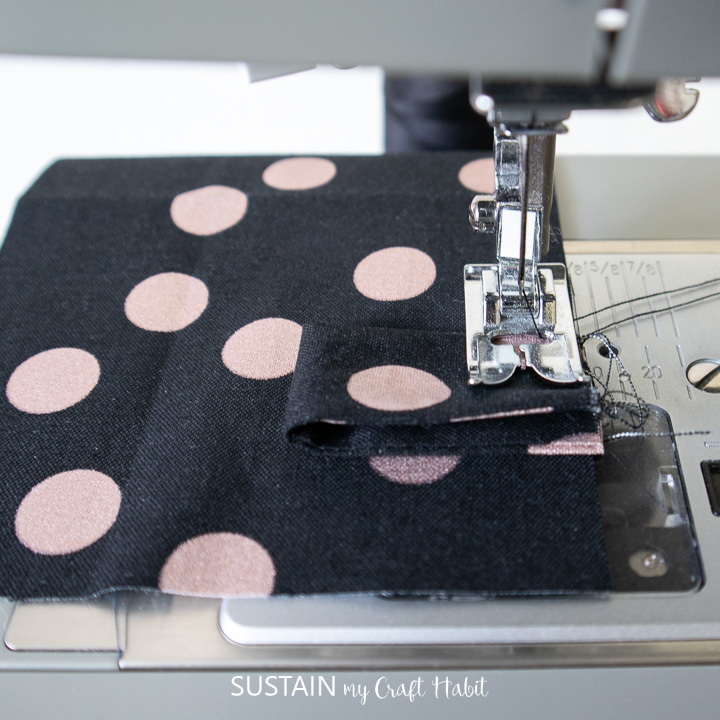
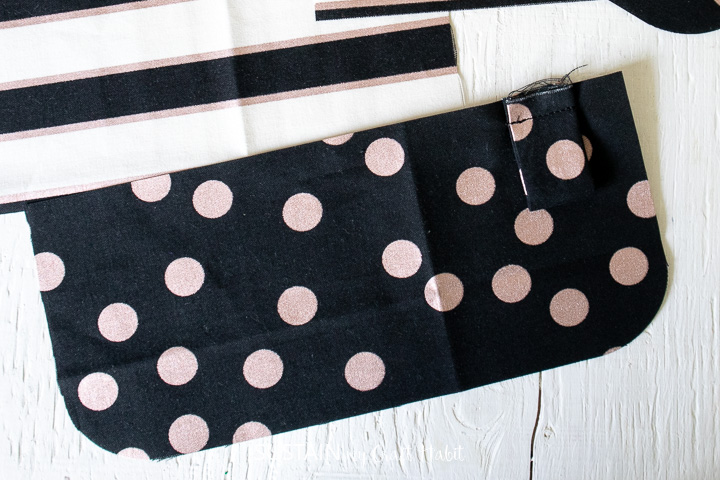
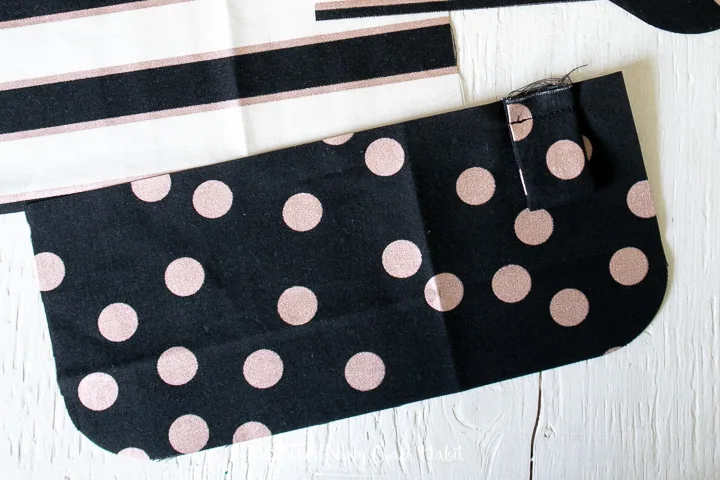
Making a Pouch to Hold all the Essentials
We recently shared this tutorial for making an over-the-shoulder kid’s mask pouch (with break-away strap). Using my Cricut Maker and this Mask Pouch SVG pattern, I was able to cut the pieces to make additional pouches in a flash!

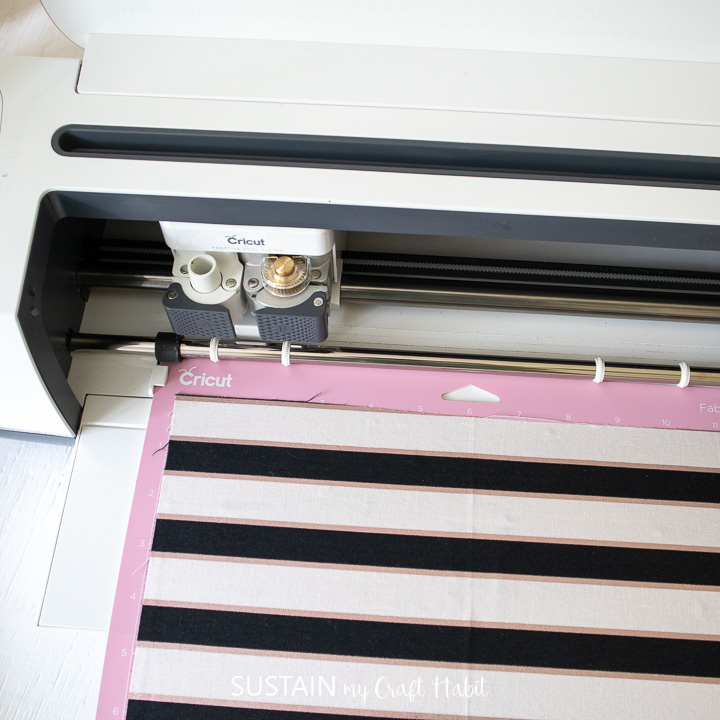

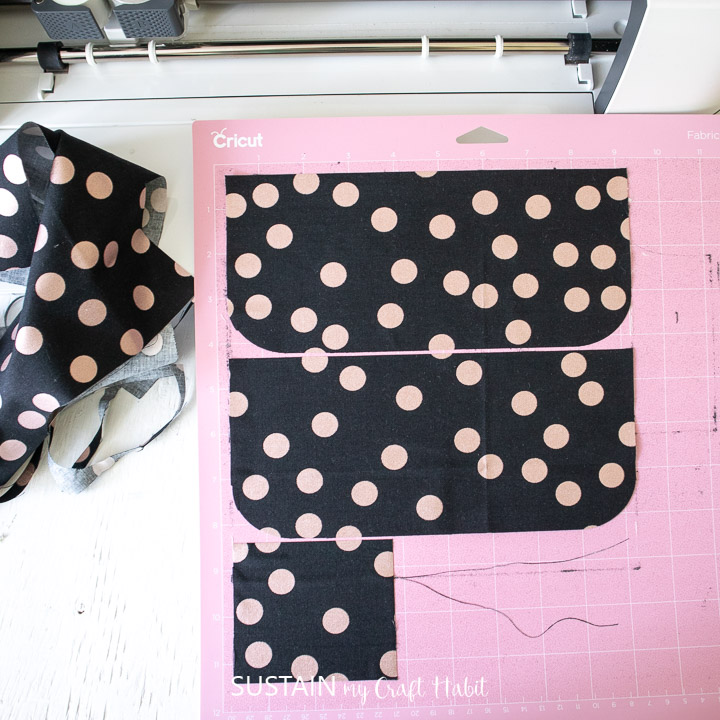

We altered the original pattern just a bit to include a tab for attaching an O-ring (instead of the strap). Simply fold the small rectangular piece in half and sew lengthwise sides together to form a tube.

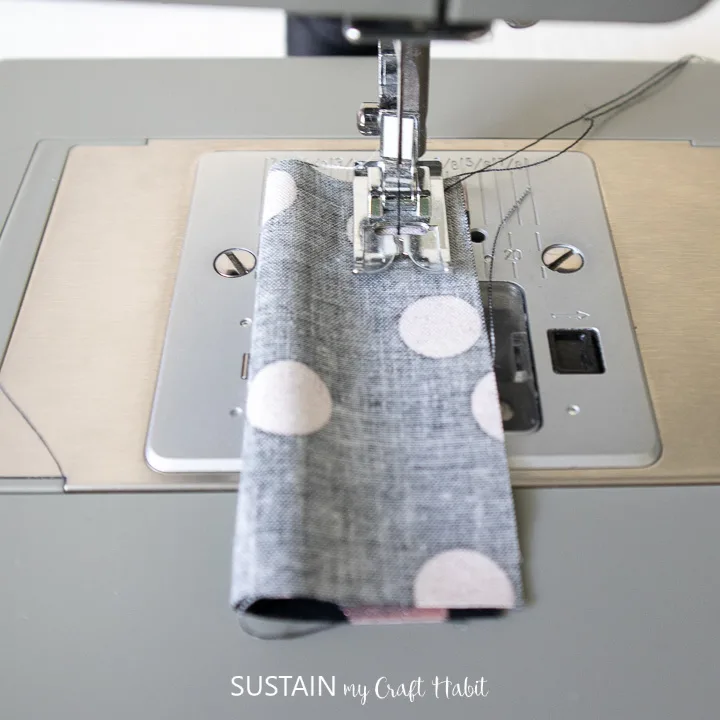

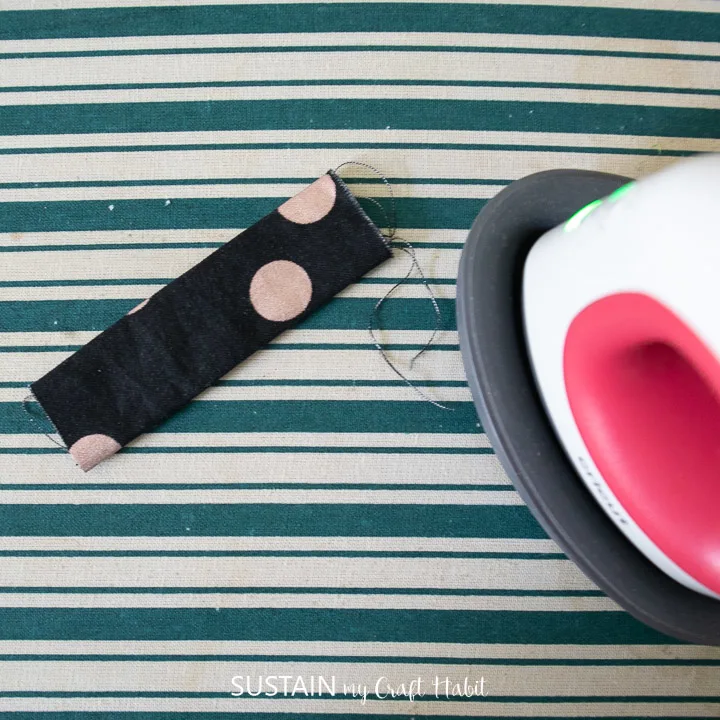
Turn it inside out and press it flat. Fold the tab in half to form a loop and sew it to one side of the pocket flap. For the full sewing tutorial, refer to this DIY fabric mask pouch post.

Now that these pouches are sewn, we can personalize each using our Cricut Maker, Everyday Iron-On Vinyl and Easy Press Mini. Additionally, we can personalize all the items that will be stored inside in a similar way.
Materials Needed to Personalize School Supplies:
Disclosure: This post contains affiliate links for your shopping convenience. Should you choose to purchase through them, we will make a small commission at no extra cost to you. You can read our full disclosure policy here.
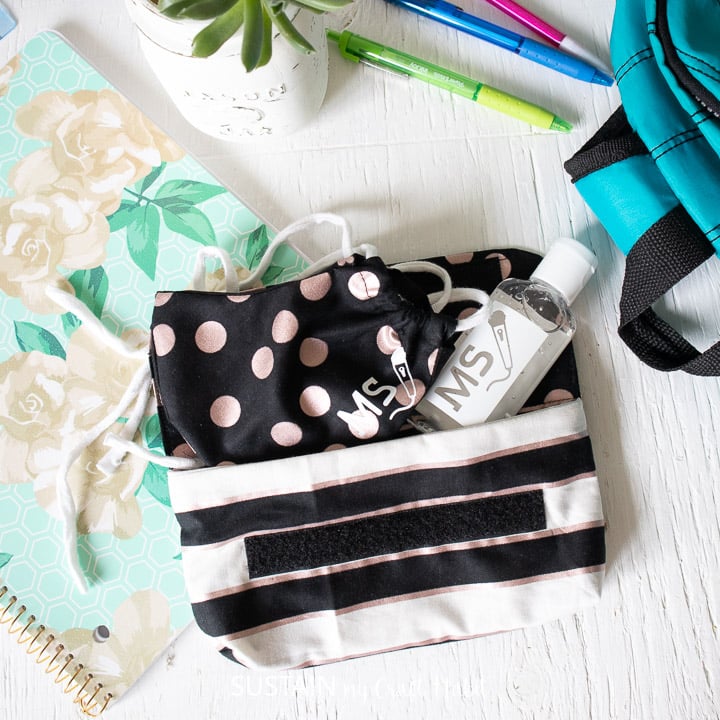
- Classroom necessities such as a mask pouch, reusable mask and sanitizer bottle
- Cricut Maker
- Standard Grip Mat
- Everyday Iron-On Vinyl in white
- Cricut Permanent Vinyl in white
- Weeder
- Scissors
- EasyPress Mini
- Cricut Transfer Tape
How To Personalize Back-to-School Supplies with Cricut:
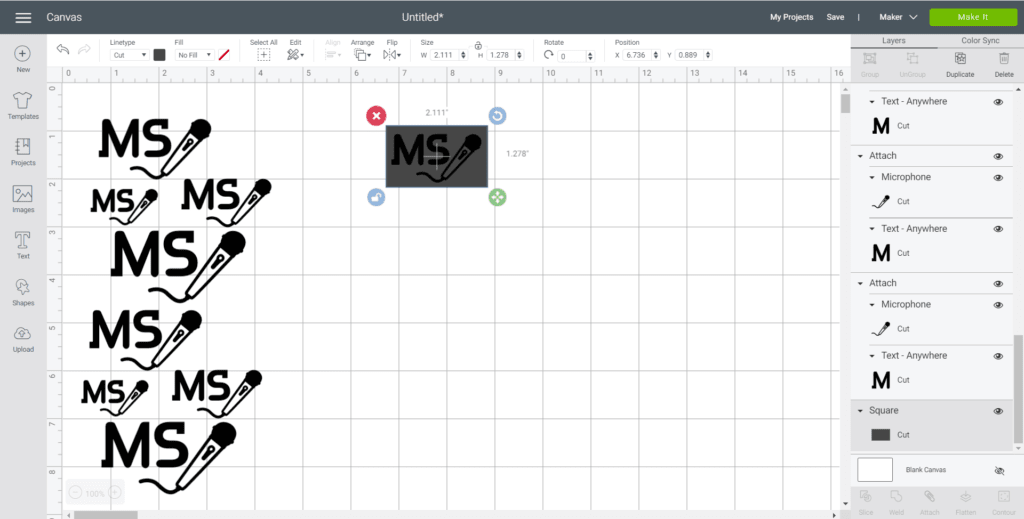
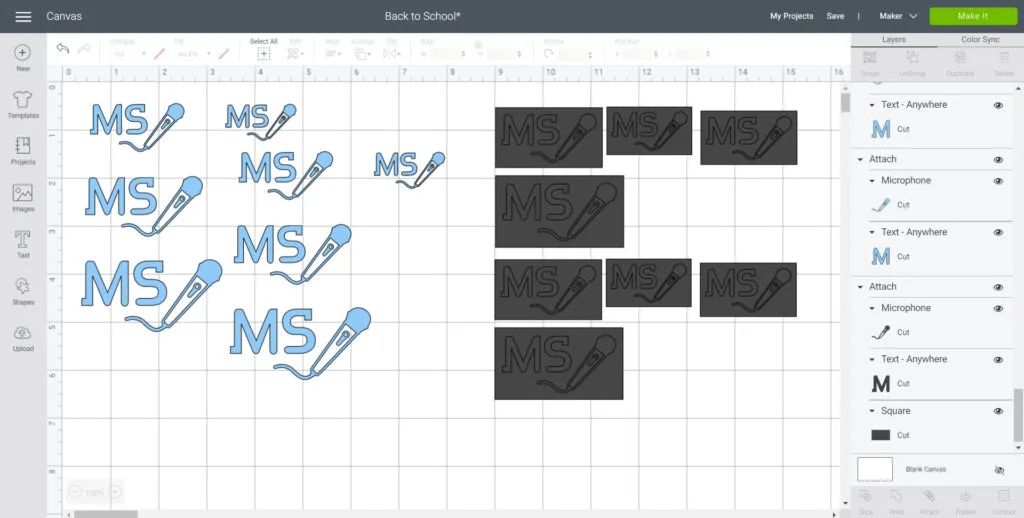
Start by creating the design in Cricut’s Design Space. In this tutorial I’ll be showing how to add my child’s initials along with a small picture. However, my school board has advised us that all of the kid’s belongings must have their full names on them to avoid loss. So for the rest of their items, I will be including their full names.
On a blank canvas, click on “text” button in the toolbar. Type out your child’s name (or initials) and change the font to Anywhere.
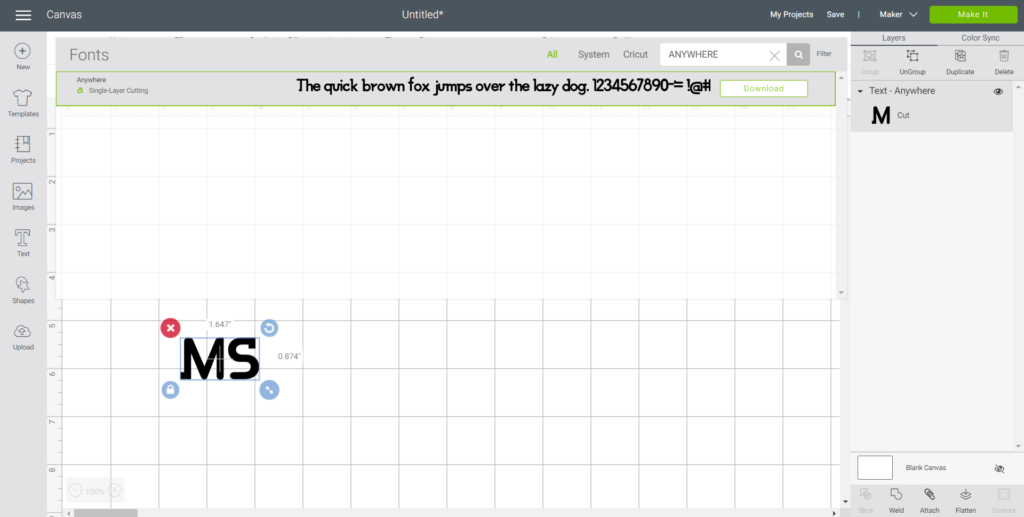
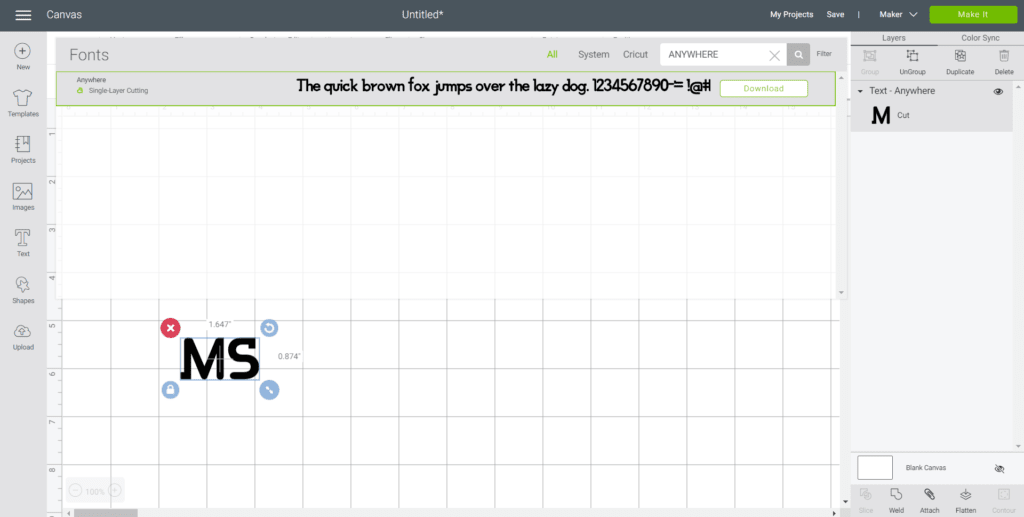
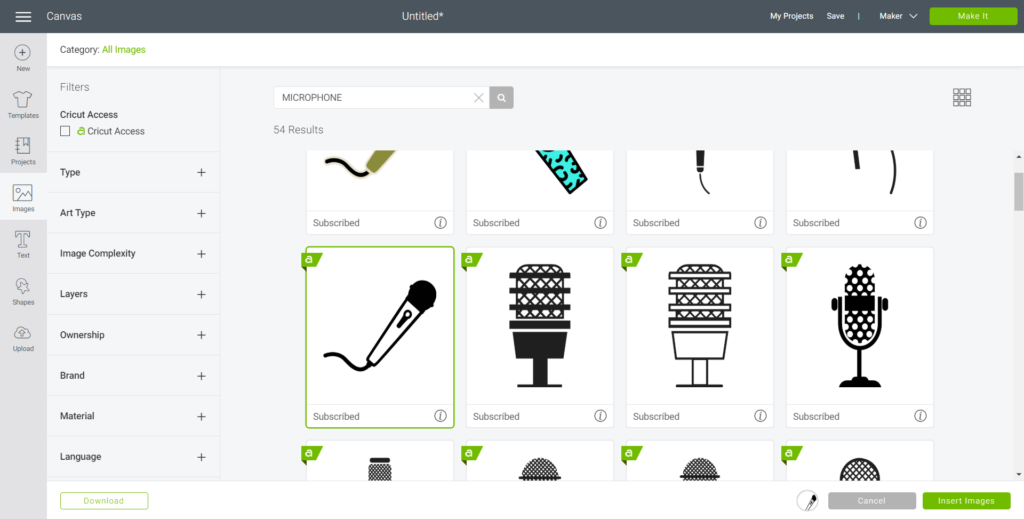
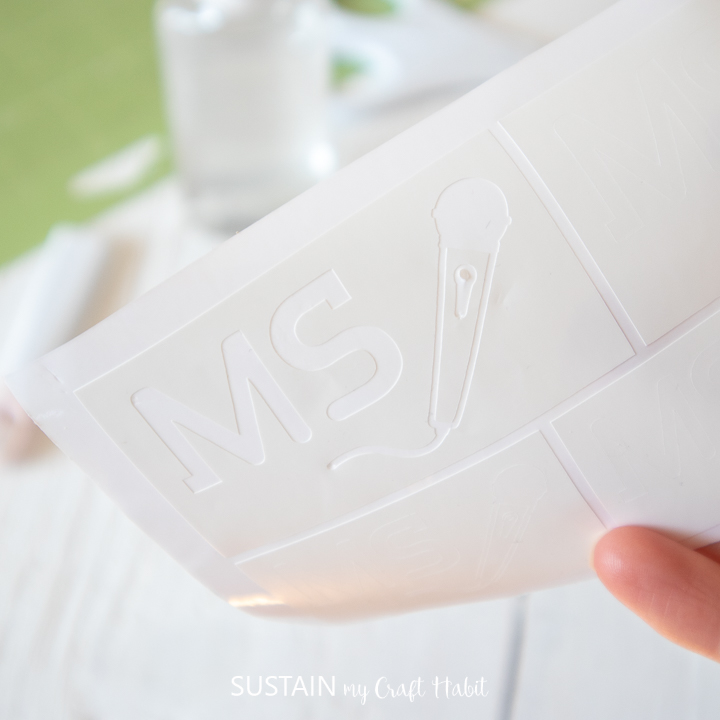
Click on the “image” button in the toolbar and search images that your child will like. In my case, I picked a microphone. Insert the image on to the canvas.

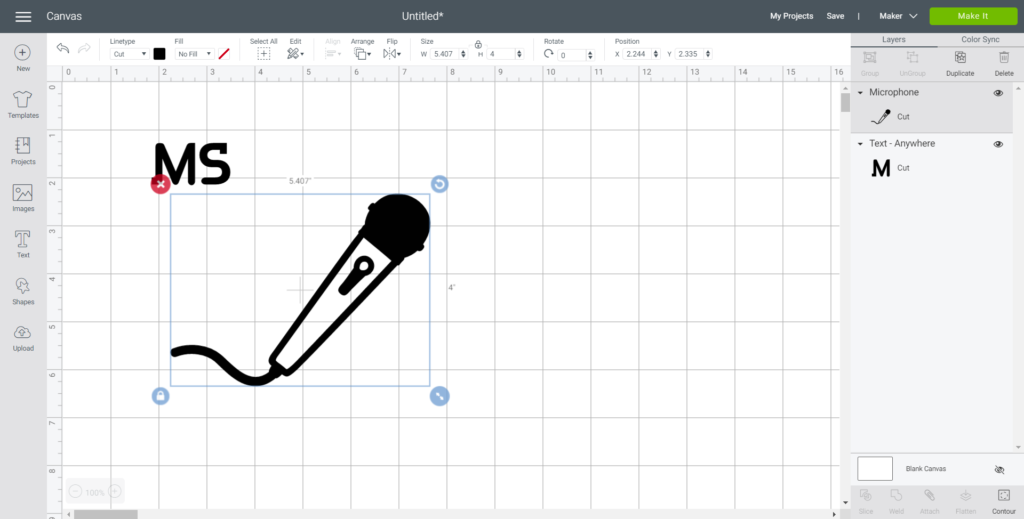

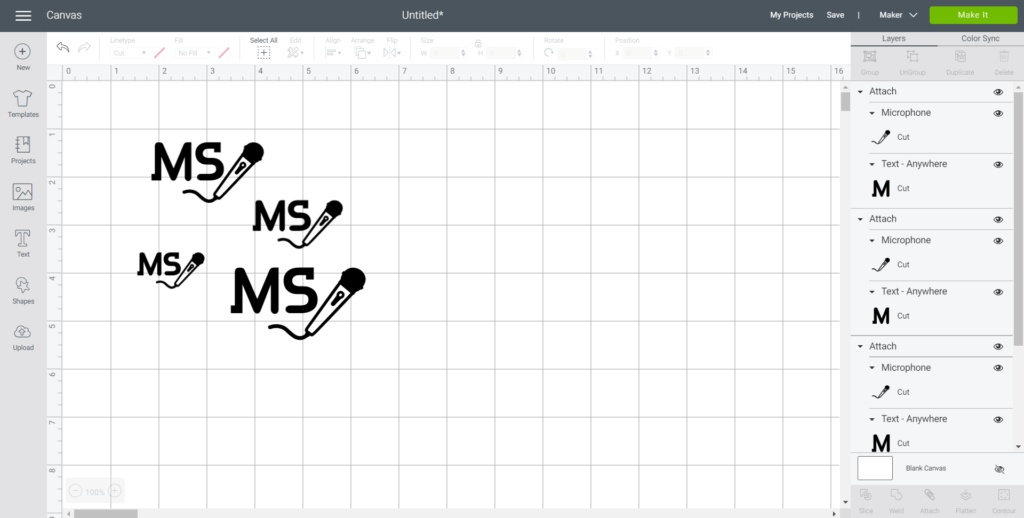
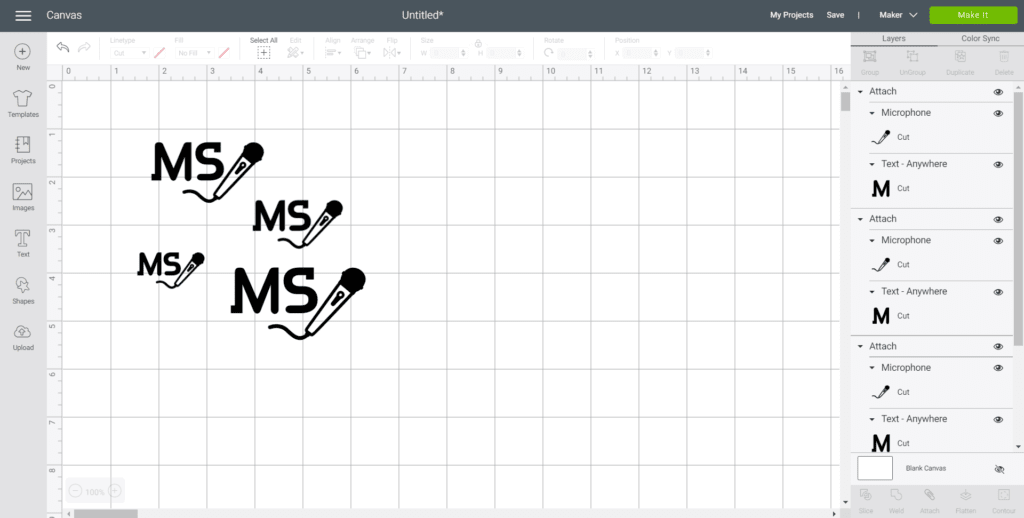
Resize the image and letters and position together accordingly. Highlight the image and letters together and select “attach” to group together.
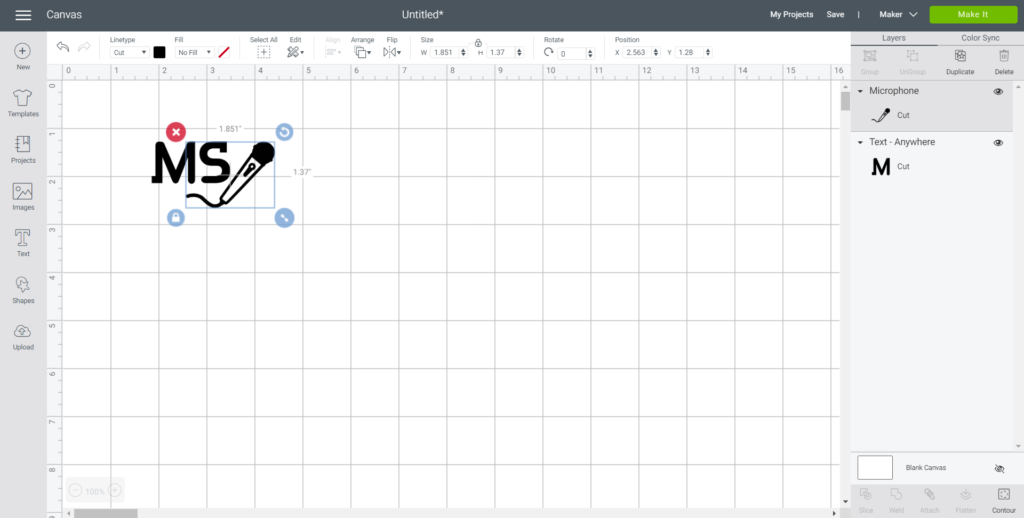

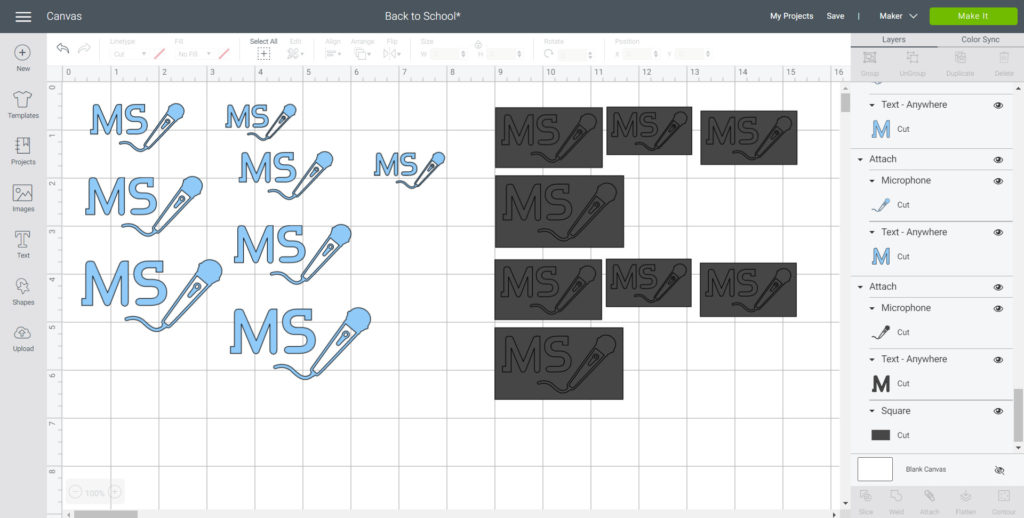
Duplicate the design multiple times. Keeping the same image, I plan to make various sizes to be cut in Everyday Iron-On Vinyl to use on fabric masks, pouches and other fabric items like their lunchtime DIY placemats.
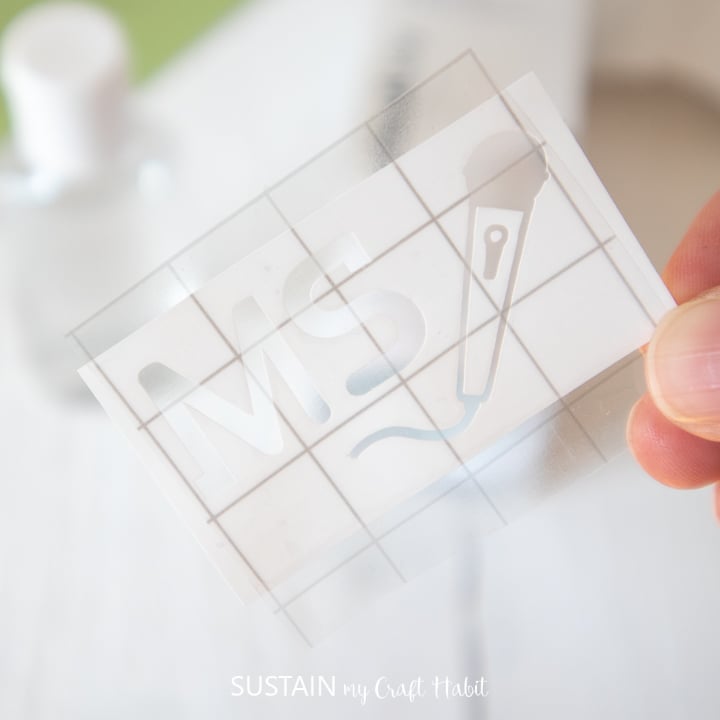
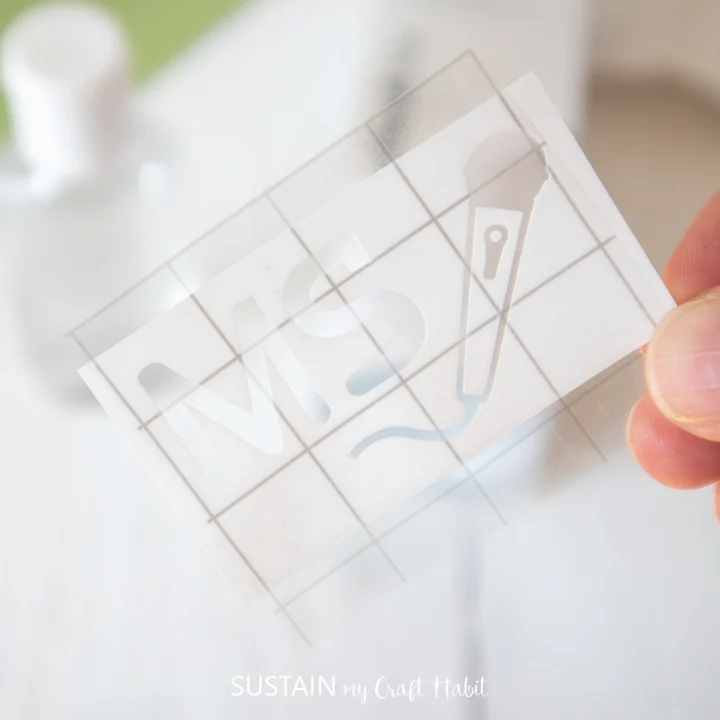
To make it simpler to transfer the lettering on to other items like sanitizer and water bottles, I made the lettering as knock out instead. To do this, insert a square shape onto the canvas.

Adjust the size and shape to fit over the image and highlight all pieces together. Click on “Attach” to make the knockout (meaning the background will remain while the individual letters are weeded out).
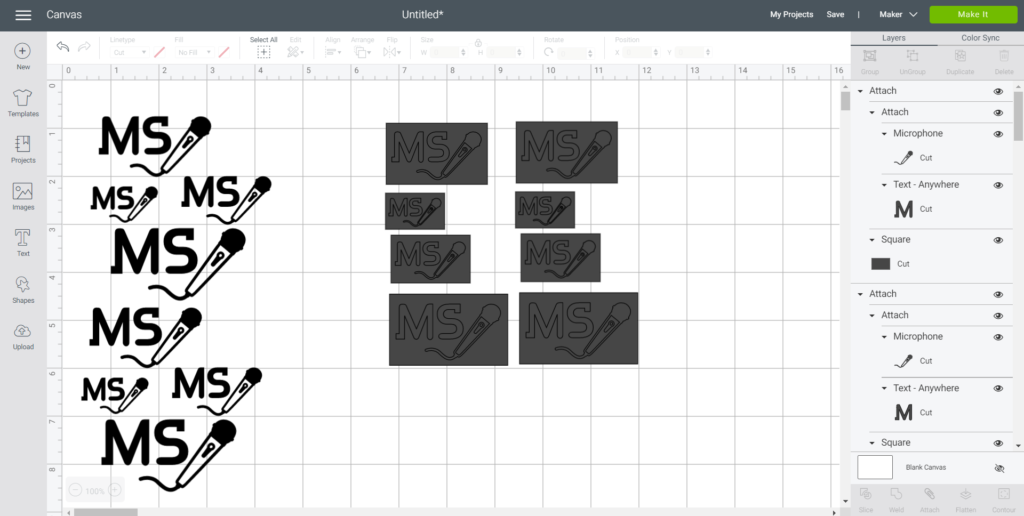
Change the color of the one set of designs to distinguish the different materials.
Personalizing Fabric Face Masks and Mask Pouches
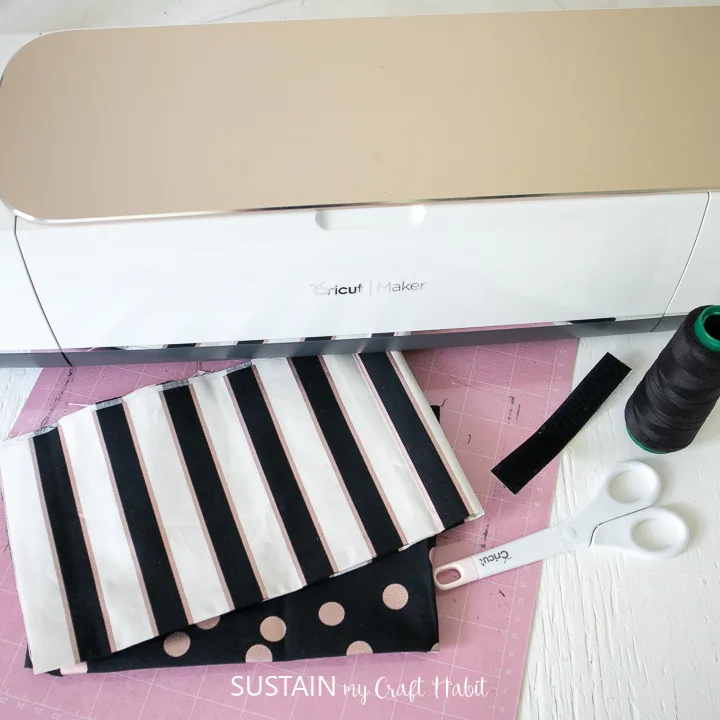
Cutting the Everyday Iron-On Vinyl:
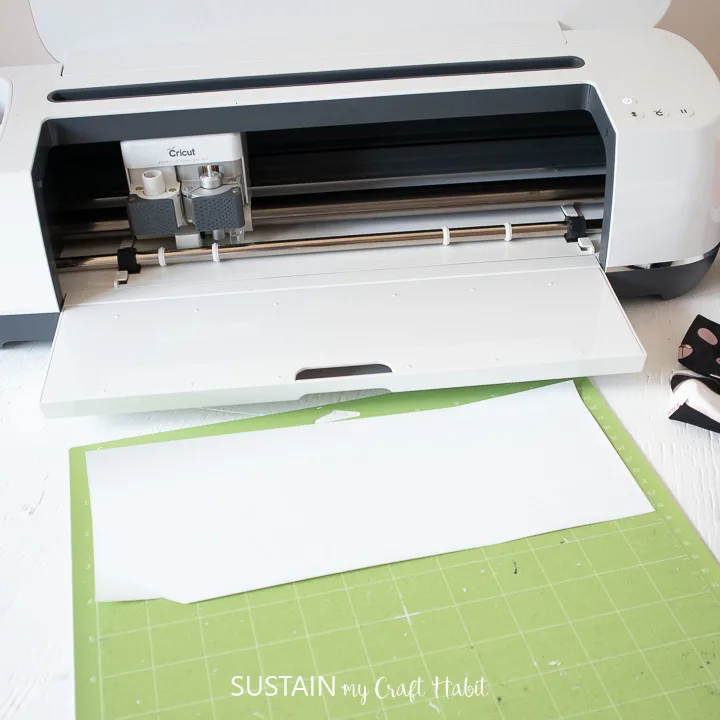
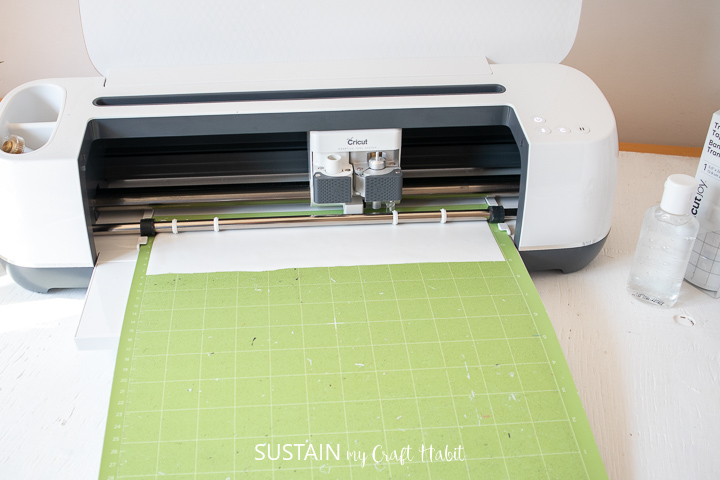
Select “Make It” in the upper right corner to proceed with cutting. Click the “Mirror” toggle button to on. This is necessary for ALL iron-on vinyl cuts (unless you don’t care if the final images is backwards). Choose Everyday Iron-On Vinyl from the list of materials and continue with the cut.
Place the Iron-On vinyl directly onto the standard grip mat with the SHINY SIDE DOWN. Following the instructions prompted on the screen, cut out the vinyl.

Preparing the Cut Image:
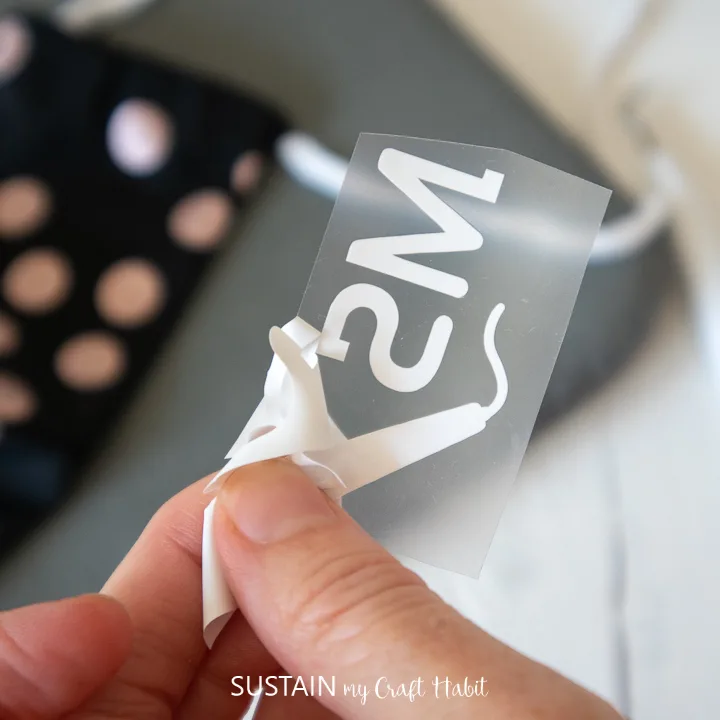
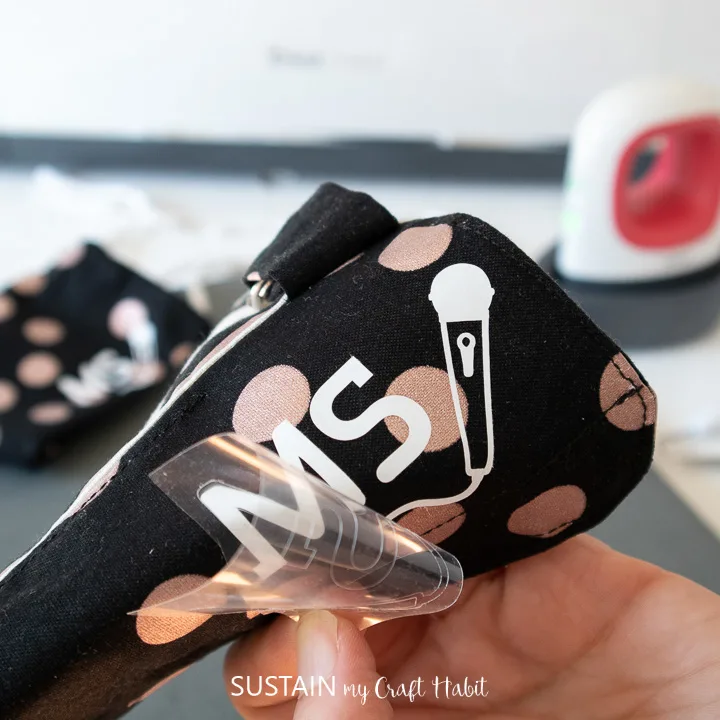
Remove the Everyday Iron-On Vinyl from the mat. Cut around the image and put aside the left over vinyl for another project.

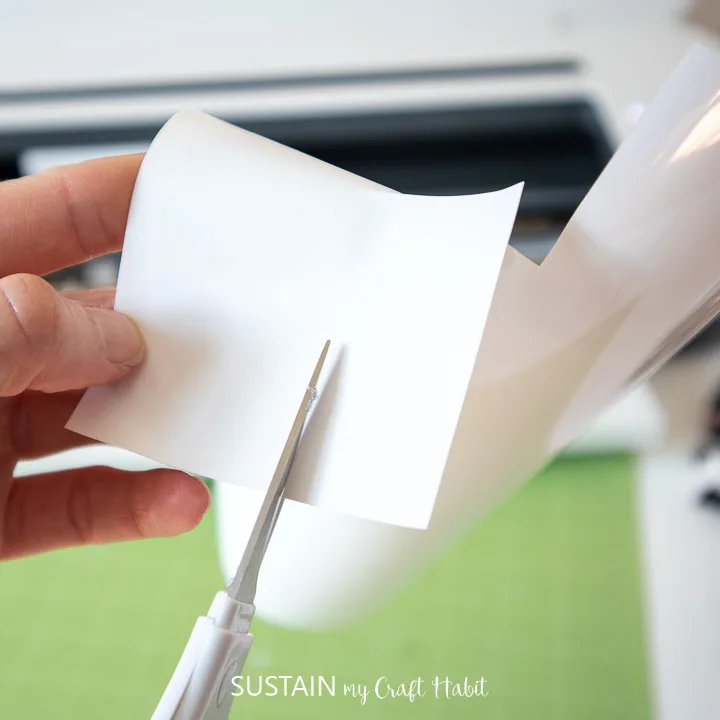
Using a weeding tool, peel away the excess vinyl leaving only the personalized image.

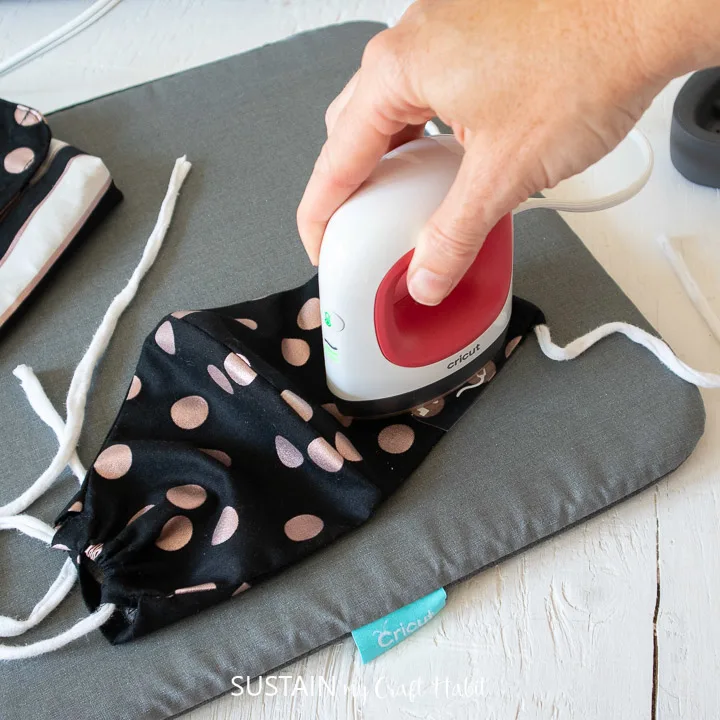
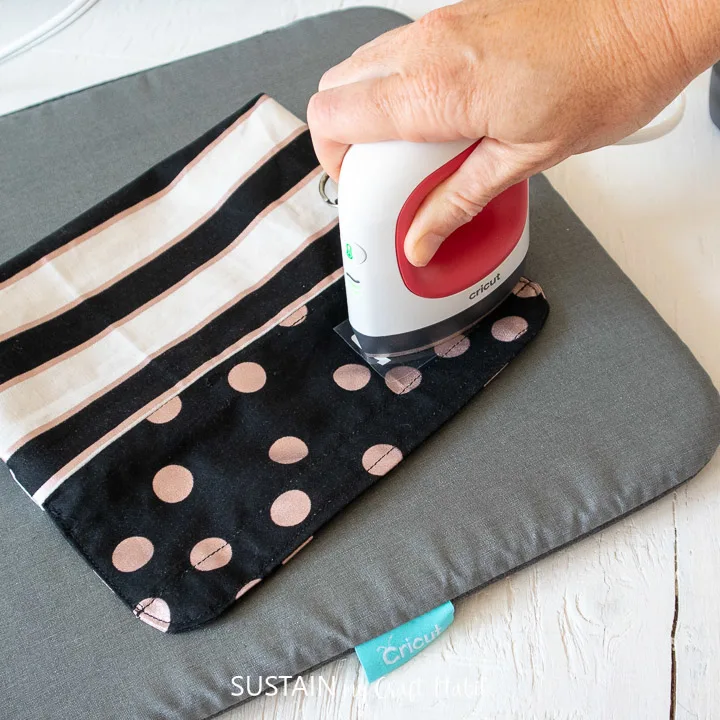
Applying the Image with the Cricut EasyPress Mini:
Position the Easypress Mat or a towel on a flat surface. Set the temperature and time on the machine following the chart for the type of vinyl and material being used or use this EasyPress Interactive Quick Reference Guide. For a 100% cotton material and Everyday Iron-On Vinyl, set the EasyPress Mini to medium heat.
Determine where you will be placing the image and preheat the pouch (or mask) in that spot for 5 seconds. This will prep the fabric for the vinyl, removing all excess moisture as well as help to remove any creases and wrinkles from the fabric.

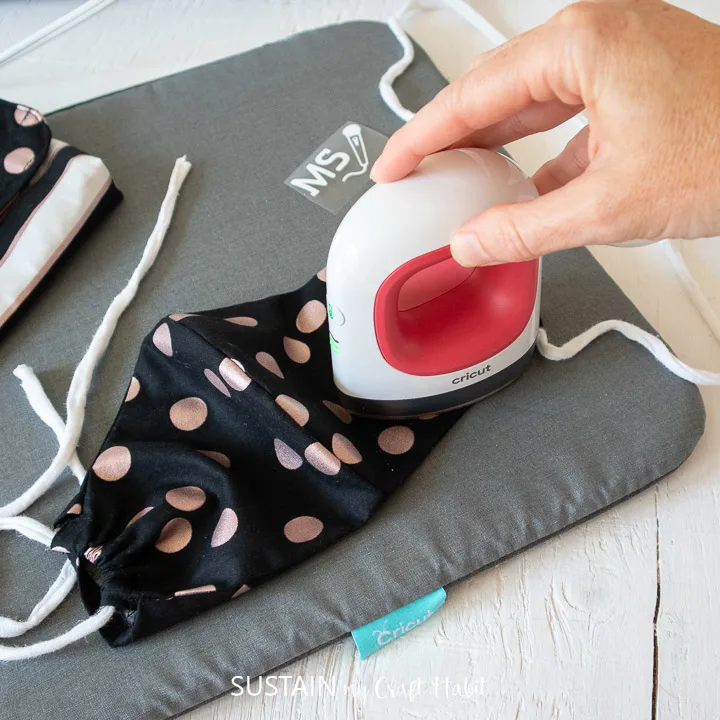

Place the image on the pouch (or mask) with the shiny side up.

Press the image on to the pouch (or mask) for 25 seconds with light pressure and constant movement.


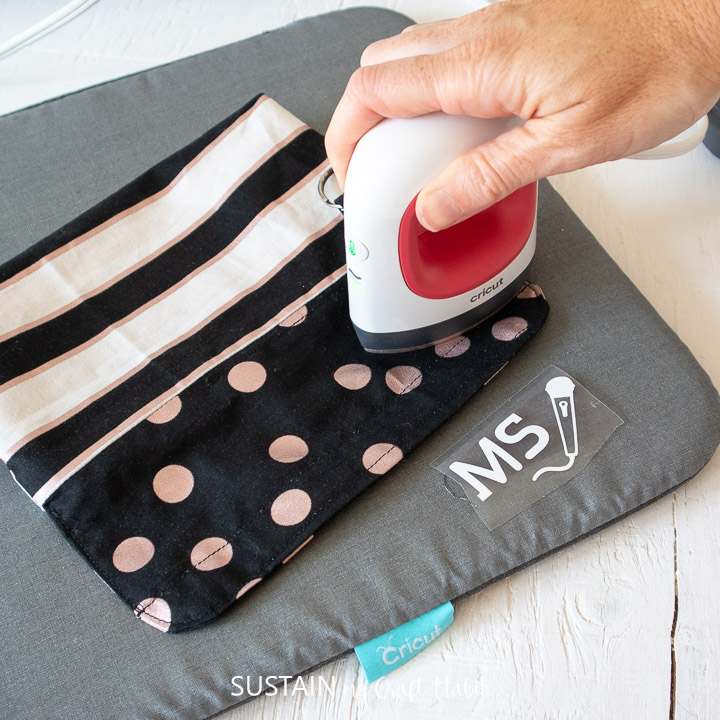
Turn the fabric pouch (or mask) upside down and apply heat for another 15 seconds.
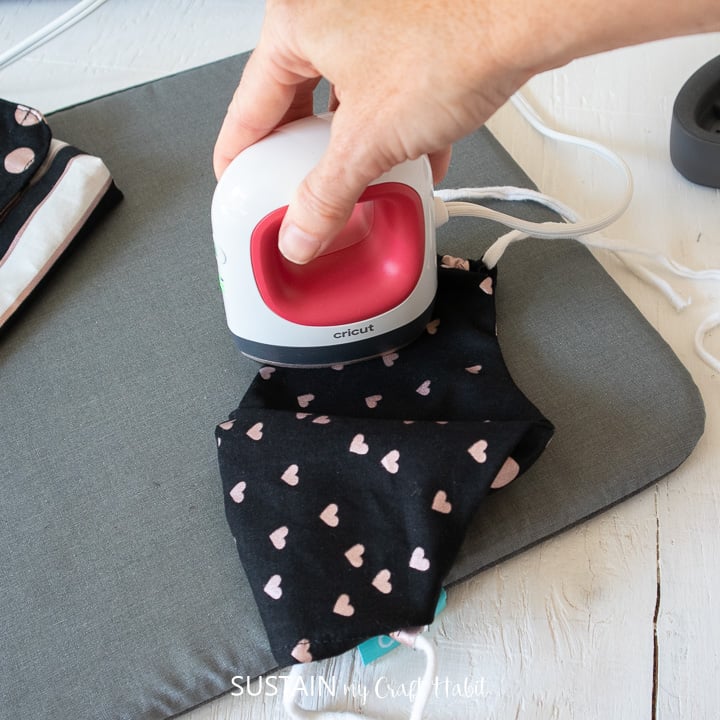

Peel the plastic part of the vinyl off carefully while it’s still warm and discard. If vinyl appears to be peeling off, keep the plastic covering on top and re-press for longer.

TIP: Make sure you do not place an iron or the EasyPress Mini directly over the vinyl without the protective plastic cover. The unprotected vinyl with melt and distort.
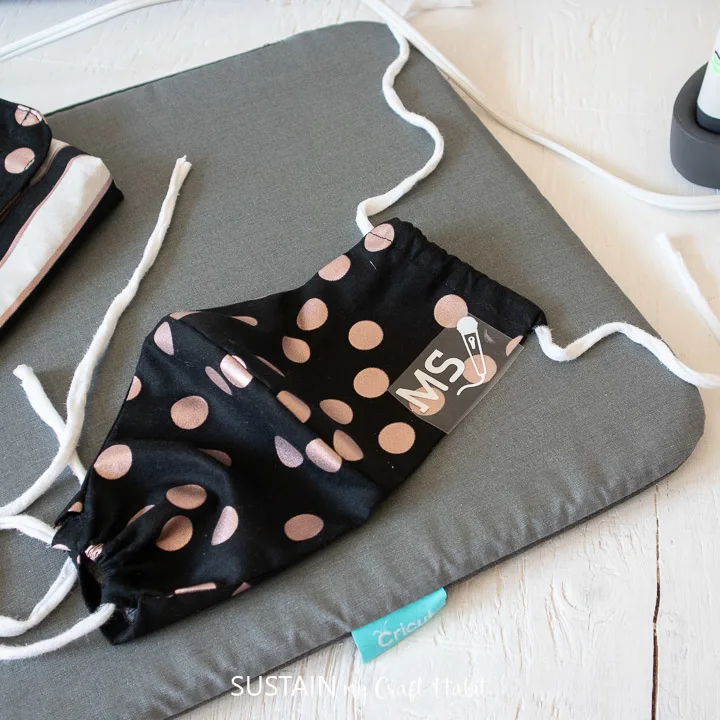
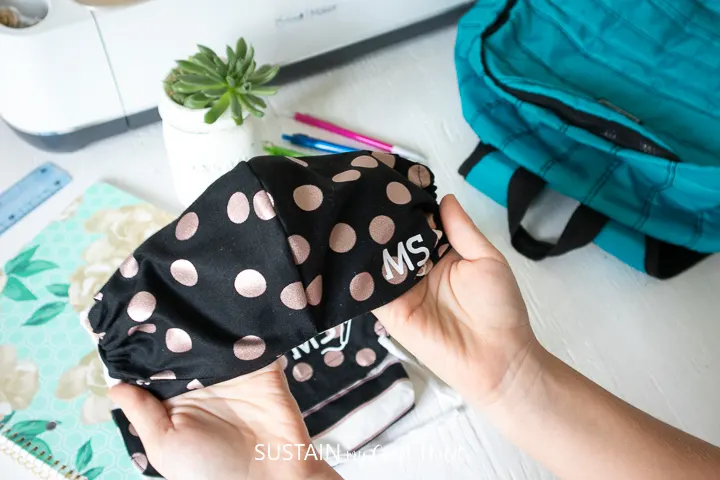
Now the items are finished and ready for use!

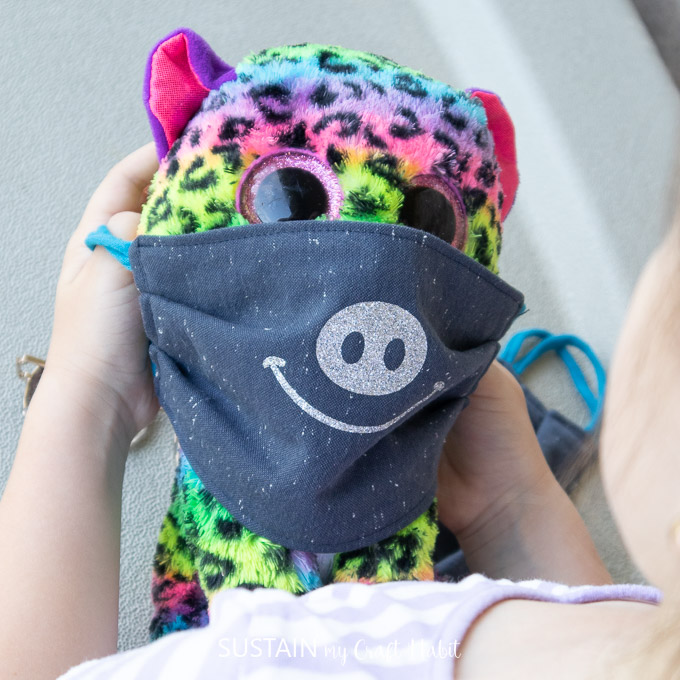
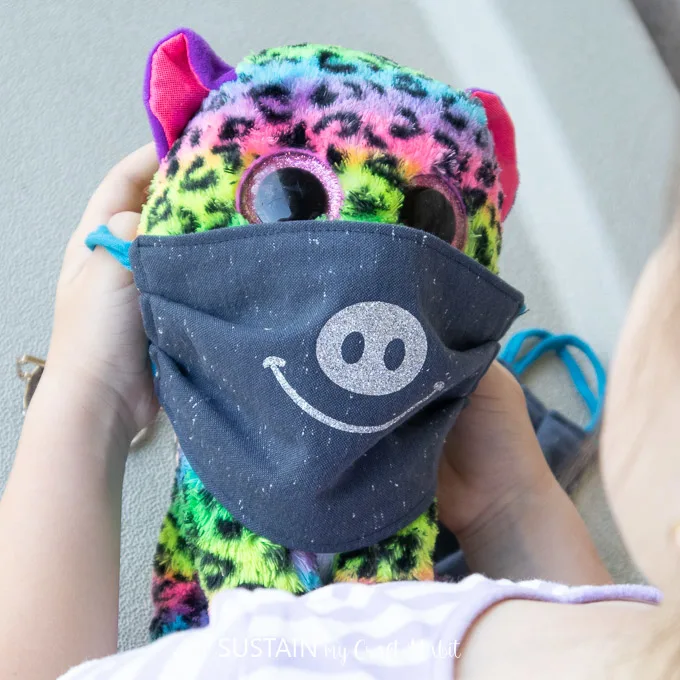
Now, refer to our post on how to make masks fun to help your child get ready for back to school.
Personalizing Sanitizer bottles and other non fabric items
Determine the size needed to personalize the sanitizer bottle and consider other items you’ll want to personalize as well, such as school suppliers, water bottles and lunch boxes.
Cutting the Vinyl:
Select “Make It” in the upper right corner to proceed with cutting. Choose Vinyl from the list of materials and continue with the cut.
Place the Vinyl directly onto the standard grip mat with the SHINY SIDE UP.
Following the instructions prompted on the screen, cut out the vinyl.

Preparing the Cut Image:
Remove the Permanent Vinyl from the mat. Cut around the image and put aside the left over vinyl for another project.
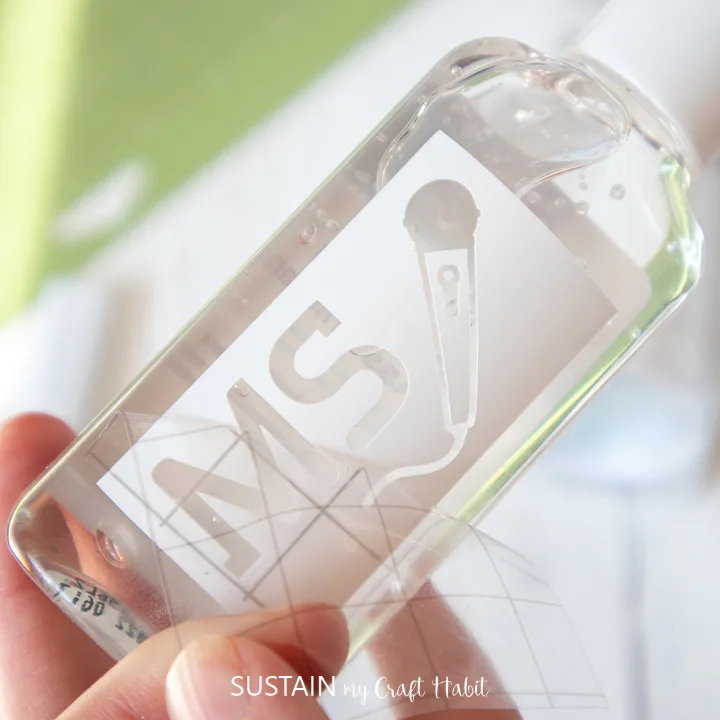
Using a weeding tool, peel away the lettering and cut image inside the box leaving only the rectangle shape with the knocked out image.


Applying the Vinyl to the Items:
Cut a piece of transfer tape a bit larger than the size of the image. Peel away the transfer tape backing and place the transfer tape overtop of the cut image. Gently rub the vinyl to help it stick to the transfer tape and peel off the backing.
Place the image on to the one side of the bottle. Gently rub the vinyl to help it stick. Carefully and slowly peel away the transfer tape.

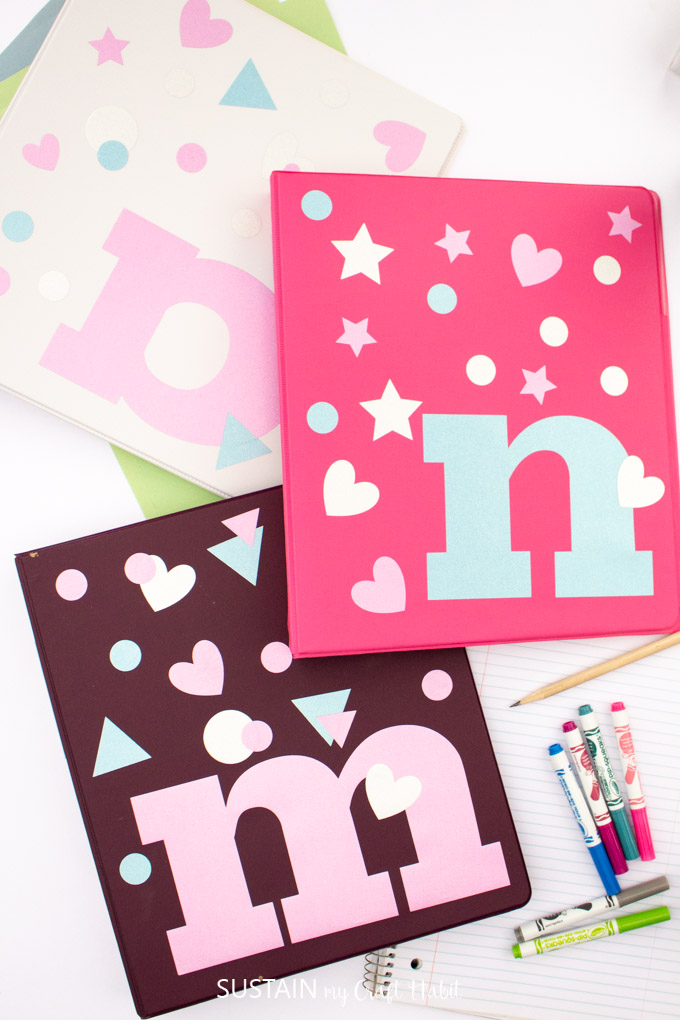
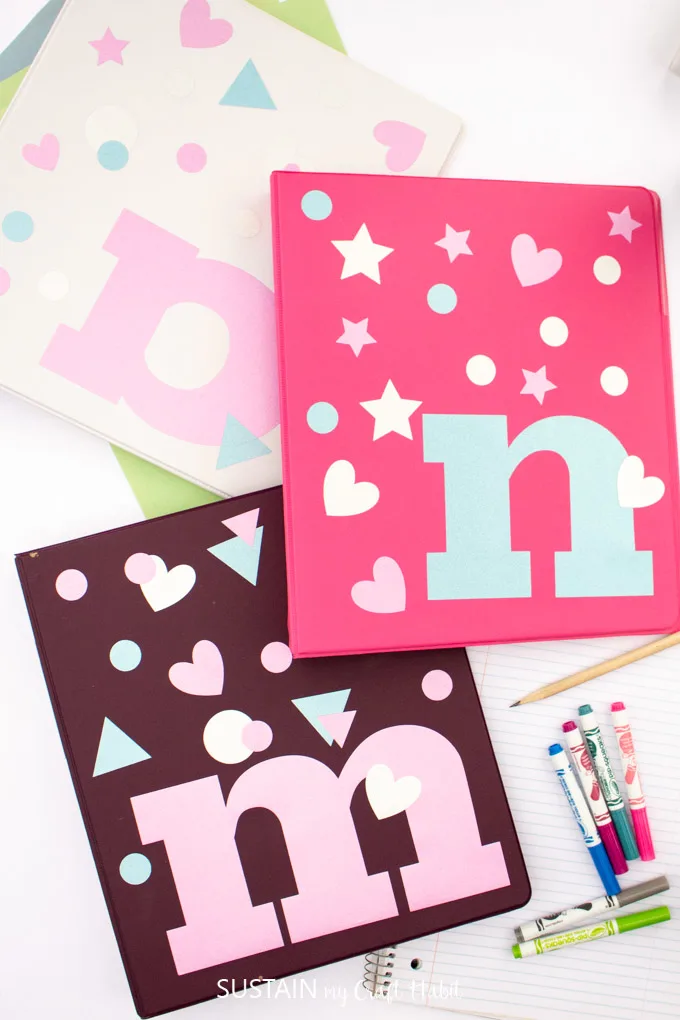
Now that these items are labelled, we can go ahead and personalize their backpacks, lunchboxes, water bottles and school supplies. You can also see how we used shimmer vinyl to personalize their binders last year.
We’re really been leaning on our Cricut supplies to help us get ready for back-to-school this year. From cutting fabric to make the masks and pouches, to cutting the vinyl for the personalizations, the more we learn about our Cricut Maker the more we appreciate how versatile it really is.

If you are new to Cricut, you might want to explore our collection of Cricut projects for beginners. Or take a look at our unboxing of the Cricut Maker video.
How are you feeling about the kids going back to school?
Like it? Pin it for later!