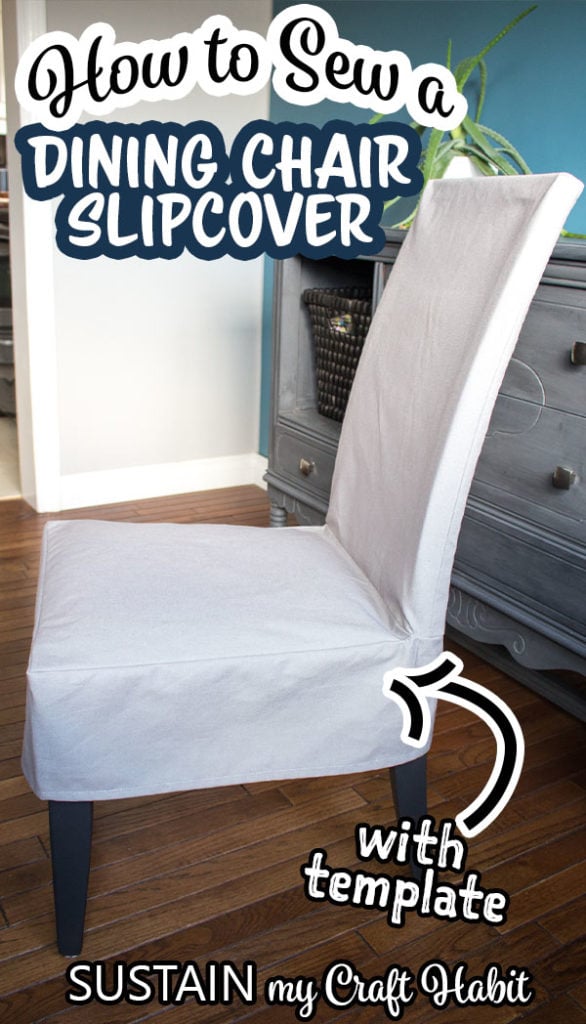

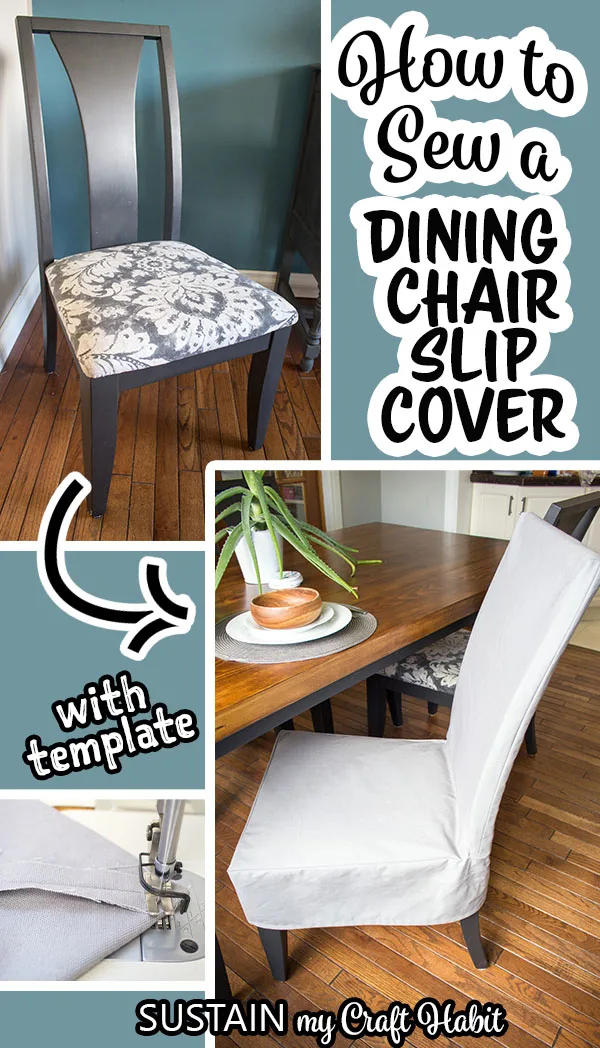
If you have dining chairs that are getting worn or even just outdated, consider making your own dining chair slipcovers instead of replacing them altogether. Chair covers are also the perfect solution if you deal with pet hair in your home: just slip them off and wash or shake them out! We’ll show you how to make a slipcover for your dining area with our easy to follow DIY sewing tutorial and free printable template.

DIY Slipcover for Dining Chairs
Disclosure: This post is sponsored by Canvas Etc. All opinions are our own. This post also contains affiliate links. Should you choose to buy through these links we make a small commission at no cost ot you. You can read our full disclosure here.
Let’s face it, dining chairs are expensive! Moreover, it gets harder and harder to find sturdy, high-quality chairs without spending a ton of money.
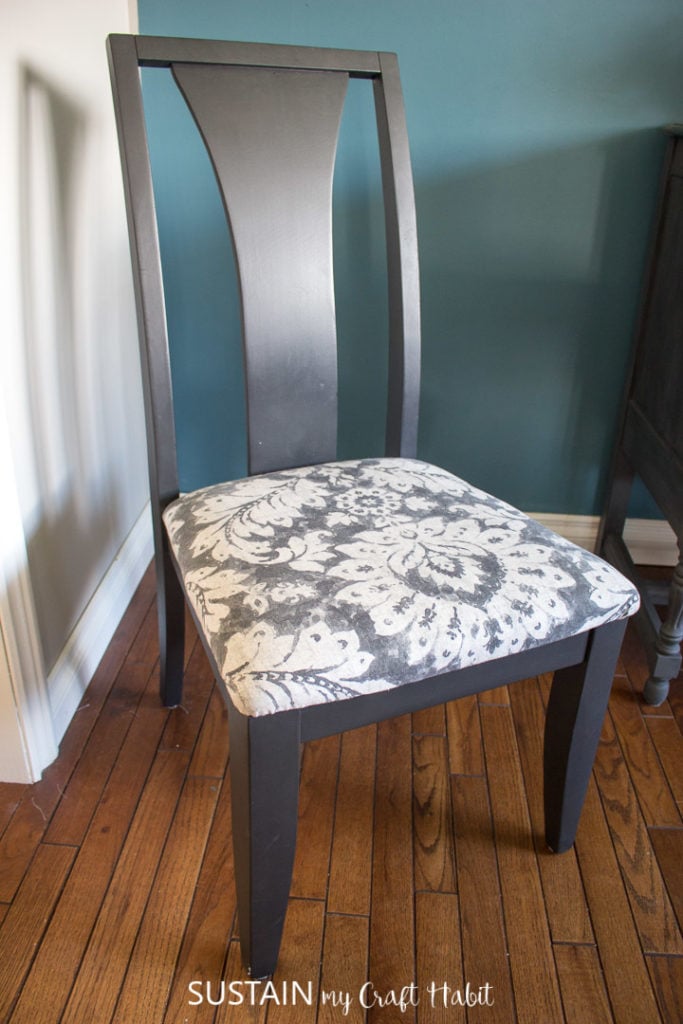
My sister has had her dining room set for a really long time. While the frames of the chairs are in pretty good condition, the microfiber seat cushions are stained, watermarked and impossible to clean.
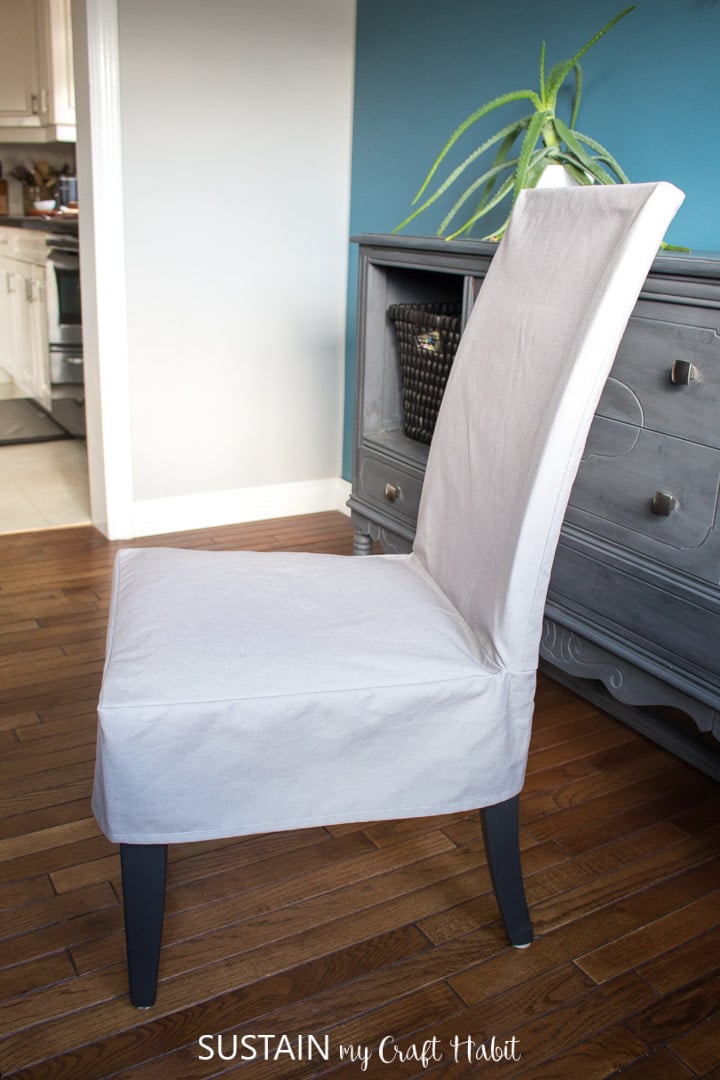
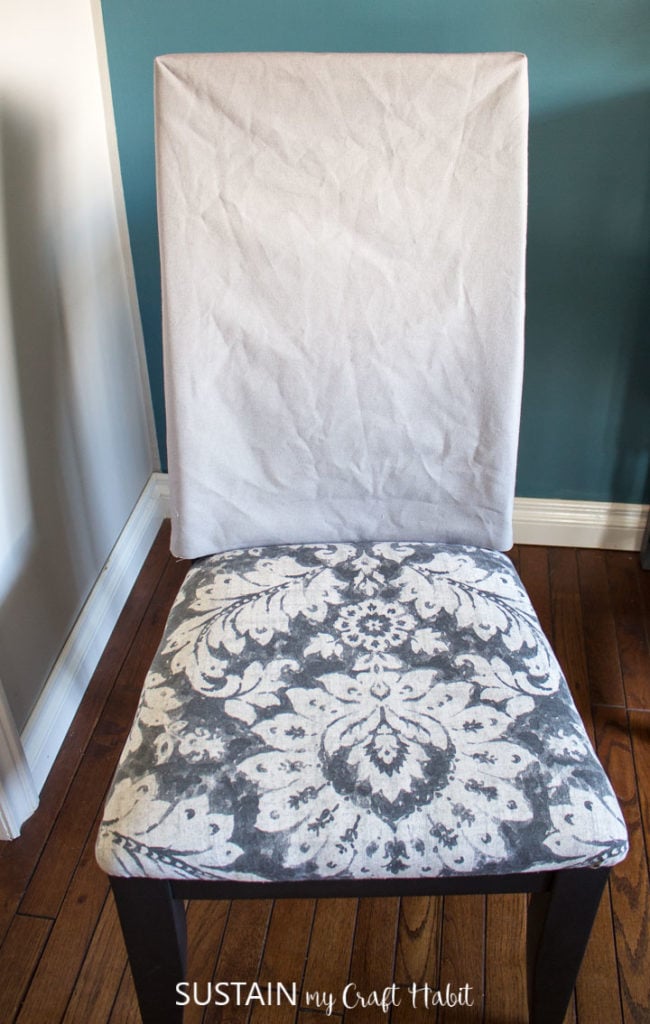
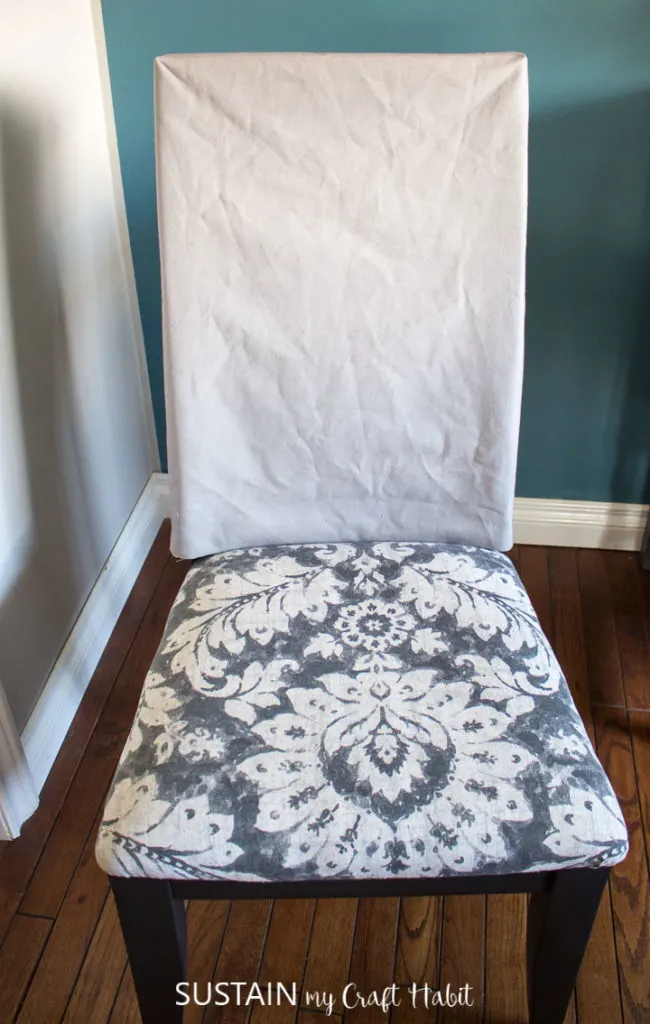
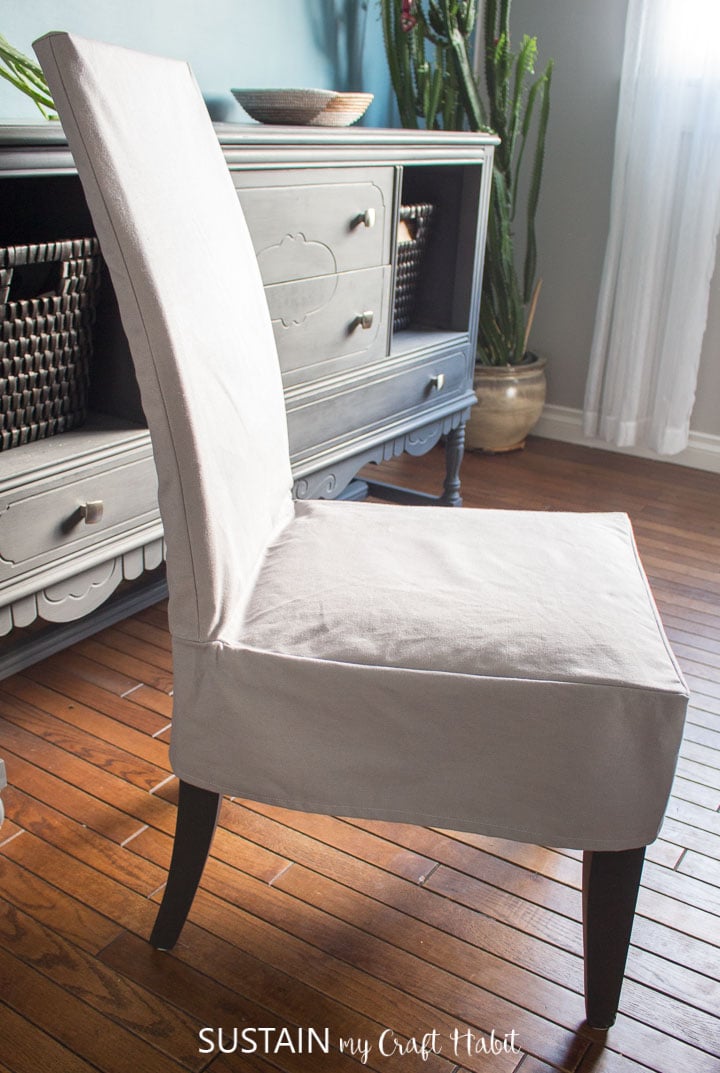
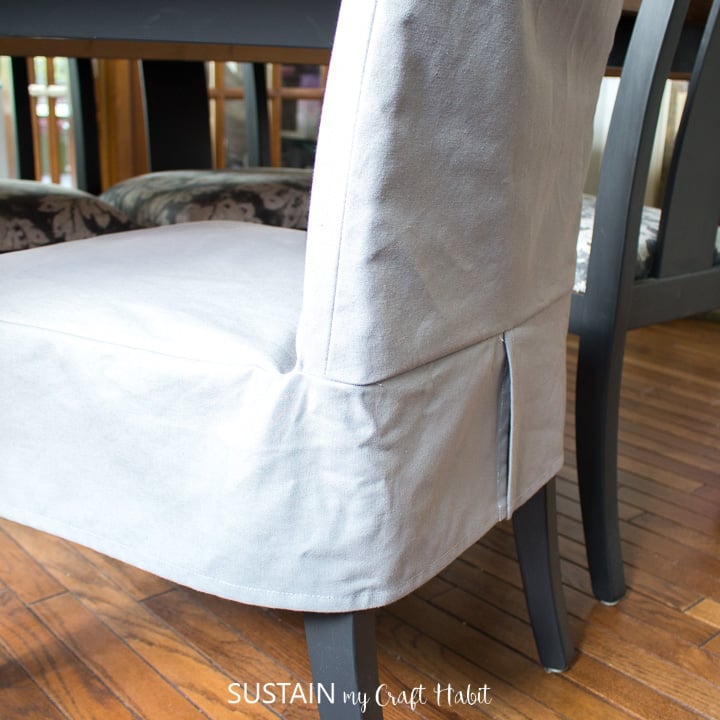
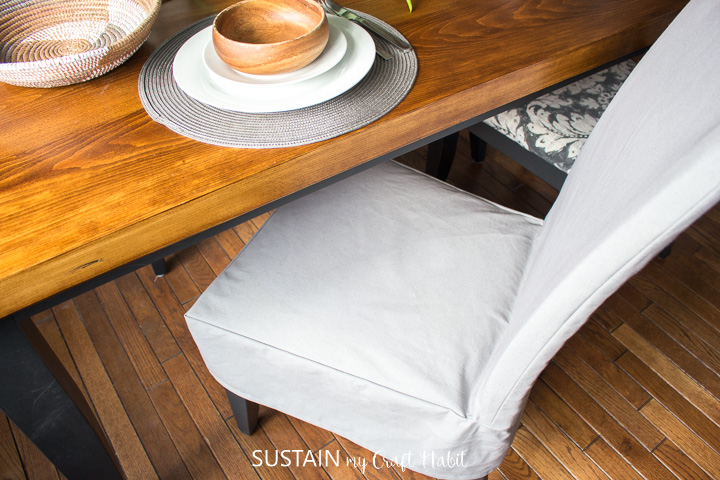
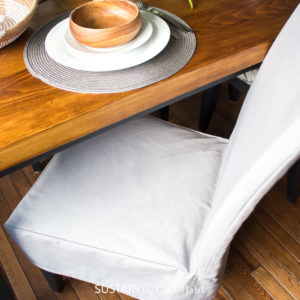
To give the chairs new life, I made some simple custom dining chair covers using 100% cotton canvas fabric in a neutral grey color from Canvas Etc. Canvas Etc. has a variety of colors to give your dining room décor a brand new look! Wouldn’t this navy blue canvas look so elegant?
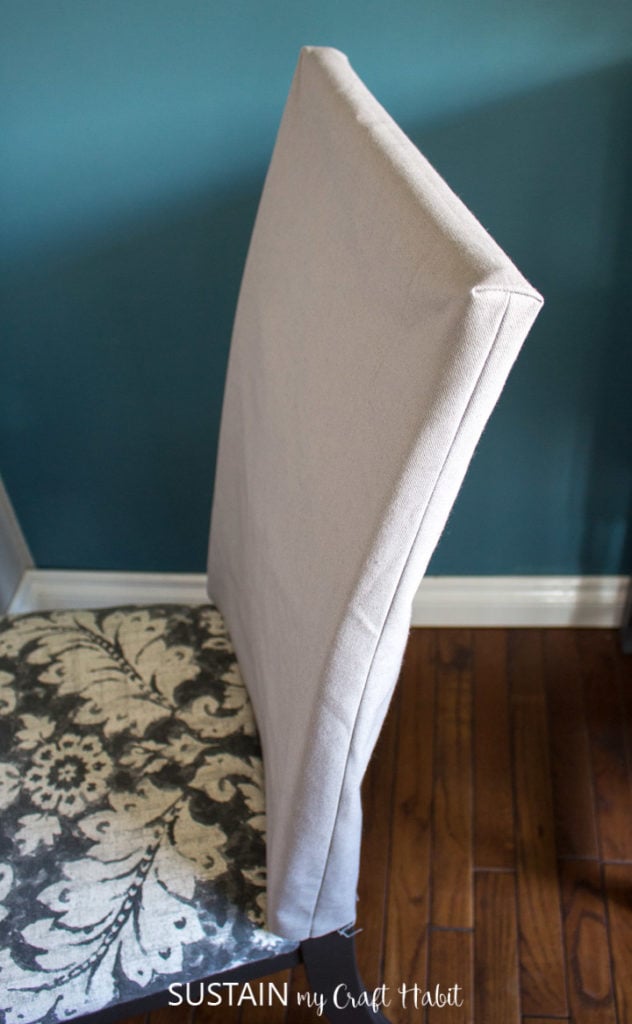
Keeping the slipcover style shorter in length makes them appear less formal and stuffy and will look really pretty next to the curtains I sewed last year.
SEWING PROJECTS: Let’s stay in touch! Subscribe for our latest sewing patterns, tutorials and tips.
If your style of chair is the same as these chairs, then you can use the free printable slipcover pattern (below) to make a set of your own.
Compare the chair measurements below with yours to be sure the pattern will work. I suggest making a sample of the slipcover first using similar scrap fabric (or a plain 100% cotton muslin) to ensure the slipcovers will fit over your chair. If you need, you can then alter the pattern to suit your chair better.

Materials Needed for DIY Chair Covers:
Disclosure: This post contains affiliate links for your shopping convenience. Should you choose to purchase through them, we will make a small commission at no extra cost to you. You can read our full disclosure policy here.
- 100% Cotton Duck Canvas, 10oz, at 58” wide (in Storm Grey), 1.5 yards for one chair slipcover
- Sewing Machine with matching thread color
- Fabric Scissors
- Measuring Tape
- Printable Slipcover pattern (or make your own to suit your chair style) along with pattern layout guide
- Iron and ironing board
How to Make a Dining Chair Slipcover:
Measuring the Chair
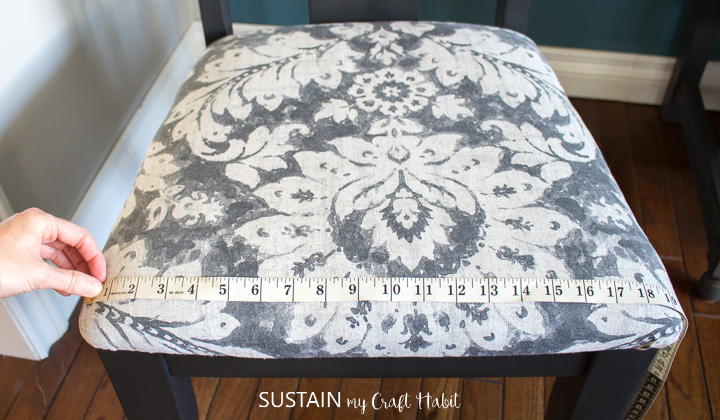
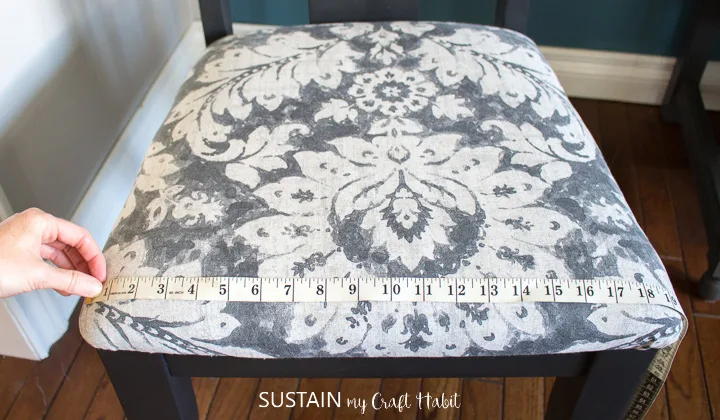
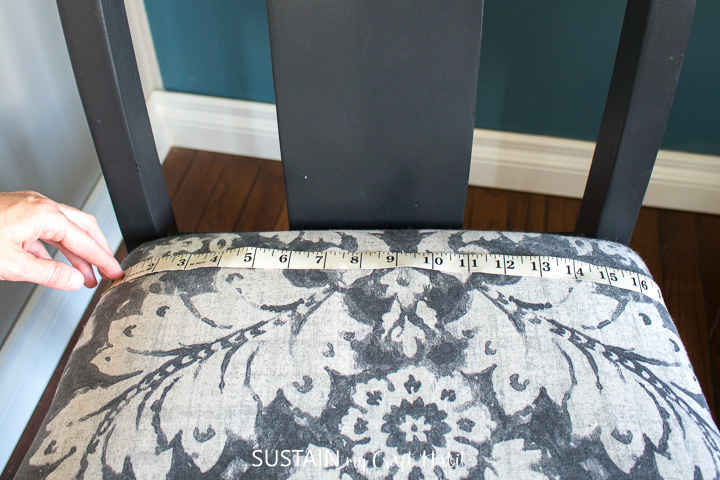
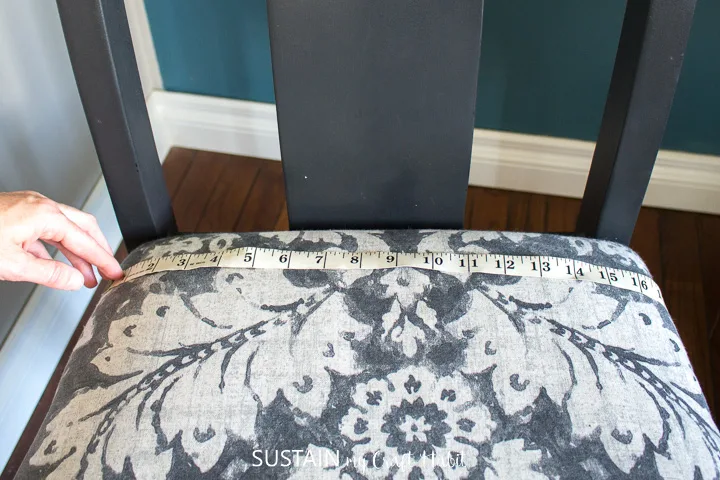
To start, you’ll need to measure your chair and record the measurements. For comparison, you can also look the photos below to see how I measured my chair. Here are the points of measure and some other things to consider:
- A = Measure the height of the back from the seat to the top edge. My chair measured 23″.
- B = Measure the width for the chair back. My chair measured 16″.
- C = Measure the depth of the chair seat. My chair measured 19″.
- D = Measure the width of the chair seat and consider the shape: is it wider towards the front or is it the same width at the front and back? My chair’s seat is wider at the front (19″) than the back (16.5″).
- E = What length do you want the slipcover to be? Floor length or short like mine, which is 7” high.

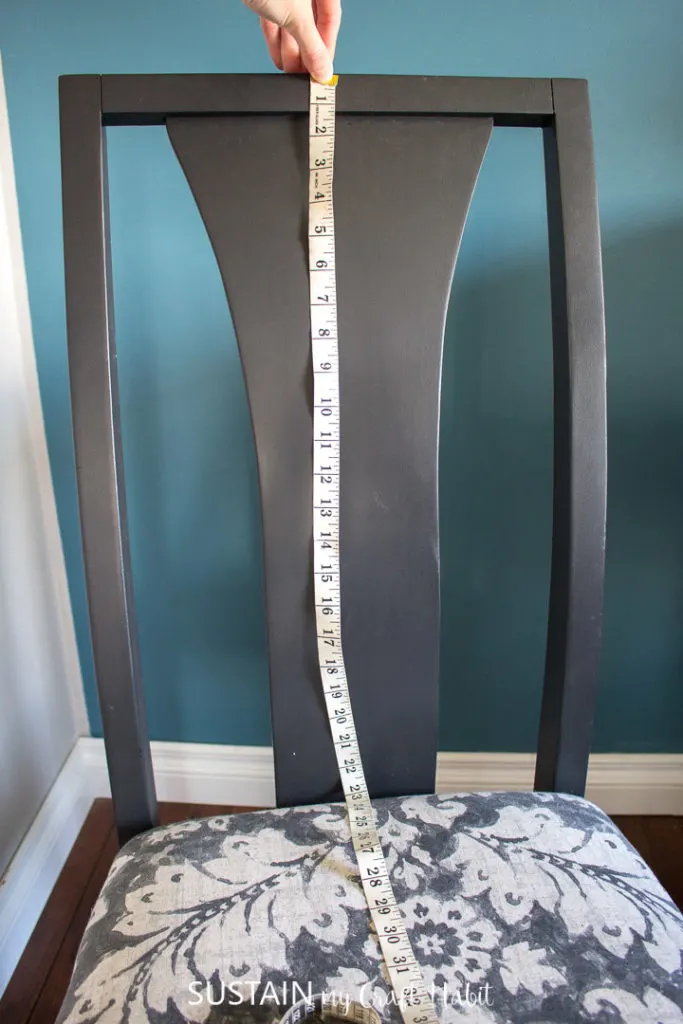

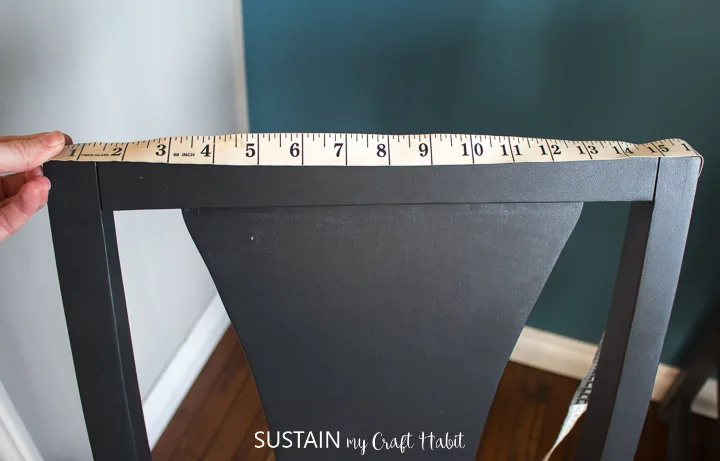
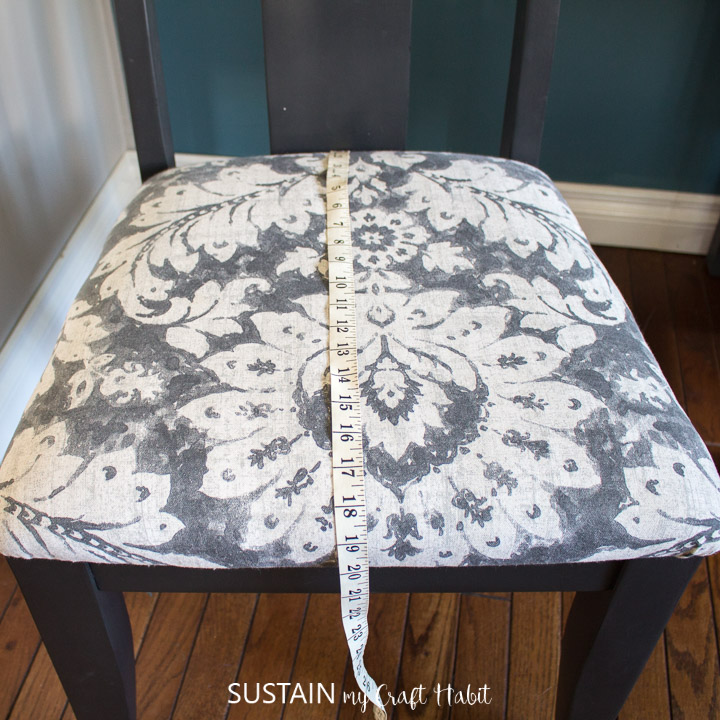

For any points of measure that are different from these, you can adjust the printable chair cover pattern. For example, if the height of your chair back is only 20″, reduce the height of the pattern piece by 3″ with a pencil and ruler. Cut and slash the pattern as you would when sewing from a dress pattern that is too long.
Start by creating a cover for the back (full details are below).

Next, create the pattern for the seat matching the shape of the seat.
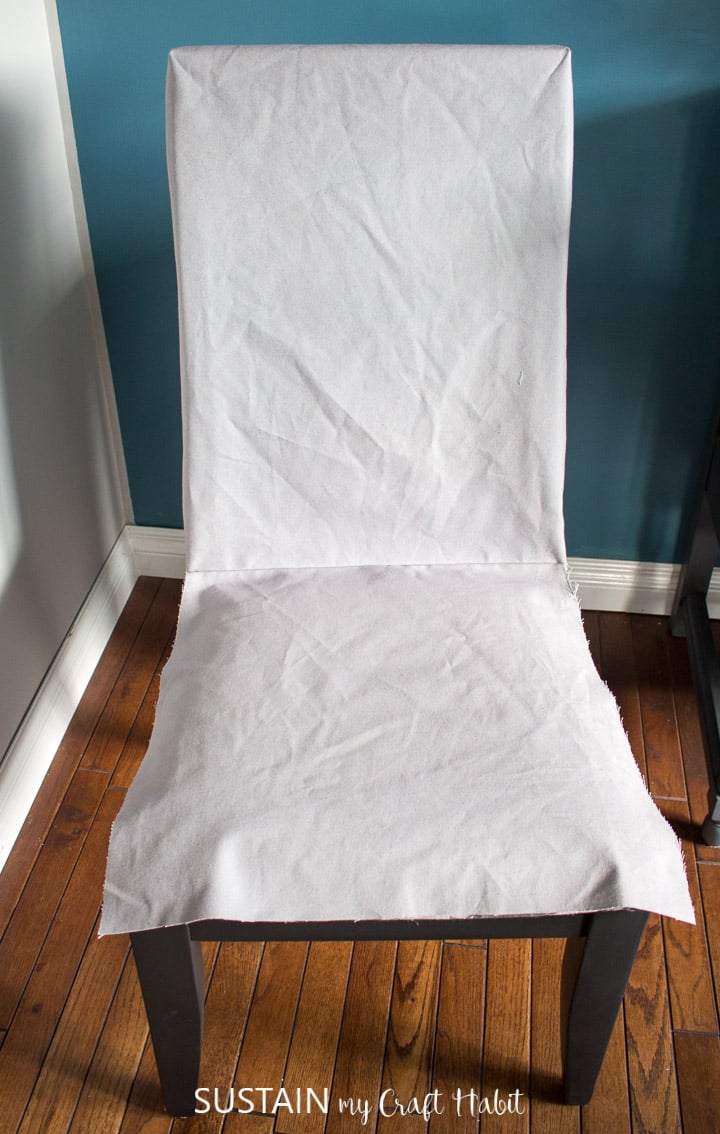
Next, create the pattern for the skirt of the chair cover. This is a long rectangular piece that wraps around the chair and is sewn to the seat and back slipcover.

How to Make Chair Covers: Using the free printable slipcover pattern
Pre-wash and dry the fabric prior to sewing. Iron out all the creases before cutting and sewing.
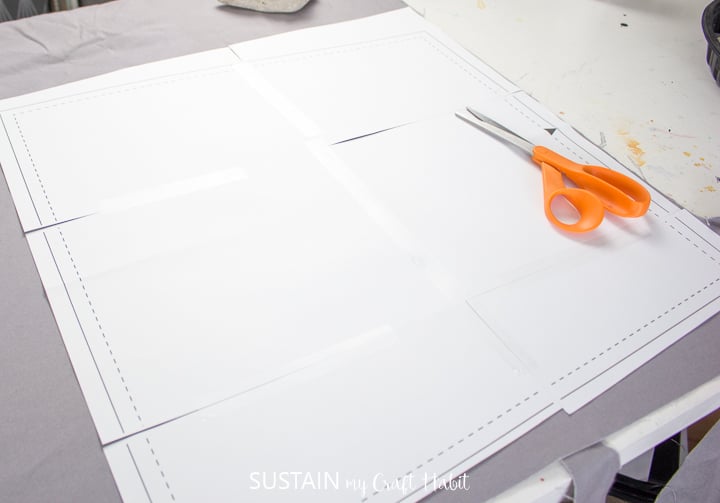
Print off the slipcover pattern on 8.5×11 sheets of paper without adjusting the scale. Align the edges of the papers to form full pattern pieces and tape together. Cut around each individual pattern for cutting on fabric. The slipcover is made up of three pattern pieces: chair back piece, seat and skirt.
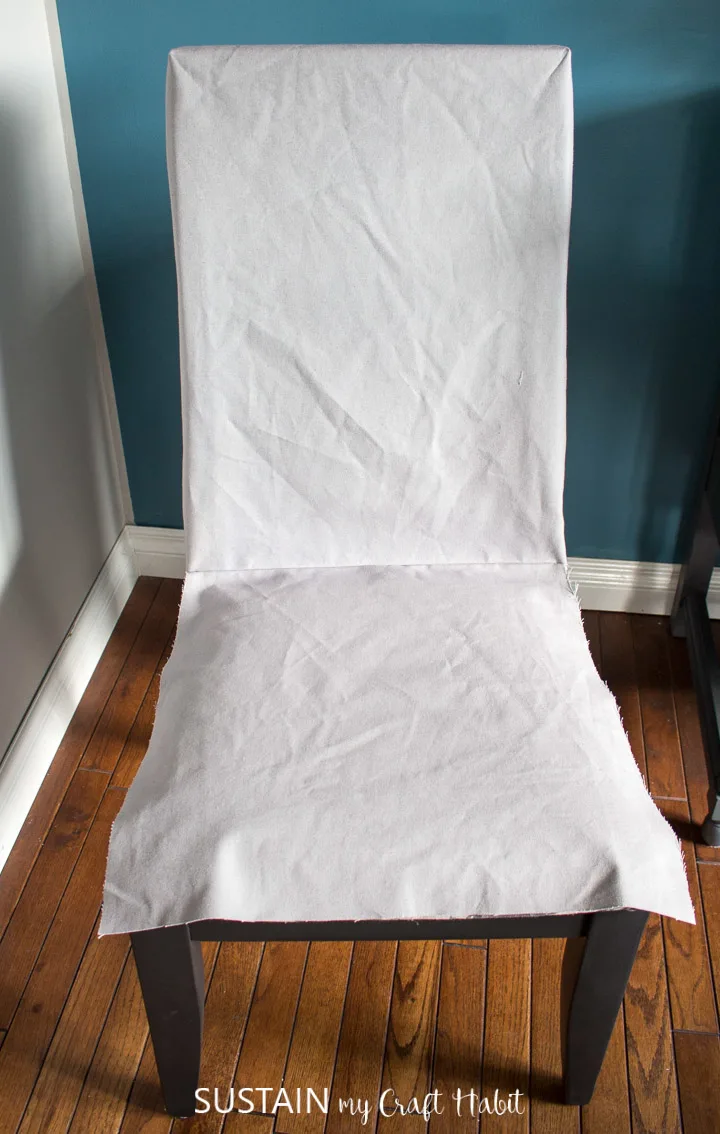
Lay the fabric piece out on a flat surface and place the individual pattern pieces on top of the fabric, aligning grainlines.

Pin the pattern to your piece of fabric (or use paper weights), then cut along the solid lines with scissors. As mentioned above, suggest to use scrap fabric to make a sample before using the actual fabric.
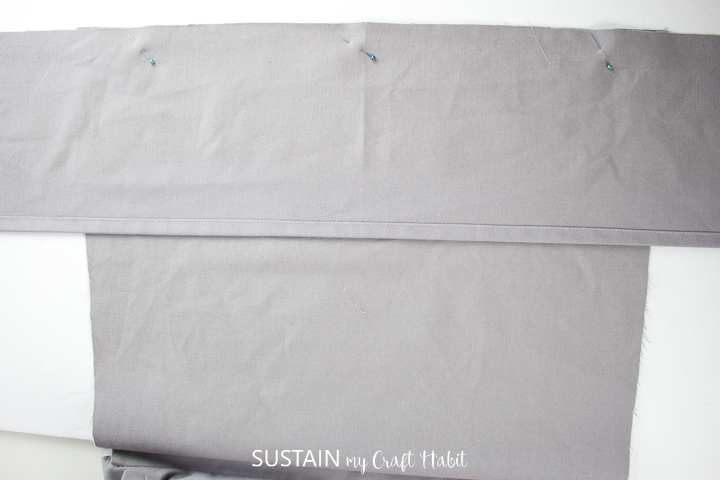
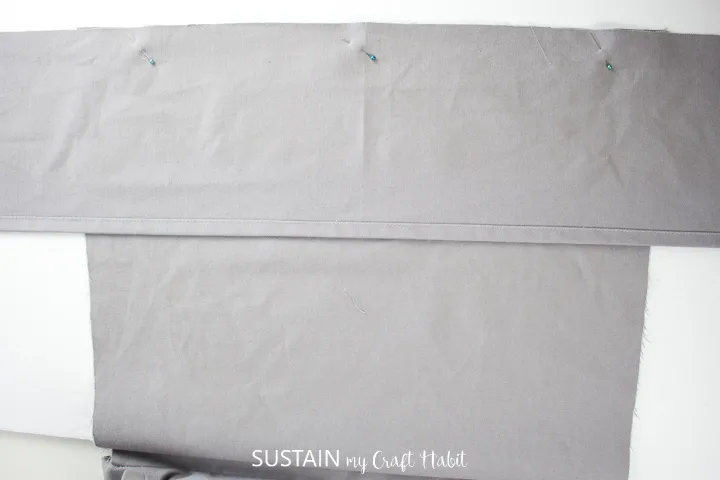
You can follow along to this pattern layout guide to help with pattern placement on fabric. Note – The skirt pattern is a single long piece and will need to be cut on the CROSS grain.
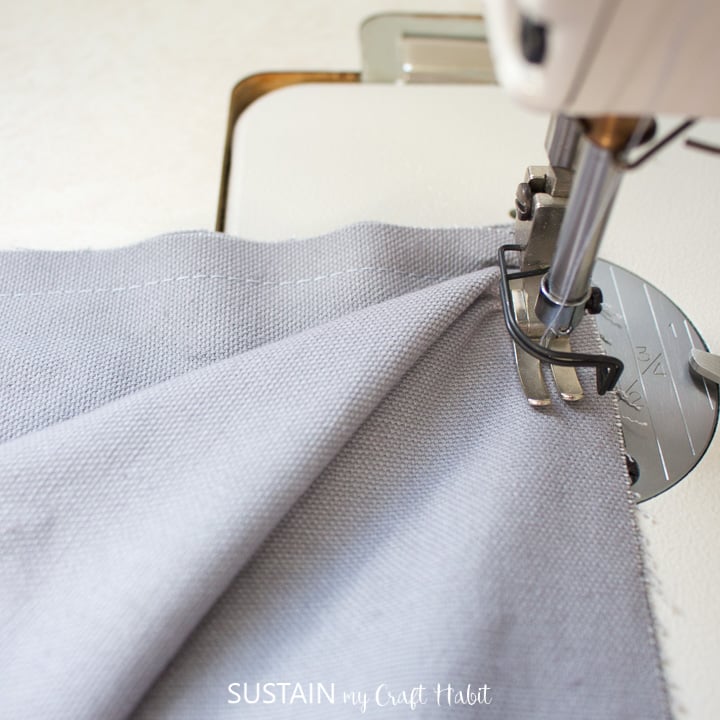
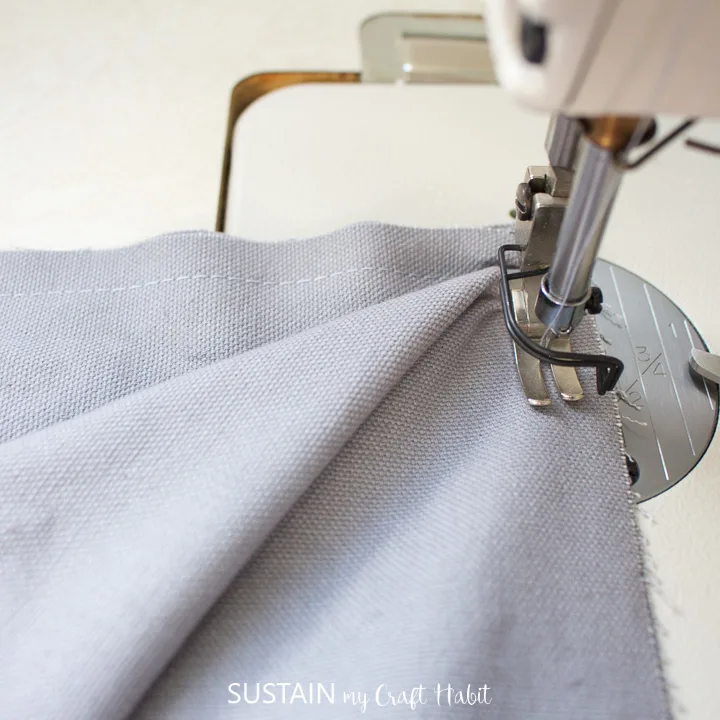
Sewing the Dining Room Chair Slipcovers
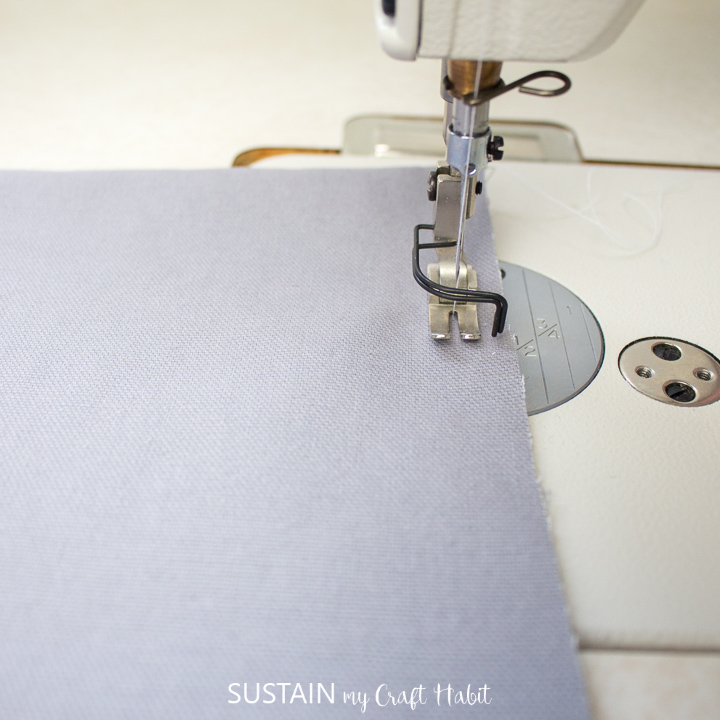
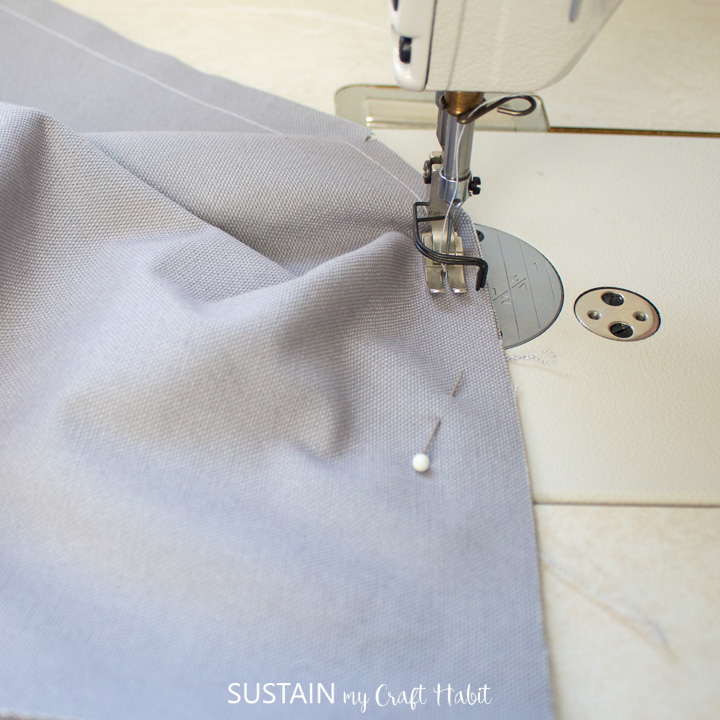
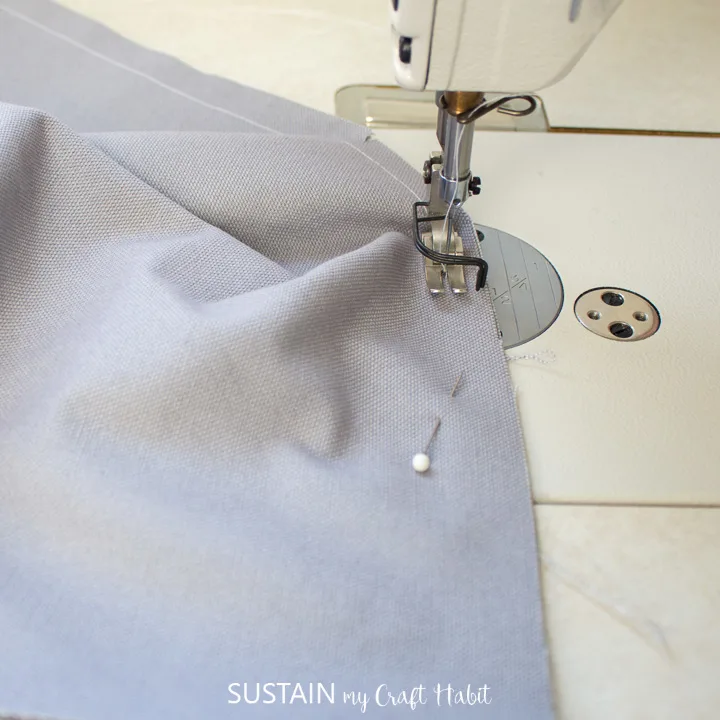
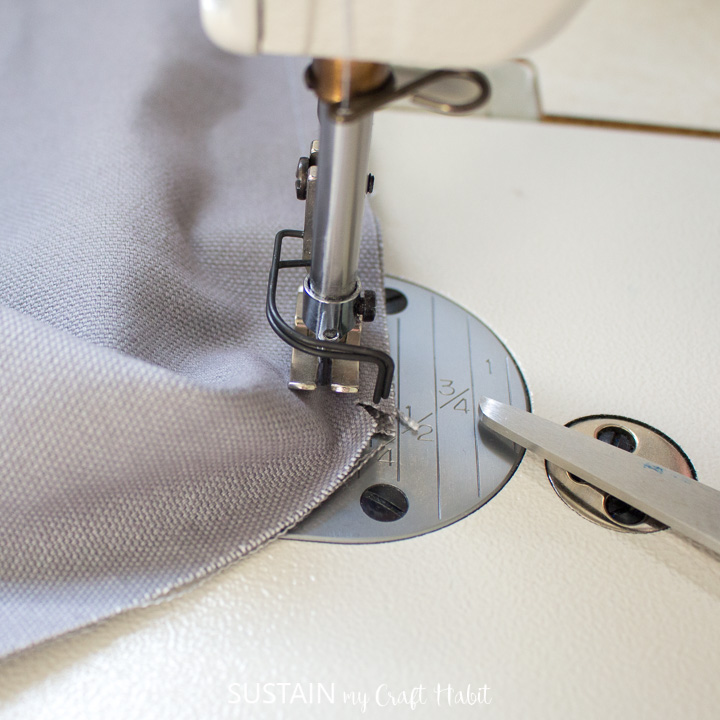
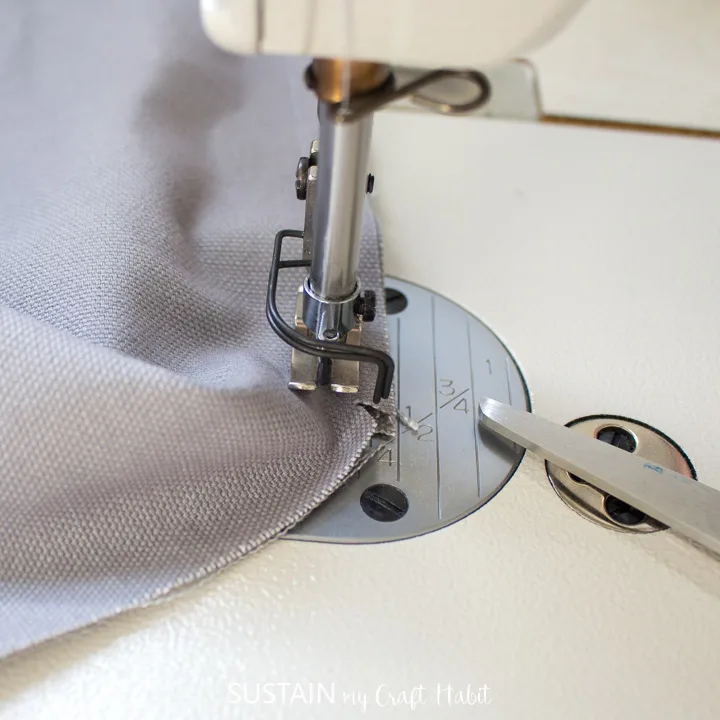
With right sides together fold the back piece in half along the edge that will be at the top. With the sides aligned, sew the raw edges together with a ½” seam allowance from the top all the way to the bottom.

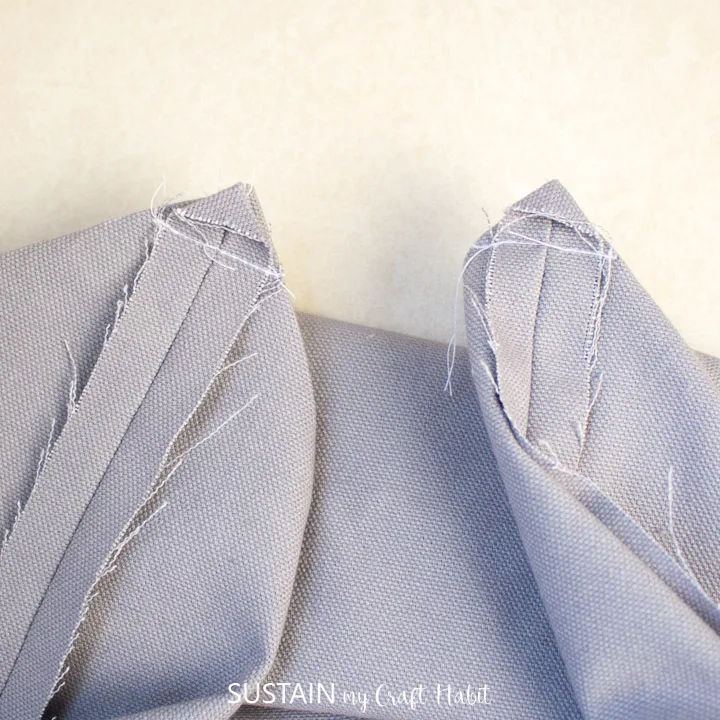
Press the seam allowances open.


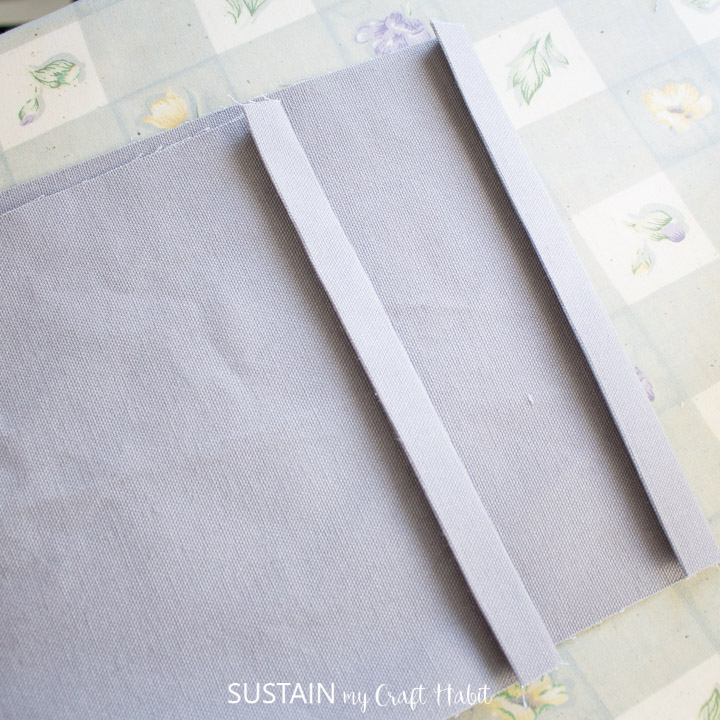
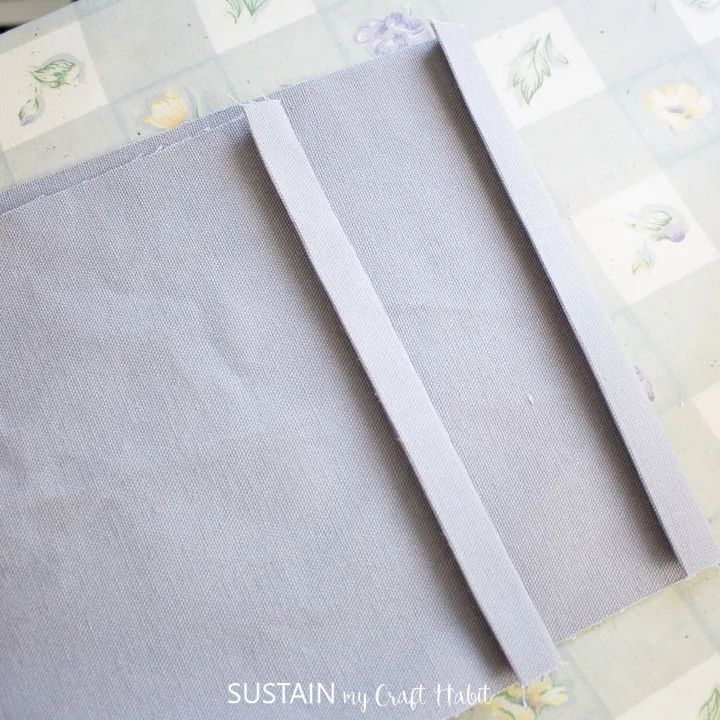
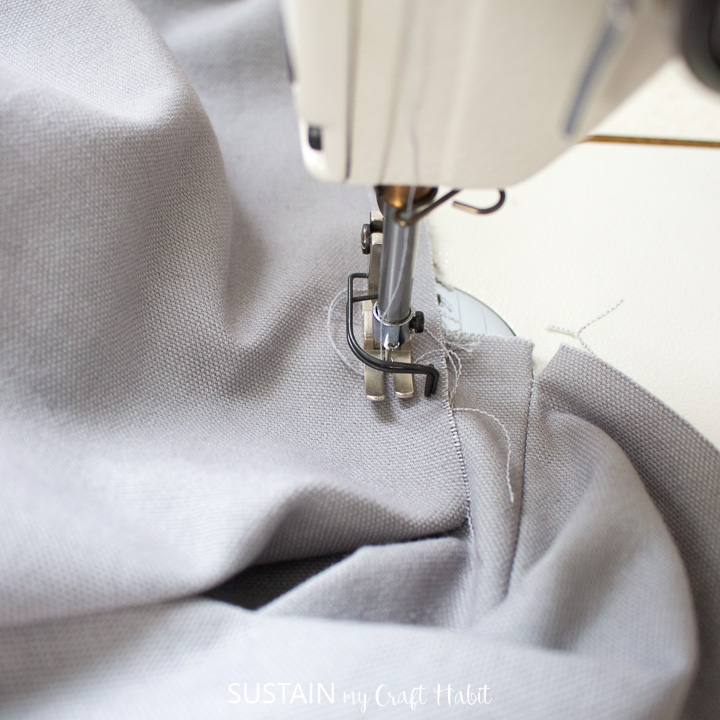
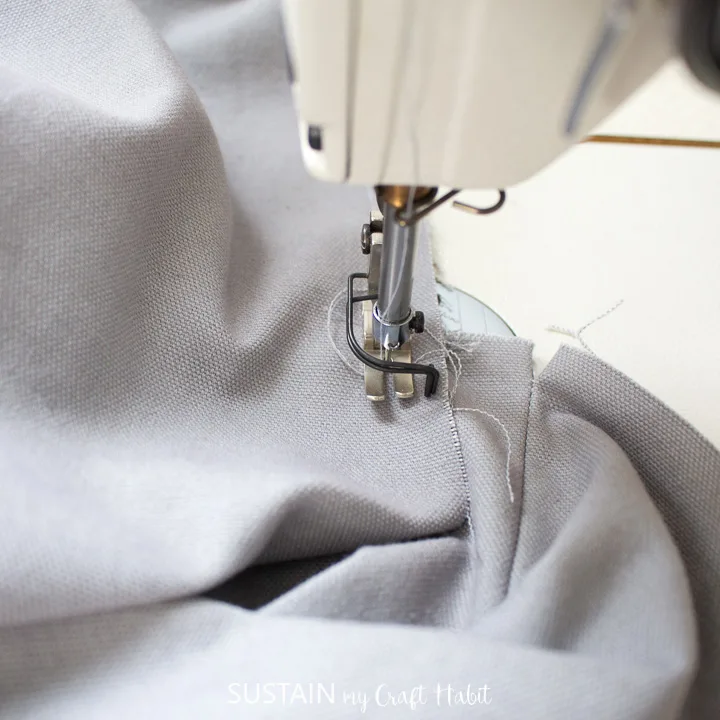
To create the depth for the chair back to fit within, form a triangle shape at the top corners as shown and stitch across the width making a 1” long stitchline.

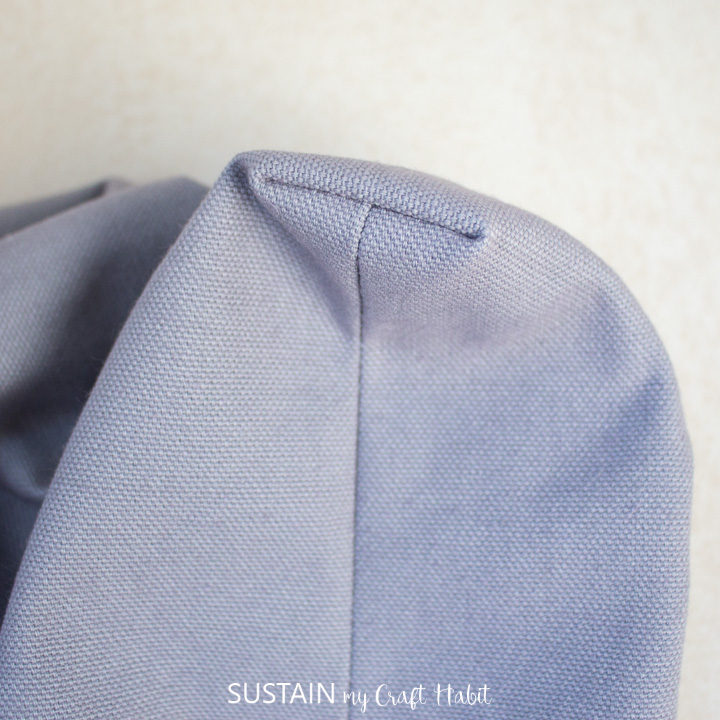
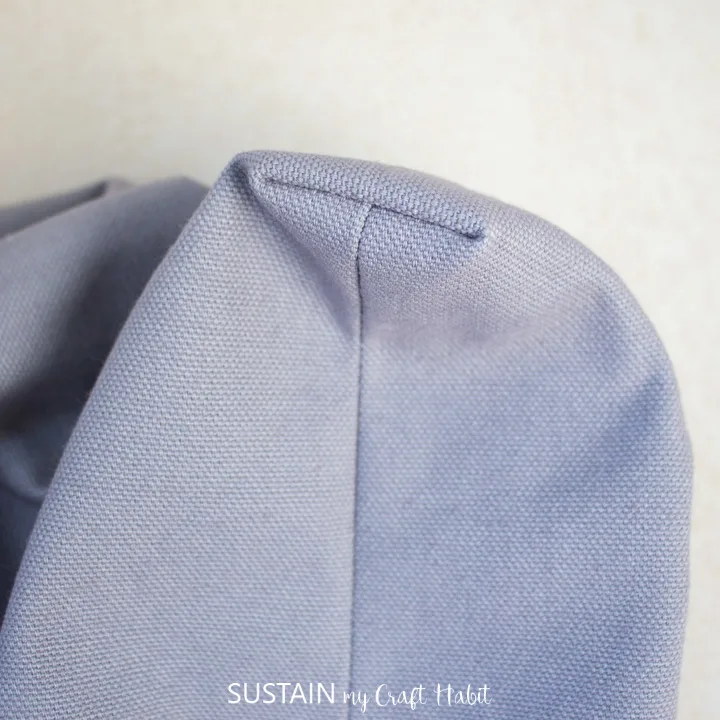
Turn the sewn piece inside out and place it over the back of the chair to see how it fits.
If all looks good, continue but if it looks too big, too small or too short, adjust the slipcover pattern and remake it.
Sewing the Slipcover: Attaching the Seat
Next, sew the seat piece to the front side of the chair back piece with the right sides together using a ½” seam allowance. Be sure to center the seat piece (and match the notches).

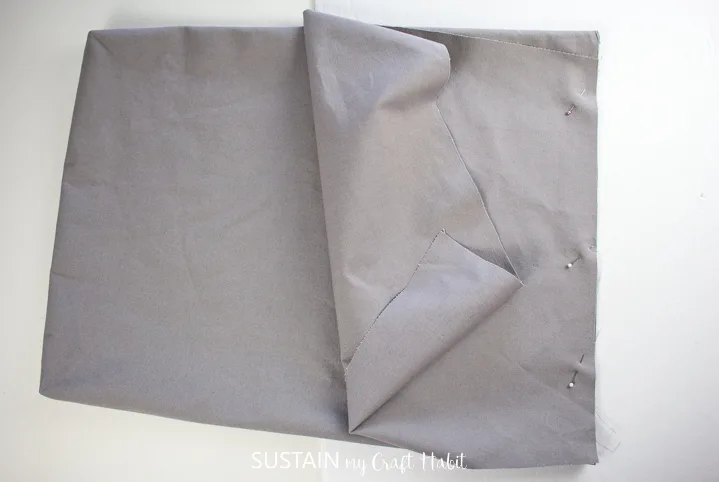
Place the slipcover over the chair to test the fit again before you proceed with sewing the skirt. If the fit looks good, continue with the sewing but if the seat looks too big, too small or possibly shaped wrong, adjust the pattern accordingly and remake the sample to test the fit again.
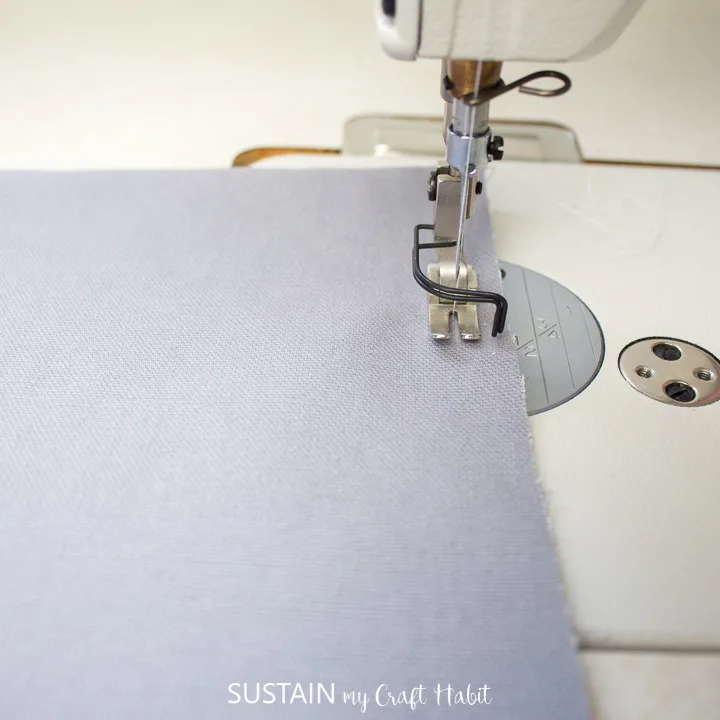
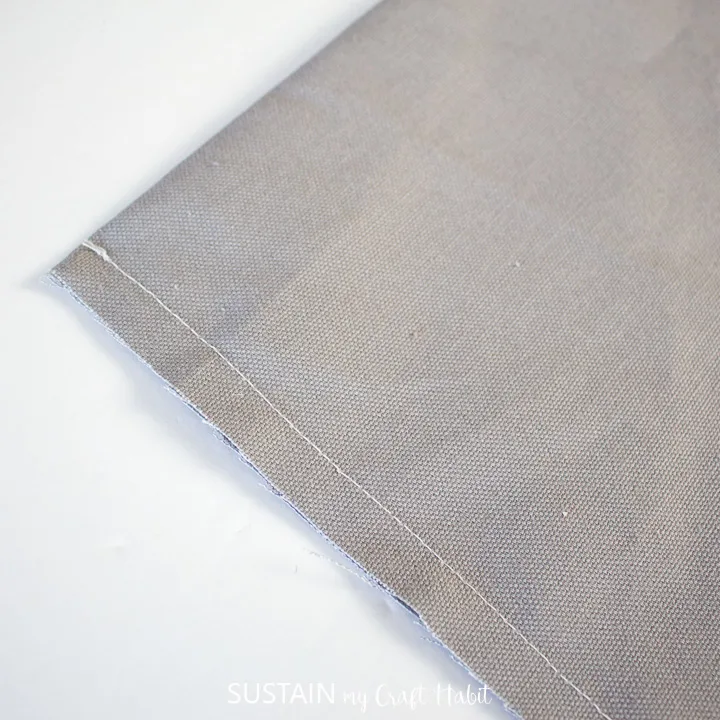
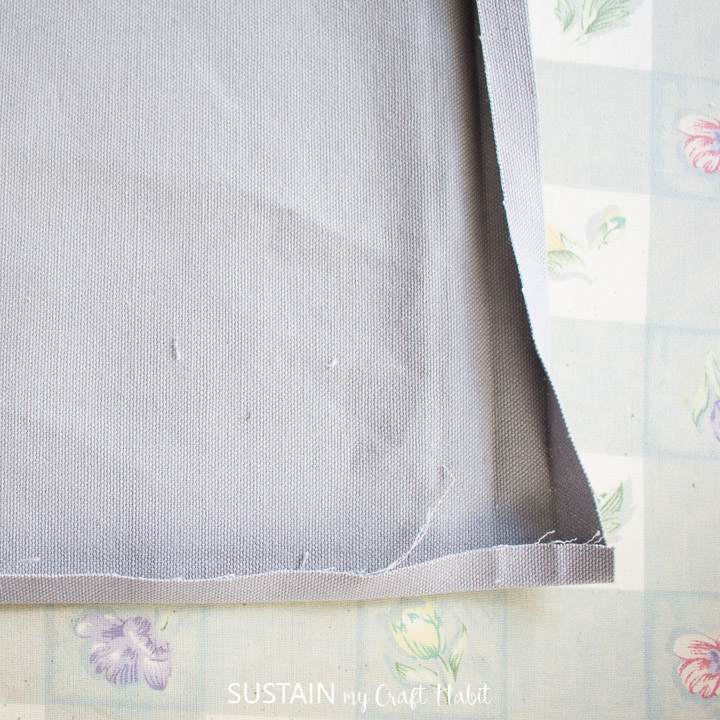
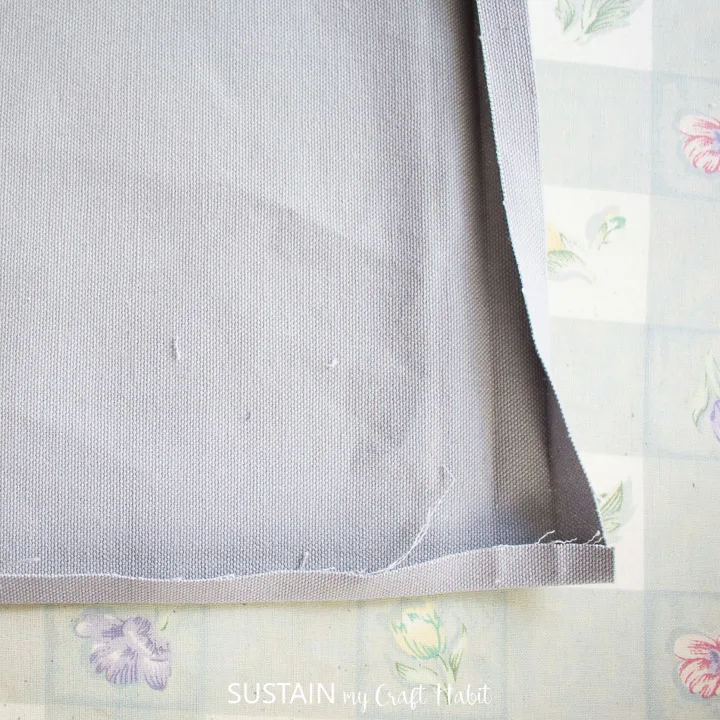
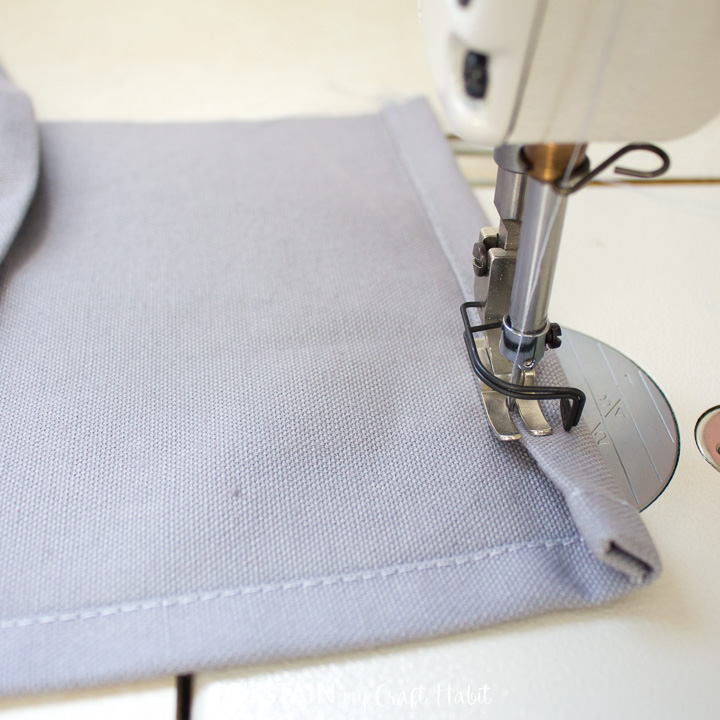
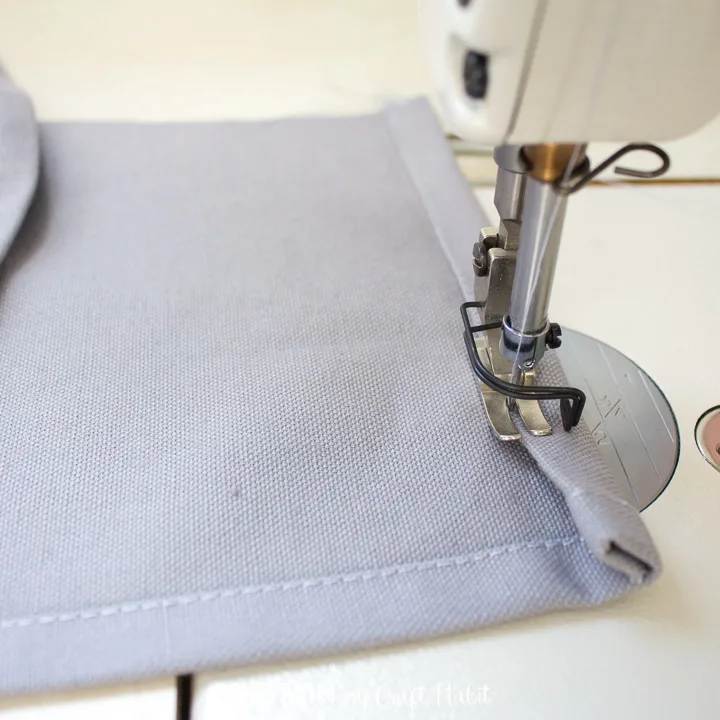
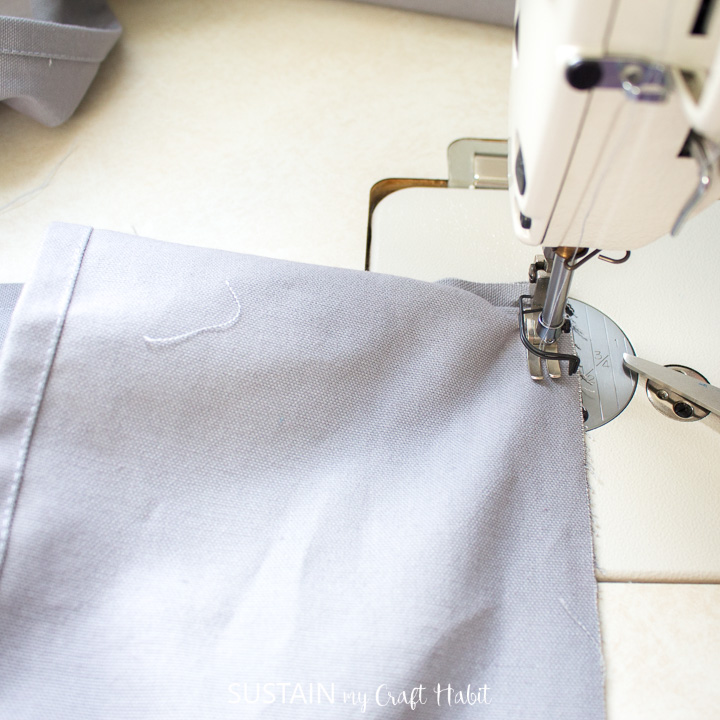
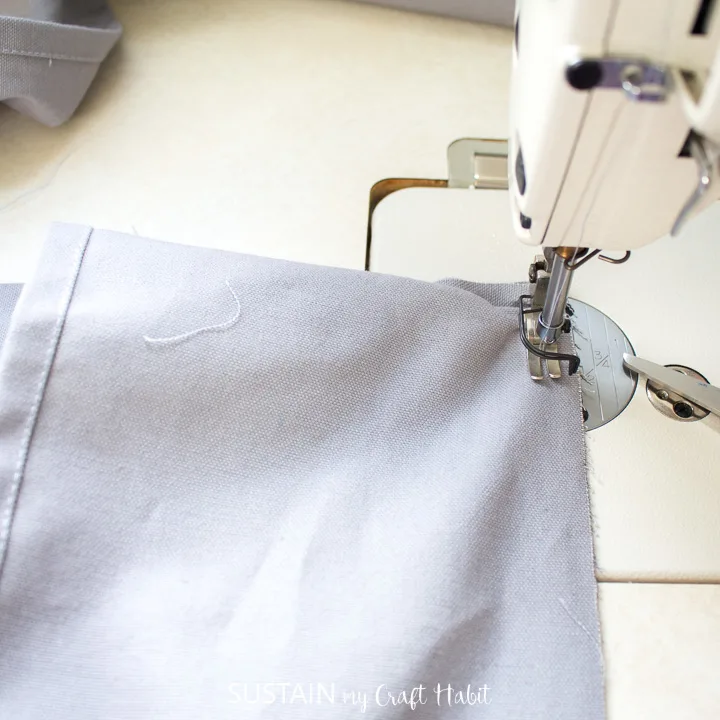
Prepare the chair skirt for sewing by first finishing the bottom and side edges.
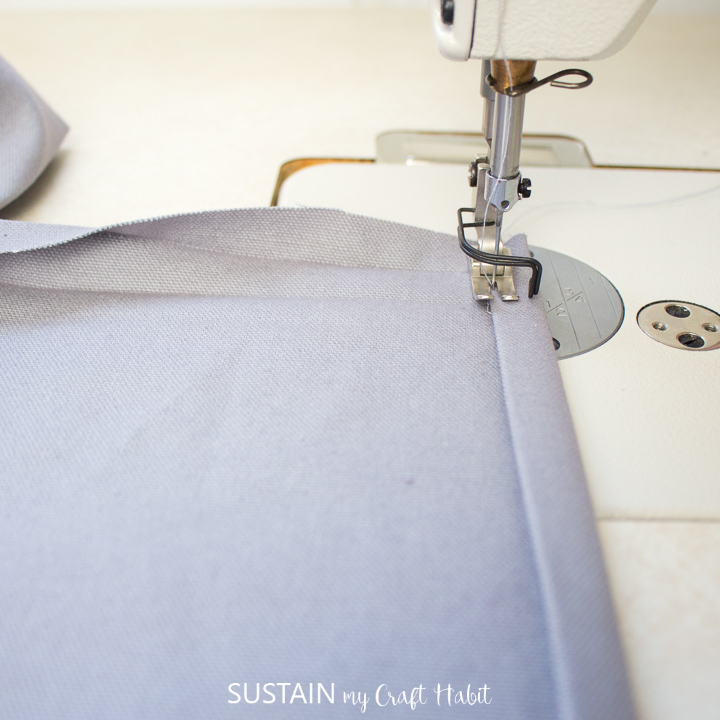
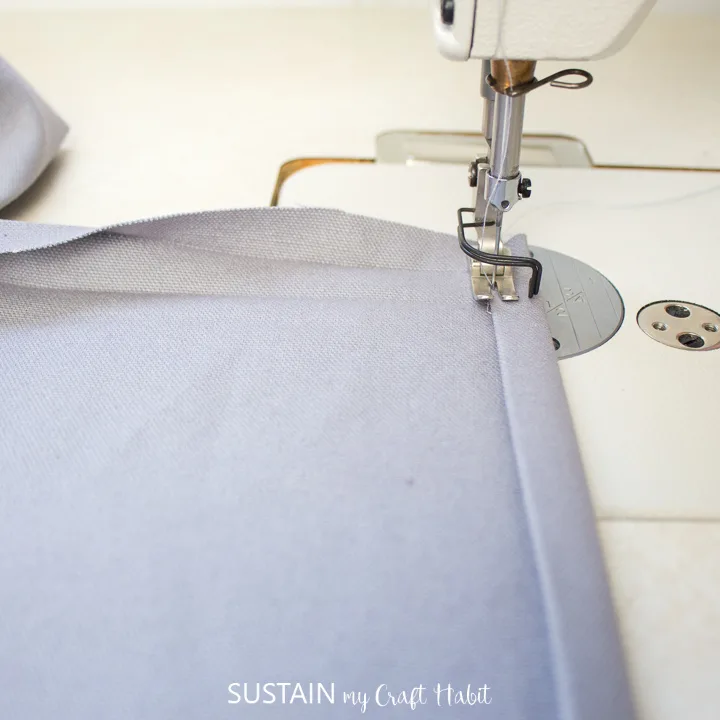
Fold the bottom edge up by ½” and press in place with an iron and then fold the hem again another ½” and also press that in place. Next, fold and press the short ends of the long rectangular skirt piece by ½”. Fold again and press, then stitch the hem with a ½” seam allowance. Also, stitch the bottom hem with a ½” hem allowance along the entire length of the skirt.
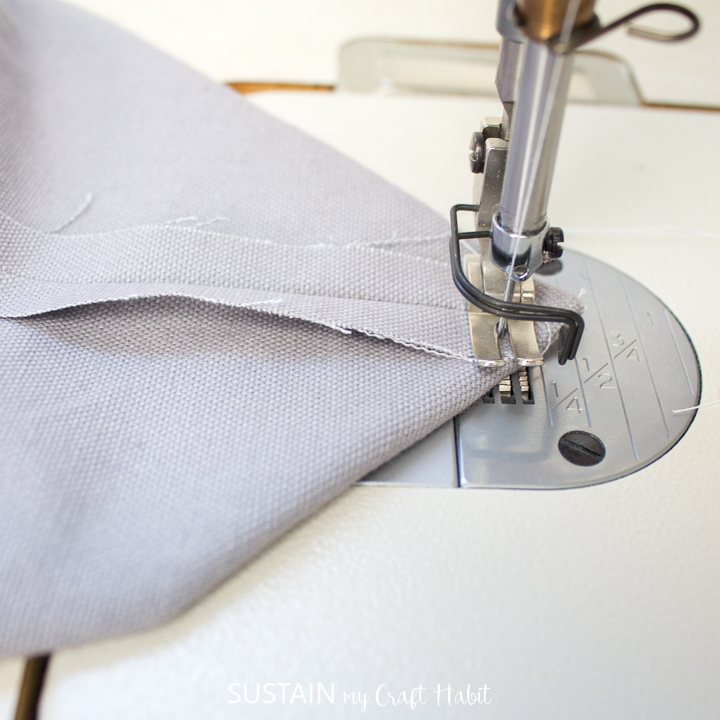
Align notches on the skirt piece and the seat piece with right sides together and pin pieces together if needed.
Sewing the Slipcover: Attaching the Skirt
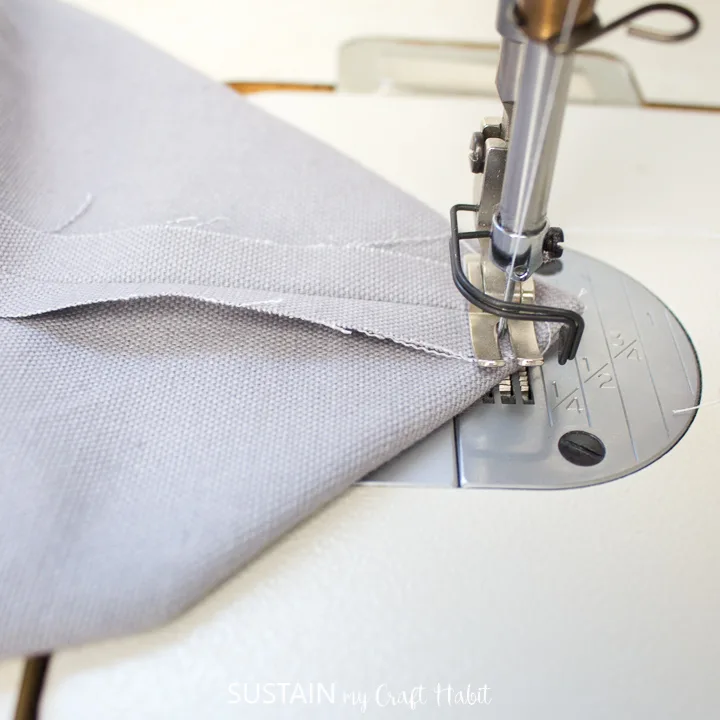
Start sewing the pieces together at the CF (center front) with a ½” seam allowance and work your way to CB (center back). Take extra care at all the corners to pivot. Clip the skirt piece at all pivot points slightly to help the fabric form a 90 degree angle and to avoid puckers or pleats in fabric at the corners.
Repeat for the other unstitched side, starting at CF and ending at the CB. The back of the skirt will overlap.

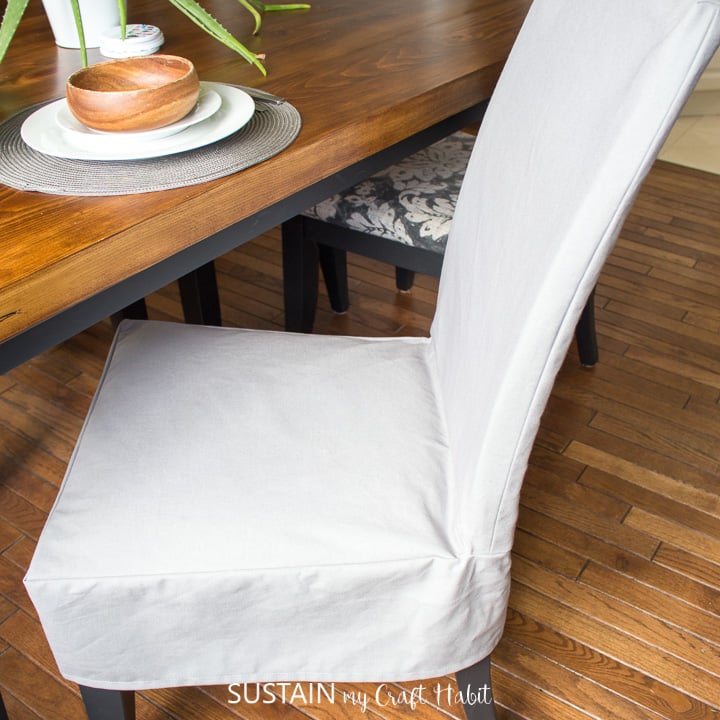
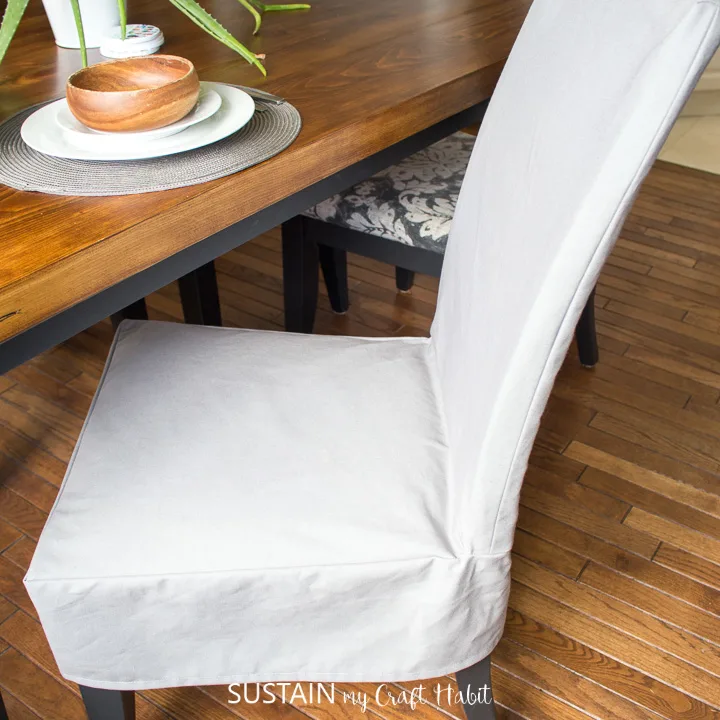
And lastly, iron out any wrinkles or creases and slip over the chairs to use.

Get updates on the latest posts and more from Sustain My Craft Habit straight to your inbox by joining our weekly newsletter. We promise to send you only the good stuff.
And that’s it! You’ve got stylish new dining chair slipcovers to transform the look of the entire room. Or use a water resistent fabric to make outdoor dining chair covers!
Although it’ll take a bit of finessing to get the pattern right for the first chair, once done you’ll be able to make your other DIY chair covers in no time!
As a mom of four, Jane loves that the canvas fabric is machine-washable! If the chair seats get messy, she simply slips them off the chair and throws them in the wash. Beautiful and practical home decor!
Did you know that CanvasEtc. offers their fabric remnants for free! Just pay a nominal shipping fee for a 5lb box of remnants for your DIY and crafting projects!
Other sewing projects you’ll love to make:
- Easy to Sew Storage ottoman with free pattern
- DIY canvas storage fabric cubes with free pattern
- DIY modern canavs planter with free pattern
- Hanging toy organizer with free pattern (used the same grey canvas as these slipcovers)
- Utility apron for adults and matching youth size apron


Like it? Pin it for later!


How to Make Dining Chair Slipcovers
Materials
- 1.5 yards 100% Cotton Duck Canvas, 10oz, at 58” wide (in Storm Grey)
- Sewing Machine with matching thread color
- Fabric Scissors
- Measuring Tape
- Printable Slipcover pattern (or make your own to suit your chair style)
- Iron and ironing board
Instructions
- Print off the pattern on 8.5×11 sheets of paper. Align the edges of the papers to form full pattern pieces and tape together.
- Lay the fabric out on a flat surface and place the individual pattern pieces on top of the fabric aligning grainlines.
- Pin in place or use paper weights, then cut the pattern pieces out along the solid lines.
- With right sides together fold the chair back piece in half along the edge that will be at the top. Aligning the sides, sew the edges together with a ½” seam allowance.
- Press the seam allowances open. To create the depth for the chair back to fit within, form a triangle shape at the top corners as shown and stitch across the width making a 1” long stitchline.
- Sew the seat piece to the front side of the chair back piece with the right sides together using a ½” seam allowance.
- Prepare the chair skirt for sewing by first finishing the bottom hem. Fold the bottom edge up by ½” and press and then fold it again another ½” pressing in place.
- Fold and press the short ends of the long rectangular skirt piece by ½”. Fold again and press, then stitch the hem with a ½” seam allowance. Also, stitch the bottom hem with a ½” hem allowance along the entire length of the skirt.
- Align notches on the skirt piece and the seat piece with right sides together. Pin together if needed.
- Start sewing the pieces together at the CF (center front) with a ½” seam allowance and work your way to CB (center back).
- Repeat for the other unstitched side, starting at CF and ending at the CB.The skirt will overlap at the back.
Nikki
Sunday 8th of October 2023
Im trying to figure out how to layout the pieces to cut the skirt. The pattern says to cut on the fold. The piece is 40" but the fabric is 60". With 1.5 yds,you dont get 80" either way. Please help!
Jane and Sonja
Tuesday 17th of October 2023
Hi there, yes you are right! I should have mentioned that you can cut the skirt on the cross grain instead of the straightgrain since the cuttable width won't be wide enough. I will add this note to the instructions as well as include a pattern placement layout so it's more clear. Many thanks!
Barbara Brown
Wednesday 8th of March 2023
Trying to make cover for the back of chairs because my are all scratched yp
Judi
Monday 22nd of November 2021
You make it look so easy that I am not even afraid to try. Thank you.
Jane and Sonja
Tuesday 23rd of November 2021
This is the sweetest comment we've received in a while. Thank you so much! Have a nice day, Jane