
Bring the beach to your home with this this step by step tutorial for making your own resin seaglass to use for a beautiful, coastal-inspired ombre wall hanging.
Relaxing Faux Seaglass Wall Hanging
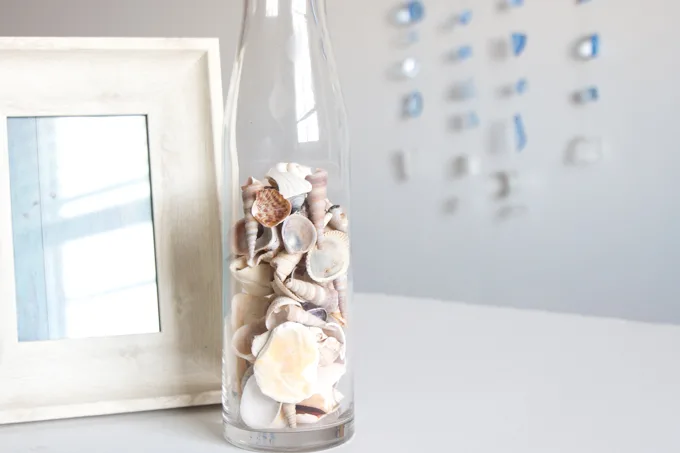
Have you ever tried drilling a hole in seaglass or any glass? If so, you know how difficult it can be. If not, take our word for it! Even with a diamond drill bit, it takes a lot of care, time and precision to drill through glass. And even though we have an impressive collection of sea glass from our days spent combing the beaches of Lake Huron, we knew that we’d need to make seaglass from resin if we wanted to easily drill holes for hanging.
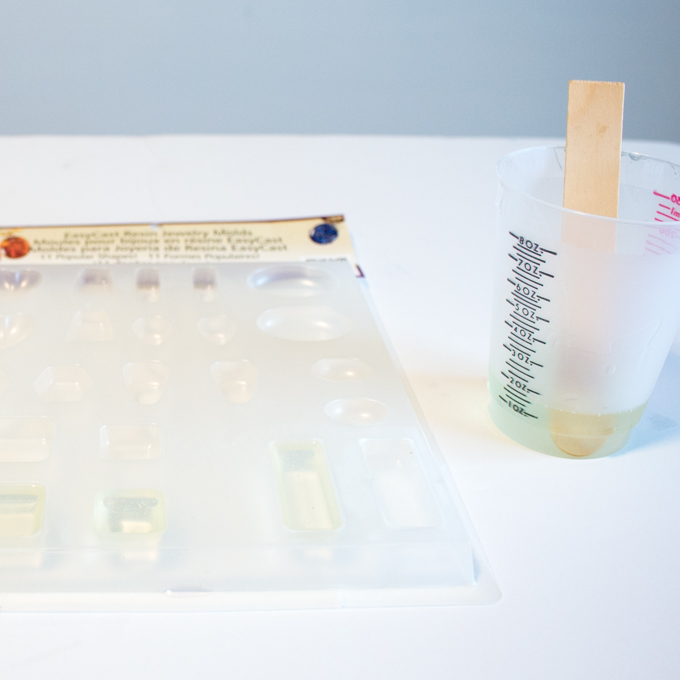
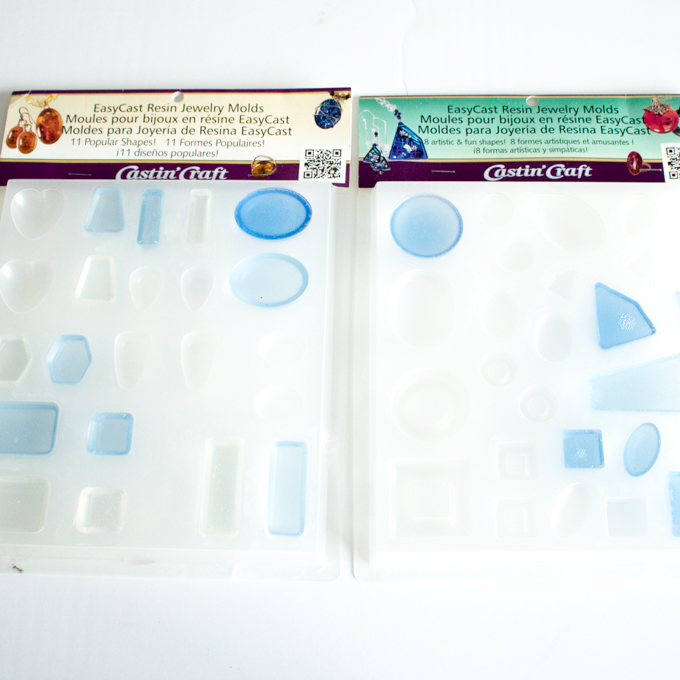
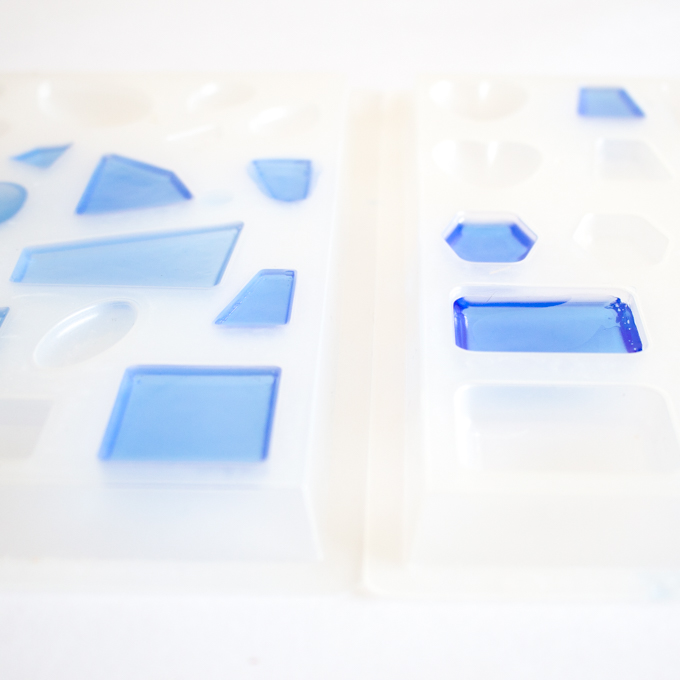
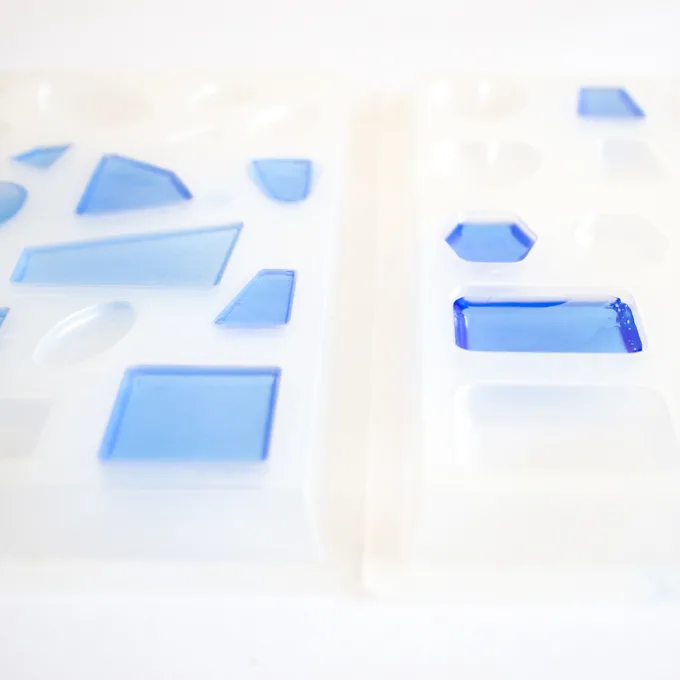
We used different shades of blue for our wall hanging but you can add any color dye you wish for a different theme. The resin was poured into this EasyCast resin jewelry mold; which we’ve used for other projects as well, such as our lovely lavender flower pendant and this festive glitter pendant.

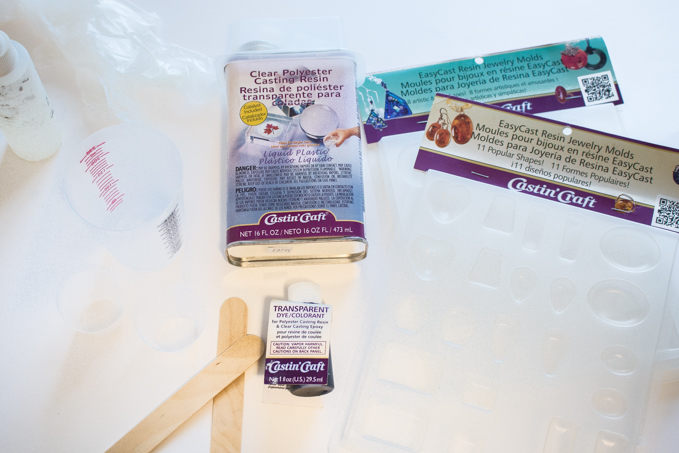
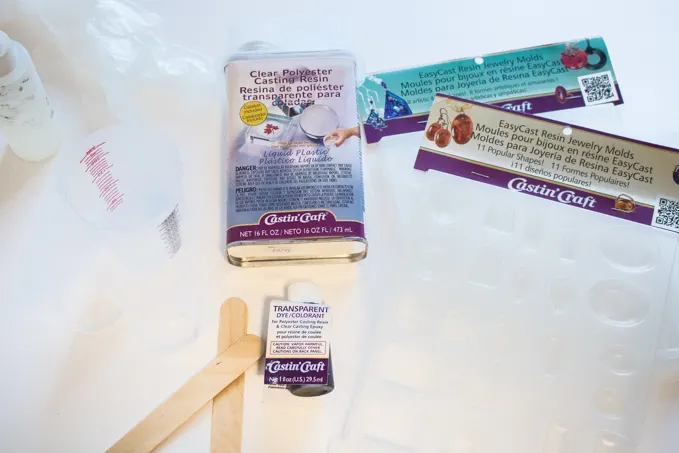
Materials needed to make a Resin Seaglass Wall Hanging:
Disclosure: This post continues affiliate links for your shopping convenience. You can find our full disclosure policy here.
- Castin’Craft Clear Polyester Casting Resin
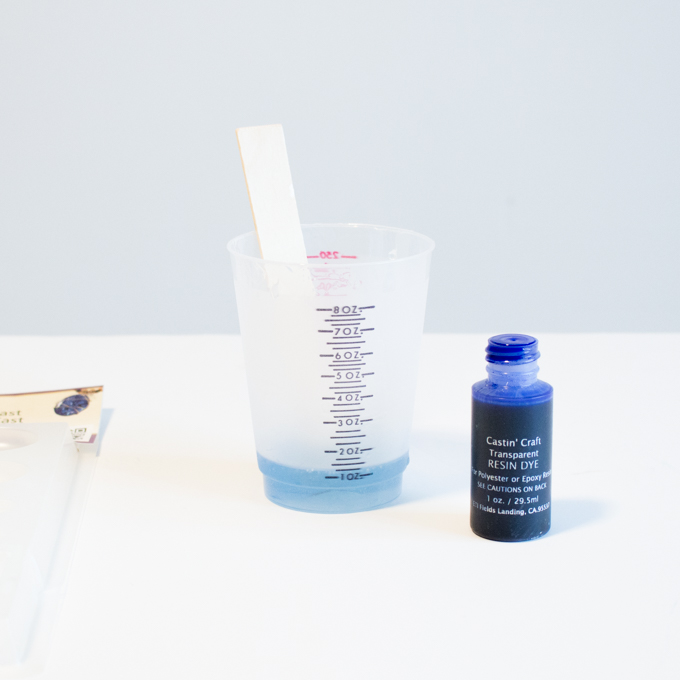
- Transparent Dye in any color (we used a blue color)
- Castin’Craft Mold Release & Conditioner
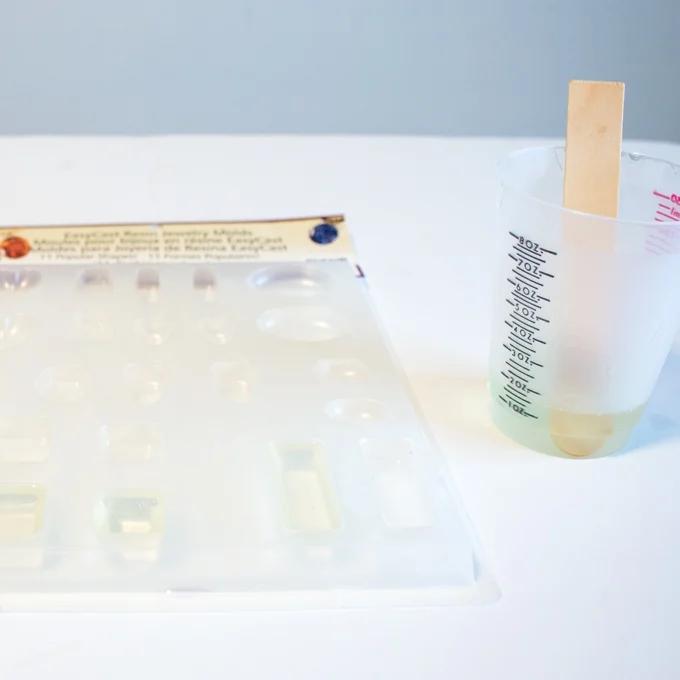
- EasyCast Resin Jewelry Molds
- Gloves, disposable mixing/measuring cups, wooden craft sticks, paper towels
- Drill or Drill Press with 3/16” diamond drill bit
- Clear Monofilament Thread (also known as fishing line)
- Wooden Dowel (I used a piece of driftwood for mine)
- Scissors
How to Make a Resin Seaglass Wall Hanging:
Work in a well ventilated area and be sure to read all the instructions on the product packaging before beginning your project. Apply a mold release agent to the jewelry molds and put aside to dry.
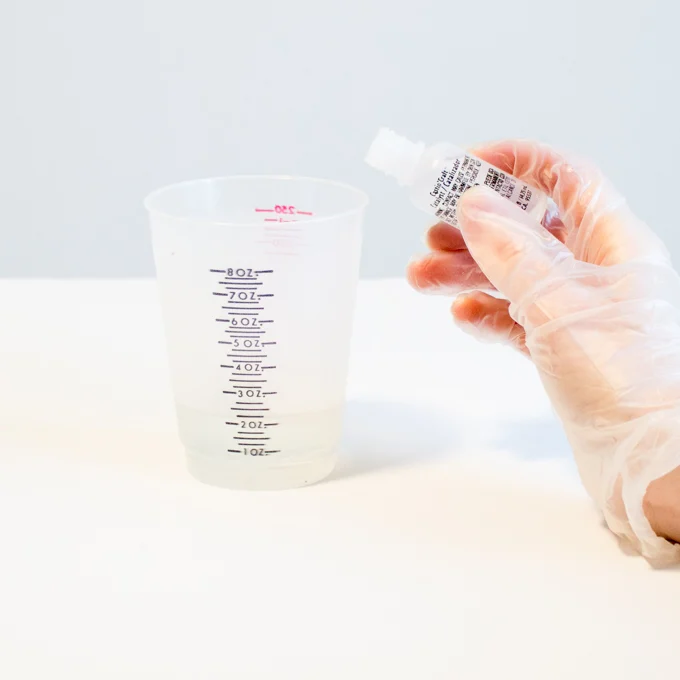
Pour the clear polyester resin into a measuring cup.
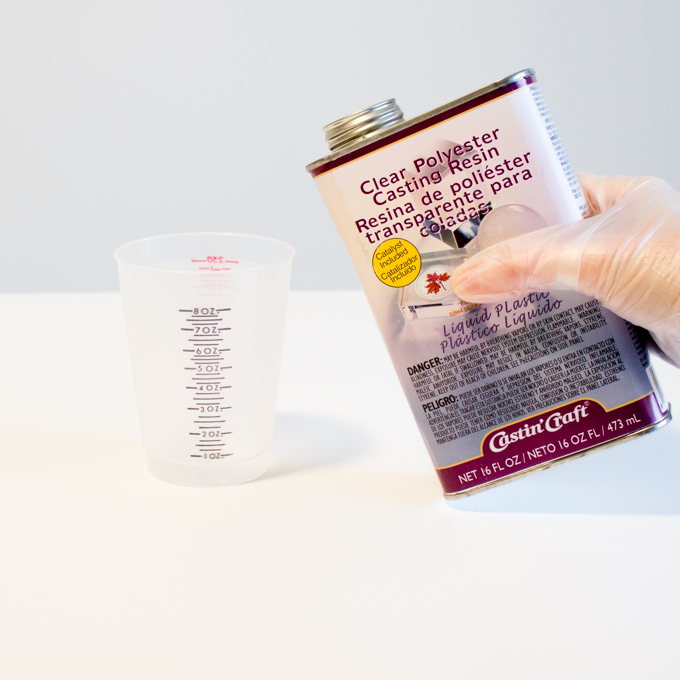
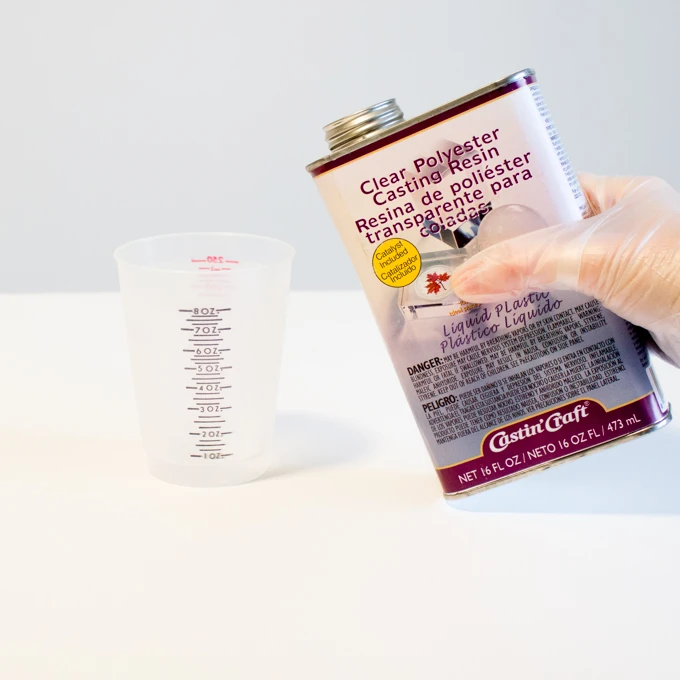
Add the catalyst to the resin. Since I started with 2oz of resin and my molds were 1/4″ thick, I added 8 drops of catalyst per ounce of resin. You’ll need to follow the instructions on the packaging for your specific project.

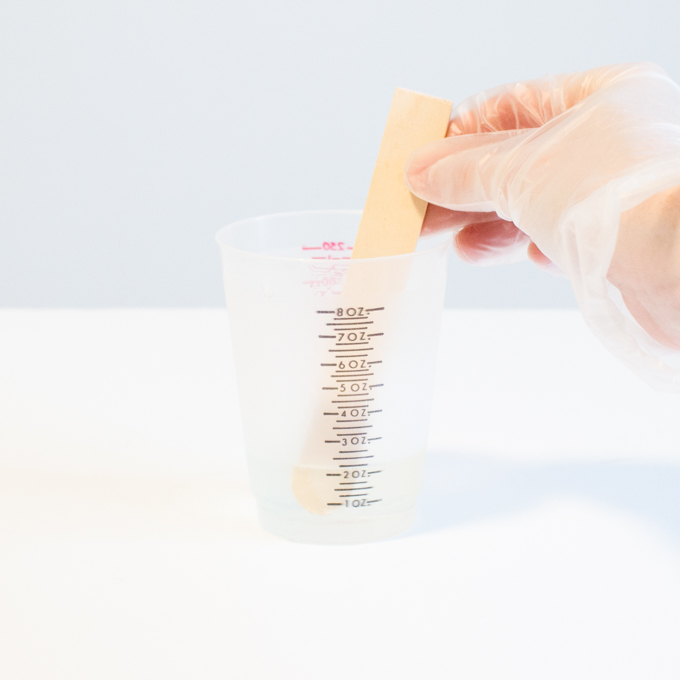
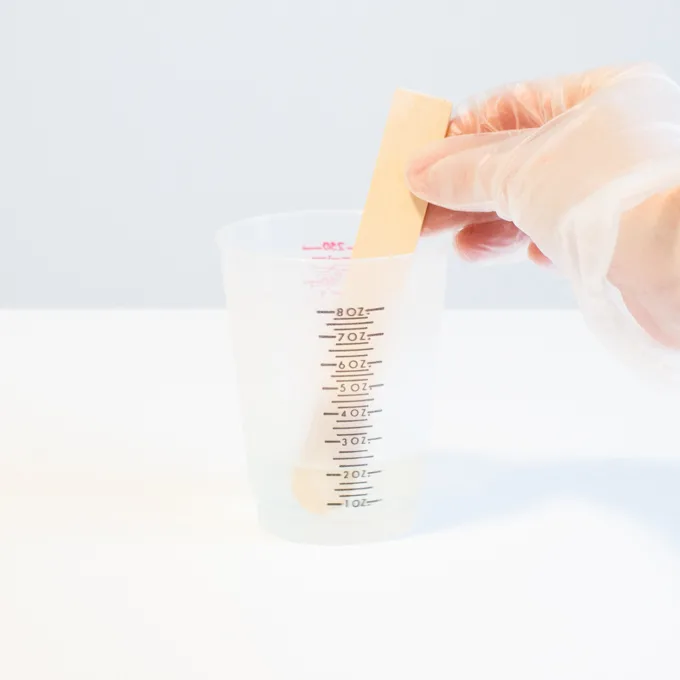
Stir continuously for 1 minute, scraping the sides and bottom of the container as you mix.
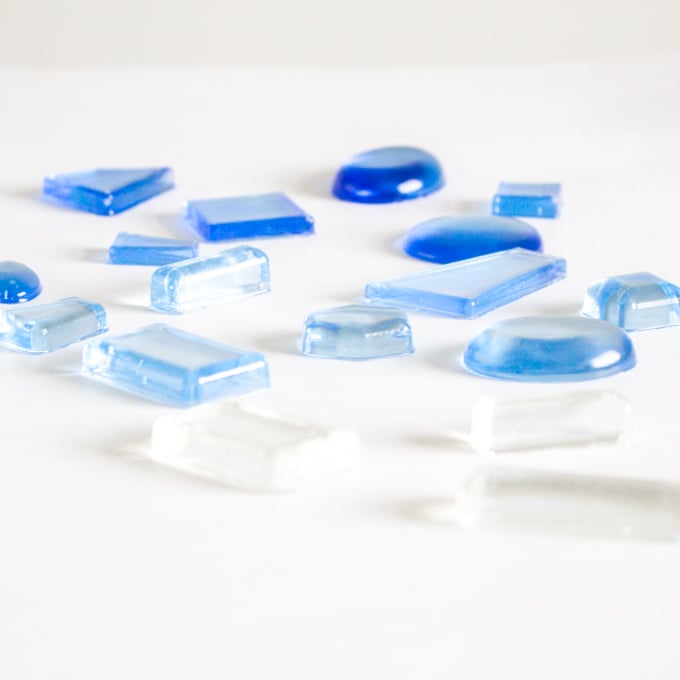
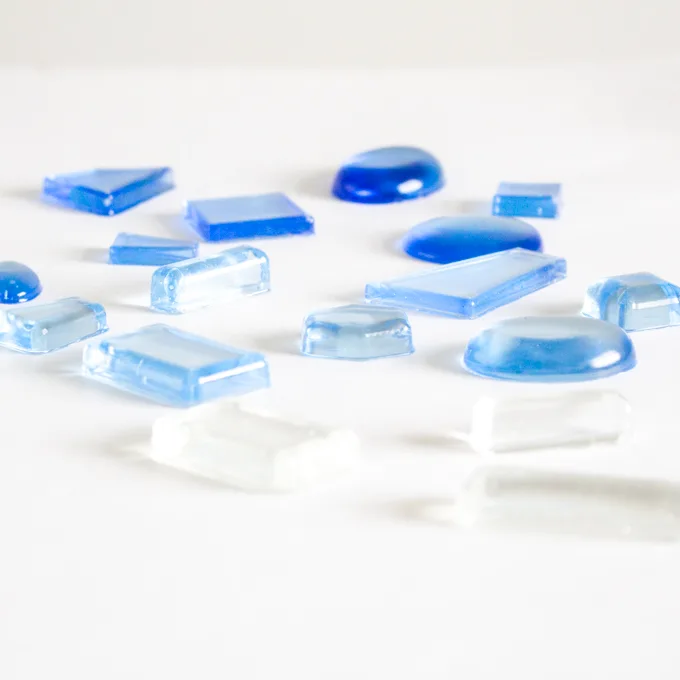
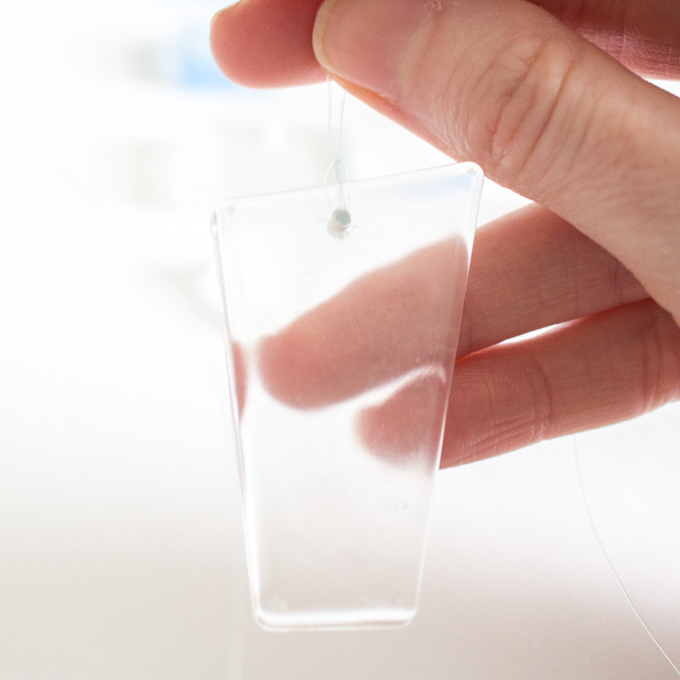
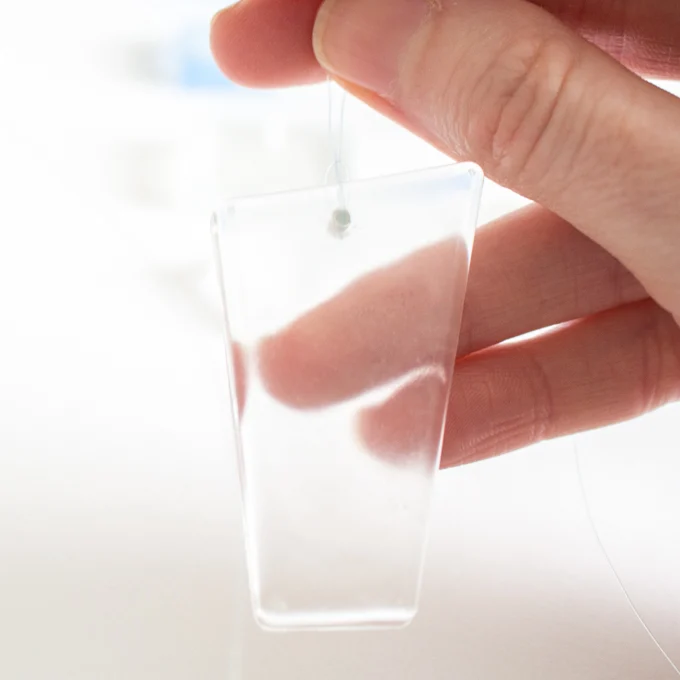
Since I wanted to include some clear “seaglass” to my ombre colored wall hanging, I filled some of the jewelry molds with the clear mixture.
Next, add one drop (a very small amount) of transparent blue dye to the same clear mixture. Stir together until the dye is a uniform color.
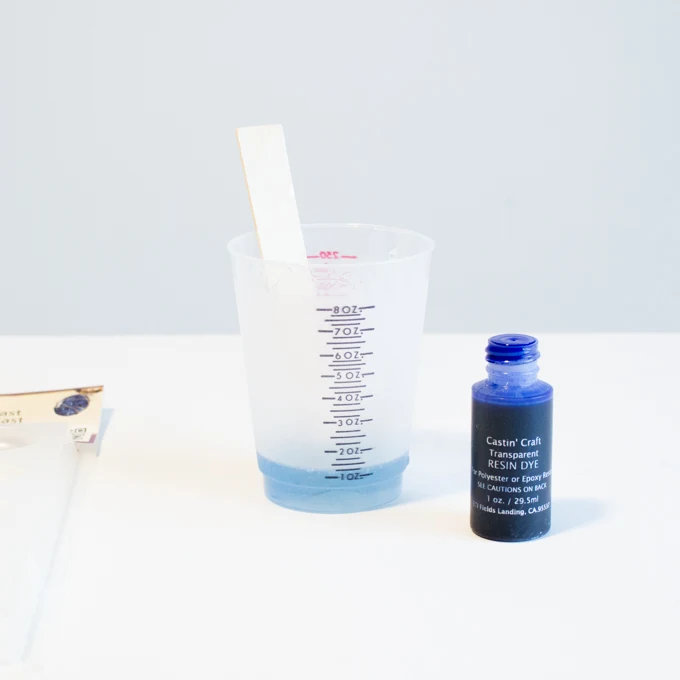
Fill your desired jewelry molds with the light blue mixture.
To have a variety of different shades of blue, add more transparent blue dye to the same mixture and fill in your desired jewelry molds.

Repeat this step one more time to have 3 different shades of blue charms. You can continue these steps as many times as you like to achieve the desired look and the amount of faux seaglass needed for your project.
Cover the pieces to keep dust out and let cure overnight.

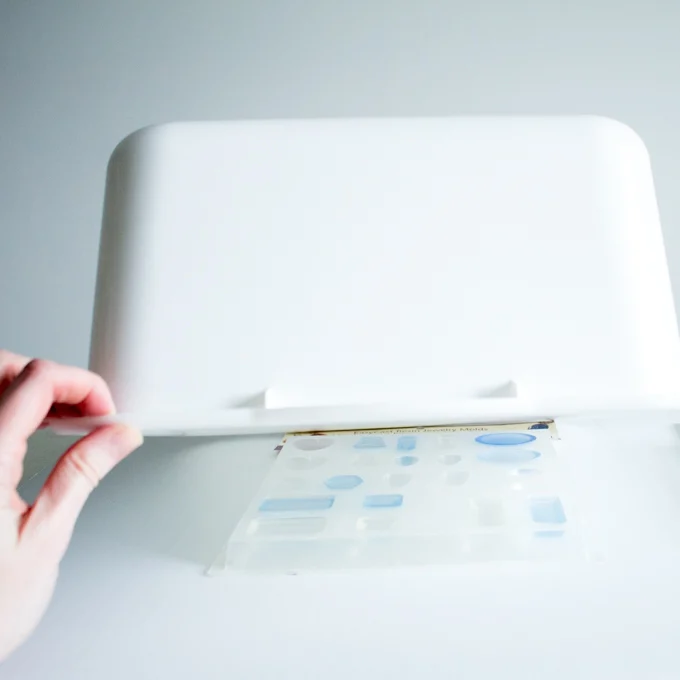
After 24 hours, remove the pieces from the mold. They should easily pop out of the jewelry molds.
Preparing the Faux Seaglass for a Wall Hanging:
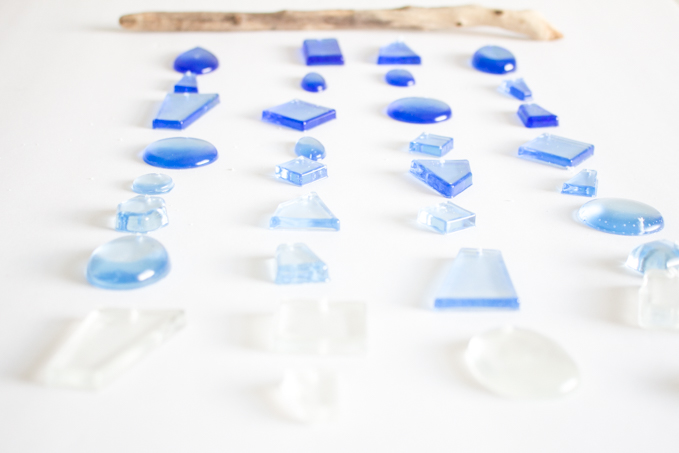
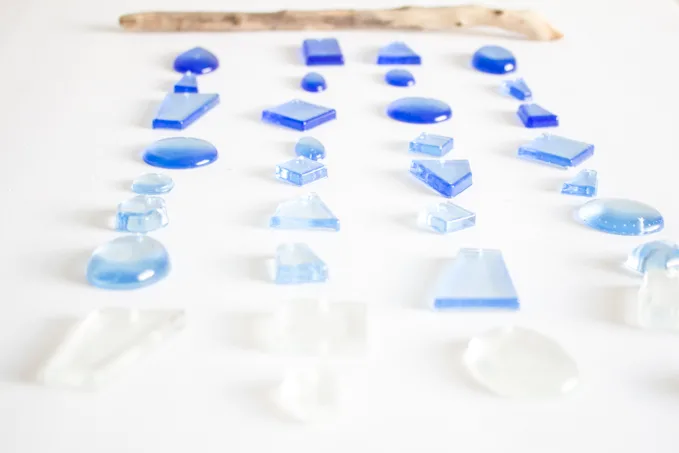
Roughly lay out the “seaglass” as you want them to hang on a flat and level surface.
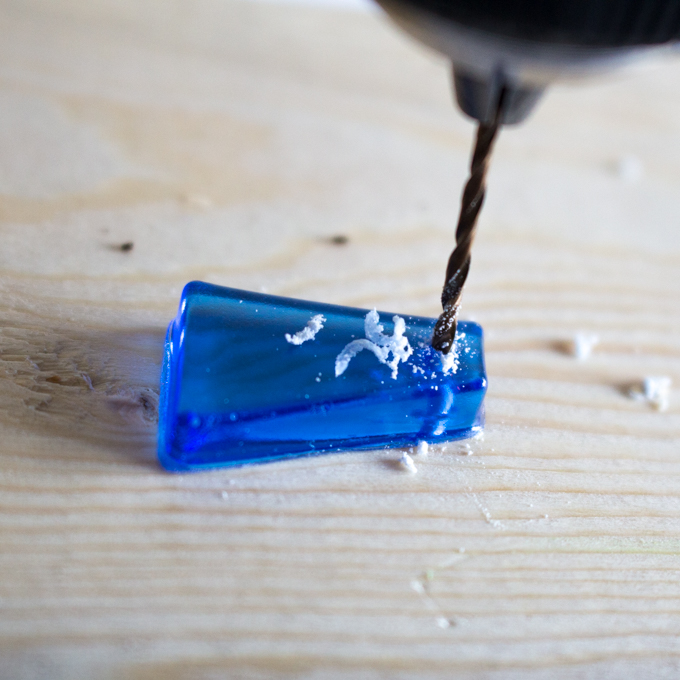
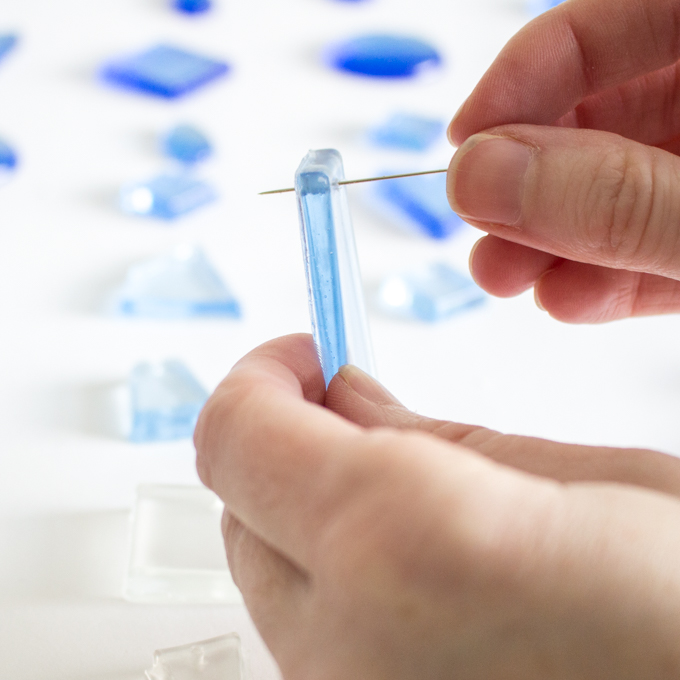
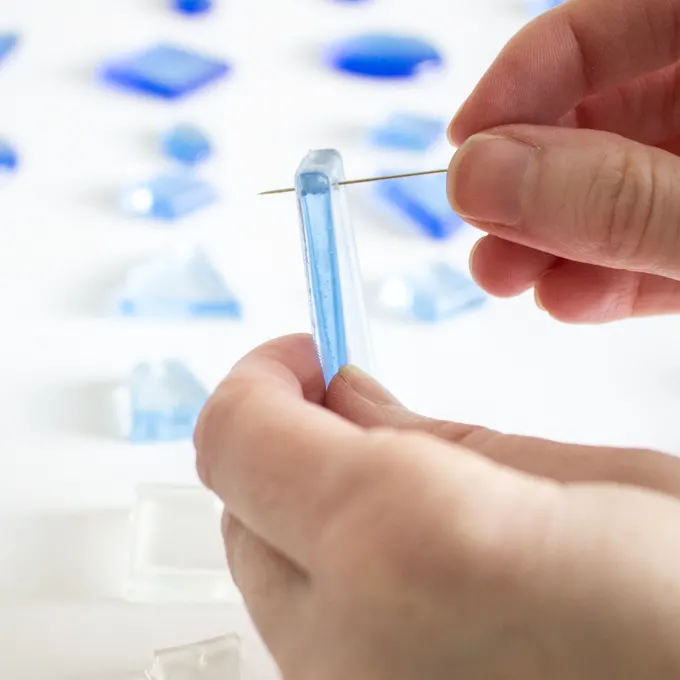
Using a 1/16″ drill bit, drill a small hole at the top of each piece. You can stick a needle through the hole to clear the hole and push out any of the resin shavings.

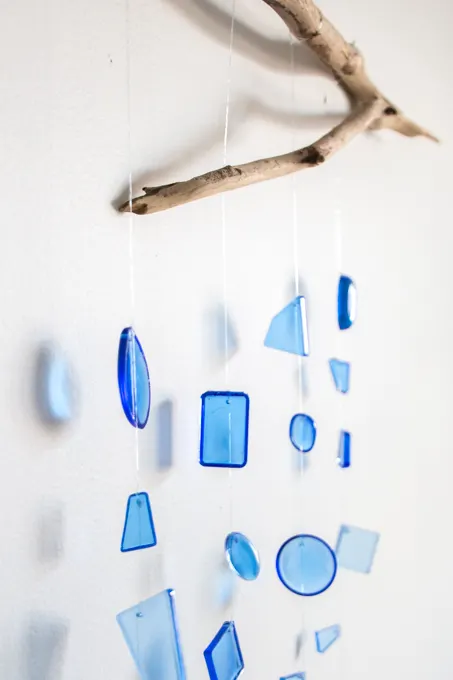
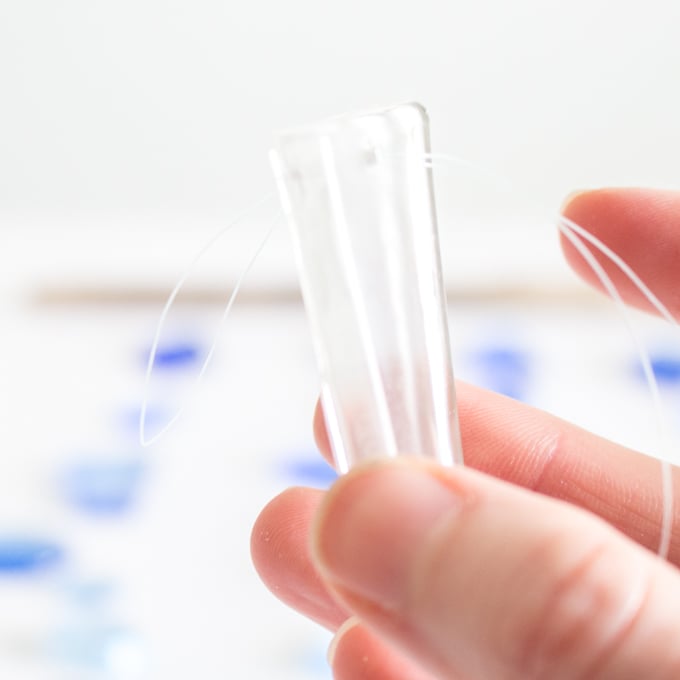
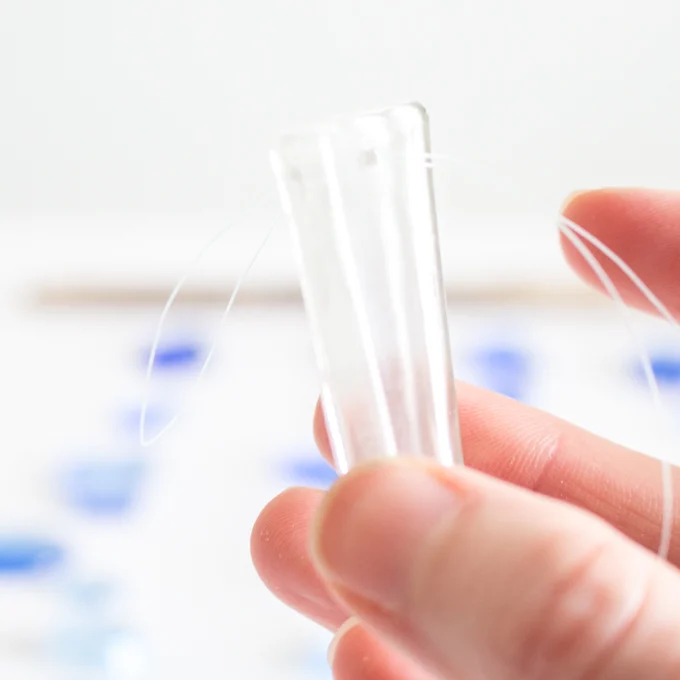
Starting at the bottom, begin to fasten the seaglass together by threading the fishing line through the drilled holes. Space each piece as you like and add a single knot at the top to hold the faux seaglass in place.
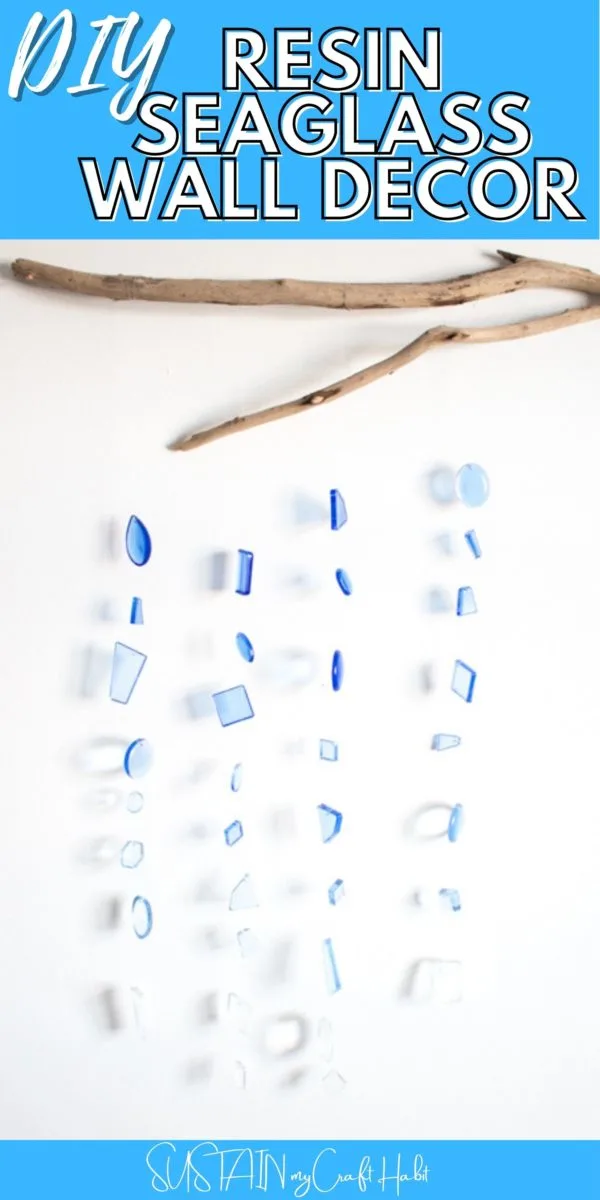
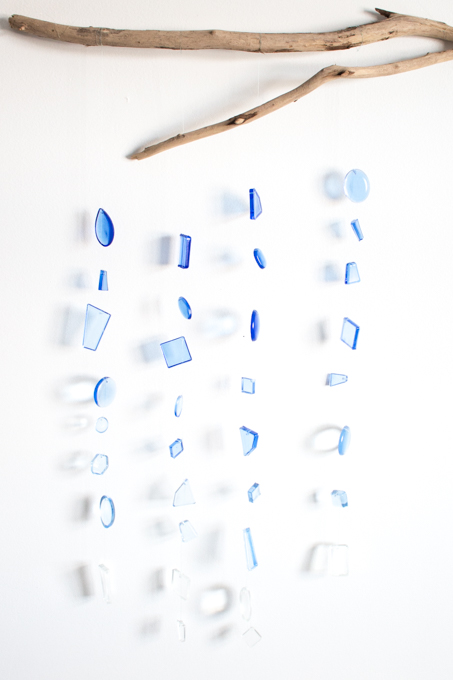
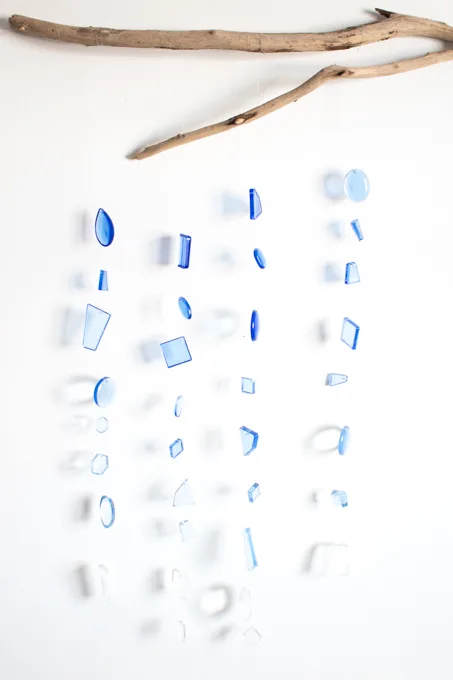
Once each piece of faux seaglass is fastened along the fishing line, tie each strand to the wooden dowel (or driftwood in my case). Repeat for all 4 strands evenly spacing the strands apart.

I have this seaglasss wall decor hanging in my beachy bathroom. Where would you have this piece of art?
This project originally appeared on the Resin Crafts Blog project gallery.
Like it? Pin it for later!
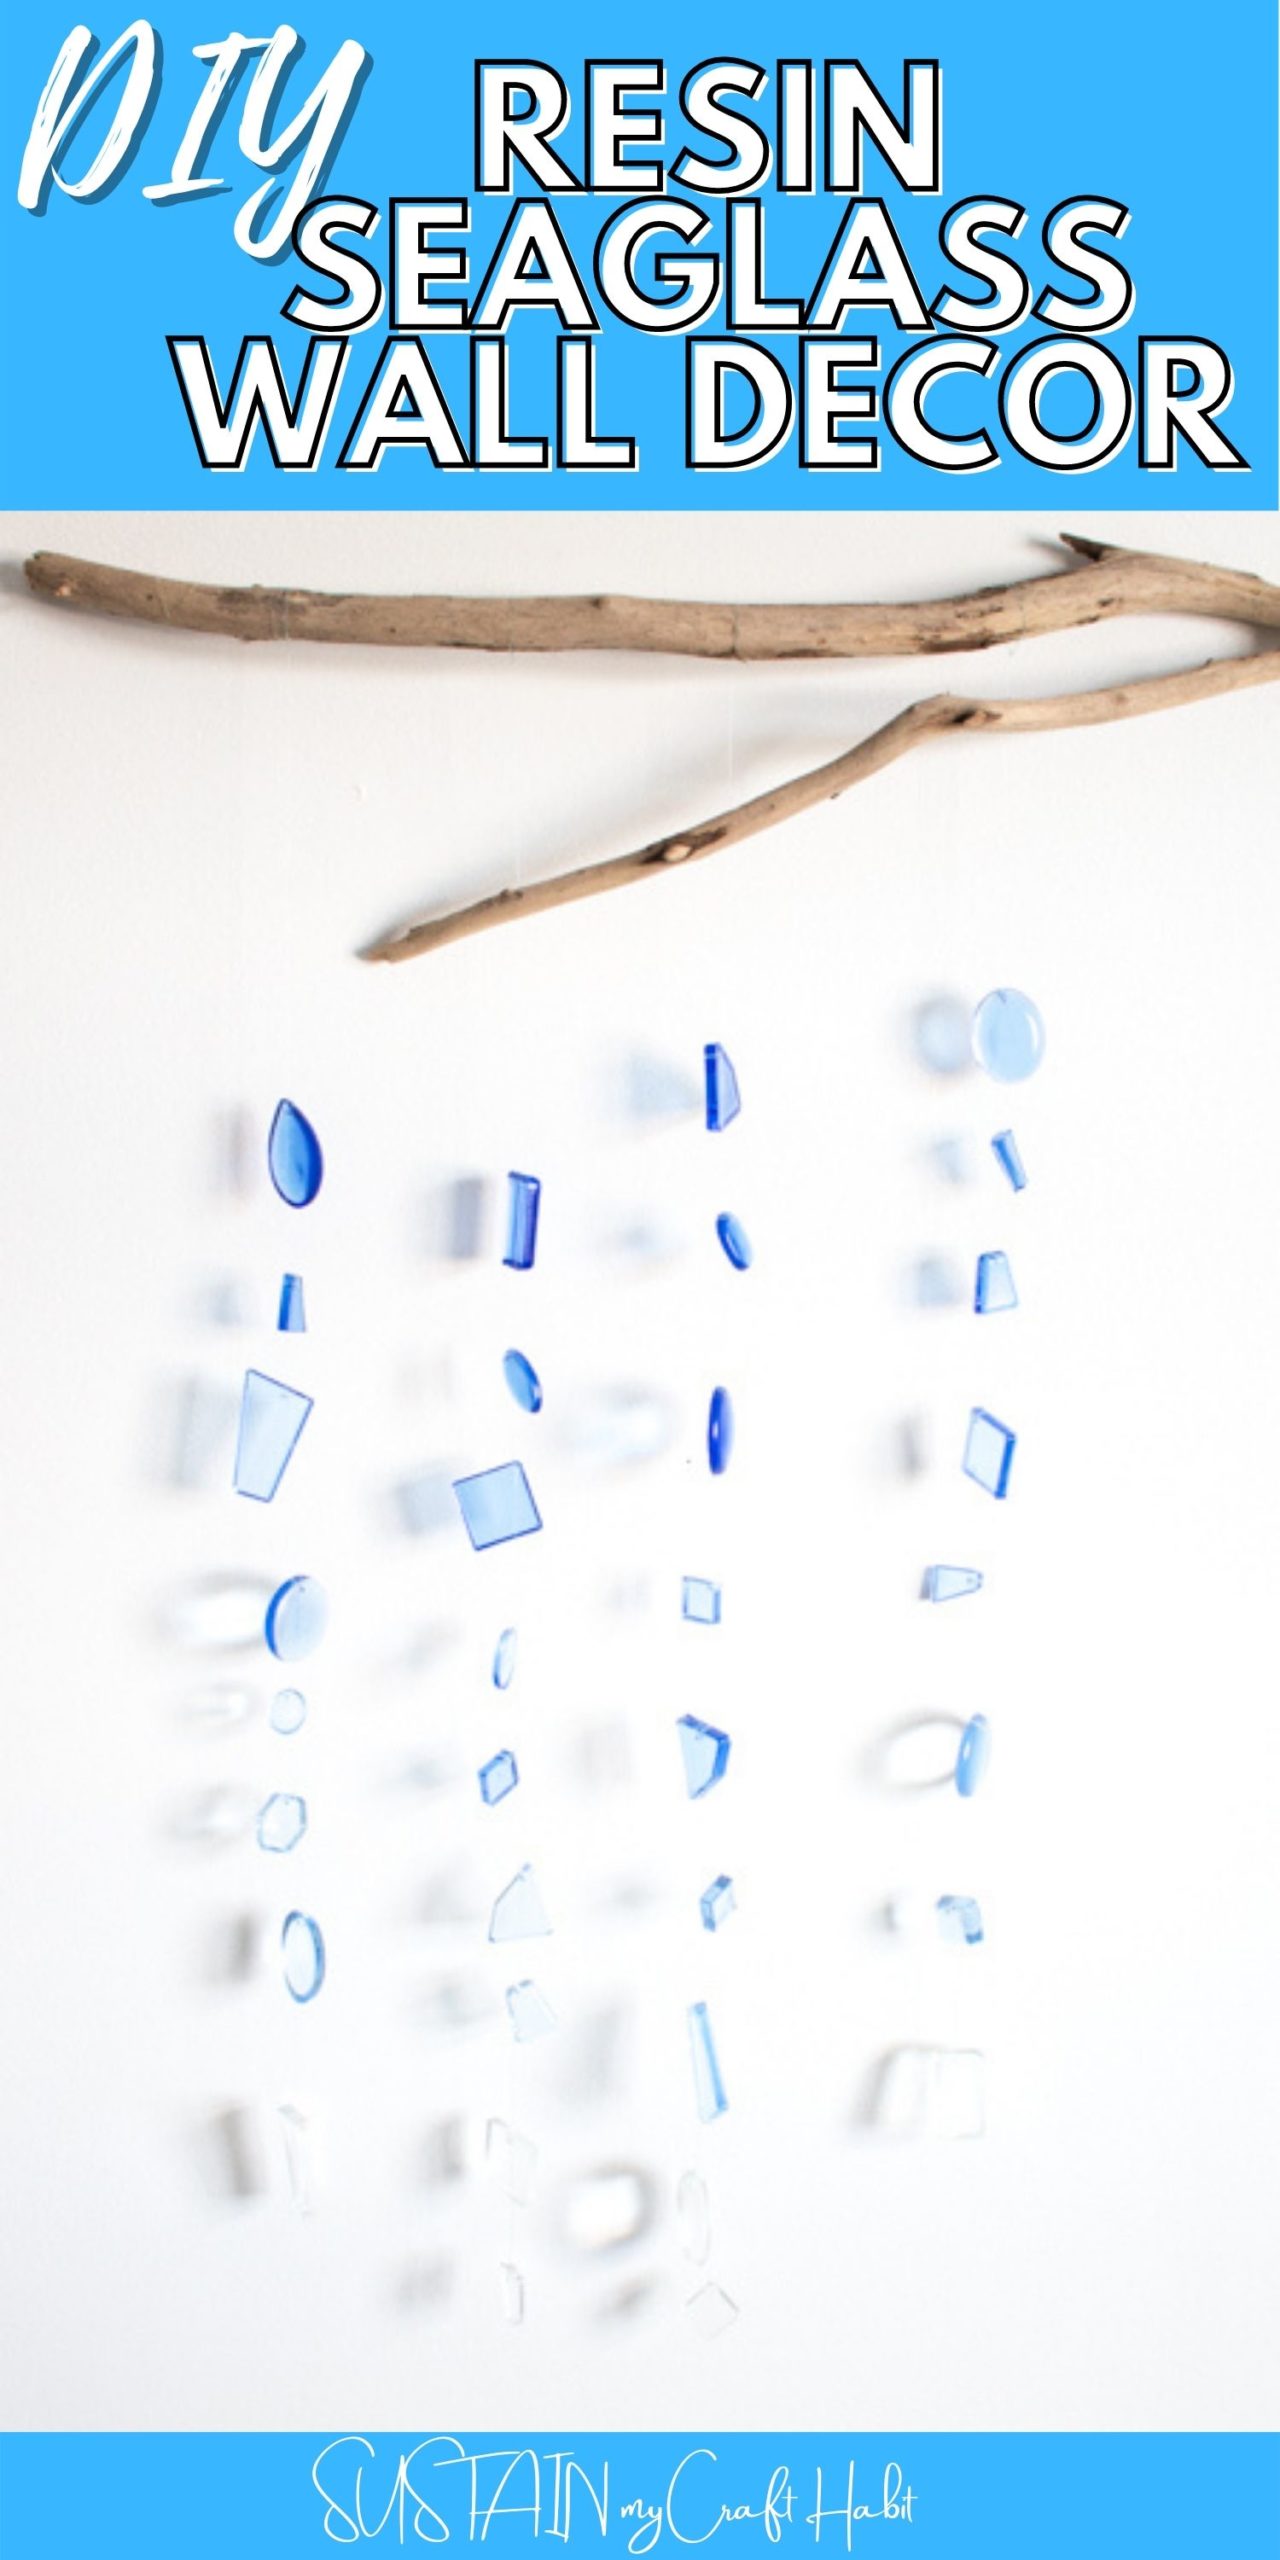

How to Make a Resin Seaglass Wall Hanging
Materials
- Castin’Craft Clear Polyester Casting Resin
- Transparent Dye in any color we used a blue color
- Castin’Craft Mold Release & Conditioner
- EasyCast Resin Jewelry Molds
- Gloves disposable mixing/measuring cups, wooden craft sticks, paper towels
- Drill or Drill Press with 3/16” diamond drill bit
- Clear Monofilament Thread also known as fishing line
- Wooden Dowel I used a piece of driftwood
- Scissors
Instructions
- Work in a well ventilated area and be sure to read all the instructions on the product packaging before beginning your project.
- Apply a mold release agent to the jewelry molds and put aside to dry.
- Pour the clear polyester resin into a measuring cup.
- Add the catalyst to the resin. You’ll need to follow the instructions on the packaging for your specific project.
- Stir continuously for 1 minute, scraping the sides and bottom of the container as you mix.
- Since I wanted to include some clear “seaglass” to my ombre colored wall hanging, I filled some of the jewelry molds with the clear mixture.
- Next, add one drop (a very small amount) of transparent blue dye to the same clear mixture. Stir together until the dye is a uniform color.
- Fill your desired jewelry molds with the light blue mixture.
- Repeat this step one more time to have 3 different shades of blue charms. You can continue these steps as many times as you like to achieve the desired look.
- Cover the pieces to keep dust out and let cure overnight.
- After 24 hours, remove the pieces from the mold. They should easily pop out of the jewelry molds.
Preparing the Faux Seaglass for a Wall Hanging:
- Roughly lay out the “seaglass” as you want them to hang on a flat and level surface.
- Using a 1/16″ drill bit, drill a small hole at the top of each piece. You can stick a needle through the hole to clear the hole and push out any of the resin shavings.
- Starting at the bottom, begin to fasten the seaglass together by threading the fishing line through the drilled holes. Space each piece as you like and add a single knot at the top to hold the faux seaglass in place.
- Once each piece of faux seaglass is fastened along the fishing line, tie each strand to the wooden dowel (or driftwood in my case). Repeat for all 4 strands evenly spacing the strands apart.