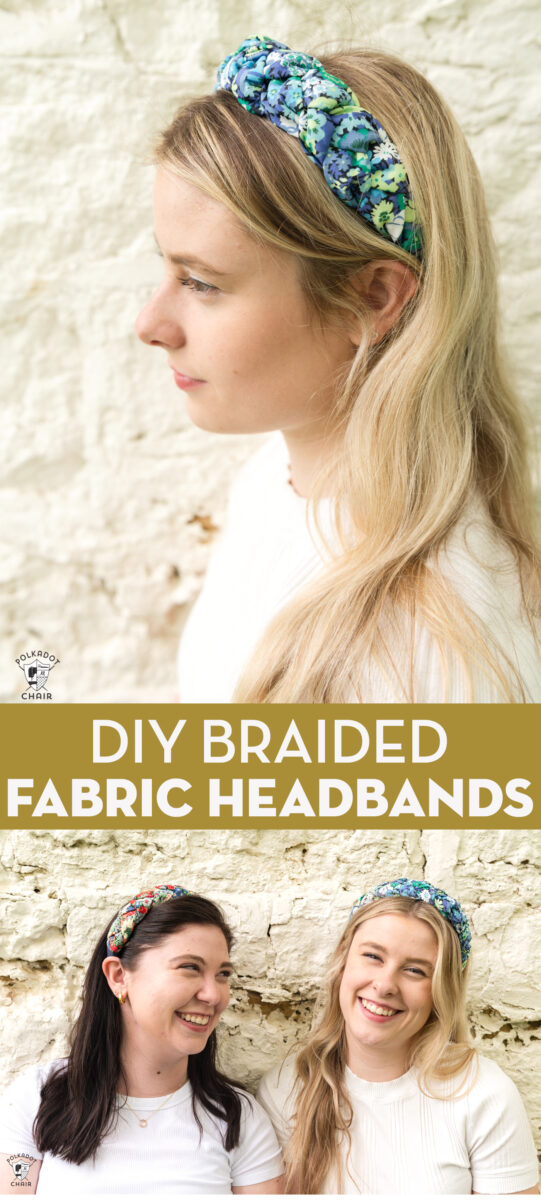
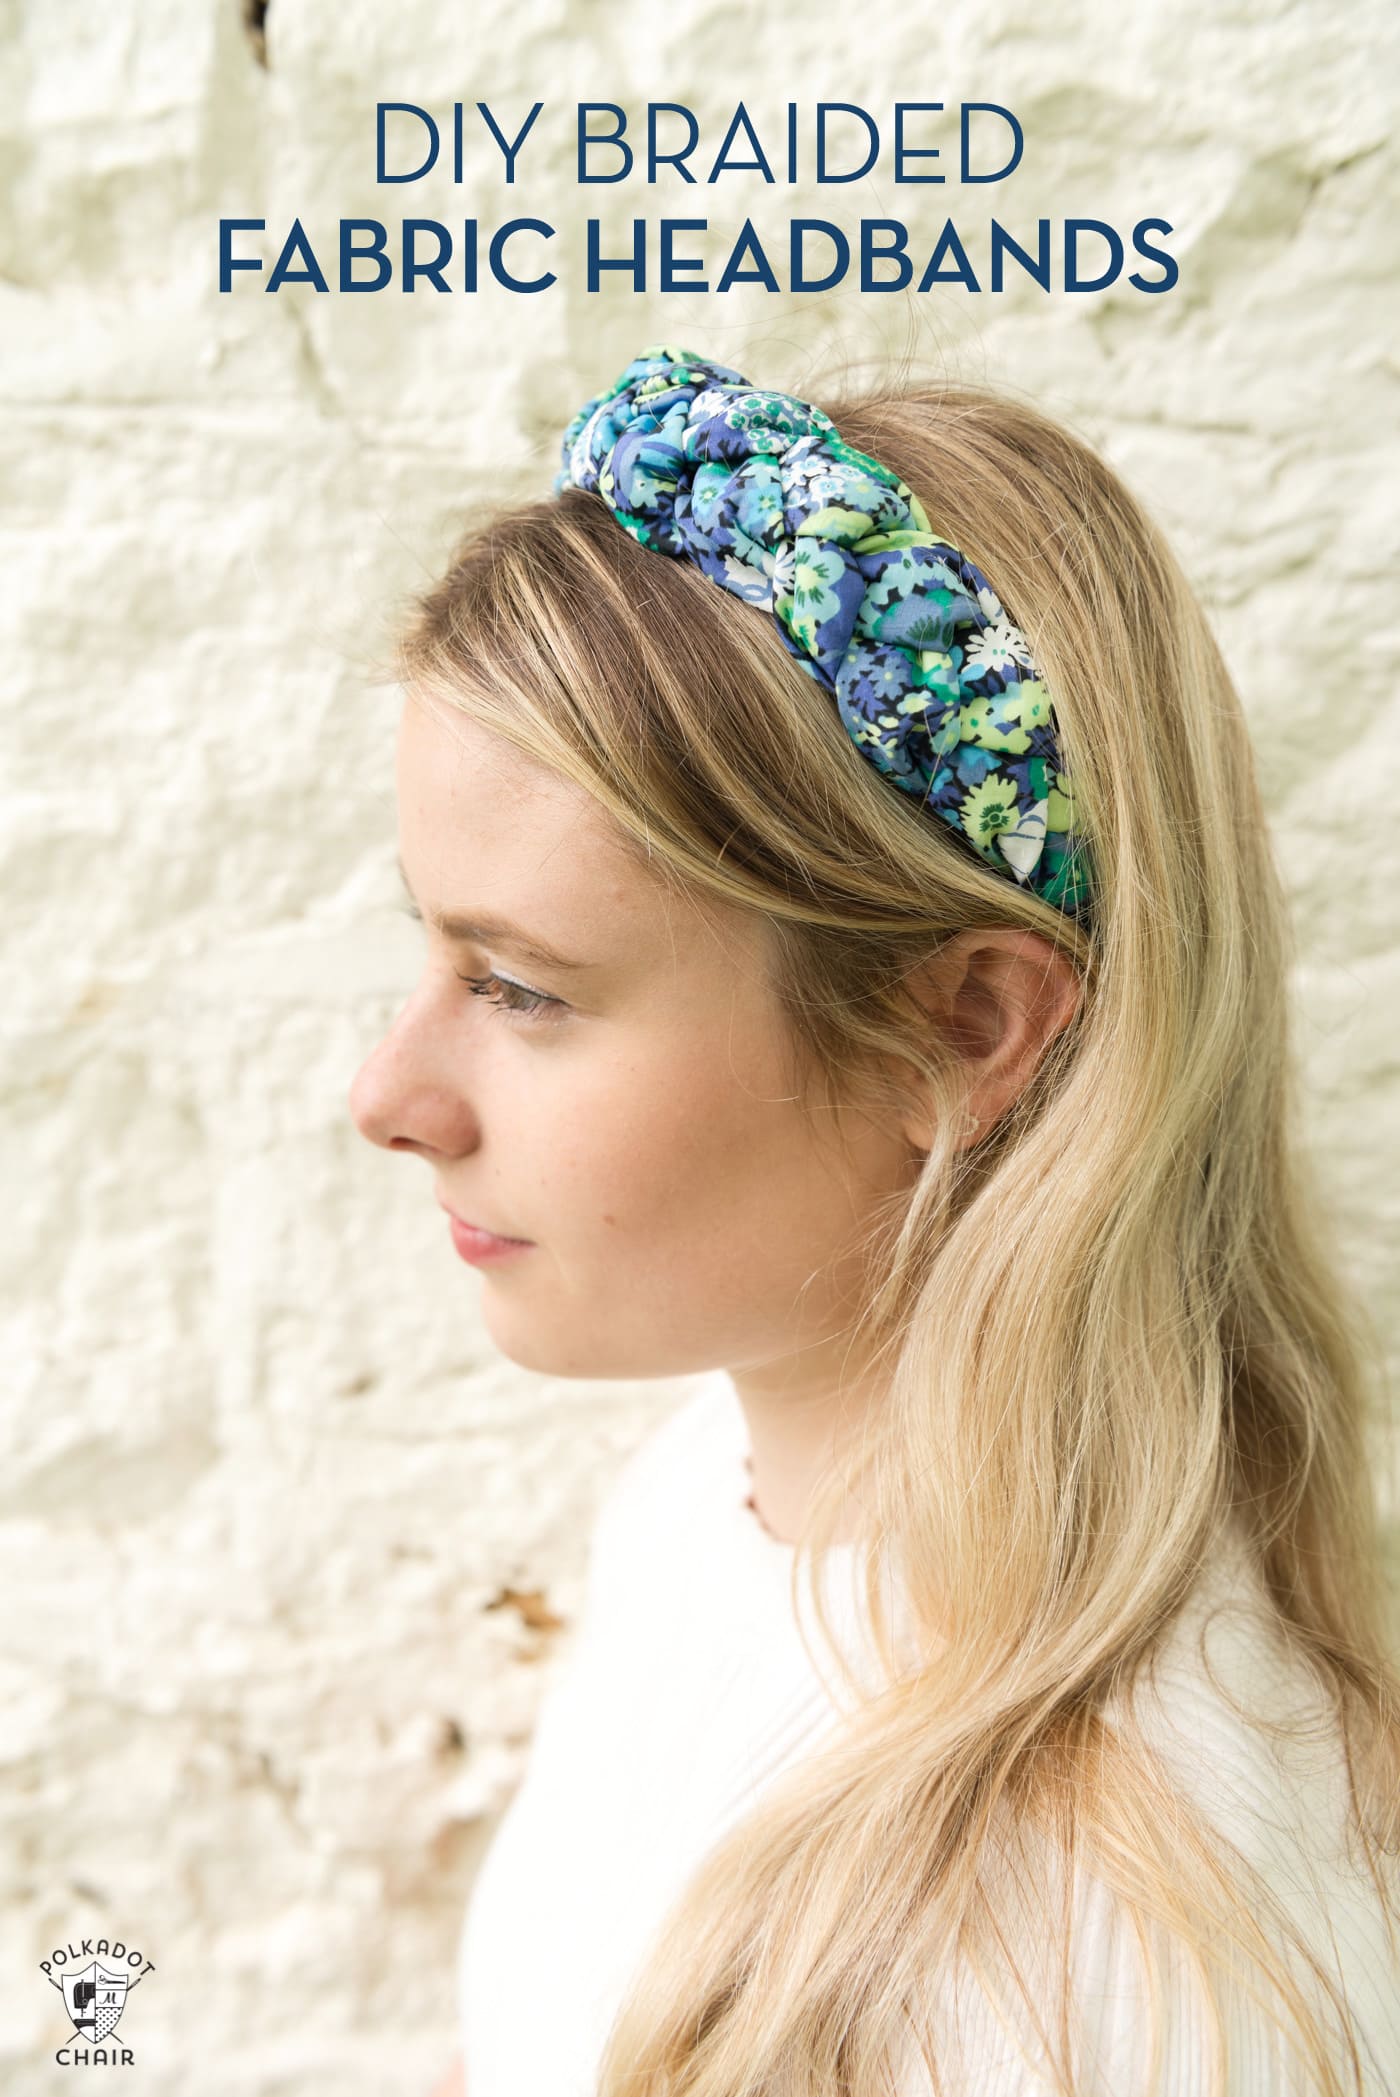
How to Make a Braided Padded Headband
Padded, braided, and knotted headbands are very trendy right now! Learn how to make a braided, padded headband with our free sewing pattern & tutorial.
I always joke that my best ideas come from my kids. I think I need to stop joking, as many of them come from my kids.
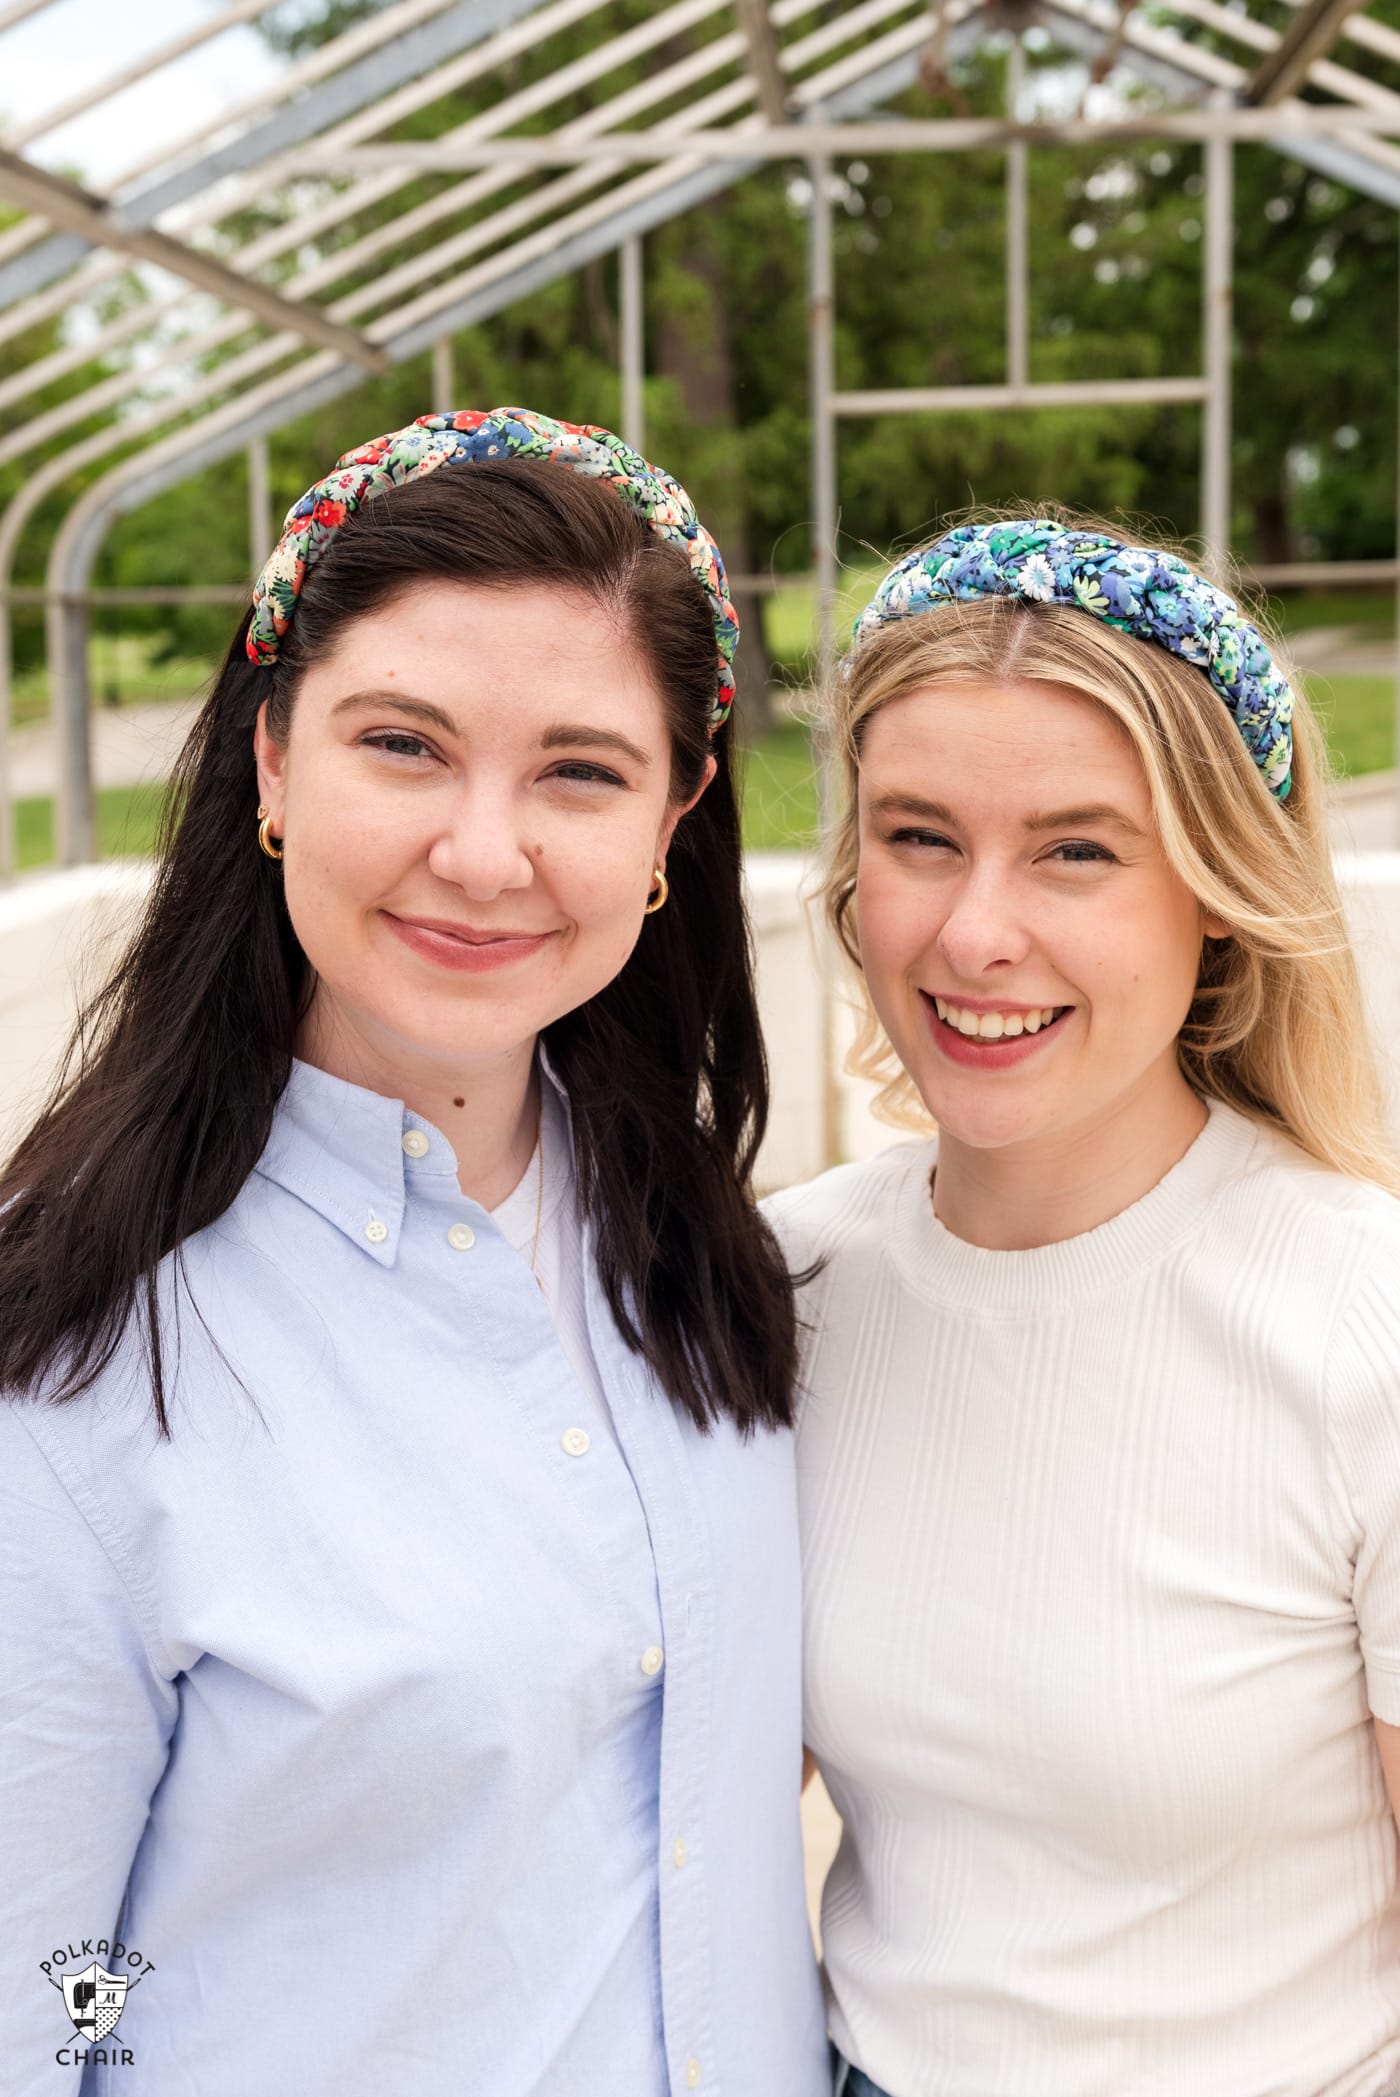
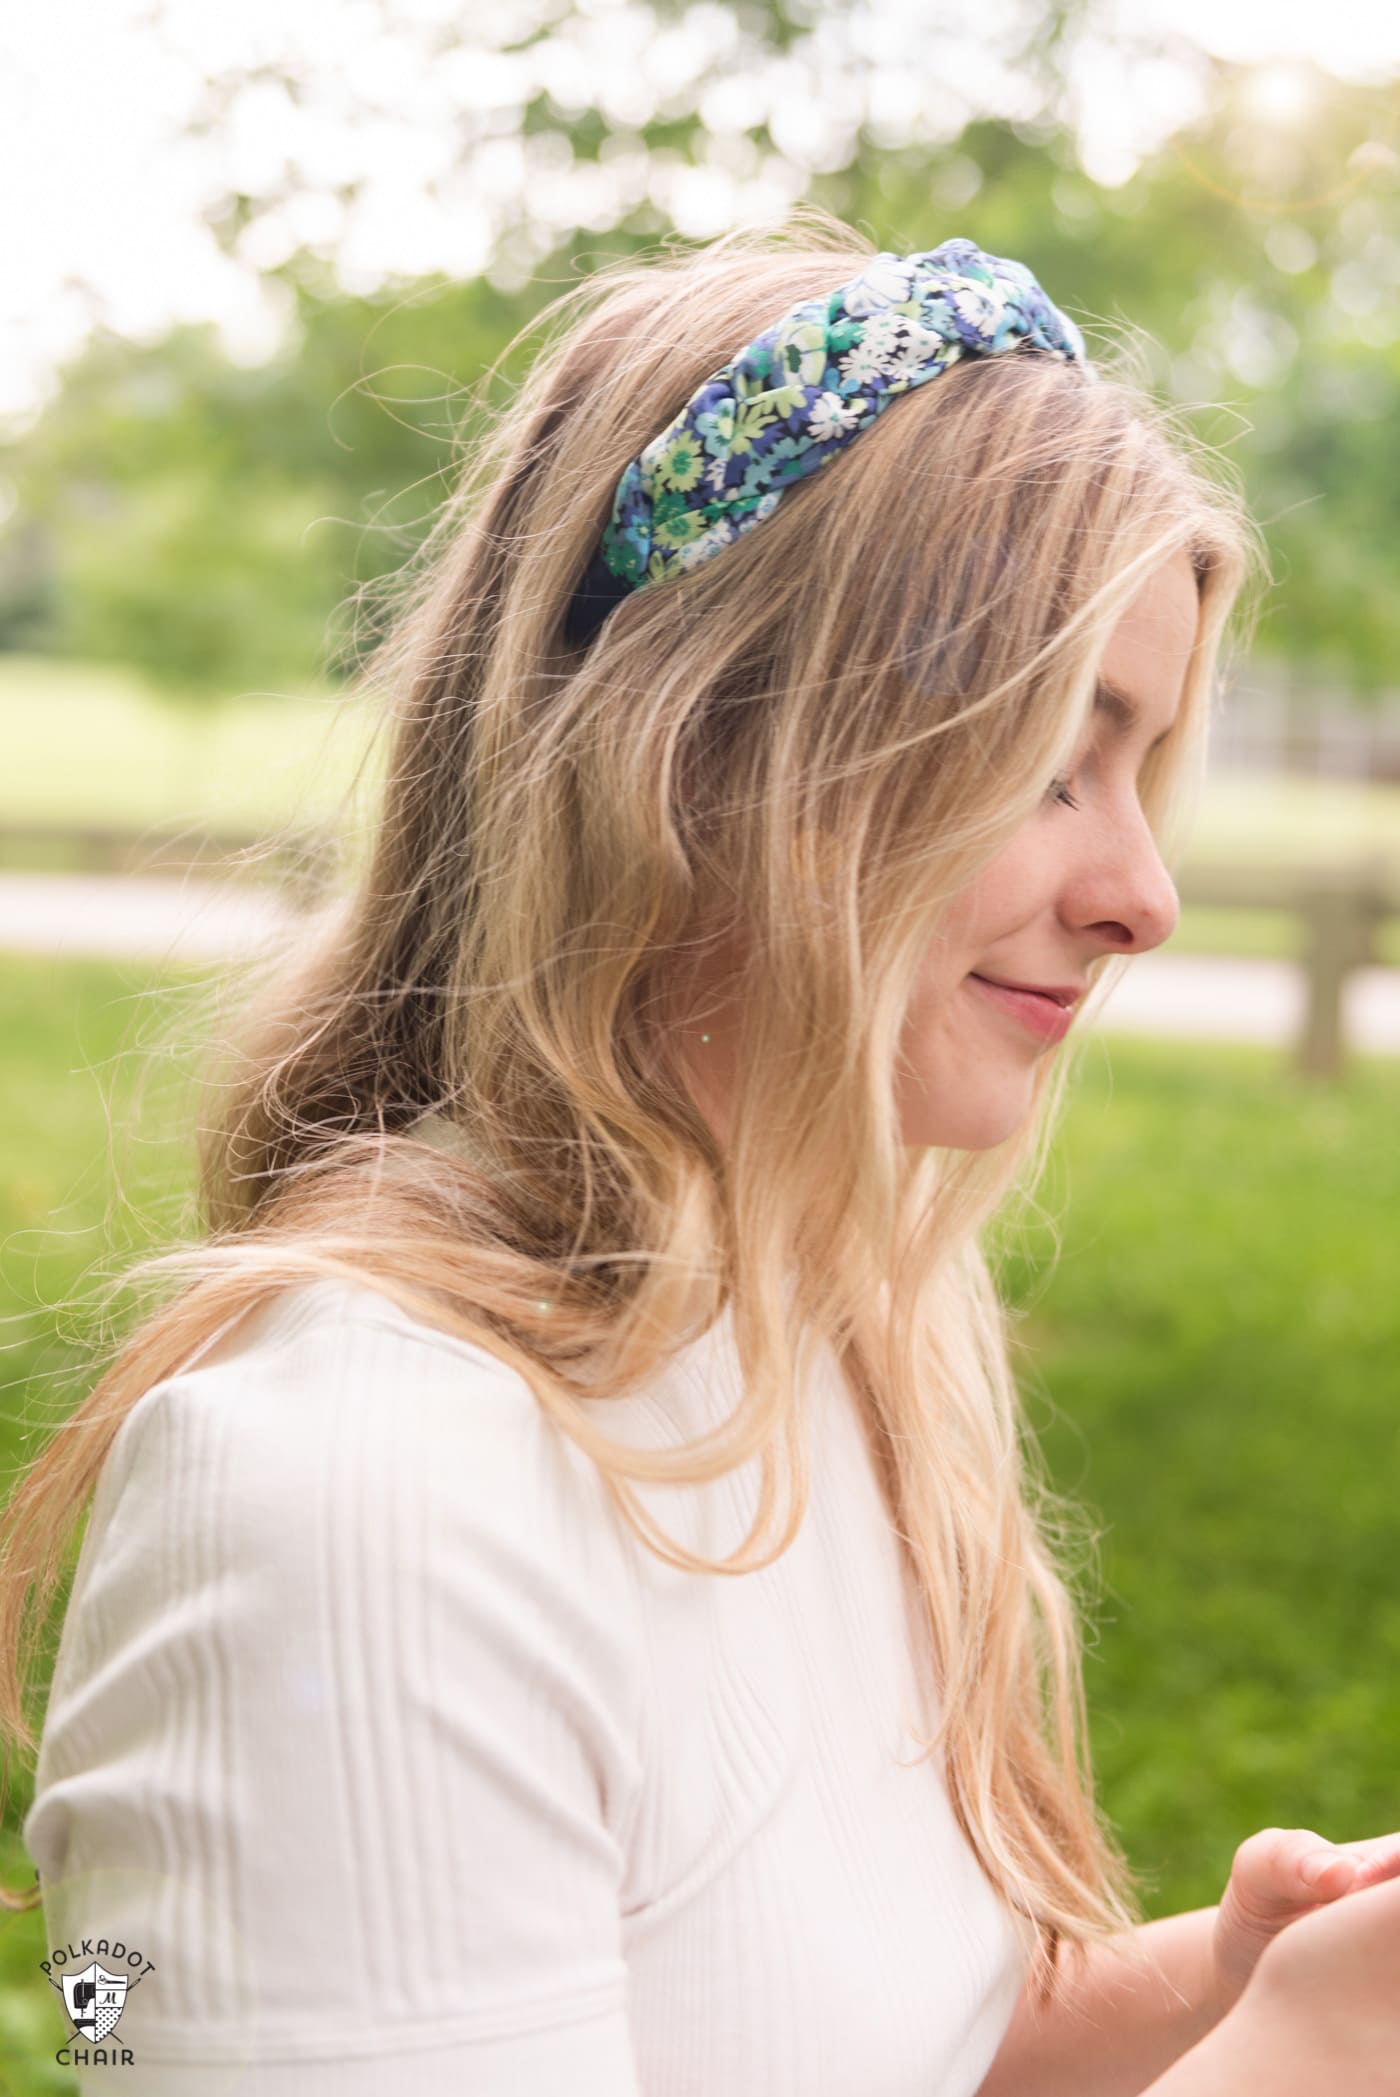
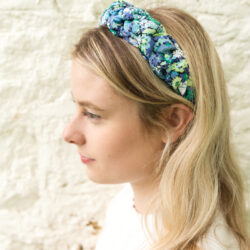
Several years ago I made a set of fabric headbands out of Liberty fabrics to take on a trip to London with me. My daughter was looking at them recently and asked me if I could make a similar headband but with braided fabric. Also, she wanted it “puffy”.
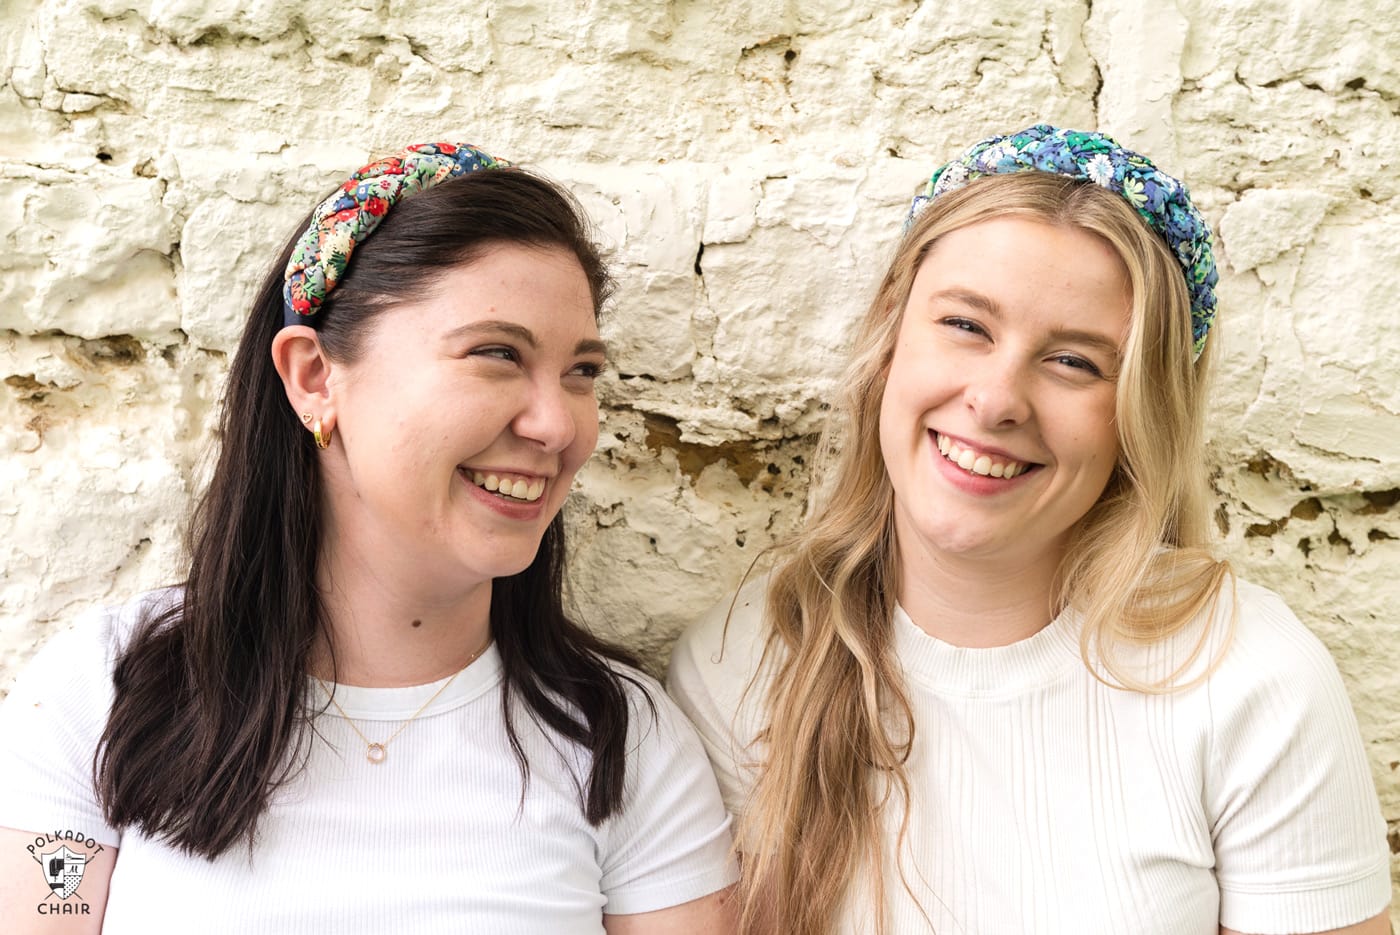
Happy to take on the challenge, I figured out how to make braided headbands, and am happy to share with you how to do it today.
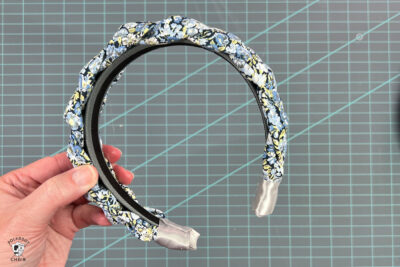
About the Headbands
These headbands are made by braiding 3 pieces of sewn fabric together and gluing them to a purchased headband.

They are lightly padded. We didn’t want them to be too “poofy” so just went with one layer of fusible fleece as the lining.
What Fabric Should I Use?
I used Liberty Lawn fabric. Liberty lawns are high-quality cotton fabrics that are a bit more lightweight than traditional quilting cotton fabrics. The threads are finely woven giving the fabric a nice finish and sheen.
You could use quilting cotton or silk for this project as well. I plan to make some of an older silk scarf I own. If you make them with silk, I recommend adding a layer of Shape Flex interfacing to the fabric before you adhere it to the fusible fleece.
Video Instructions
I’ve created a short video walking you through some of the steps to create the headbands.
We have also uploaded the video tutorial to the Polka Dot Chair YouTube Channel.
Supplies Required
- One Fat Quarter of Fabric
- Fusible fleece (piece at least 8″ x 20″)
- Heavy Duty Thread – I used Mettler Cordonette
- Hot Glue Gun & Glue
- Turning Tubes (not required but make the job so much easier)
- Purchased Headband (these are the ones we used)
Braided Padded Headband Sewing Pattern
Equipment
- Tube Turners Make turning the fabric right side out so much easier
supplies
- 1 Fat Quarter Fabric If you want your headband made from 3 different fabrics, you'll need to buy 3 fat quarters.
- 1 Piece Fusbile Fleece At least 8" x 20"
- 1 Spool Heavy Duty Thread I used METTLER Cordonette
- 1 1" Wide Headband These are the headbands I used, any 1" headband will work.
- 1 Yard 1" wide satin ribbon
Instructions
Cutting
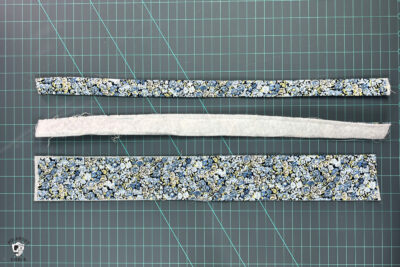
- From Fabric Cut:3 pieces each 2 1/2" x 20"From Fusible Fleece Cut:3 pieces each 2 1/2" x 20"
Prep
- Apply fusible fleece to the wrong side of all 3 pieces of fabric
Sewing
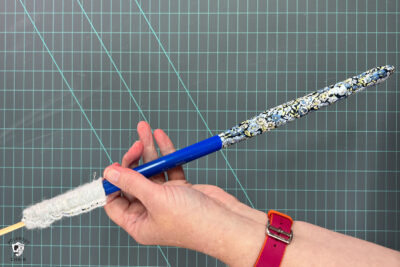
- Fold the fabric piece in half right sides facing and sew with a 1/4" seam allowance down the long side and one short side. Repeat with other two pieces of fabric.

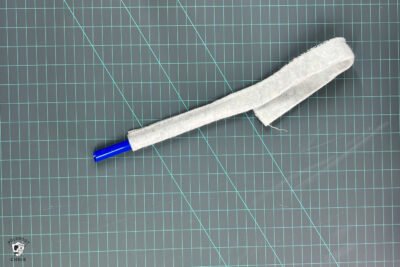
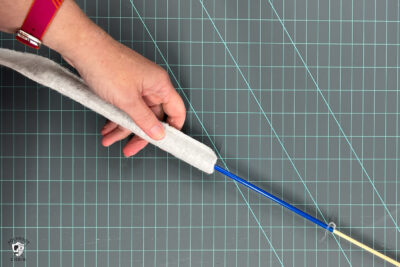
- Using a tube turner, or another method. Turn the fabric right side out.
- To use the tube turner, insert the wider tube into the sewn fabric. Use the smaller piece to push the sewn short end of the fabric into the tube.
- Keep pushing the fabric into the tube until it is right side out.
- Press with the seam allowance in the center. Make sure your seam allowance is flat.
Assembly
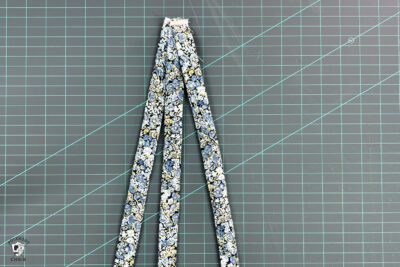
- Sew the 3 strips together along one end. This will help you braid the fabric.
- Clip the sewn end of the strips to the end of a quilt ruler. Begin braiding the same way you would braid hair. When you get to the end, secure with another clip and sew the ends together.

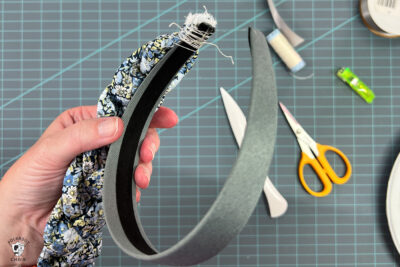
- Using hot glue, glue one end of the braided fabric to the end of the purchased headband.
- After the glue has cooled, use heavy-duty thread to wrap the ends of the fabric around the end of the headband. Wrap the thread about 3/4" to 1" up from the end of the headband.
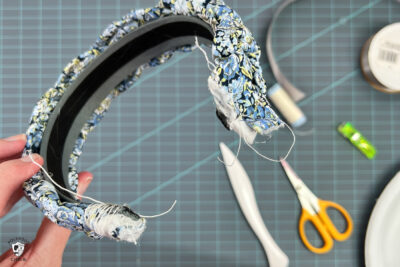
- Glue the fabric to the headband, you may need to stretch the braided fabric a bit to get it to "mold" over the headband.
- When you get to the other end, wrap the end with heavy-duty thread.
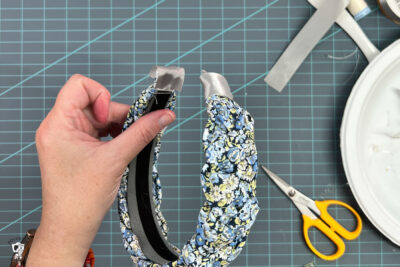
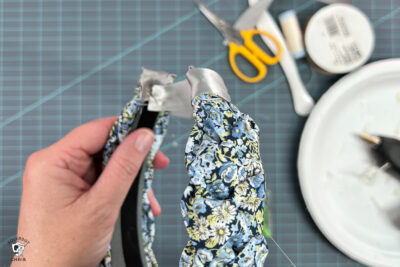
- Cut a piece of 1" wide satin ribbon to about 1 1/2". Glue it over the tip of the headband.
- Wrap another piece of ribbon around the end of the headband so that it covers the raw edges of the ribbon and the thread. Glue in place on the back of the headband. Trim away any excess ribbon.
- The heat from the glue will finish the ends of the ribbon so you don't need to worry about the ribbon fraying


You May Also Like: