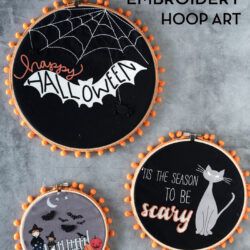
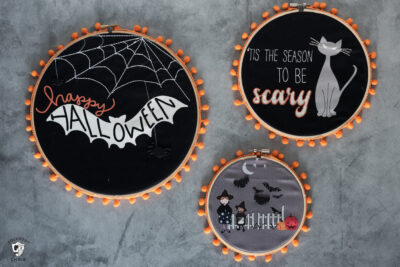
Halloween Fabric Embroidery Hoop Art
Create a unique piece of embroidery hoop art with this fun Halloween craft idea. Turn a portion of your favorite Halloween fabric into a cute wall hanging for Halloween.
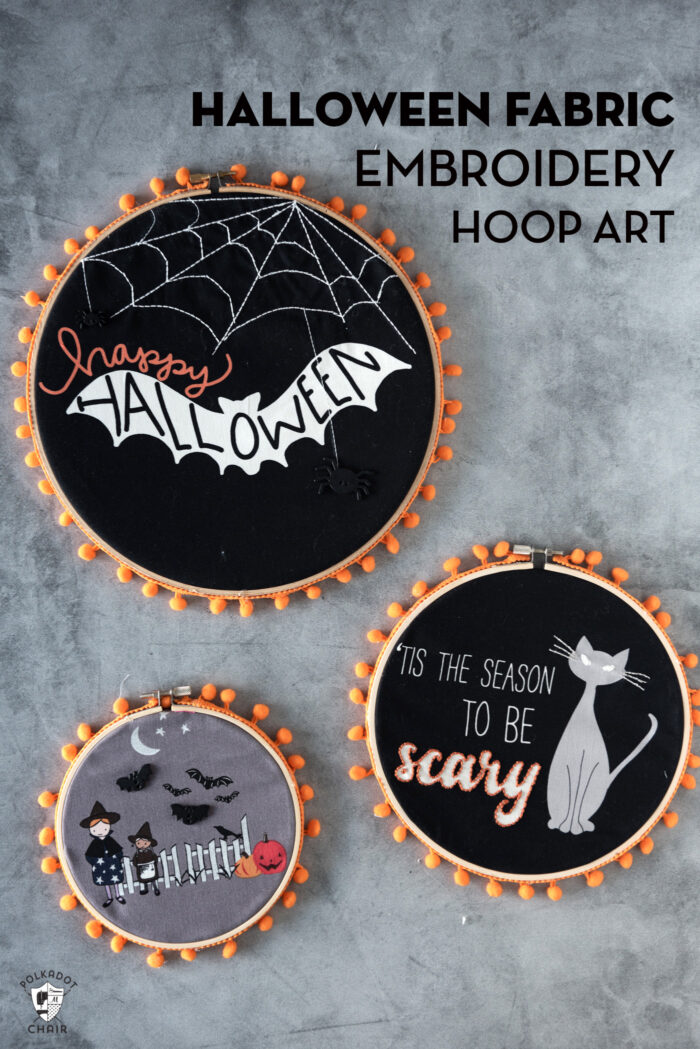
In September, I taught a few classes at the Garden of Quilts event in Utah. One of my classes was called “Panels to Embroidery Hoop Art.” The idea behind the course was that you could save yourself some time when creating Embroidery art by using quilting fabric (more specifically, fabric panels).
Using Quilt Panels for Embroidery Projects
Many fabric collections feature some type of panel print. Most quilt panels are designed to be turned into stuffed toys, cheater quilts, or tote bags. I thought it would be fun to think of another way to create with a quilt panel and use it to make a Halloween decoration.
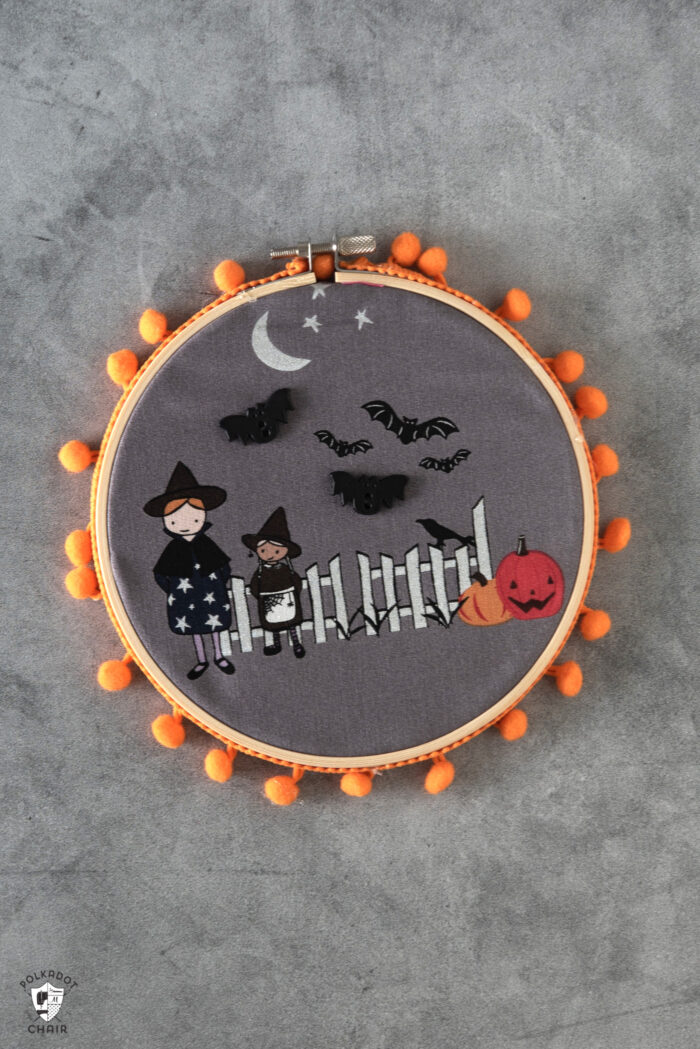
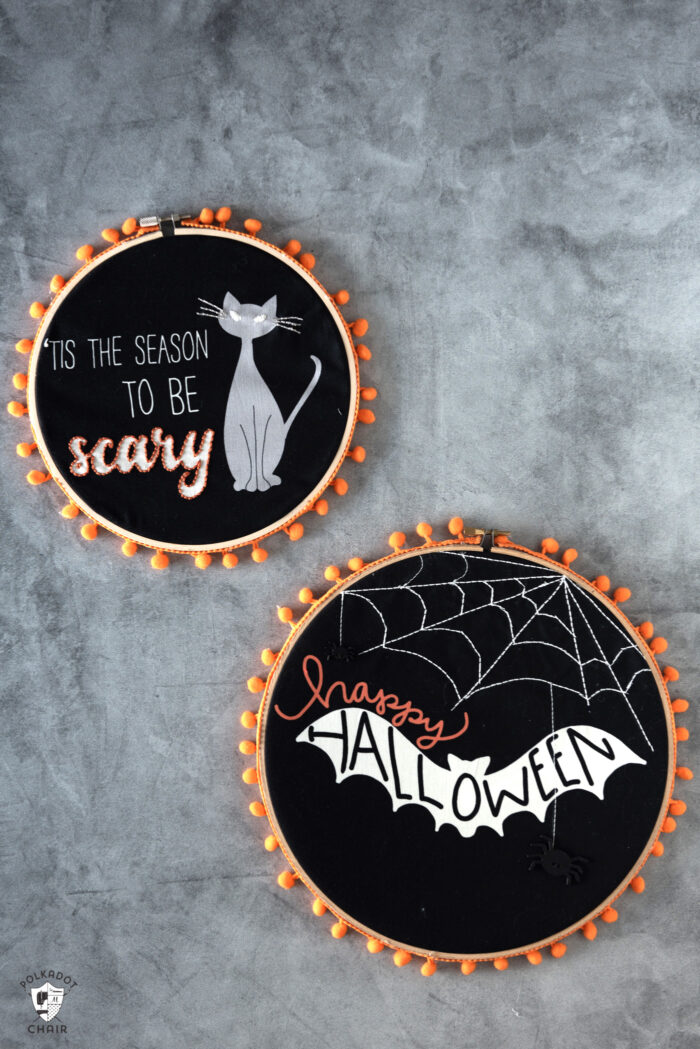
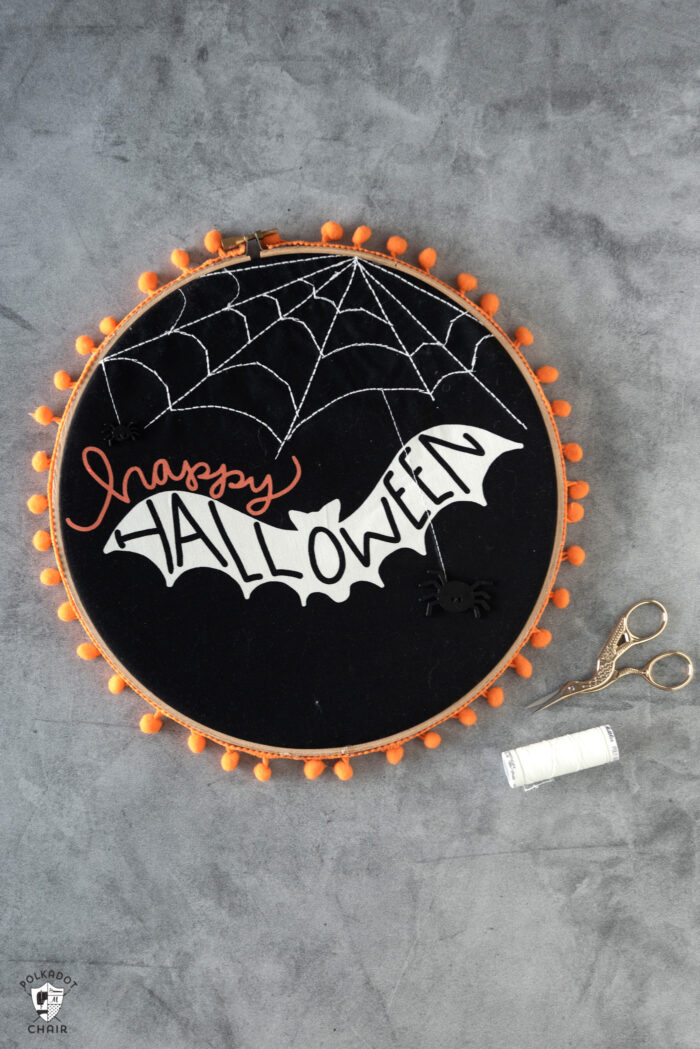
You do not need to use a fabric panel either. This small hoop was created by fussy cutting a section of the main print in the Spooky Hollow fabric collection. Choose your favorite fabric print and add a bit of extra detail with some novelty buttons, as I’ve done here.
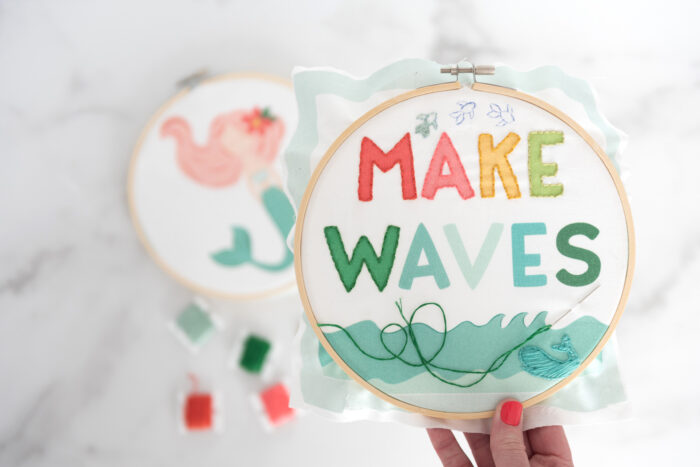
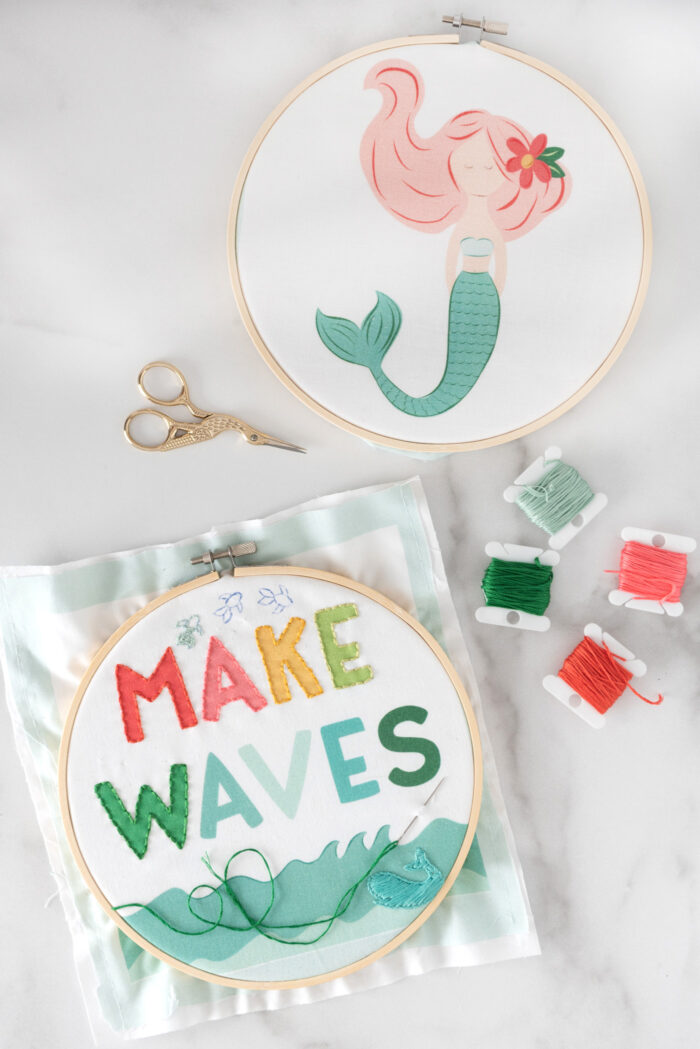
You could also do this with ANY fabric collection for any time of year. I am also working on a few embroidery hoops using my Ahoy! Mermaids fabric. These would be so cute to use as decor in a kid’s room, in my opinion.
To create this type of wall decor, all you need to do is add a bit of extra texture and detail using embroidery thread, buttons, or fabric trims.
I realize that many quilting cotton fabric prints come and go from stores quickly. If the fabrics featured in today’s post are no longer available (you’re stumbling onto this post years later), you can use this technique on ANY fabric panel. Every year fabric companies release dozens of ADORABLE Halloween fabric lines; my guess is there will always be one out there that you’ll want to use.
Embellishment Ideas
Here are some ideas of ways to embellish your fabric to create a framed embroidery hoop.
- Add detail using your sewing machine and contrasting thread.
- Outlining letters using a simple backstitch.
- Using a lazy daisy stitch to add flowers.
- Embellishing key parts of the design with french knots.
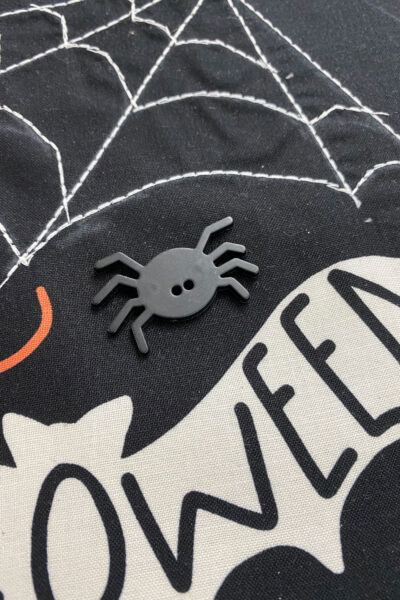
- Adding novetly buttons.
- Decorating the outside of the hoop with pom pom or other trim.
- Adding outline details using metallic embroidery thread.
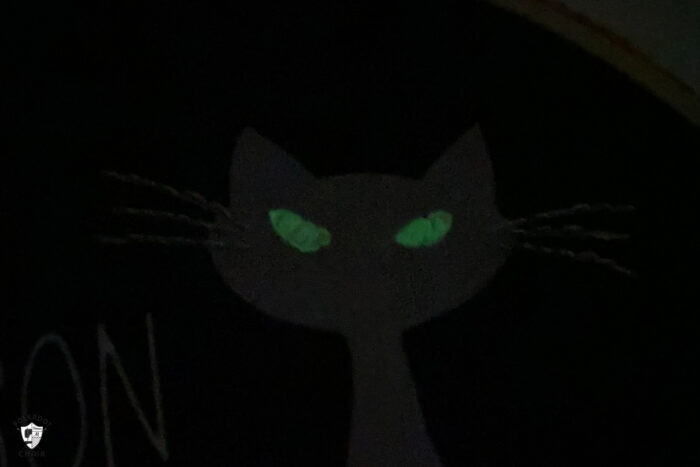
Using Glow in the Dark Thread
Since my project was designed for Halloween, I thought it would be fun to try out some glow-in-the-dark thread!
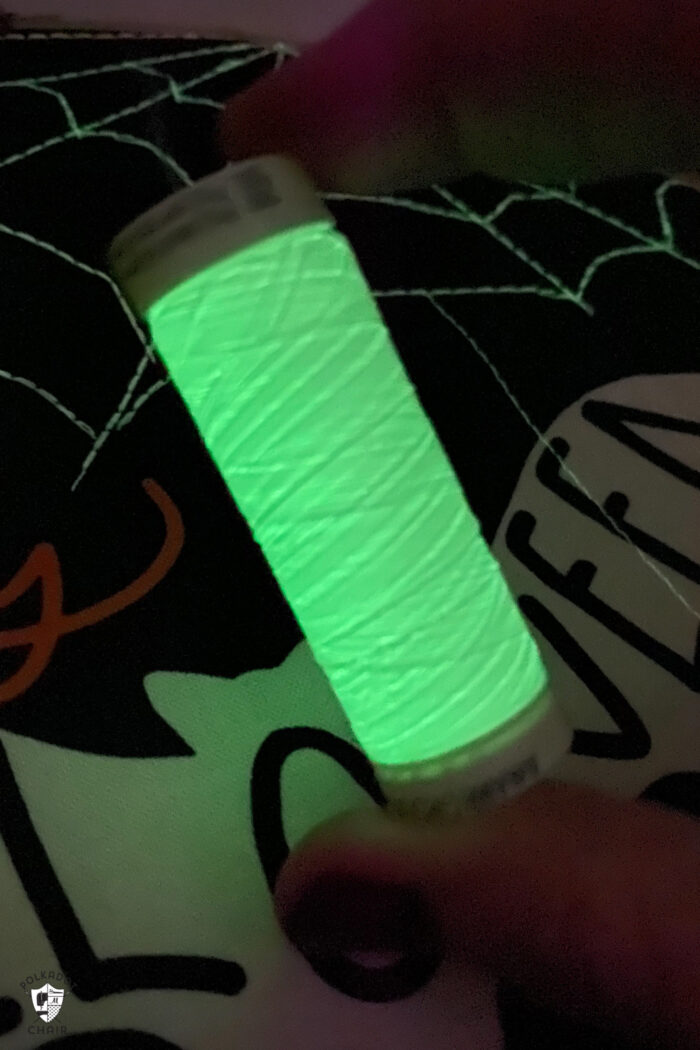
Glow in the dark thread is just that thread that glows in the dark! The thread used in this project is Poly Glow by METTLER. I have to say I am VERY impressed with how well this thread glows! It’s like a tiny glow stick!
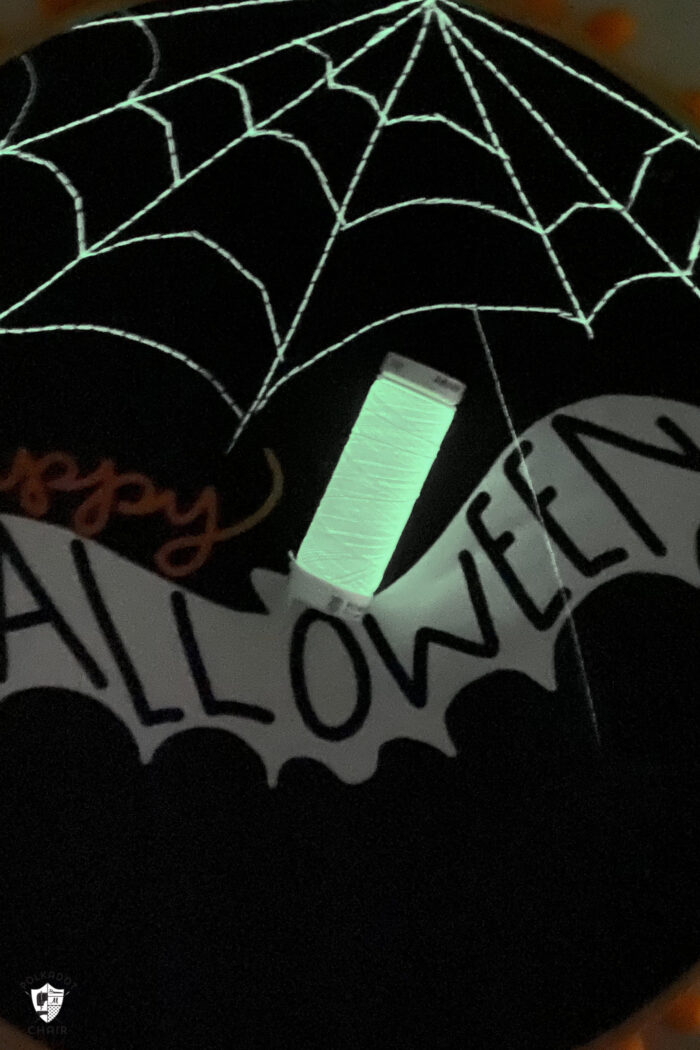
The thread also adds a lot of texture to your project. You can use it in a sewing machine as I did for the spiderwebs. Or hand sew with it as I did for the cat eyes on the medium hoop.

Halloween Fabric Embroidery Hoop Art
supplies
- 1 piece Halloween Fabric to Fit your Embroidery Hoop Mine are from the Spooky Hollow Fabric Quilt Panel
- 1 Embroidery Hoop Sized to fit your material.
- 1 spool Glow in the Dark Thread I used METTLER PolyGlow
- 1 piece Felt or Scrapbook Paper To cover the back of the hoop when finished
- 1 piece Lightweight Fusible Interfacing The same size as your fabric
- 1 Yard Small Pom Pom Trim optional
Instructions
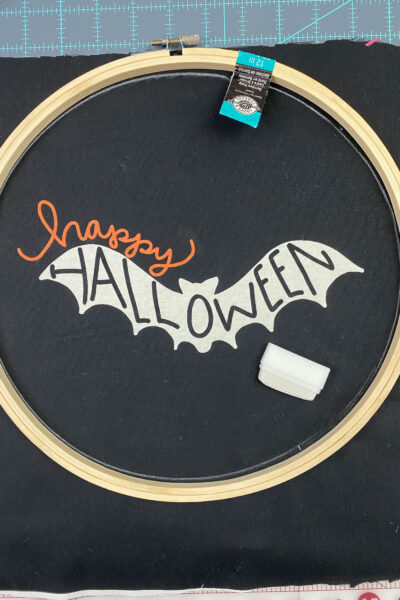
Design
- There are several ways to complete this project many of them will depend on which Halloween fabric you are working with. Take a few minutes and brainstorm some ideas of ways to add extra details and texture to your piece of fabric.These may include:Adding buttonsAdd Hand Embroidery StitchesDrawing Spiderwebs and StitchingAdding Pom PomsI made 3 embroidery hoops in various sizes with the intention of hanging them together on my wall.
Prep
- Iron the fusible interfacing onto the back of your fabric piece. This will stabilize your fabric as you add stitches. You can choose to leave off this step, however, if you're working with dark embroidery thread on a white fabric, the thread may show through. The fabric may also pucker from the extra tension from the added threads.
- Lay your embroidery hoop over your fabric piece. Using a fabric safe marking pen or chalk, mark the section of the fabric that you would like to show in the hoop.

- If you are adding hand embroidery stitches, then you can now place your design in the hoop.
- TIP:I find it easier when working with large embroidery hoops to hand stitch individual sections of my design using smaller embroidery hoops, then placing the design in a large hoop when I'm done.
Hand Embroidery
- If you are adding hand embroidery to your hoops, outline the image (or words) on your fabric with a simple backstitch using 6 strands of embroidery floss.
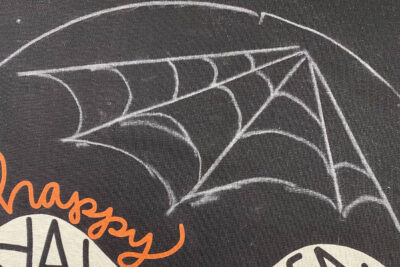
Machine Stitched Spiderwebs
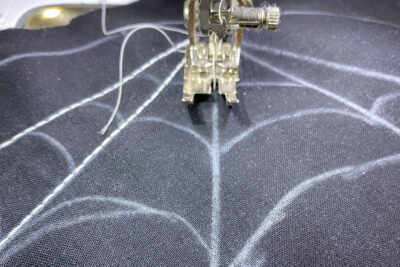
- To add spiderwebs to your design, use a piece of chalk or fabric-safe pen and draw a spiderweb on your fabric.

- Begin by drawing the straight lines which should all begin at one point, then go back and draw in the swoops to connect the straight lines.
- Load the glow-in-the-dark thread into your sewing machine.
- On your machine select a "Hand Stitch" stitch. On my BERNINA it is stitch #6. Many machines have some sort of "hand" stitch. Stitch #6 on the BERNINA is called a triple stitch. It is a stitch that backstitches every time it moves forward.Set your stitch length at 4-5.
- If you don't have a hand stitch looking stitch on your machine, length your stitch length to a 4 or 5, and be sure to backstitch several times.
- Sew along the lines you drew. Be sure to pivot at the sections where the spiderweb lines intersect. I find it easiest to first sew the straight lines, then go back in and sew the swoops between the lines.
Finishing
- Embellish with buttons if desired.
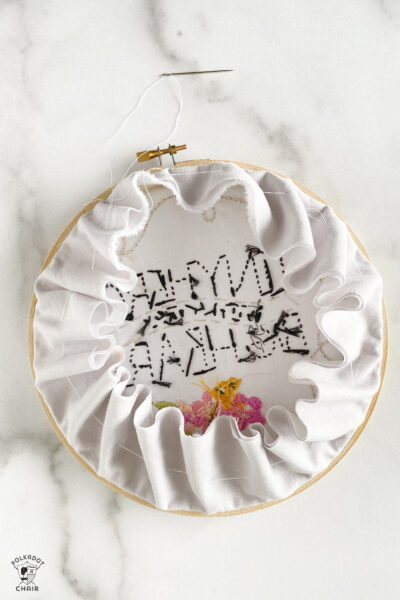
- To finish, cut your fabric about 2" larger than your hoop. Using a heavy duty thread and a hand sewing needle, gather up the fabric on the back so it lays flat. (Photo is from another project, but the process is exactly the same).
- Cut a piece of felt or scrapbook paper the same size as your hoop. Attach to the back with hot glue.
- If desired, glue small pom pom trim on the outside edge of the embroidery hoop.

Great ideas, Melissa. Thanks so much.