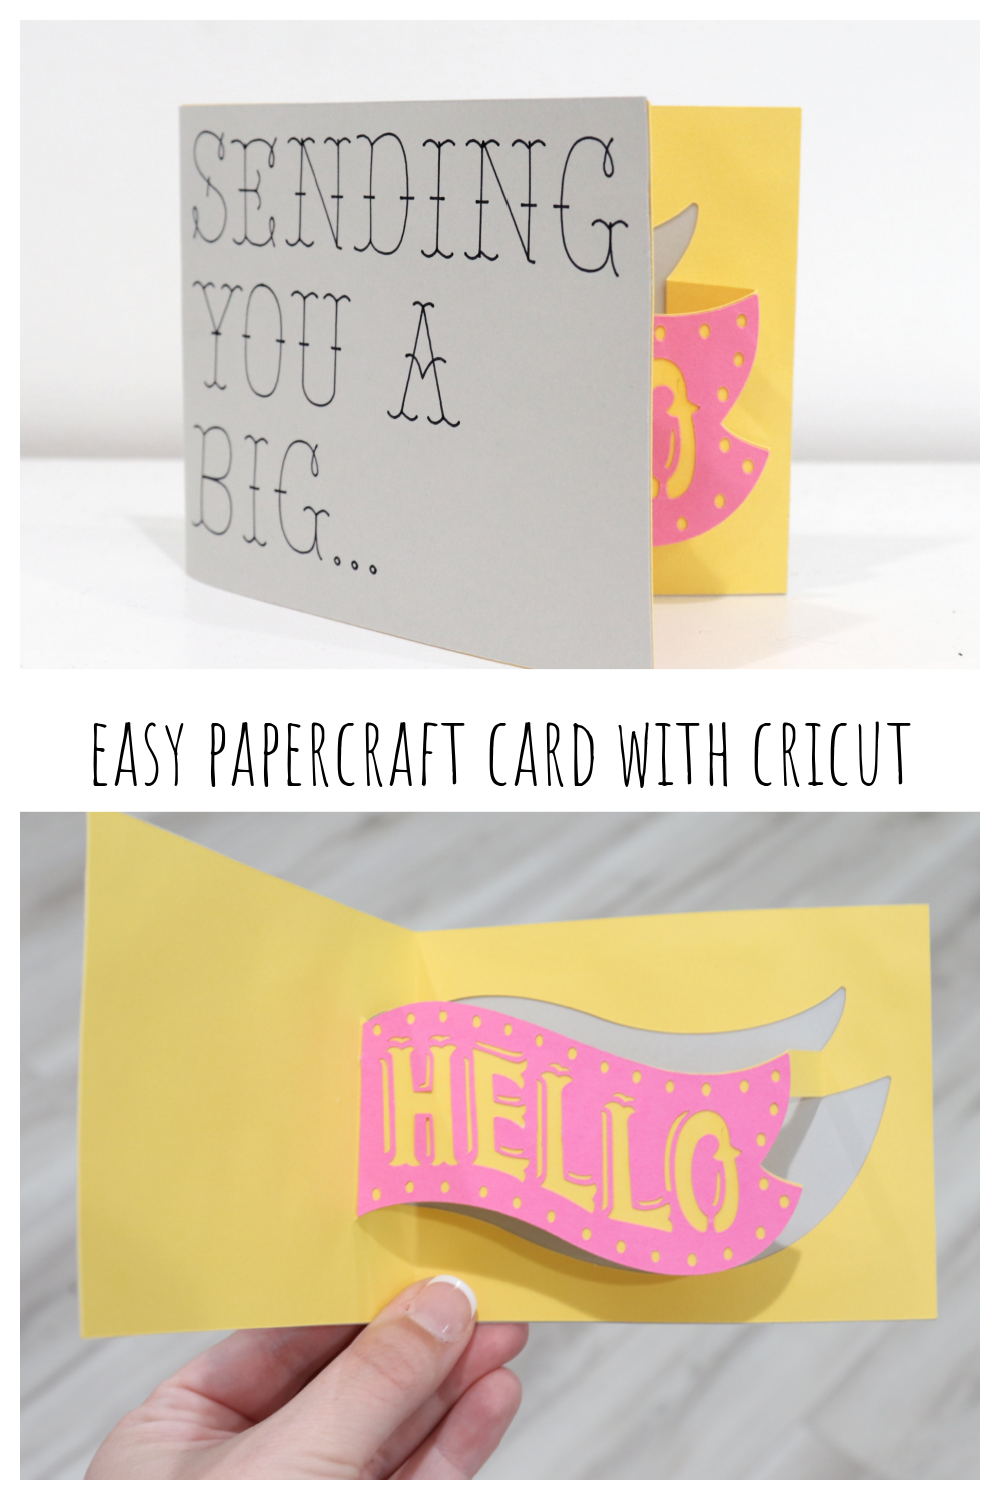
Easy Papercraft Card with the Cricut Maker 3
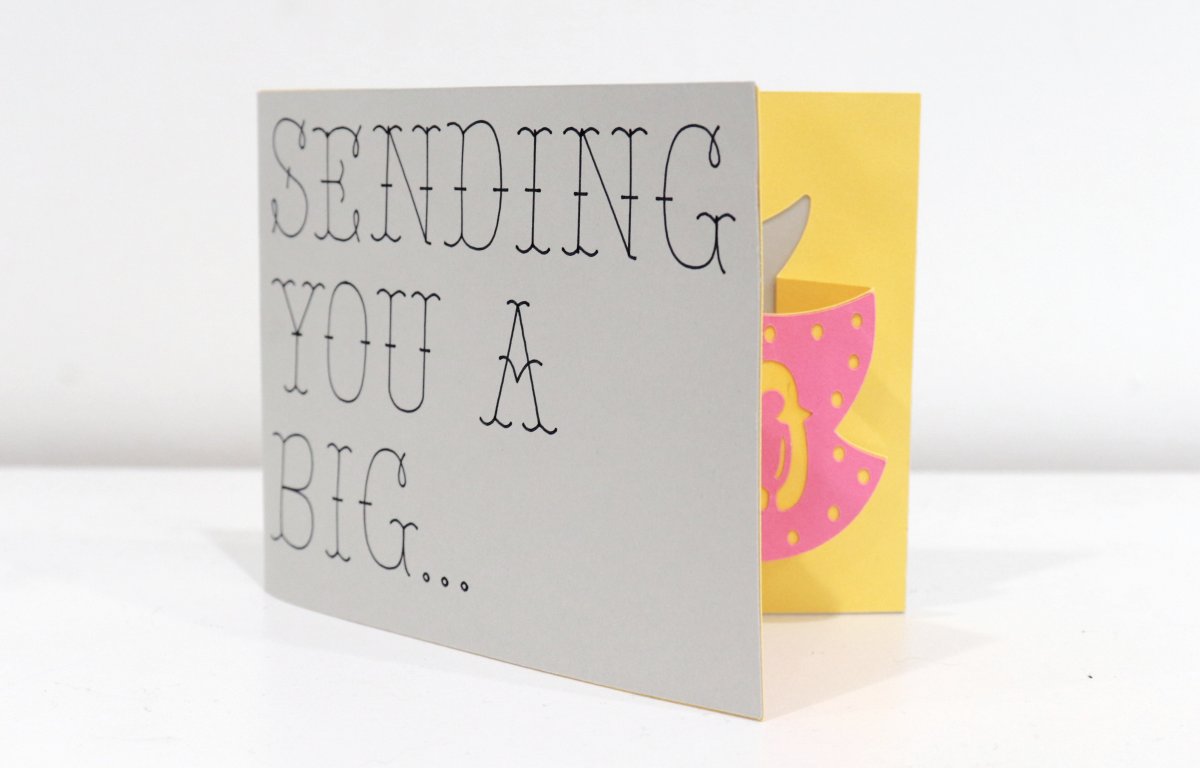
Over the past few weeks, my 13-year-old son has become very interested in papercrafting. He’s been downloading templates online, then cutting, folding, and gluing paper or cardstock to create all kinds of characters from his favorite video games. He’s loving the hobby, except that he’s not a huge fan of all the cutting involved. So, he asked me if there were ways to create papercraft projects using our Cricut. Here’s the first project we tried; a very simple “hello” card that we gave to my grandmother. It’s a great beginner level papercraft project that anyone can do, and it turns out so sweet; take a look!
You’ll need:
Cardstock, your choice of 3 colors
Glue or Adhesive tape
Cricut Design Space: Hello Pop-Up Card
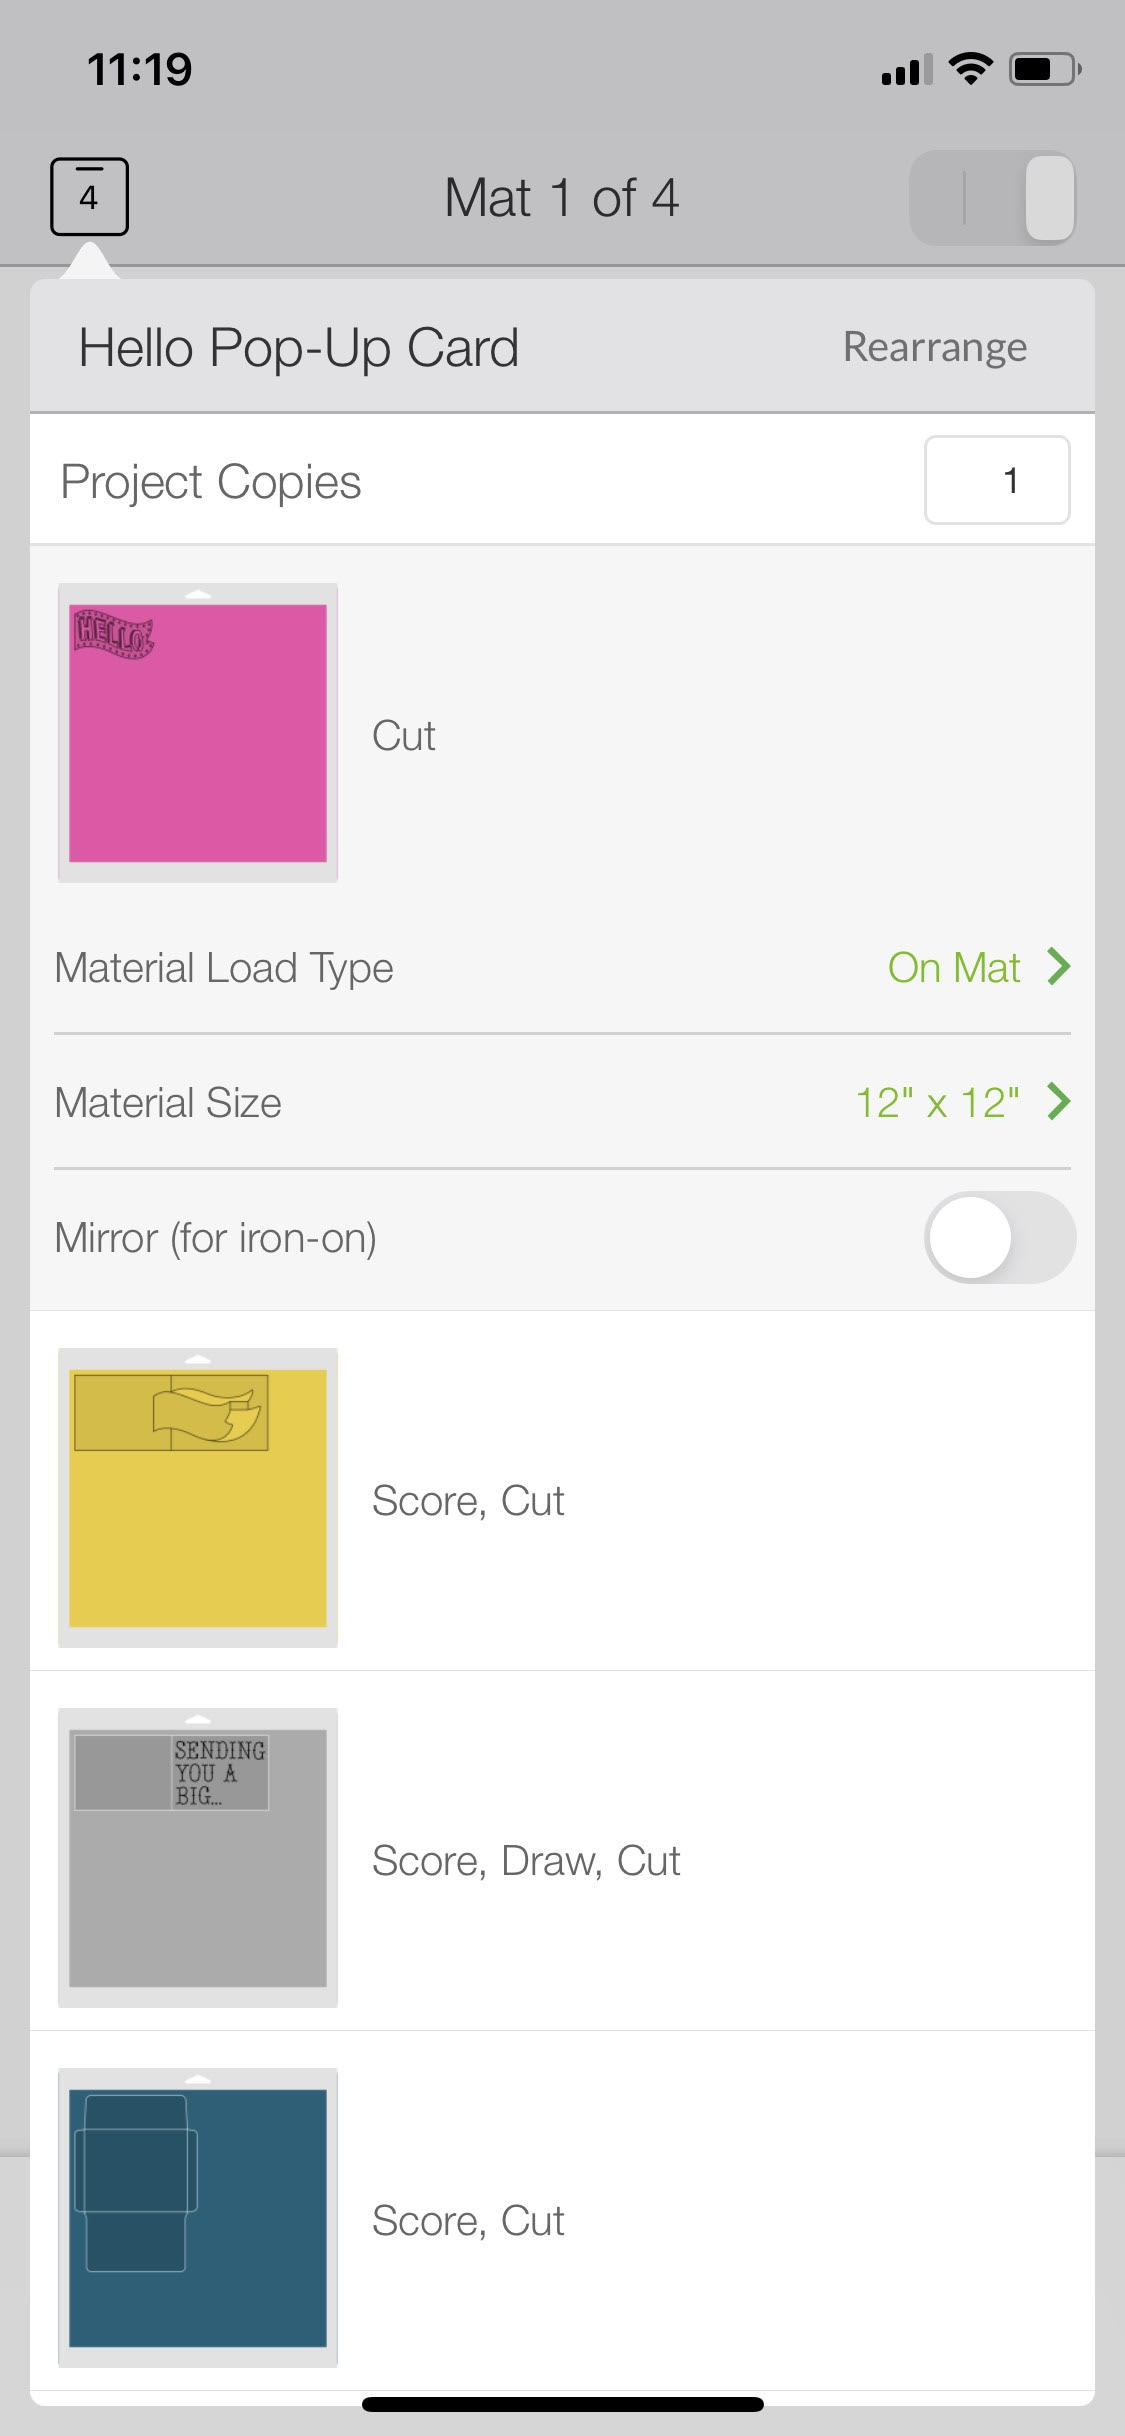
Step 1: Open this project in Cricut Design Space.
Choose, “Make it,” and you’ll see that the software divides all the pieces of the project into mats by color.
Step 2: Follow the prompts to load and cut the first mat.
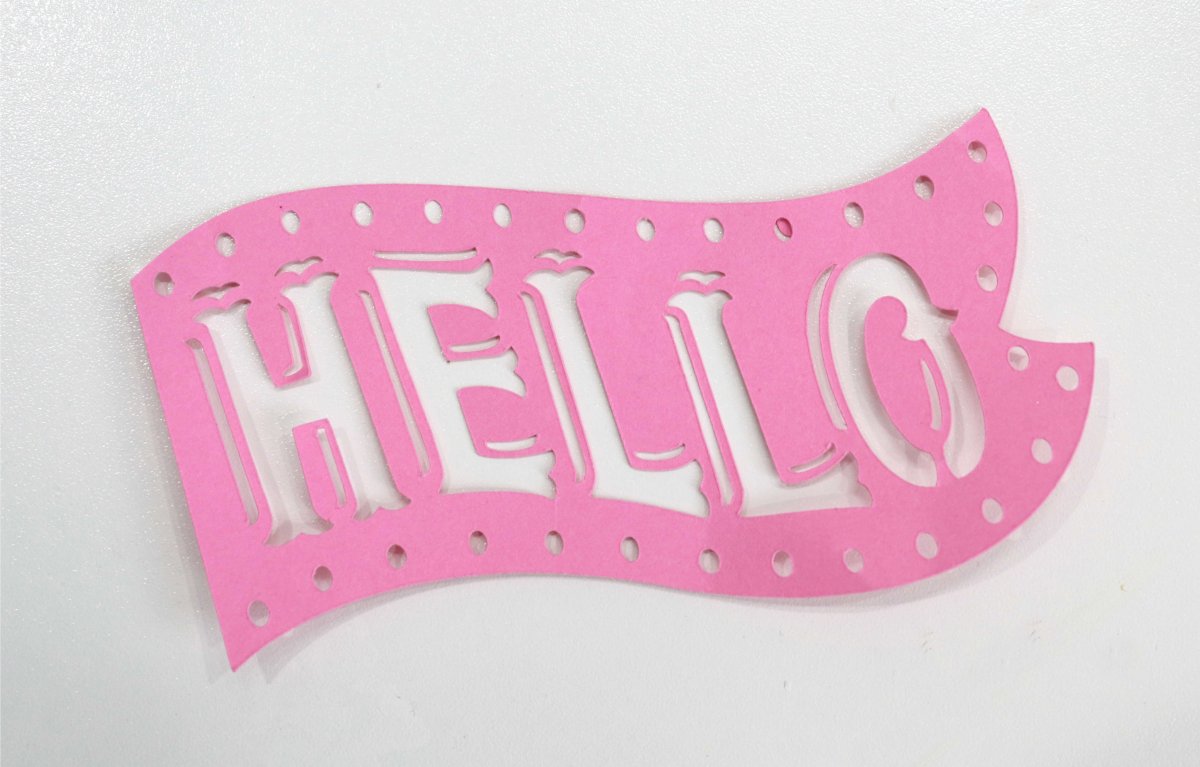
This one is the inner “hello” design, and is just a basic (although intricate) cut. We chose pink because we liked the look of the sample card, but you can choose any color of cardstock you like.

Remove the cardstock from the mat and set aside your cut piece. Make sure to weed out all the tiny spots.
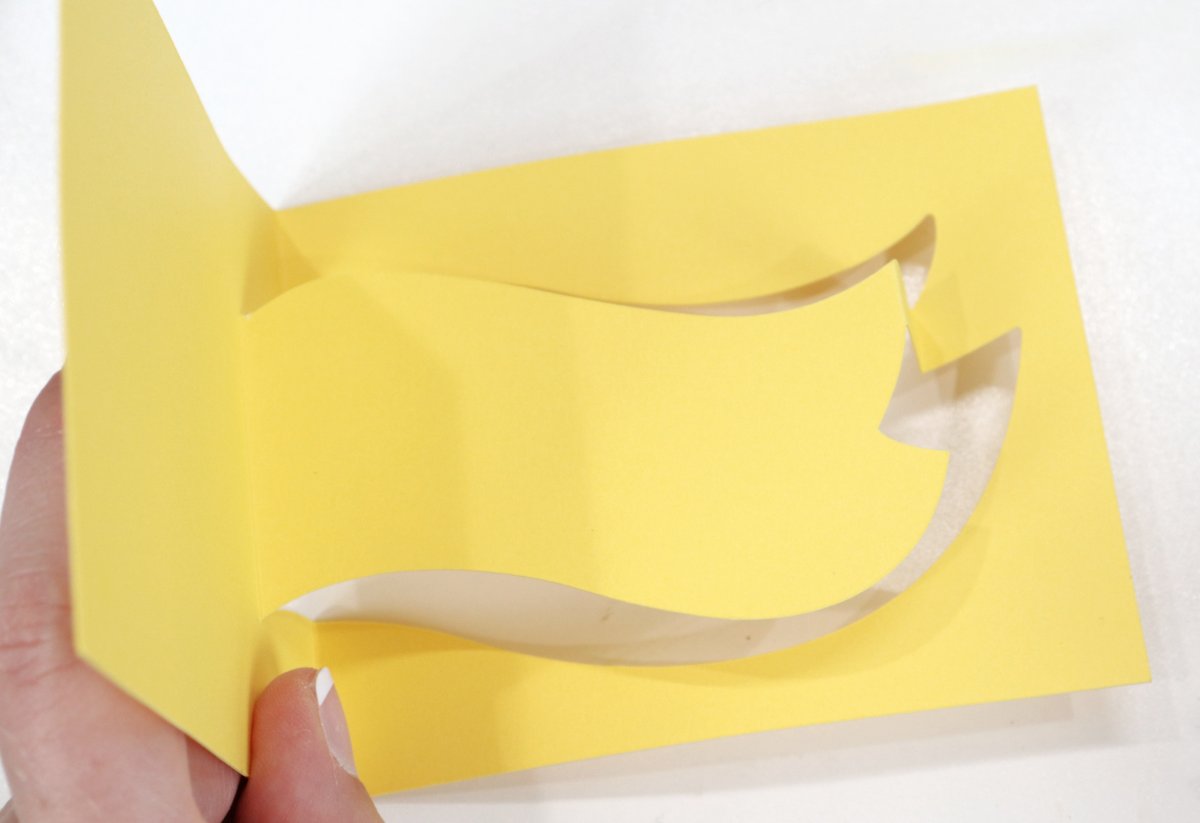
Step 3: Follow the prompts to load, cut, and score the second mat.
This time, you’ll get a long rectangle with a banner shaped cutout. The app will prompt you to start by inserting the scoring wheel tool, then after the scoring is complete, you’ll be prompted to replace it with the fine blade for the cutting. Gently fold along the scored lines so that your banner pops out, as shown below.
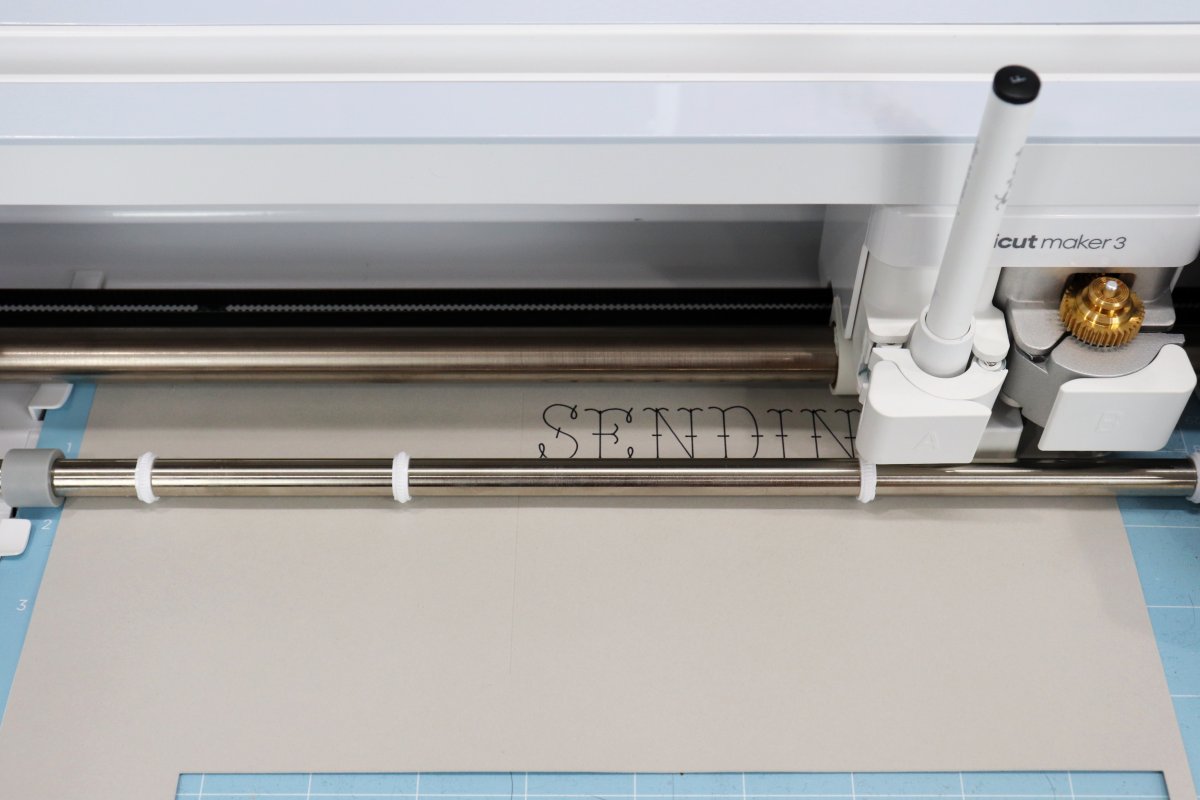
Step 4: Repeat for the third mat.
This time, you’ll also be taking advantage of the Cricut Maker’s ability to draw! You’ll insert the pen into the holder in clamp A, and place the scoring tool in B. The machine will, score and draw, then you’ll replace the scoring tool with the blade for the final cut.
Remove the card from the mat and fold along the scored line.

Now, you have all three pieces of the card itself. Use adhesive tape or glue to attach them. The folded yellow inner card goes inside the grey card, then the pink piece goes on top of the yellow banner shape (or whatever colors you choose).

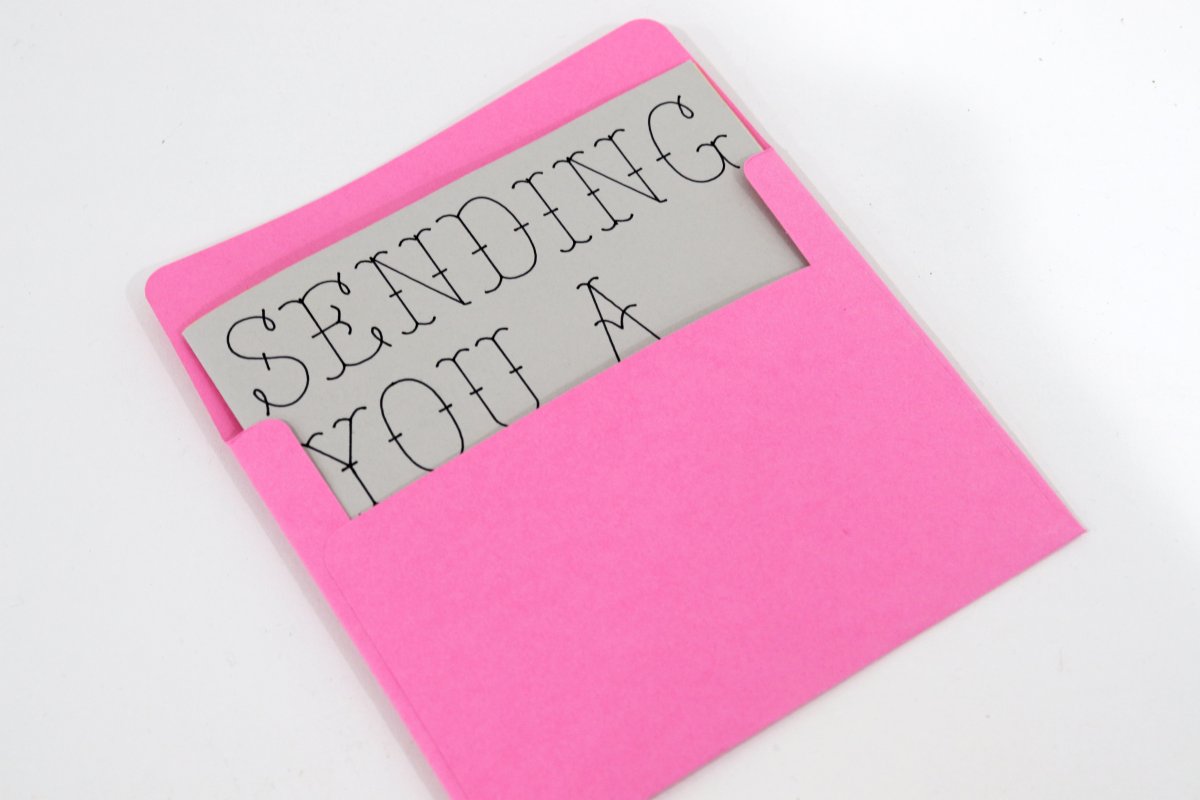
Step 5: Score and cut the final mat and form your envelope.
The final thing the Cricut cuts is the envelope. We chose to go with the pink, while the sample shows navy blue. Follow the prompts for the scoring tool and blade, then fold along the scored lines and glue the edges down to create an envelope that’s the perfect size to hold your pop-up card.
This project was really fun to assemble, and while it took a few extra steps, it was fun to see the Cricut put three of its skills to use: scoring, cutting, AND drawing! And the best part is that my grandmother loved it. If you’ve never tried a papercraft project with your Cricut, I encourage you to go for it! This is an easy one to start with, and you’re going to love how it turns out. Happy creating!