
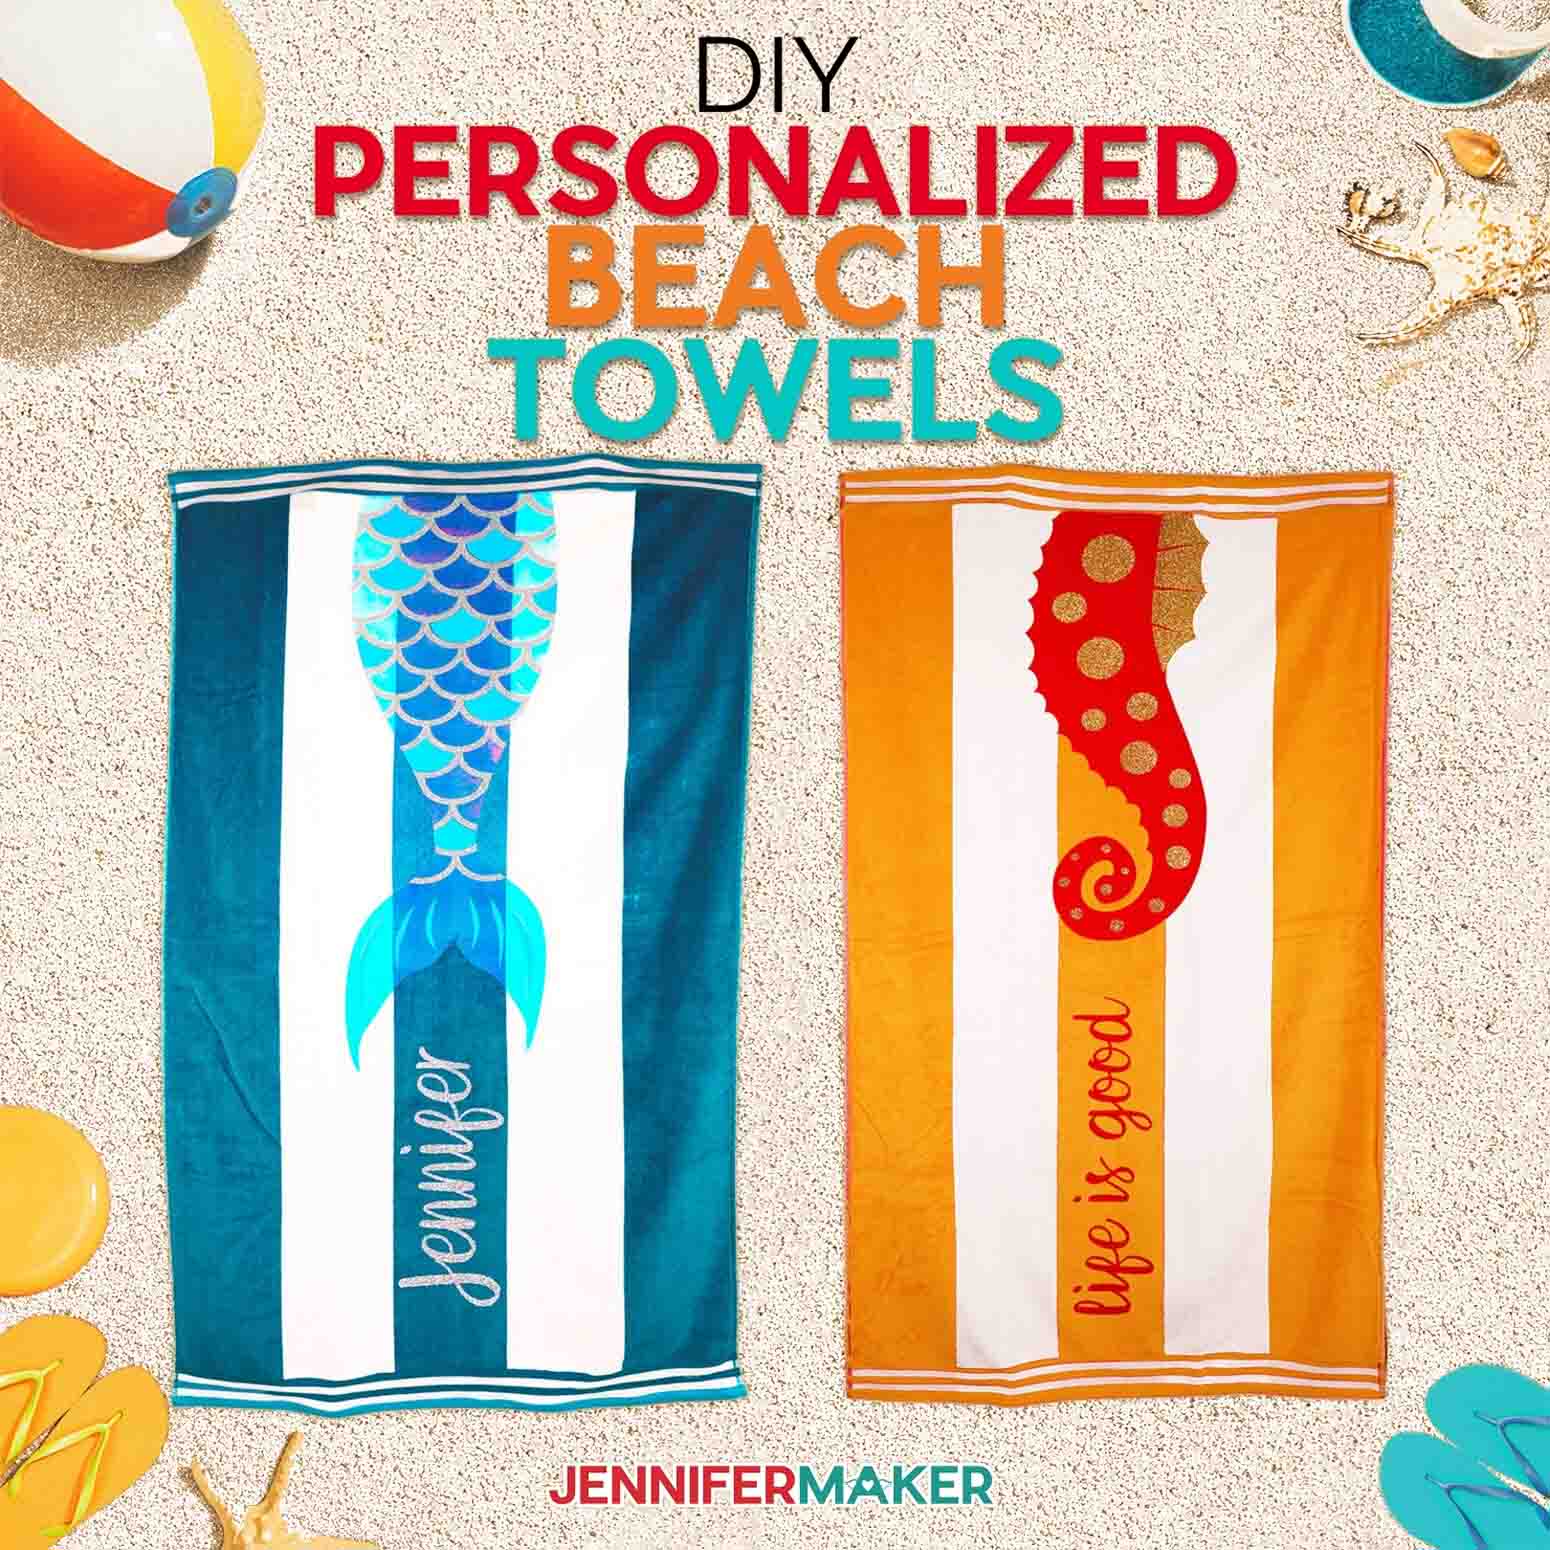
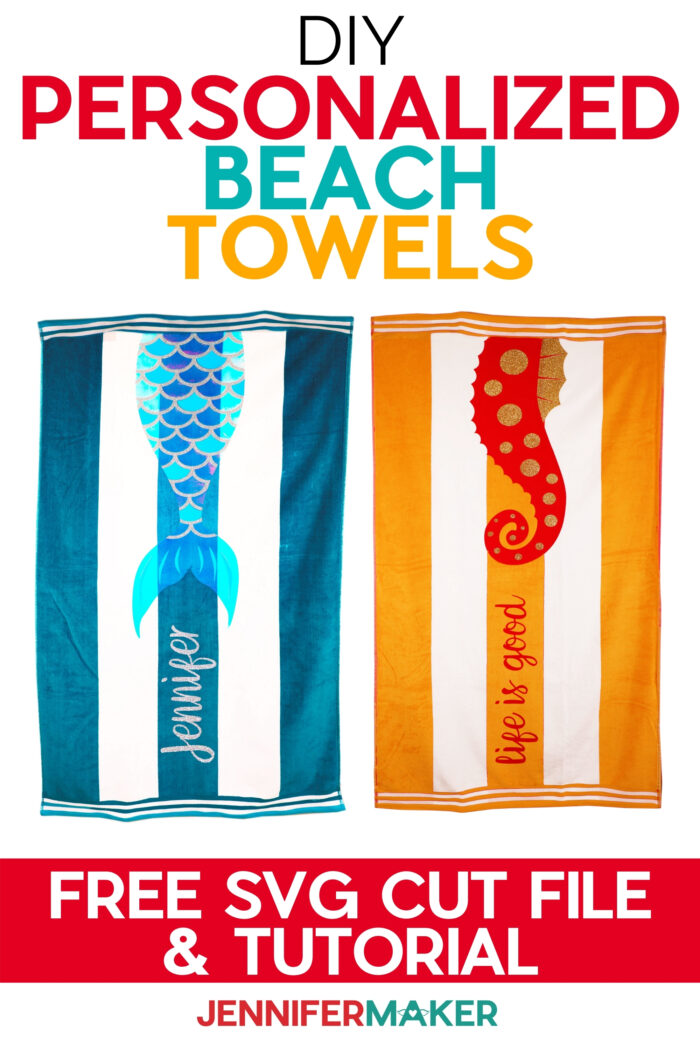
Make a splash with these DIY personalized beach towels decorated with layered Smart Iron On and cut with the Cricut Maker 3 or Cricut Explore 3!
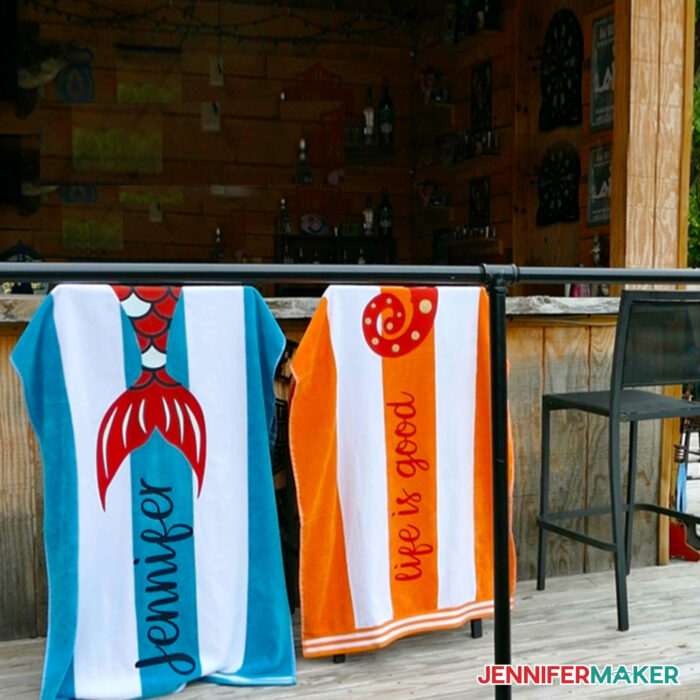
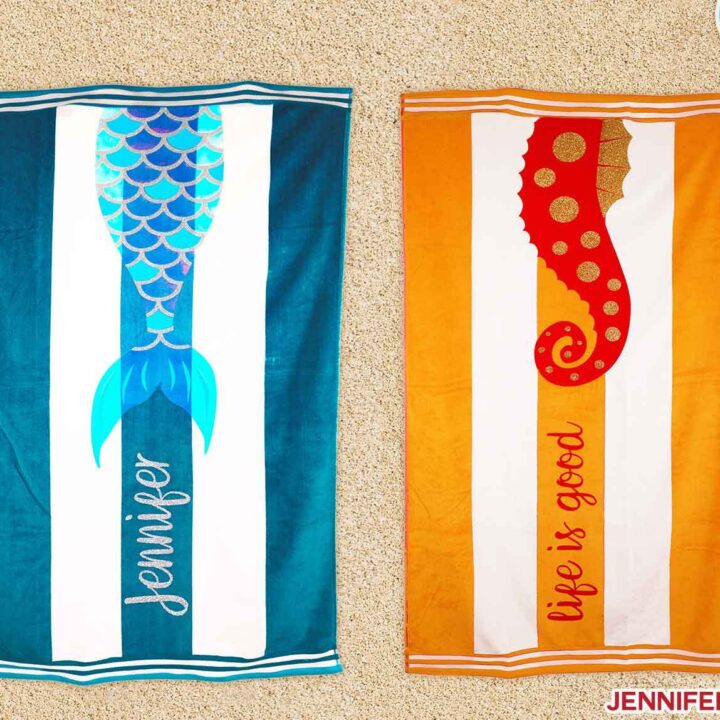
I have been having so much fun experimenting with various materials on the new Cricut 3 machines! Like the looong Smart Iron On that Cricut just introduced along with the new Cricut Explore 3 and Maker 3 machines. Oh my gosh, there is so much versatility with having the ability to make long cuts and I just had to try it on some beach towels for the summer! And look how cute these mermaid and seahorse towels are! I absolutely love how these DIY Personalized Beach Towels have turned out with Smart Iron On cut on the Cricut Maker 3.
Watch the DIY Personalized Beach Towels assembly video here:
These beach towel designs have been created for towels that measure 34″x 64″. You will want to confirm the size of your towel before cutting your design to be sure your design will not exceed the size of your towel!
For the Mermaid design, you will need Smart Iron On in the following lengths, but please remember that your length will change depending on your length of personalization!
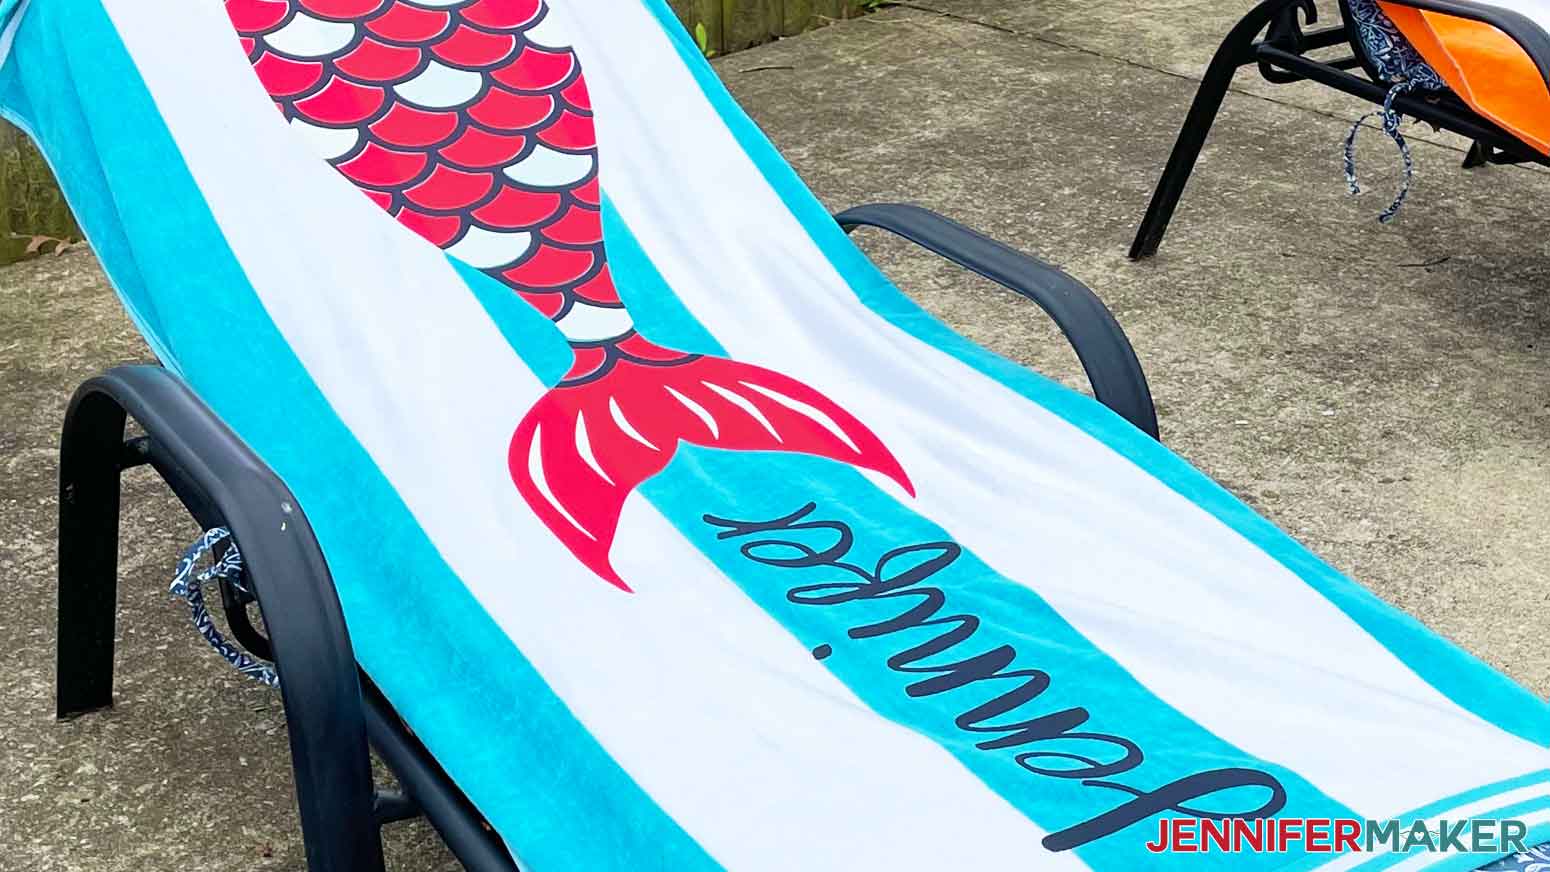
- 57.75” of Smart Iron On – Matte Blue (with the name “Jennifer” attached to the scales—your length will be different depending on name or word you use)
- 39.25” of Smart Iron On — Matte Red
- 35.25” of Smart Iron On Glitter in White (if you attach the scales and the fin pieces)
For the Seahorse design, you will need Smart Iron On in the following lengths:
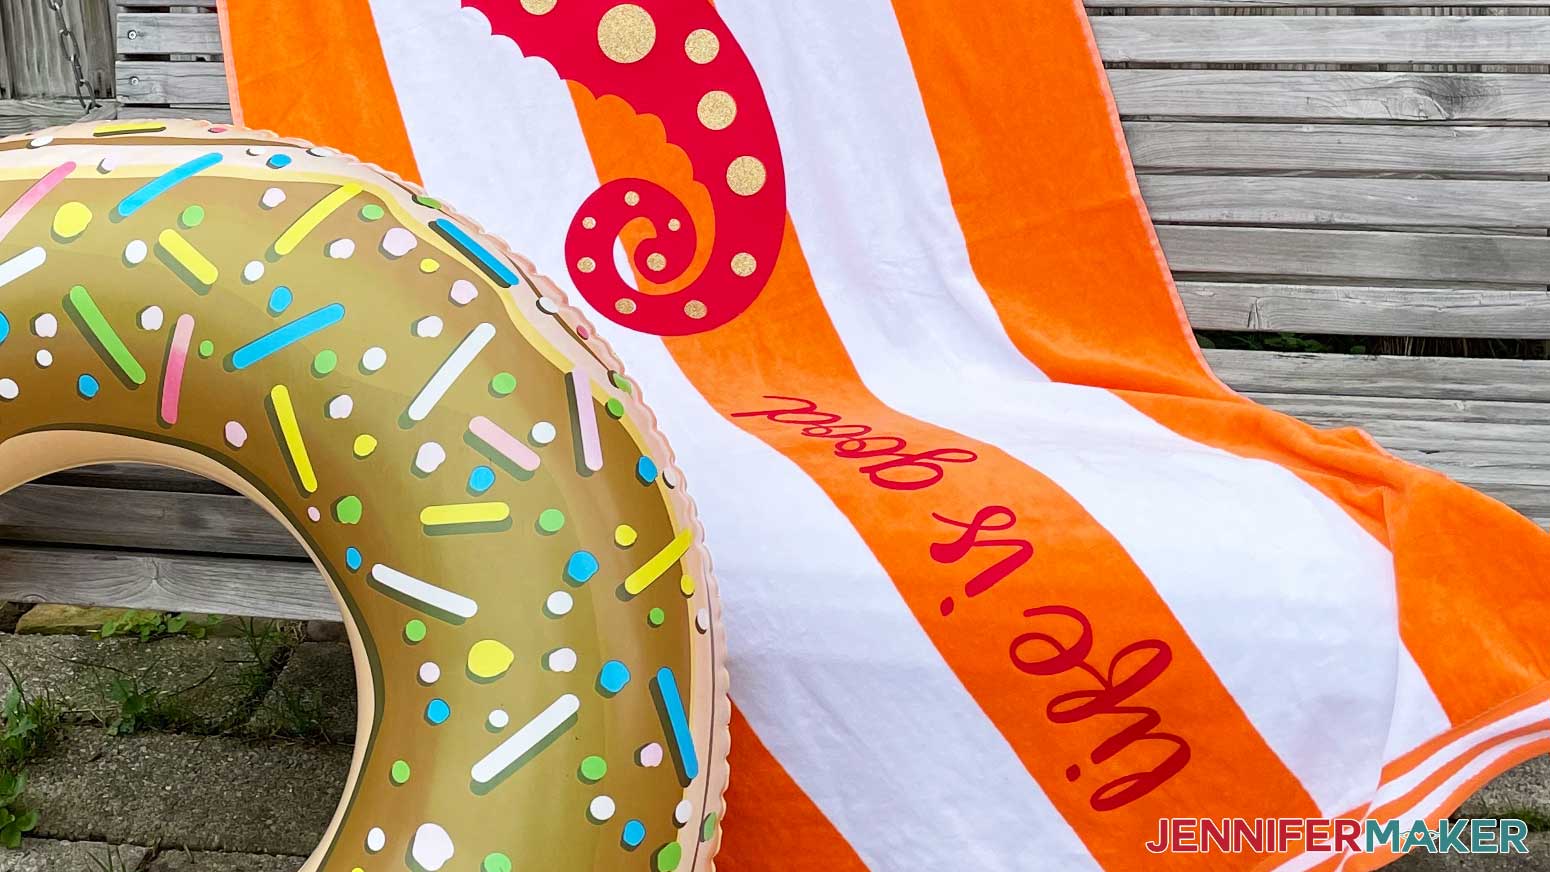
- 56.5″ of Smart Iron On in Matte Red (with the “Life is Good” quote Attached to the seahorse body – your length will be different if you change the text)
- 29.25” of Smart Iron On Glitter in Gold
Of course, you can use whatever colors of iron-on vinyl (aka heat transfer vinyl) you want!
You will also need a weeding tool to weed your designs after you cut them. This is a great thing to work on while you wait for your Cricut Easy Press, or whatever heating element you will be using, to come up to the correct temperature!
Once you have weeded your design, you want to prepare your towels by preheating them with your EasyPress or household iron by applying light pressure for five seconds. Repeat this process on all parts of your towel that will have vinyl attached.
After aligning all the iron-on vinyl pieces for your DIY Personalized Beach Towels design, then you will adhere them using your EasyPress or iron. You want to work one layer at a time, using my step-by-step directions below. If you are struggling to remove the carrier sheet, reapply heat in very small increments of 3 – 5 seconds until it does come off!
After you’ve applied all the layers, you will want to cover your entire design with the large carrier sheet from your first layer and cover your entire design. Then you will heat each section of the Mermaid or Seahorse beach towel for 12 to 15 seconds with light pressure.
The text has only been tacked to the towel once, so next, you’ll want to heat the text sections for up to 20 to 25 seconds to make sure it’s fully adhered. If your text layer is Glitter vinyl, you can increase the temperature of the EasyPress for this section up to 330ºF. If your text layer is regular Iron-On vinyl, then you’ll want your EasyPress to be 315ºF. For a household iron, you would pick a setting between Cotton and Linen. It may take some experimenting to find just the correct temperature, as individual irons do differ! Experiment!
I’m going to cut this on my new Cricut Maker 3, but you could also do it on the Cricut Explore 3. And since I’m using a roll of Smart Iron On, I’m going to use and show you how to use the Cricut Roll Holder, too! If you don’t have those, you can still make it with another cutting machine — look at my Vertical Sign tutorial to see how to piece and align your vinyl on the towel!
Let me show you how easy it is to make this wonderful DIY Personalized Beach Towels project! This post contains some affiliate links for your convenience (which means if you make a purchase after clicking a link I will earn a small commission but it won’t cost you a penny more)! Read my full disclosure policy.
Materials to Make DIY Personalized Beach Towel With Smart Iron On
View my Amazon shopping list with the exact items we used to make this project!
- 100% cotton beach towels – I used these exact ones in turquoise blue and coral orange)
- Cricut Smart Iron On Glitter – Gold (3 ft.)
- Cricut Smart Iron On Glitter – White (3 ft.)
- Cricut Smart Iron On – Matte Red (9 ft.)
- Cricut Smart Iron On – Matte Navy (3 ft.)
- Cricut Roll Holder (Optional)
- Teflon Sheet or Parchment Paper (Optional)
- Cricut EasyPress
- Cricut EasyPress Heat Mat
- Cricut Weeding Tool
- Font used: Breethy
- A method to cut your Smart Vinyl, I used the amazing Cricut Maker 3 or Cricut Explore 3, but you could also use any Cricut if you piece your vinyl
- Design #310 – My free SVG/PDF/DXF design files are available in my free resource library – get the password by filling out the form at the bottom of this page
How to Make Your Own Adorable DIY Personalized Beach Towels
DIY Personalized Beach Towels
Make a splash with these DIY personalized beach towels decorated with Smart Iron-On Vinyl and cut with the Cricut Maker 3 or Cricut Explore 3!
Materials
- 100% Cotton Beach Towels
- Cricut Smart Iron On Glitter - Gold (3 ft.)
- Cricut Smart Iron On Glitter - White (3 ft.)
- Cricut Smart Iron On - Matte Red (9 ft.)
- Cricut Smart Iron On - Matte Navy (3 ft.)
- Optional - Teflon Sheet or Parchment Paper
- Design #310 (My free SVG/PDF/DXF design files are available in my free resource library - get the password by filling out the form at the bottom of this page)
Tools
Instructions
STEP 1: GET MY FREE DIY PERSONALIZED BEACH TOWELS FILES
These DIY Personalized Beach Towels are SO easy to make thanks to the new Cricut Maker 3 and Explore 3! Both machines allow for long cuts (some Smart Materials can be cut up to 12 ft!) which make them ideal for this project!
For this tutorial, I will be using both the Maker 3 and the Explore 3, but you can make these towels with either cutting machine. If you don’t have a Cricut Explore 3 or Maker 3, you can still make these beach towels with another cutting machine -- just use the SVG versions that are already spliced to fit on 12" x 24" machine mats.
The first step is to get my DIY Personalized Beach Towels designs from my resource library -- it's design #310.
TIP: If you are not sure how to upload an SVG cut file to Cricut Design Space, watch this helpful video training series I made. If you are on an iPad or iPhone, here is how to download and upload SVG files to the Cricut Design Space app.
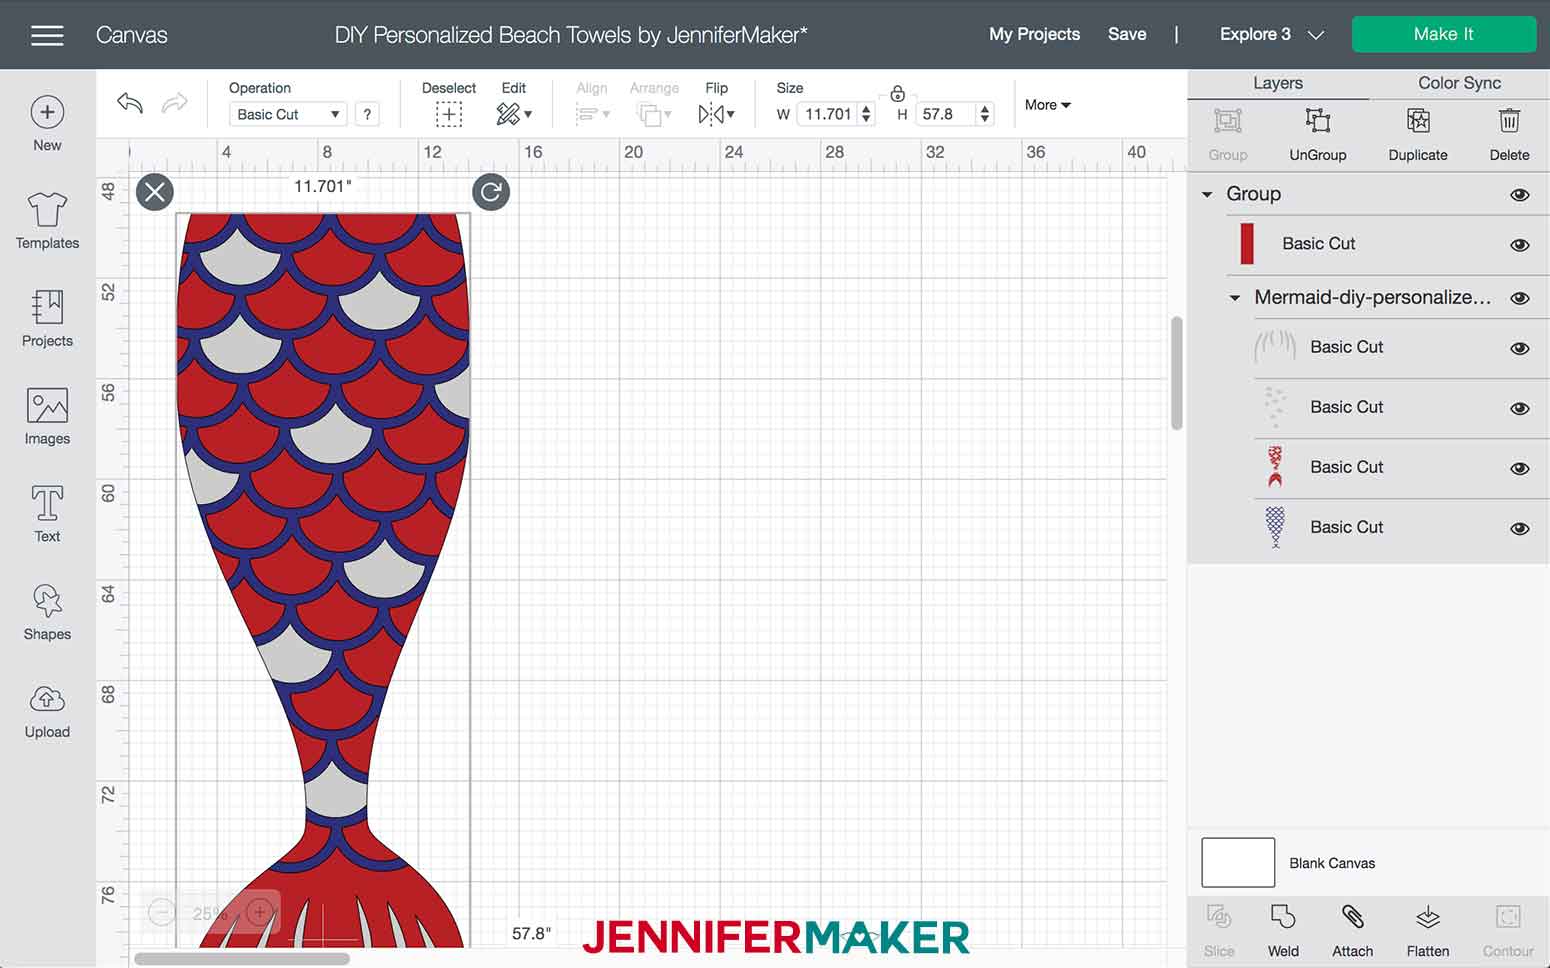
This is what my DIY Personalized Beach Towels SVG files look like when they are uploaded to Cricut Design Space. 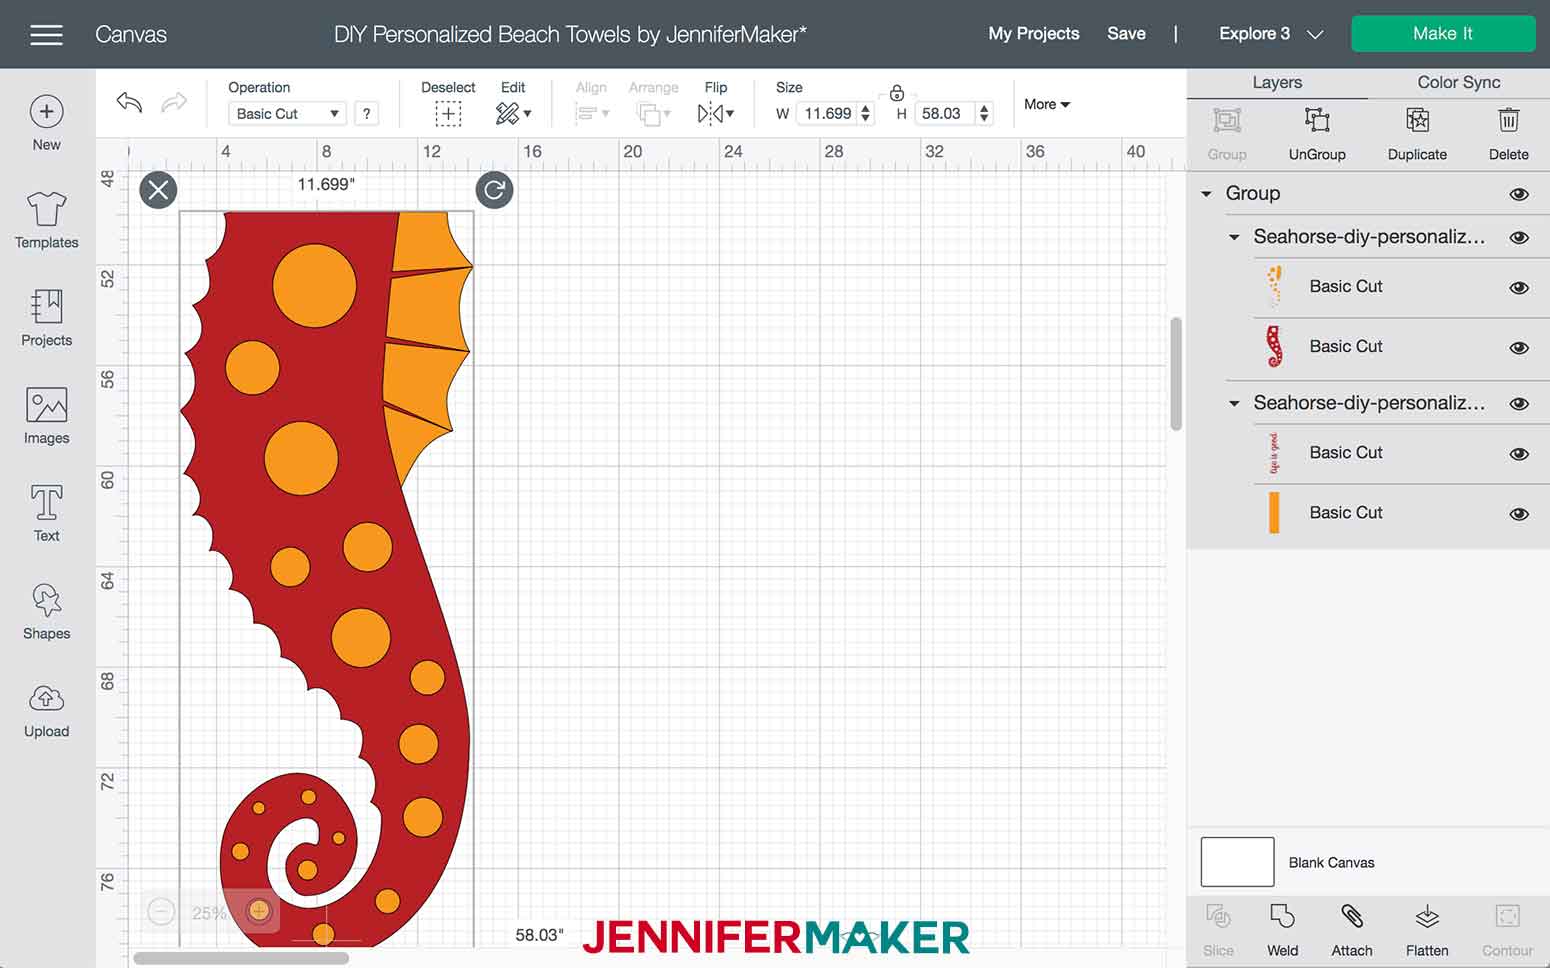
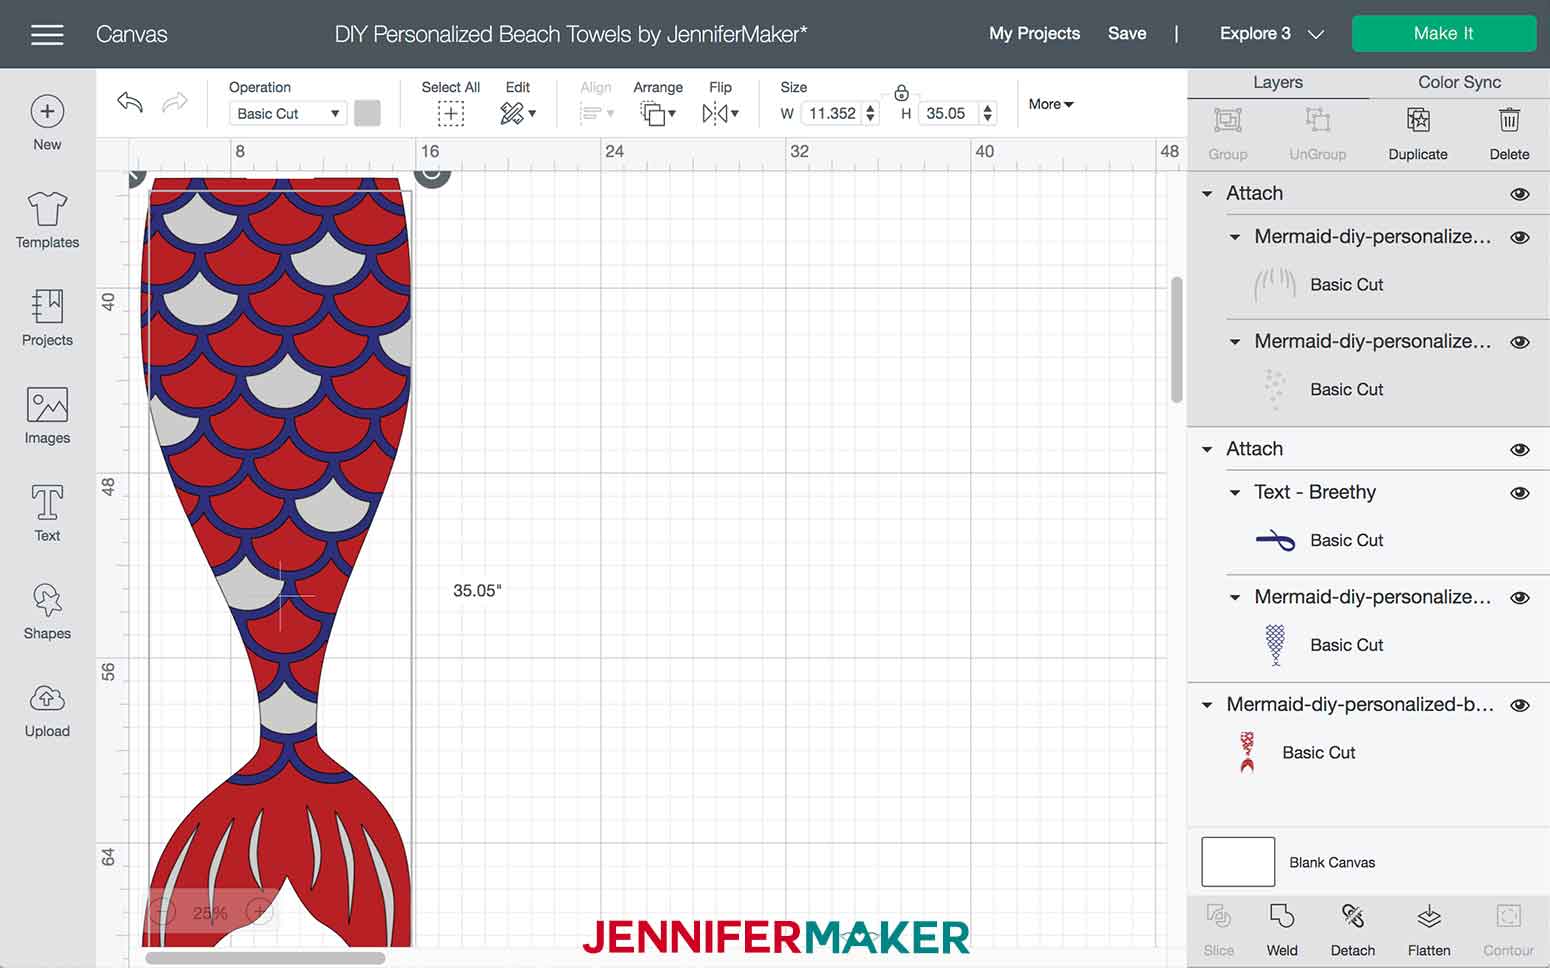
With your SVG still selected, click “Ungroup” in the upper right corner. You will need to do this multiple times by selecting grouped layers and ungrouping them until all your layers are individual, like this.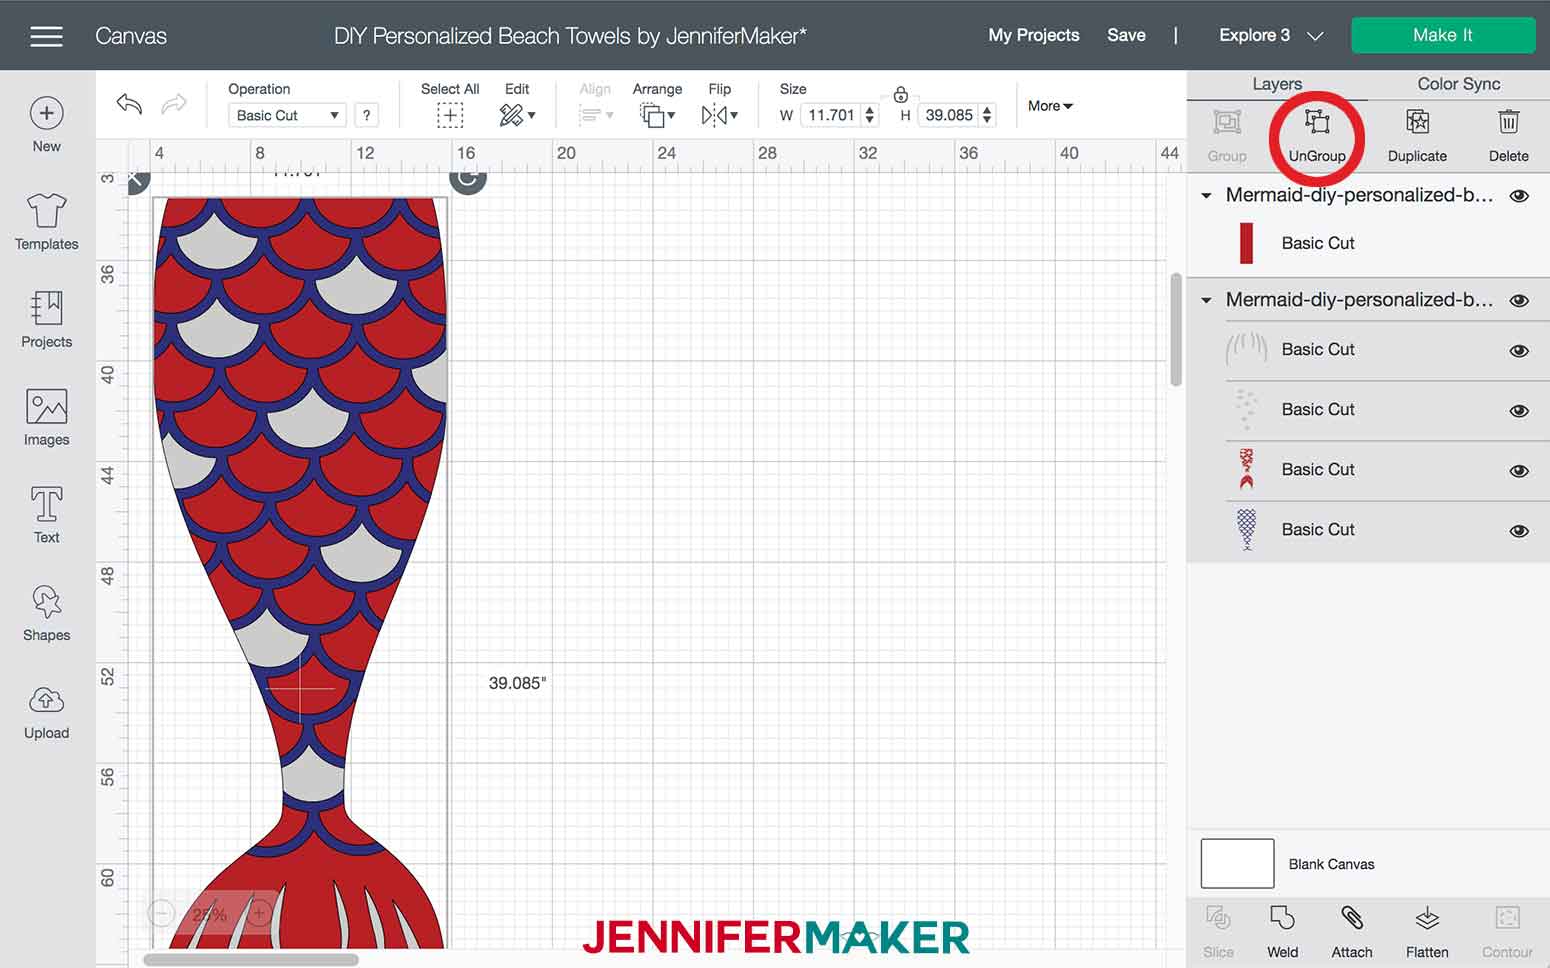
This is what it looks like when all the layers are ungrouped.
Now let's add a name to your Mermaid DIY Personalized Beach Towel.
Click on "Text" on the left side of your screen and select your font from the dropdown box at the top. I used Breethy at 380 pt.
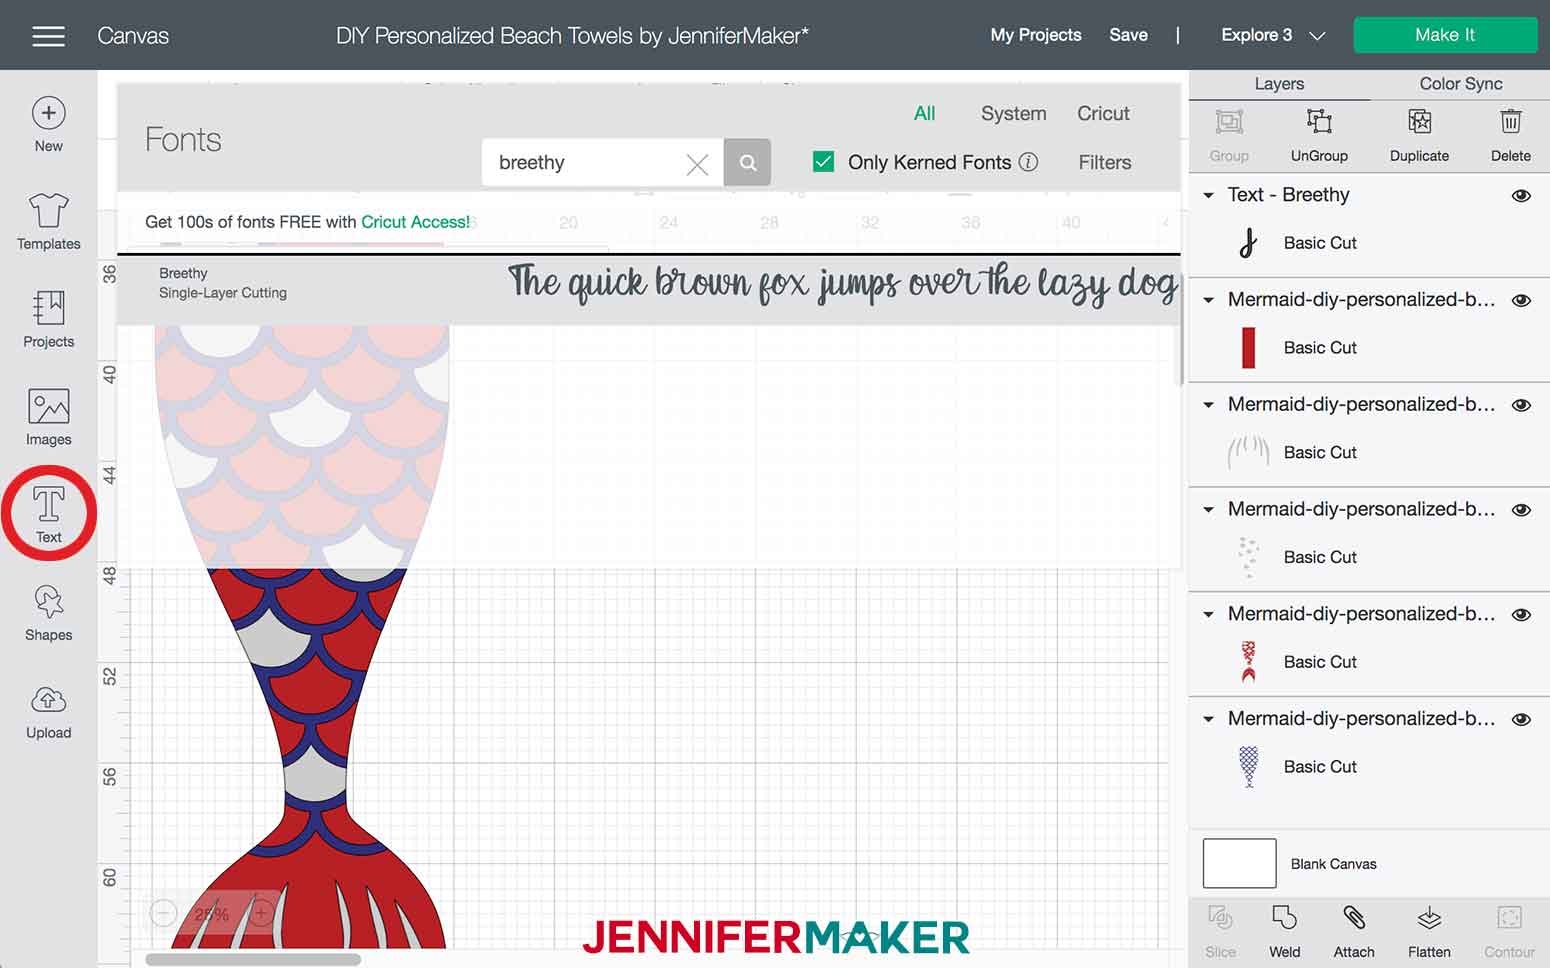
NOTE: If you do not have this font installed, you can get it here. But really the choice of what font to use is up to you, so be creative!
Type your desired name or text, and click anywhere on your canvas to get out of the text edit mode. If you used the same font as I did, your name will look like this, with the letters flowing together. There is no need to Weld the letters with Kerned fonts!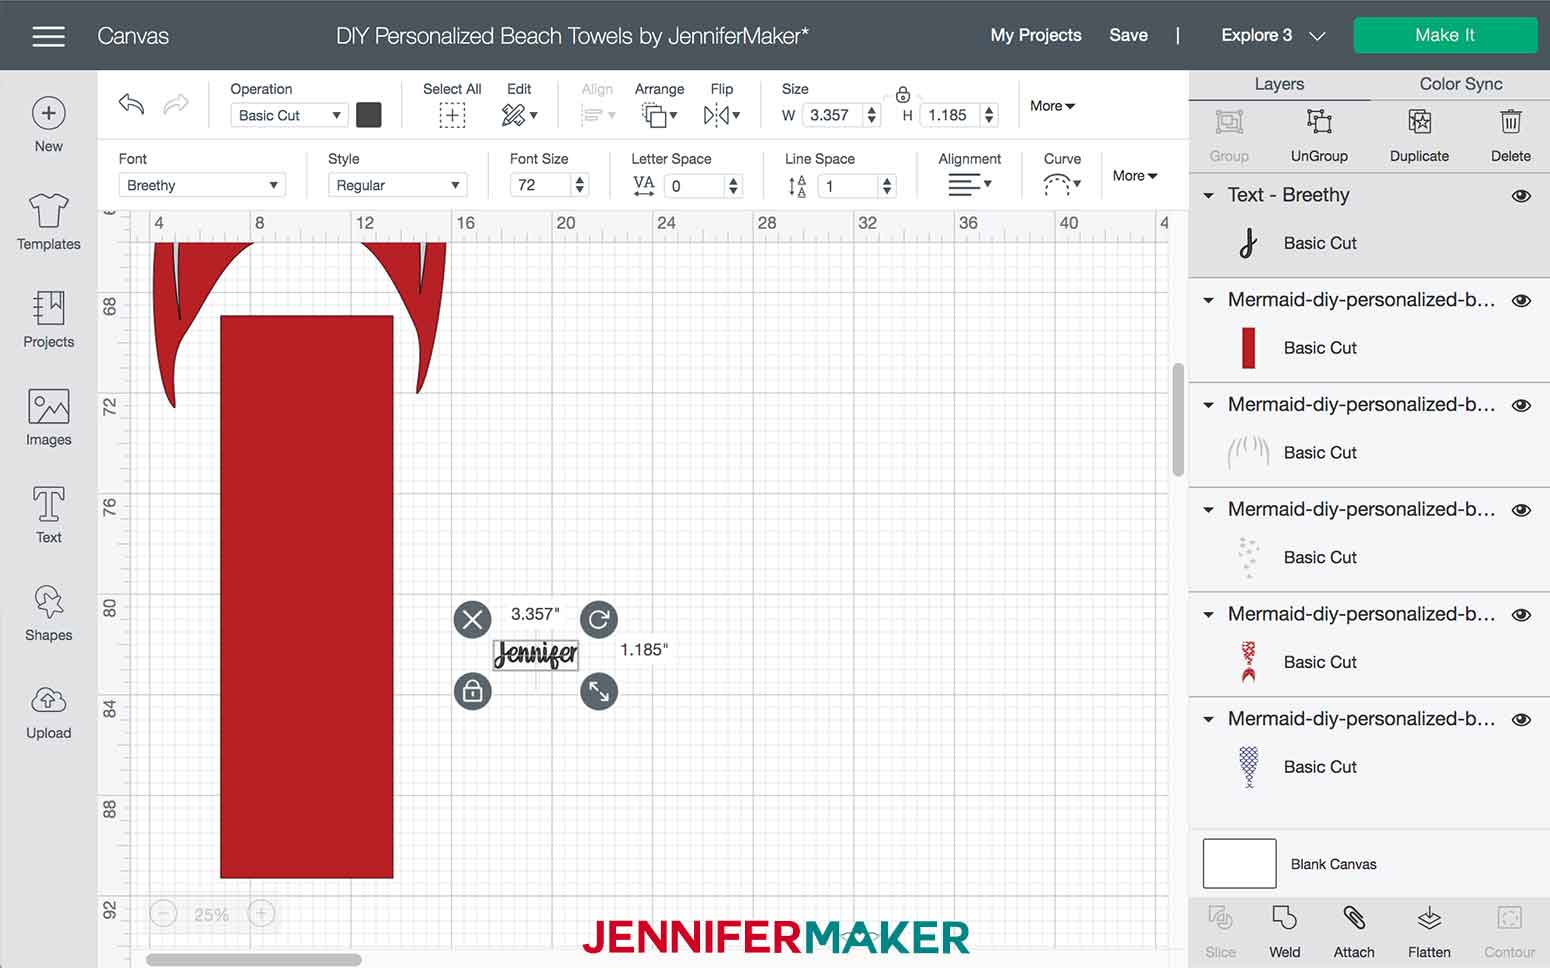
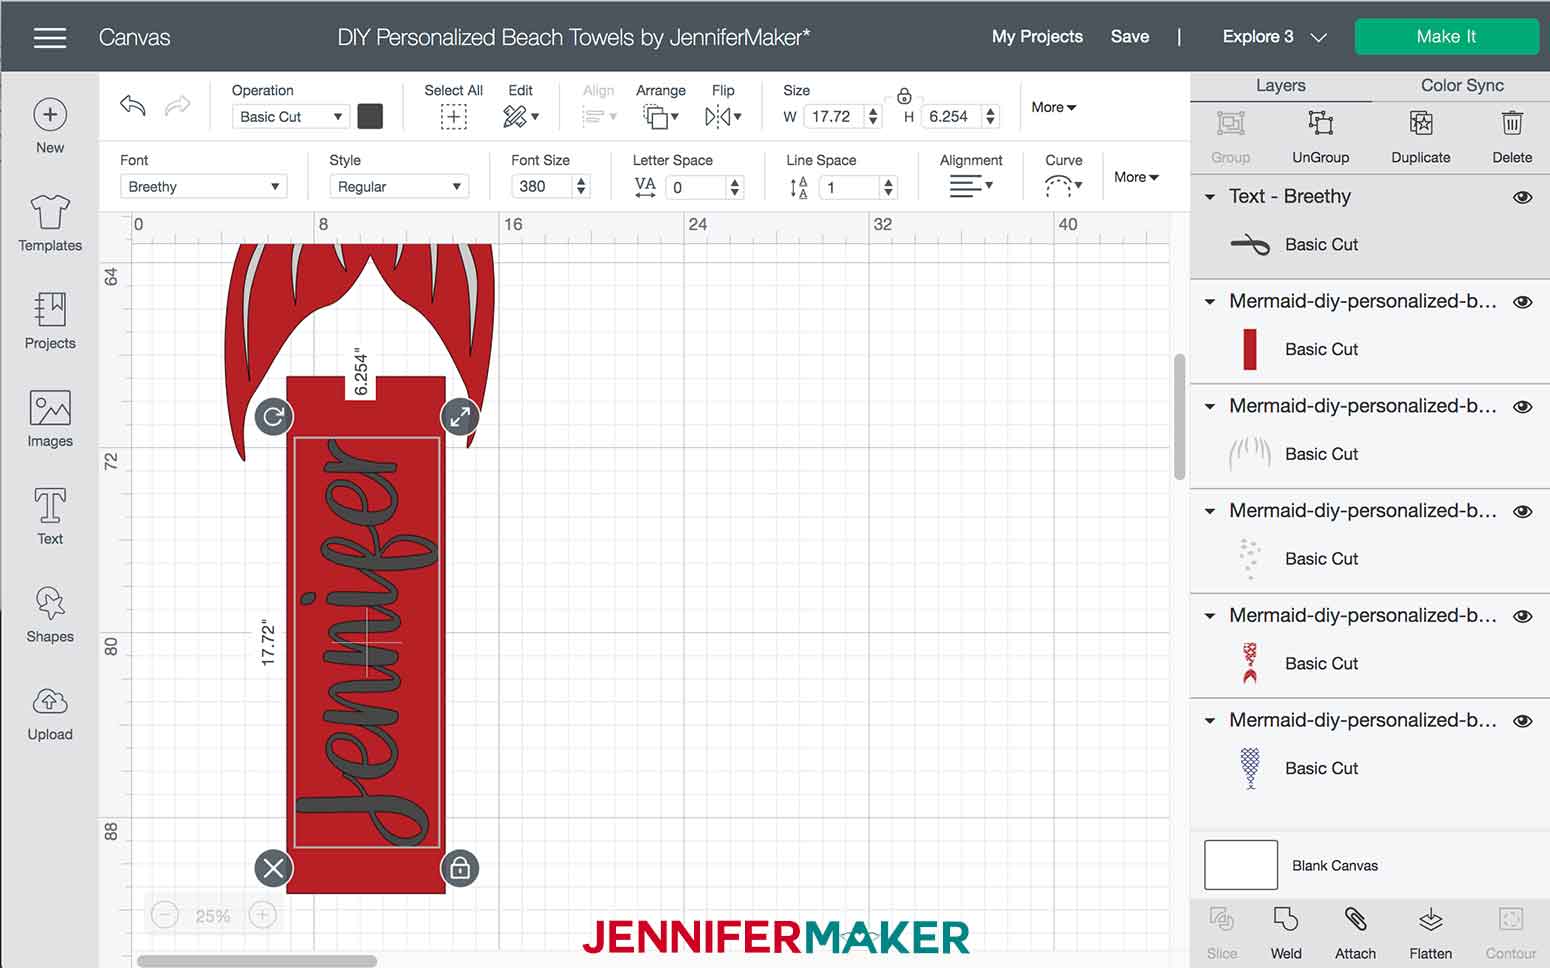
Now, with your text selected, click and drag, rotate and resize your text into place over the red box. Be sure to keep your text within the red box so it will be aligned and sized correctly on your towel (if you use the same size towel as me, which is 34" x 64").
Once your text is where you want it, go ahead and either delete the red box or hide it. You won't need it anymore because it’s only there to help you place the text in right spot.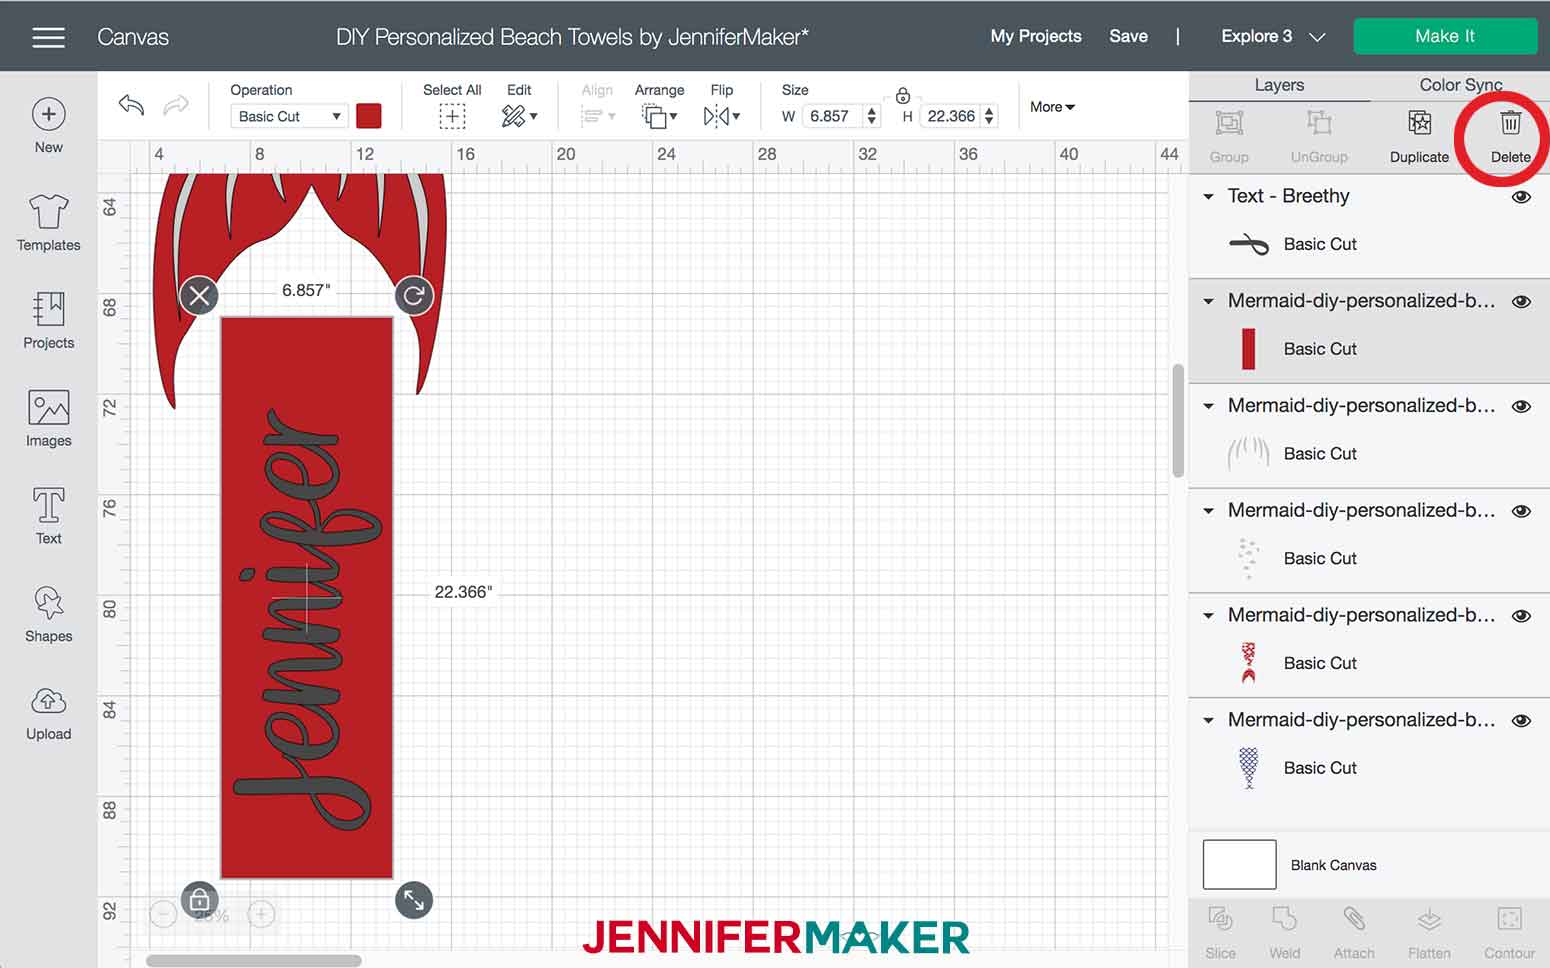
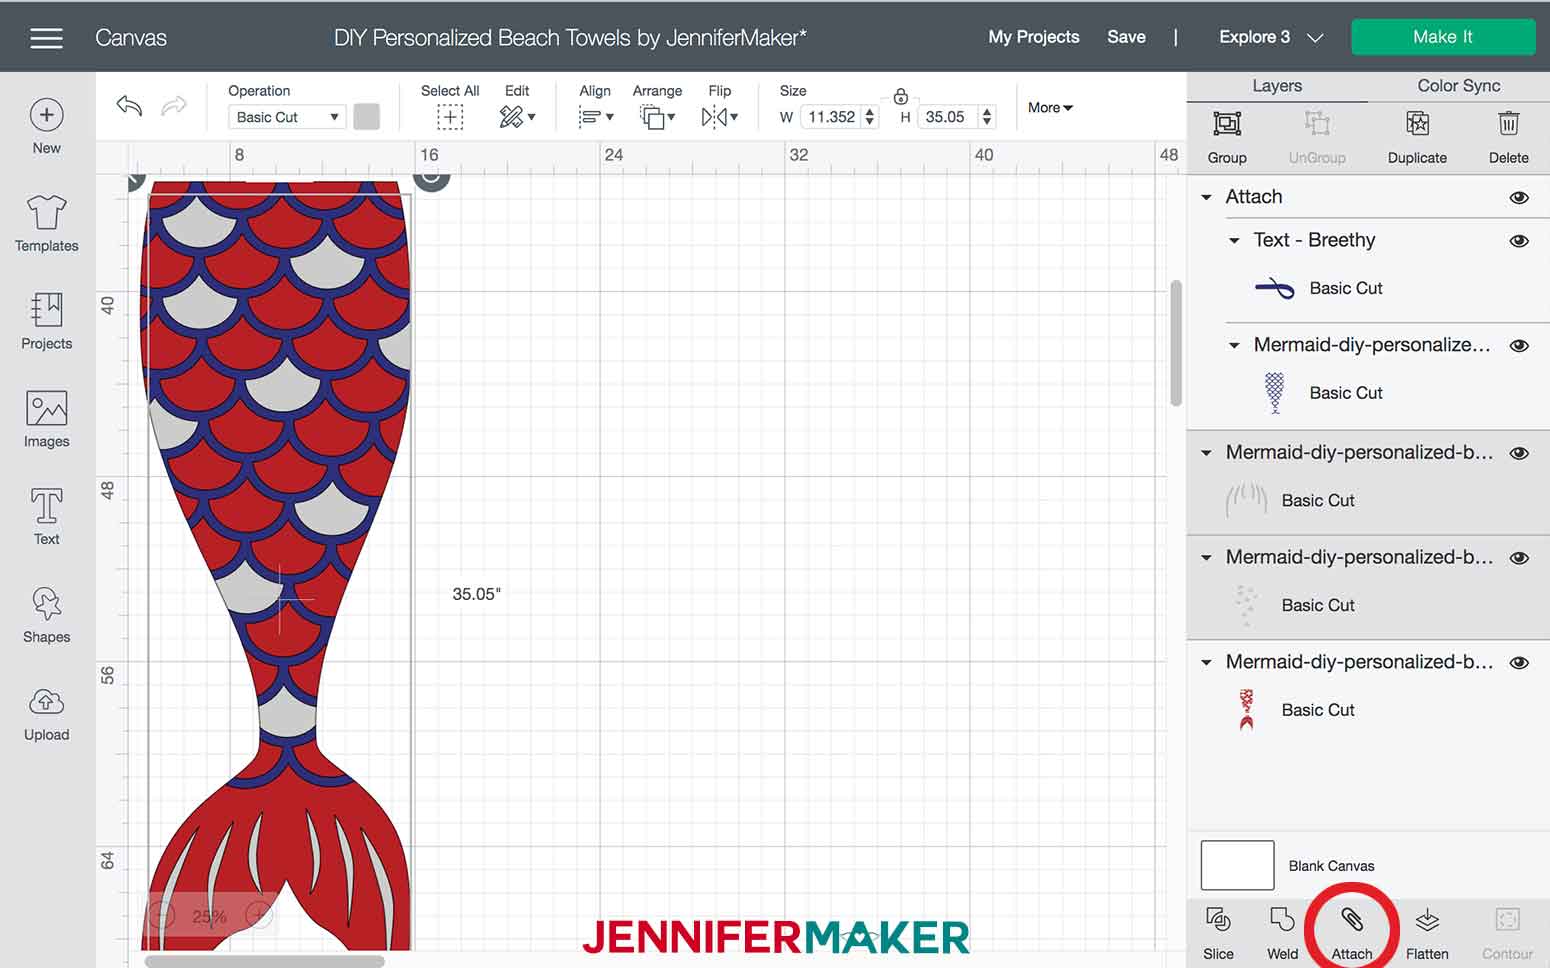
If you want to cut your name as one long continuous piece aligned to the tail, then attach your text layer to one of the vinyl layers. I attached my name “Jennifer” to the layer containing the scale outlines and cut them as one continuous piece from Smart Iron-On in Matte Navy. To do this, select the layer with your text in your Layers panel. Press Shift and also select the scale outline layer. At the bottom right, click “Attach.” 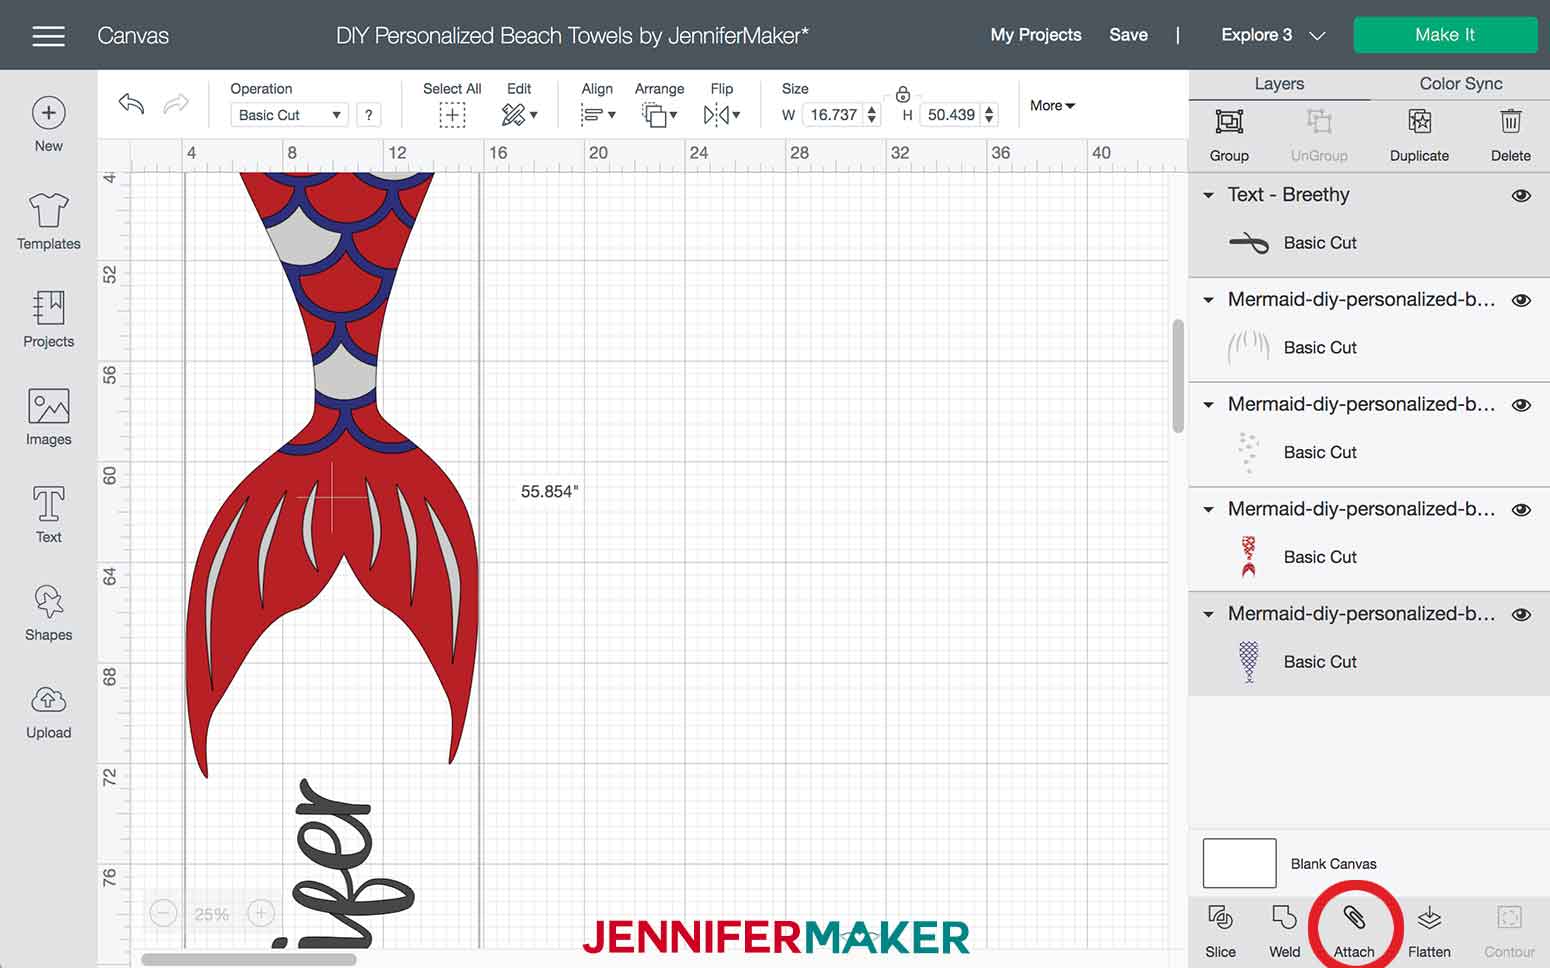
You’re all set! You can now cut your “Mermaid” design with personalized text.
If you choose to customize the Seahorse DIY Personalized Beach Towel, you will first select all the layers and click “Ungroup.” You will need to do this multiple times until all your layers are individual, like this.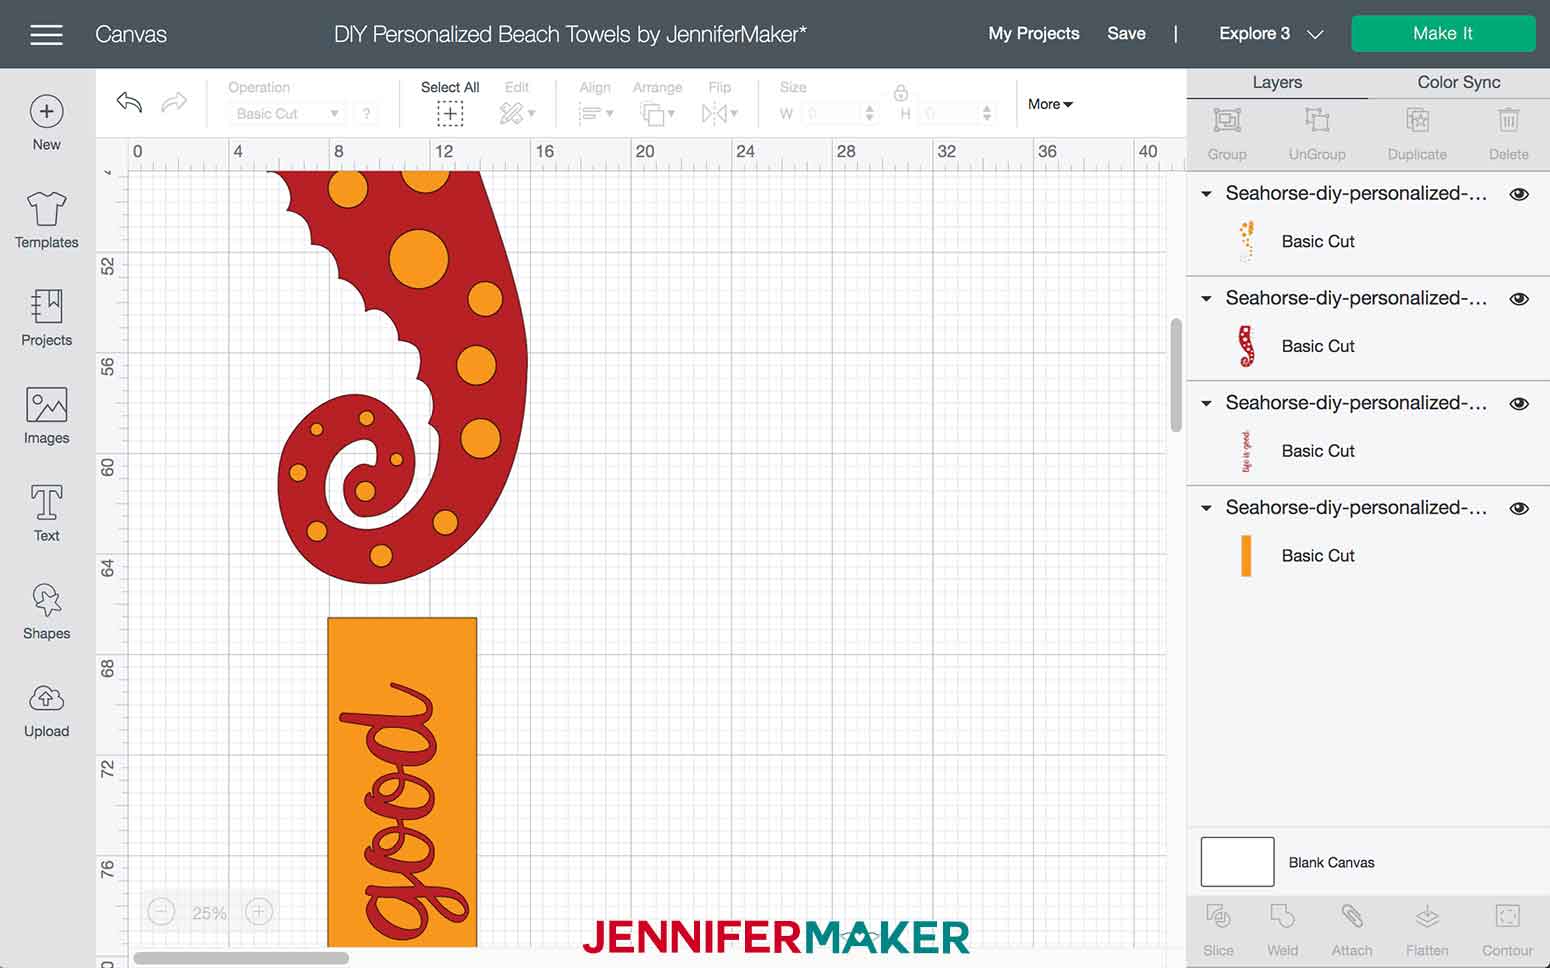
Next, select only the “Life is Good” layer and click “Delete.” 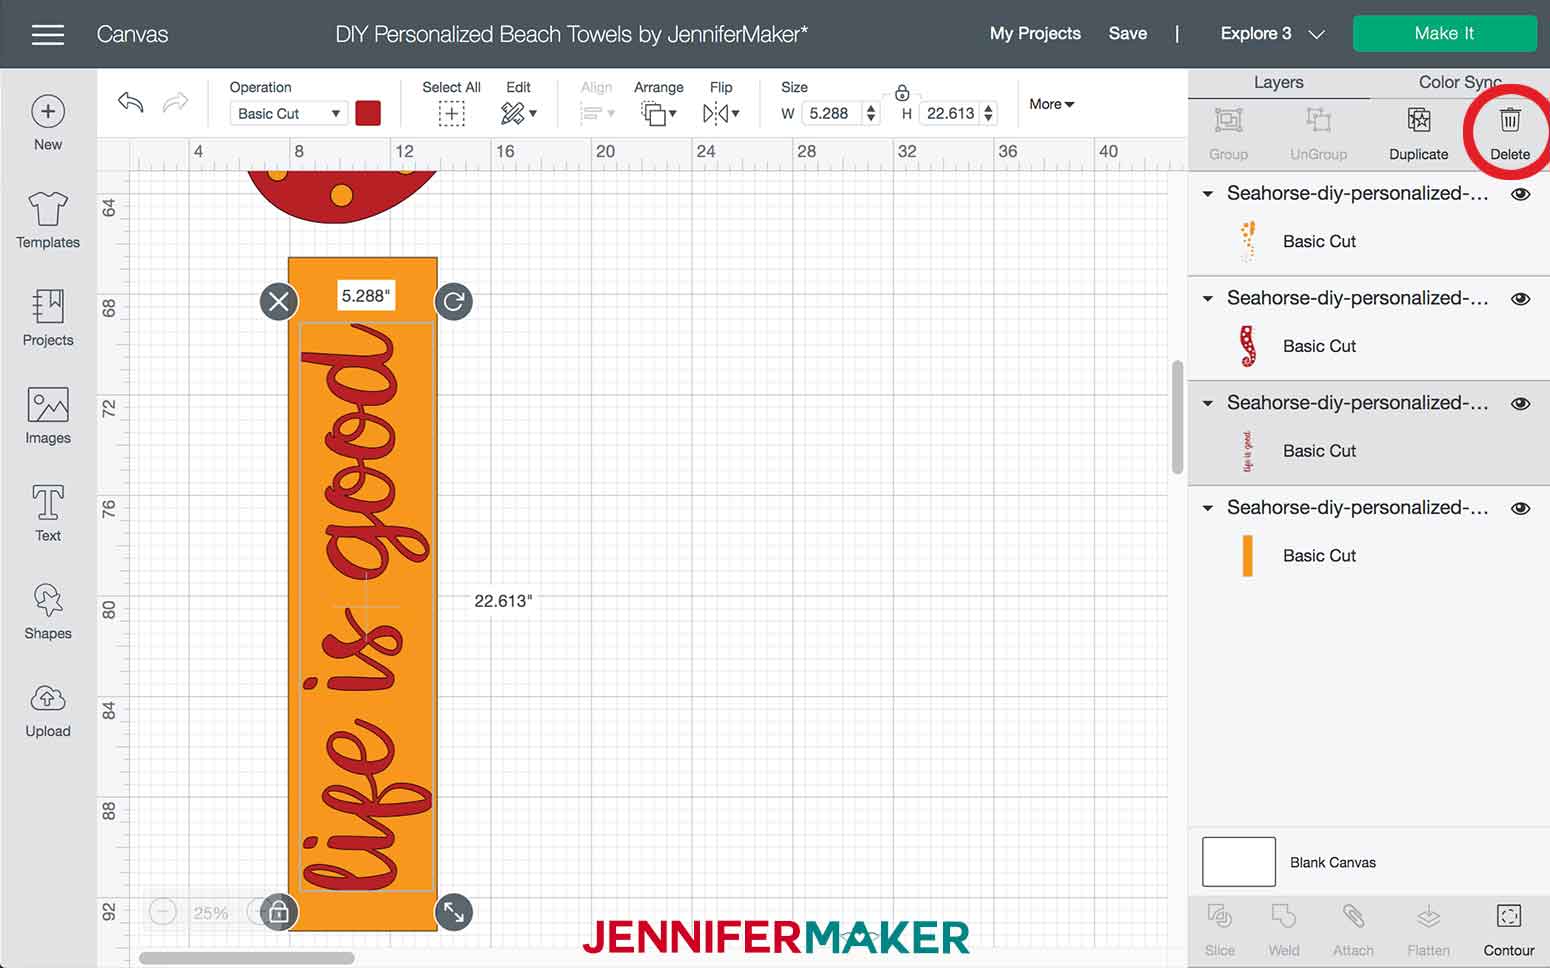
Now, follow the instructions above for adding text. Be sure to keep your text within the yellow box so it will be aligned and sized correctly on your towel, and make sure to Attach the text to another layer if you want it to cut as a long continuous vinyl piece like you did above for the “Mermaid” towel. Delete or hide the yellow text box when you're finished placing the text.
STEP 2: CUT YOUR VINYL DESIGN
My designs are created for towels that are 34” wide by 64” long. Confirm the width and length of your towel before cutting your design and make sure the dimensions of your design do not exceed the length of your towel. You can confirm the length of the design by selecting all the layers of your design in Design Space and looking at the measurements along the side of the design on the canvas or in the "Size" section on the top toolbar.
TIP: Your towel may not be the same measurements as advertised in the store so make sure to check that! 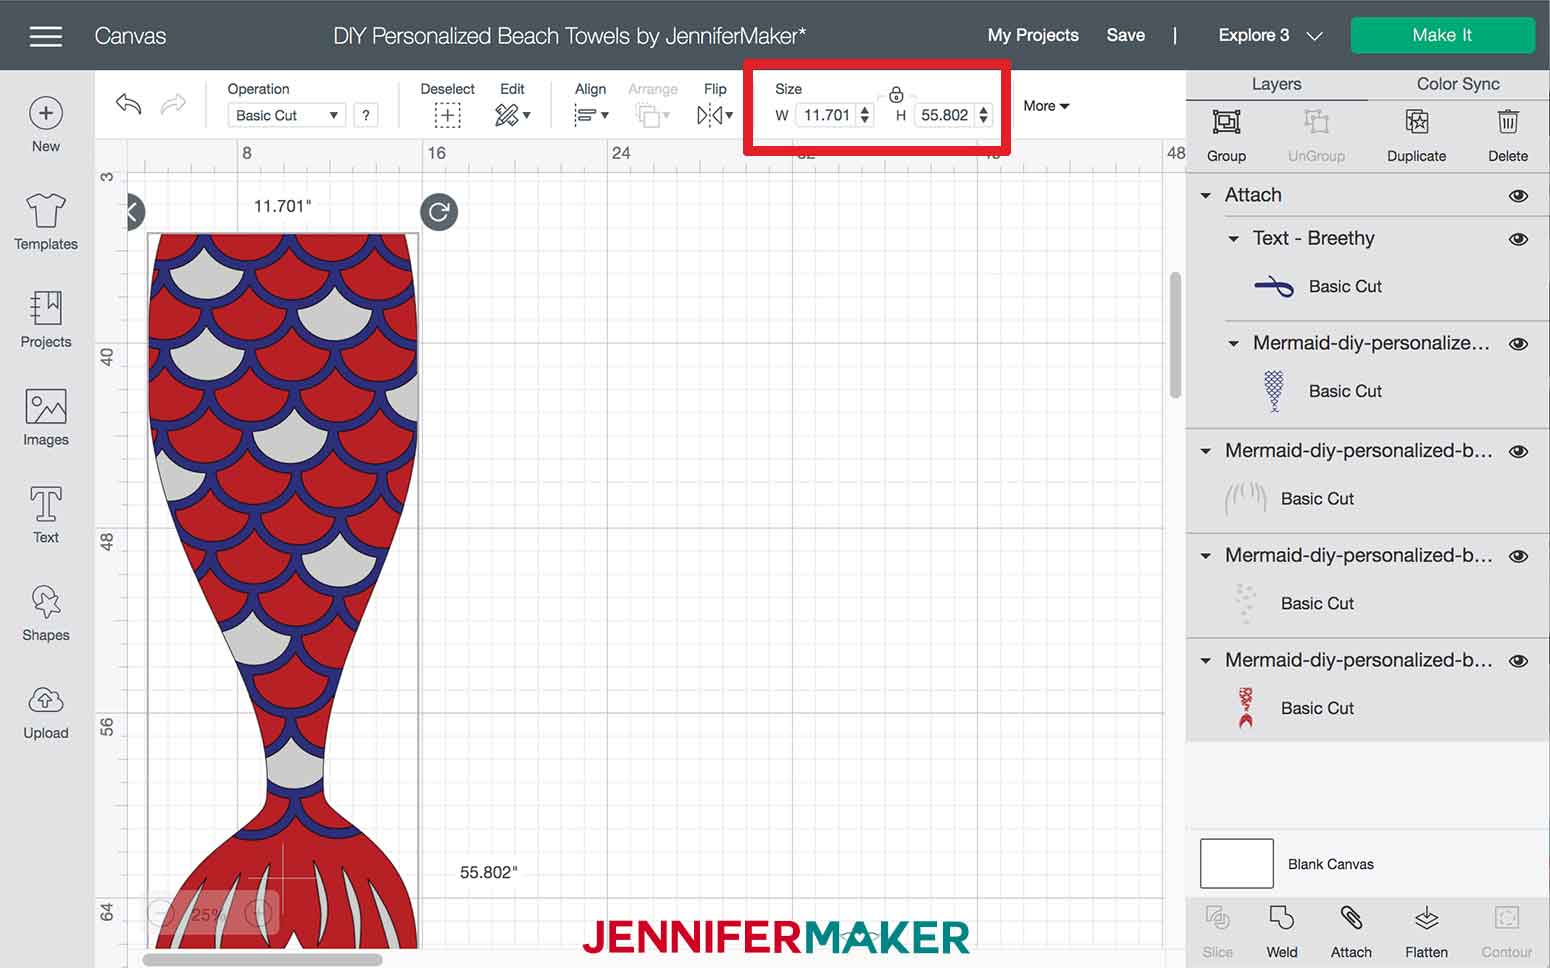
Click “Make It” in the top right.
TIP: Make sure you either hid or deleted the text box first!
The next screen allows you to review your cut. You will notice this screen also tells you the minimum length of Smart Vinyl you will need to make your cut.
For the “Mermaid” design you will need vinyl in these lengths:
57.5” of Smart Iron On in Matte Navy (with the name “Jennifer” Attached to the scales—your length will be different depending on what you write)
40.75” of Smart Iron On in Matte Red
36.75” of Smart Iron On – Glitter in White (if you Attach the scales and the fin pieces together)
TIP: I cut some of the scales and the fin detail all in Glitter in White, but I left these pieces as separate layers in the SVG design in case you don’t want to use the same color for both. I left mine unattached even though I used a single color because I wanted to cut them using a single 3 ft roll of vinyl, and if I attached them I would need 36.75” of vinyl. If you choose to cut them in a single color and as a single cut piece you can Attach them like this.
For the “Seahorse” design you will need vinyl in these lengths:
58.25” of Smart Iron On in Matte Red (with the "Life is Good" quote Attached to the seahorse body—your length will be different if you change the text)
31” of Smart Iron On – Glitter in Gold
TIP: You may need different amounts of vinyl if you personalized the text.
Make sure you check the length of each cut before proceeding, and also be sure to mirror each one since this is Iron-On vinyl.
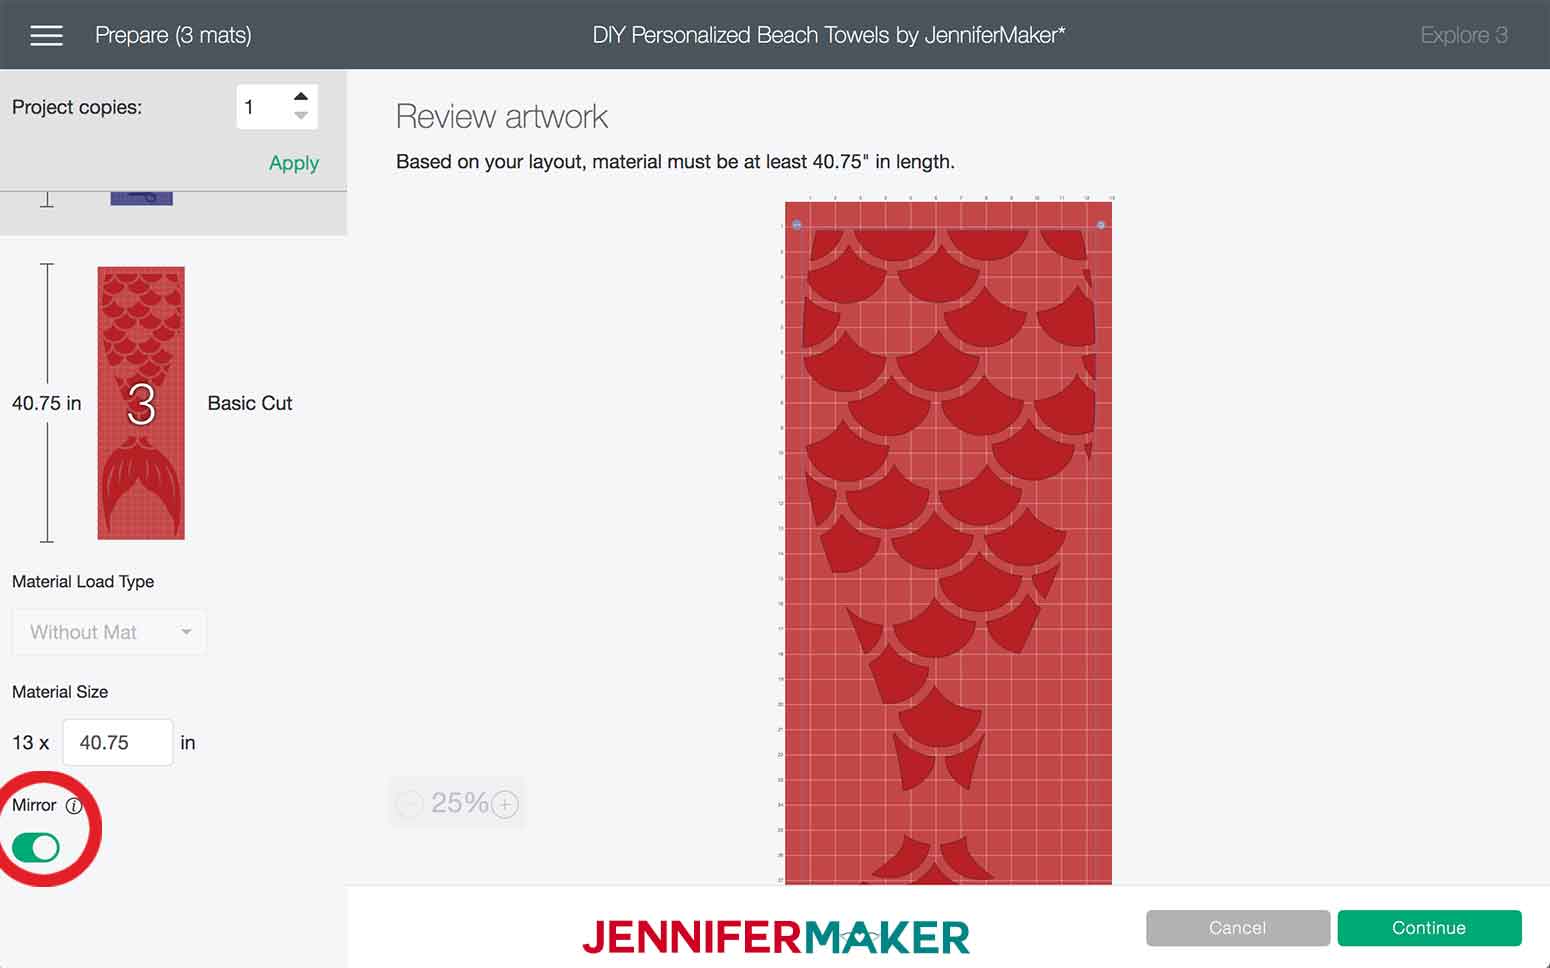
Now the cool part, if you are using a Cricut Maker 3 or Cricut Explore 3 you can load your vinyl without a mat! It's truly a timesaver!
Click “Continue.” 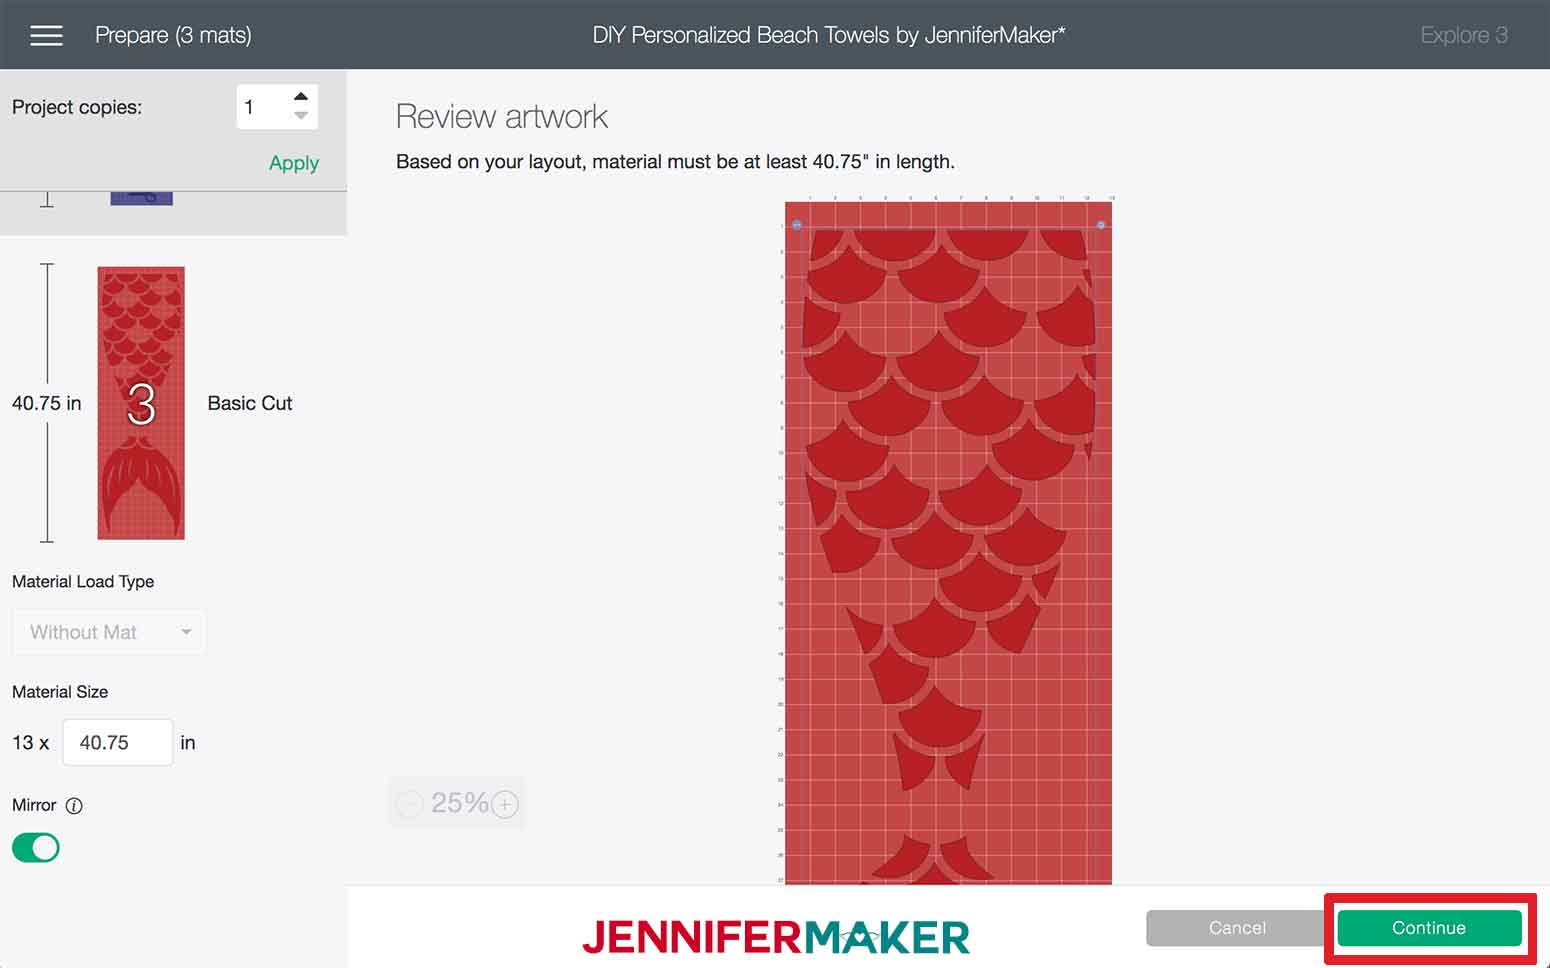
Select your first material, which will be either Smart Iron-On or Smart Iron-On – Glitter, depending on the design you picked: Seahorse or Mermaid.
Insert your Smart Vinyl into the Cricut Roll Holder and feed your Smart Vinyl into your Cricut Maker 3 or Cricut Explore 3.
TIP: Make sure you load your material into the machine with the shiny side facing DOWN and that you have selected Mirror On!
If you do not have a roll holder, you can simply cut your Smart Vinyl to meet the minimum length indicated.
TIP: If you are not at a long table, you may want to put a tub or bin behind your machine to catch the vinyl as it feeds through your machine!
Press the “Load/Unload” Button. Your machine will pull the vinyl all the way through to confirm there is enough material before starting the cut. Once your machine is ready, press the flashing "Arrow/Go" button. You'll notice this button has been updated on the Cricut Maker 3 and Explore 3. Now sit back and watch your Cricut whiz through and cut the design quickly and effortlessly!
When your design is done cutting, use the Cutter on the Roll Holder to trim off the Smart Vinyl. If you didn't use a roll holder you can, of course, skip this step. 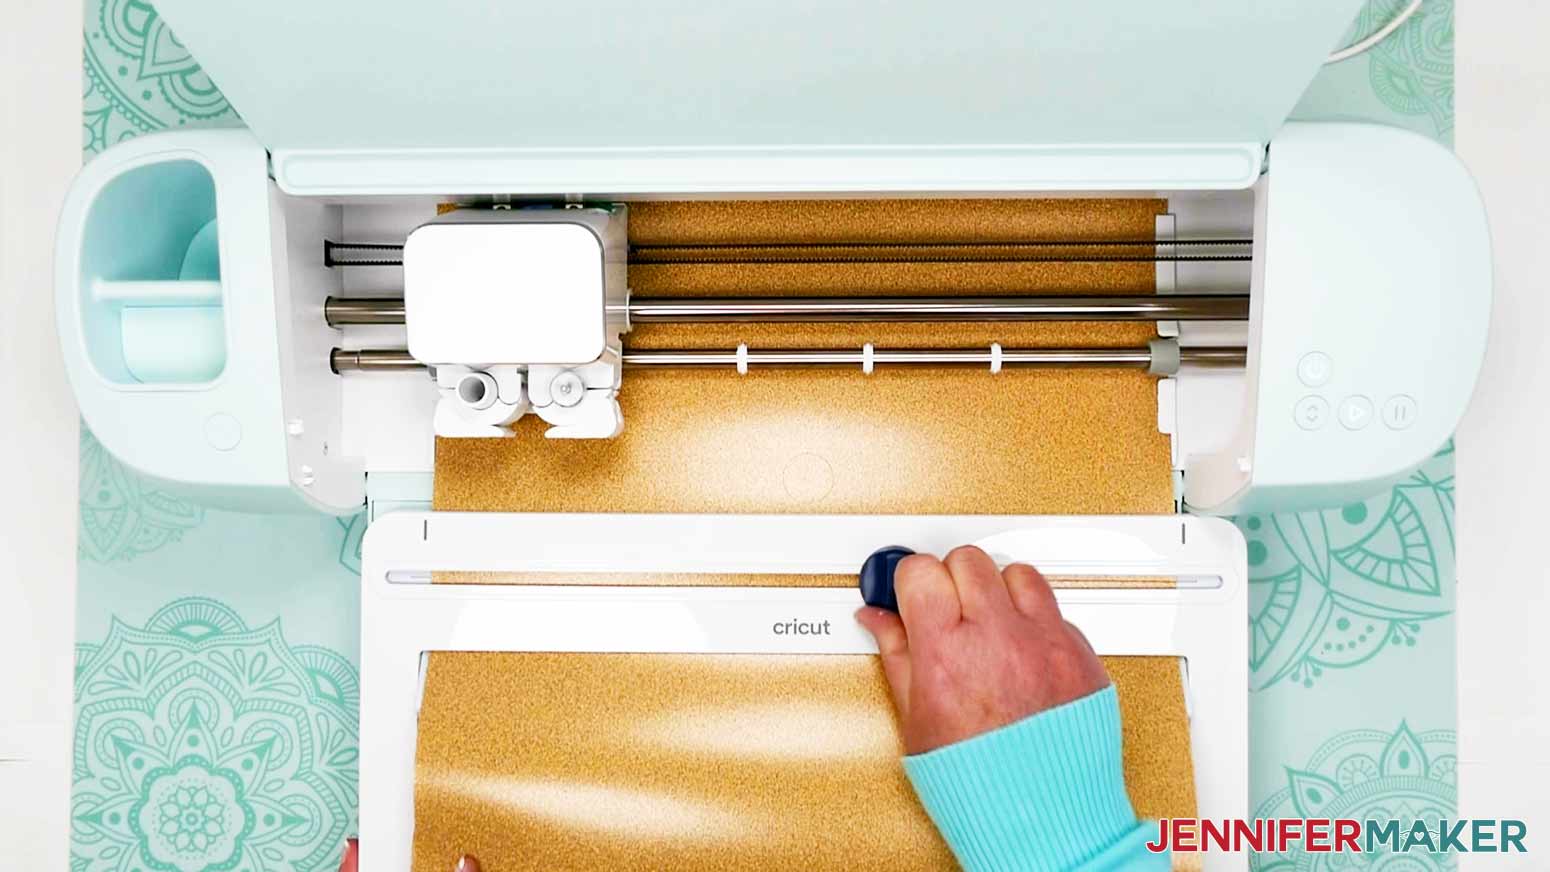
TIP: After cutting glitter vinyl you may want to check your blade for debris and clean it. You can check out my tips and tricks for cleaner cutting for help.
STEP 3: APPLY YOUR SMART VINYL DESIGN TO YOUR TOWELS
Time to put it all together!
Heat up your Cricut EasyPress to 330ºF (or if you are using an iron, pick a setting between Cotton and Linen).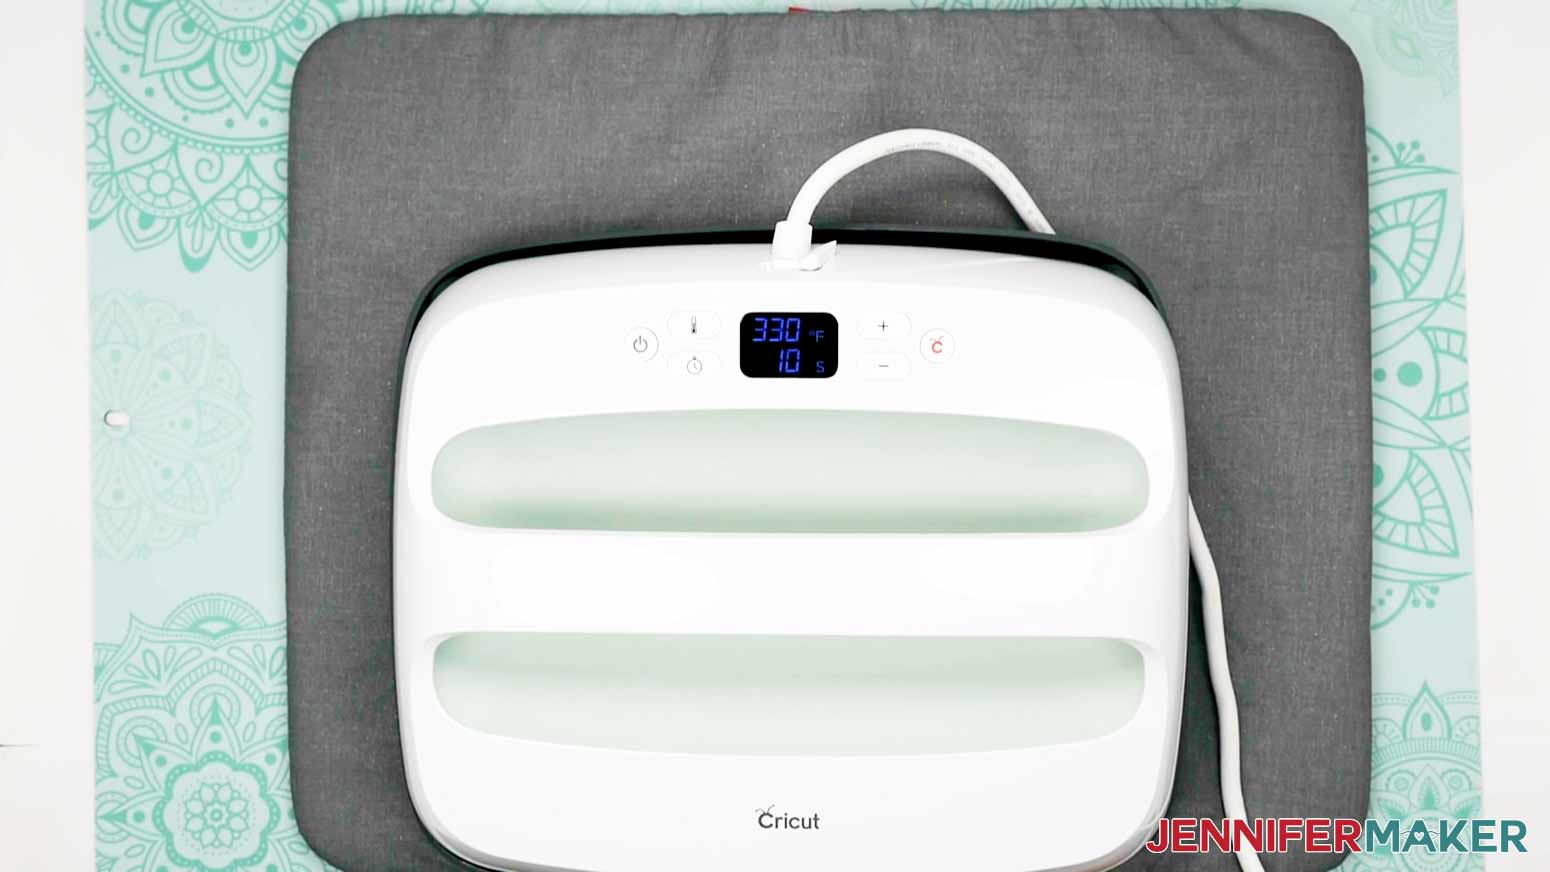
While your Cricut EasyPress is heating up, grab your weeding tool and peel away all of the excess vinyl from your DIY Personalized Beach Towel designs. Be extra cautious to make sure you are only weeding away the parts you DON’T want. You want to keep your mirrored design ON the carrier sheet.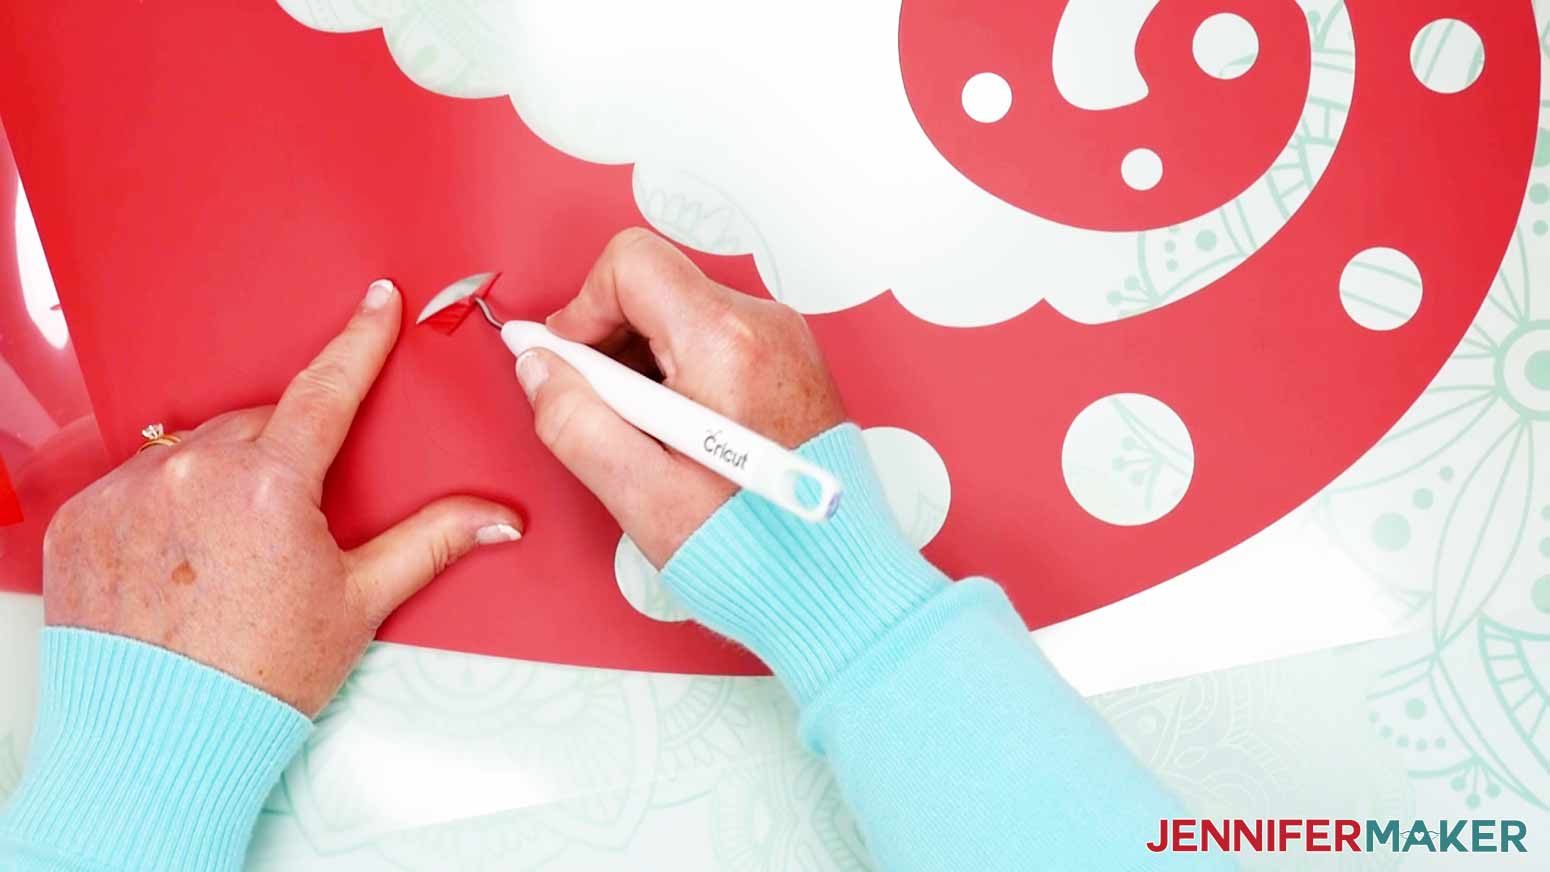
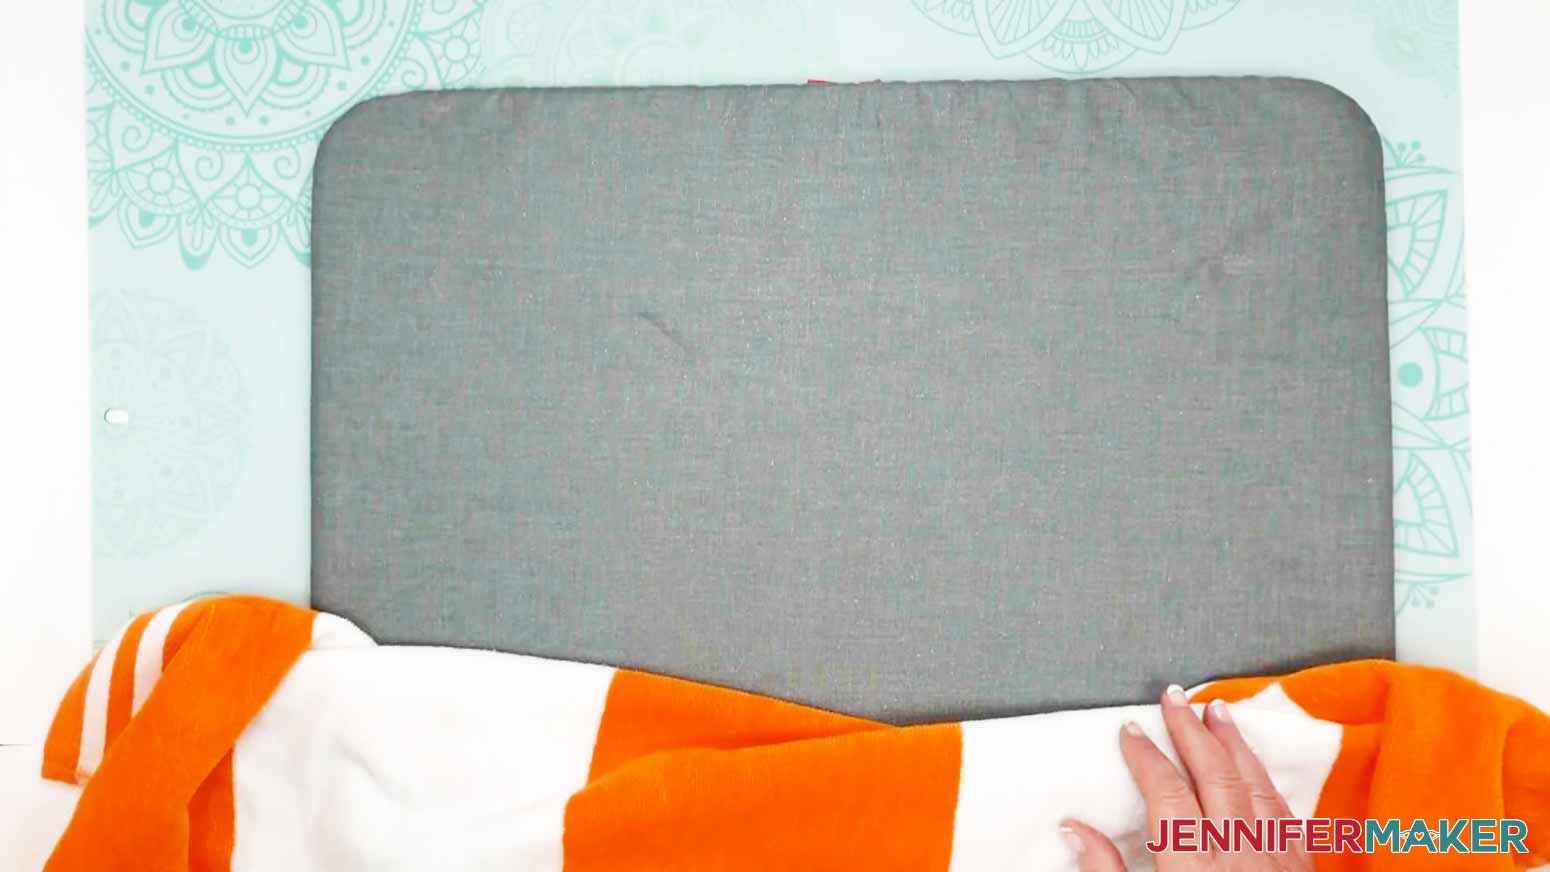
Now let’s prepare the towels. Place a Cricut EasyPress Heat Mat underneath one section of your towel to protect your work surface. Now, place your hot EasyPress (or iron) on the towel and apply light pressure for 5 seconds to preheat the towel.
TIP: Your EasyPress will be HOT! Be careful while using it.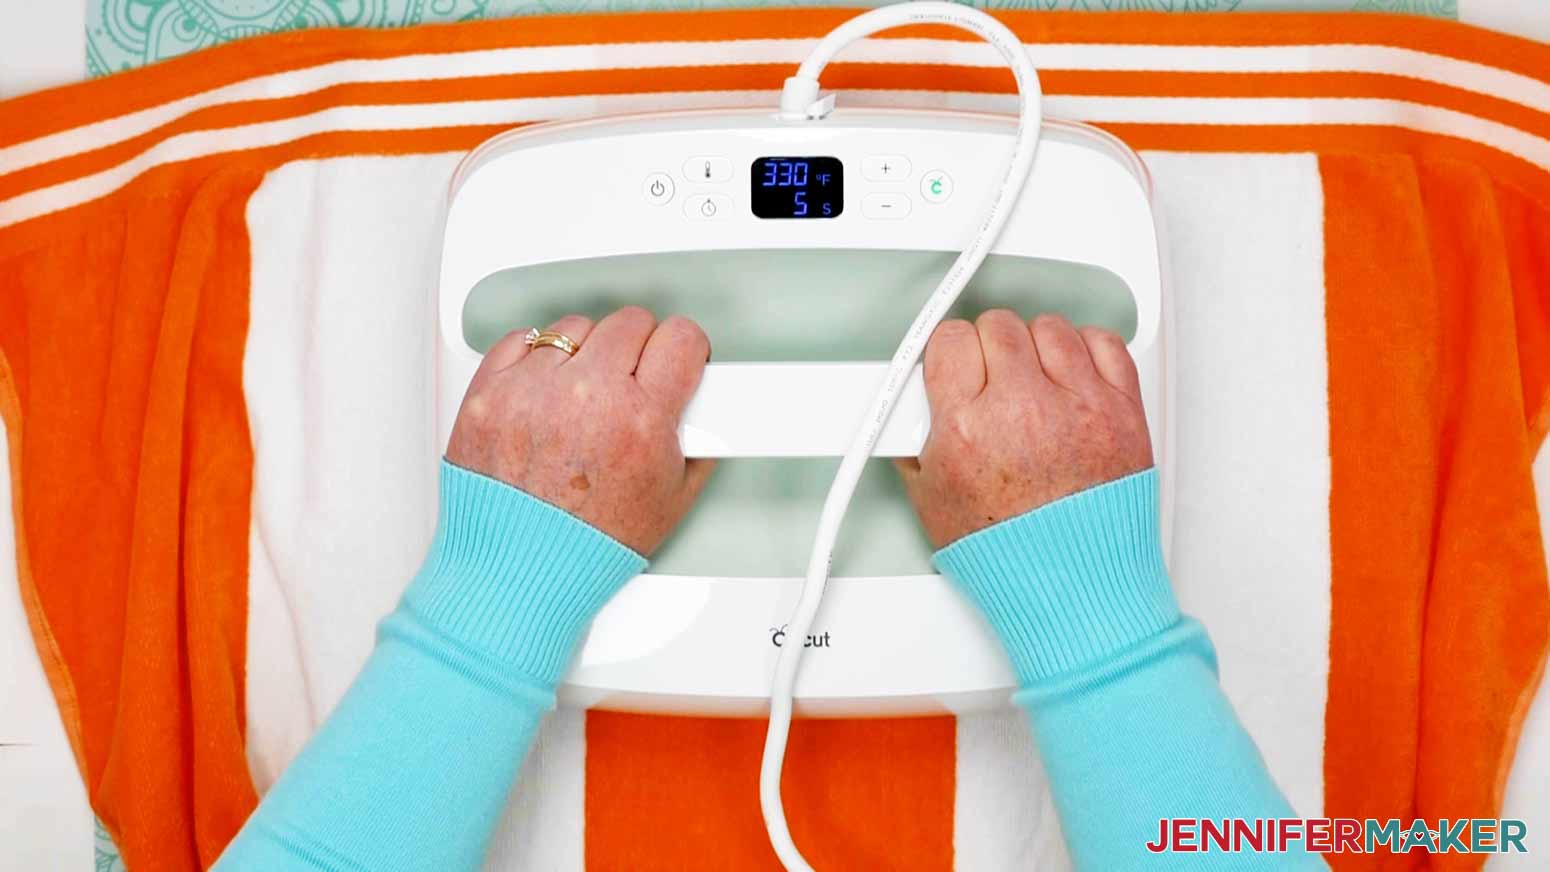
Repeat this process in sections until all parts of the towel that you will be applying vinyl to have been preheated. When you’re done, remove the EasyPress Mat so your towel lays flat on your work surface.
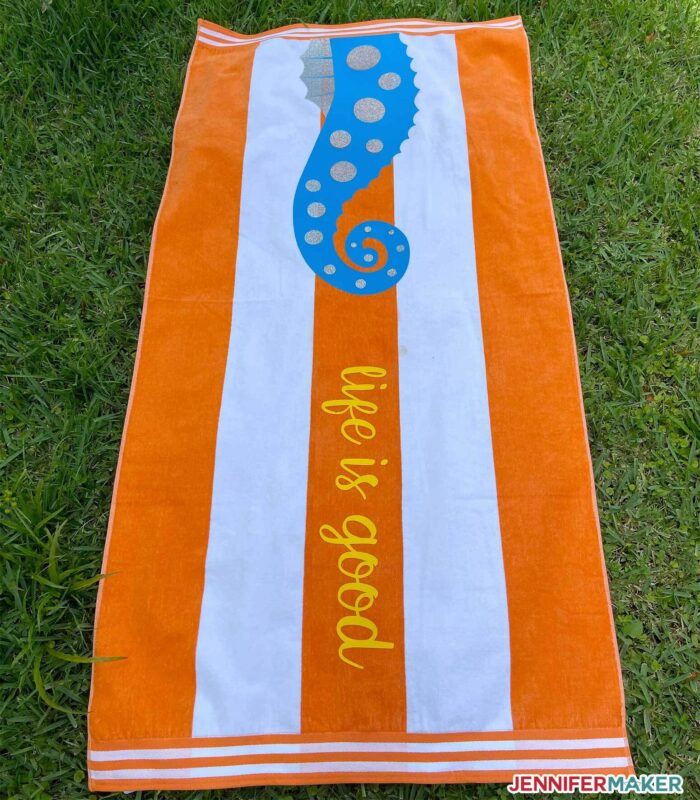
Applying the “Seahorse” design
Now let’s layer the weeded vinyl in the order we will apply it to the DIY personalized beach towels. For the “Seahorse” design, lay your Red body section flat on a work surface with the shiny carrier sheet side down (so your sticky side is facing UP). Carefully line up the Gold Glitter layer (the fin and accent pieces) over the body layer -- they will fit inside the Red vinyl pieces like a puzzle. Once they are aligned, stick it down in place on top of the Red vinyl layer with the sticky side facing up. Your two pieces should be perfectly aligned and stuck together.
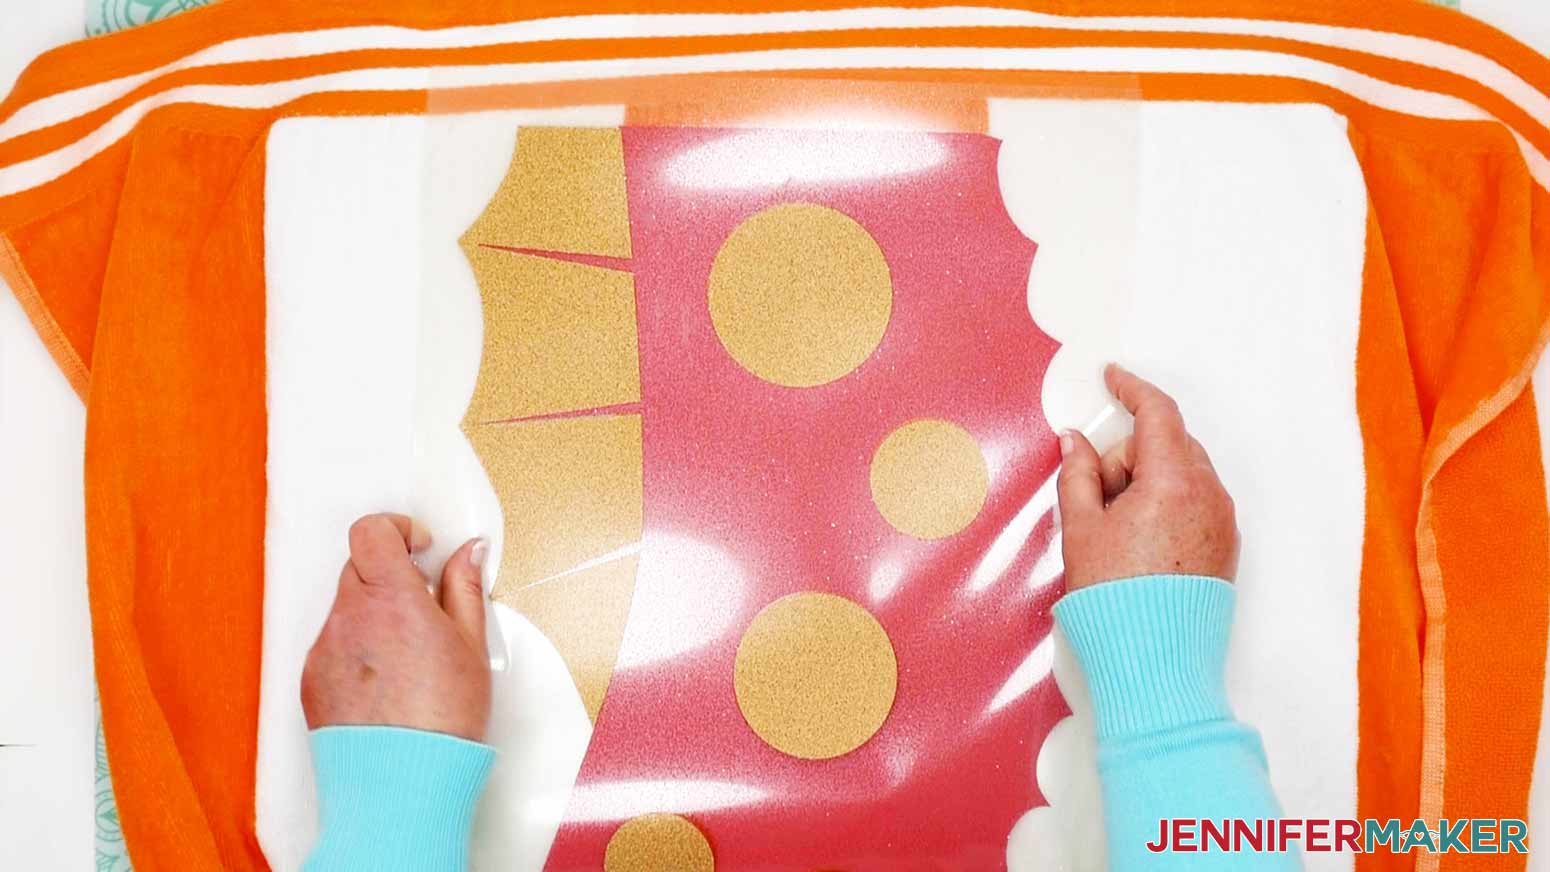
Flip over your “Seahorse” layers so the sticky side is now DOWN and line them up on your towel using the vertical lines of the towel as reference. 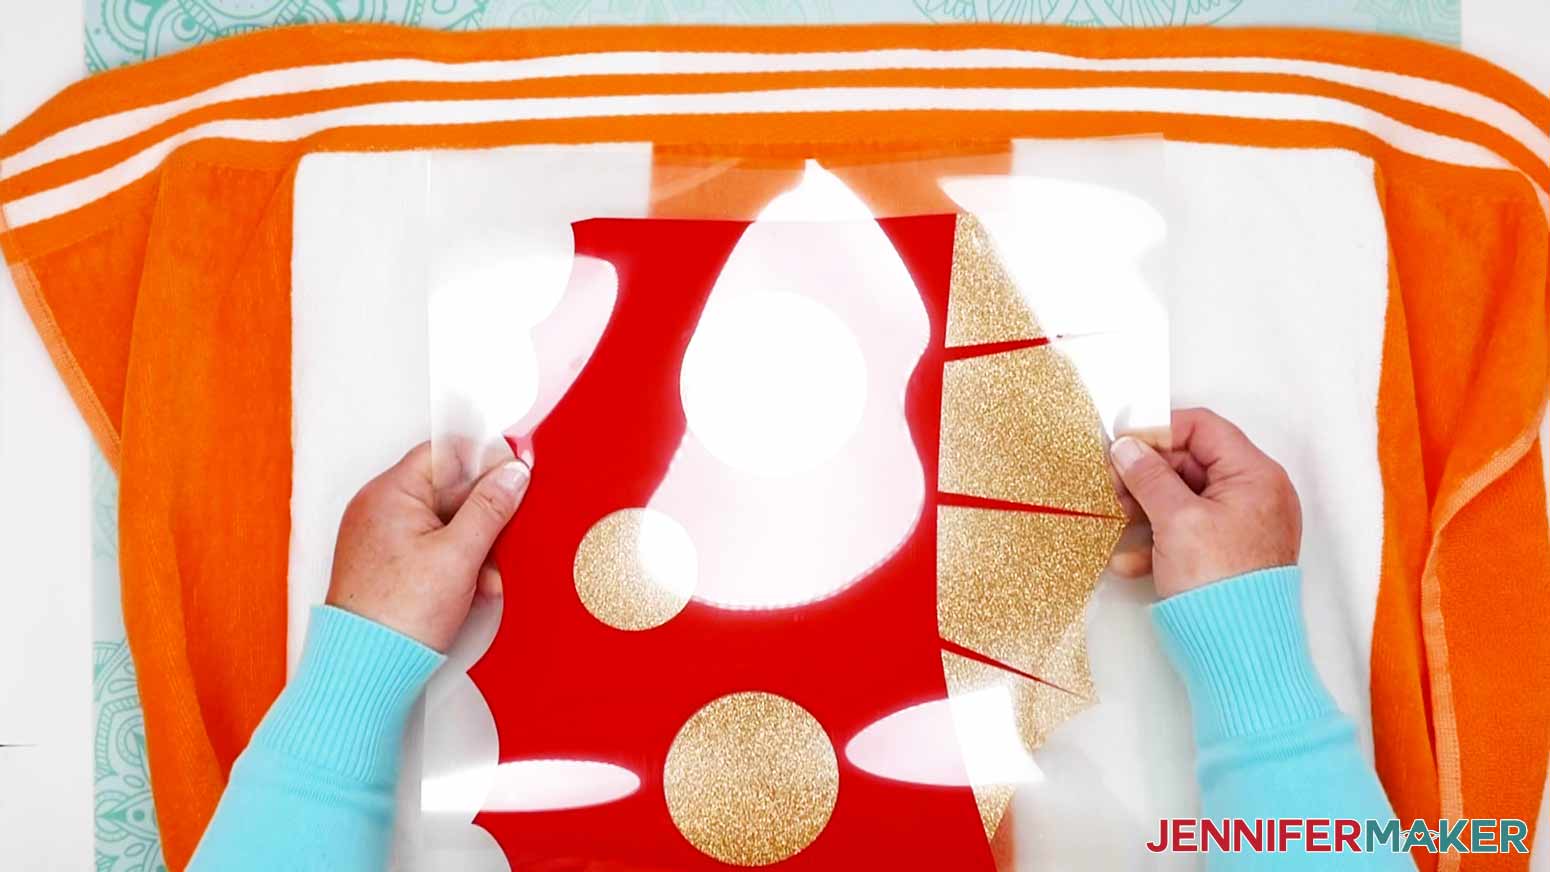
Stick the “Seahorse” design down on the towel where you want it. Be sure the text is centered and aligned correctly. Once everything is aligned correctly, carefully peel up the Red vinyl and carrier sheet, leaving the Gold Glitter vinyl and carrier sheet stuck to the towel. Set the Red vinyl piece aside.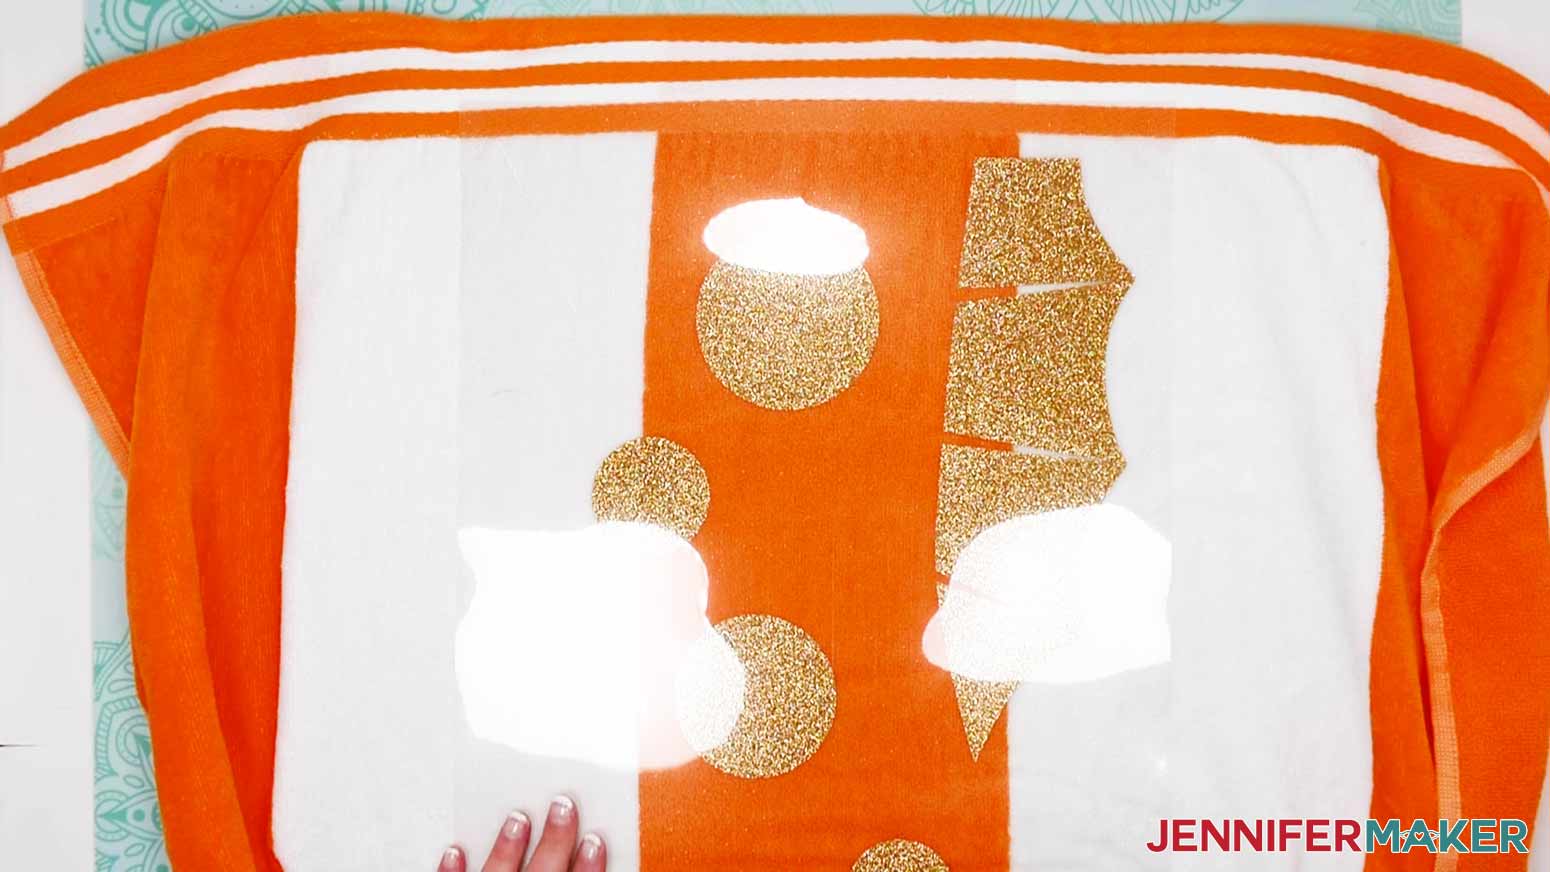
Now, we just want to tack the Gold Glitter vinyl to the towel (we do NOT want to fully adhere it yet because we will be adding extra heat later to tack on the Red vinyl and we do not want to “overcook” the vinyl). We will do this in sections until everything is adhered.
To do this, first be sure to place your Cricut EasyPress Mat under the towel to protect your work surface.
Make sure your EasyPress is still at 330ºF and hold it to your first section with light pressure for 8 seconds. Do NOT slide your EasyPress (or iron) while applying pressure.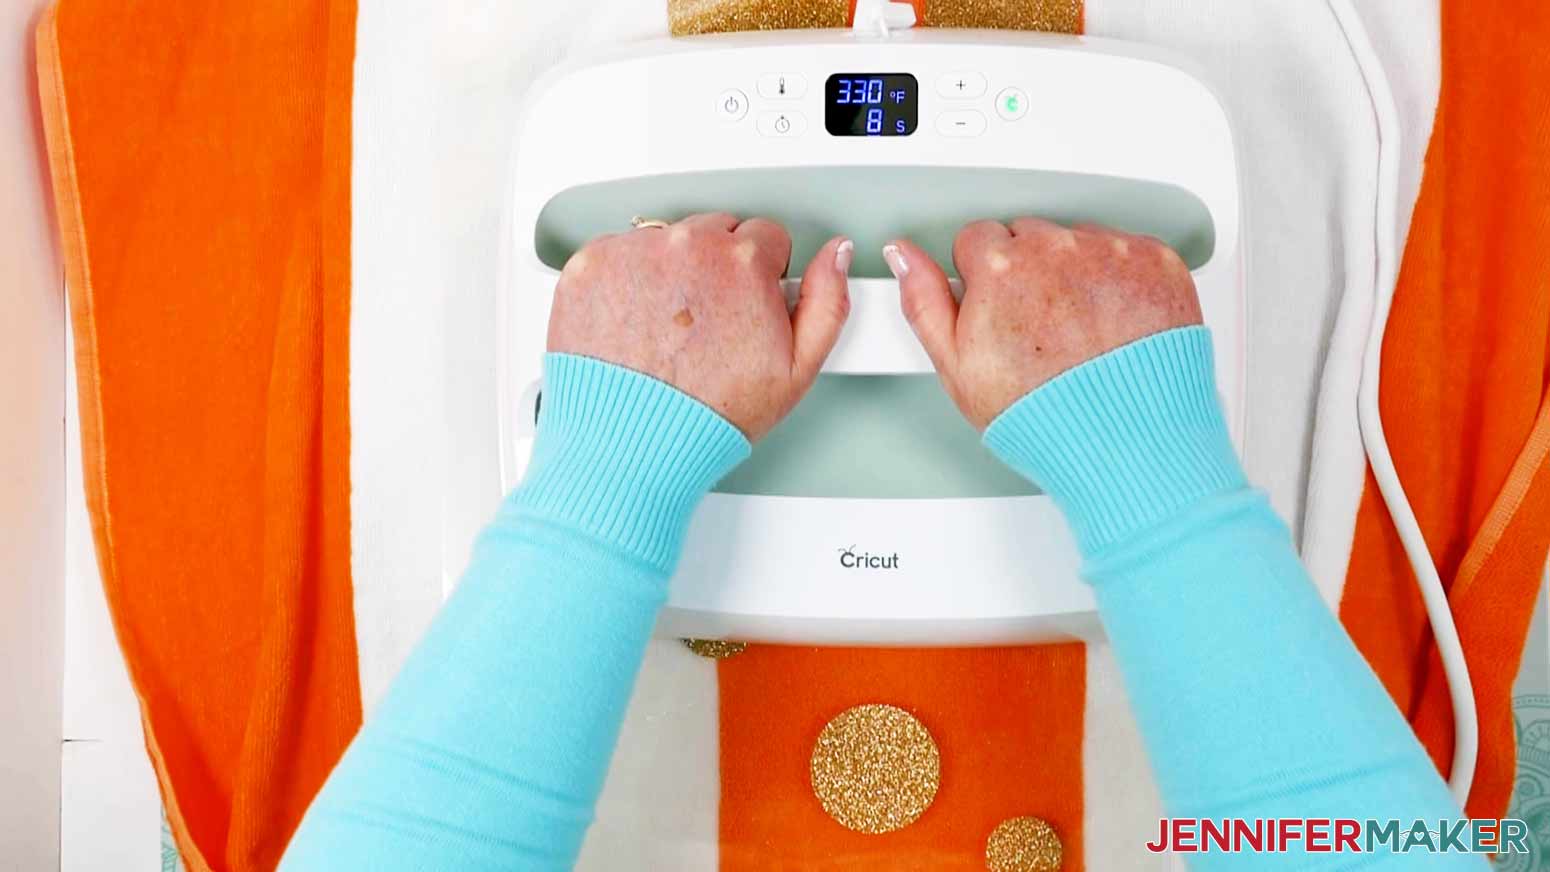
Repeat this to all sections until the entire Glitter layer of the “Seahorse” design is tacked to the towel. Remove the carrier sheet and set it aside, don't throw it away because we will use it again later.
TIP: If your carrier sheet does not lift off easily, reapply the heat in small increments of 3 to 5 seconds until it does come off. If you are using an iron you may need to do this many times.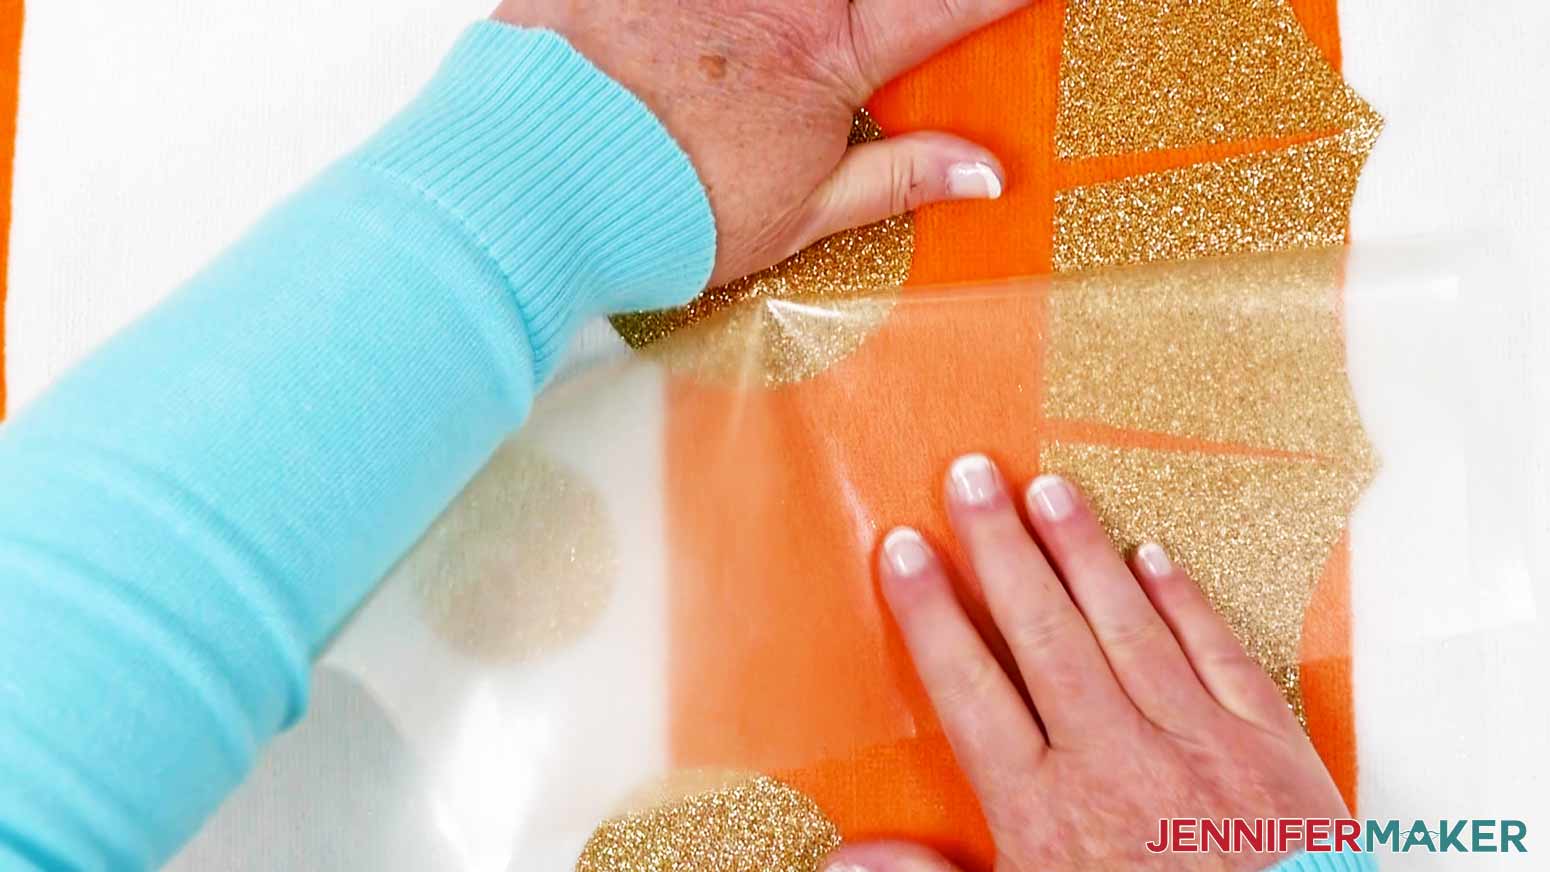
Now, reduce the temperature of your EasyPress to 315ºF (if you are using an iron, change the temperature dial down a bit to the Cotton setting). Move your EasyPress Mat to the side so you have a completely flat surface to work on.
While your EasyPress is adjusting temperature, line up your Red vinyl layer on top of your Gold Glitter layer on the towel. You may need to carefully align it in sections to make sure it fits well to the Gold layer underneath. Once your Red layer is aligned, press it sticky side down to the towel.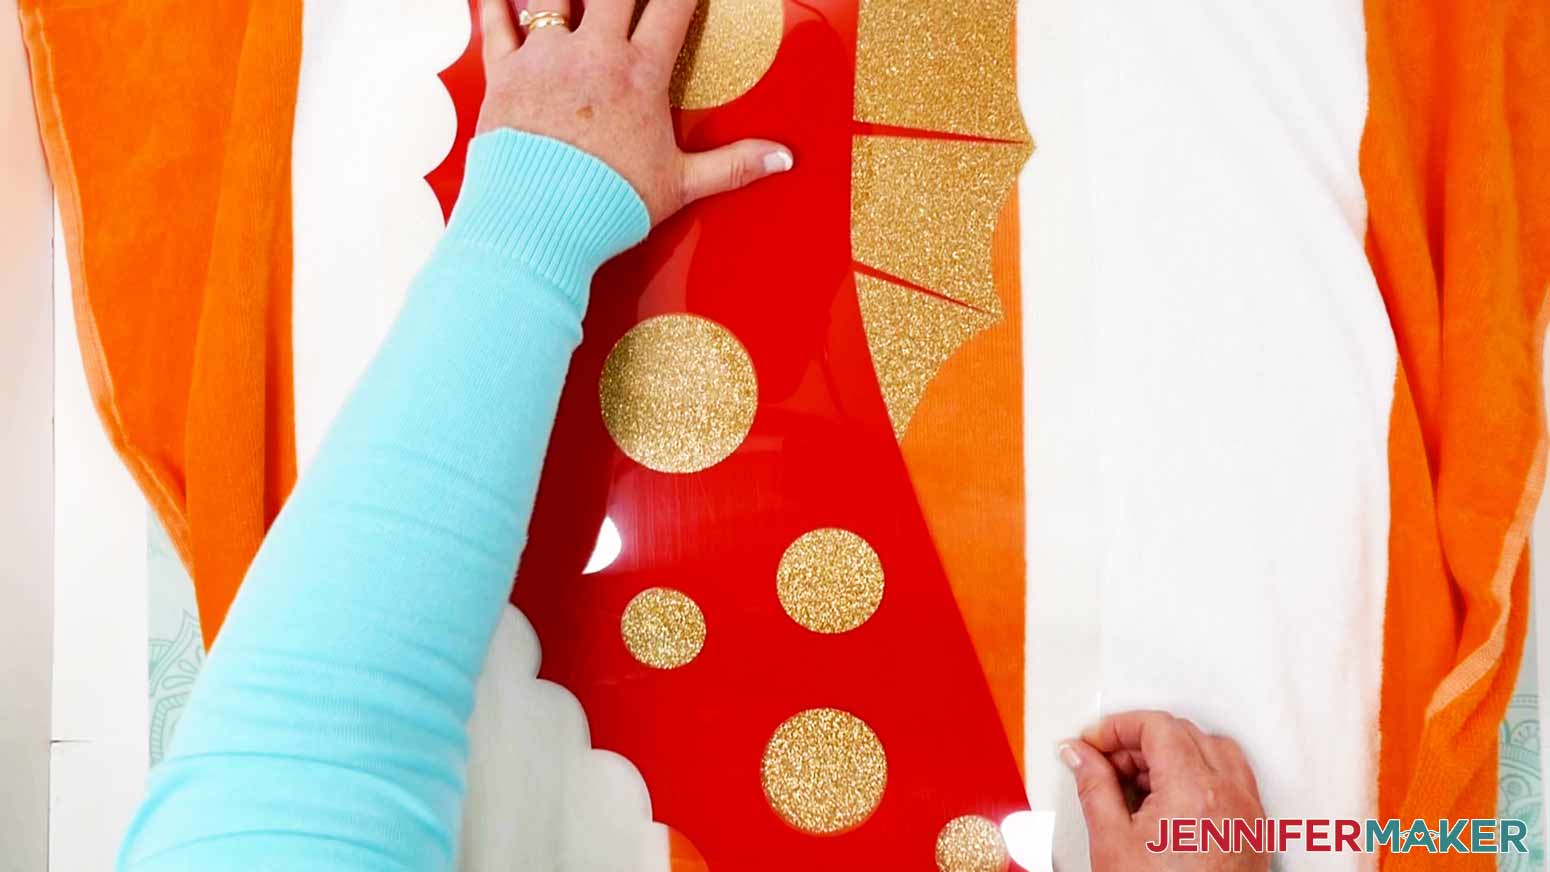
Once your EasyPress is ready at 315ºF, set your EasyPress Mat under your towel again. Tack your Red vinyl to the towel in sections the same way you did before with the Gold Glitter, but this time in only 5 second intervals.
TIP: If your carrier sheet does not cover ALL the vinyl underneath, use a teflon sheet or piece of parchment paper cut to cover all the exposed vinyl. You do not want any vinyl in direct contact with your EasyPress (or iron).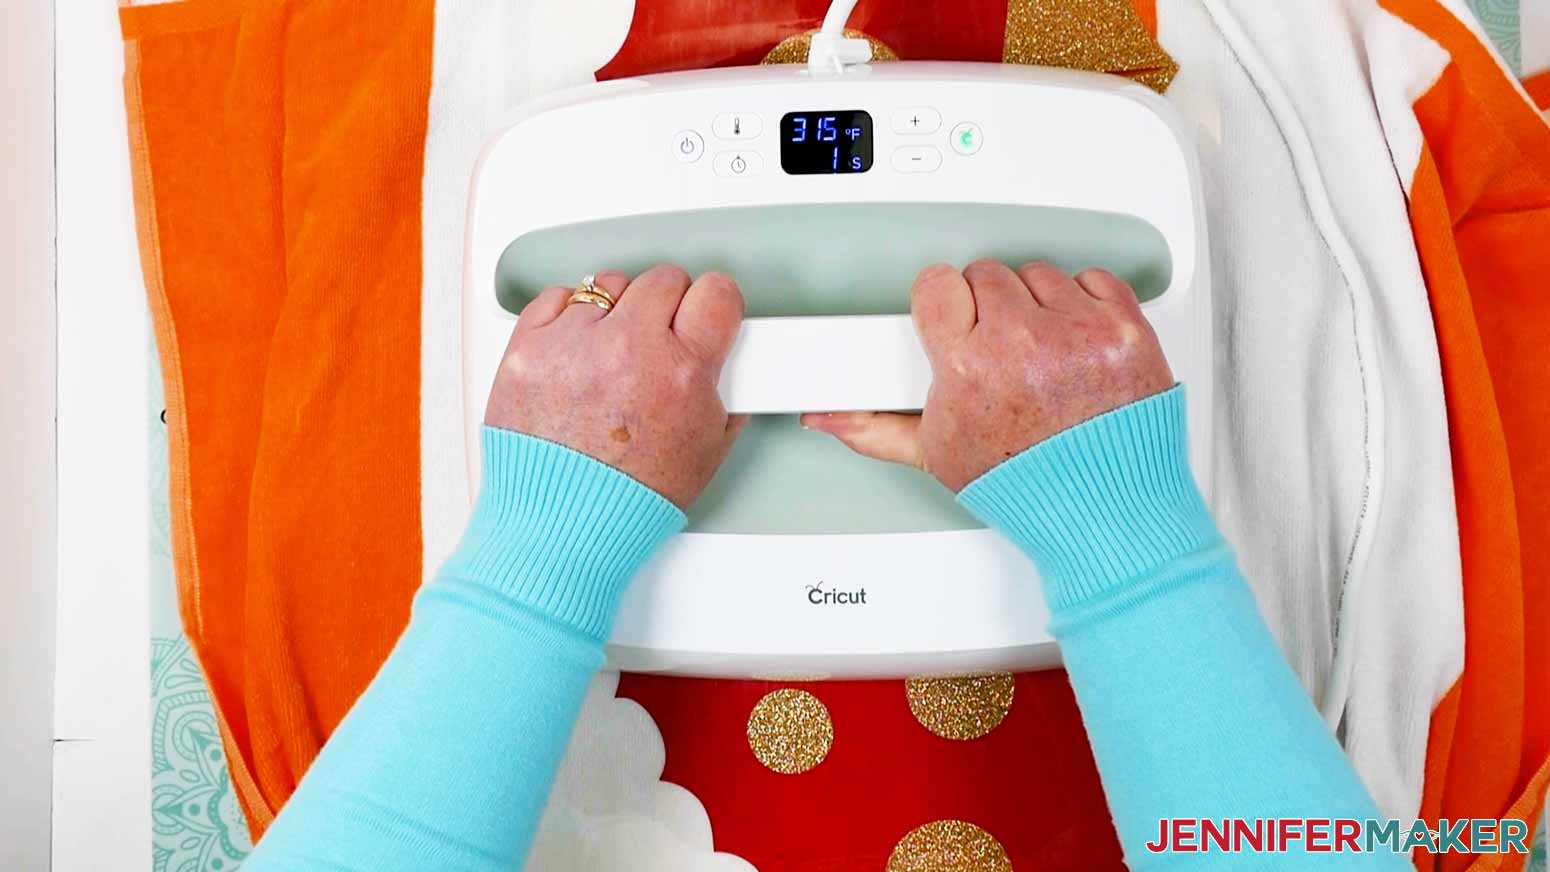
Once you are done, remove the carrier sheet and set it aside.
TIP: Repeat the tacking process if the sheet doesn’t easily come up.
Now that your entire design is tacked to the towel, we want to go over the entire vinyl again with the heat to fully adhere it to the towel.
To do this, retrieve the largest piece of carrier sheet you removed earlier. Place it sticky side down over the entire design, including the text. This will protect the vinyl from the EasyPress heat.
Place your EasyPress Mat under the towel and heat the design in sections using your EasyPress set to 315ºF (or an iron on the Cotton setting). This time you will heat each section of the “Seahorse” for 12 to 15 seconds with light pressure.
TIP: Your text has only been tacked to the towel once, so you’ll want to heat the text sections for up to 20 to 25 seconds to make sure it’s fully adhered. If your text layer is Glitter vinyl, you can increase the temperature of the EasyPress for this section up to 330ºF (or an iron on a setting between Cotton and Linen). If your text layer is regular Iron-On vinyl, then you’ll want your EasyPress to be 315ºF (or an iron on a setting on Cotton).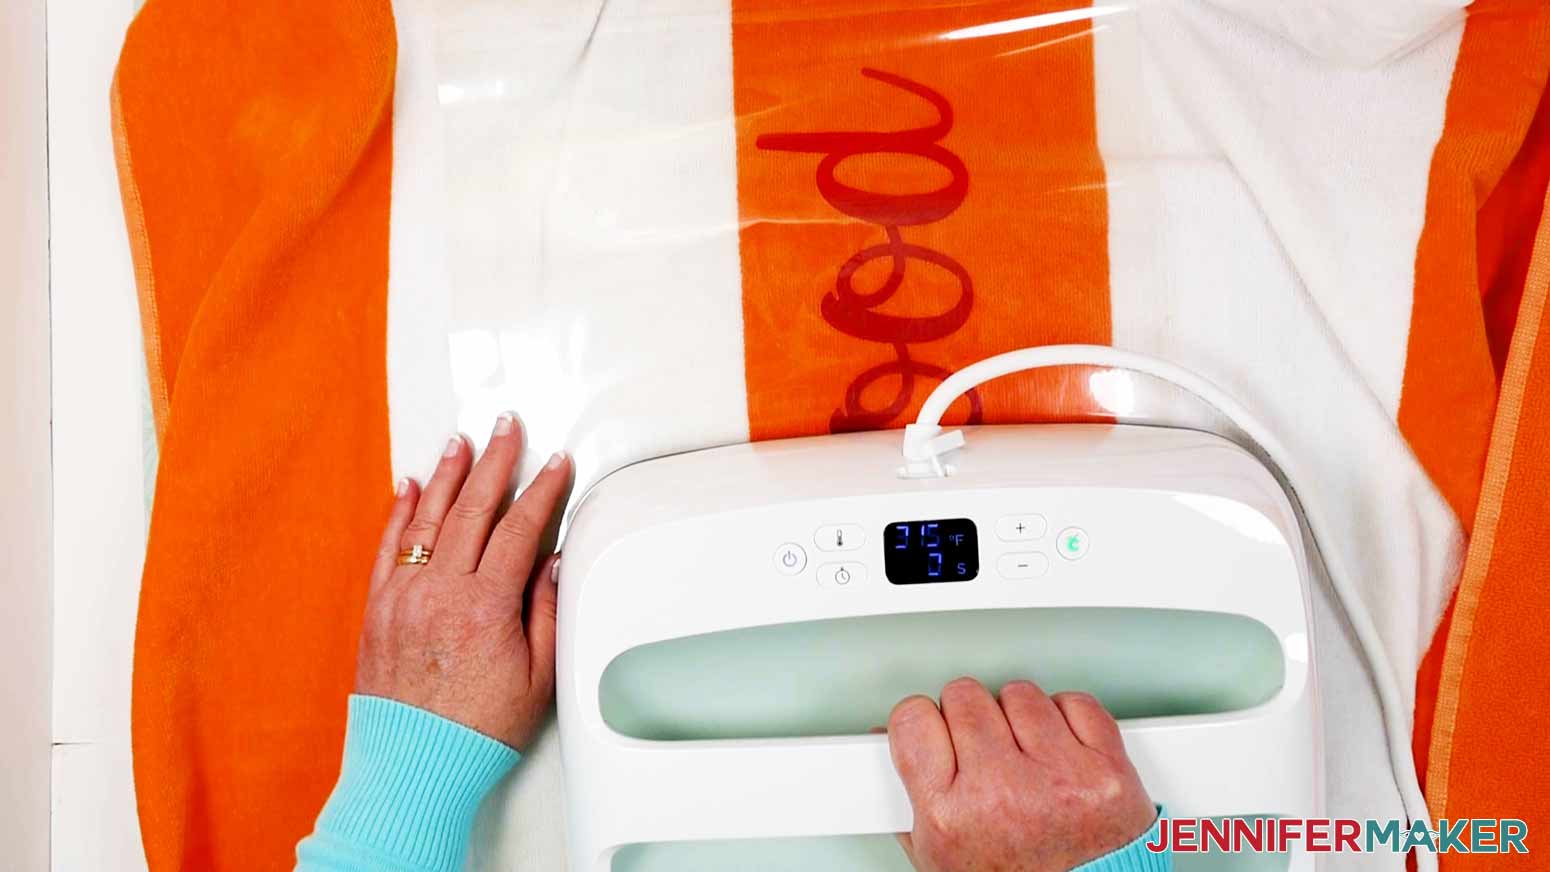
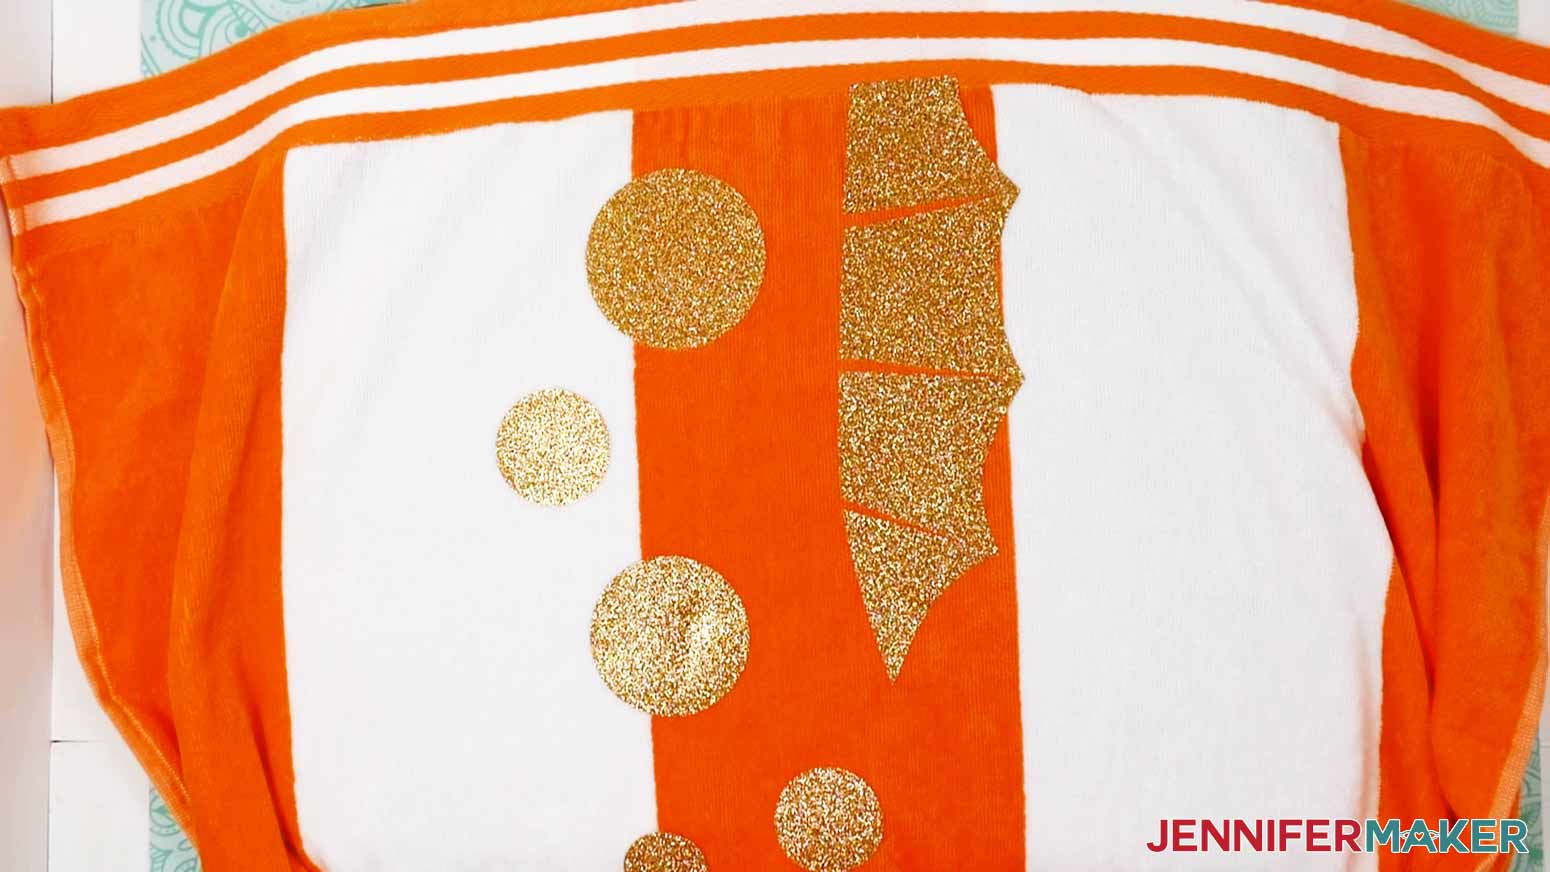
Remove the carrier sheet and check that all the vinyl is adhered well. Reheat any sections that need more attention.
Now you’re done! Allow up to 24 hours before washing and tumbling dry. Do not use bleach. You can expect your vinyl to last up to 50 washes!
Applying the “Mermaid” design
For the “Mermaid” design, align your Matte Red vinyl layer (the scale and tail layer) on the preheated towel using the stripes as a guide. Be sure it is centered and aligned correctly. Press the layer sticky side down on the towel so it stays in place. 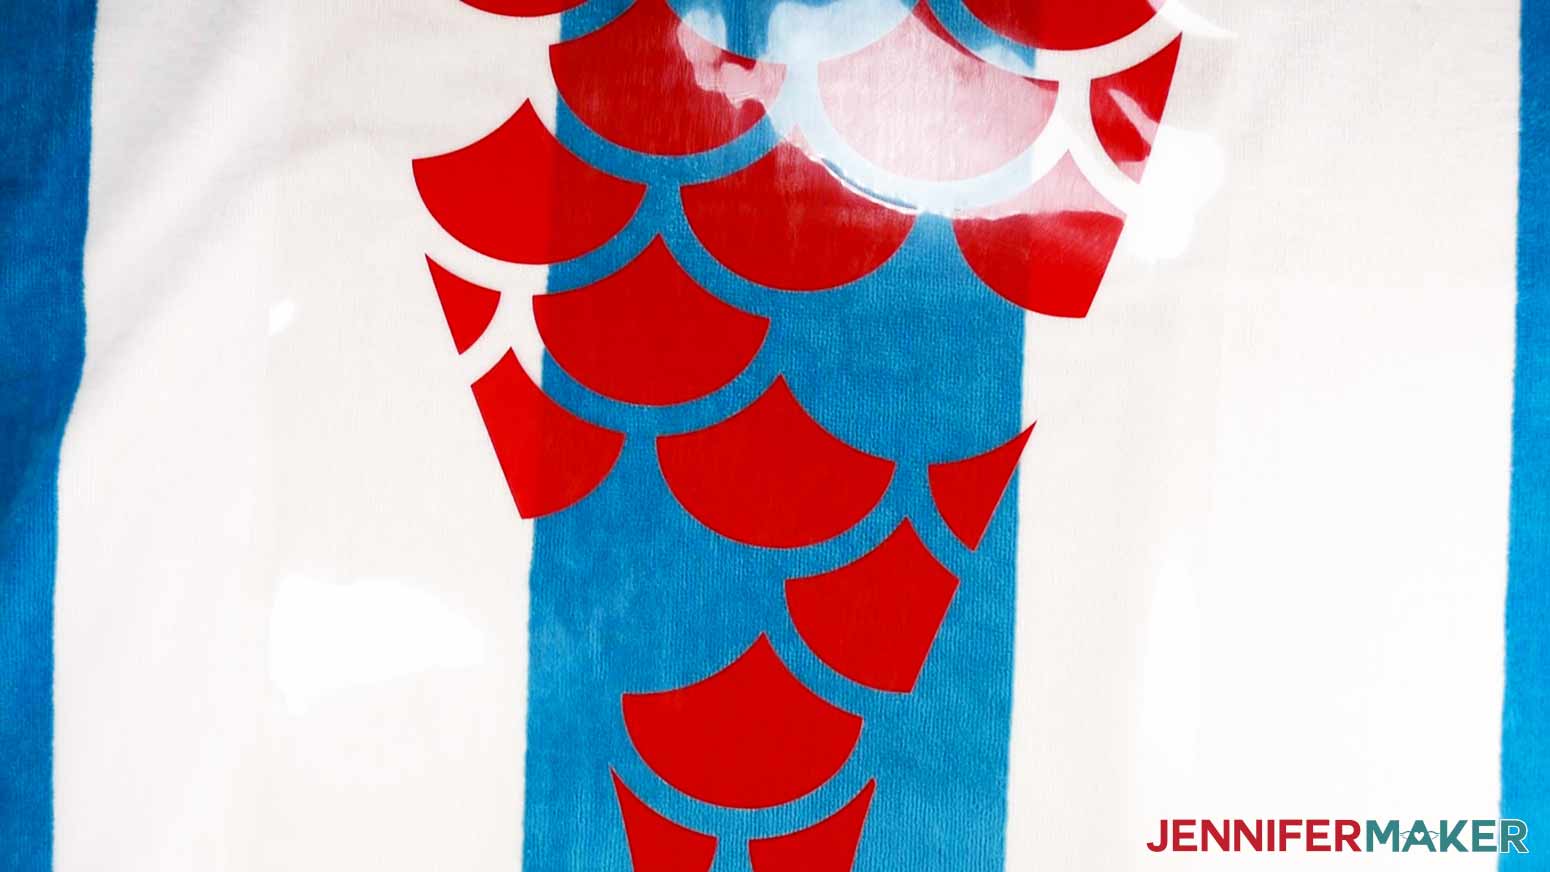
Place your Cricut EasyPress Mat under the towel to protect your work surface. Make sure your EasyPress is at 315ºF (or an iron on the Cotton setting) and hold it to your first section with light pressure for 5 seconds.
TIP: Do NOT slide your EasyPress (or iron) while applying pressure.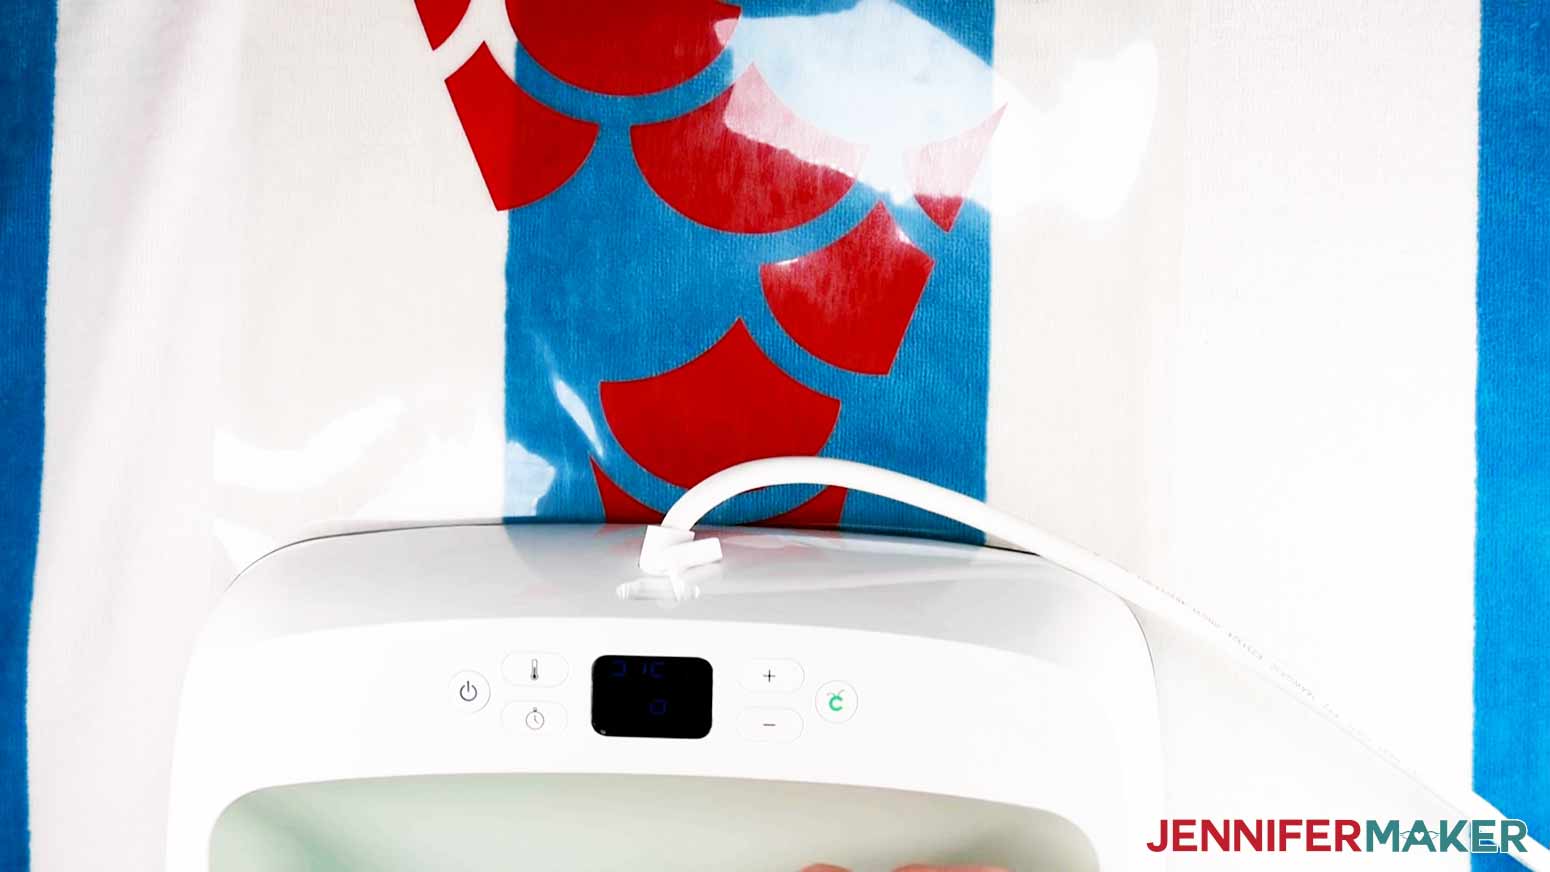
Repeat this to all sections until the entire Red layer of the “Mermaid” design is tacked to the towel. Remove the carrier sheet and set it aside, and move your EasyPress Mat to the side so you have a completely flat surface to work on.
TIP: If your carrier sheet does not lift off easily, reapply the heat in small increments of 5 seconds until it does come off.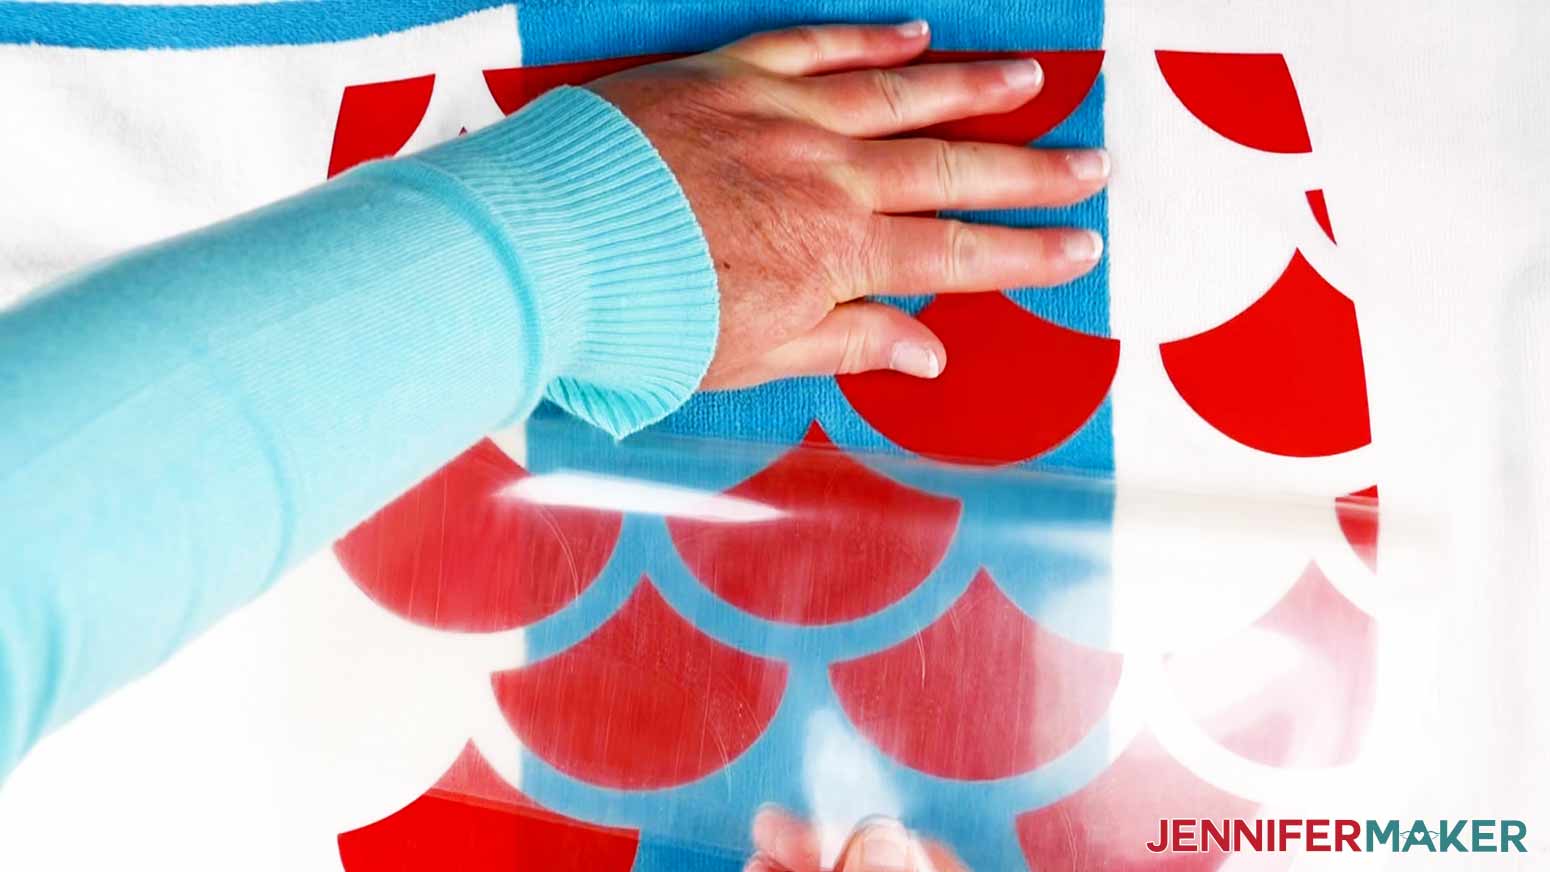
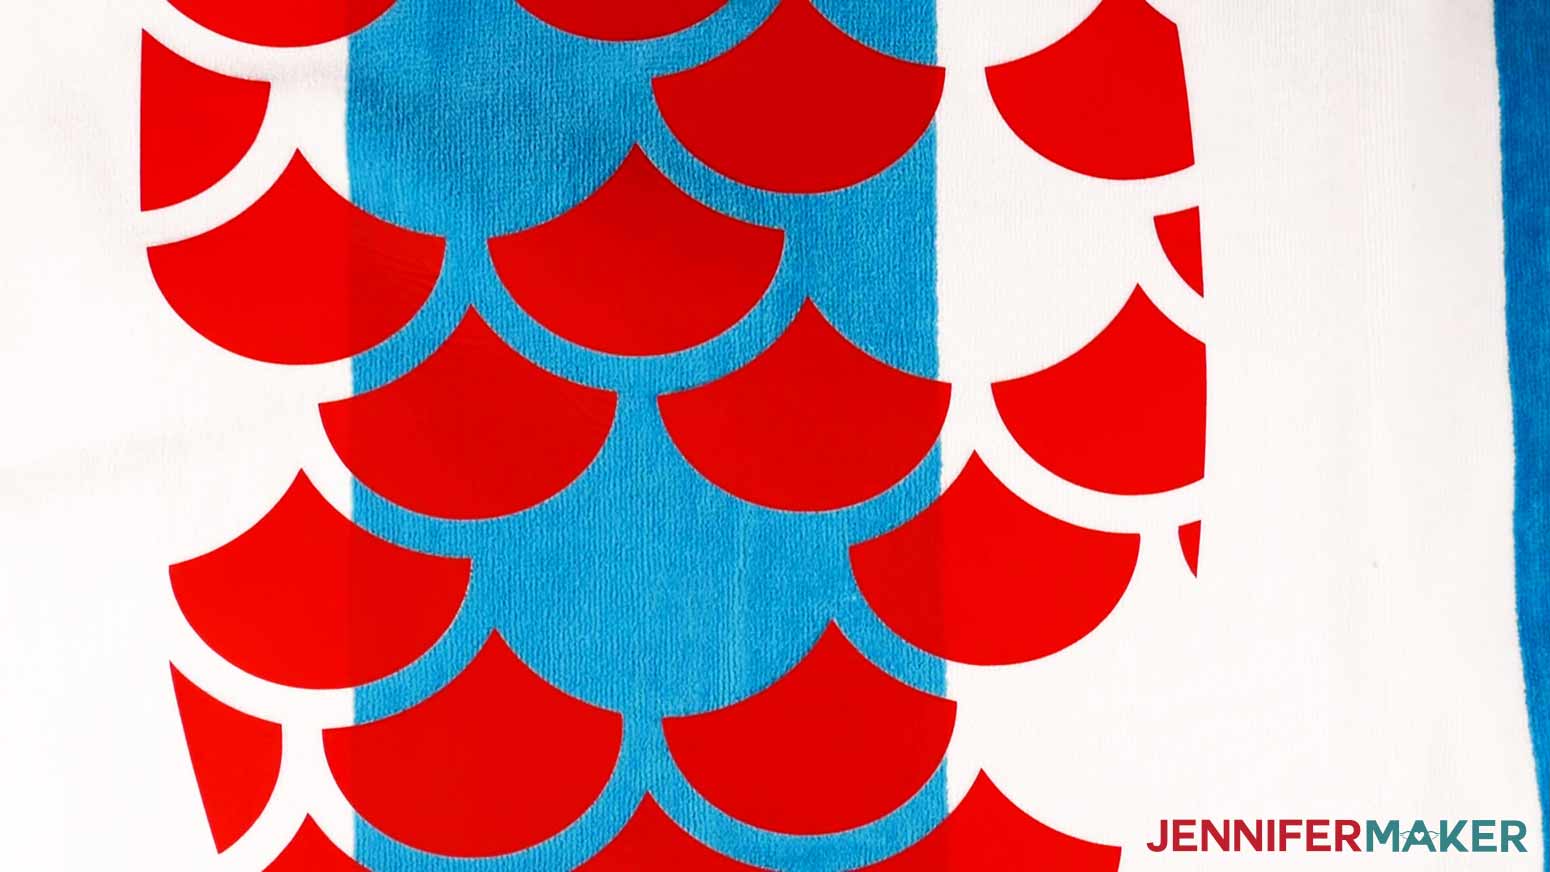
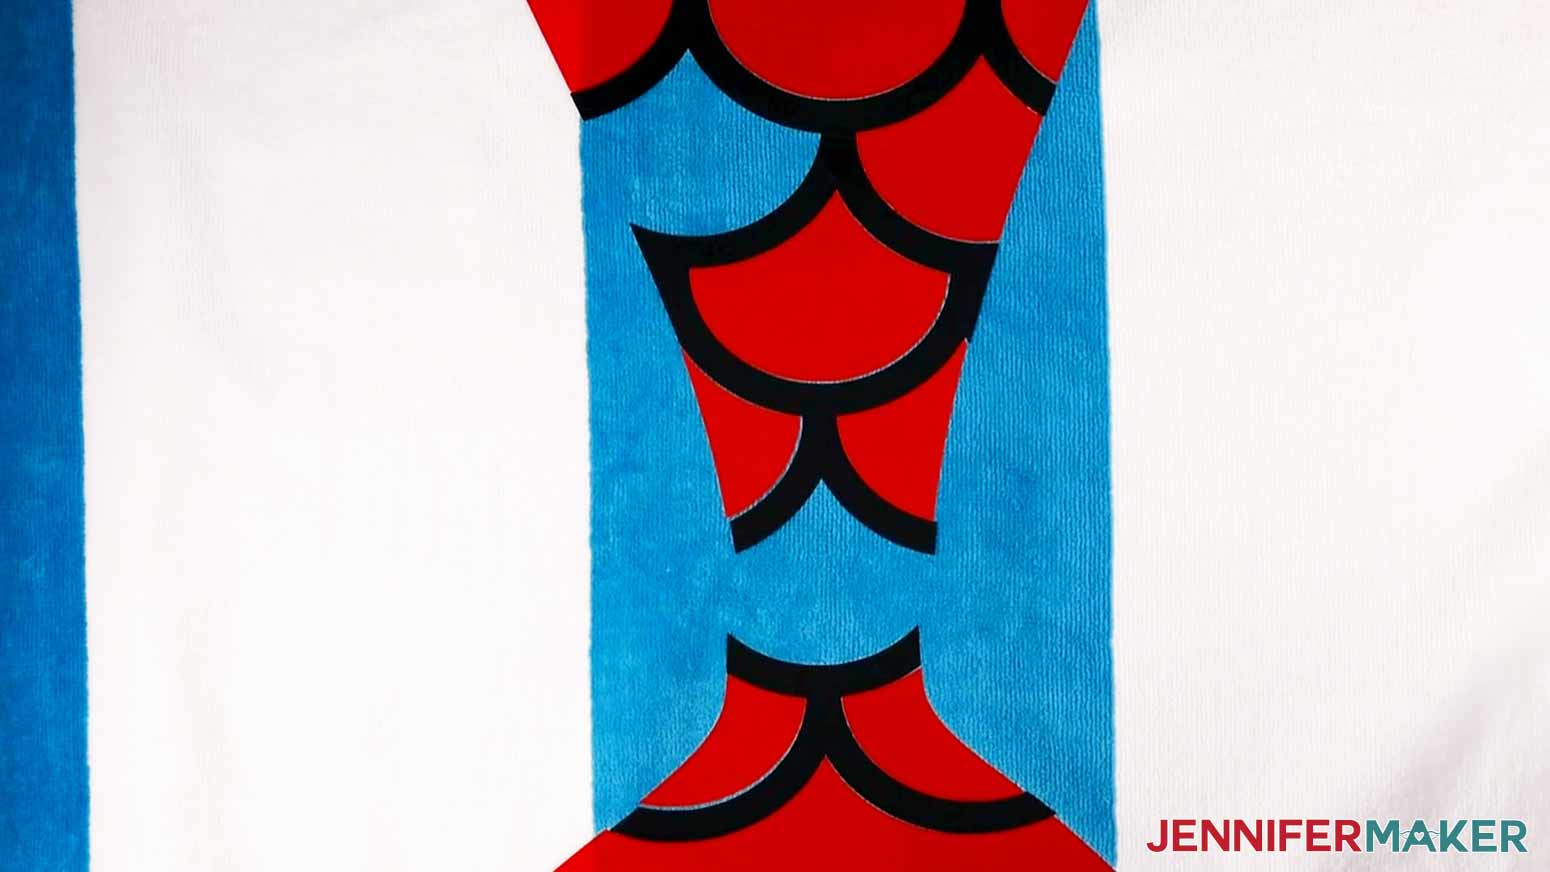
Now, line up the Navy layer (the scale outlines) over the Red layer and stick it down in place -- they will fit together like a puzzle. 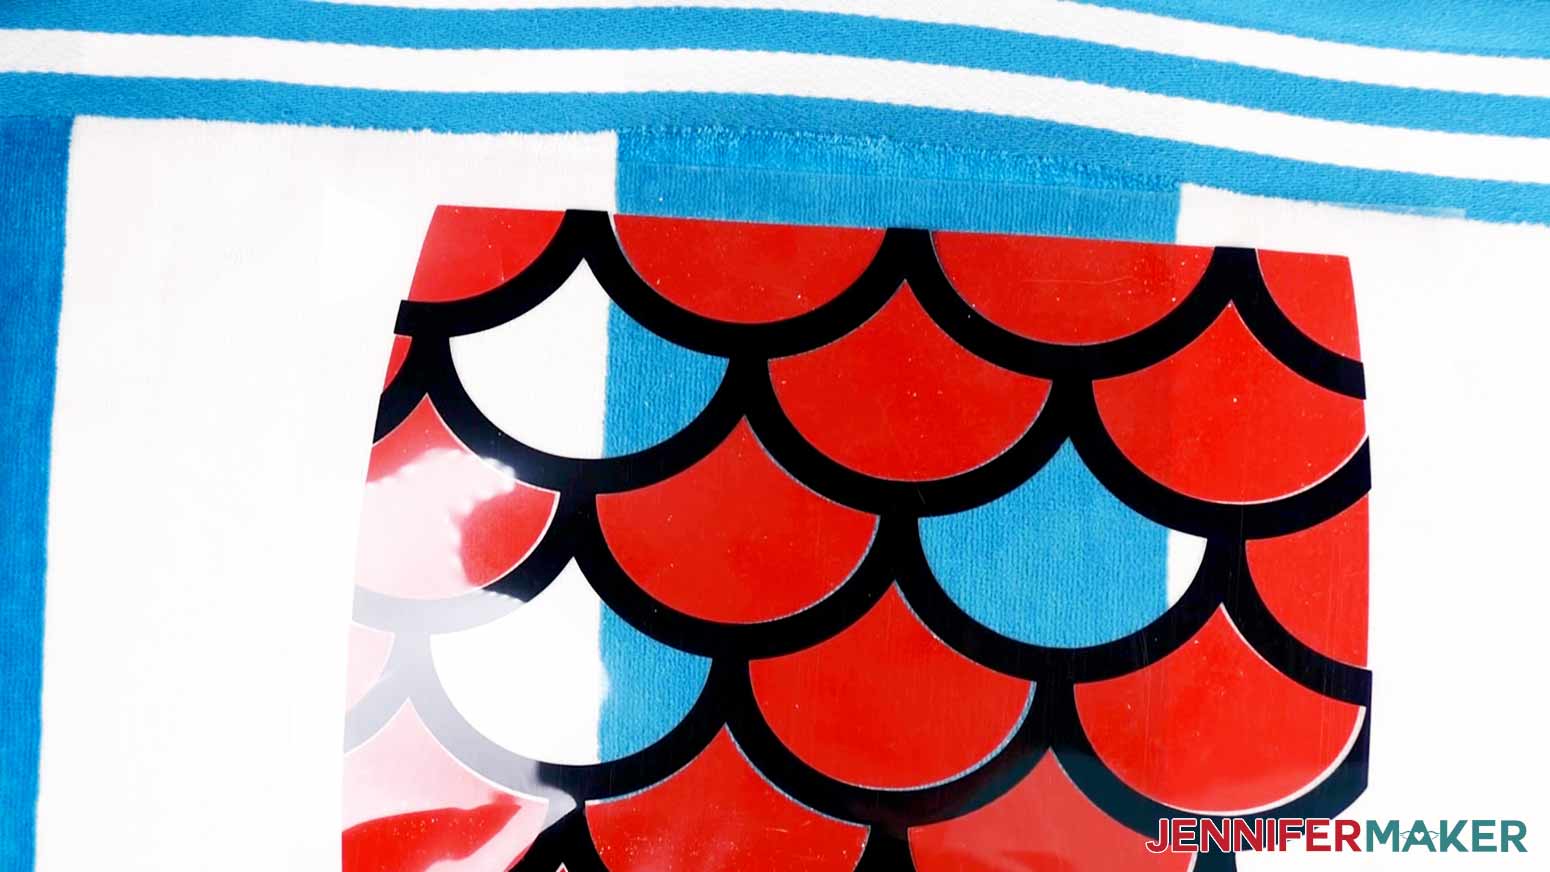
Once they are aligned, repeat the process of heating the vinyl for 5 seconds until all sections of the Navy layer is tacked onto the towel. Your EasyPress should still be set on 315ºF. Remove the carrier sheet when everything is tacked onto the towel.
TIP: If your carrier sheet does not cover ALL the vinyl underneath, use a teflon sheet or piece of parchment paper cut to cover all the exposed vinyl. You do not want any vinyl in direct contact with your EasyPress (or iron).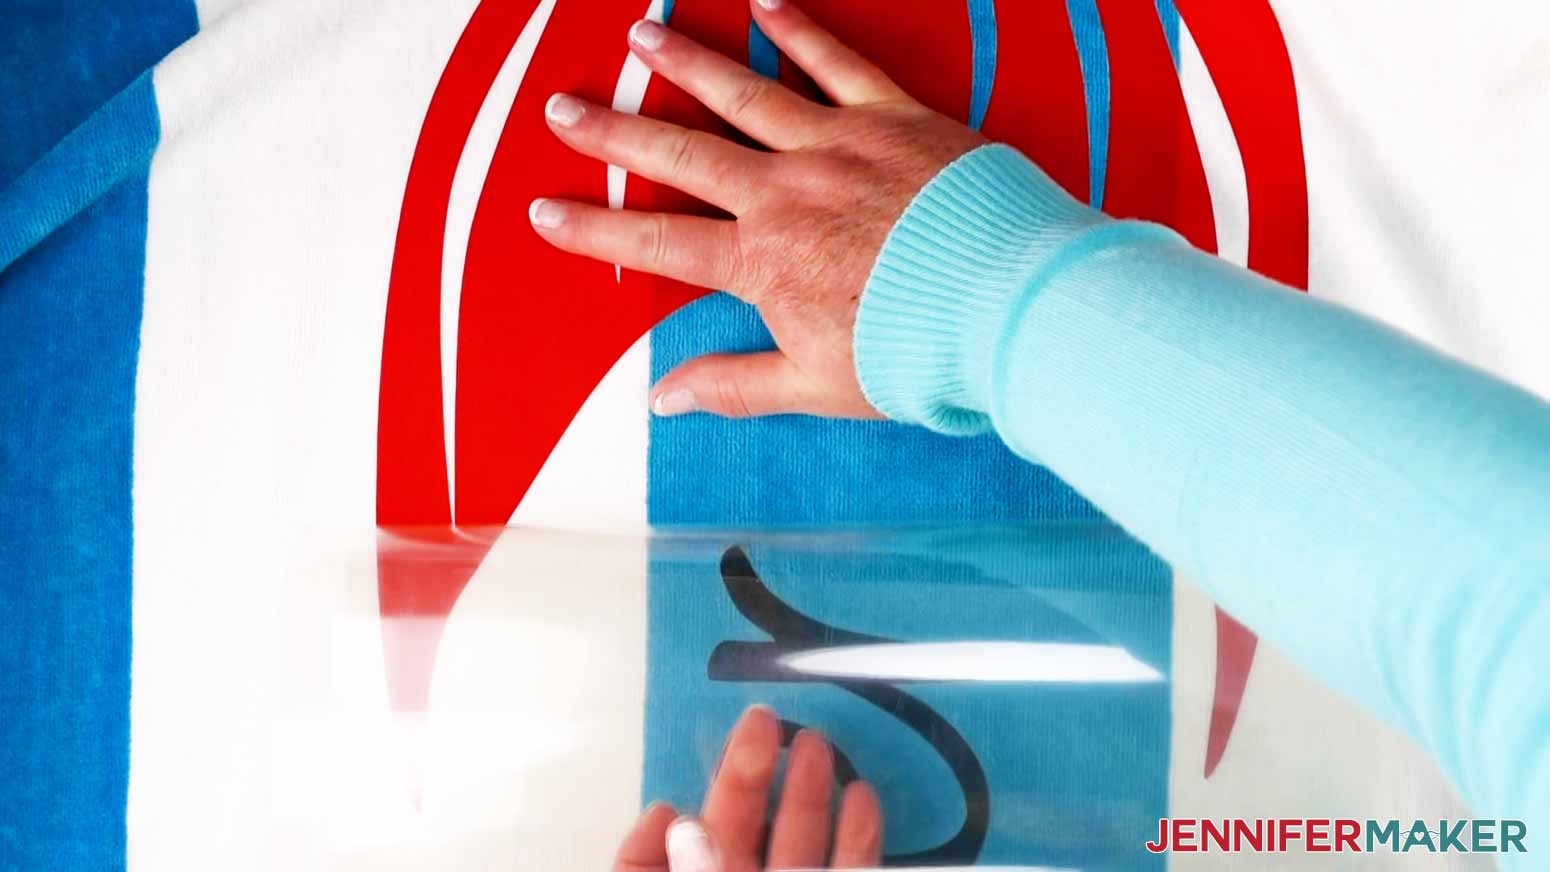
Now, increase the temperature of your EasyPress to 330ºF (or an iron on a setting between Cotton and Linen). Move your EasyPress Mat to the side so you have a completely flat surface to work on.
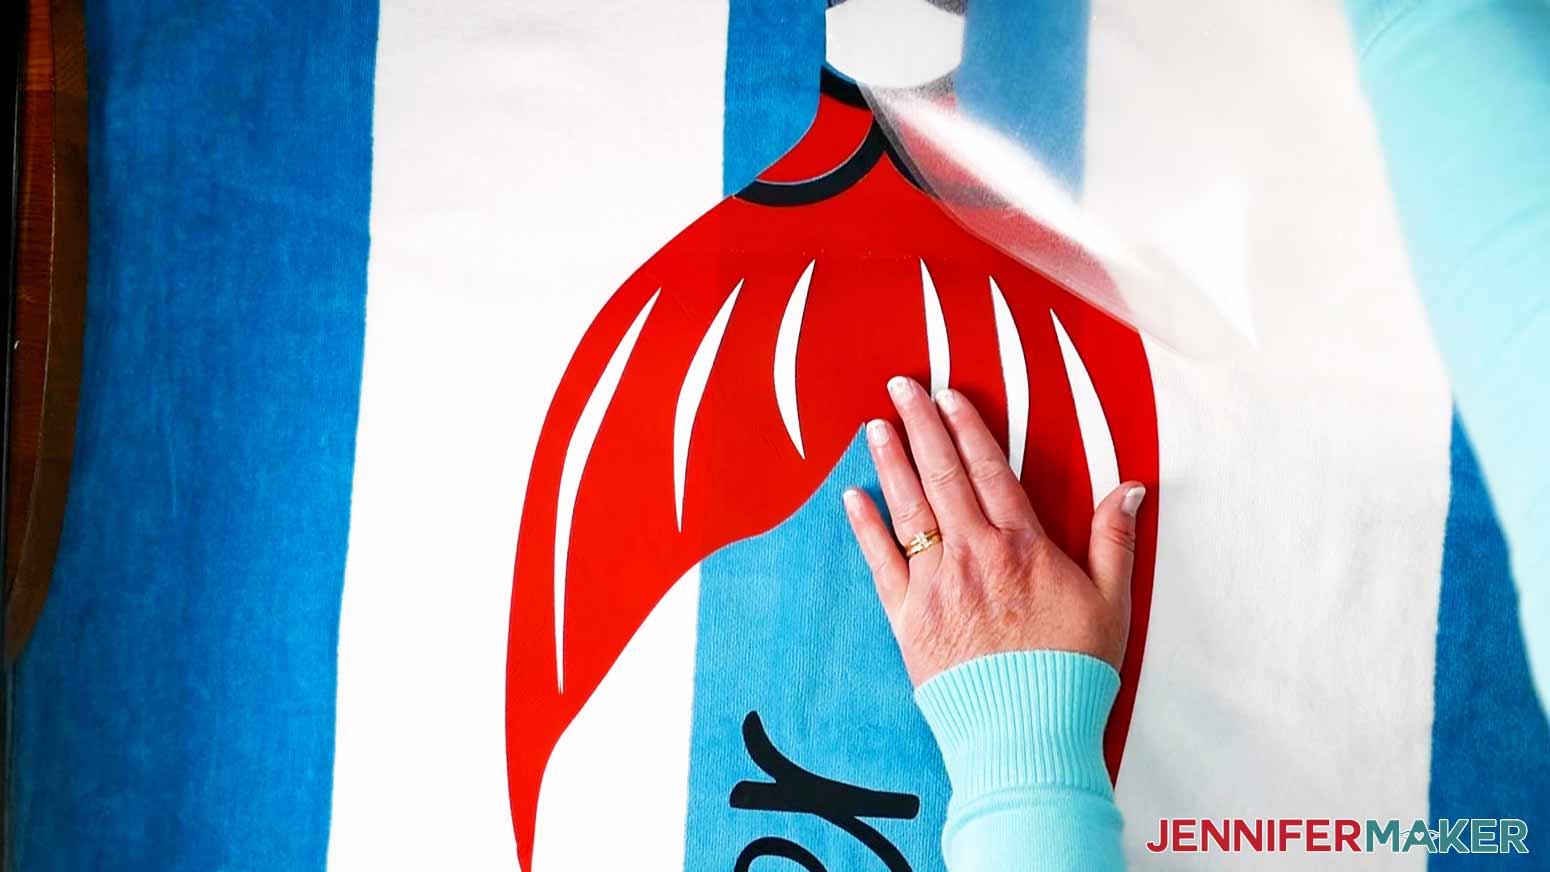
While your EasyPress is adjusting temperature, line up your White Glitter layer on top of your other layers on the towel. You may need to carefully align it in sections to make sure it aligns well with the layers underneath. Once your White Glitter layer is in place, press it sticky side down to the towel.
TIP: If your carrier sheet does not cover ALL the vinyl underneath, use a teflon sheet or piece of parchment paper cut to cover all the exposed vinyl. You do not want any vinyl in direct contact with your EasyPress.
Once your EasyPress is 330ºF, set your EasyPress Mat under your towel again. Tack your White Glitter vinyl to the towel in sections the same way you did before with the other layers, but this time in 10 second intervals. 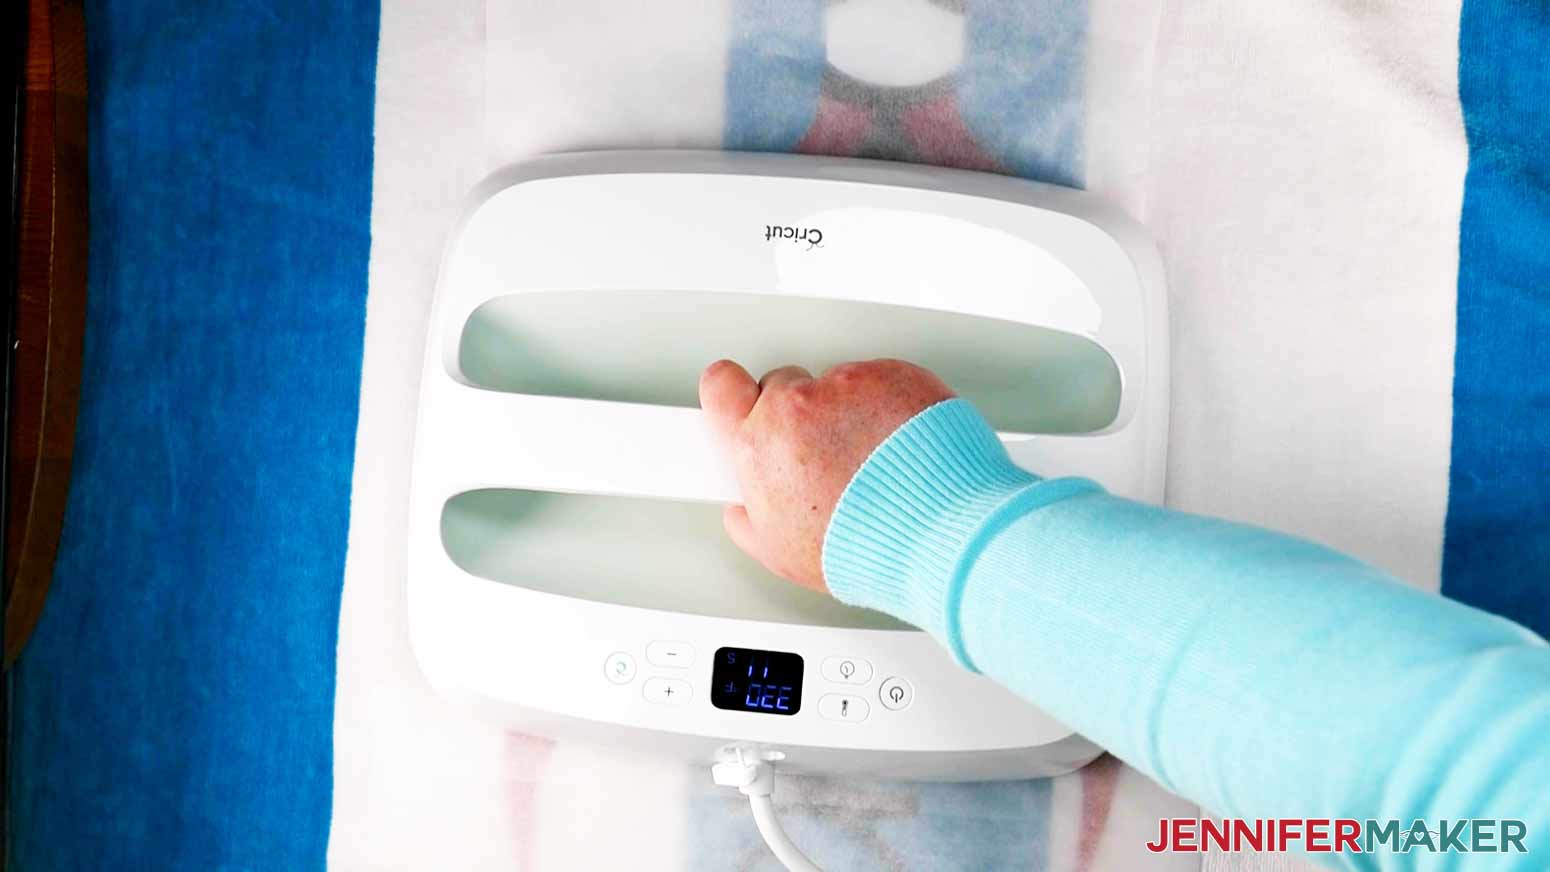
Once you are done, remove the carrier sheet and set it aside.
TIP: Repeat the tacking process if the sheet doesn’t easily come up.
Now that your entire design is tacked to the towel, we want to go over the entire vinyl again with the heat to fully adhere it to the towel.
To do this, retrieve the largest piece of carrier sheet you removed earlier. Place it sticky side down over the entire design, including the text. This will protect the vinyl from the EasyPress heat.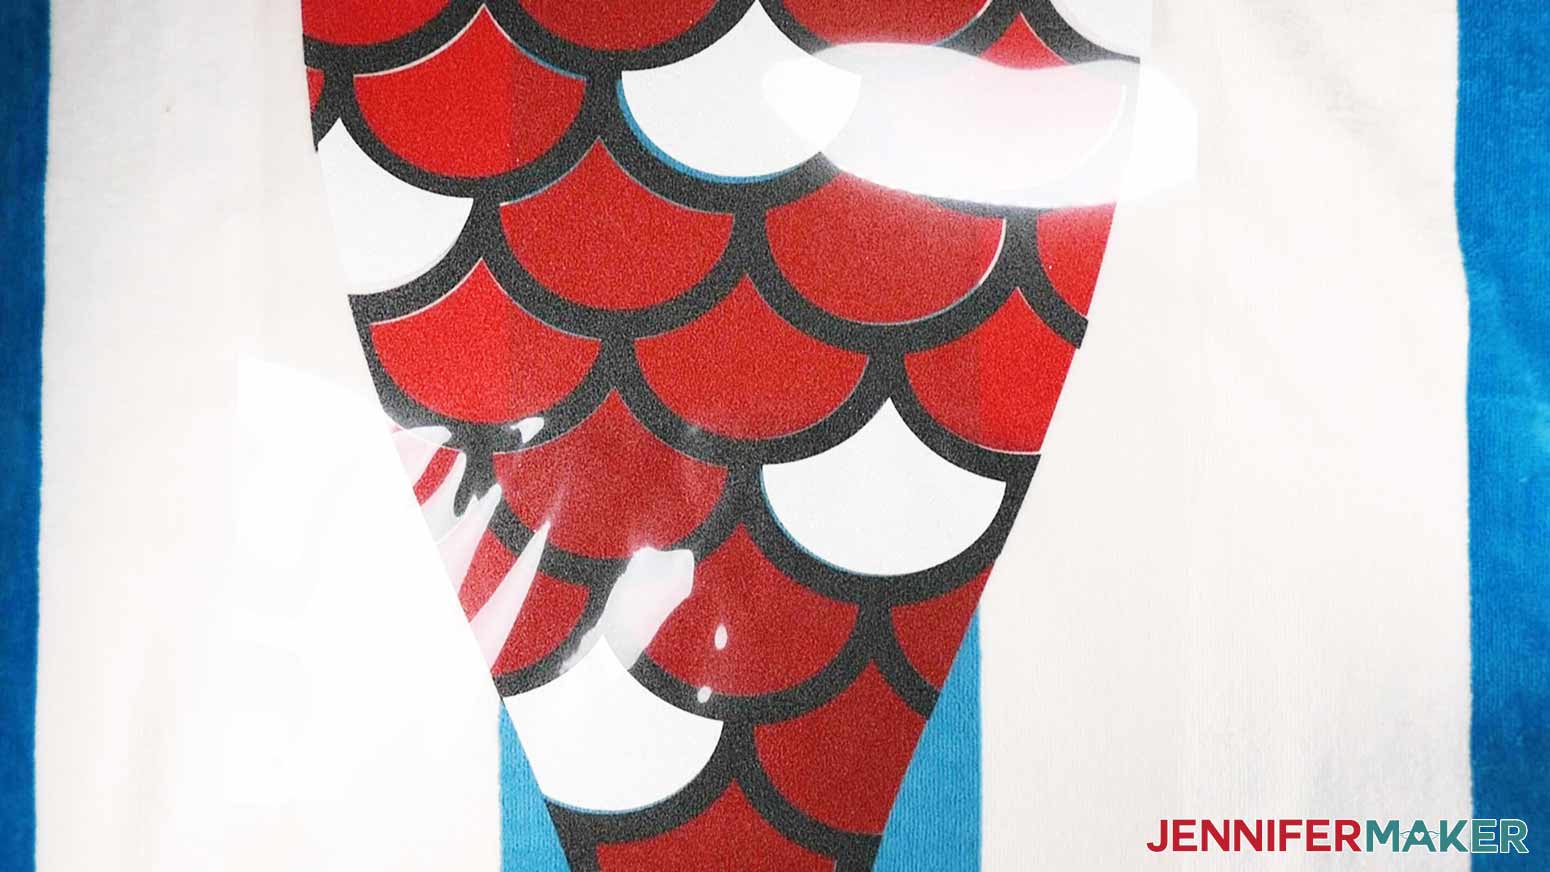
Place your EasyPress Mat under the towel and heat the design in sections using your EasyPress set to 315ºF. This time you will heat each section of the “Mermaid” for 10 seconds with light pressure.
TIP: Your text has only been tacked to the towel once, so you’ll want to heat the text sections for up to 20 to 25 seconds to make sure it’s fully adhered. If your text layer is Glitter vinyl, you can increase the temperature of the EasyPress for this section up to 330ºF (or a setting between Cotton and Linen on an iron). If your text layer is regular Iron-On vinyl, then you’ll want your EasyPress to be 315ºF (or the Cotton setting on an iron).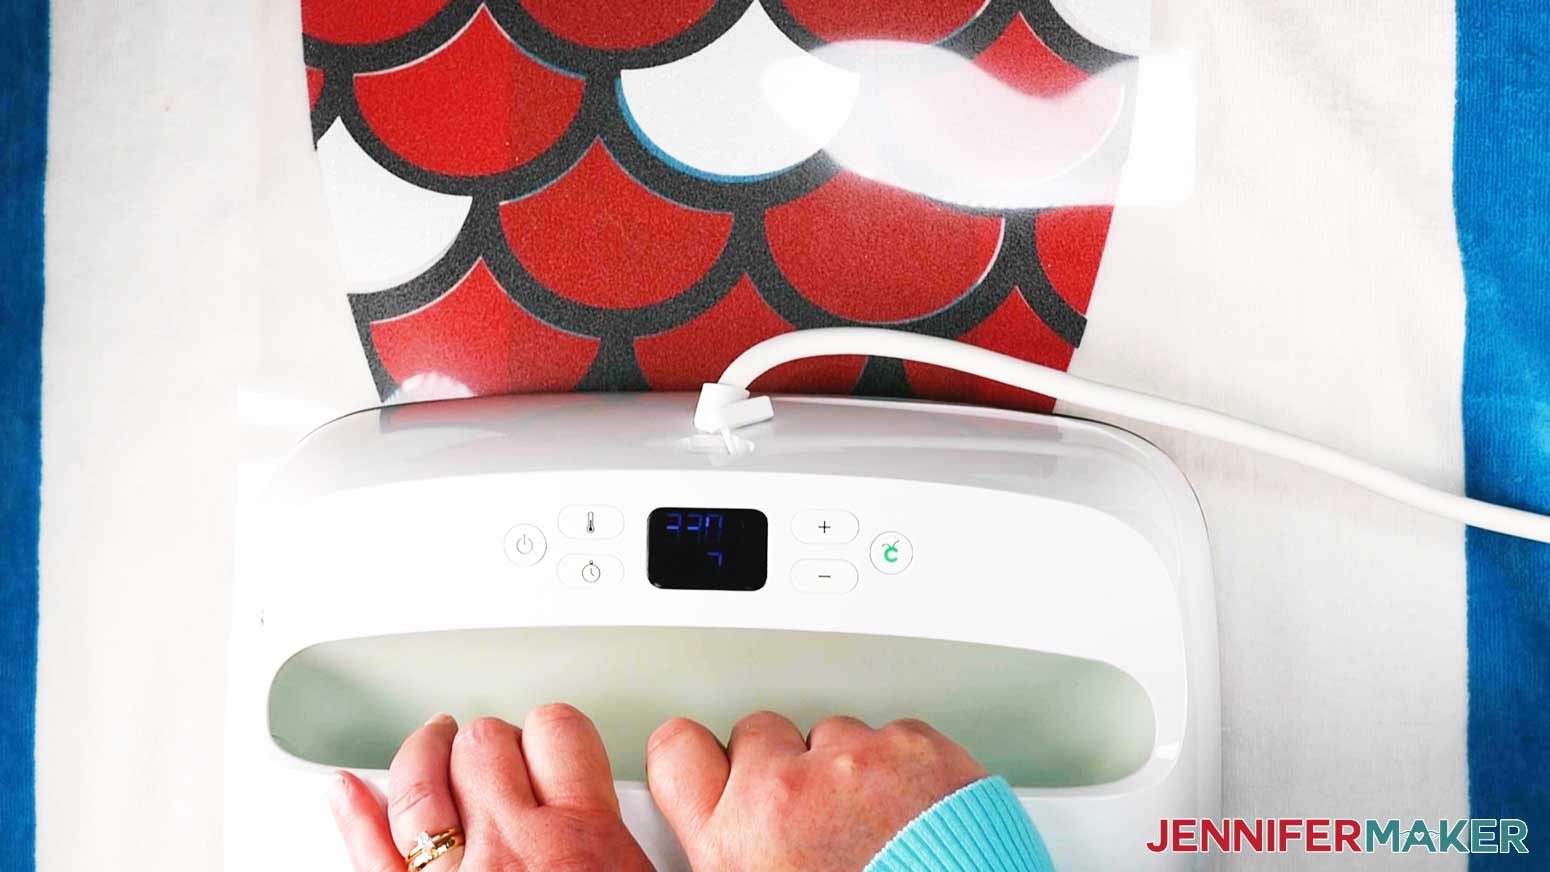
Remove the carrier sheet and check that all the vinyl is adhered well. Reheat any sections that need more attention.
Now you’re done! Allow up to 24 hours before washing and tumbling dry. Do not use bleach. You can expect your vinyl to last up to 50 washes!
STEP 4: SHOW IT OFF
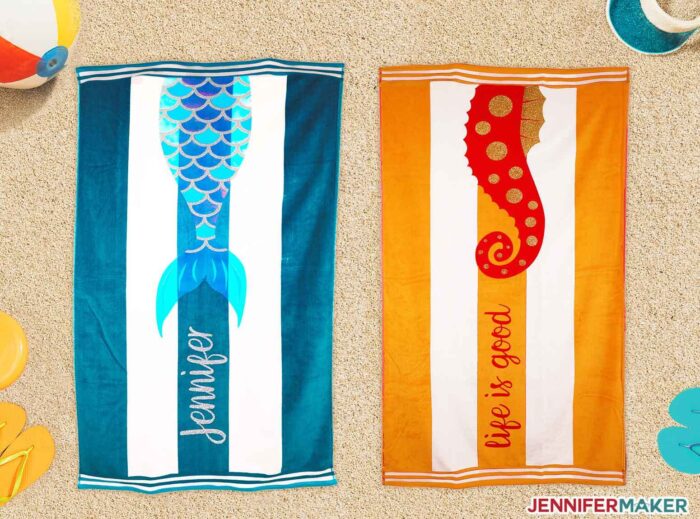
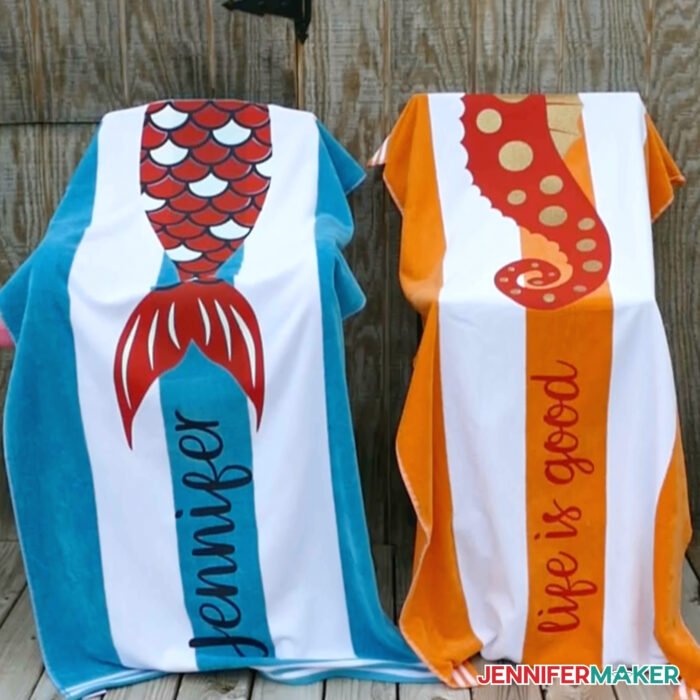
Your DIY Personalized Beach Towels are complete! I can’t wait to see all of the beautiful towels you make with your Cricut Maker 3 and Cricut Explore 3!
Notes
Fonts used
Breethy
The final size of each beach towel is 34" x 64"
Recommended Products
As an Amazon Associate and member of other affiliate programs, I earn from qualifying purchases.

Answers to Your Questions About How to Make DIY Personalized Beach Towels
Q: Do I have to use only these beach towels?
Of course not! Feel free to use whatever you have on hand, or find in a local store! You will be more pleased with your results using as thick a towel as you can find with as smooth a surface as possible, though. Iron on vinyl (HTV) needs a smooth surface to adhere well, and the “nubbier” towels won’t be able to provide that! Please experiment with a small test design to see if you like the result! I always recommend a test cut and press anyway.
Q: Can I cut these on my Explore Air 2?
You sure can! Original Maker and Explore owners will be able to make their own DIY Personalized Beach Towels! You just cannot cut the entire design in one pass like the Maker 3 and Explore 3 do, so you’ll either want to resize so it fits on a 12″ x 24″ mat OR slice the design up into pieces — my Easy Vertical Welcome Sign tutorial teaches you how to do this!
Q: What size beach towel do I need?
I used a beach towel that was 34” wide by 64” long for this project. You can always use one larger or smaller — just make sure that you re-size your SVG to fit! Not sure how to do that? I can show you here: How to Resize SVG Files in Cricut Design Space!
Q: Do I have to use an EasyPress, or can I use my household iron?
Using an EasyPress only makes this easier to do, since the vinyl pieces are so large. But you can certainly use your iron! Be very careful that your vinyl is adhering well, and feel free to go back and apply more heat if you need to.
Q: Do I have to use Cricut Smart Iron On or can I use any brand?
I love the Cricut brand and have never had a problem with it. As far as the Maker 3 and Explore 3, they are recommending that you stay away from other manufacturers if you want to cut matless. Cricut vinyl has gone through extensive testing to make sure it works properly with their machines without a mat, and, especially with a brand-new Cricut, I’m not going to take a chance on another brand of vinyl!
Get my free SVG files to create eye-catching DIY Personalized Beach Towels
I’d love to see YOUR DIY personalized beach towels and how you choose to decorate them! Please share a photo in our Facebook group or tag me on social media with #jennifermaker.
Love,

Want to remember this? Save this Personalized Beach Towels Tutorial to your favorite Pinterest Board!


I absolutely love this. My question is does it have to be the Smart Vinyl . I have an Explorer 2. Can I use Cricut regular HTV?
You sure can use regular HTV, Karen! 🙂
These towels are really cute, can you wash and dry them like regular I embellished towels? I would like to make them as bridesmaids gifts and add care instructions.
We haven’t had them long enough to have washed them enough times to know, Carole, but the test towels we have made up have held up well with normal HTV care instructions. Wash them in cool water, and either air dry or dry on a very low heat! And make sure you are following the application instructions closely! What a great bridesmaid gift! Super idea! 😍