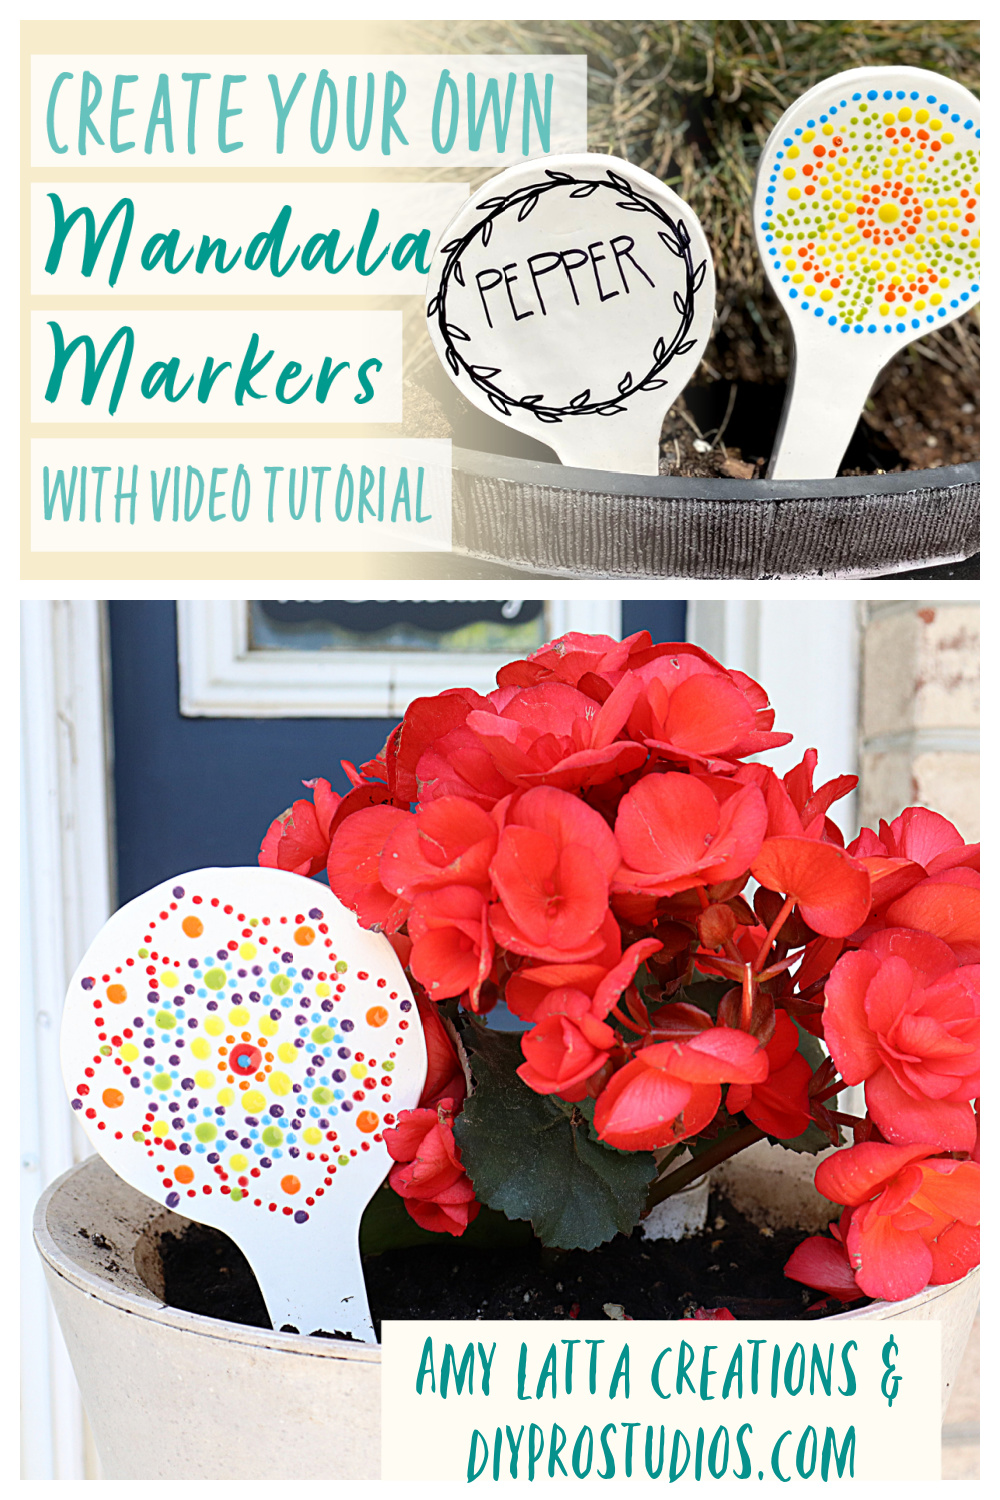
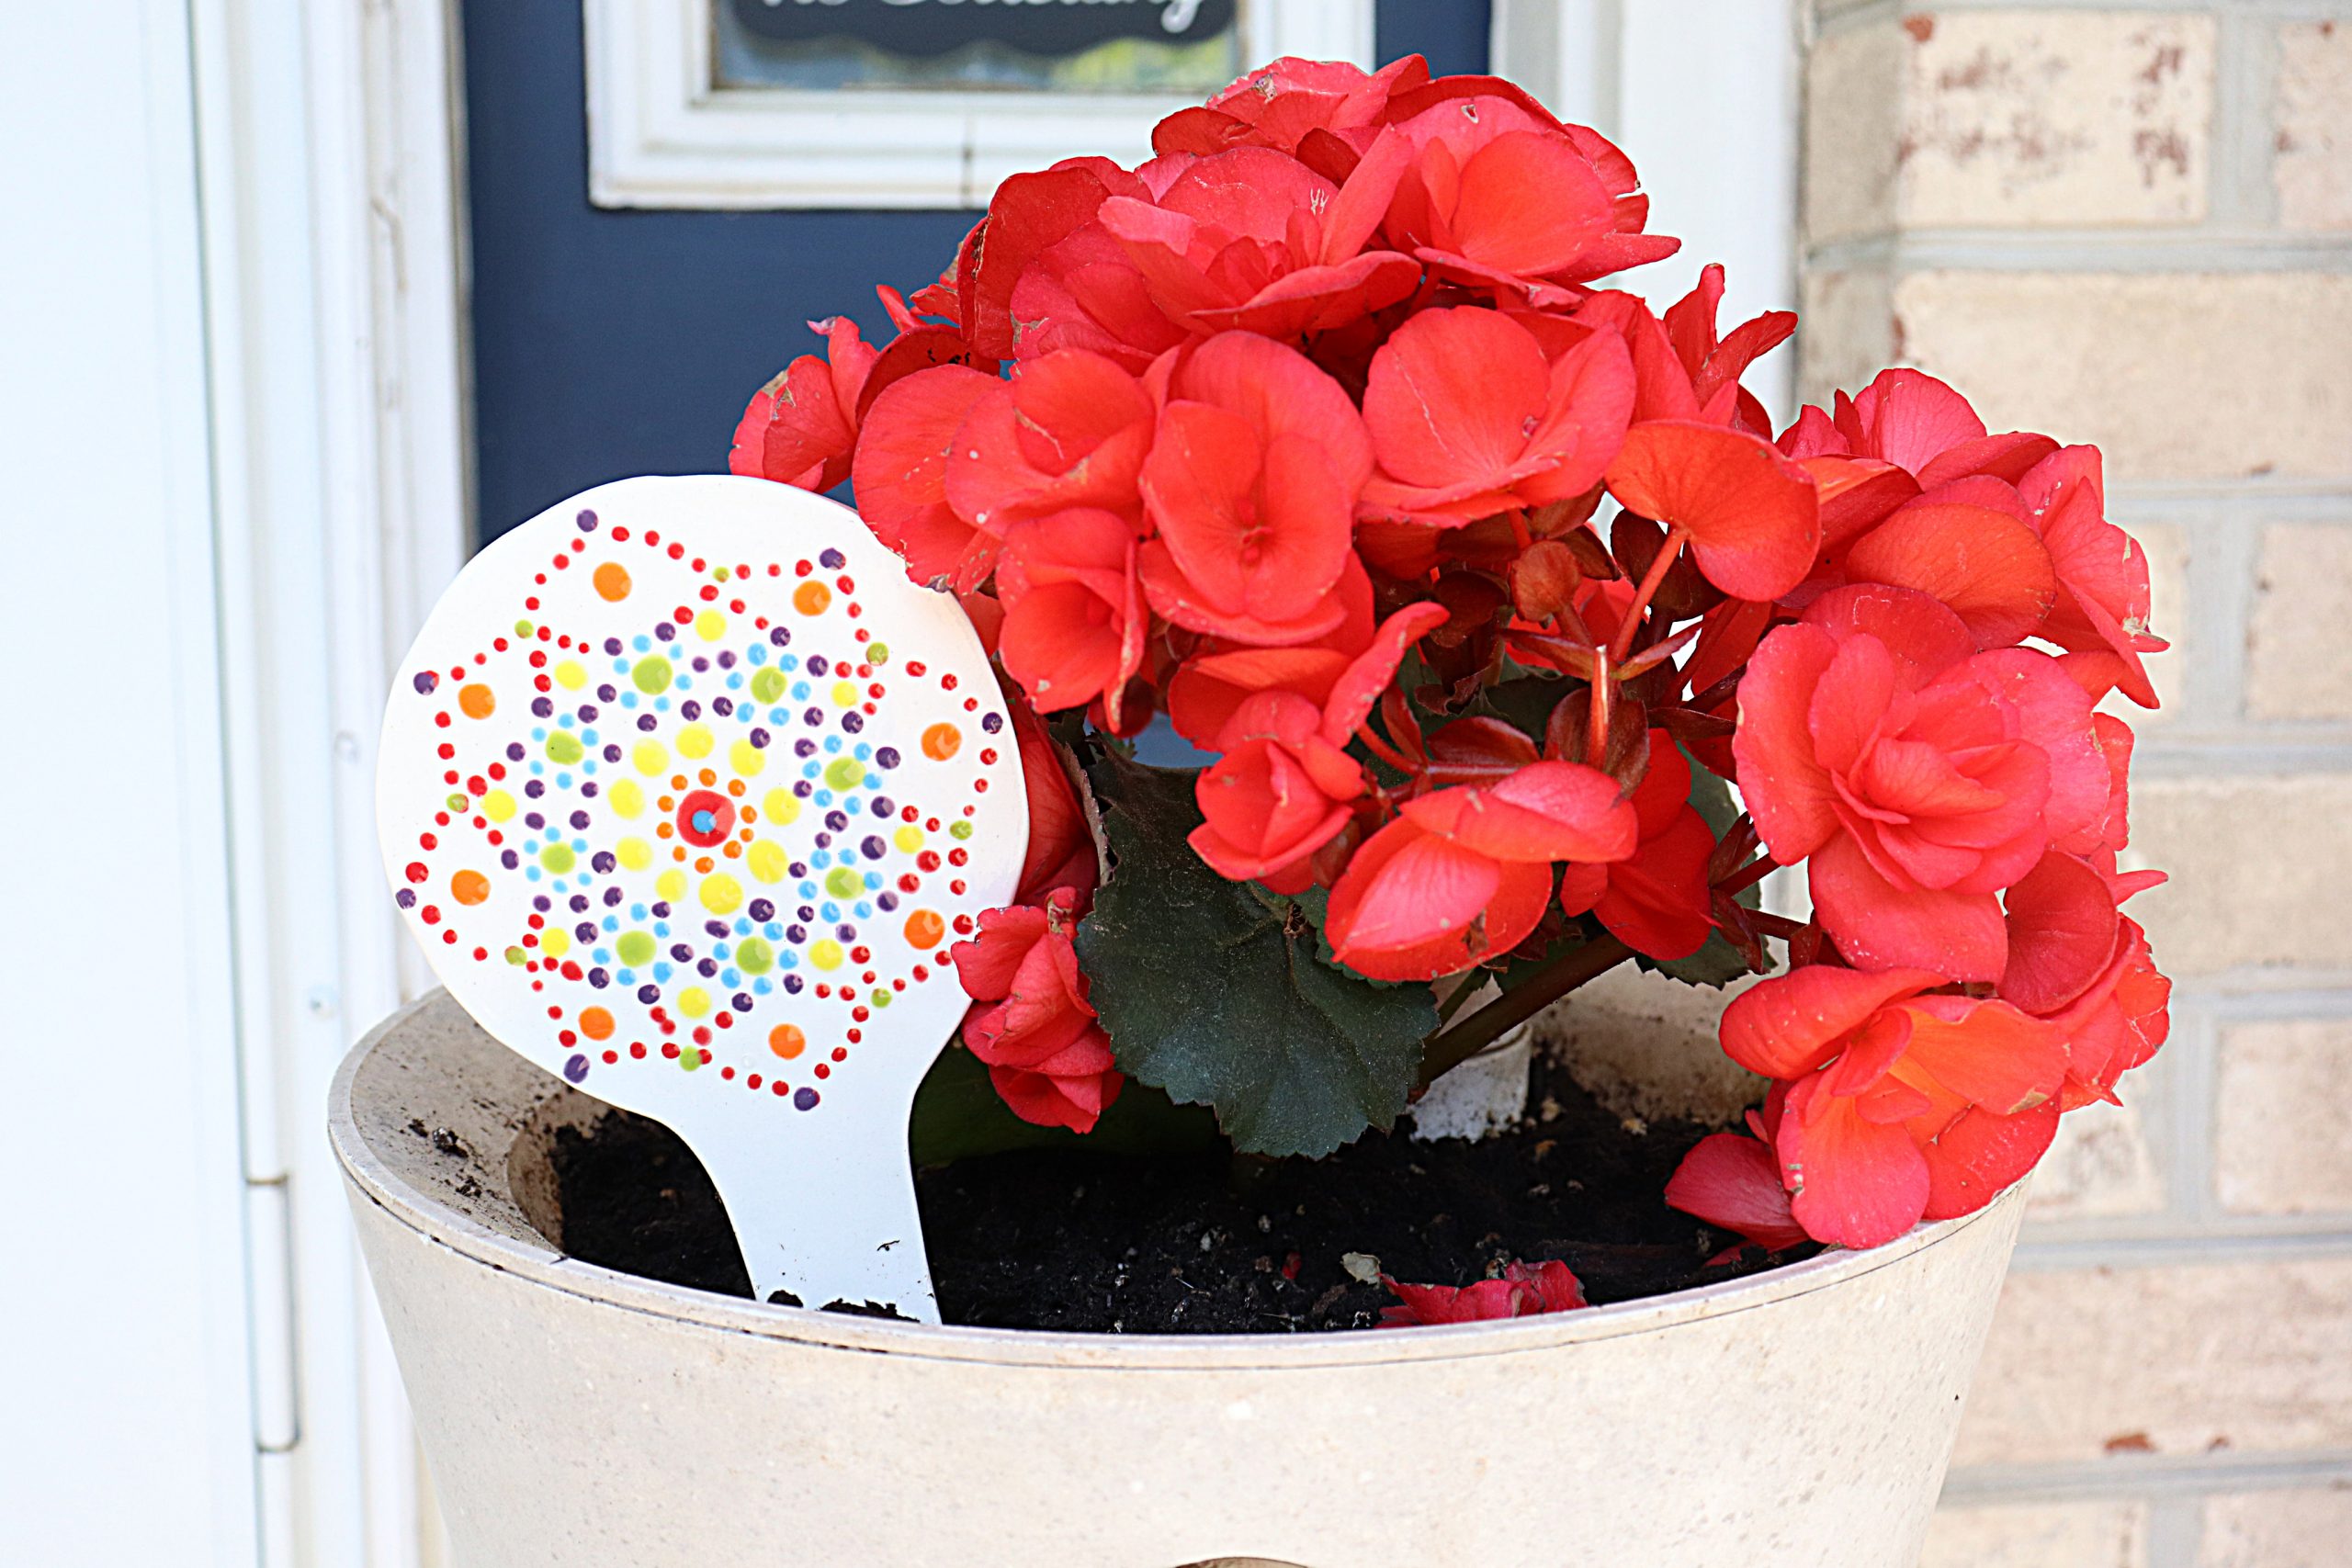
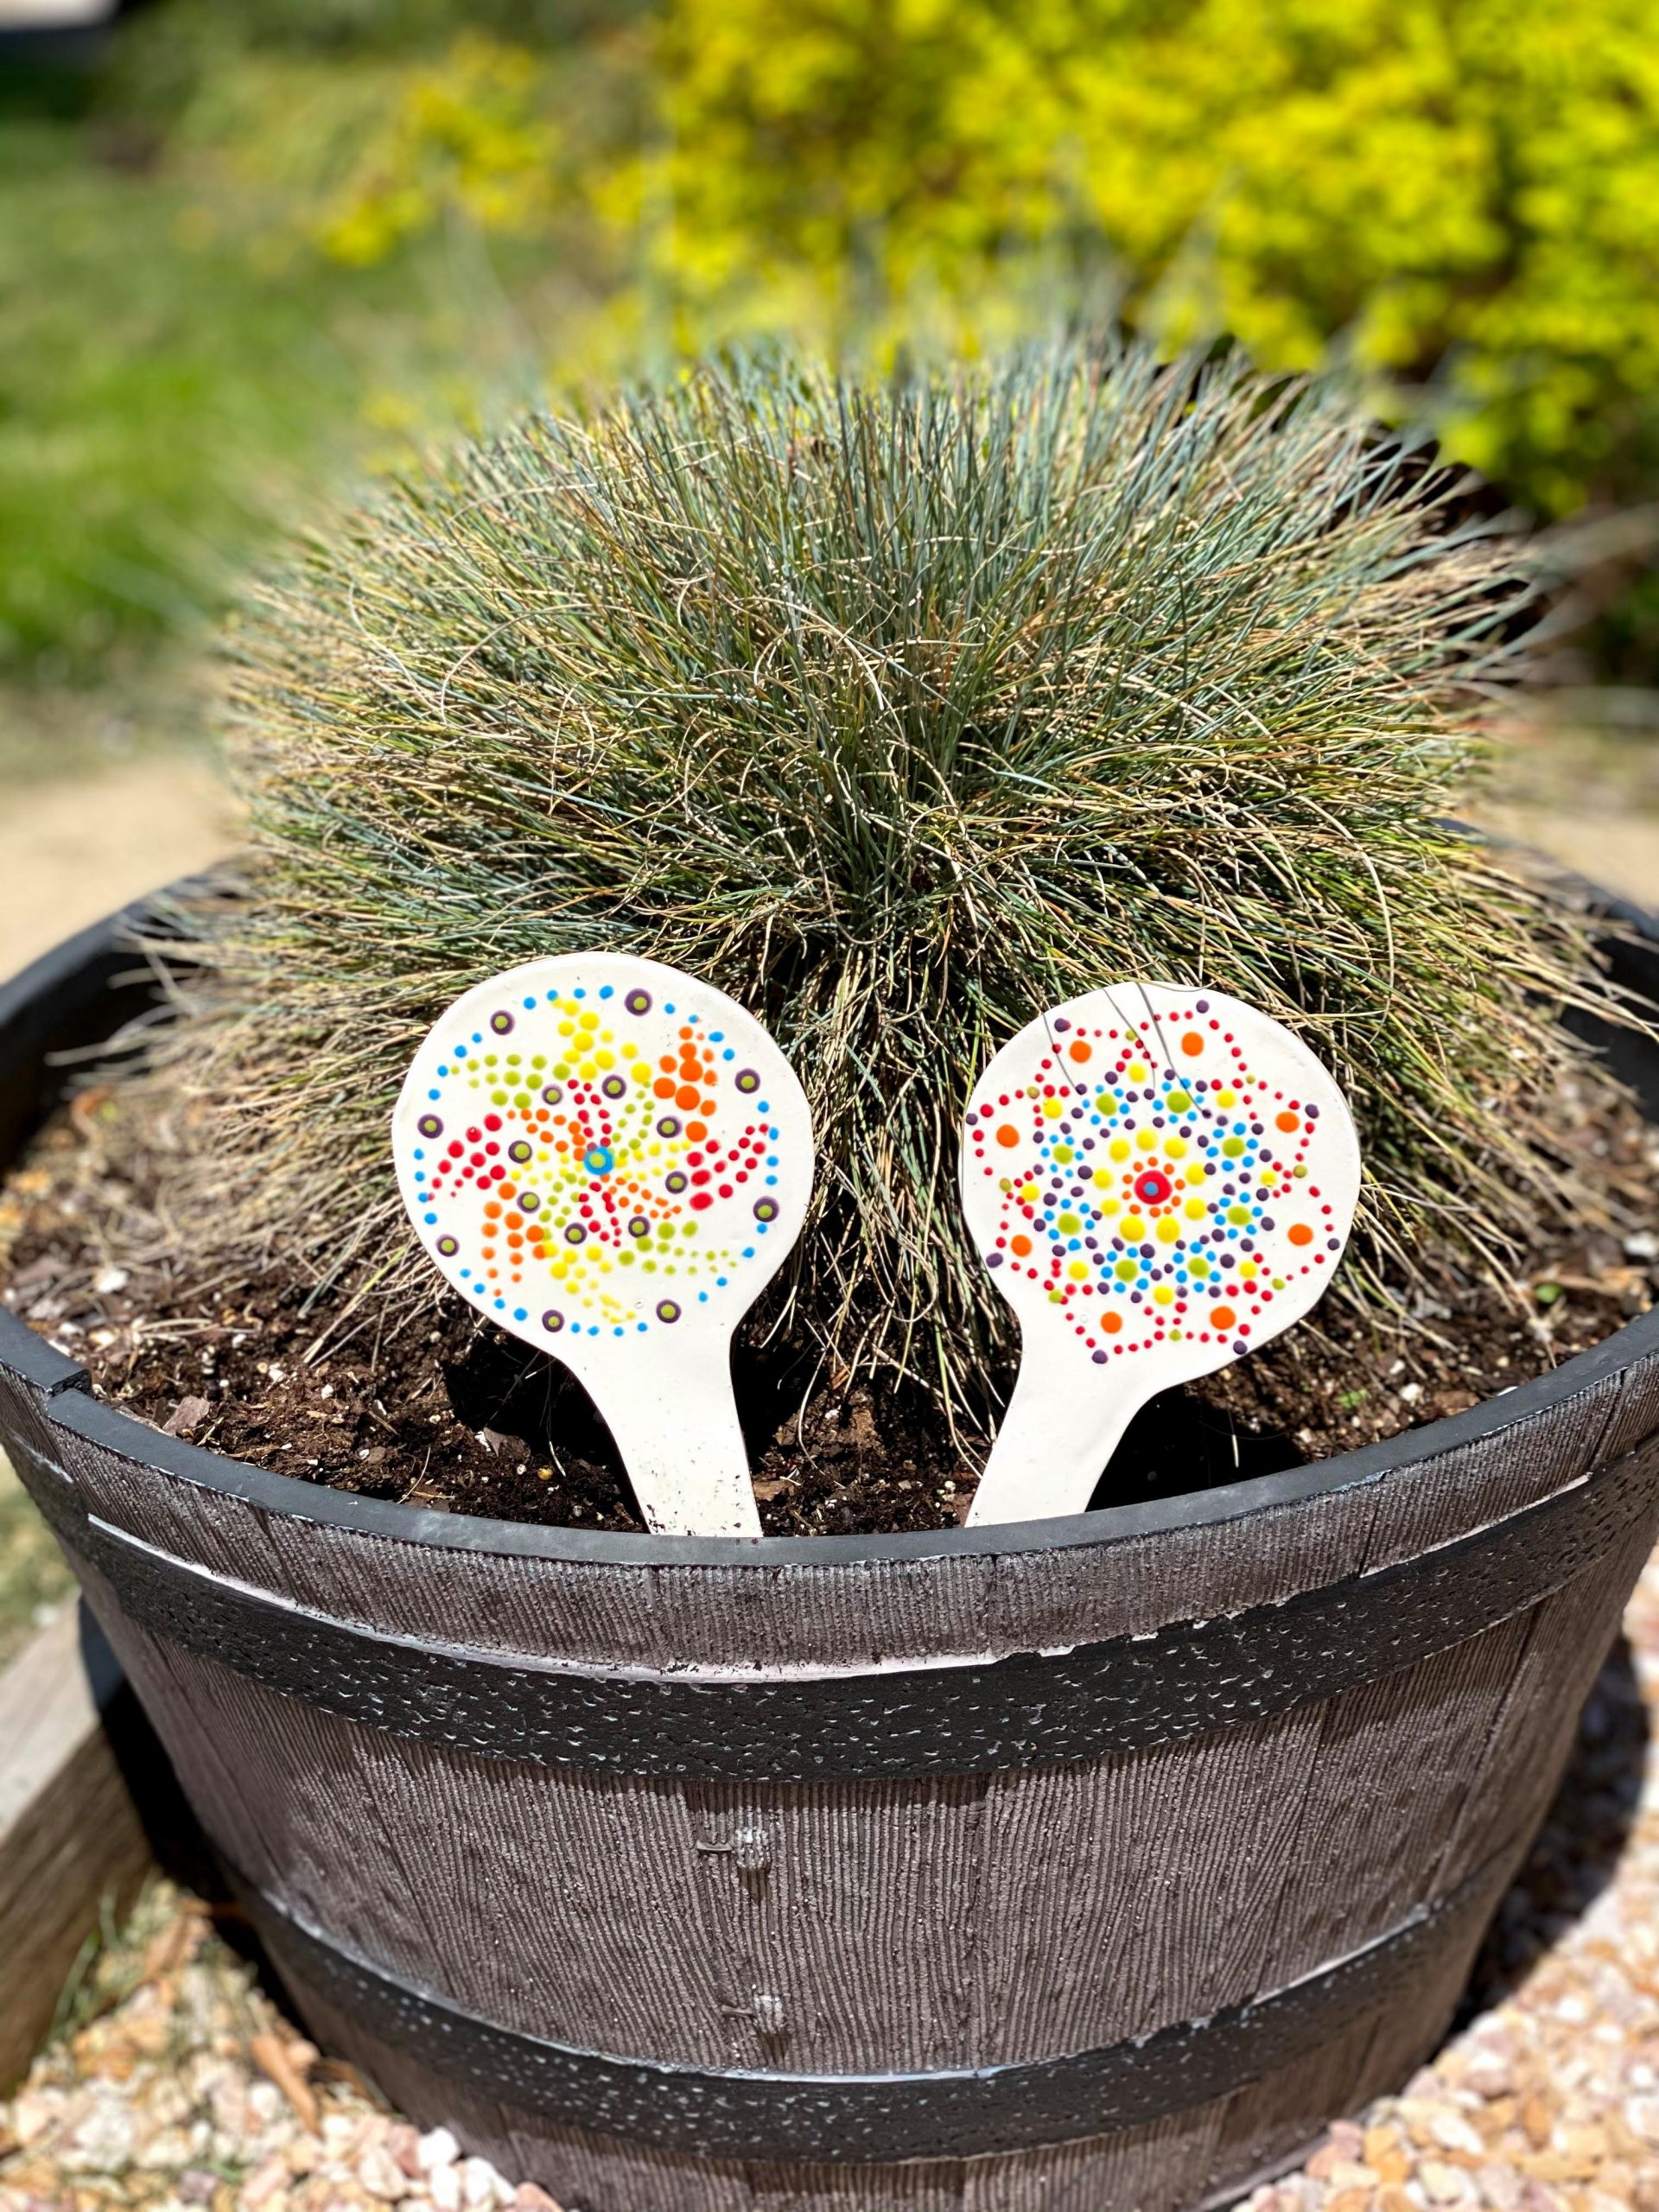
DIY Mandala Garden Markers
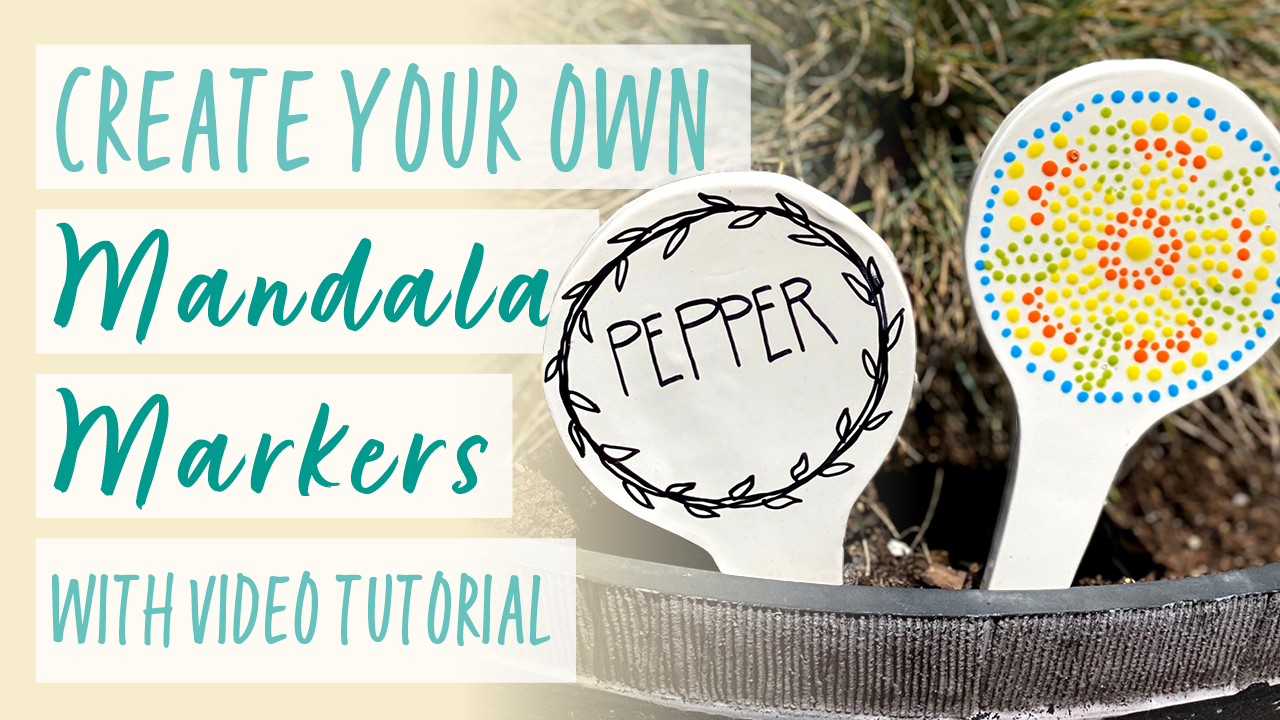
Friends, I am so excited to share this Mandala Garden Markers project with you! To create your own, all you need to do is visit DIYProStudios.com to find a local paint-your-own-pottery store near you, then pick up a “to-go” kit that contains all of the supplies. Take it home, then follow these simple instructions (and/or watch along with the video on the DIY Pro Studios website) and create your mandalas. Then, you’ll return them to the studio, where they’ll be clear glazed and fired in the kiln, which will make them shiny and ready to add to your indoor or outdoor garden. Take a look:
Kit includes:
2 Bisque Garden Stakes
Red tracing paper
Assorted colors of glaze
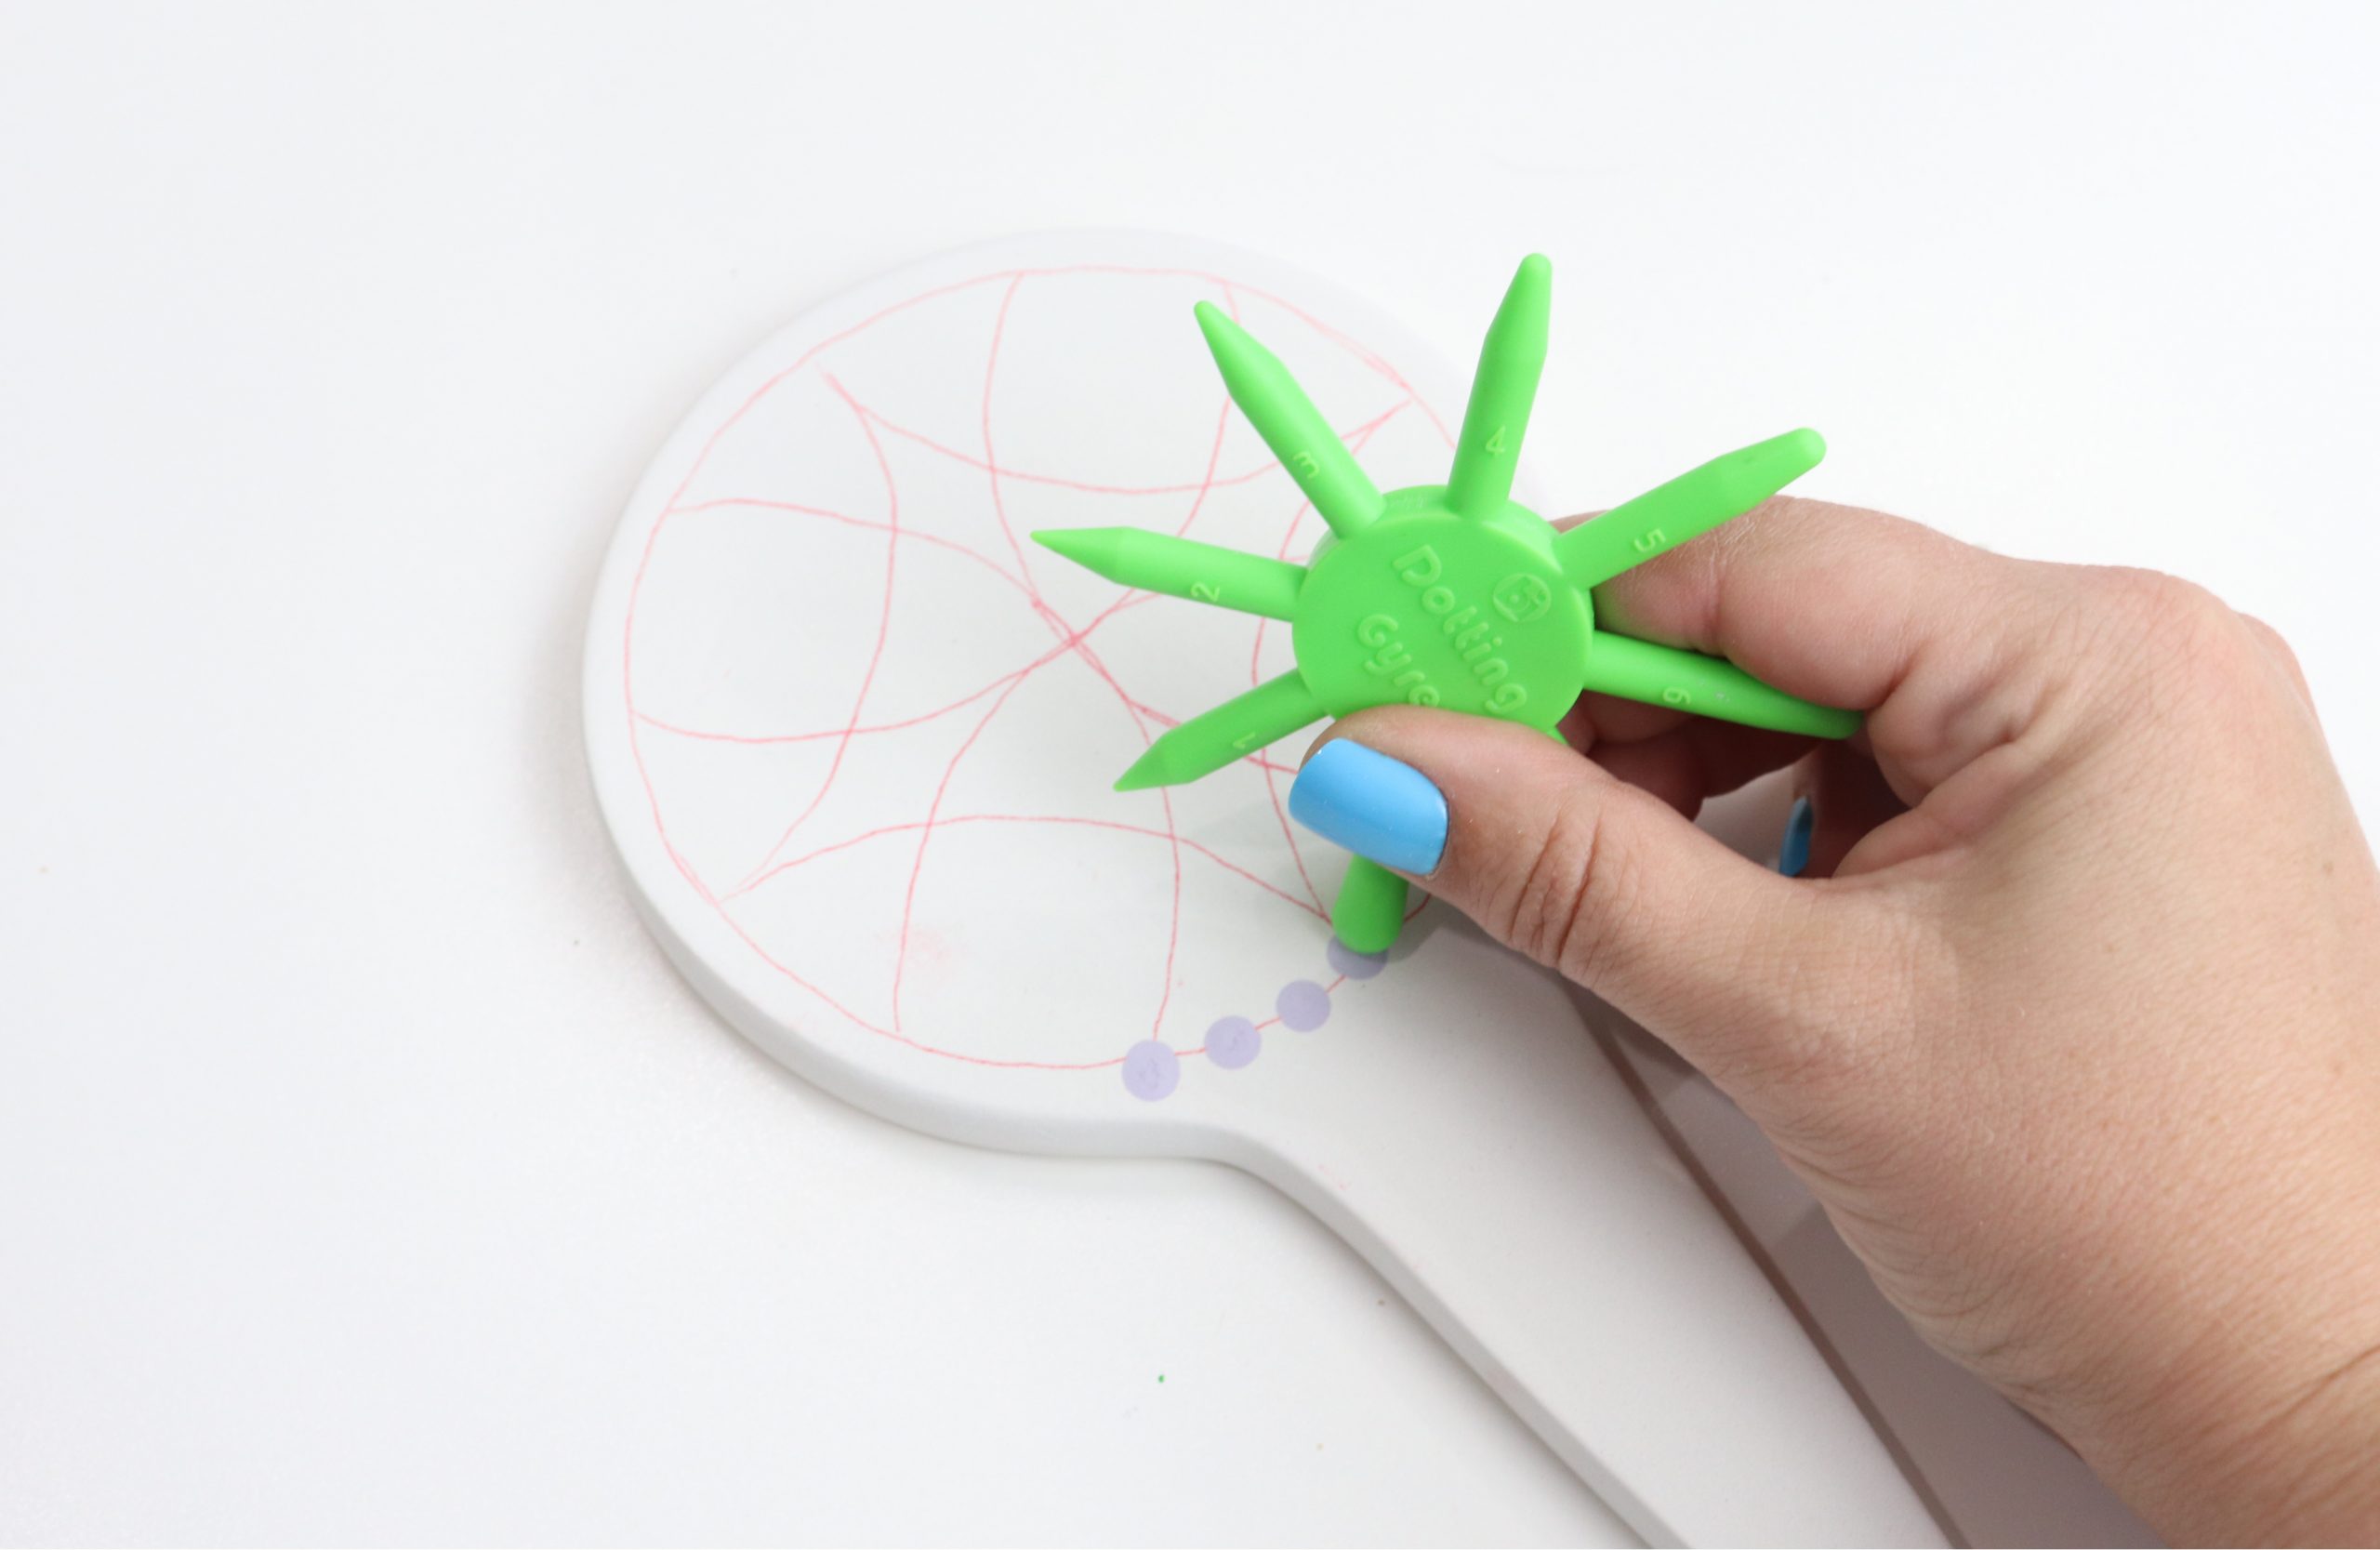
Dotting Gyre
Mandala patterns
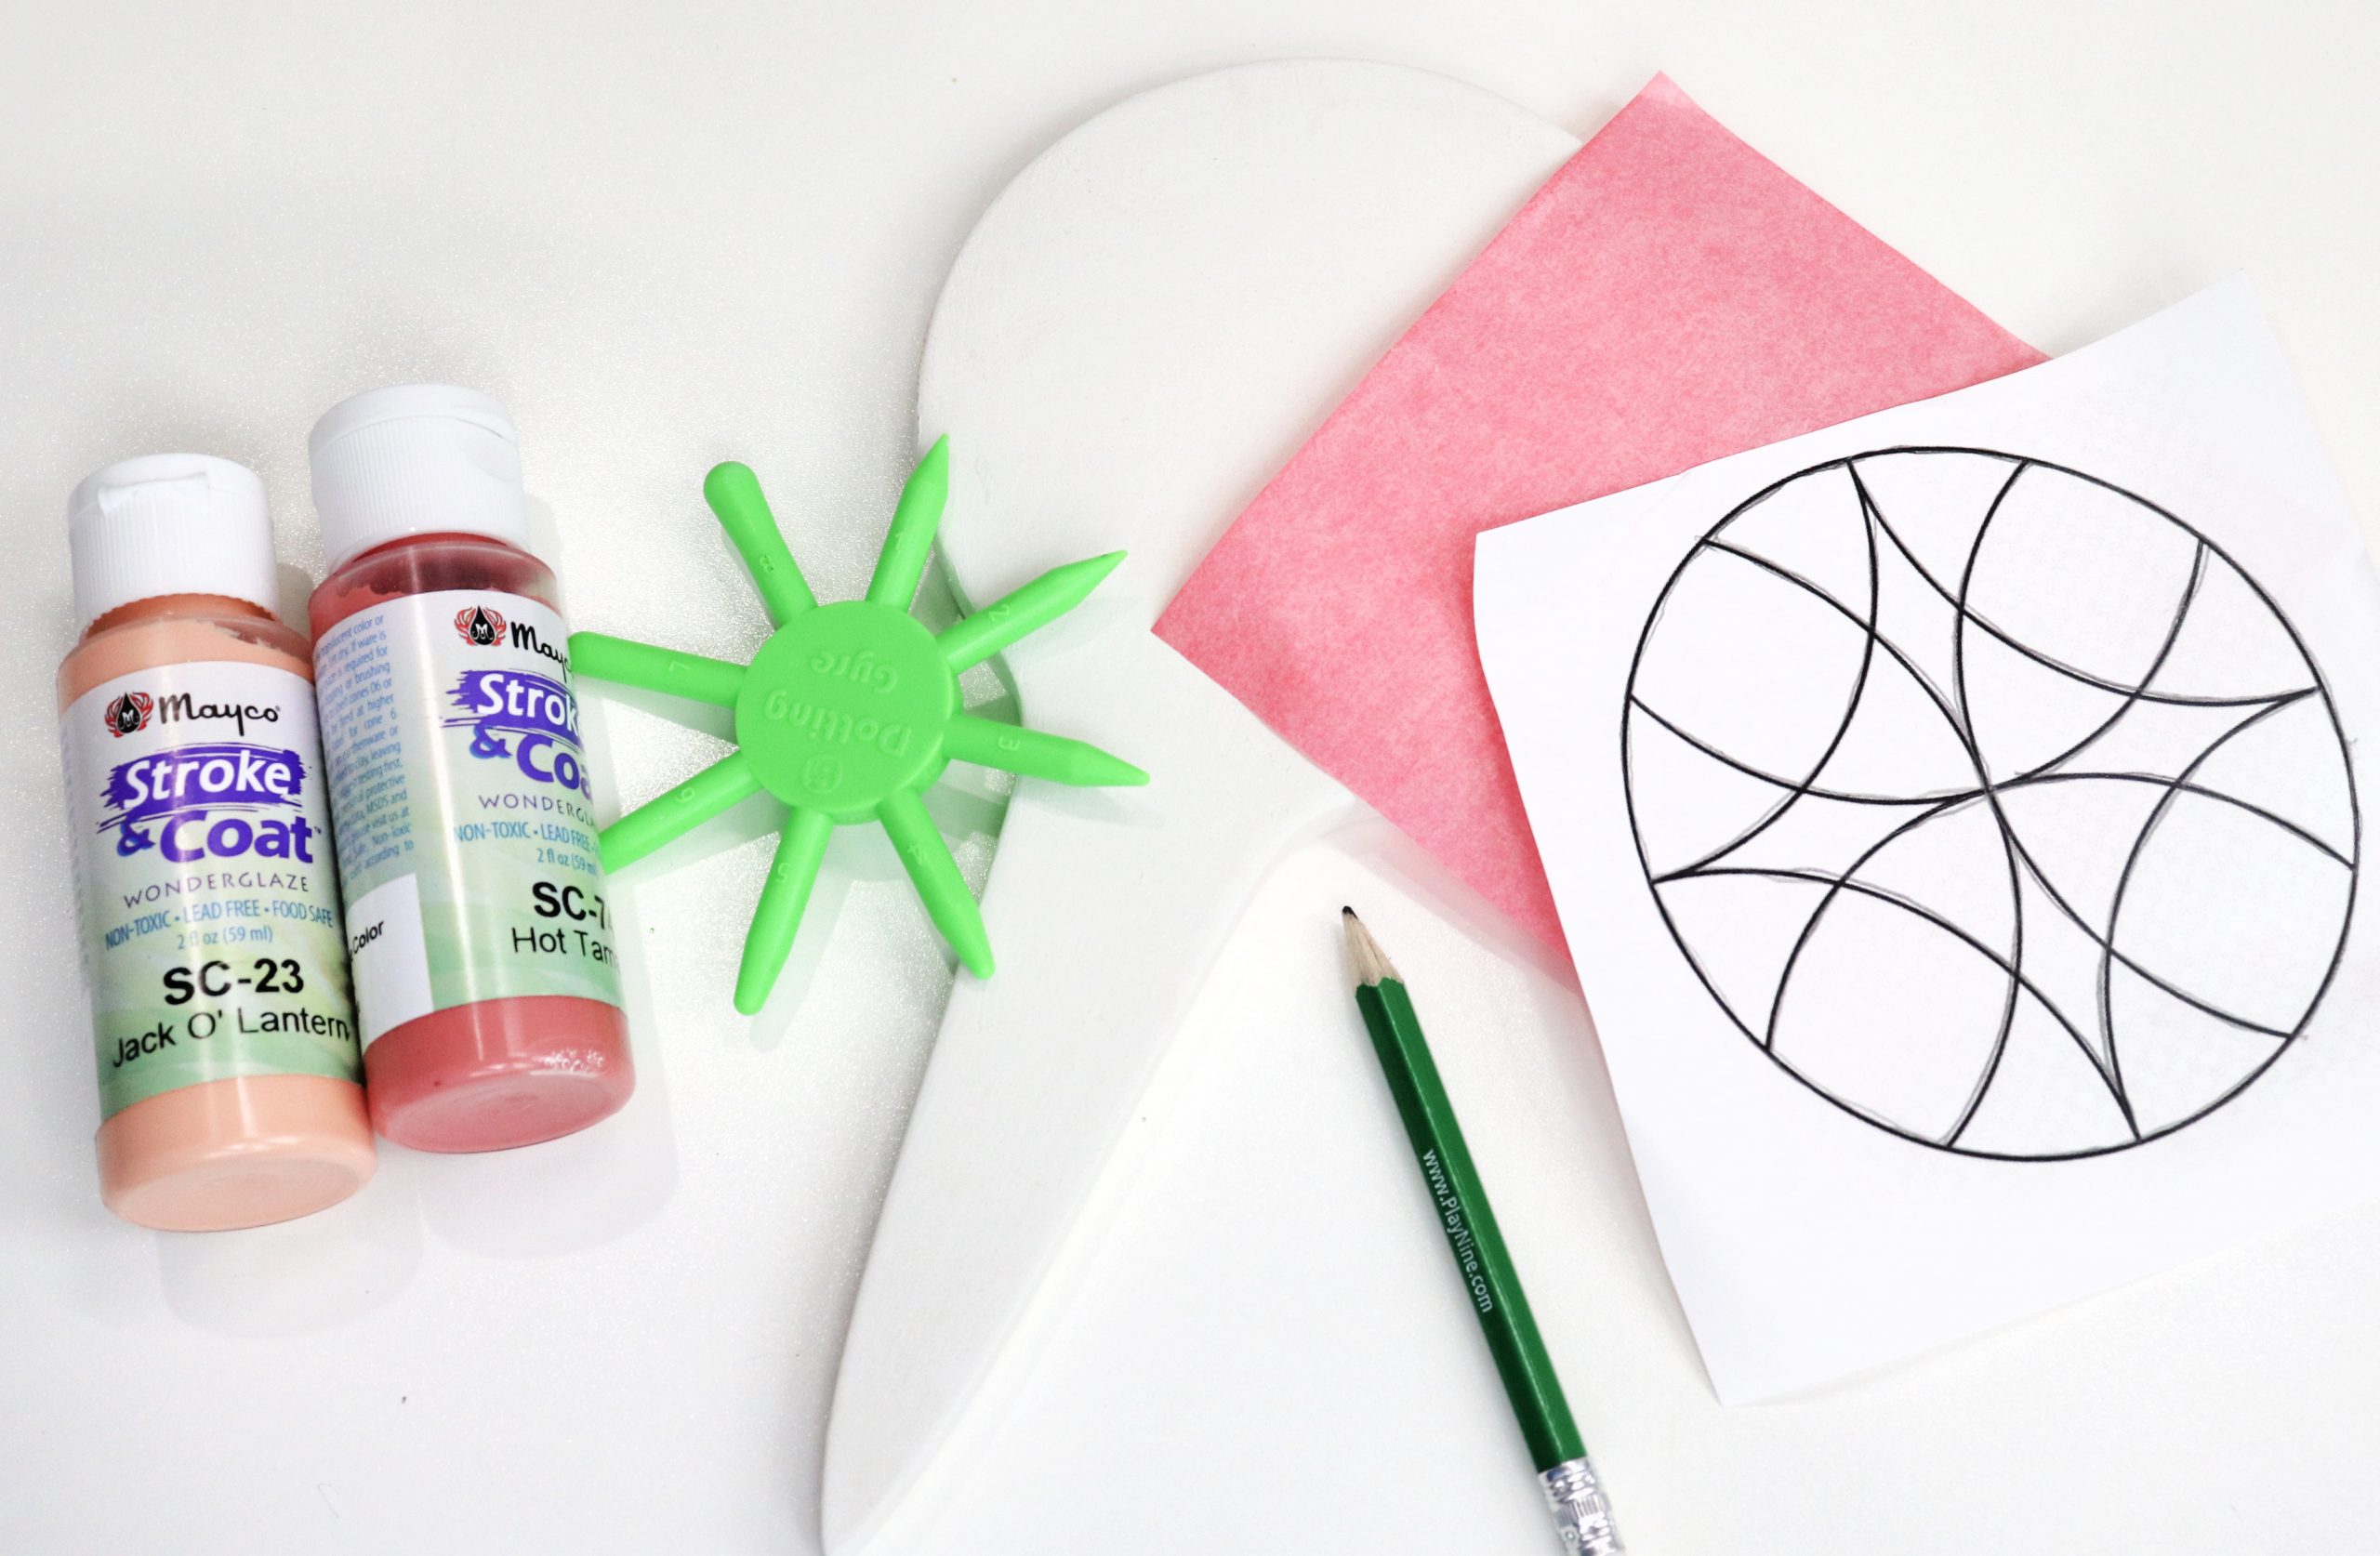
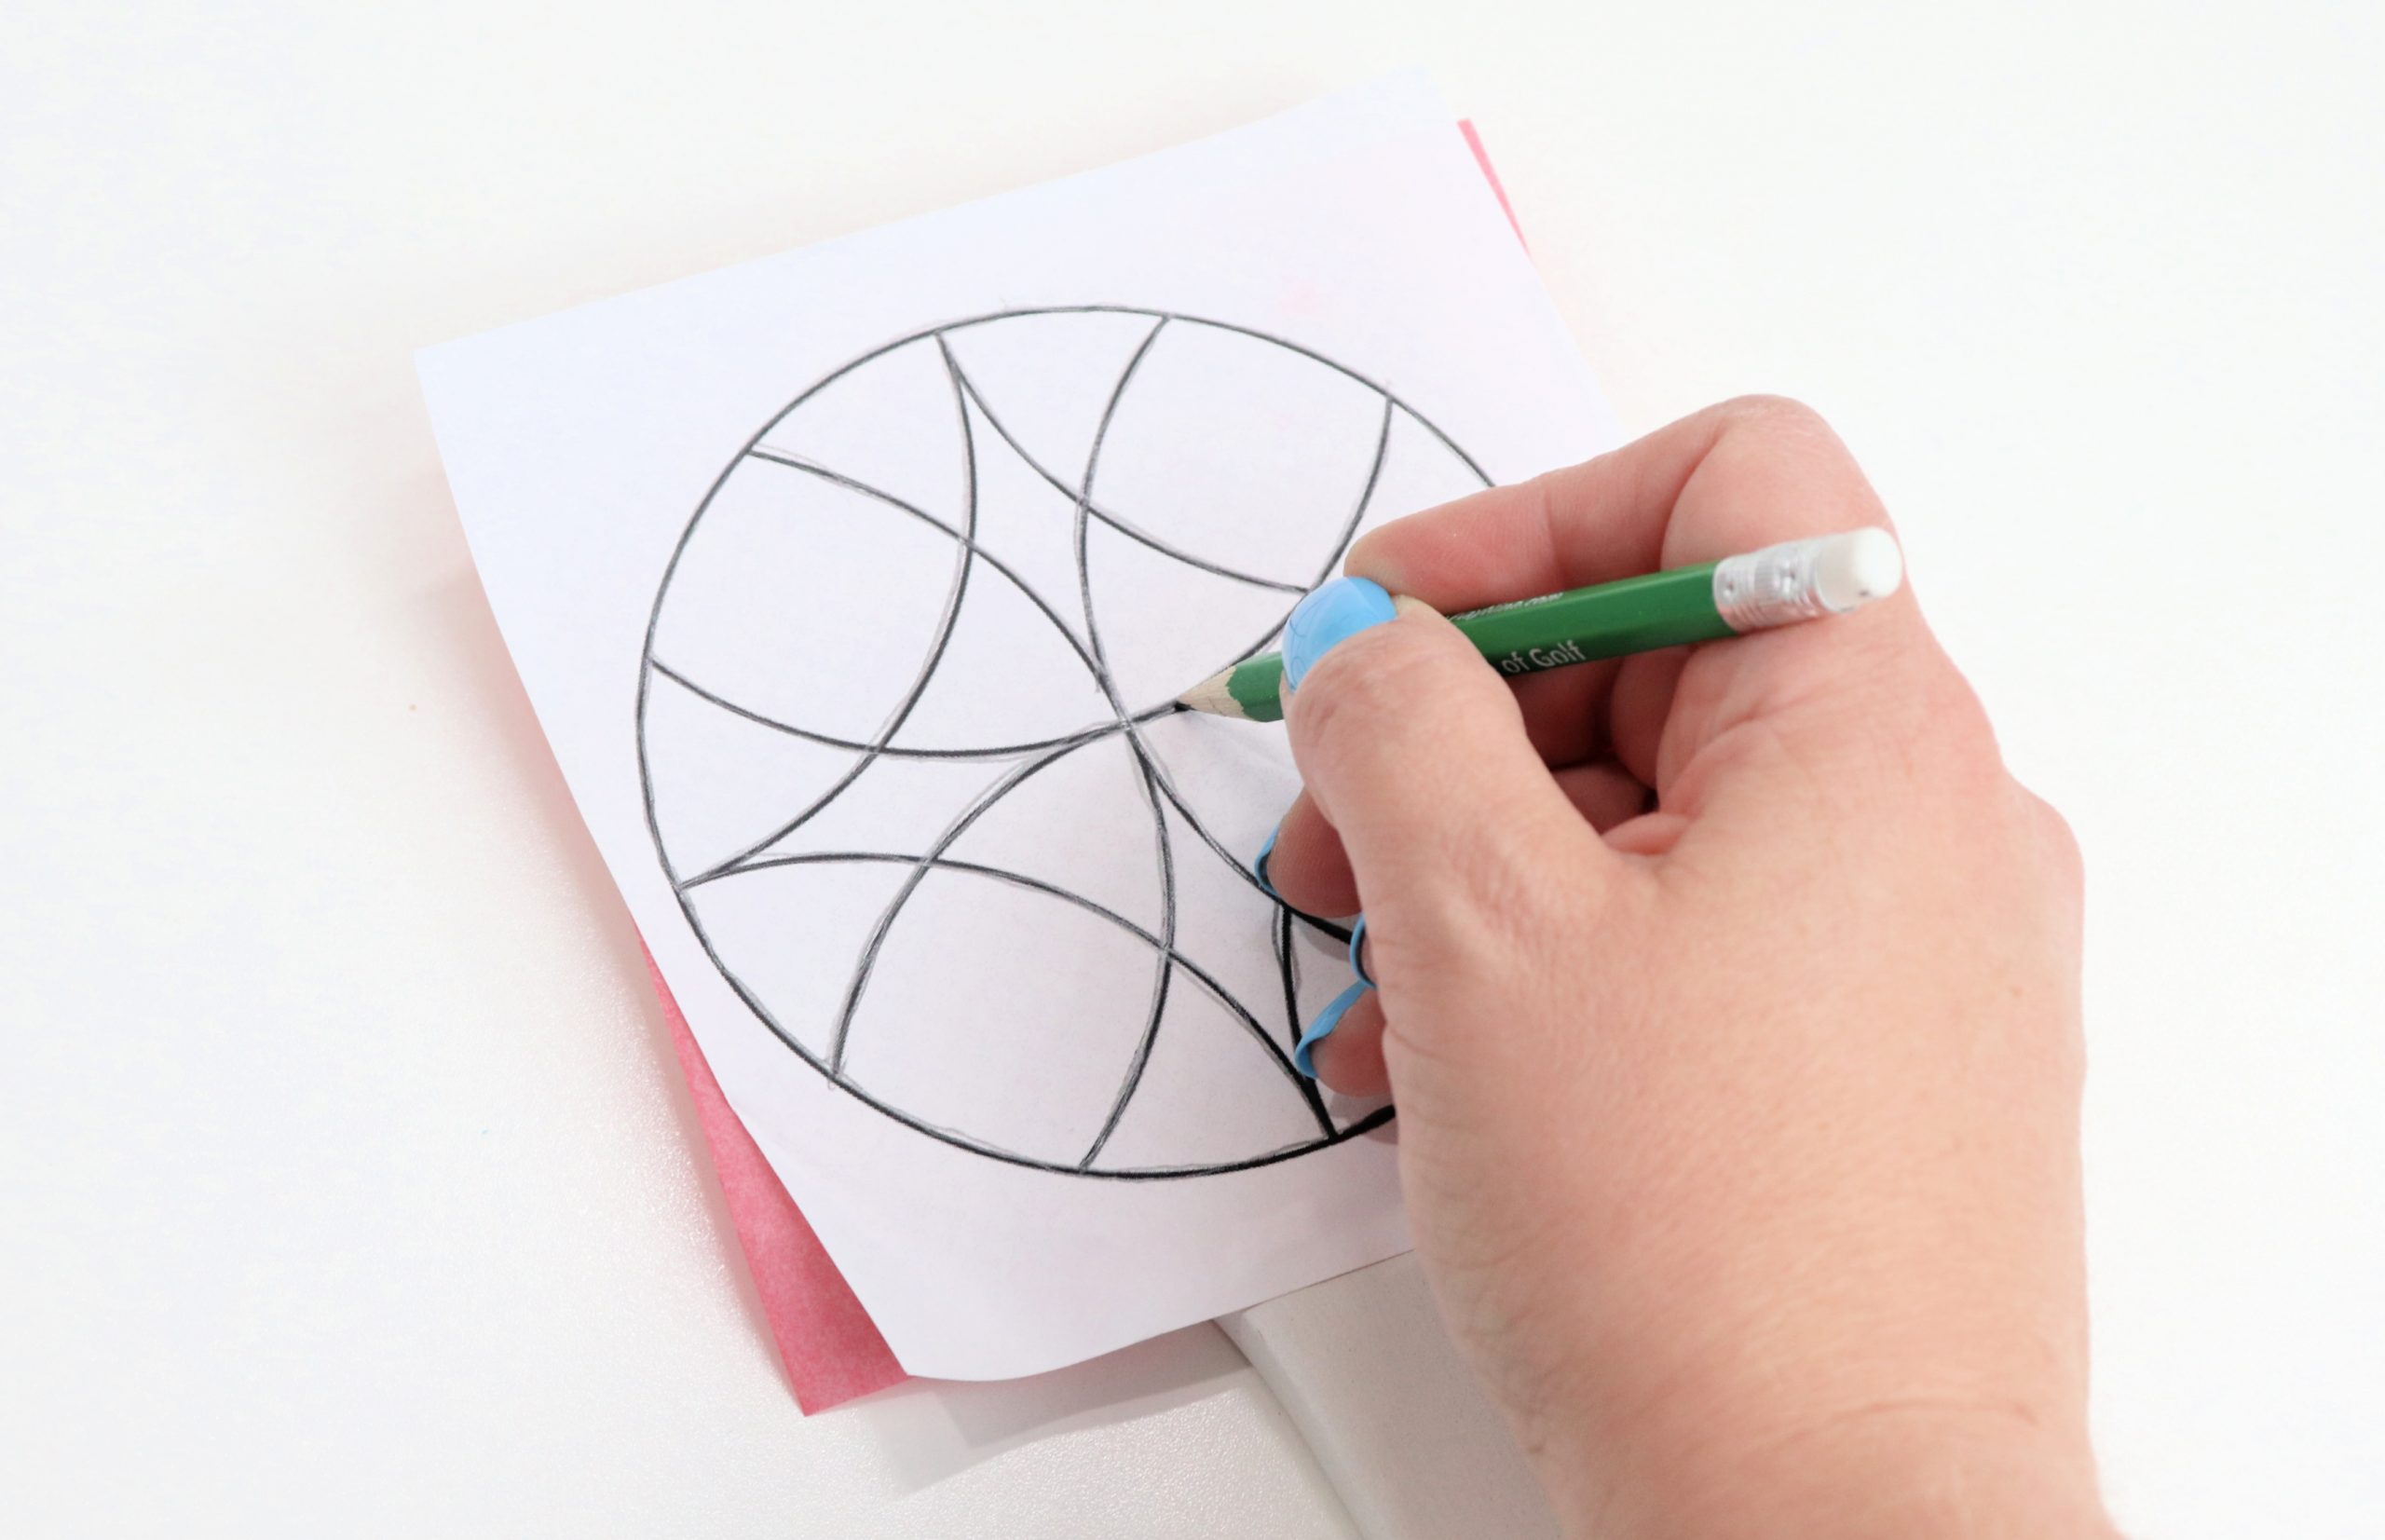
Step 1: Choose and trace your mandala pattern.
Print your favorite pattern(s). Place a piece of red tracing paper face down on top of the garden marker, then put the mandala pattern on top. Use a pencil to trace the lines of the pattern. This will cause the design to appear as red lines on your bisque. Don’t worry, these lines will disappear later in the kiln!
Step 2: Use the dotting gyre and glazes to create your own colorful mandala!
The gyre has 8 different sides, each one making a different size dot. To create the dots, simply dip one side of the gyre into a pool of paint, then tap it onto the bisque. Repeat for each dot. This is the fun part, because you can use any size and color dots you want to create your mandala. Follow the lines, fill in the spaces, and/or do anything you like!
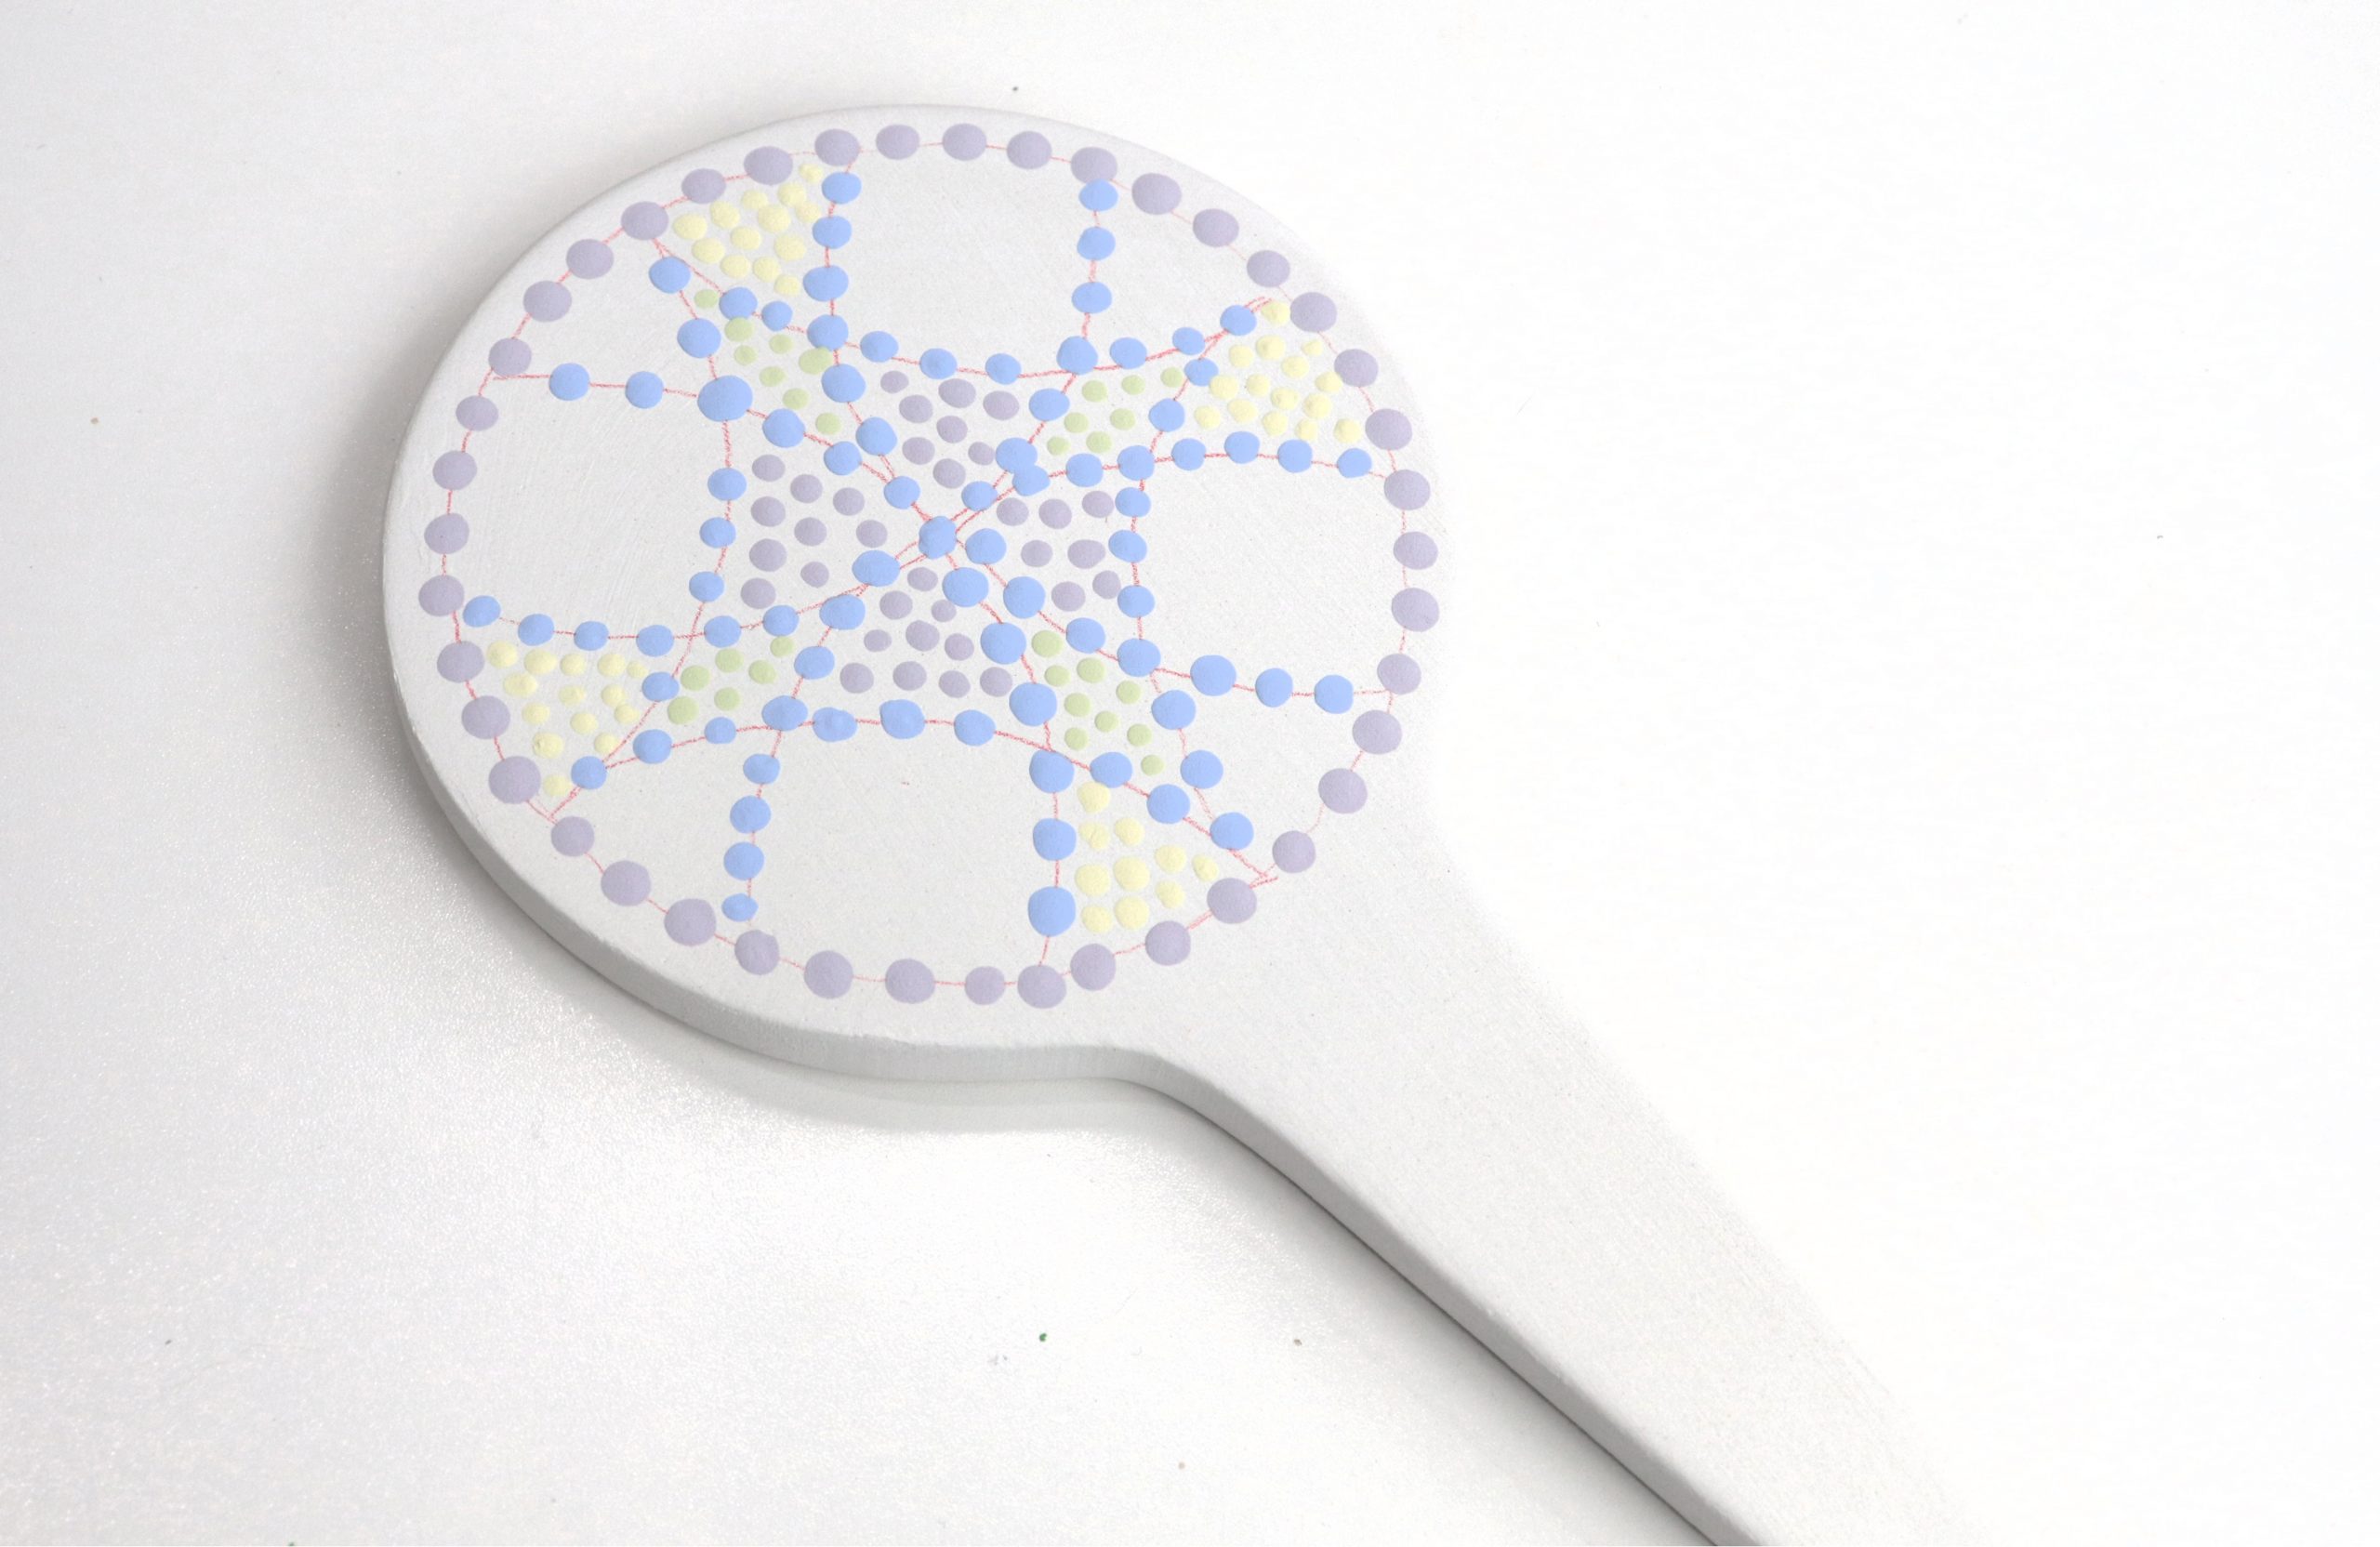
You’ll notice that the colors appear muted, but that’s only because they haven’t been fired in the kiln yet. Once they react to the heat, they’ll become bright and vibrant. If you make a mistake, you can use a toothpick to scrape the paint back off and try again. If you happen to get glaze on your fingers or your clothes, don’t worry, it will wash right out.
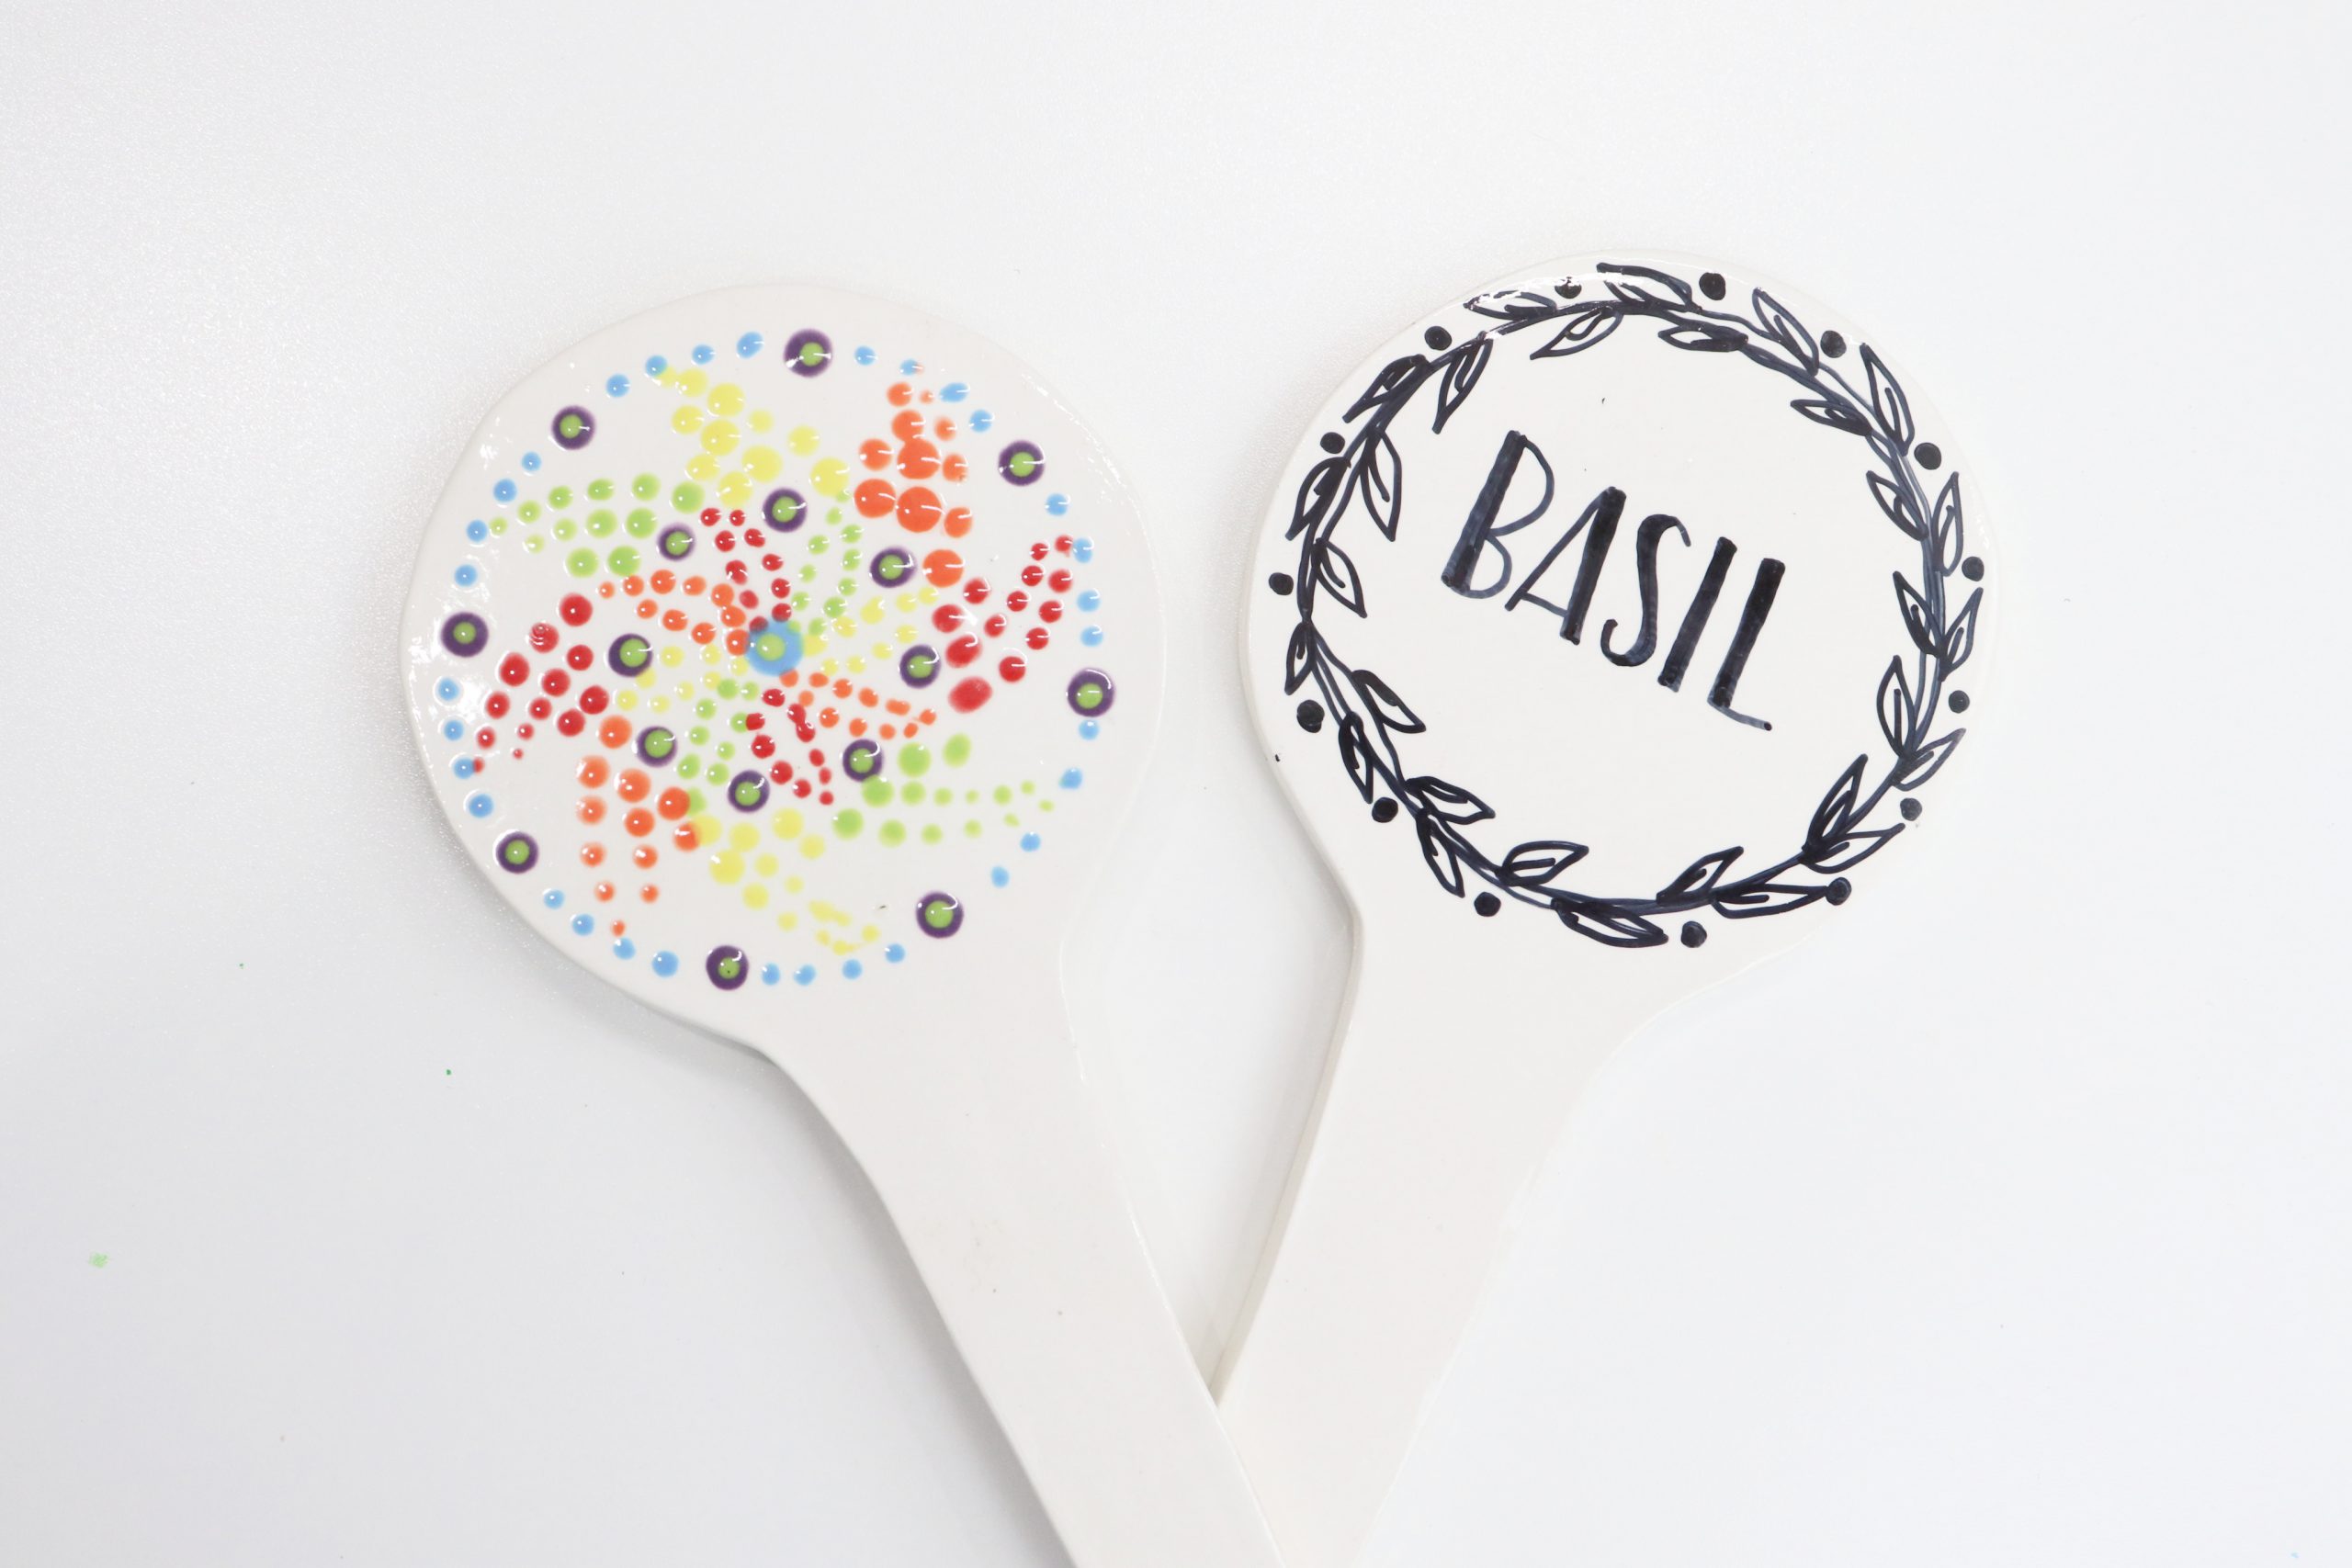
Step 3: Return your completed garden stakes to the DIY Pro Studio where you got your kit.
The studio will apply a clear finishing glaze and fire your projects in the kiln. When you pick them up, they will be ready to use in your garden.
Step 4 (optional): Use a permanent marker to letter the names of your plants or herbs on the back.
Permanent marker will stay on the glazed surface until you choose to remove it with rubbing alcohol. New to lettering? Check out this quick tutorial video I created!
That’s all there is to it! These Mandala Garden Markers are a fun, simple project that will look fantastic in your garden all summer long. To find a DIY Pro Studio near you where you can pick up a project kit, head to this link and enter your zip code or city name.
Isn’t it awesome how each one of these mandala garden markers turns out to be completely unique? It’s so much fun creating different patterns and playing with color. There’s no “right” or “wrong” way to create your mandala designs, so let yourself experiment and enjoy coming up with something you love.
If you create this project, I’d love to see how your Mandala Garden markers turn out; be sure to share your photos and feedback in the Amy Latta & Friends Facebook Group! Also, be sure to share your pictures on social media and tag me @amylattacreations along with @diyprostudios and the store where you got your kit, so we can all see your fabulous creations. Happy crafting!