DIY Holiday Family Pajamas
One of our family’s annual holiday traditions is receiving and wearing new pajamas on Christmas Eve. I’ve always wanted to do the cute “matching pjs” trend, but it gets difficult with two teenage boys who can’t seem to agree on anything. Plus, all of us prefer different kinds of sleepwear. My hubby likes flannel pants, the boys sleep in shorts, and I prefer lighter cotton pants. My solution was to create DIY Holiday Family Pajamas so we could all have just what we wanted.
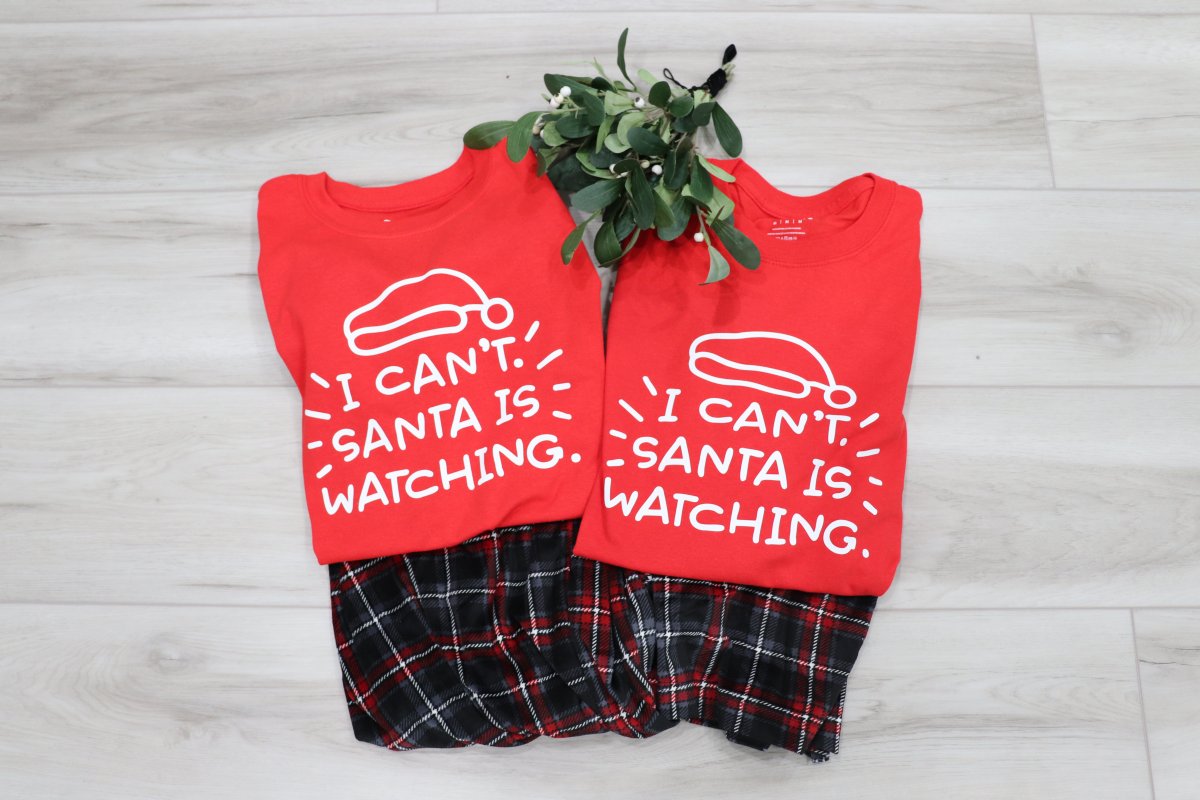
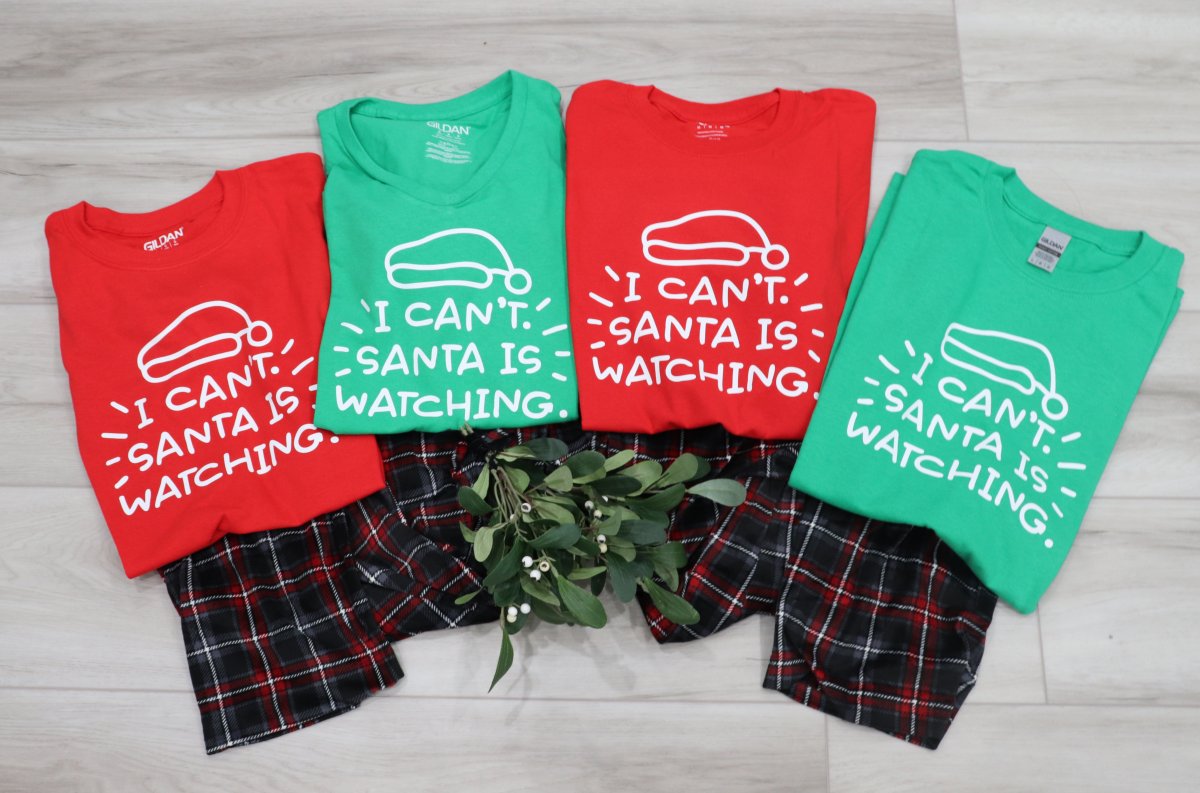
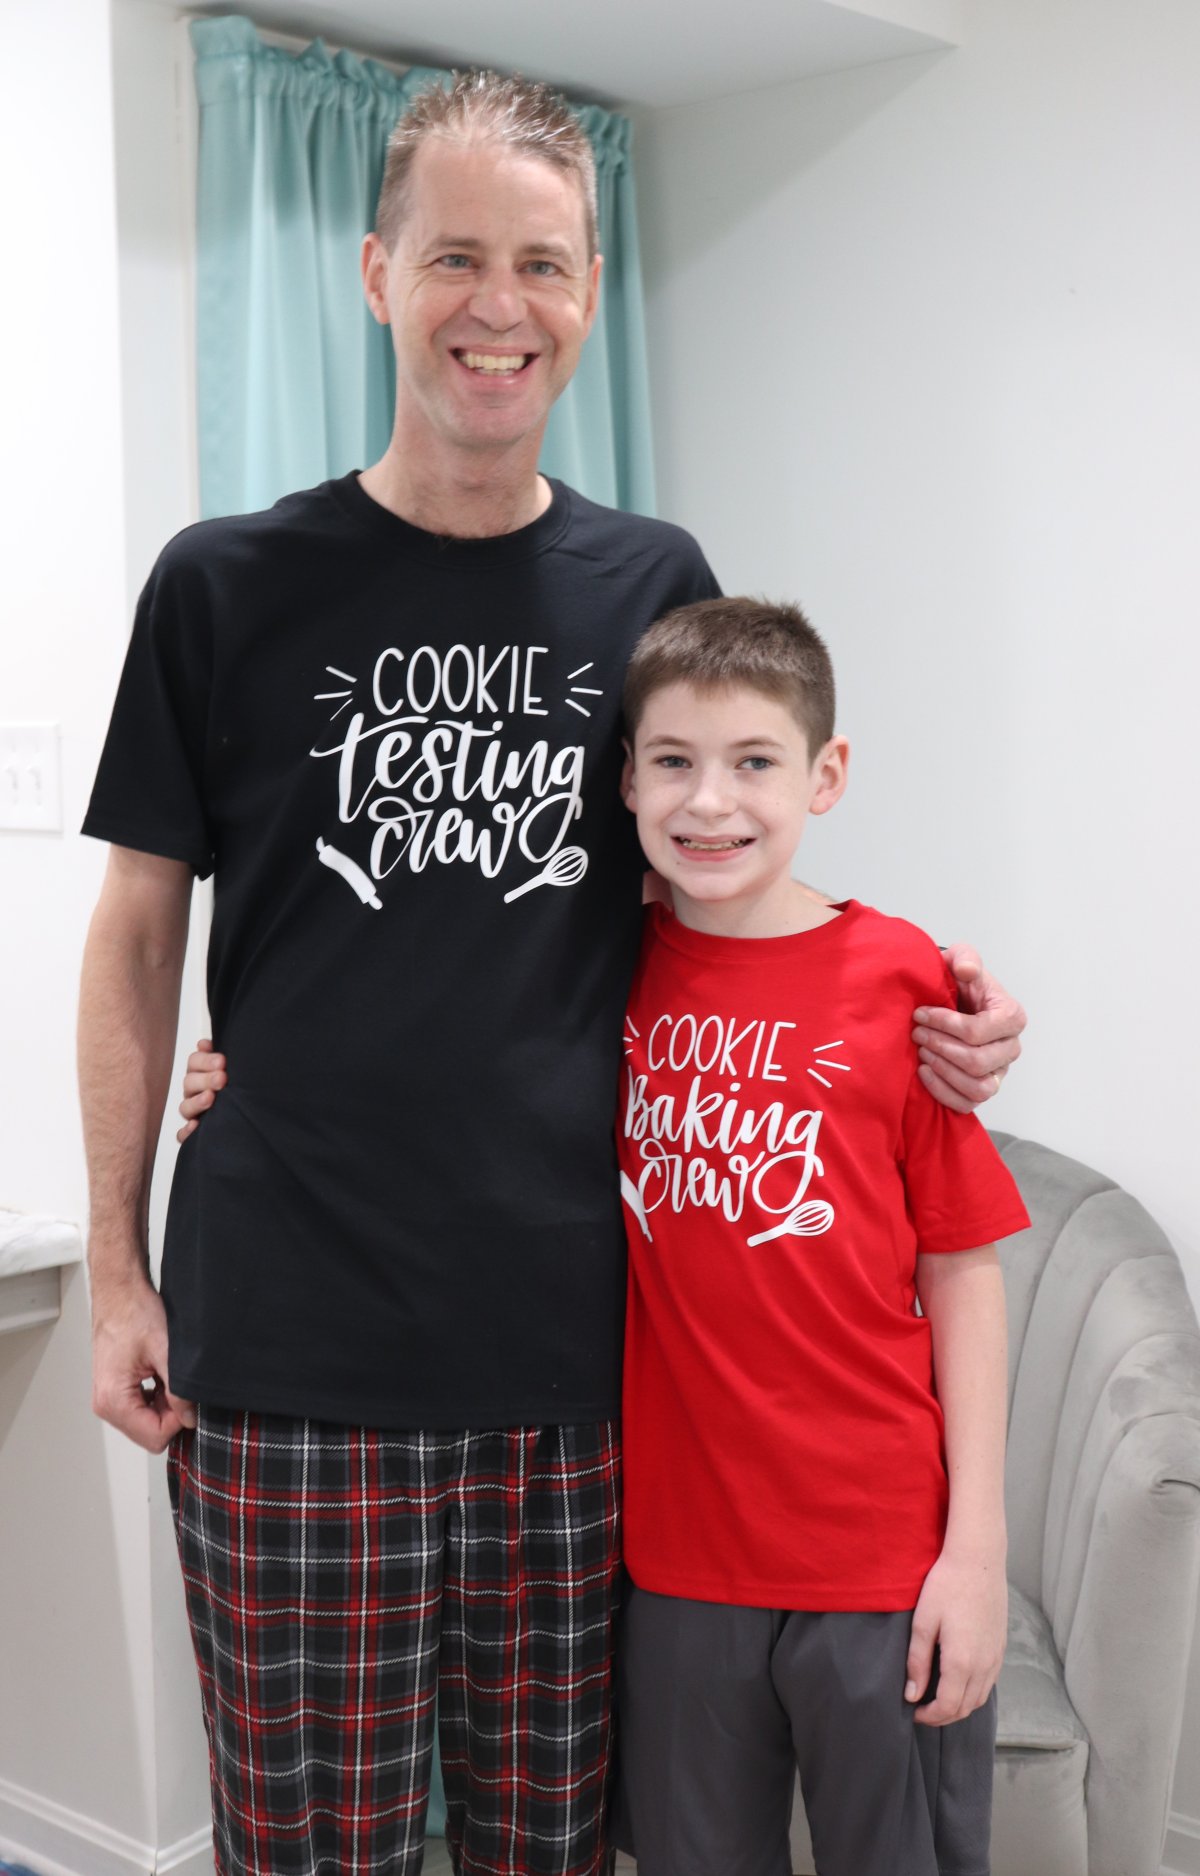
I actually made two different sets for us: one is a set of coordinating red and green shirts with the message, “I can’t, Santa is watching.” The other set shows which two of us are the “cookie baking crew” and which two are the “cookie testing crew.” Here’s how I did it and you can too.
You’ll need:
solid colored shirts (the great part is you can choose long/short sleeve, round/v-neck, etc. based on each person’s preferences)
Cricut cutting machine
Cricut Iron-On Vinyl
Cricut EasyPress or iron
EasyPress mat or towel
Step 1:
Choose your design in the Cricut Design Space app and size it to fit your shirt. Usually 6″ wide is a good size for kids’ shirts, and somewhere between 8-10″ works well for adult sizes.
Step 2:
Load your machine with Iron-On vinyl (the shiny side should be facing down on the mat) and send the design to the machine. Make sure you check the box that says to MIRROR your design before cutting.
Step 3:
Weed your design. That means removing all the vinyl that isn’t part of the design from the clear backing.
Step 4:
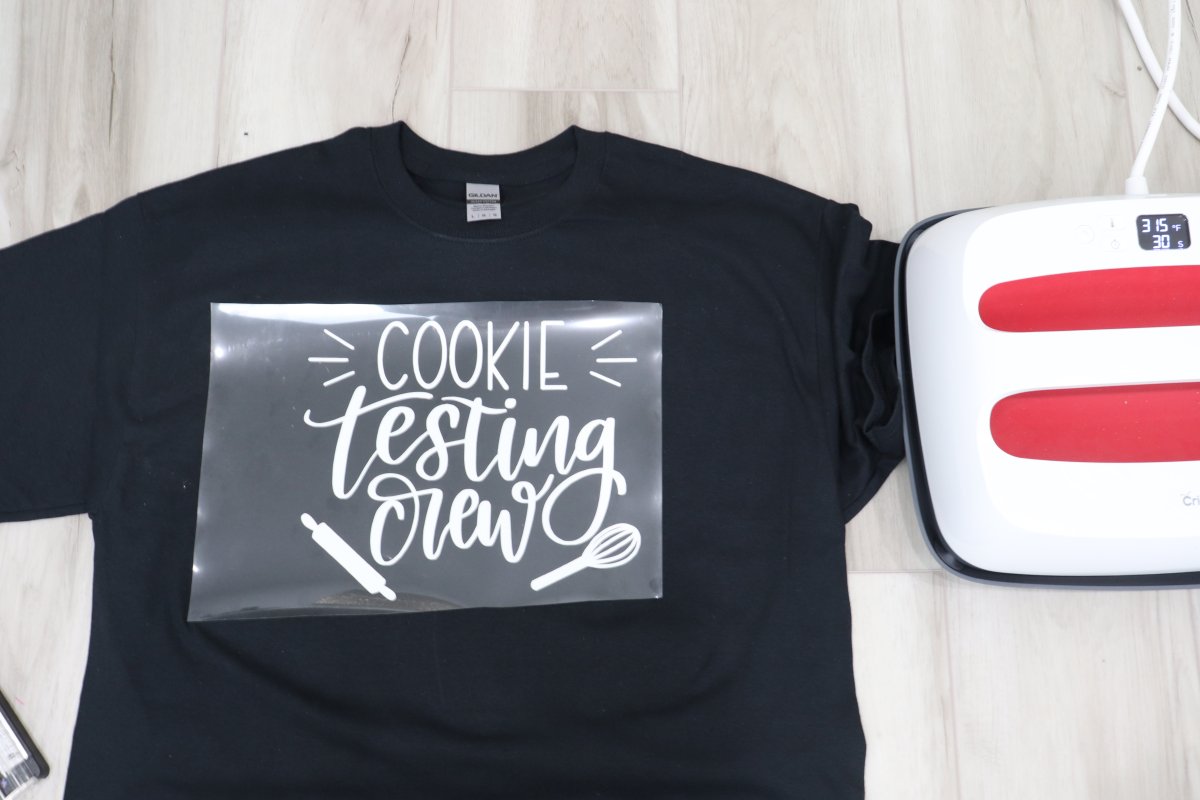
Place the shirt on your EasyPress Mat or folded towel and preheat it for about 10-15 seconds.
Step 5:
Position the design where you want it to be on the shirt.
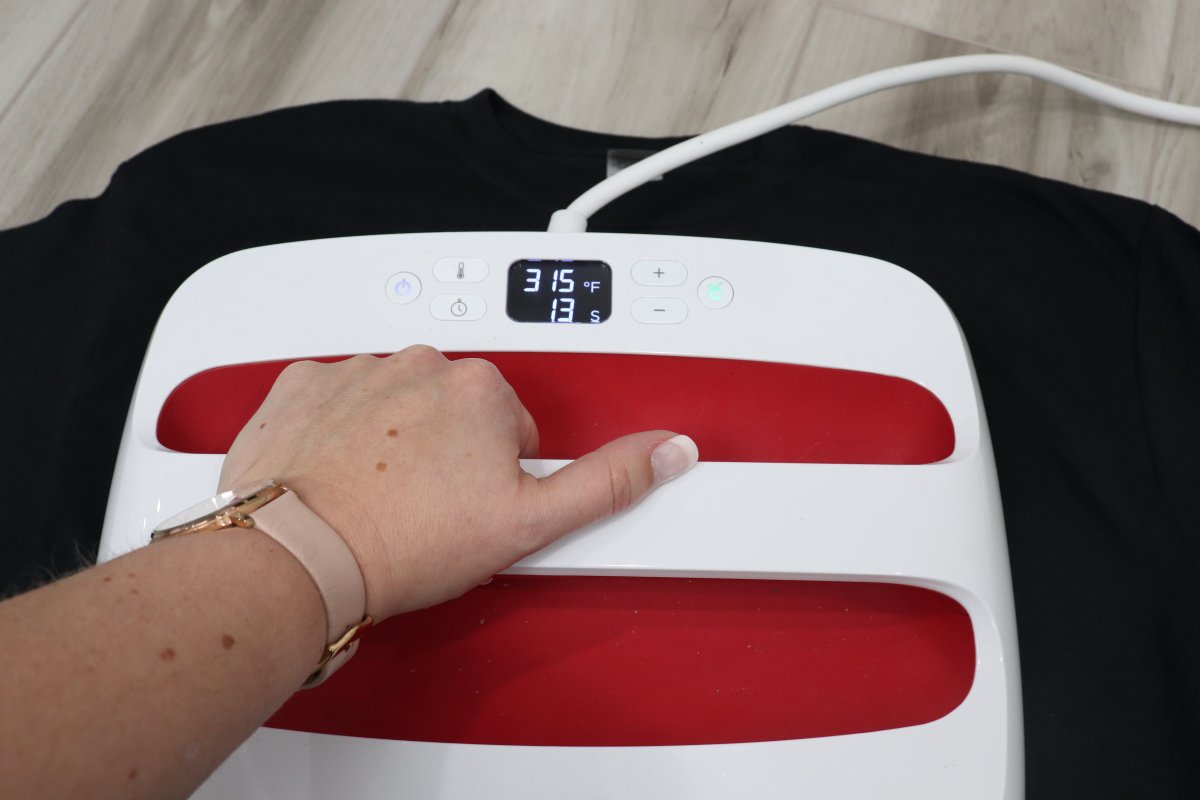
Step 6:
Use the EasyPress (or your iron) to heat the design. The Cricut Heat Guide will tell you exactly what temperature to use and what length of time is perfect, based on the material of your t-shirt.
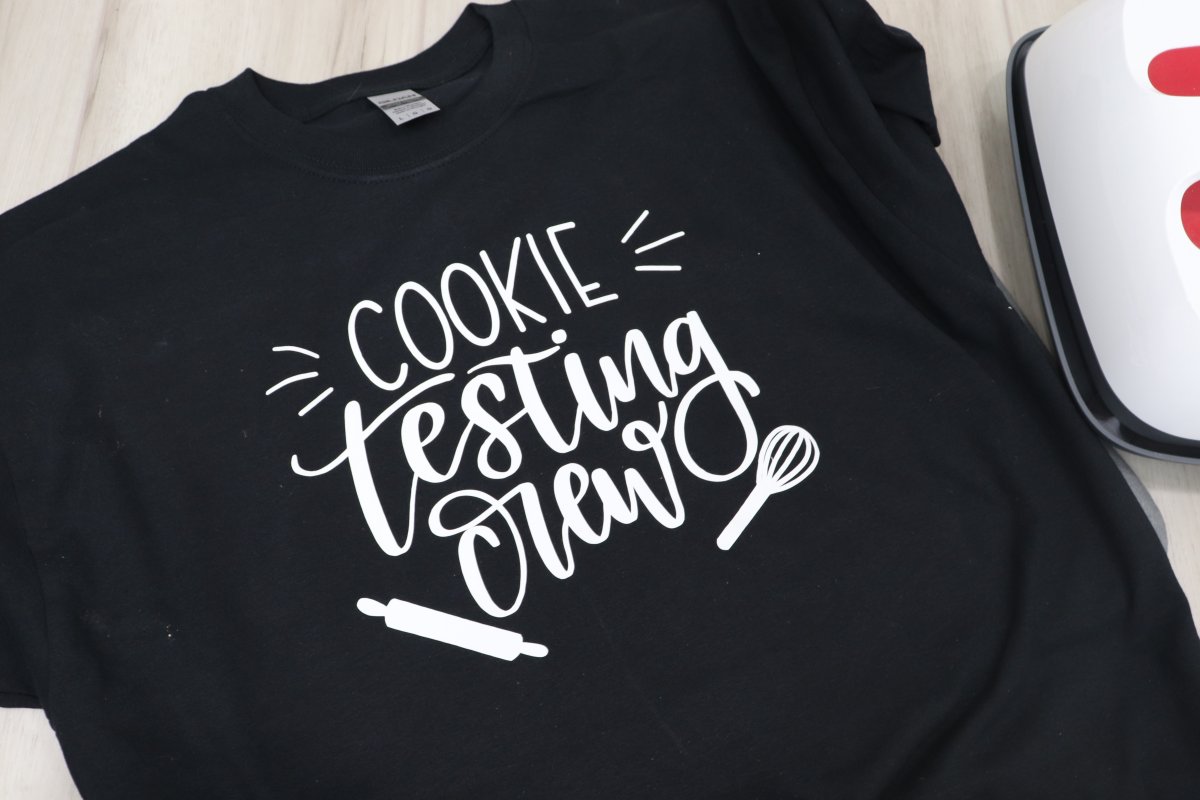
Step 7:
Let your shirt cool off a bit, then remove the clear paper. Your design is now permanently adhered. It’s safe to wash and wear.
All that’s left to do is choose what bottoms you’d like to pair with your t-shirts. Shorts, cotton pants, and/or flannel pants in coordinating colors are all great choices, and an added bonus is that buying these plain tops and bottoms as separates usually ends up being significantly cheaper than purchasing the matching sets! In fact, you can often get the tops for about $5 each at a craft store, and sometimes less on clearance at Walmart or Target! Hooray for saving money and personalizing things all at the same time!
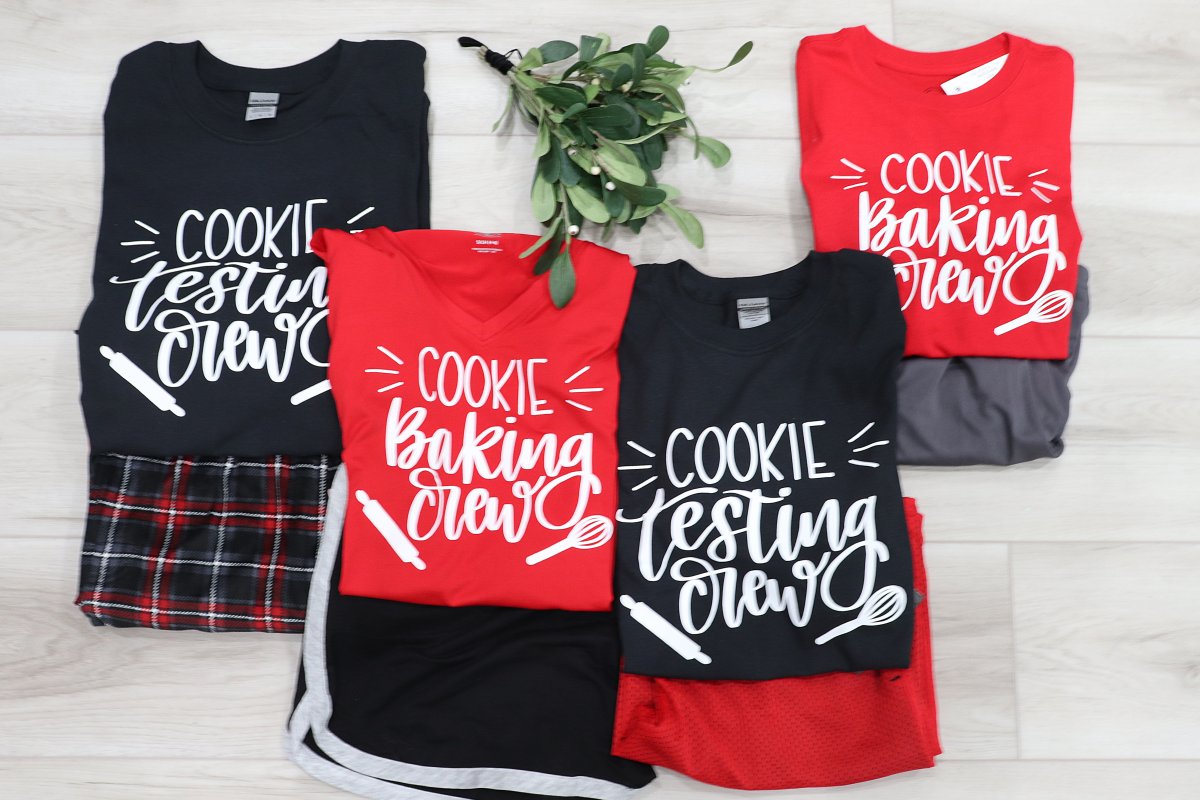
I am really happy with how our family’s DIY holiday pajamas turned out! I think the cookie baking ones may be my favorite, but that may just be because…well, cookies. I’d love to know what you and your family would choose for your personalized designs!
Be sure to join the Amy Latta and Friends Facebook Group to share your holiday project photos with us so we can all be inspired. See you there!
Also, check out this project in these segments:
A DIY SPIN ON FAMILY TRADITIONS ON GOOD DAY PA

FAMILY CHRISTMAS CRAFTS ON GREAT DAY LIVE TAMPA BAY

CHRISTMAS CRAFT IDEAS FOR THE FAMILY