
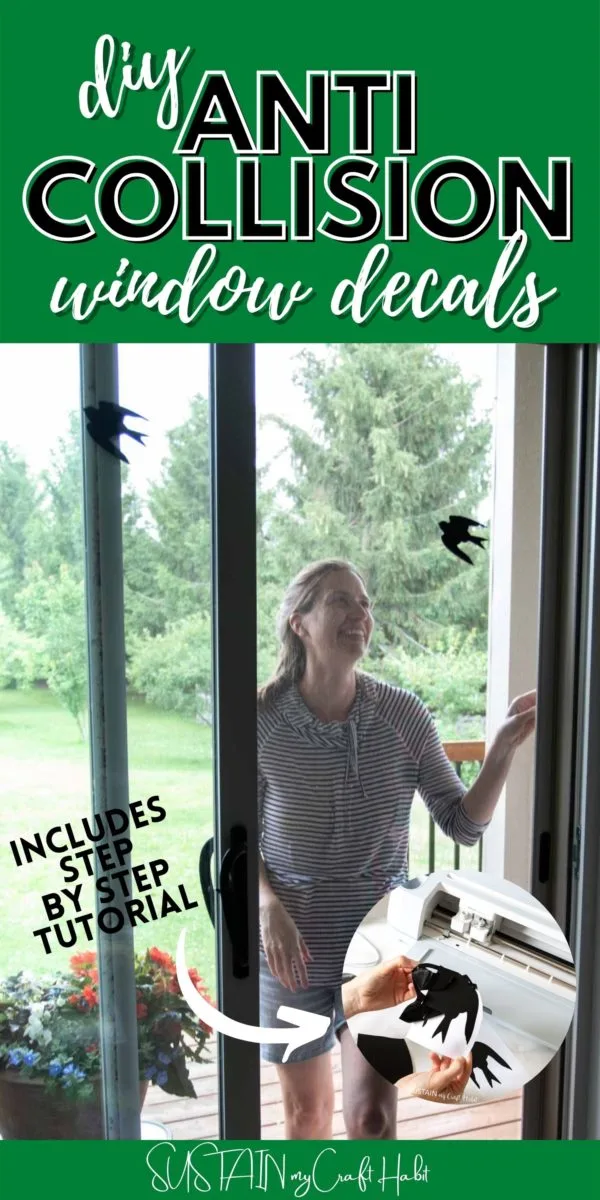
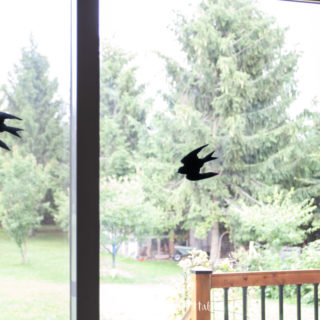
Do you have a problem of birds flying into your windows at home? If so, we have a solution! Make your own pretty yet functional anti-collision window decals using a Cricut cutting machine and some removable vinyl with this simple DIY.

How to Prevent Birds from Flying into Windows
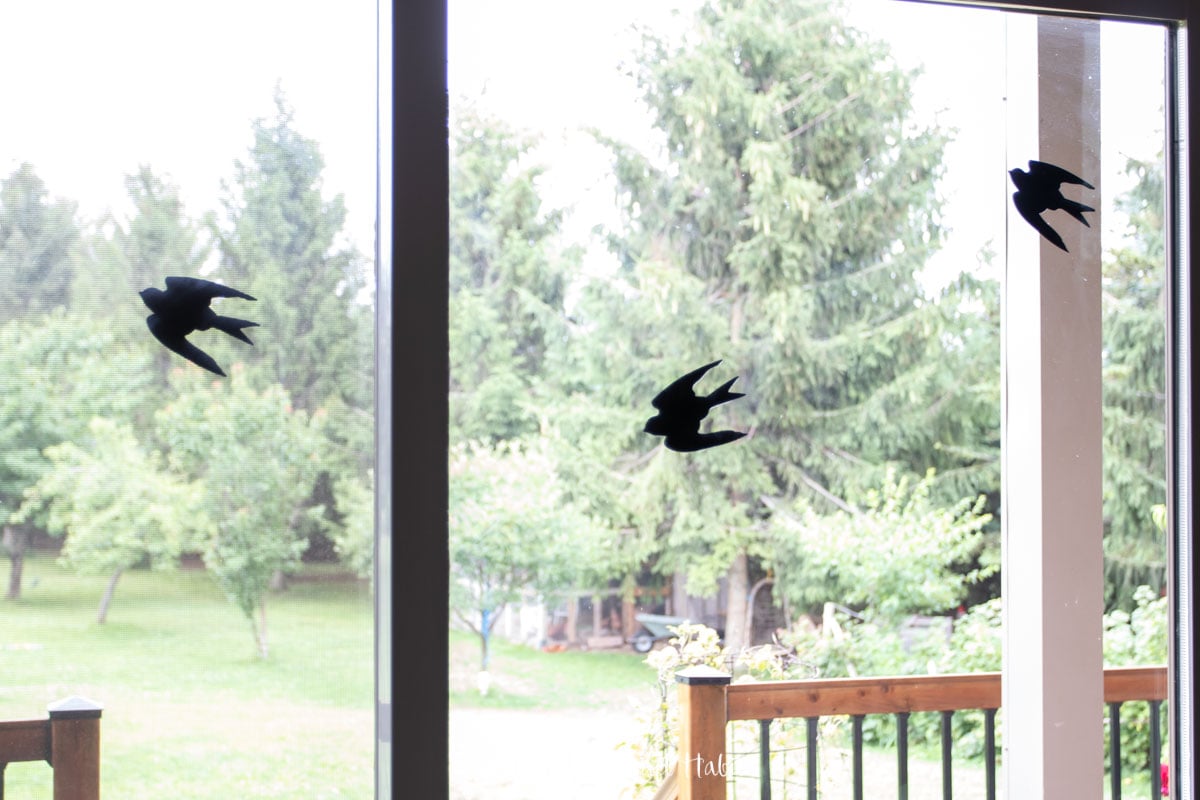
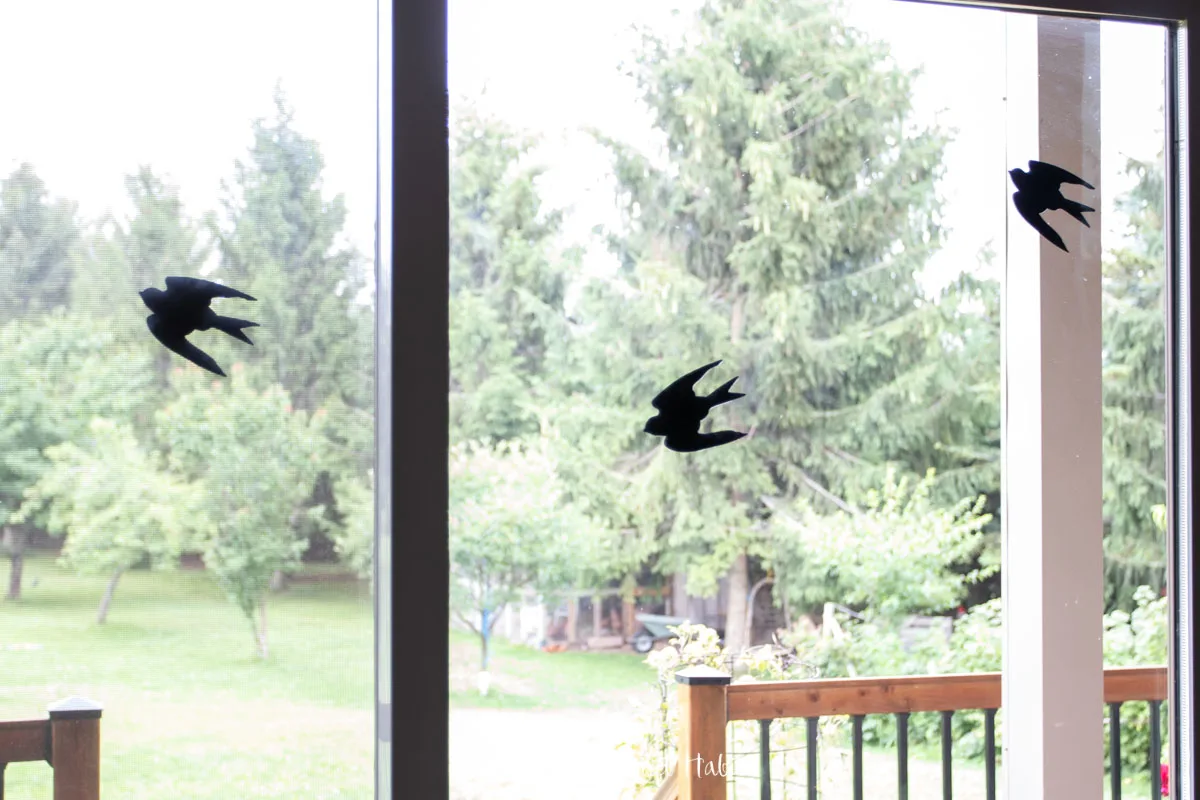
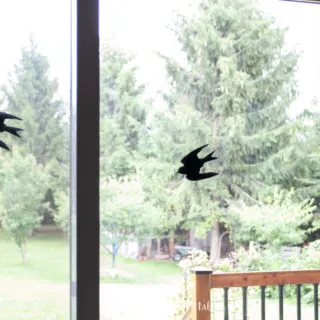
Having a large reflective window at the front of our family cottage, we often faced a problem with birds flying in to the window and injurying themselves. It was such a sad sight that we wanted to find a way to prevent it from happening. So once we placed some bird stickers on to the window, we found the birds were much less likely to fly into them.
The very first craft we made using our Cricut Maker 3 was a set of anti collision window decals to use on our other windows and screen doors. If you already have a cutting machine then you know the amount of versatility it offers, however, if you’re new to the Cricut world, you can refer to our complete guide and review of the Cricut Maker 3 to answer all your questions.


And let’s face it, it’s not only the birds we need to remind…who hasn’t walked through a screen door (or come close for that matter!) in their life time? I still remember my daughter years ago accidently charging through the screen door in our house, taking the screen right off it’s track! I’m sure these bird decals would have prevented her from charging through the screen!
Materials Needed:
Disclosure: This post contains affiliate links for your shopping convenience. Should you choose to purchase through them, we will make a small commission at no extra cost to you. You can read our full disclosure policy here.
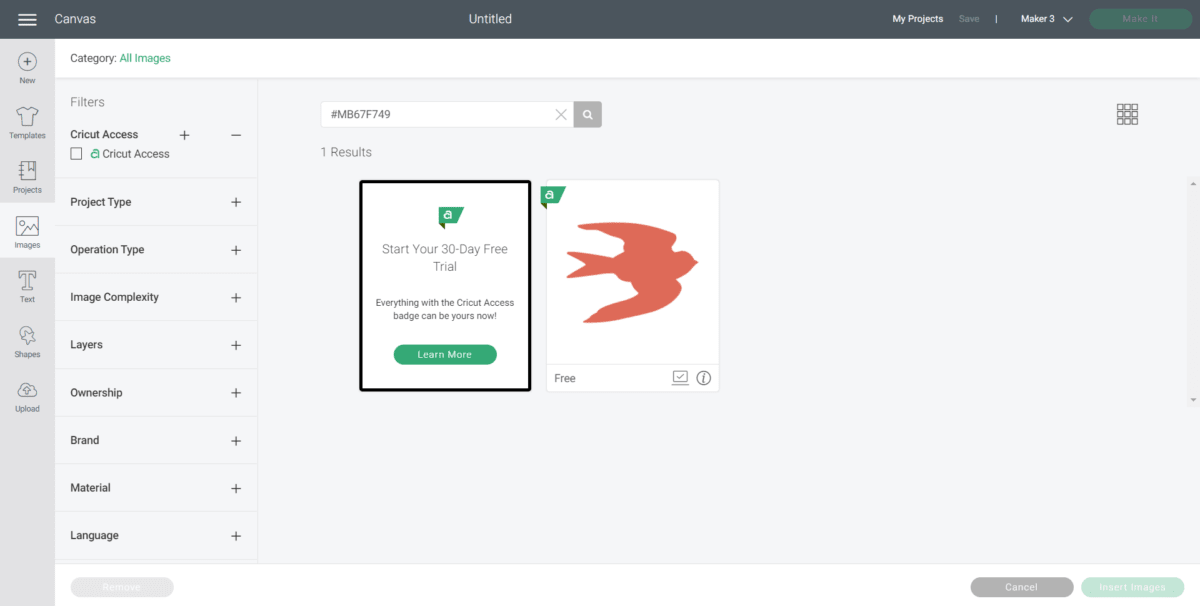
- Design Space bird image #MB67F749
- Cricut Maker 3 (or any of the Cricut cutting machines)
- Removable Smart Vinyl in Black
- Scissors
Instructions for Making Anti-Collision Window Decals:
Preparing the Design
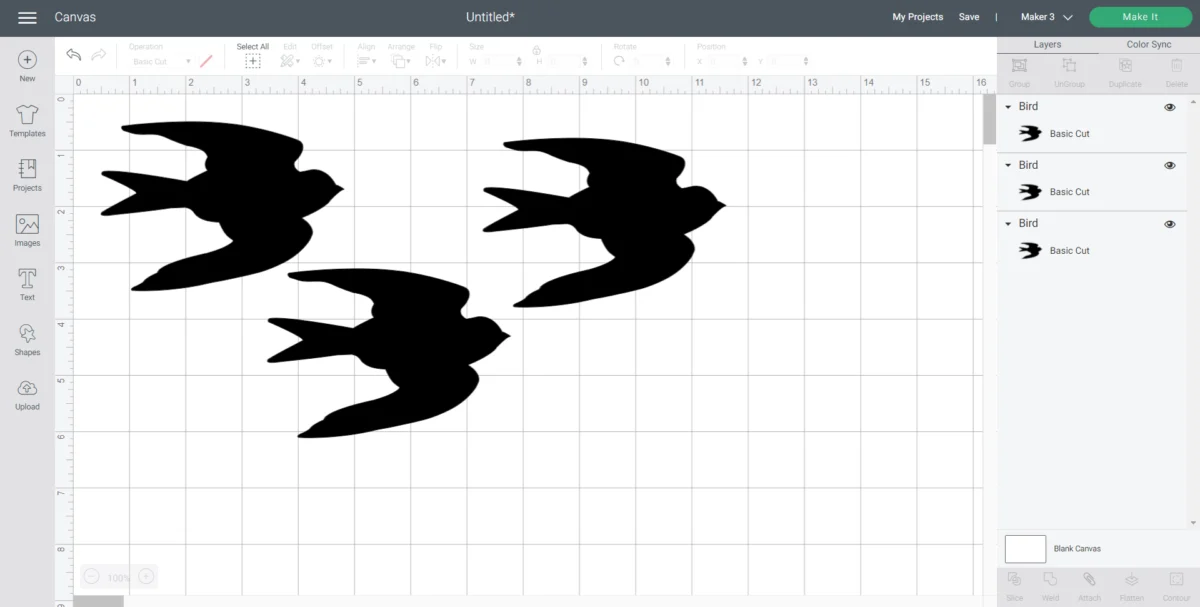
Open Cricut Design Space and click on the “+” sign to start a new project, opening up a blank canvas. Next, click on the Image button from the toolbar to search pattern #MB67F749 and insert it onto the blank canvas.

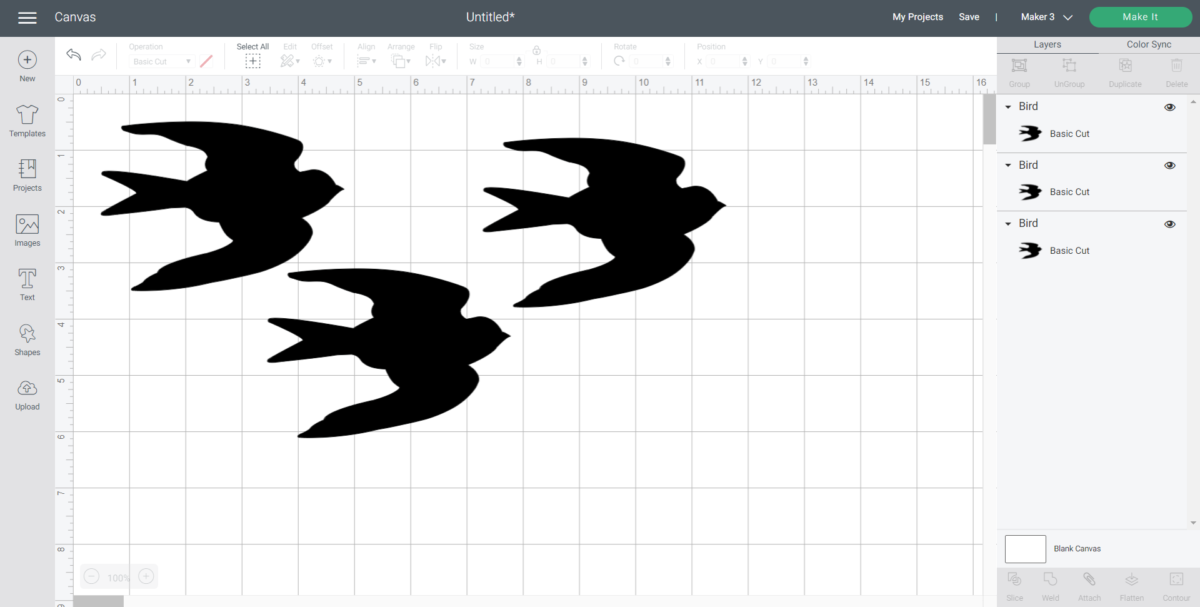
Maintain the size as is or adjust as you want and duplicate the pattern as many times as you need. We like placing a couple on each screen door. Lastly, adjust the material color to match the Smart Vinyl color you’re using if desired. In our case, we’re use black colored Smart Vinyl.
Cutting the Vinyl
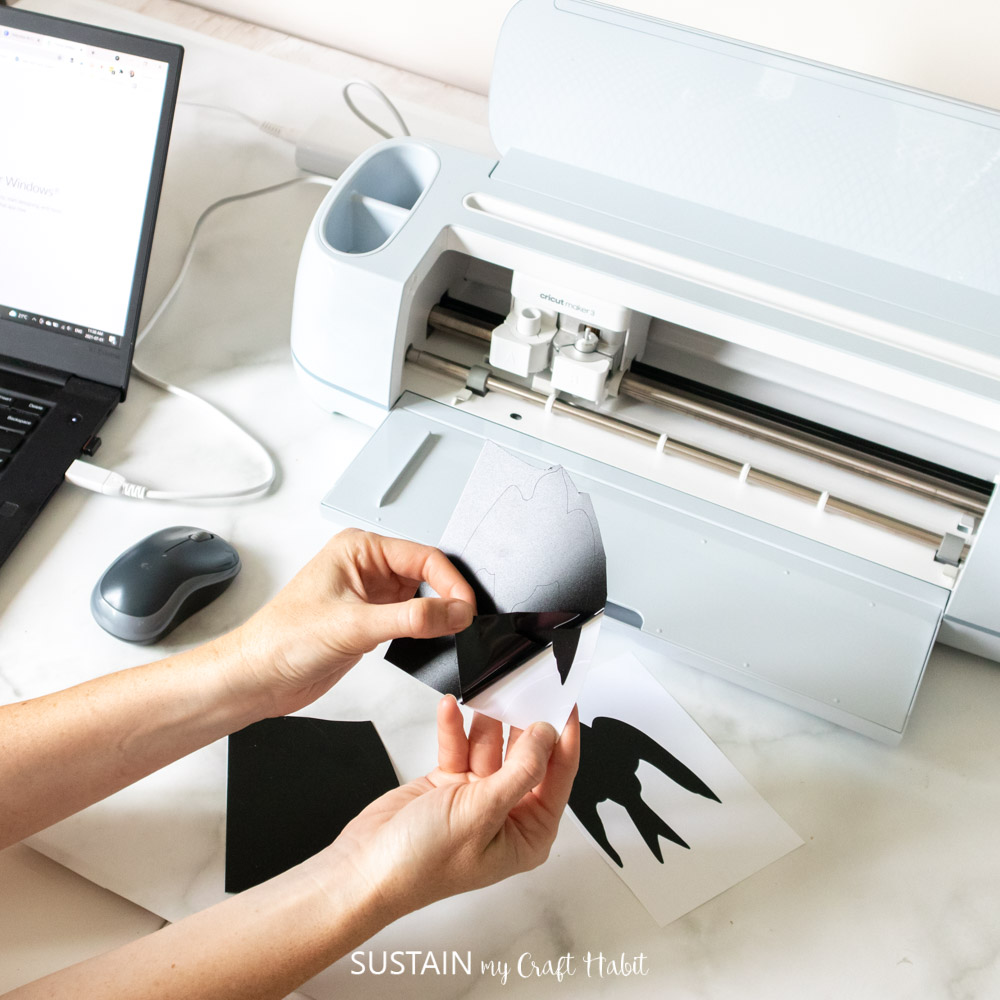
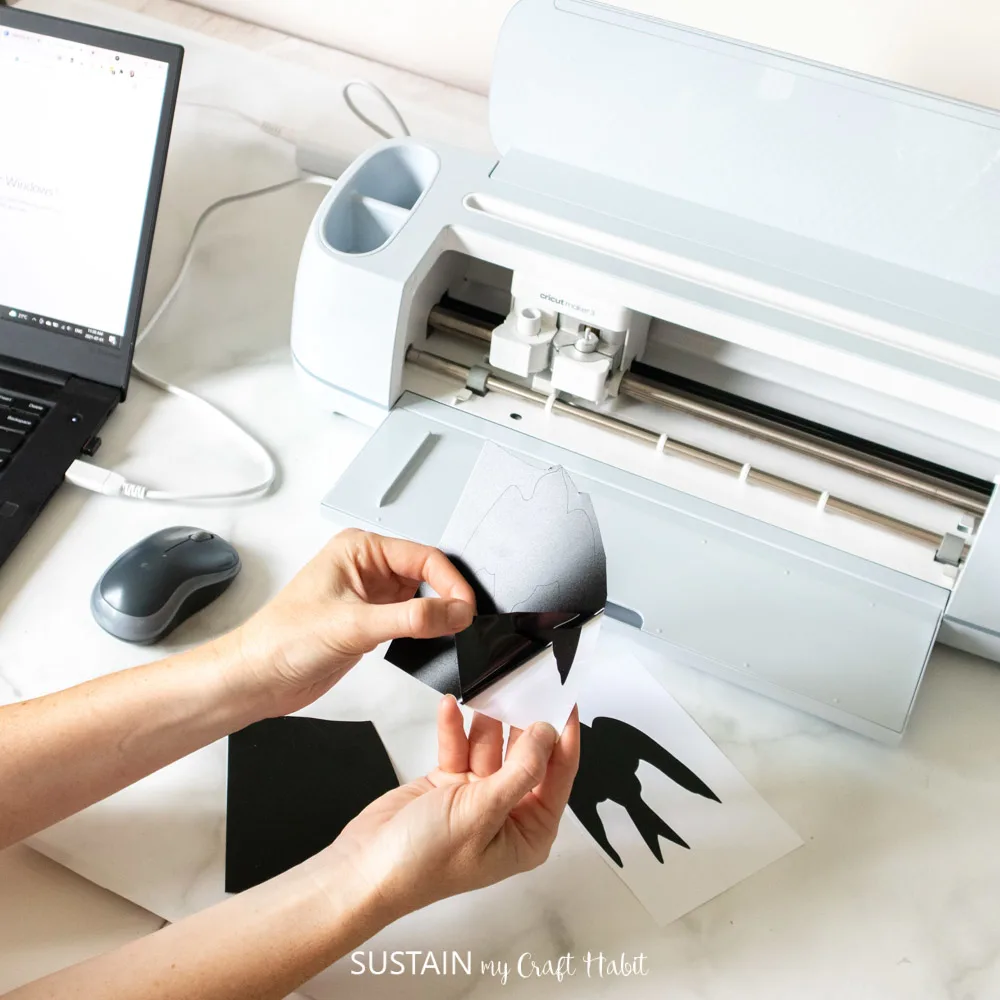
Ensure the machine is set to Cricut Maker 3 and select “Make It” in Design Space. Choose “Without Mat” as the option for cutting when using Smart Vinyl.
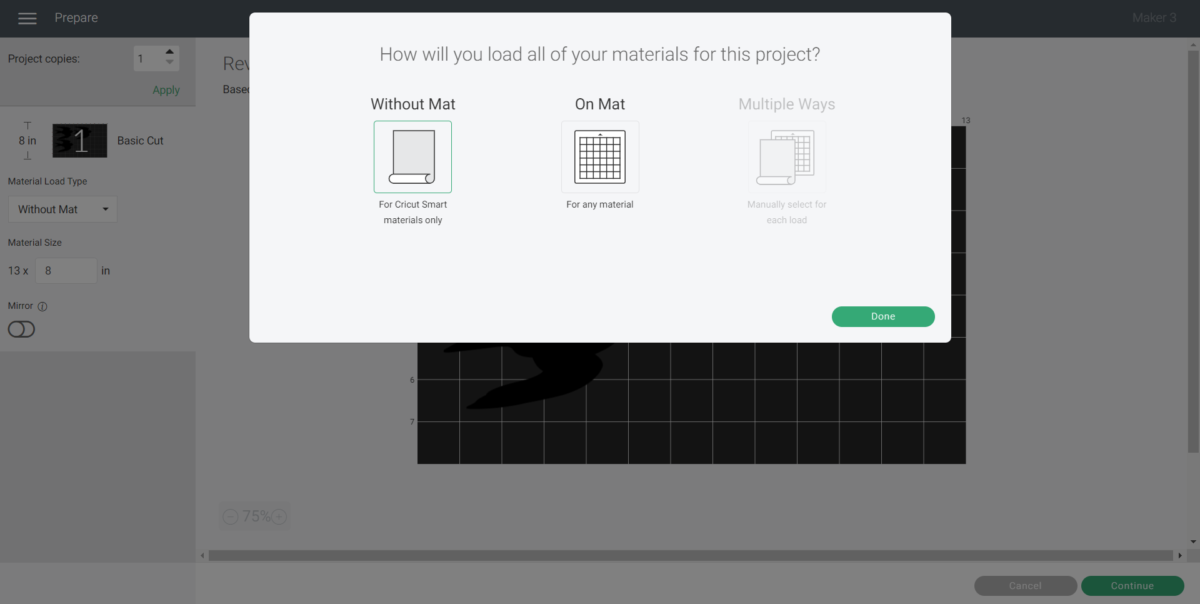
Set material type to Smart Vinyl and follow the prompts for loading and cutting the vinyl. And since we’re using a Smart Material, there is no need for a cutting mat! This makes it so much easier and quicker to create things.

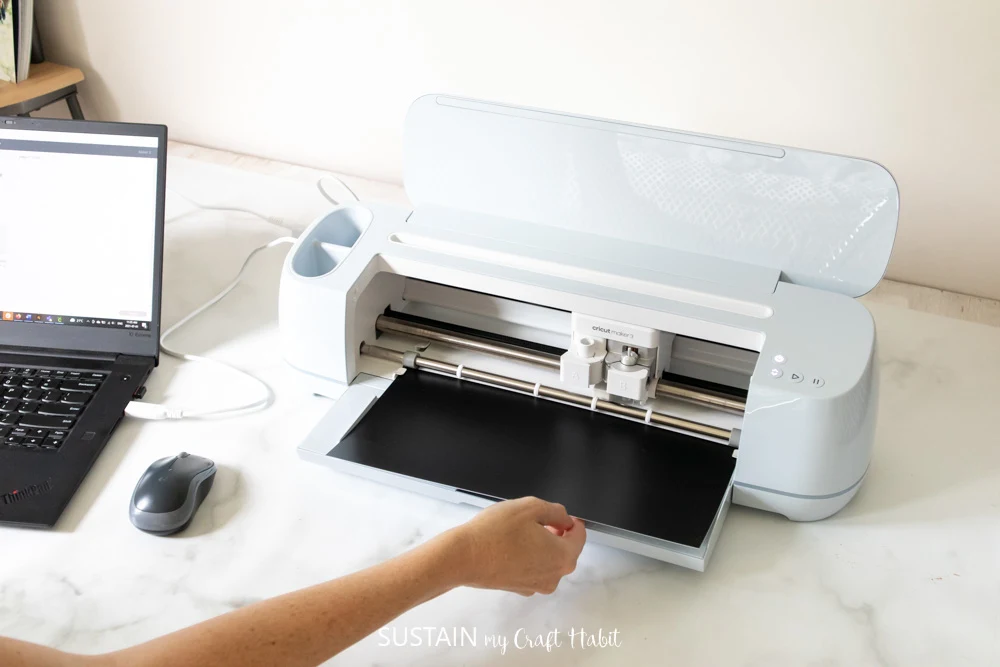
When prompted, unload the vinyl from the cutting machine.
Applying the Vinyl
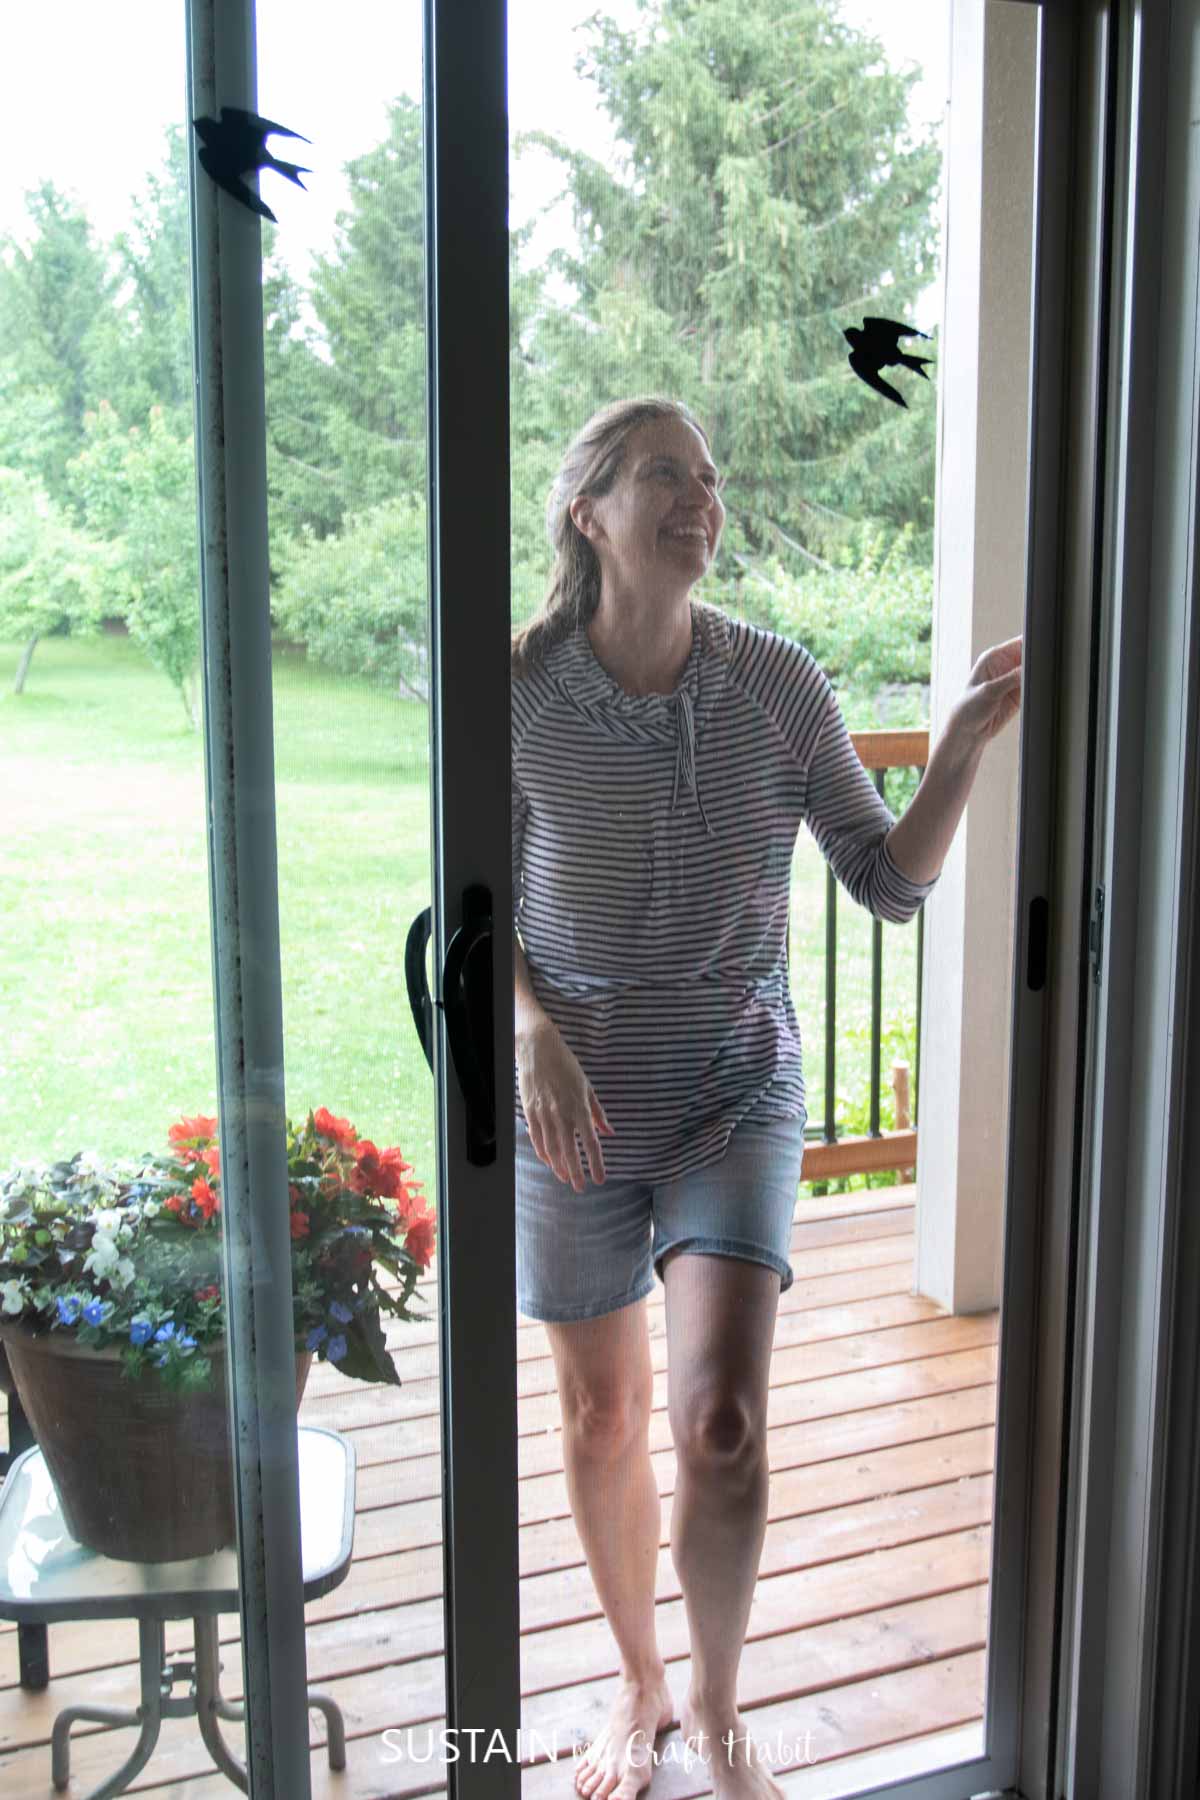
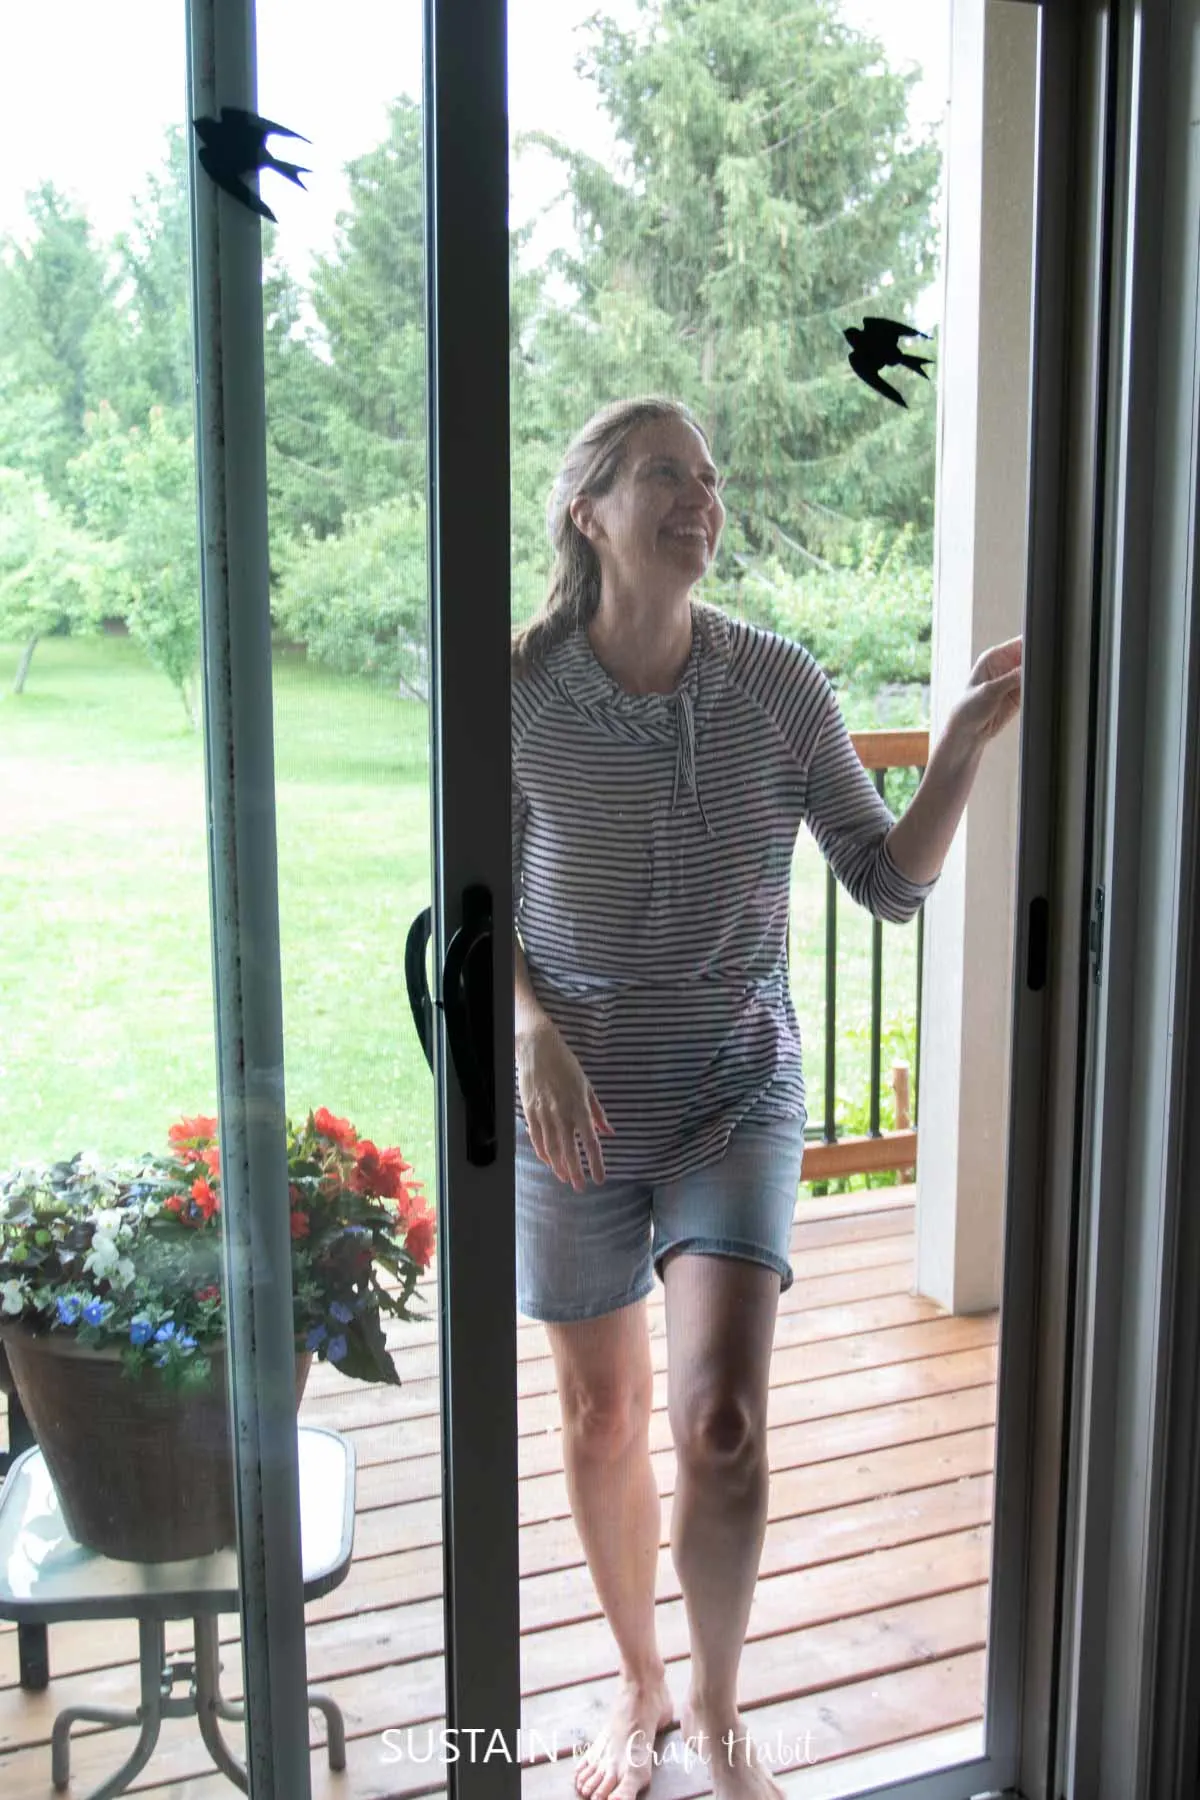
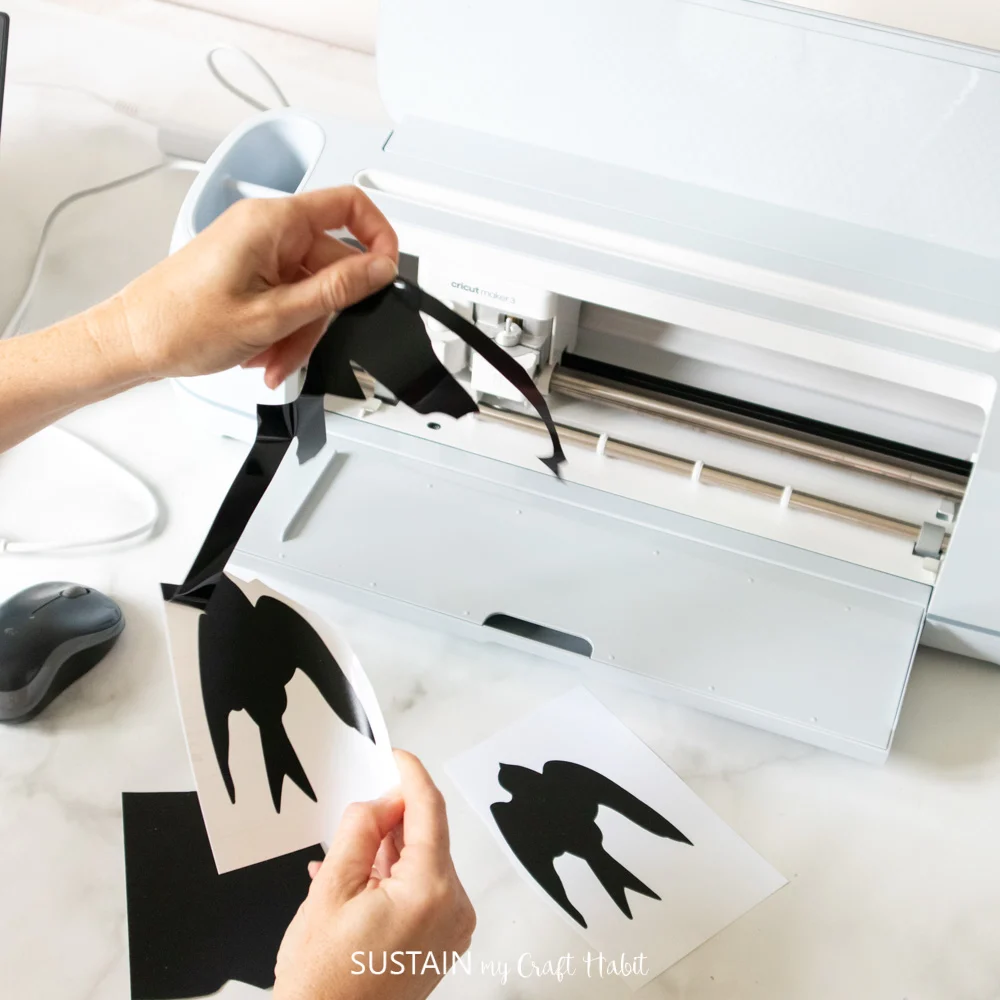
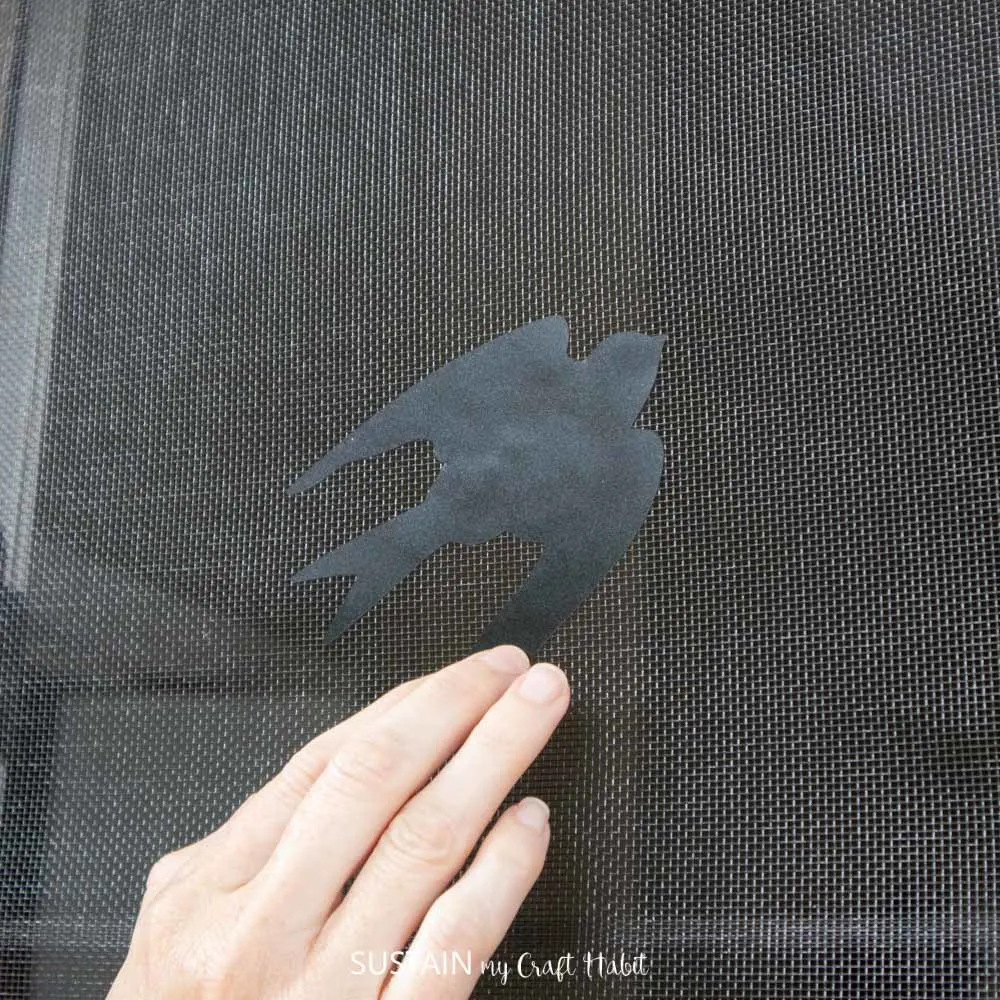
Cut around each of the bird decals and peel away the excess vinyl.

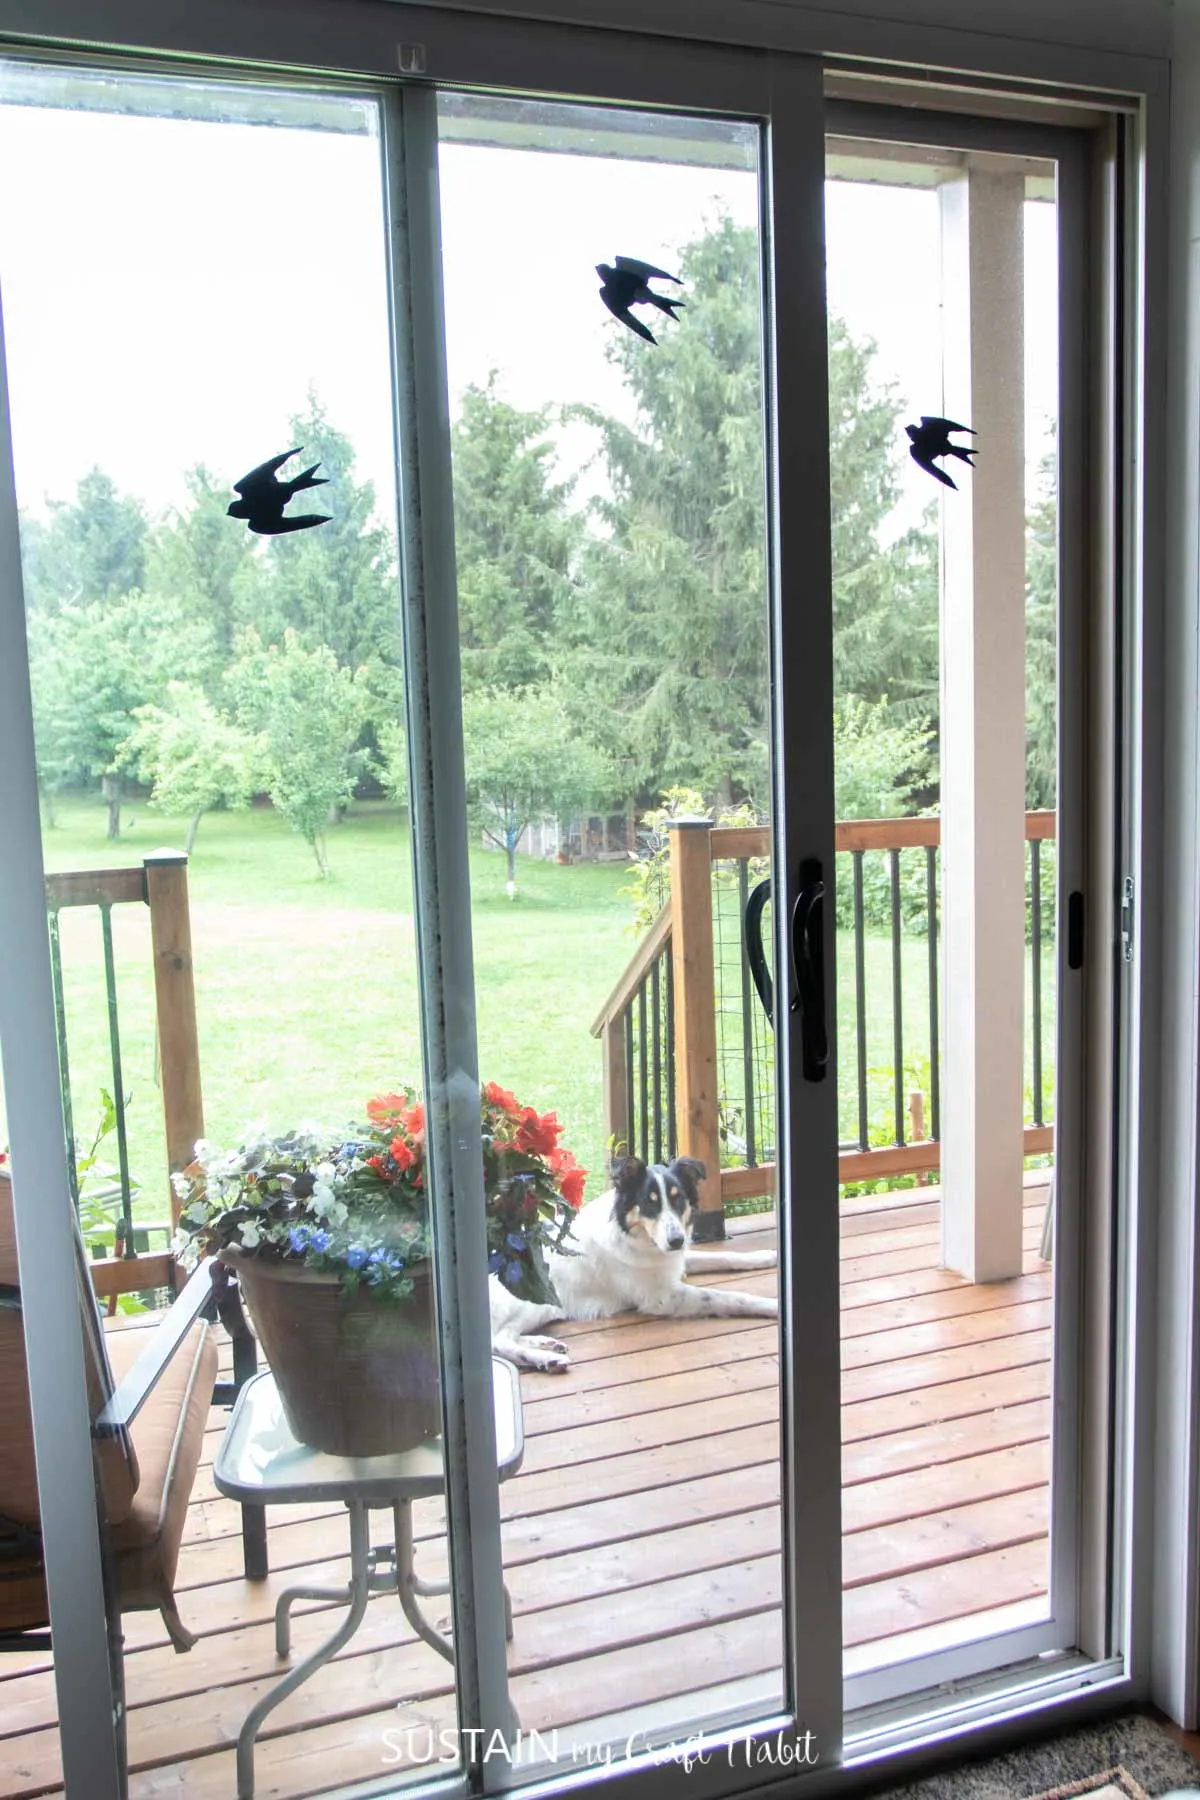
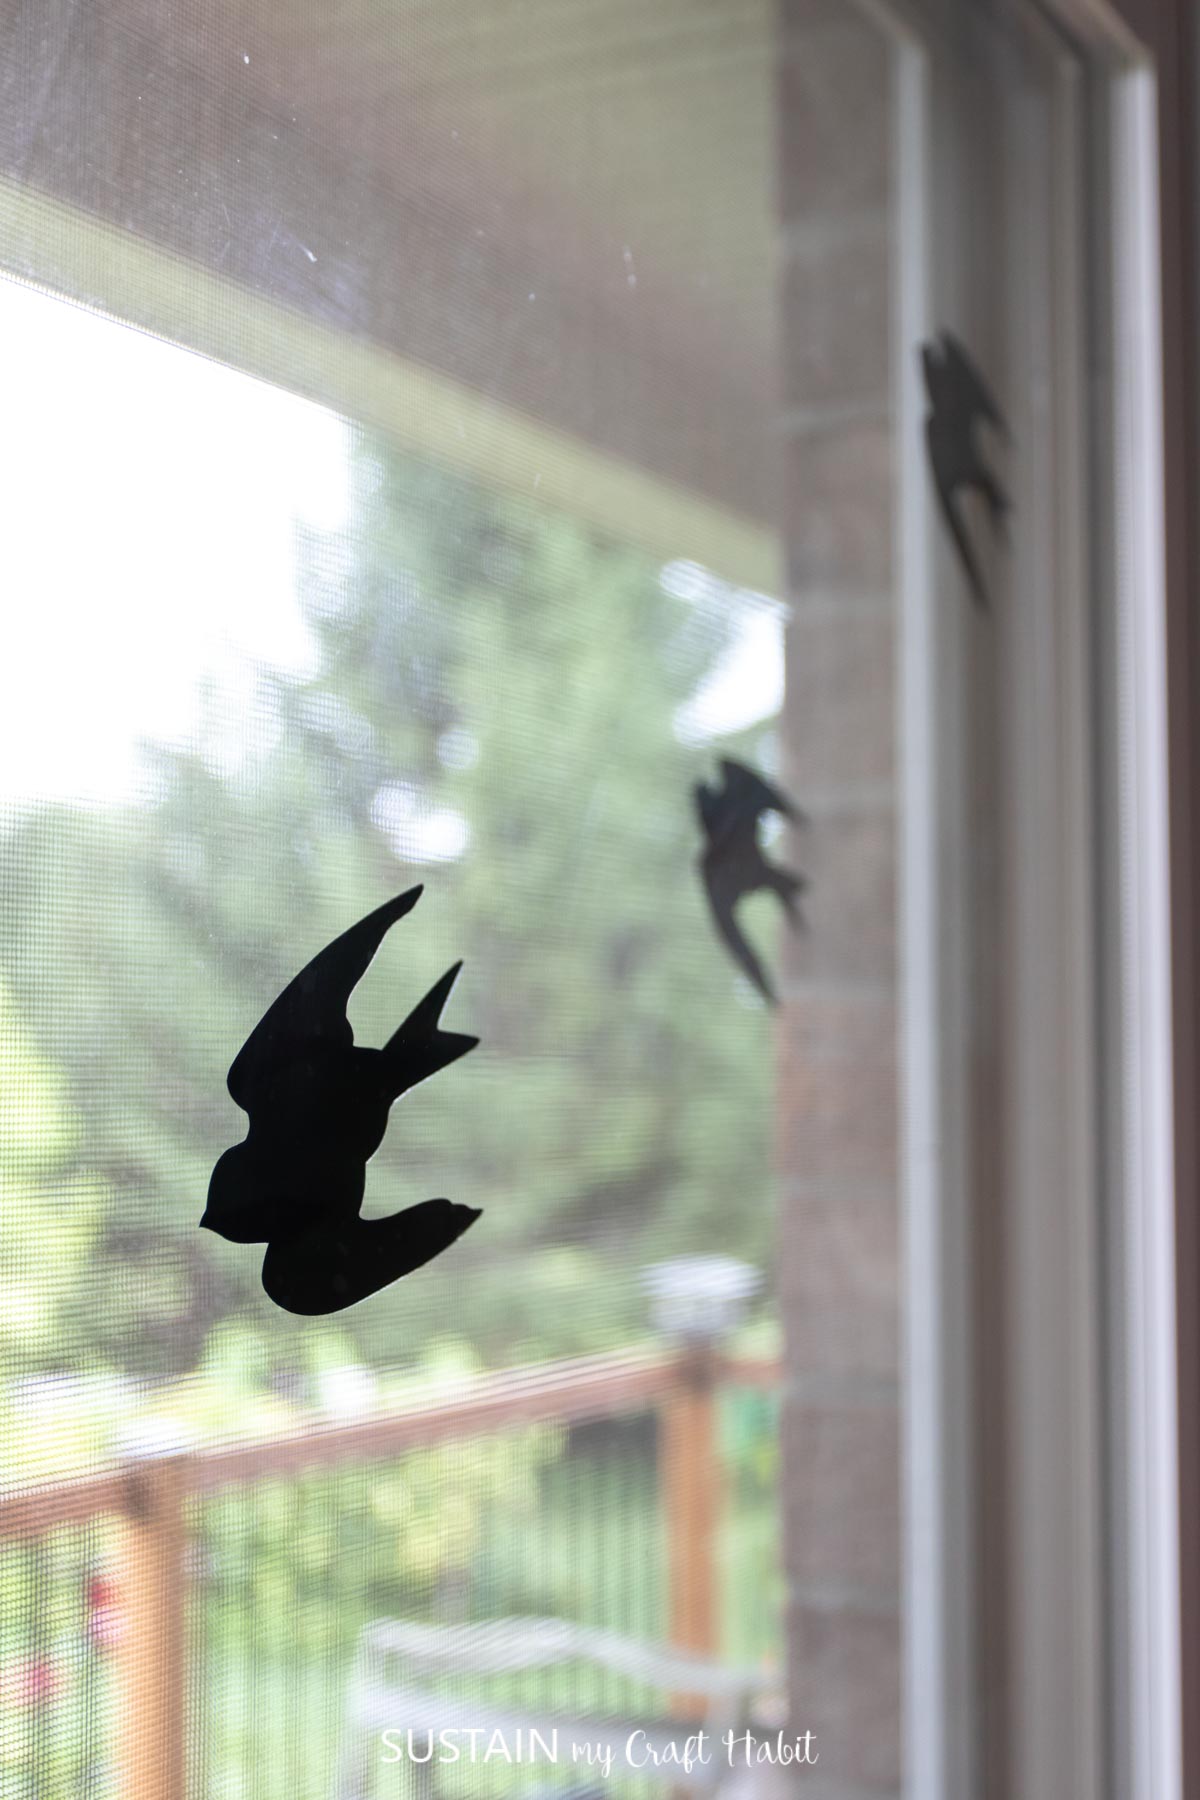
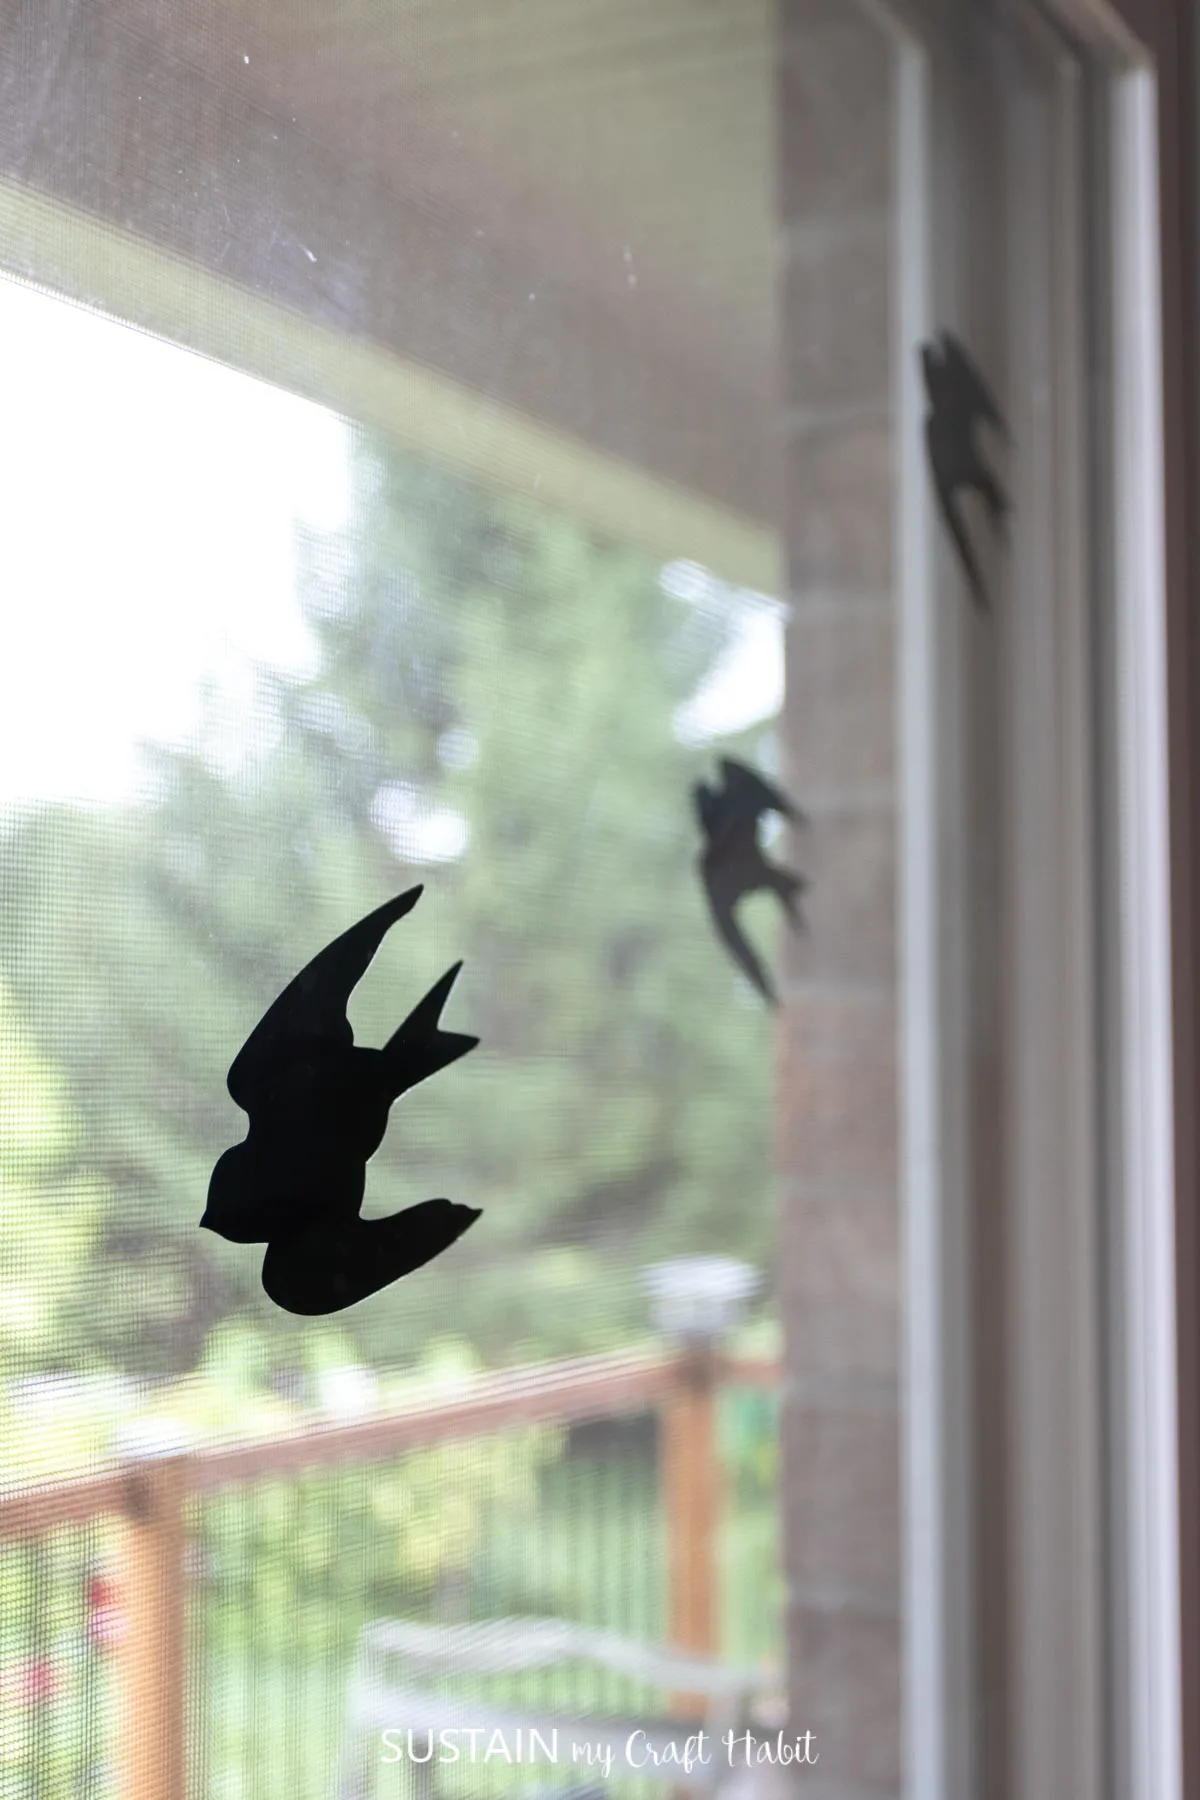
Remove the bird from the backing and stick it to the screen or window. If placing on the screen like we did her, be sure to press the decal from the back as well to help it adhere well.

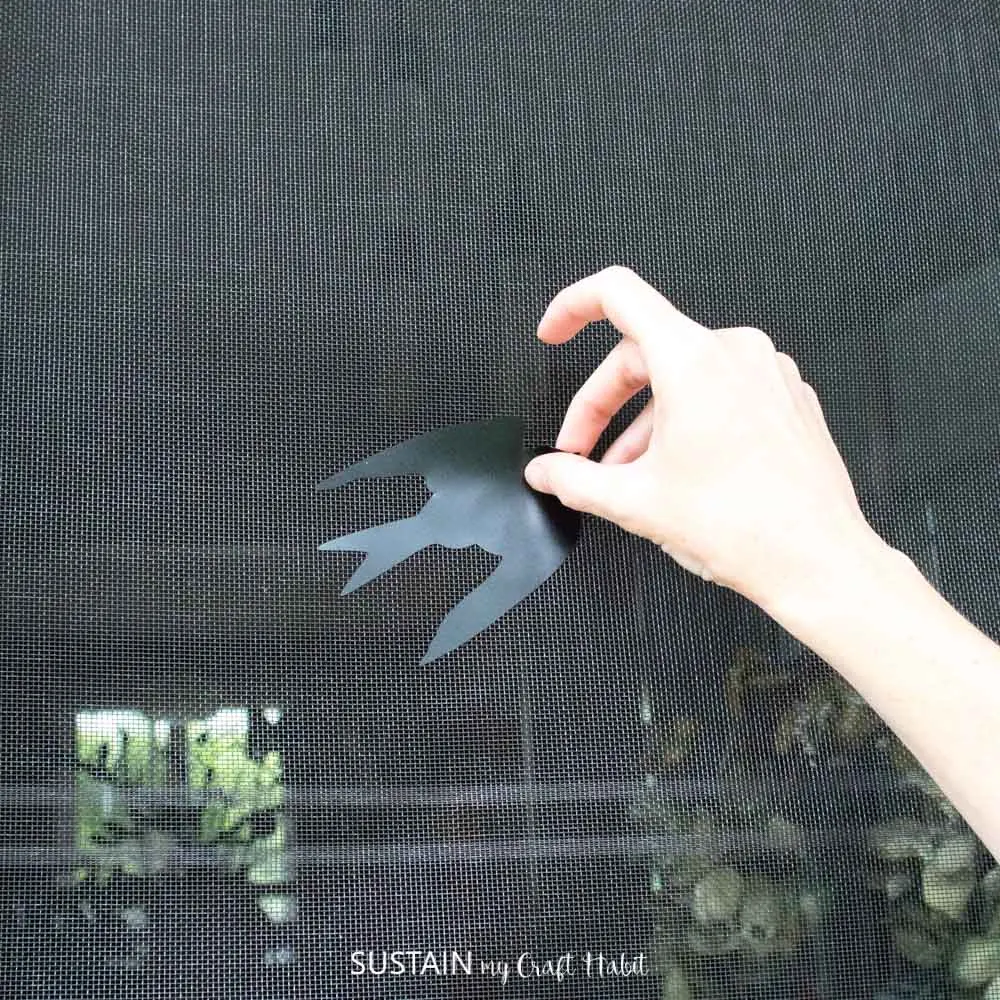
Repeat with the remaining birds placing them throughout the window and door and place some at eye level too.

We love that our very first craft using the Cricut Maker 3 was not only fun and easy but also really practical! To create your own window decals or other fun projects, get yourself a Cricut Maker 3 today.
More Simple Crafts with Cricut
We have loads of inspiration and step by step tutorials for making cool crafts for the home with Cricut.
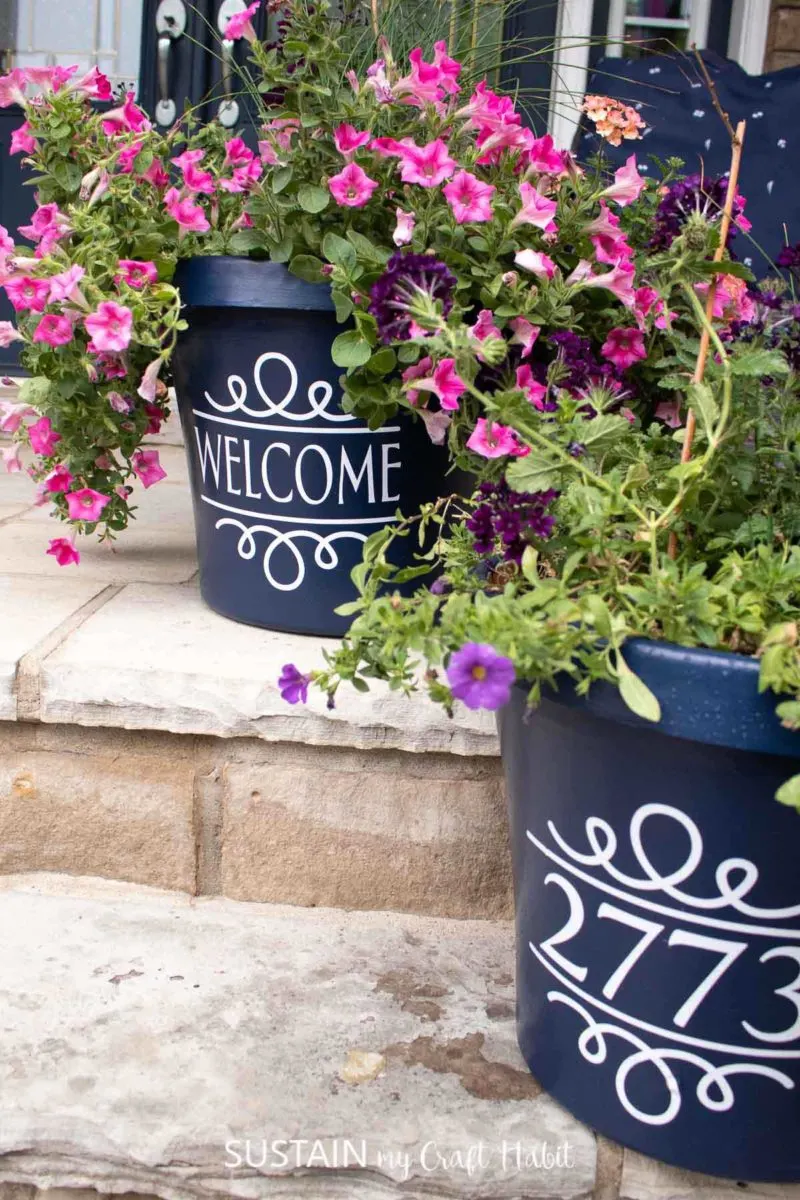
- Personalized budget friendly porch planters (with video)
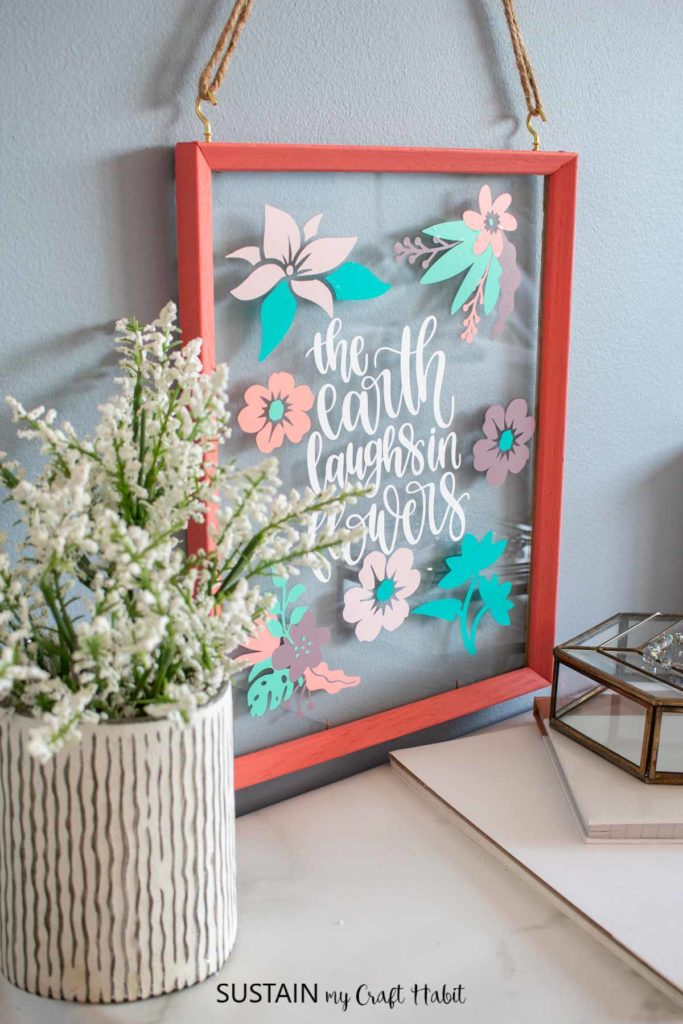
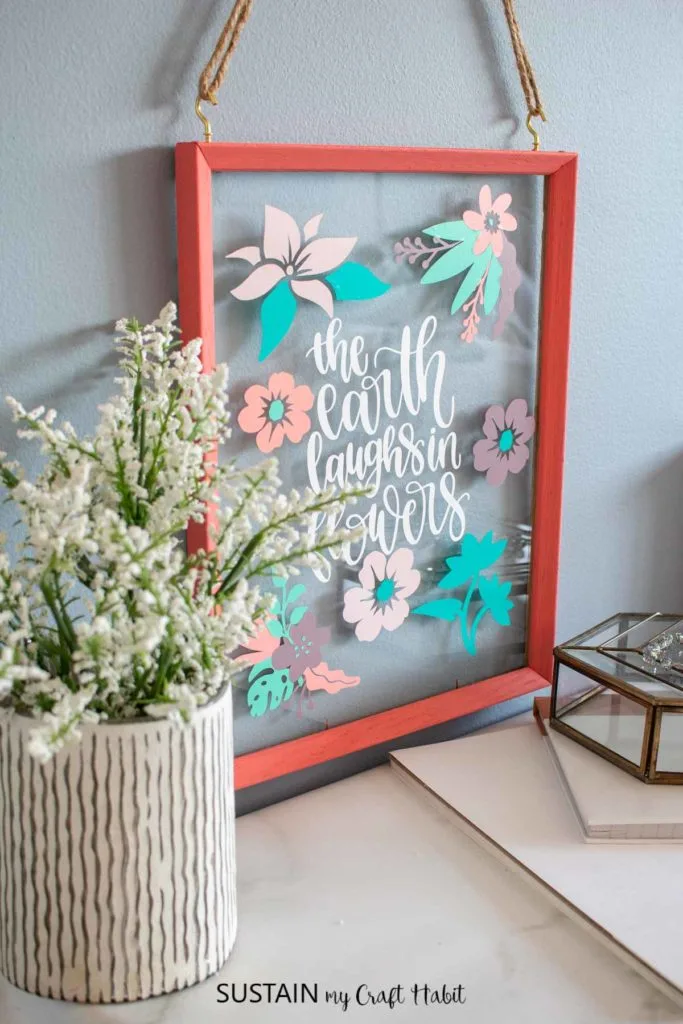
- Pretty thrifted framed wall art for Spring
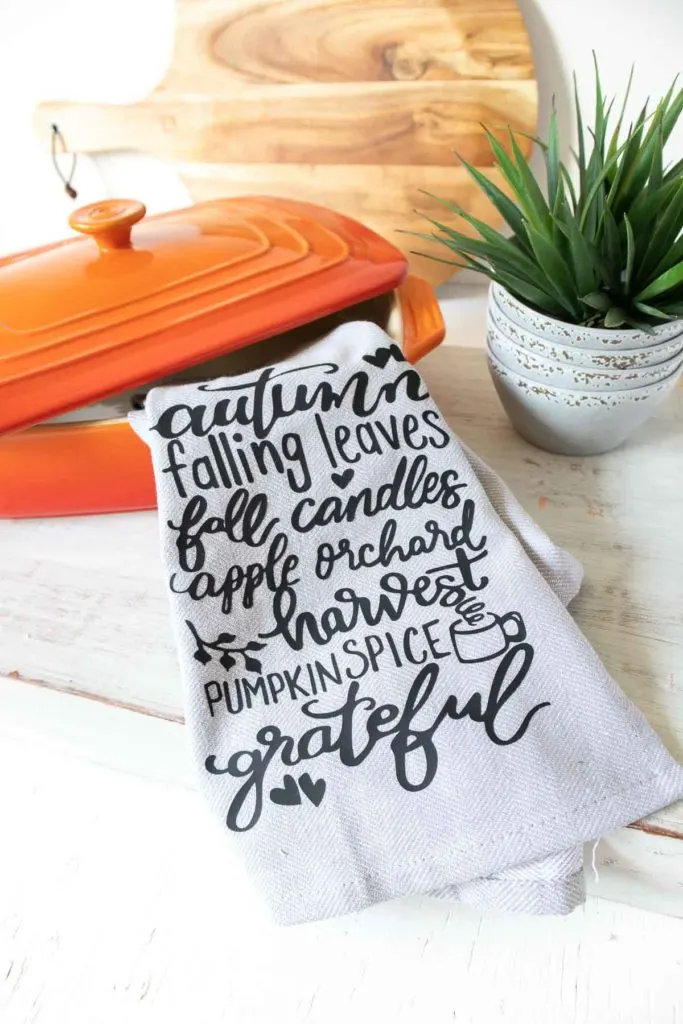
- Fall-themed tea towel for the kitchen


Like it? Pin it for later!


DIY Anti-Collision Window Decals
Materials
- Design Space bird image #MB67F749
- Cricut Maker 3 or any of the Cricut cutting machines
- Removable Smart Vinyl in Black
- Scissors
Instructions
- Open Cricut Design Space and click on the “+” sign to start a new project, opening up a blank canvas. Next, click on the Image button from the toolbar to search pattern #MB67F749 and insert it onto the blank canvas.
- Maintain the size as is or adjust as you want and duplicate the pattern as many times as you need.
Cutting the Vinyl
- Ensure the machine is set to Cricut Maker 3 and select “Make It” in Design Space. Choose “Without Mat” as the option for cutting when using Smart Vinyl.
- Set material type to Smart Vinyl and follow the prompts for loading and cutting the vinyl.
- When prompted, unload the vinyl from the cutting machine.
Applying the Vinyl
- Cut around each of the bird decals and peel away the excess vinyl.
- Remove the bird from the backing and stick it to the screen or window.
- Repeat with the remaining birds placing them throughout the window and door and place some at eye level too.
Jane Axelrod
Tuesday 4th of April 2023
Do you put these decals on the inside or outside?
Jane and Sonja
Wednesday 5th of April 2023
Hi Jane. We put them on the inside. The vinyl will last longer that way. Thanks for stopping by! -Jane :)