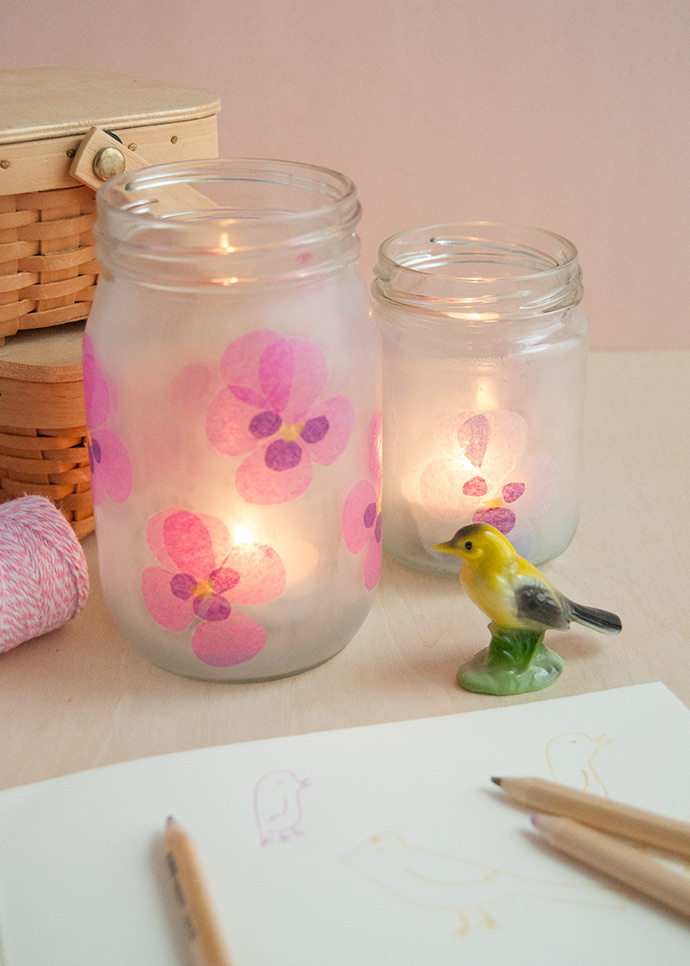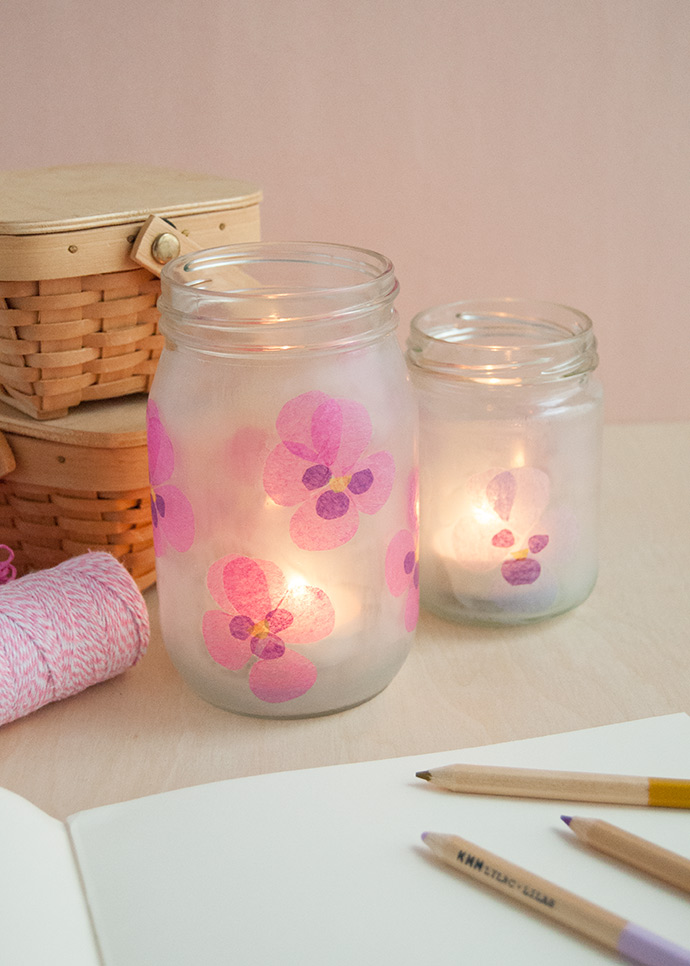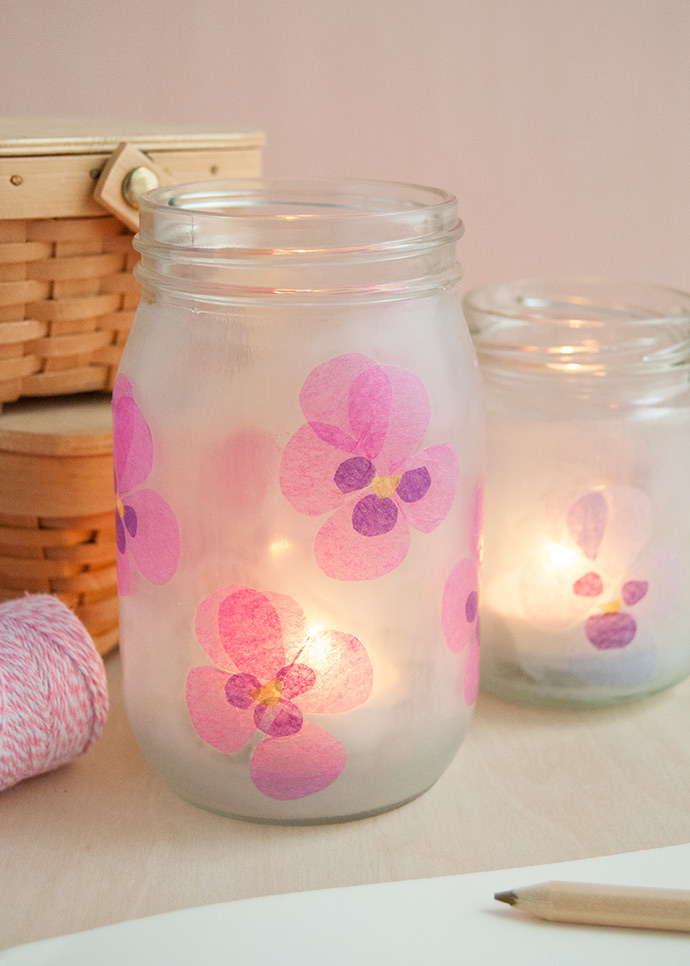
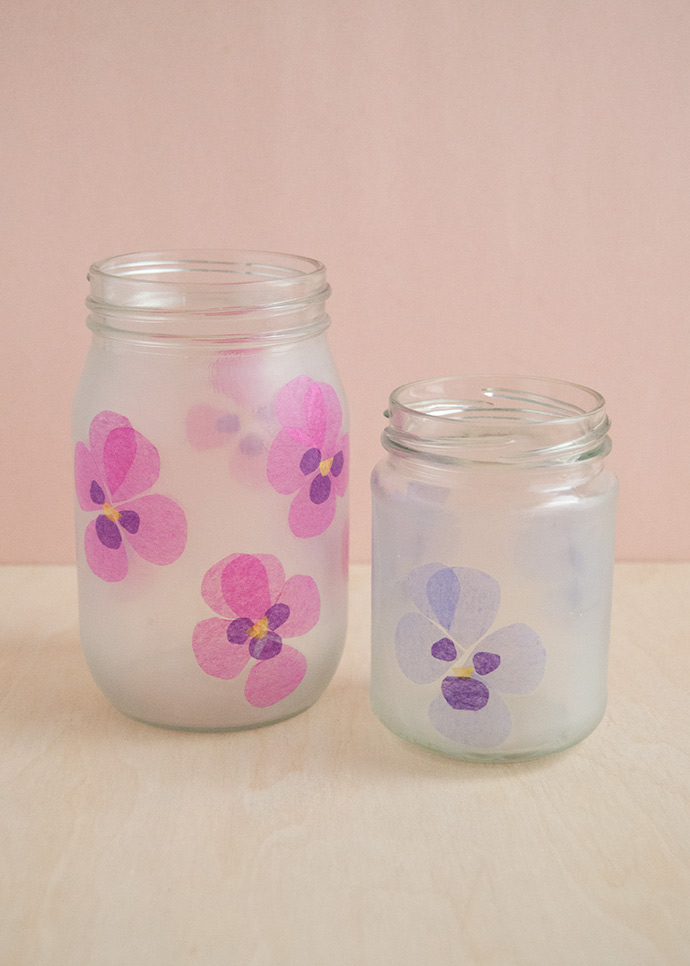
I’ve always loved the scene in Disney’s animated Alice in Wonderland where all the flowers are singing. It’s been a little while since I’ve seen the movie in full, but that scene has really stuck with me over the years! We added some pansies into our garden this year and it reminded me of how much I love them. The singing pansies in Alice in Wonderland look a bit different from the real thing, but I used their simple lines combined with real pansies as the inspiration for these decoupage votives. Earlier this year, I made these pastel gingham lanterns in a similar way and I think these new pansy ones would pair so nicely with them. You can of course use this method to make any type of flower you like – the finished product looks so much like pressed flowers!
what you need:
- Tissue paper (in multiple colors)
- Scissors
- White glue
- Paintbrush
- Empty glass jars
- Pencil
- Scrap paper
how-to:
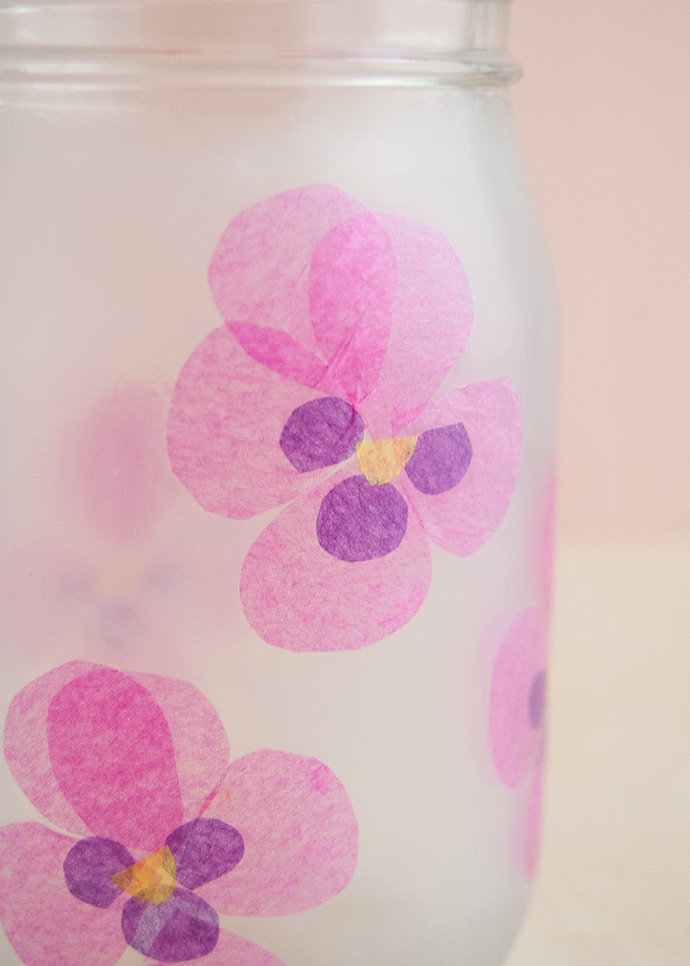
On a piece of scrap paper, draw out a simple pansy shape. Do an image search (or look in your garden!) for reference – I originally had each petal as a slightly different shape, but later realized that it was nearly impossible to tell them apart, so I suggest just making one petal template here. Cut out the template.
Cut a segment off of a single sheet of tissue paper and fold it into a more workable size. Trace the template onto the folded tissue carefully and cut out.
On a contrasting color of tissue paper, cut small little blobs to be the color detail for three of the pansy petals. The lower petal has a slightly larger spot while the two side petals have matching smaller spots.
Apply white glue onto a section of your jar using a paintbrush. Gently place the pansy petals onto the glue, carefully shifting them if needed. Gently apply more glue on top of these petals to seal them in place and then place the colored spots on top. Apply a little more glue on top of these to seal.
Repeat this process until the jar is covered on all sides. Set aside to dry completely before placing a tealight inside.