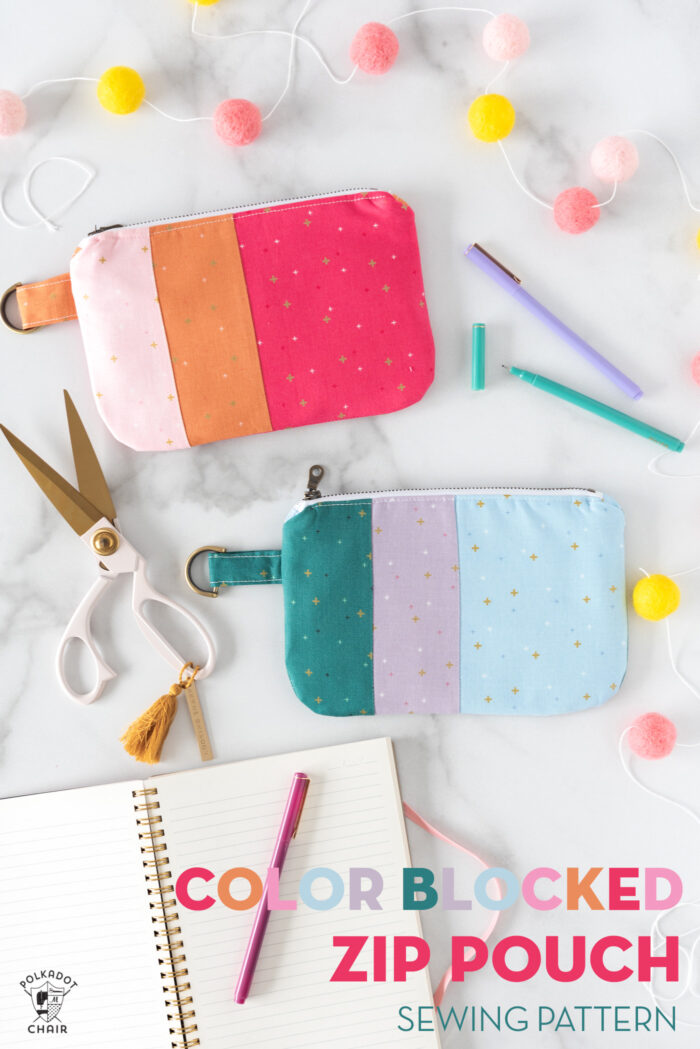
Color-Blocked Zip Pouch Sewing Pattern
Create a stylish and oh so useful zippered pouch with our free Color-Blocked Zip Pouch Sewing Pattern. This clutch is simple to construct and makes a great gift!
Oh, how I love a simple zip pouch! I think they may be one of my favorite things to sew! I remember the first time I made one and it turned out nicely, I felt a huge sense of accomplishment!
In the years since I stitched my first zippered clutch, I’ve made dozens more. I don’t know if I can count how many. They are the perfect little project when you want to sew something quickly, but still fun and useful.
I have a bunch of similar zip bags that I carry with me when I travel. One for cords, another for gum, one for lip balm, etc.
About the Sewing Pattern
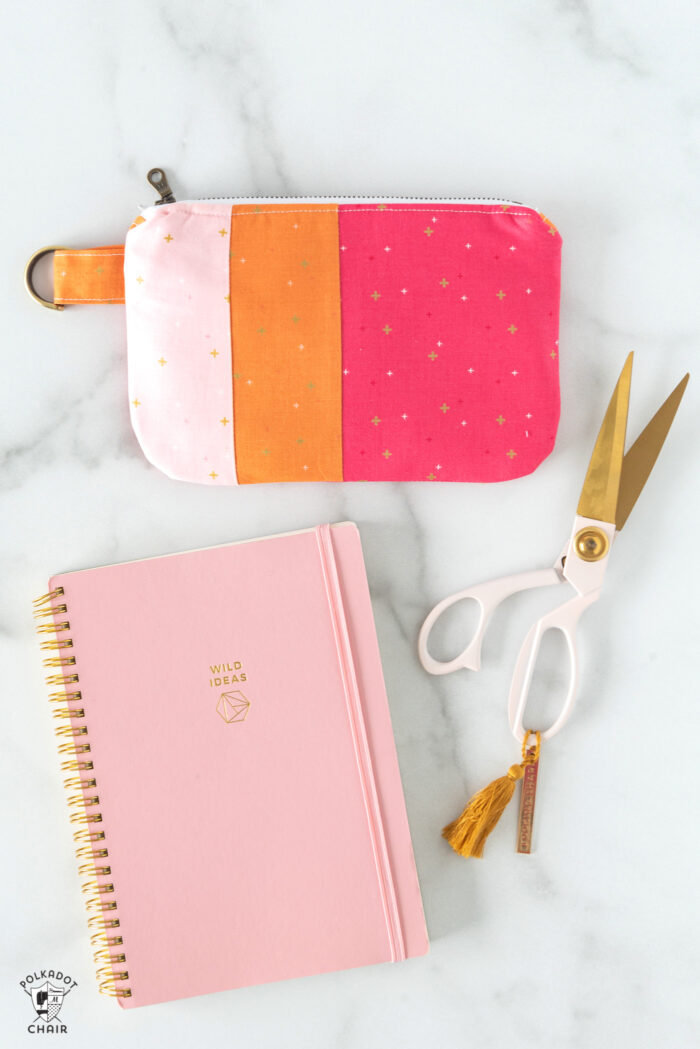
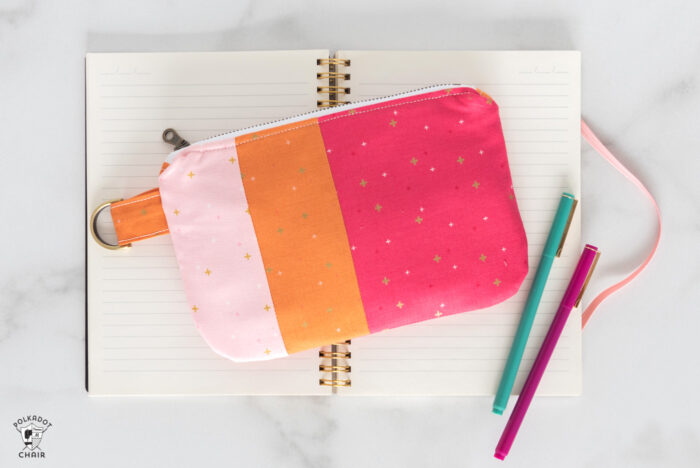
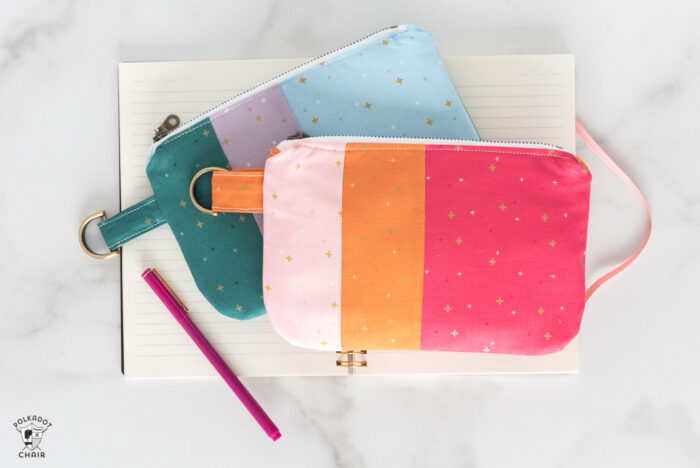
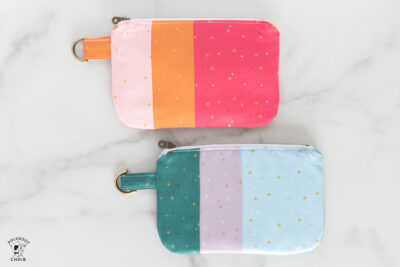
When finished, this zip pouch measures approximately 8″ wide by 5″ tall. It features a metal zipper and a D ring on the side to attach a key ring or lanyard.
This bag is a little different than a few of the zip bag tutorials I’ve shared in the past in that it features rounded corners. I also added zip tabs to the ends of the zipper.
I created two color-blocked versions of this bag. One featuring pink and orange, one in green, lavender, and baby blue.

The fabrics are from my Sparkler collection, and the exact colors are:
- Baby Pink
- Pumpkin
- Raspberry
- Jade
- Lilac
- Boy Blue
The bags are fully lined as well.
Supplies Required
For this project, you will need.
- 1 Fat Quarter of Fabric for Bag Lining
- 3 pieces of fabric at least 6″ x 9″ for the front and back of the bag
- 7″ metal zipper
- Fusible Fleece
- Lightweight Fusible Interfacing
- Purse D Ring
- Iron
- Sewing Machine
- Sewing Notions
If this is the first time you’ve created a zip pouch, you might want to check out the highlight bubble on my Instagram profile (@polkadotchair) called Bag Sew Along. I walk you through the steps to create a simple zip pouch.
A few steps are different, but the portions of the tutorial that you may find a bit confusing are the same.
Color-Blocked Zip Pouch Sewing Pattern
supplies
- 1 piece Fabric 6" x 9" for bag bag
- 3 pieces Fabric 6" x 6" or larger for bag stripes
- 1 Fat Quarter Fabric For Bag Lining
- 1 package Fusible Fleece
- 1 package Lightweight Interfacing I prefer Shape-Flex
- 1 Zipper 7"
Instructions
Cutting Directions:
- For Left Stripe Cut: 1 piece 2 ¾” x 6” For Center Stripe Cut: 1 piece 2 ½” x 6” For Right Stripe Cut: 1 piece 4 ¾” x 6” For Bag Back Cut: 1 piece 6” x 9” For Bag Lining Cut: 2 pieces 6” x 9” From Fusible Fleece Cut: 2 pieces 6” x 9” From Lightweight Interfacing Cut: 4 pieces 6” x 9” From Accent Fabric Cut: 4 pieces 1” x 2” for zipper tabs 1 piece 2 ½” x 4” for D ring attachment
Step One: Create the Bag Front
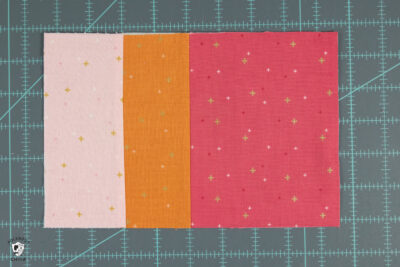
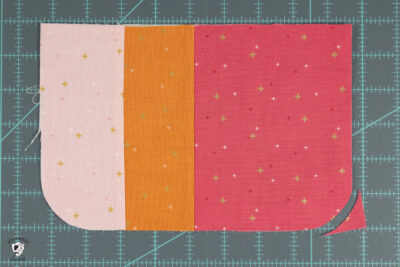
- Sew the Left, Center, and Right bag front strips together using a ¼” seam allowance.

- Press the seams and trim to 6” x 9” if necessary.
Step Two: Intervacing
- Following the directions on the package, apply interfacing to the following pieces.
- Lightweight Interfacing: Apply to the bag front, bag back, and lining pieces.
- Fusible Fleece: Apply to the bag lining pieces on top of the lightweight interfacing.
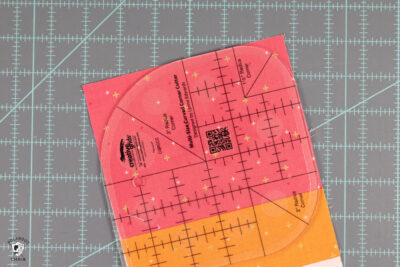
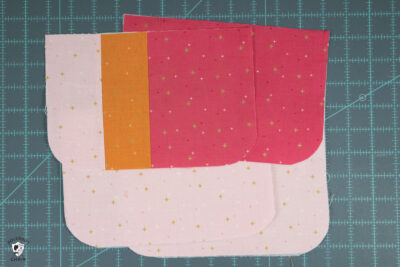
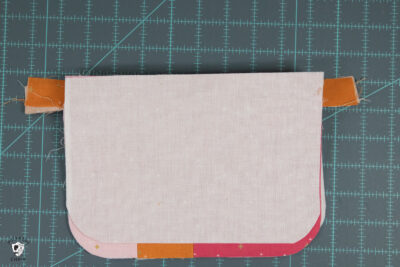
Step Three: Round Corners
- Using a round object (like a plate or an old CD), round the two bottom corners of the bag front piece.
- I used a Curved Corner ruler, but if you don't have one just use any round object.
- Repeat with the bag back and both lining pieces.
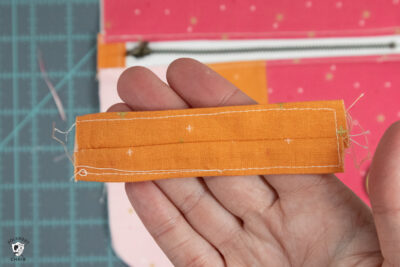
Step Four: Zipper
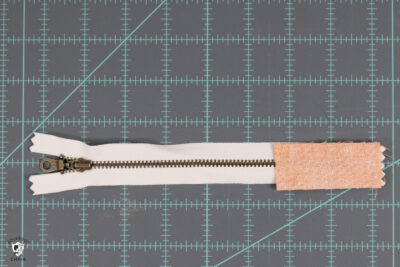
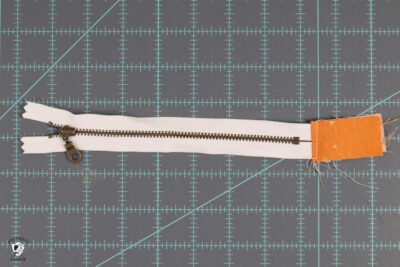
- Pin one of the 1” x 2” zipper tab pieces to the end of your zipper, right sides facing. Pin another piece to the back of the zipper. Sew in place.
- Flip the zipper tabs so that they are away from the zipper and the fabric is right side up, and press. Topstitch along the fold.
- Repeat for the other side of the zipper.
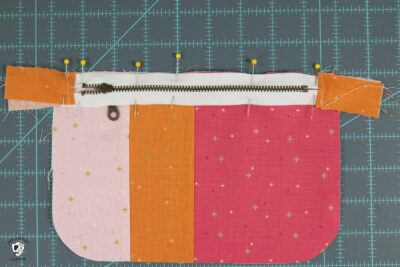
- Pin the zipper to the bag front piece, aligning the centers. The right side of the zipper will be facing the right side of the fabric.
- Pin one of the lining pieces to the top of this. You will pin it so that the right side of the lining faces the zipper’s wrong side.
- Stitch in place using a zipper foot on your sewing machine with a ¼” – ⅜” seam allowance.
- Repeat the steps with the bag’s back and the other lining pieces.
- Press the fabric away from the zipper and topstitch along both zipper ends. Be careful, as metal zippers can become very hot when ironed.
- Trim the excess fabric from the zipper tabs.

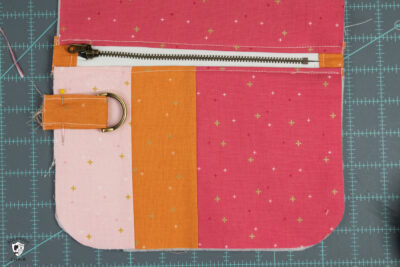
Step Five: D Ring
- Fold the 2 ½” x 4” piece of fabric in half lengthwise and sew with a ¼” seam allowance. Turn right side out.
- Press the piece so that the seam is centered. Topstitch down both sides of the piece.
- Feed the D ring through the fabric and pin to the bag front piece about 2” down from the top of the bag. Stitch in place. Pin the D ring so that it does not get in the way as you finish the bag assembly.
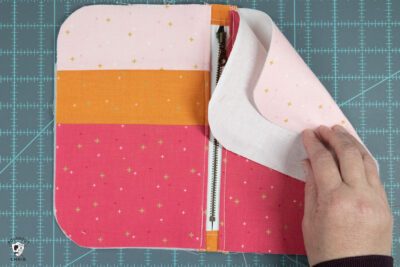
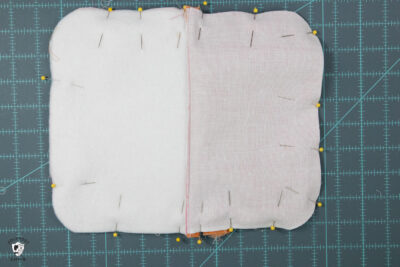
Step Six: Assembly
- Unzip the zipper.
- Pin the bag front and bag back pieces together, right sides facing. Pin the bag lining pieces together right sides facing.
- Stitch around the perimeter of the bag with a ⅜” seam allowance. Be VERY careful when you are stitching over the area with the zipper. Make sure that you do not sew over any of the metal parts of the zipper.
- Leave a 3” opening on the lining side of the bag.
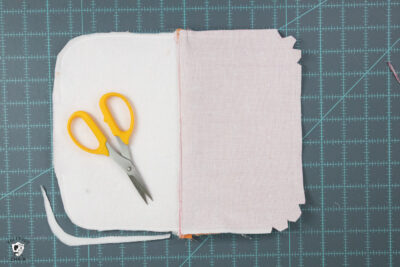
Step Seven: Finishing
- Trim the seam allowance of the lining down to ⅛”.
- Clip the curves on the bag.
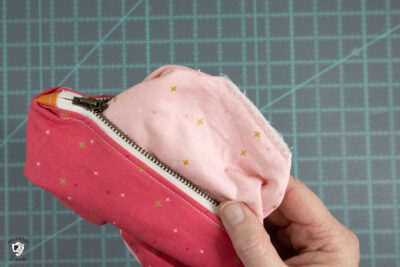
- Turn the bag right side out through the opening you left in the lining.
- When you’re sure that the bag is sewn correctly, close the hole in the lining with a zig-zag stitch.
- Press the bag well. I recommend that you use steam for this step as it will help to smooth out any wrinkles that may have occurred during the construction process.
You May Also Like