
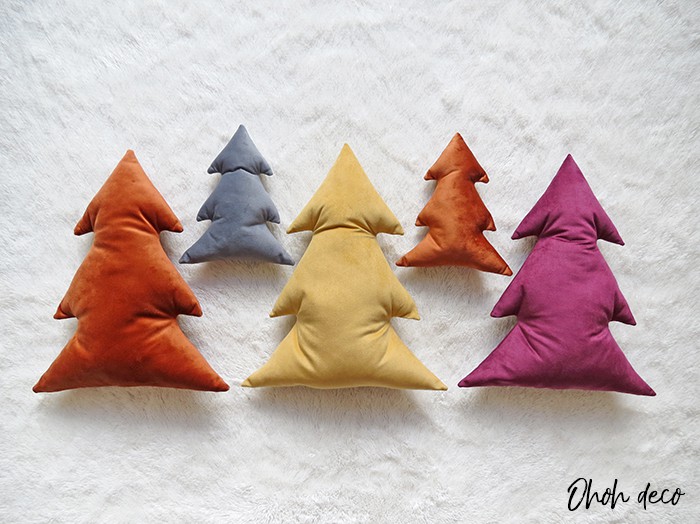

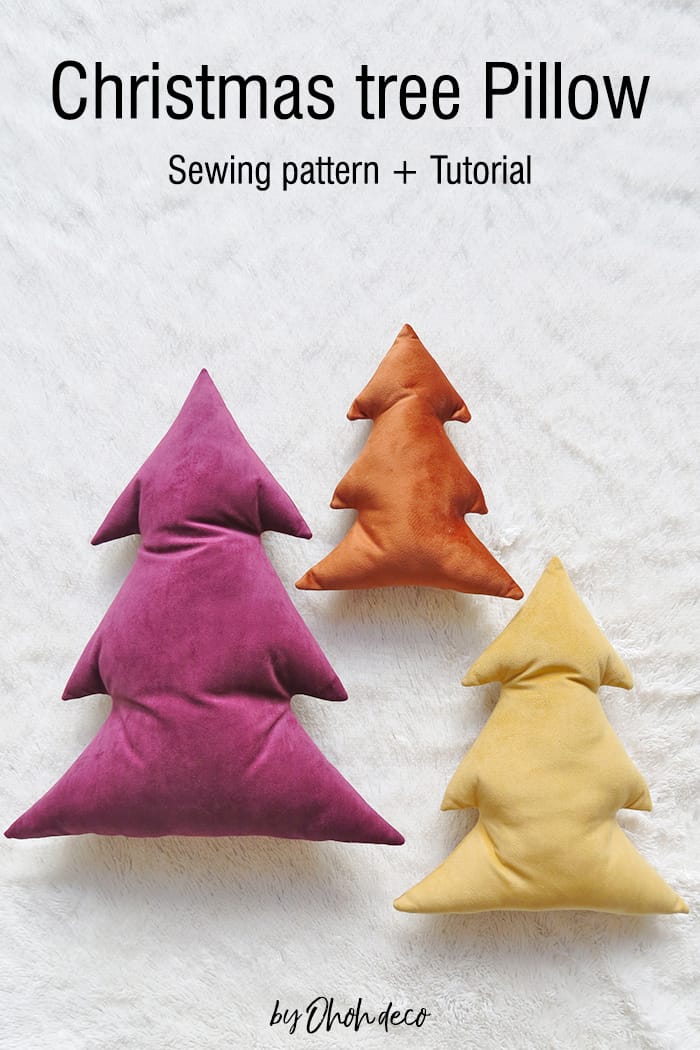
Pillows are a great and easy way to add seasonal decor to a room. You can use the Christmas tree pillow on the sofa or on the bed. But you can also display them on a shelf or around the tree.
Christmas cushions surely are a fun addition to complete your holiday decor.
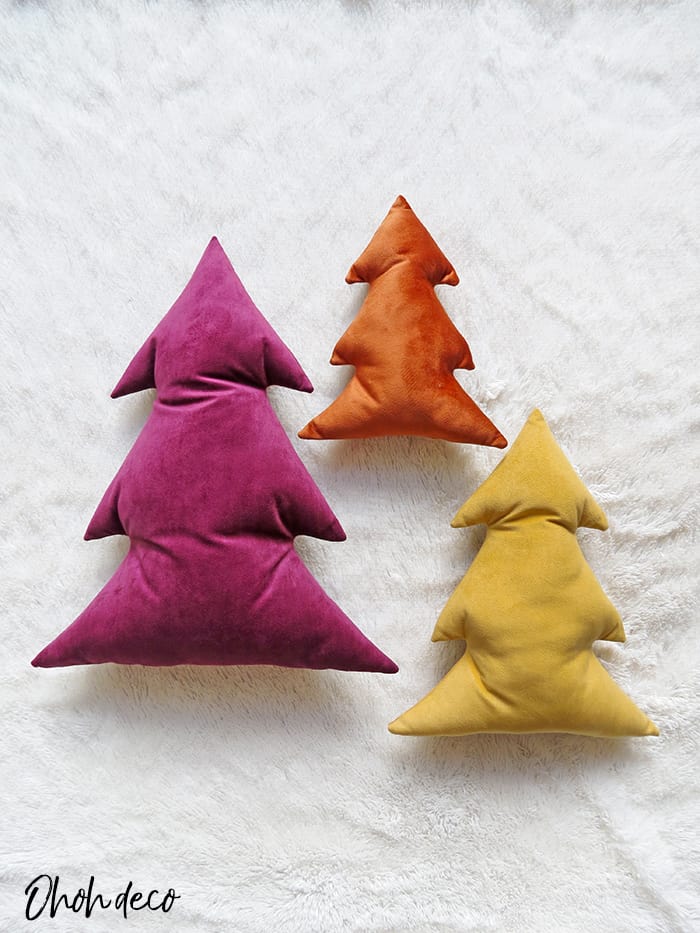
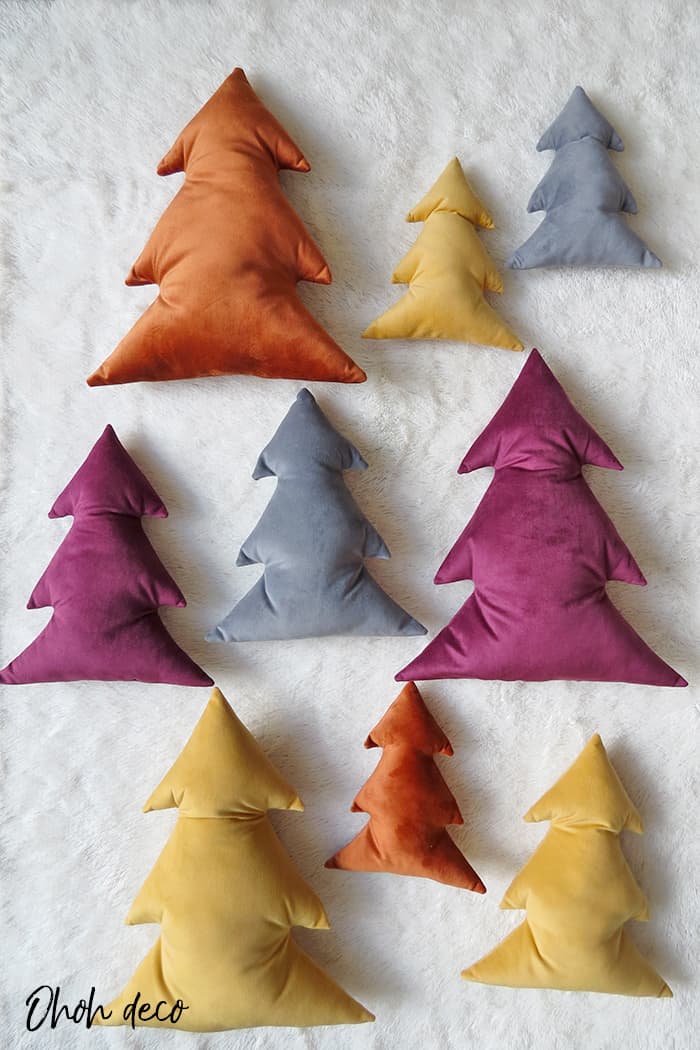
They are three different pillow sizes available, large, medium, and small.
The Christmas pillow is quick to sew so it’s easy to make several and to create a little Christmas forest for your couch.
[ This post probably contains affiliate links, our full disclosure policy is really boring, but you can read it HERE ]
RELATED: Christmas tree skirt sewing pattern
RELATED: Santa pillow pattern
How to sew a Christmas tree pillow
Supplies you will need:
- The pillow pattern (3 sizes)
- Fabric (I used this one)
- Matching thread
- Cushion filling
- Pins
- Needle
- Sewing machine
- Scissors
Have fun mixing the pattern sizes and try sewing them with different fabrics.
There are many pretty Christmas fabrics that will work great to make this sewing project.
A lot of kinds of fabric will work for this project, so you may want to dig into your fabric stash.
I suggest you use cotton, suede, velvet, or fleece. Try to avoid stretch fabric.
Don’t hesitate to try using patterned fabric. Polka dot fabric can be a good option as it will mimic the tree ornaments.
The pattern can be printed on US letter-sized paper. It comes in 9 pages. Follow the printing plan to assemble it.
The printable also includes an envelope to keep your pattern and instructions for future use.
You have 3 different tree pillow sizes to choose from: large, medium, and small.

RELATED: DIY Christmas Napkin rings and Cutlery holders
RELATED: DIY Holly Christmas Garland
Christmas tree pillow sewing tutorial
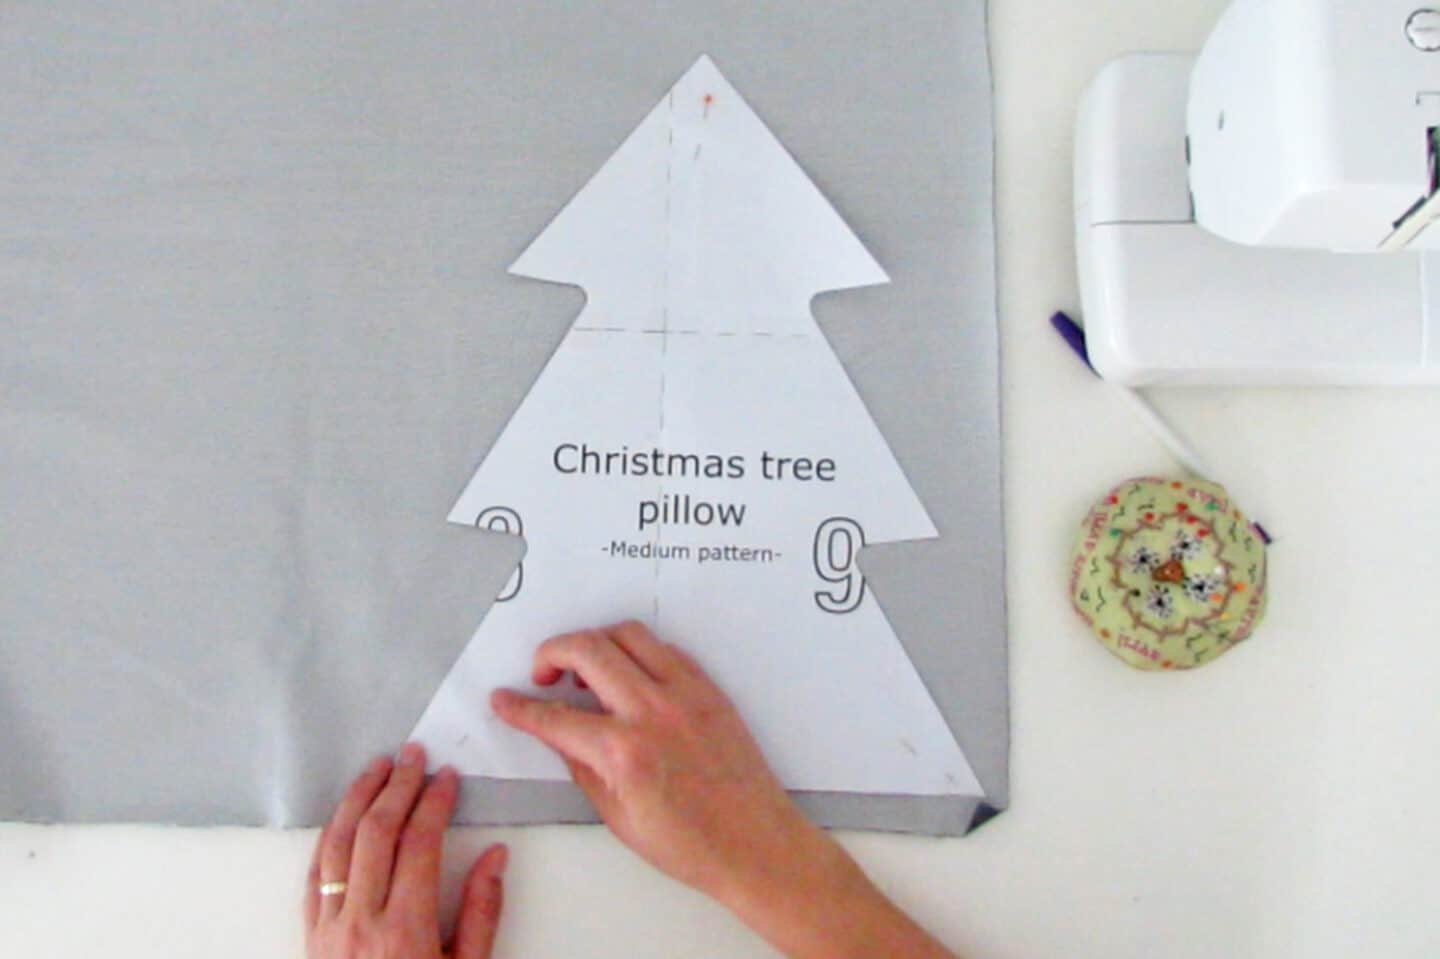

Place the fabric wrong side up. Lay the pattern on it, pin, and report the tree shape on the fabric.

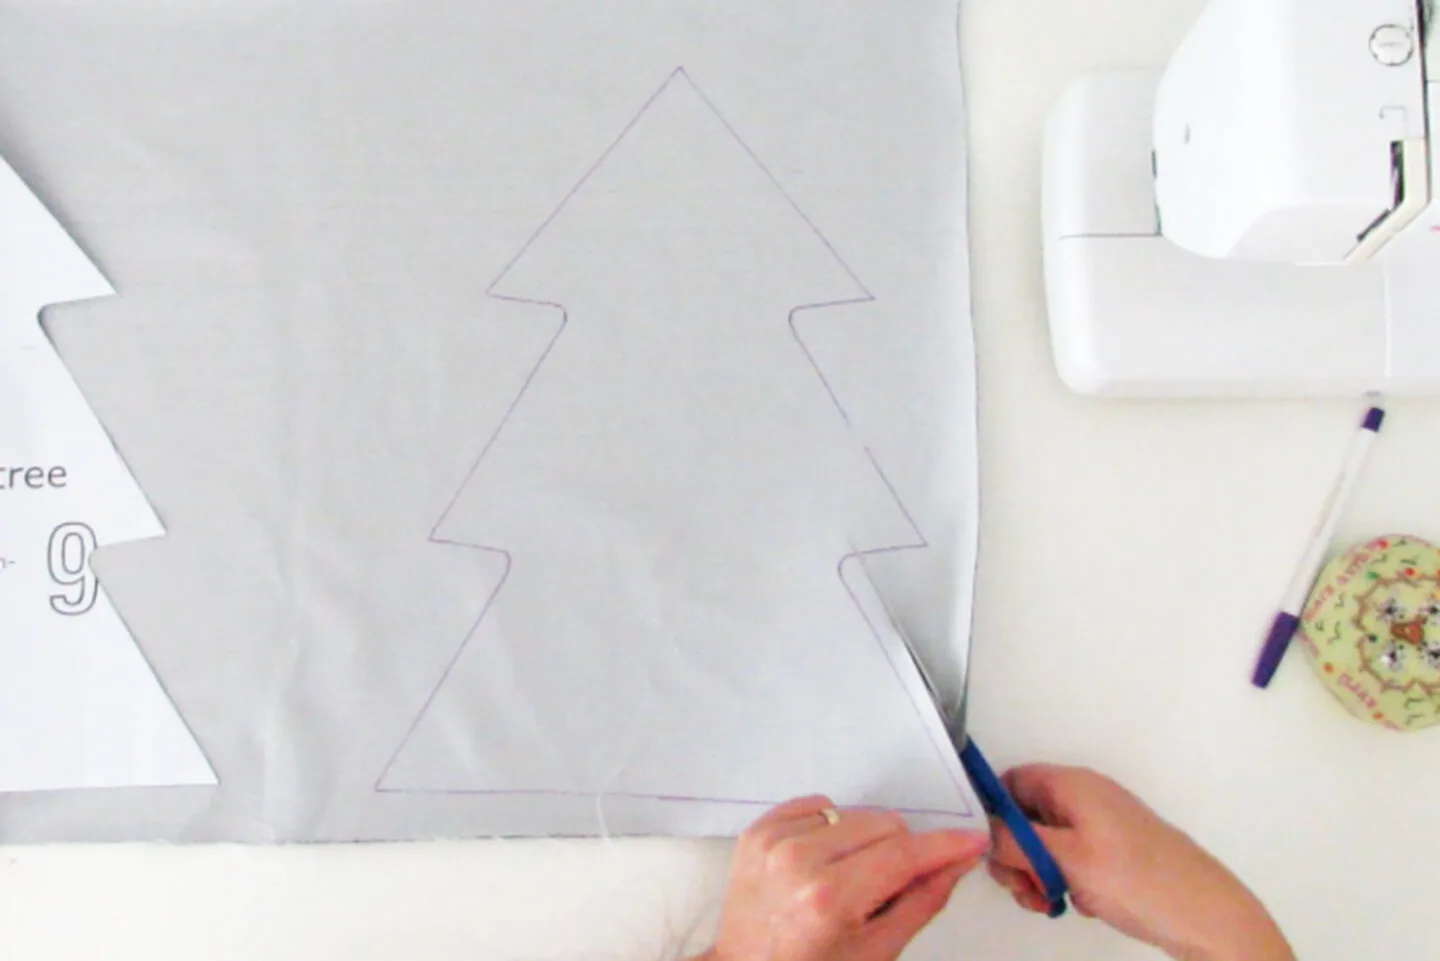
Cut the tree shape adding a seam allowance of 1/2 in. (1cm).
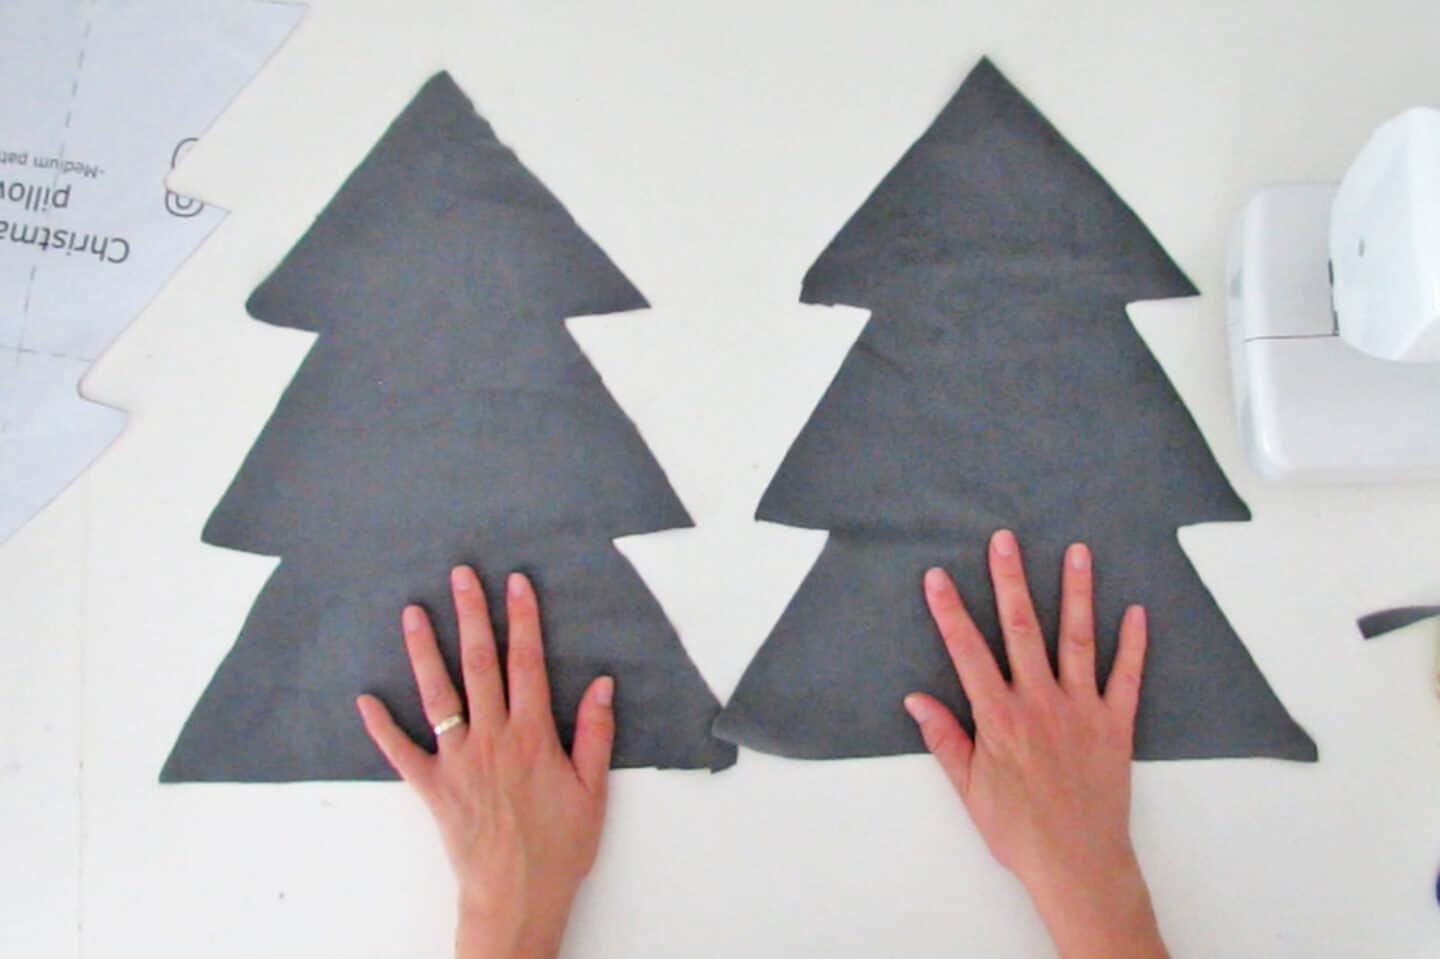

Report and cut the tree shape again to have two identical pieces.

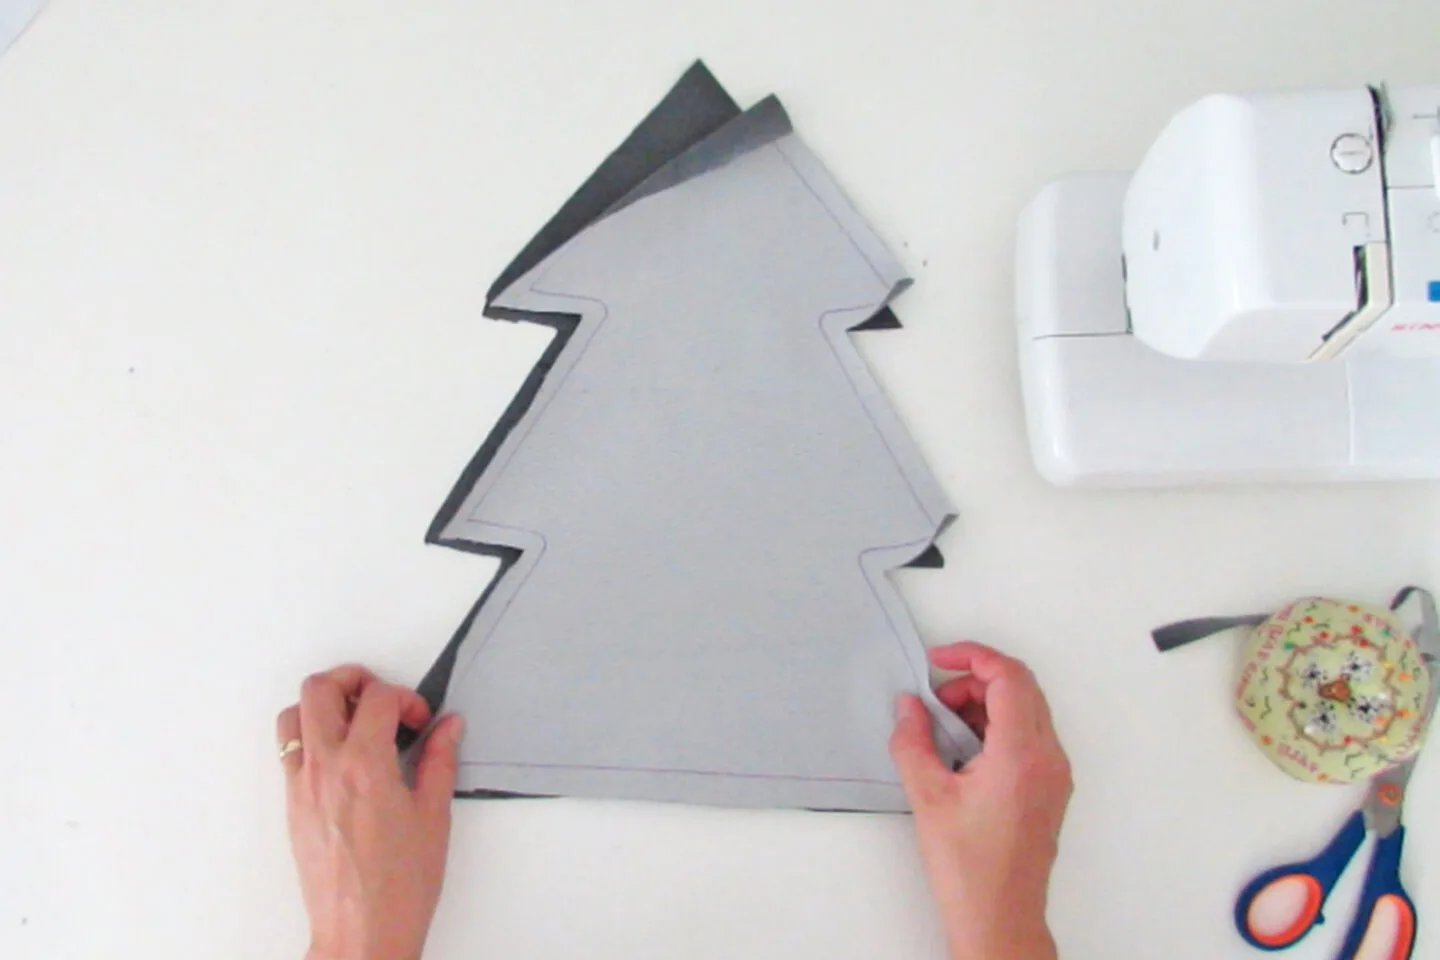
Place both tree shapes on top of each other, wrong side of fabric out. Align the edges and pin them together.
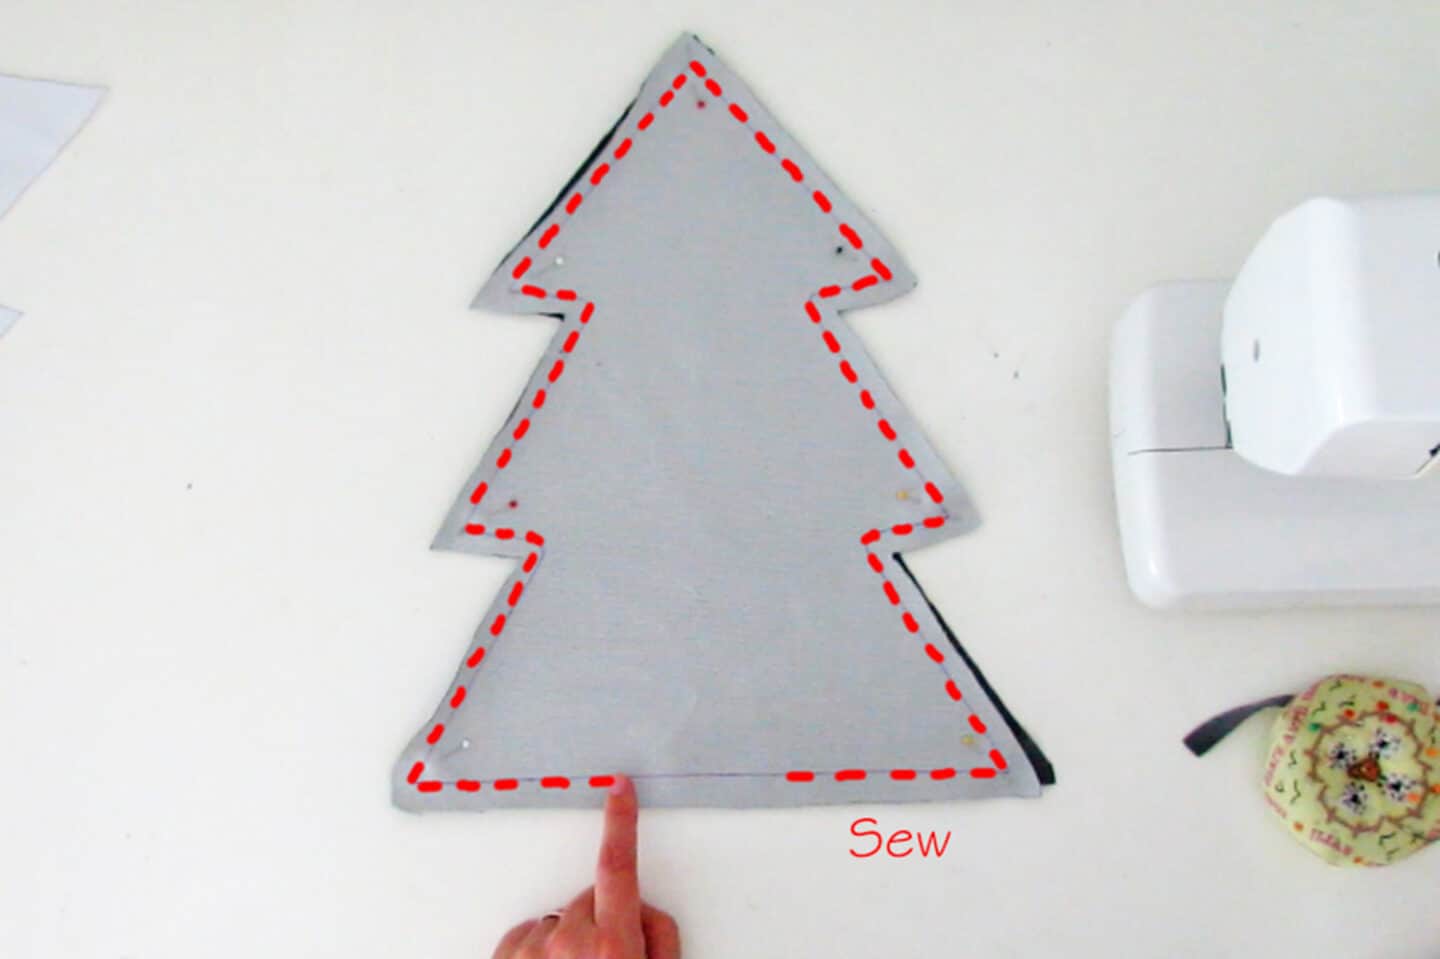
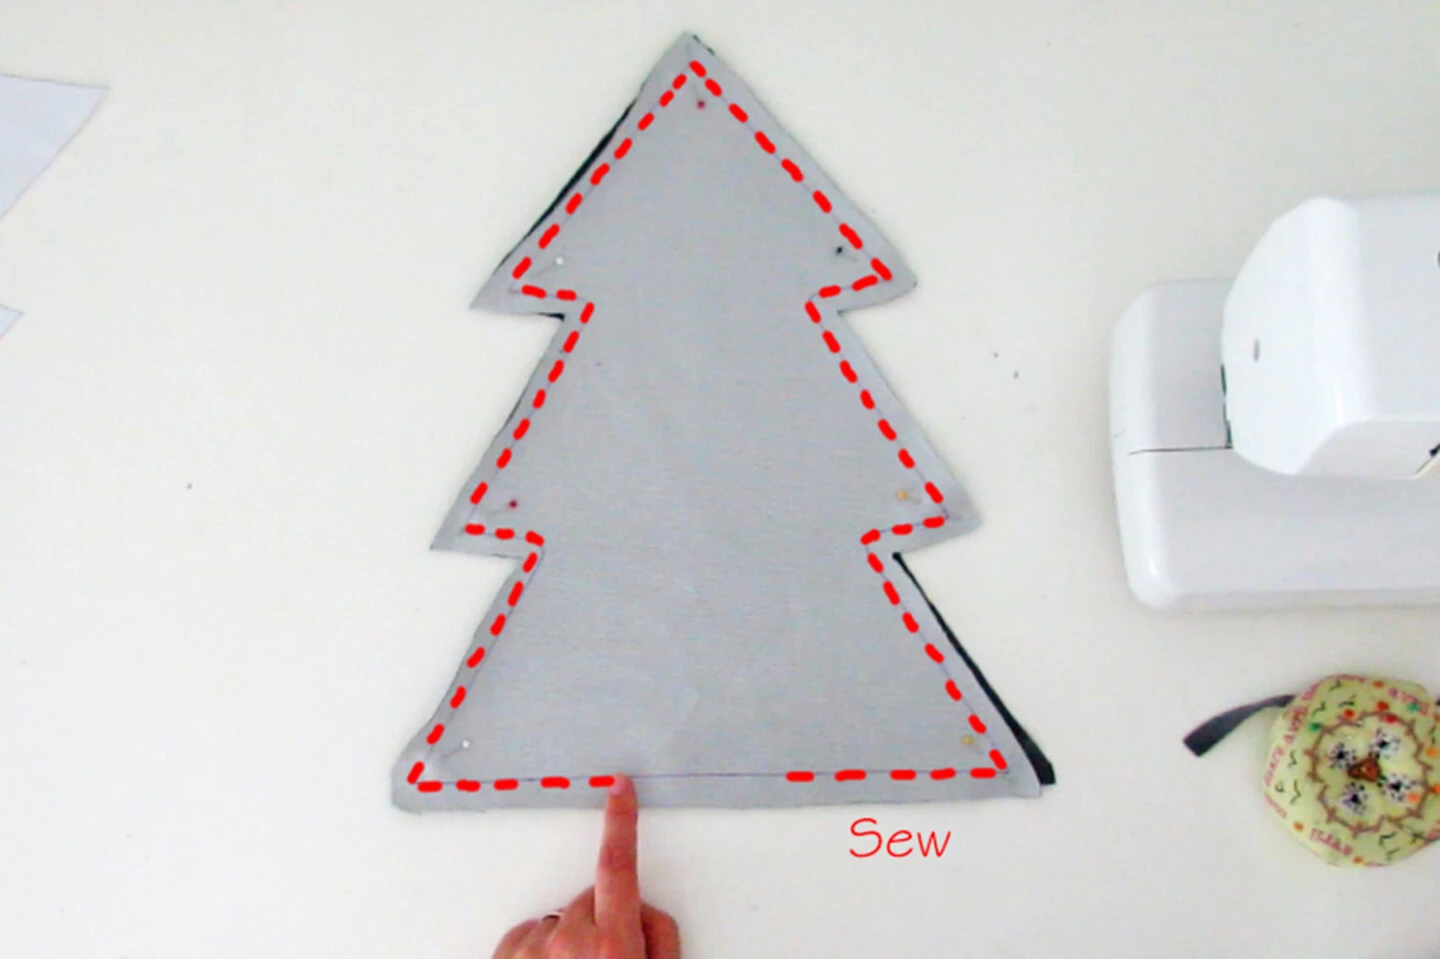
Sew along the edges, leave an opening of a few inches on the base of the tree.
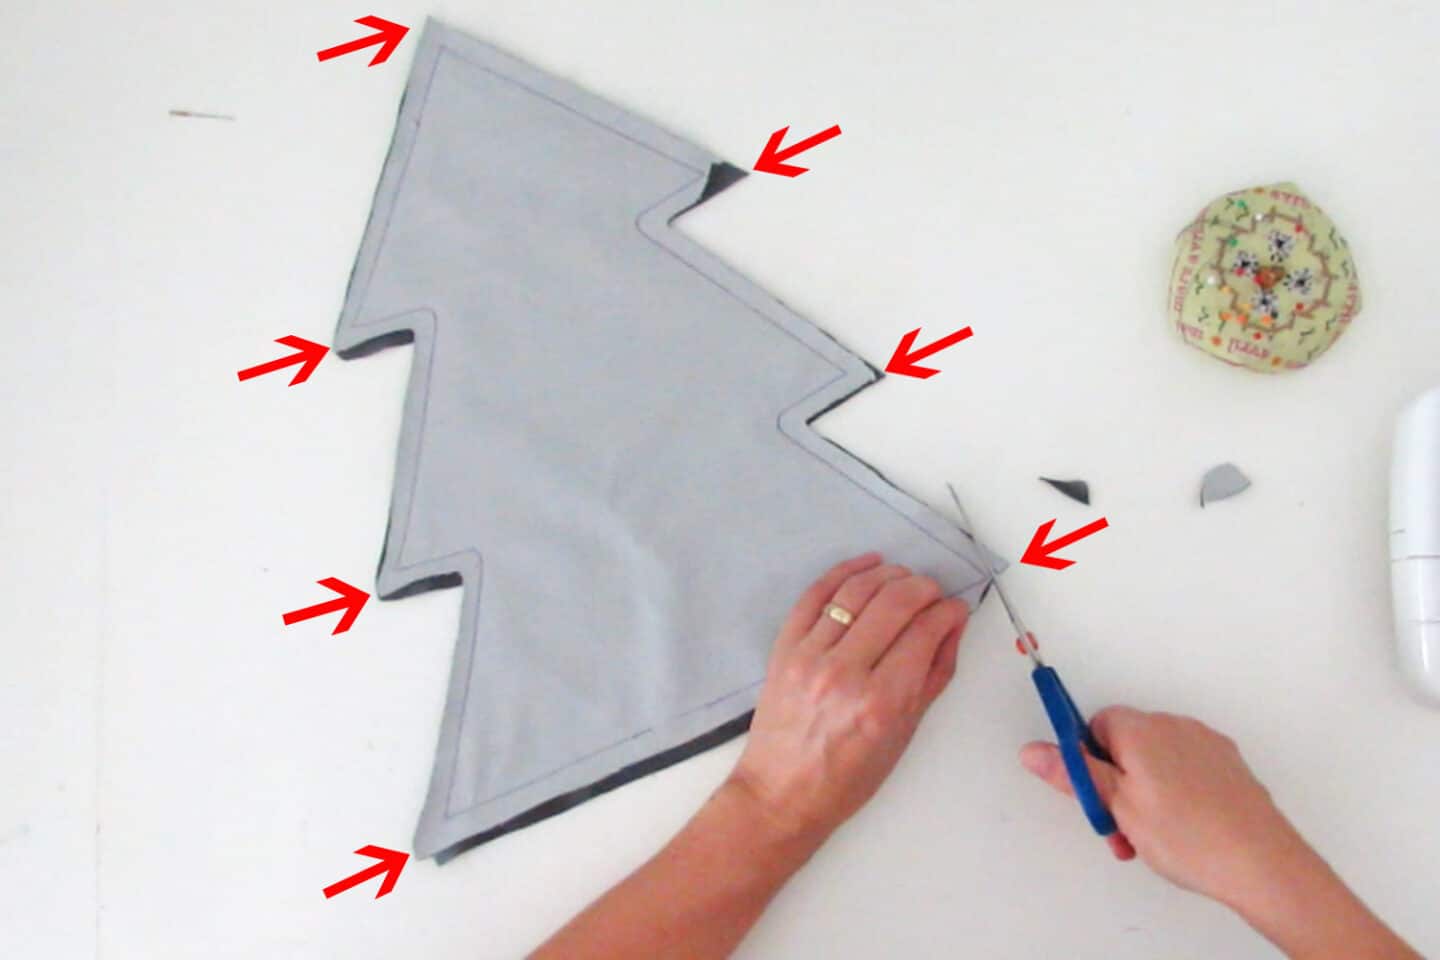
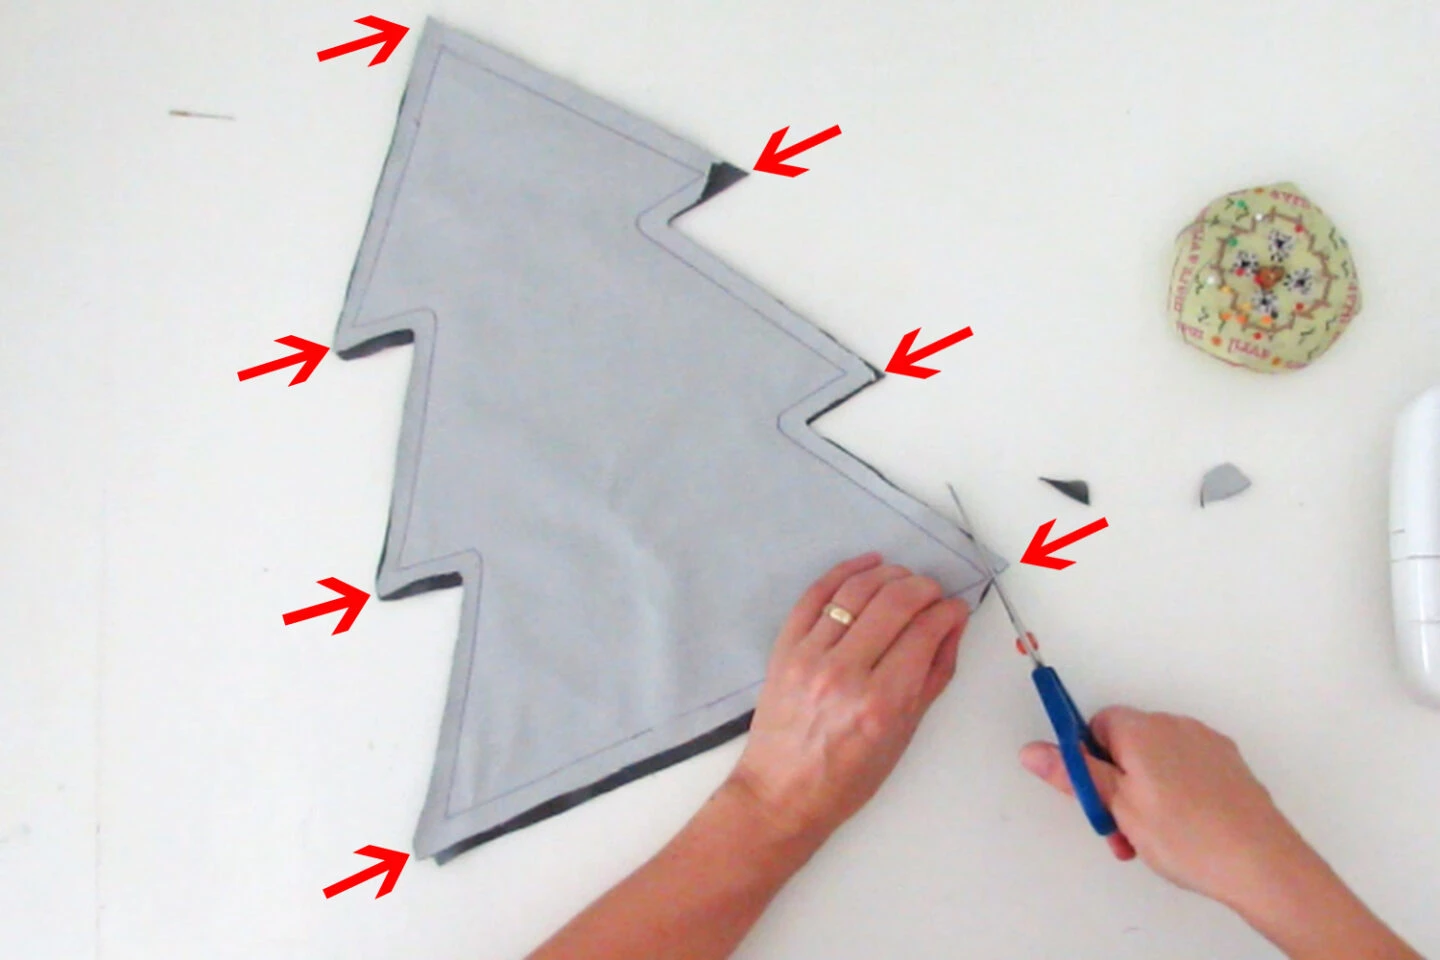
Remove the pins and trim all the tree tips.


Trim the tips with a V shape, so the tree shape will look nice once the pillow is right side out.
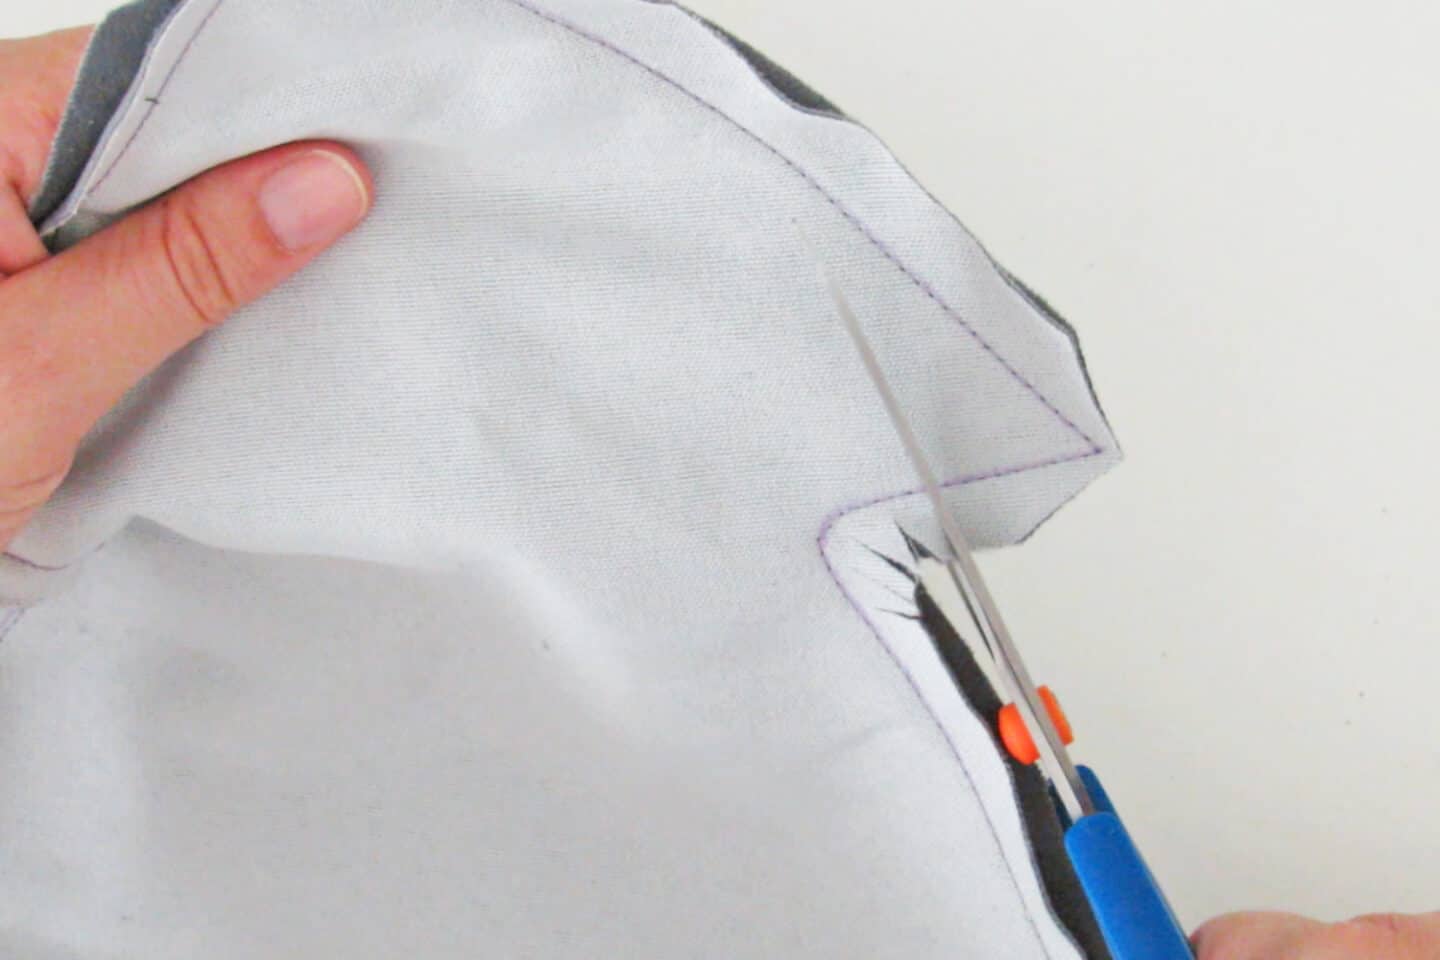

Cut notches on the angles of the tree shape.
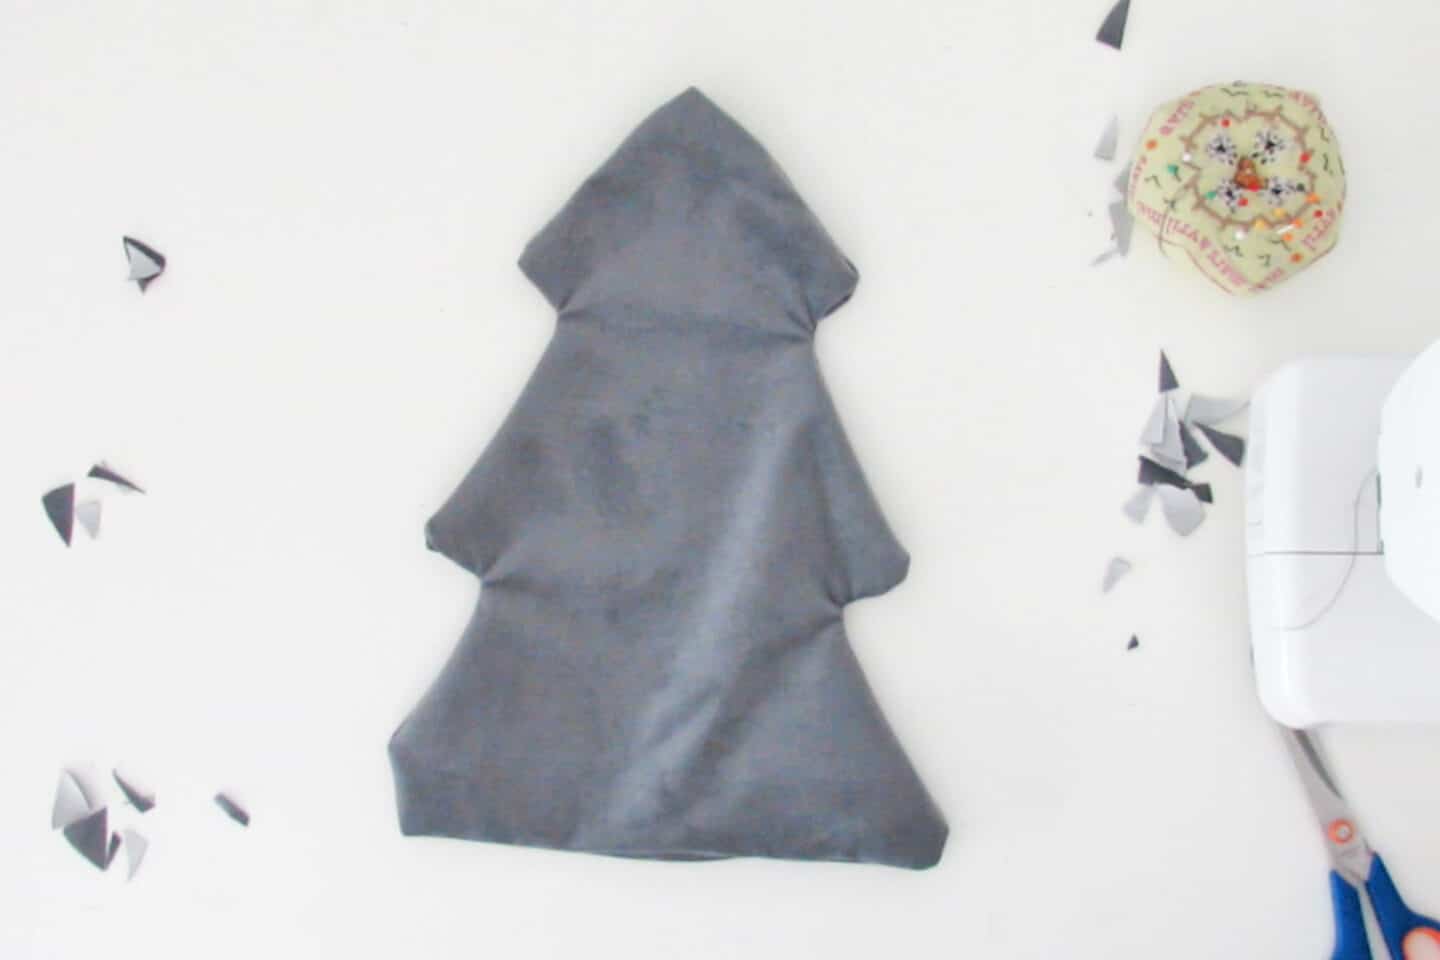
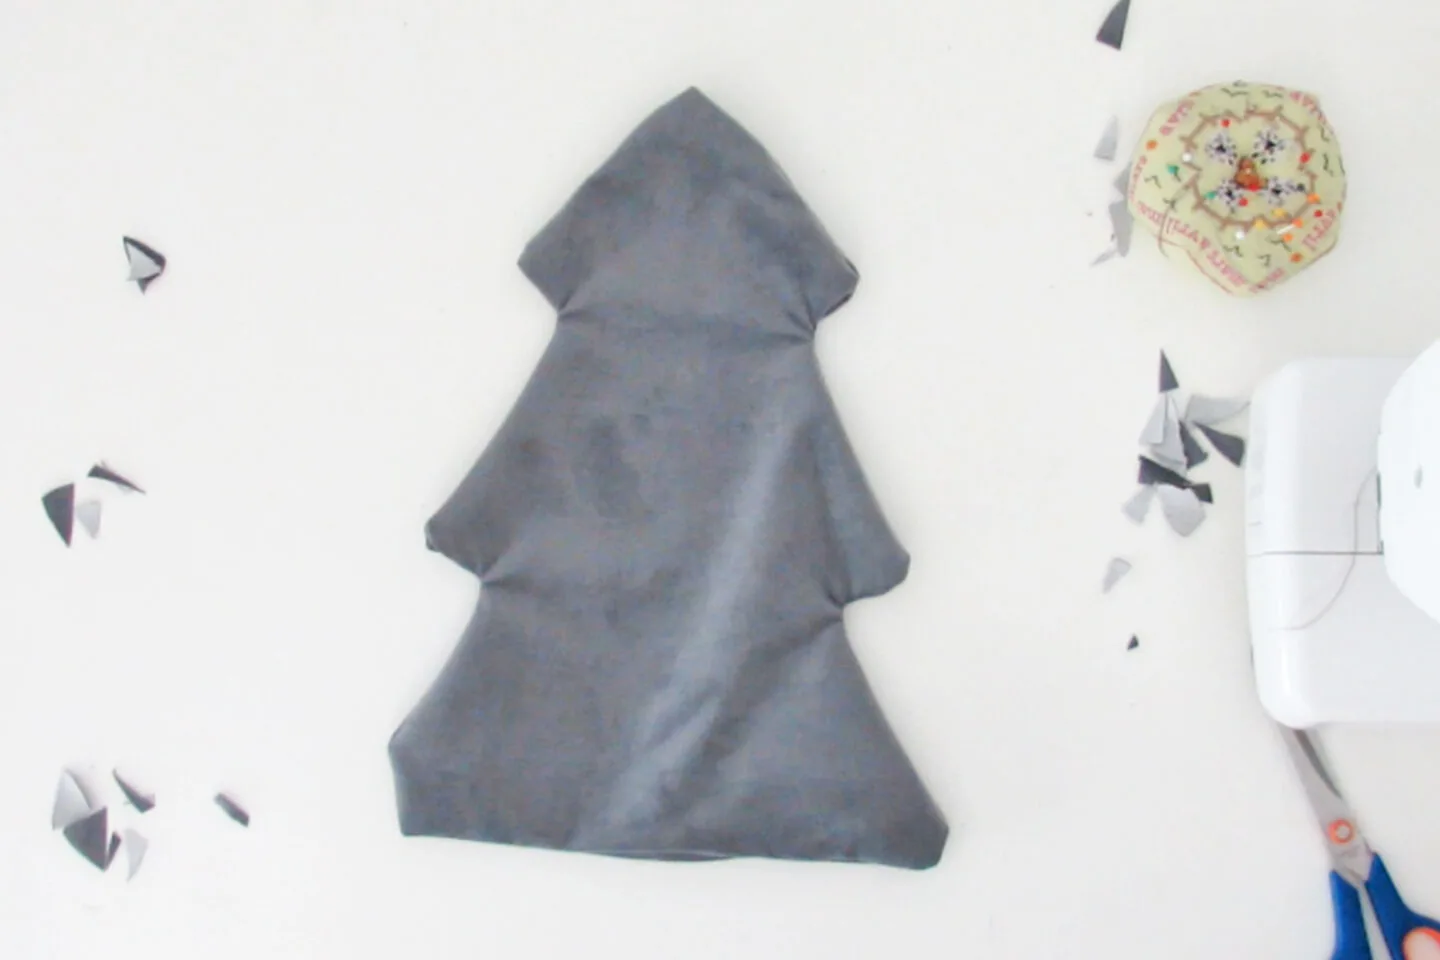
Turn the pillow right side out.
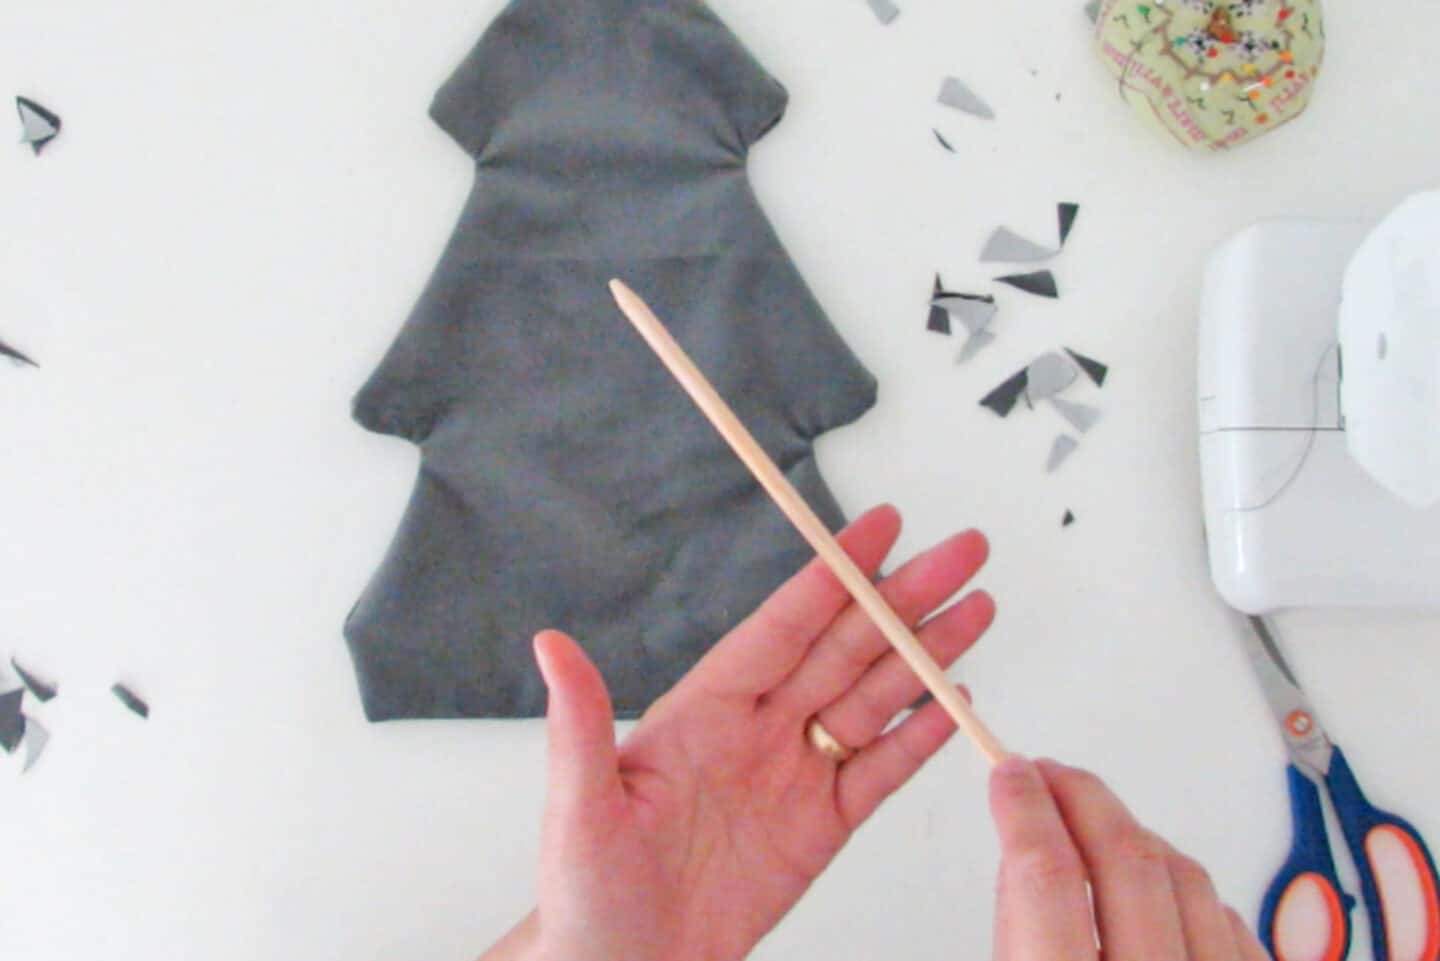

Use a craft dowel or a skewer to push the tips out and have a nice tree shape.


Fill the pillow with cushion filling, don’t hesitate to fill the tips a little more.
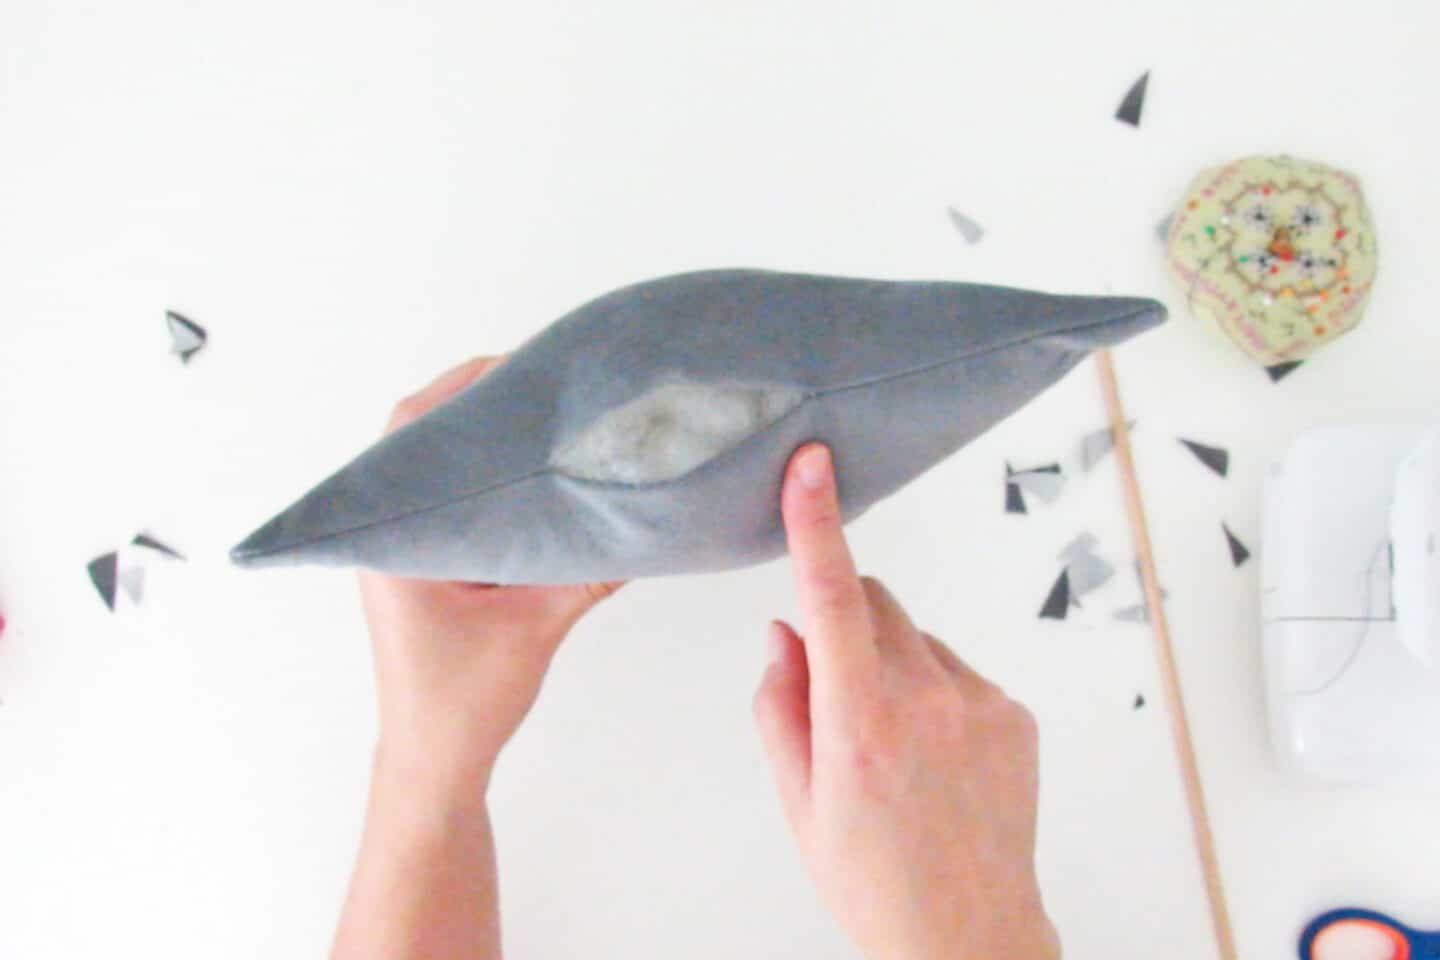
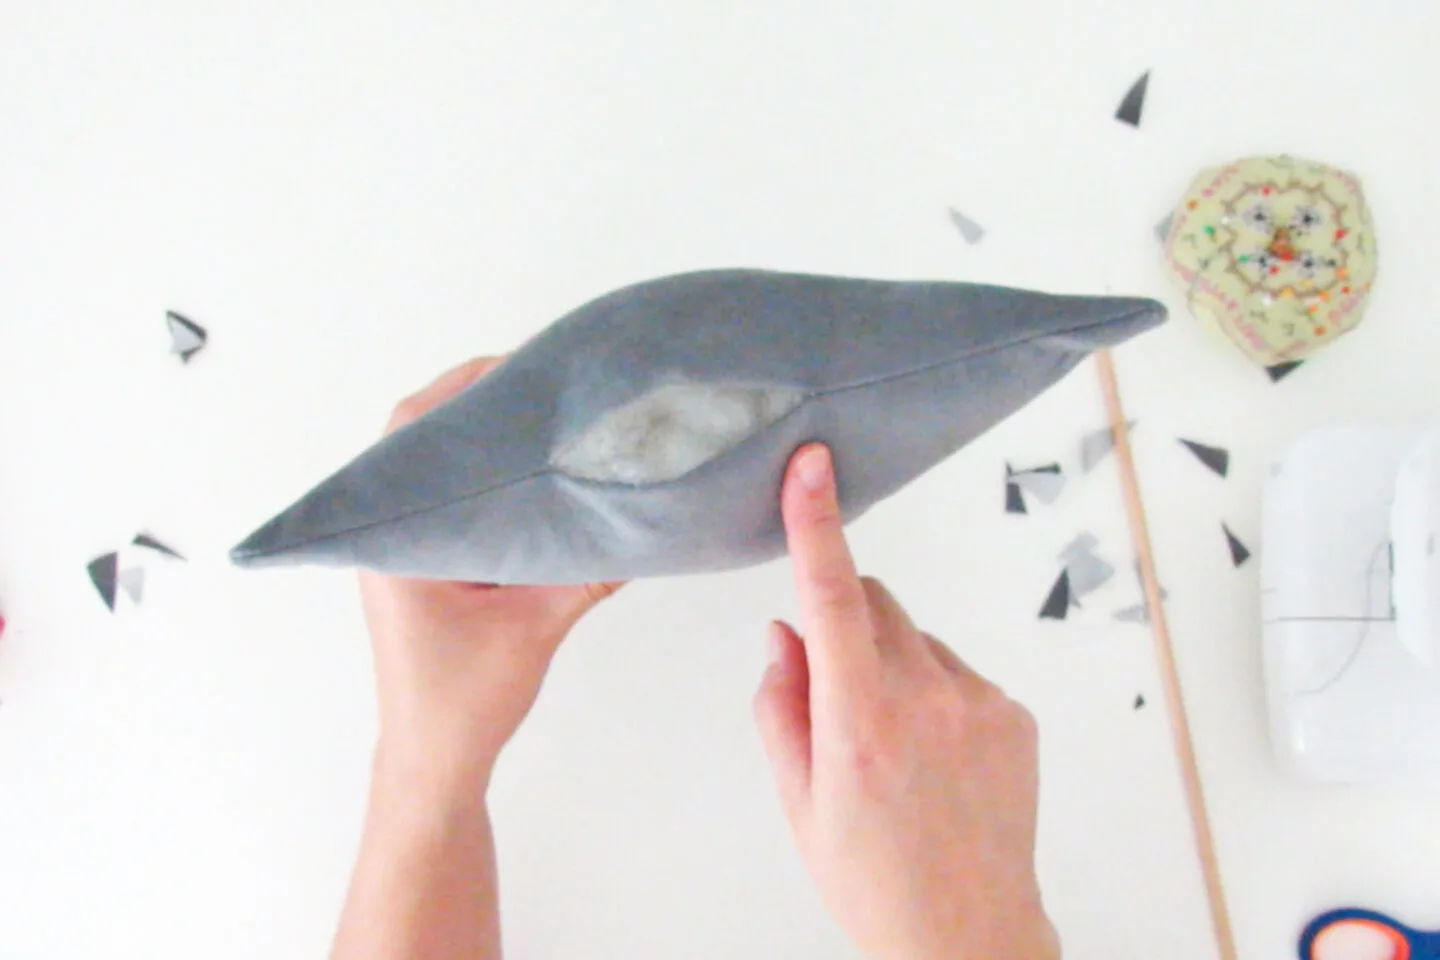
Pin both sides of the bottom opening together and close it with a few invisible hand-stitches.
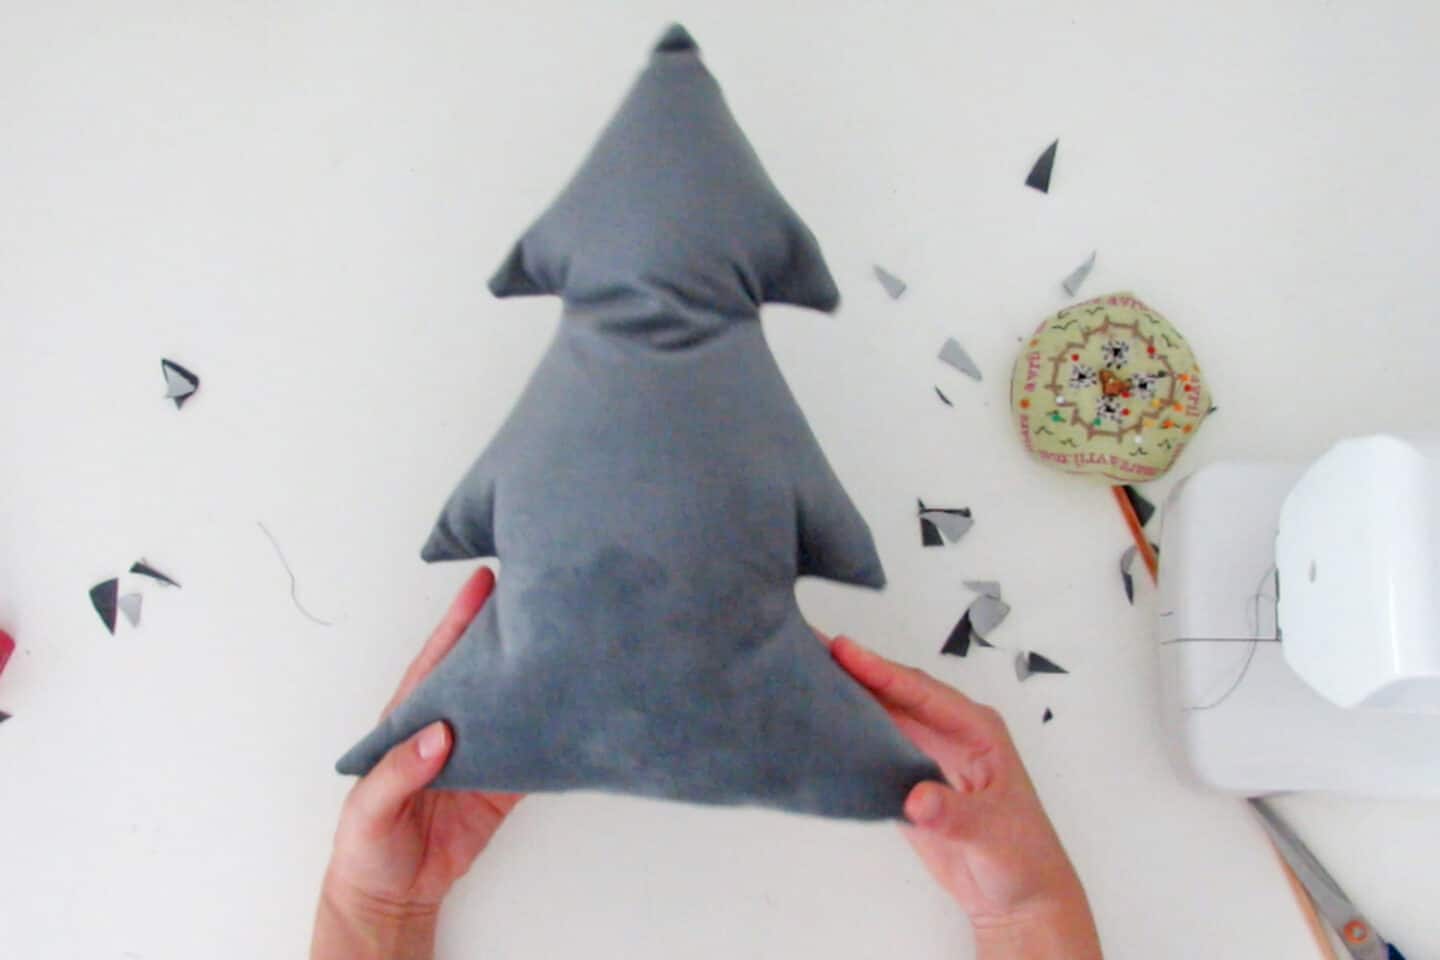
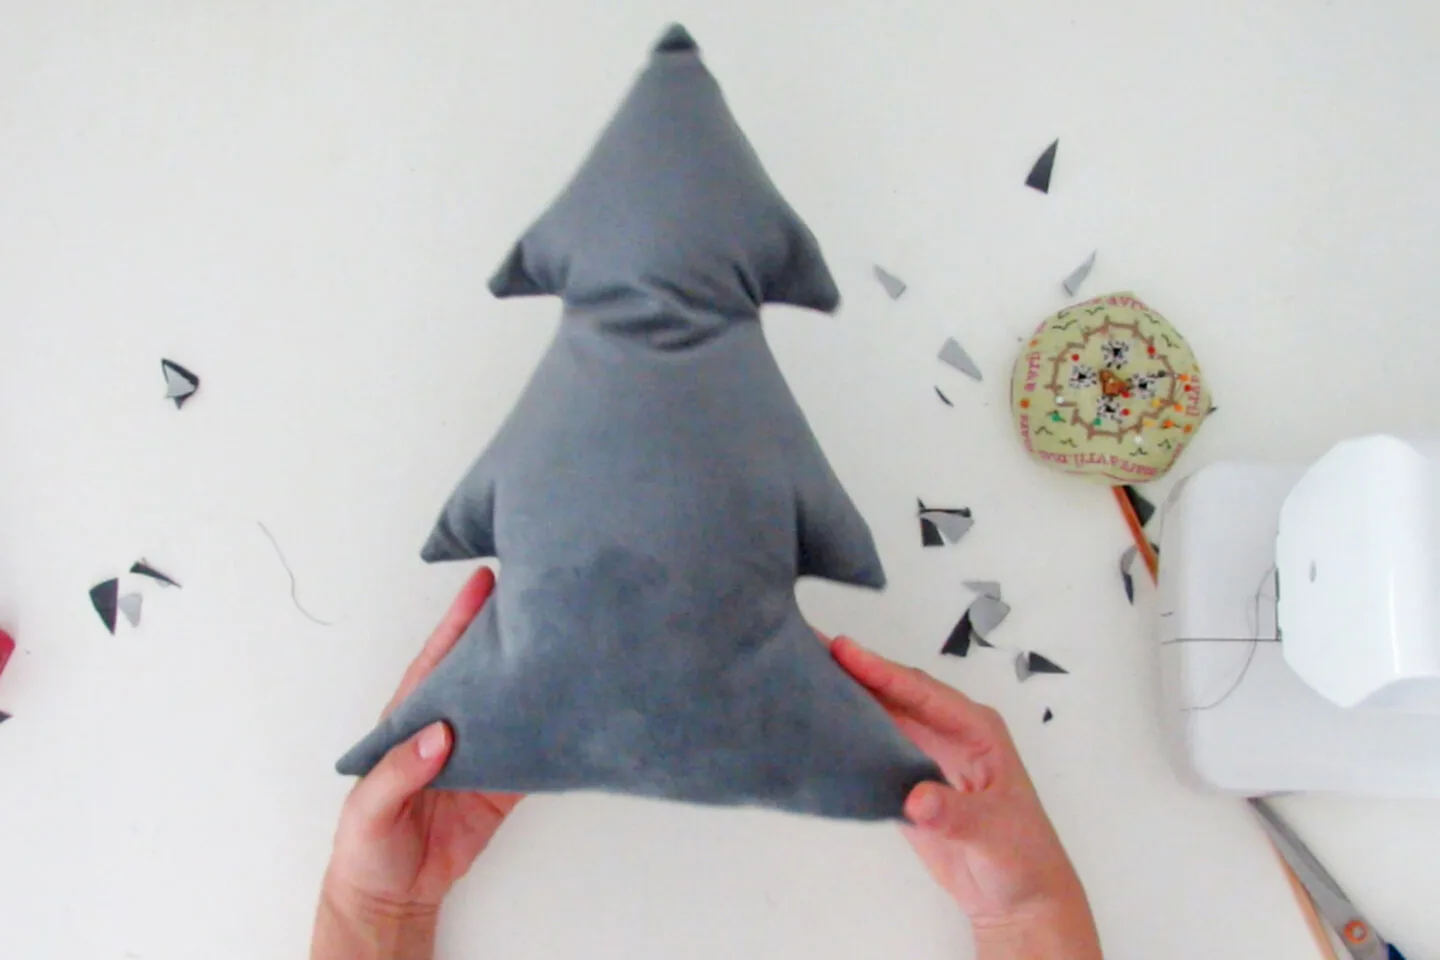
And done! You have a nice tree-shaped Christmas pillow. The process is the same for all three pattern sizes.


Sew as much as you like with different fabrics. Have fun sewing for Christmas.
I love to see your creations, so don’t hesitate to let me a comment or share them on social media (FB: @ohohdeco IG: ohoh.deco)

Watch the video to help you sew the Christmas tree pillow
RELATED: How to make a Christmas gingerbread village with cardboard
RELATED: 25 easy DIY Scandinavian Christmas Ornaments


Want to remember it? Save this Christmas tree pillow pattern on your favorite Pinterest board

Amaryllis