 For years, our a-frame dollhouse (which is discontinued) has been showing up on photos here on the blog. Each time, we receive so many questions about it and had to break the sad news that it’s no longer available. So, we decided to make a (smaller) DIY version and share it here! If you have a lifelong passion for a-frames like we do, this is a great tutorial to use for a gift for the little person in your life!
Previous dollhouse DIYS: Mary Poppins-inspired dollhouse (and here’s it after being decorated), treehouse dollhouse, how to build a simple dollhouse and fold-away dollhouse.
Looking for more projects to do with kids? How to make oobleck. How to make slime with just three ingredients.
 Supplies:
-three 1/4″ x 3″ x 3′ boards
-one 1/4″ x 3″ square wooden dowel
-two 1/4″ x 1 1/2″ x 3′ boards
-one 3/4″ x 10″ x 3′ board
-wood glue
Tools:
-miter saw
–pin nailer
-drill
-1″ hole saw
 Start by cutting three 10″ pieces of the 1/4″ x 3″ x 3′ boards with 50-degree angles on the top side and 30-degree angles on the bottom with a miter saw. This is to make one side of the a-frame. Lay three down and cut two pieces of 1/4″ square dowel and attach them across the inside of the three boards to attach them together. Repeat the same steps with the other side of the a-frame, but cut the 1/4″ x 3″ x 3′ boards to 9.5″ instead of 10″.
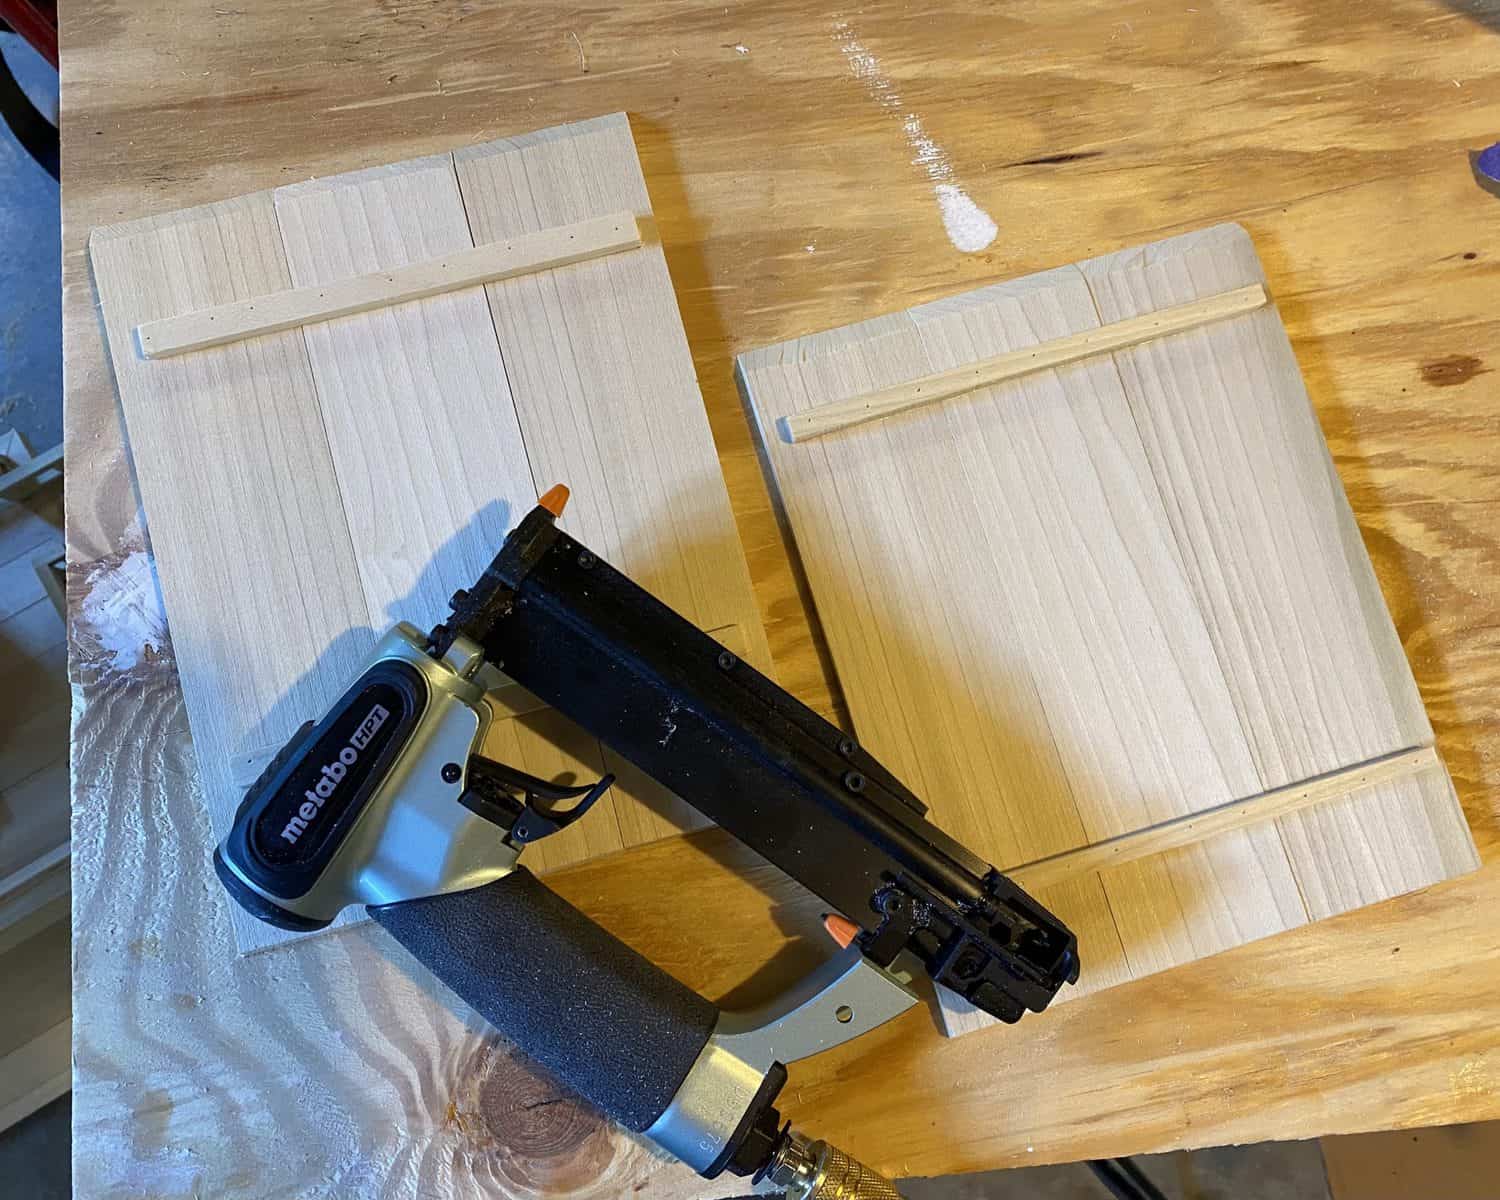
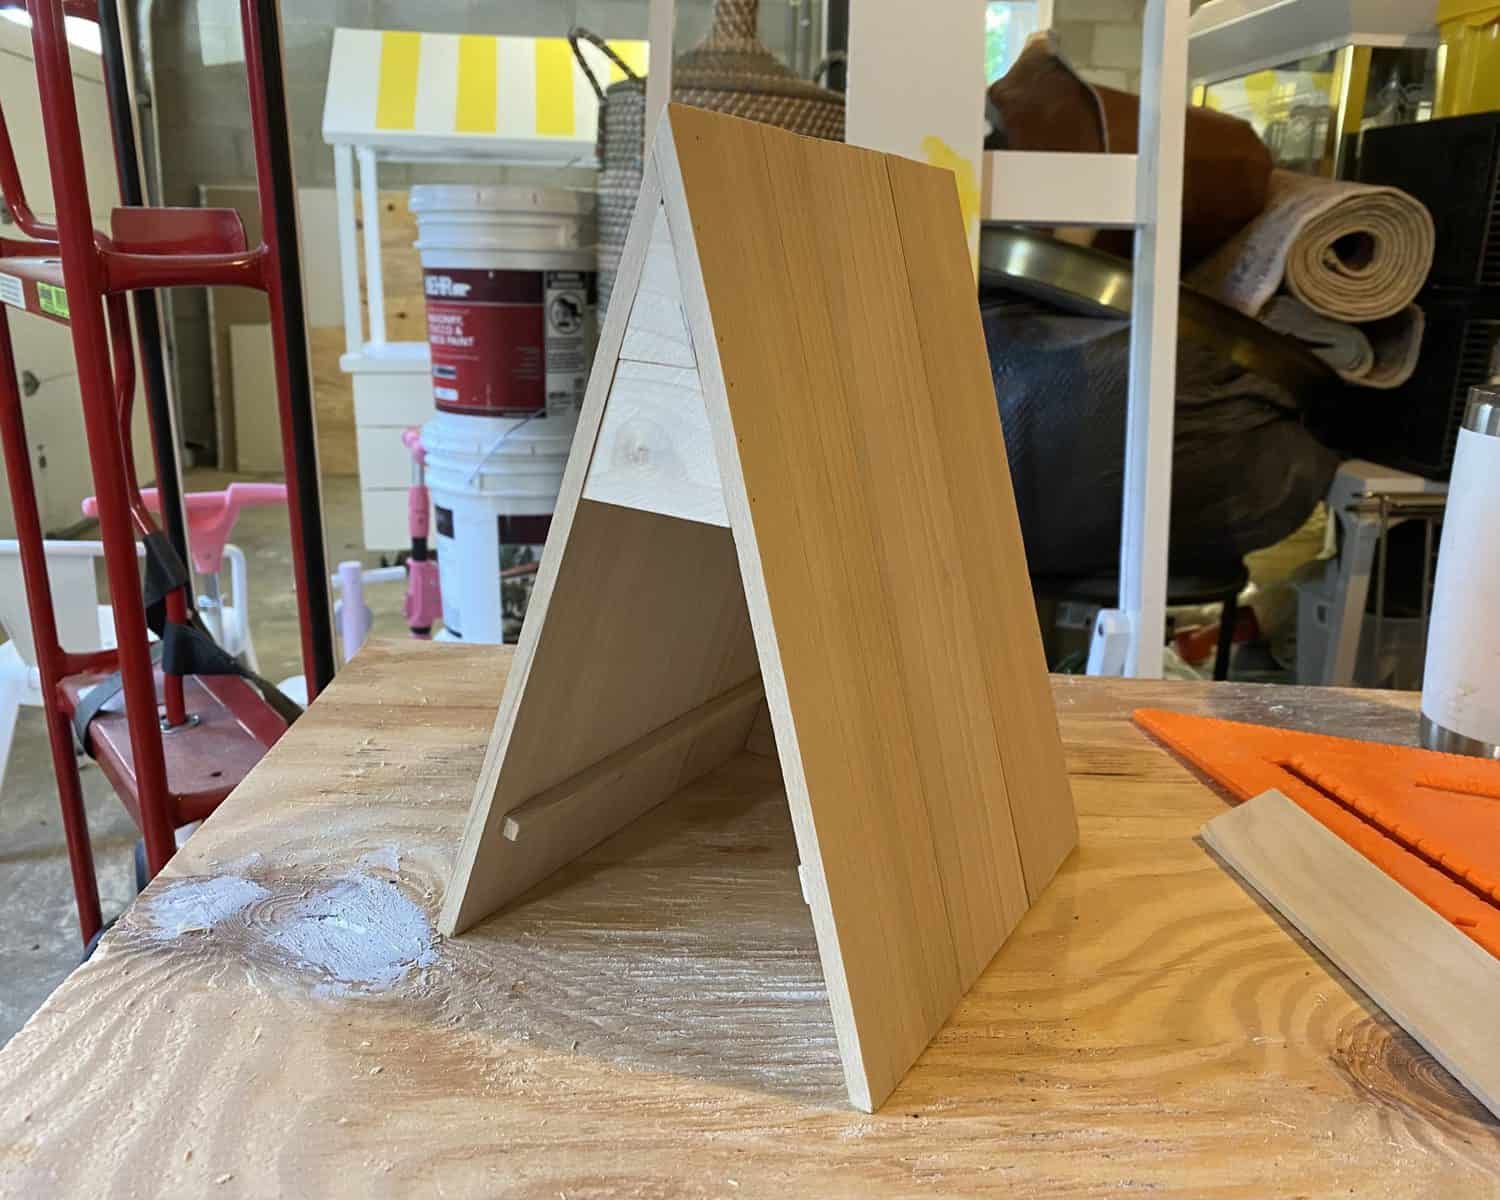 Attach the two sides of the frame together with wood glue and pin nailer and start filling in the back side of the a-frame with pieces cut from the 1/4″ x 1 1/2″ x 3′ boards. To do this, simply hold up each piece to the a-frame and trace with a pencil, take it over to your miter saw and match the angle to your pencil mark and cut. Attach each piece with wood glue and pin nailer. Repeat until the back side is done.
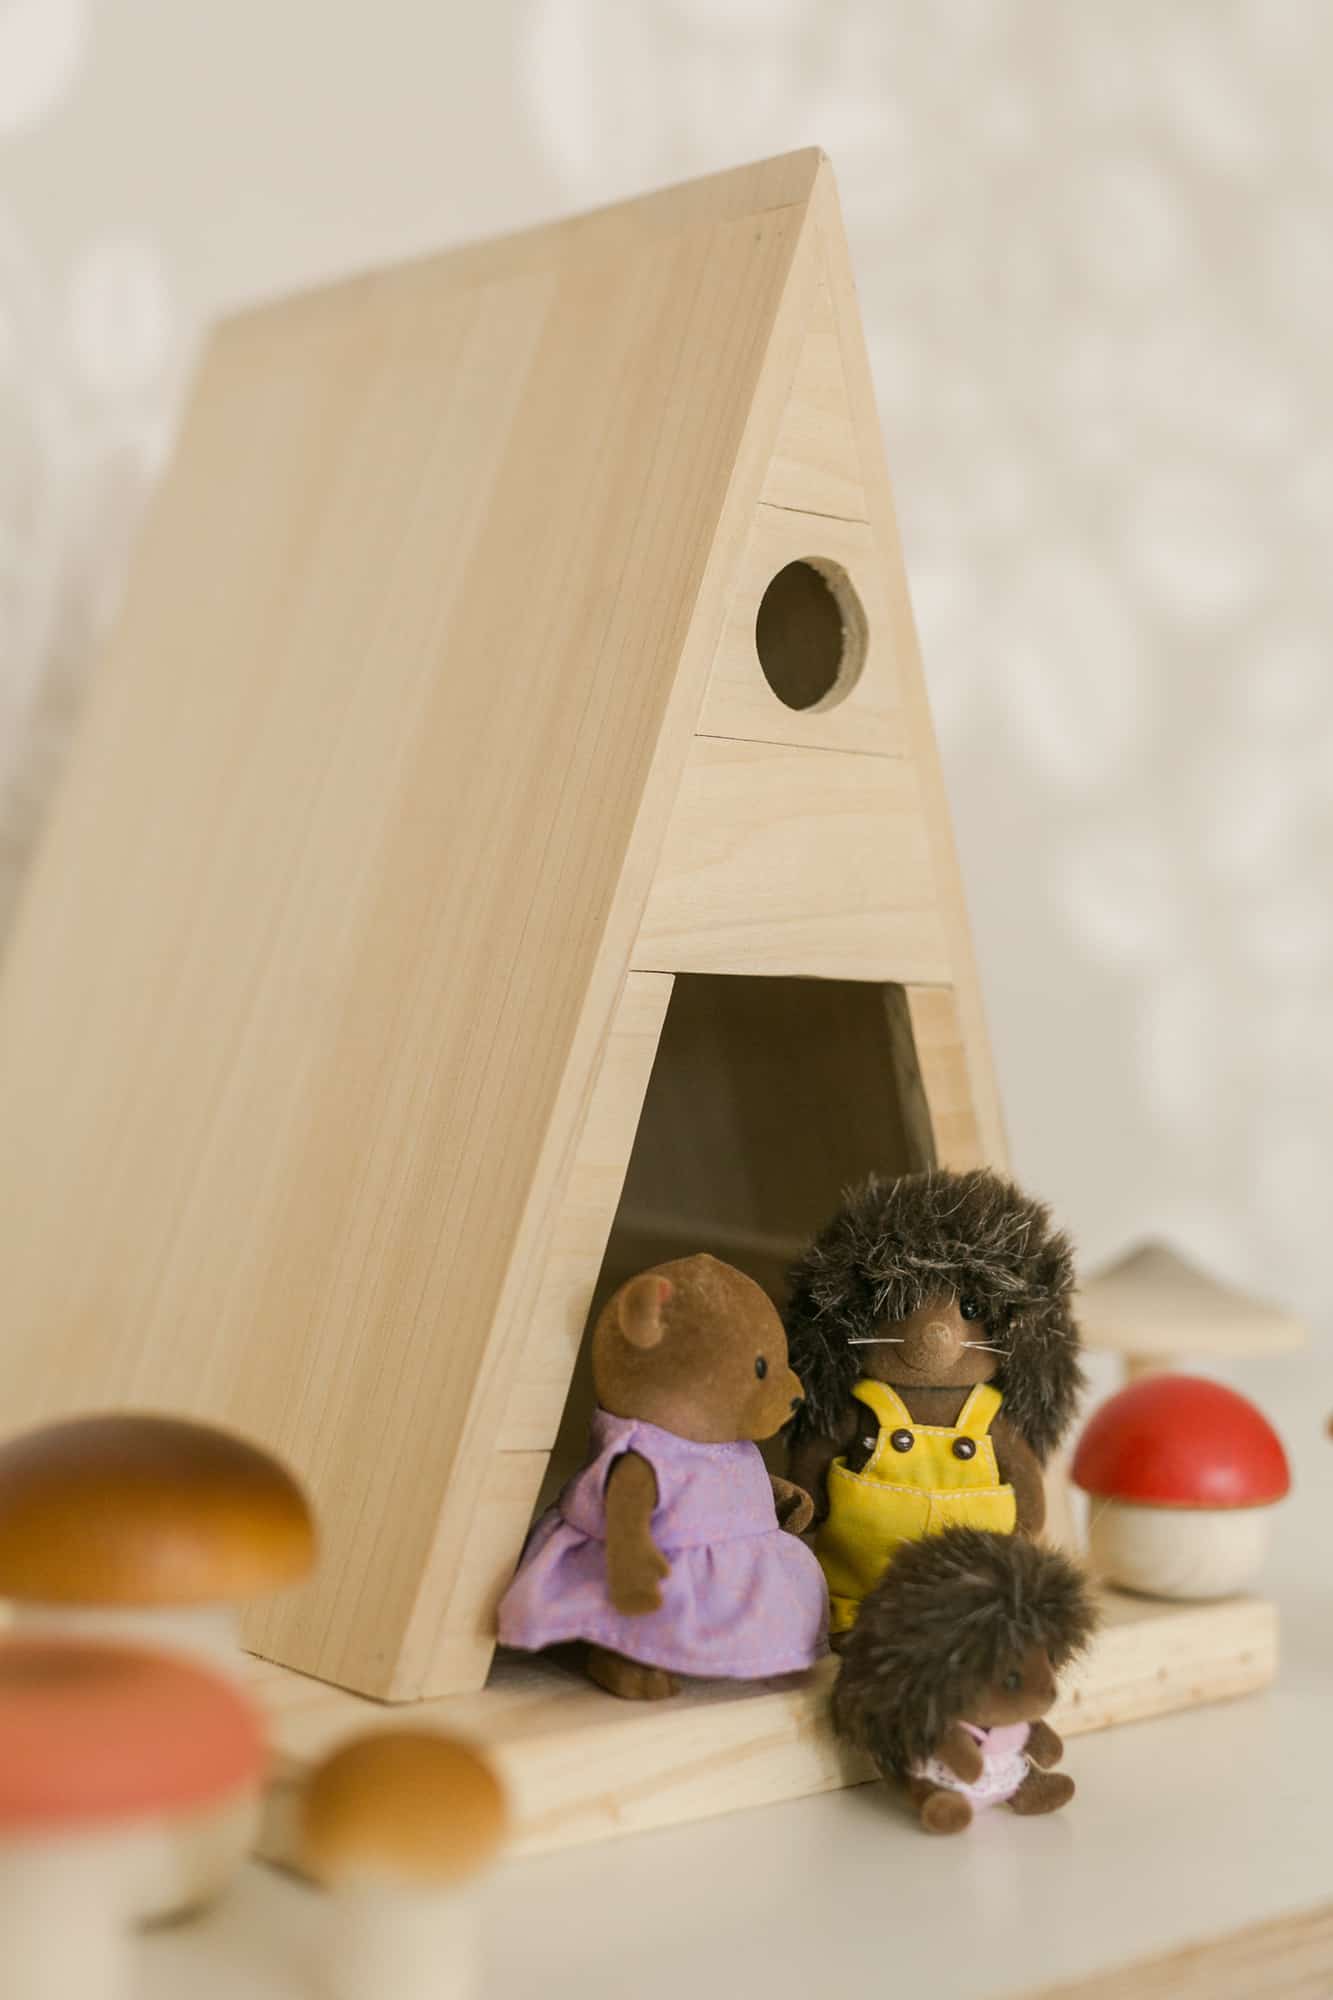
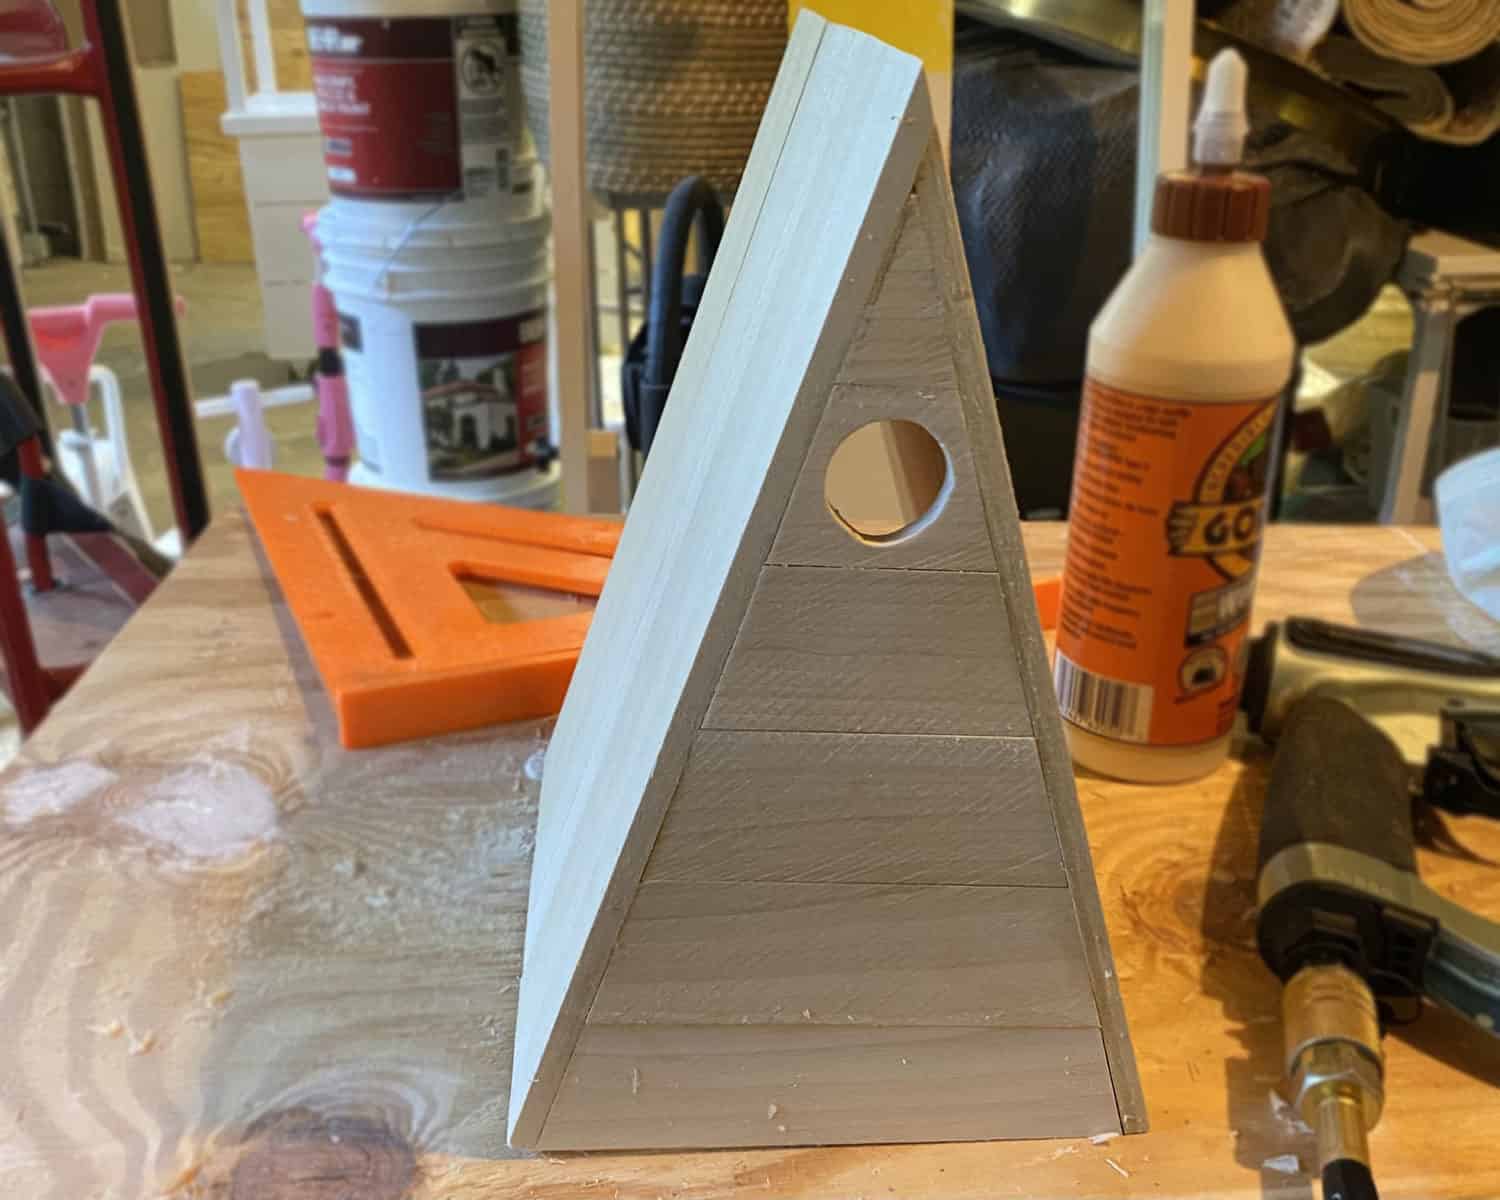 Once the back side is filled in, use your 1″ hole saw to make a “window” as shown above.
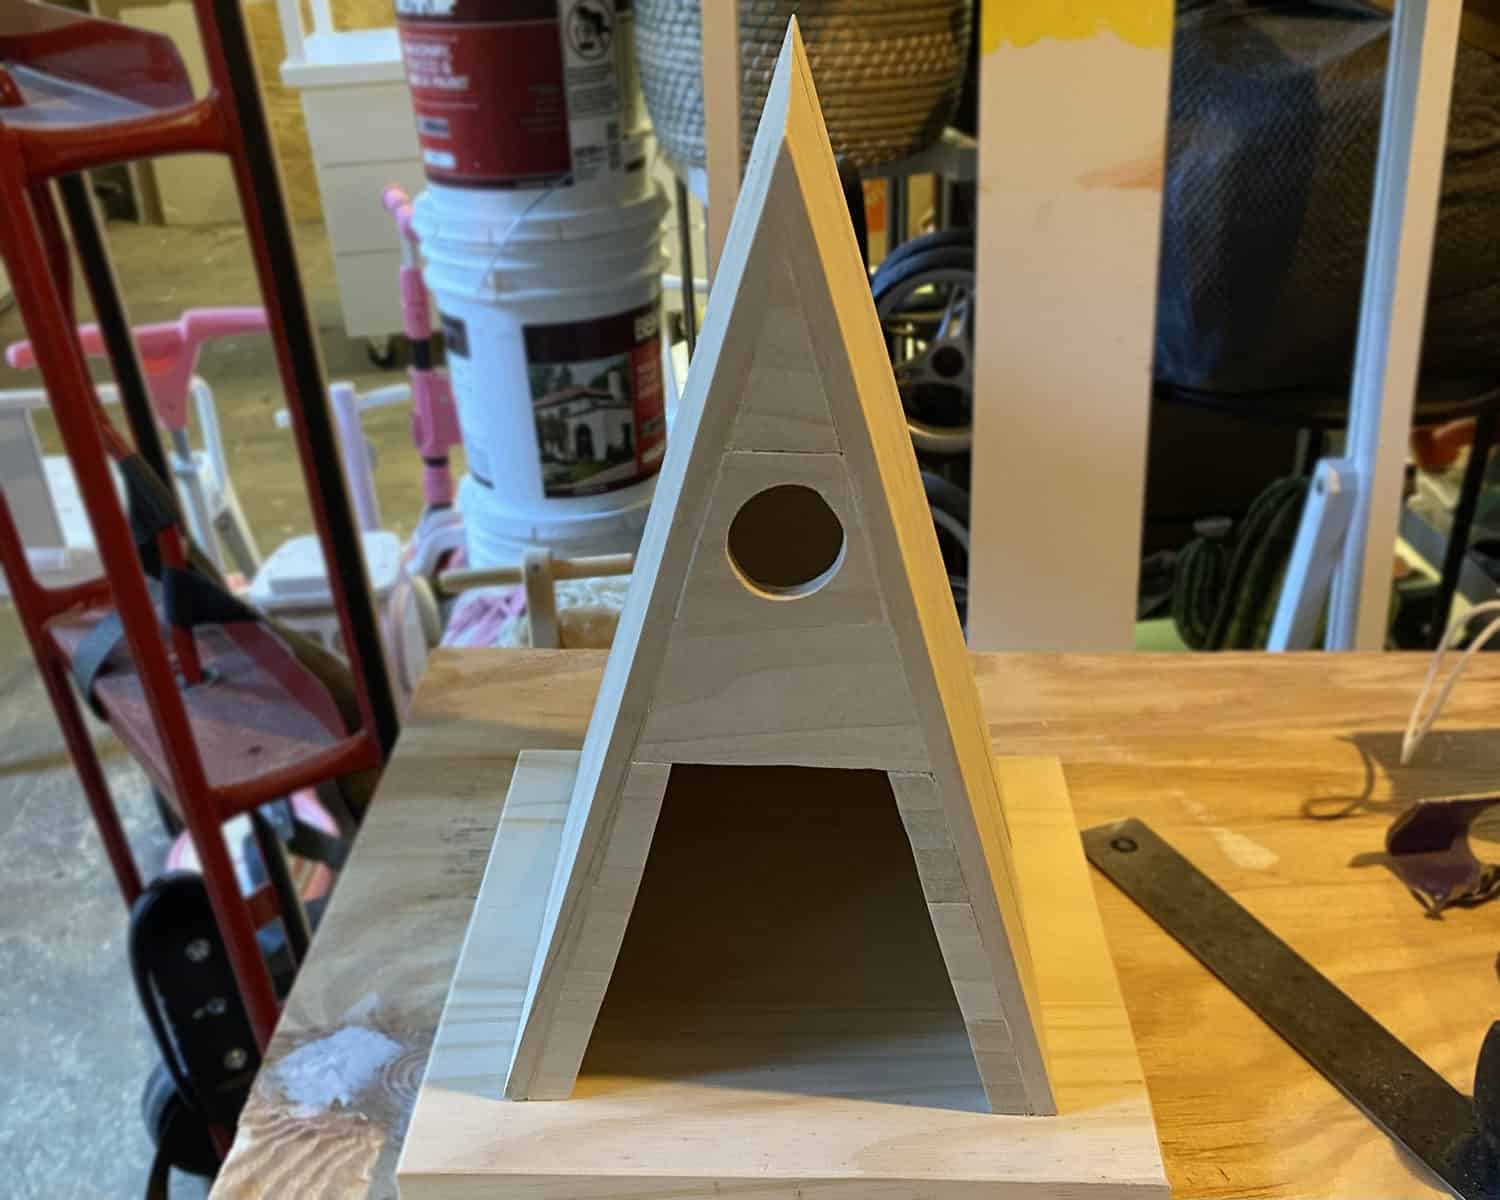 Repeat the same steps to fill in the front side of the a-frame, but cut 1/2″ pieces for the bottom three rows to leave an opening. Last, grab your 3/4″ x 10″ x 3″ board and cut it to 12″. Mount the a-frame onto the 12″ x 10″ board to make a little platform.
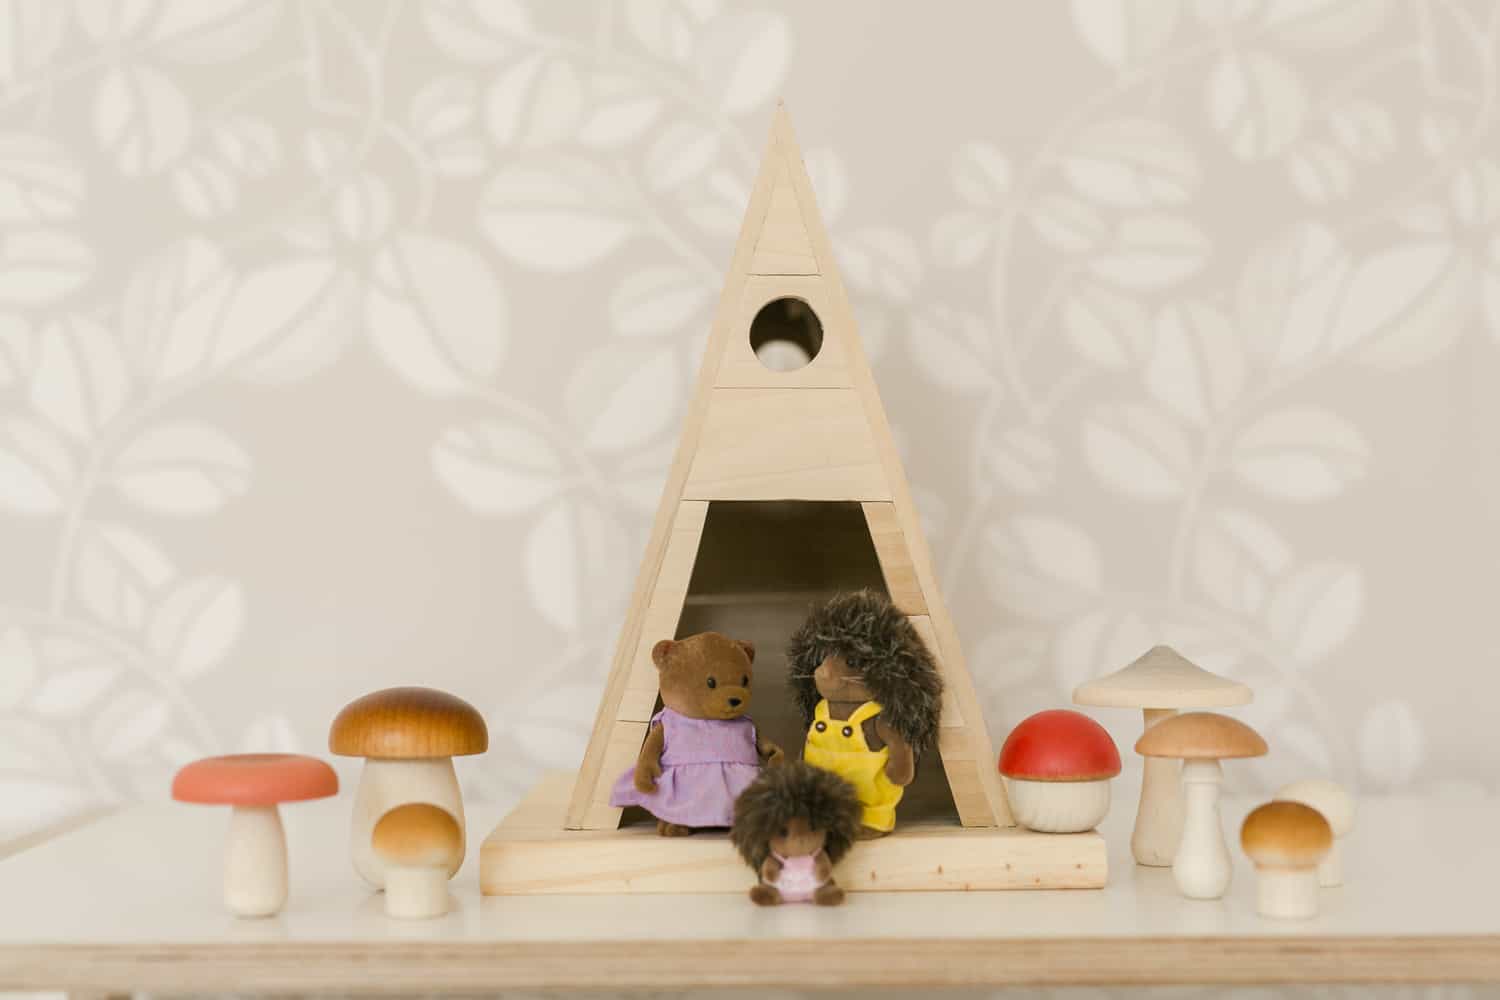
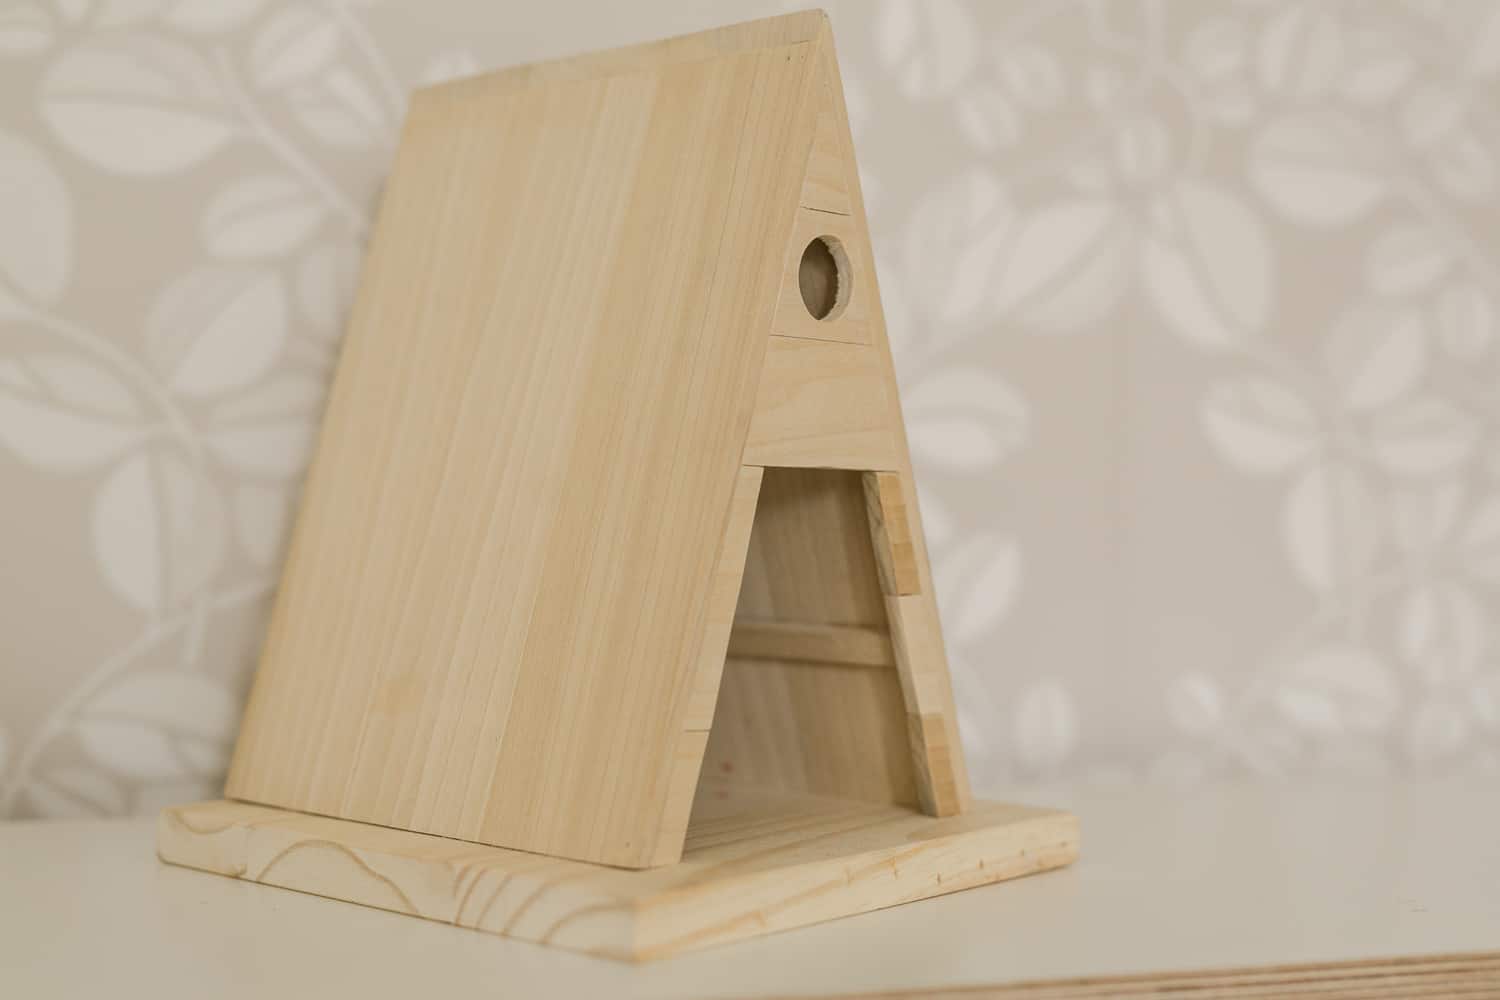
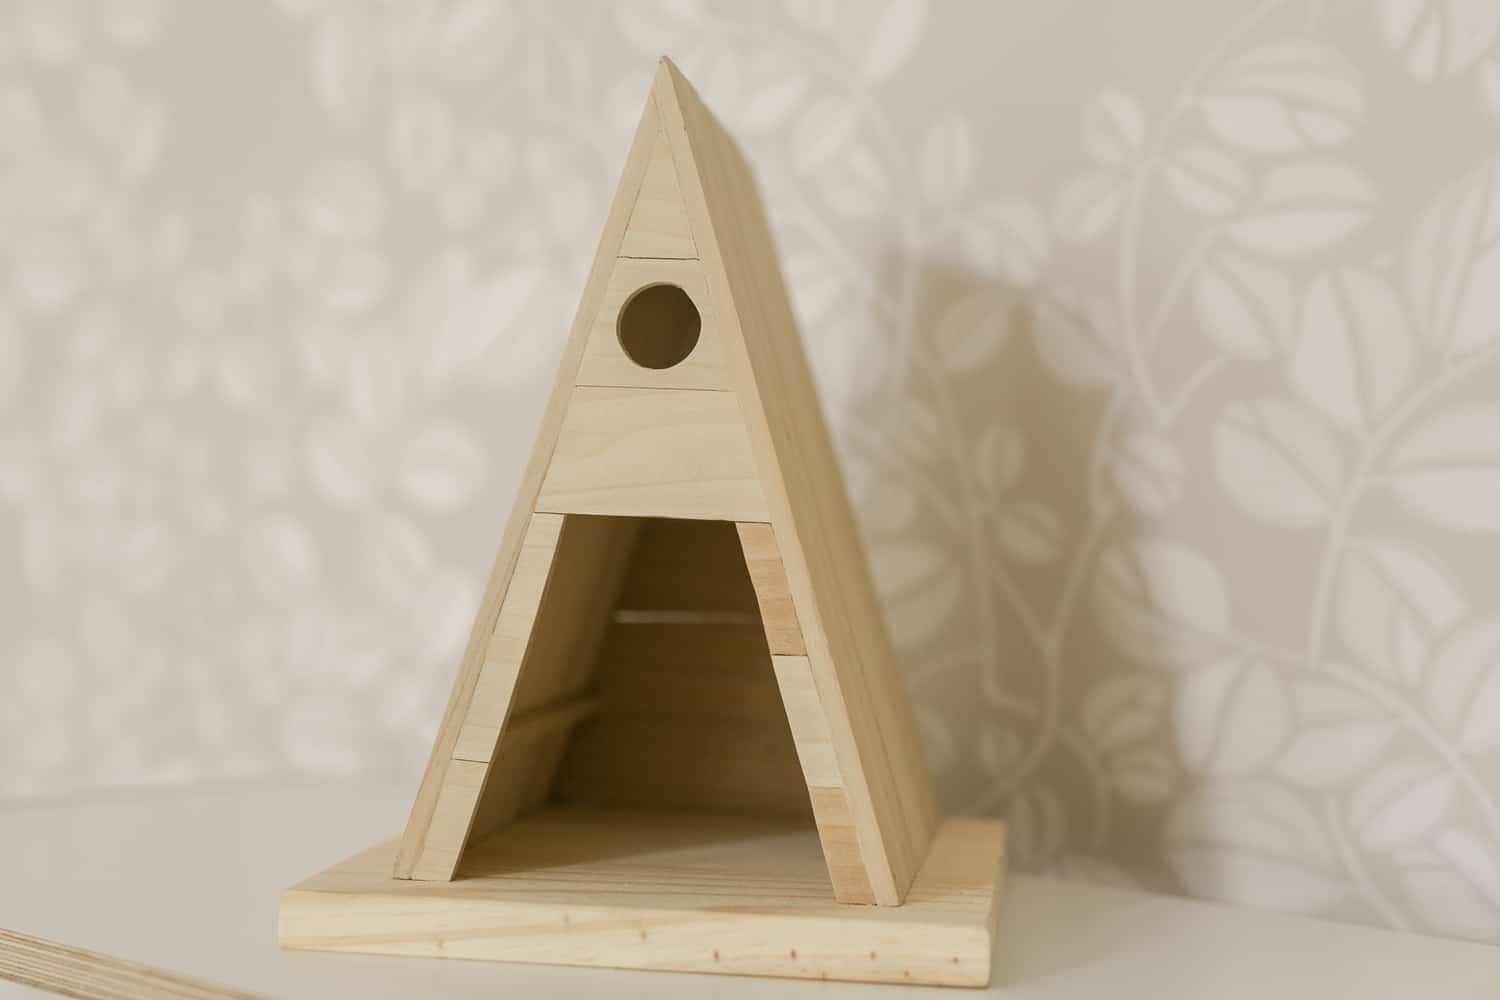
Here’s the completed dollhouse!
 I set this out on in our kids play space the other day (I like to leave new toys for them to discover). Our daughter immediately brought it over to me saying it needs to be painted. Haha, I think she’s definitely taking after me in that way because I agree with her. Do you think we should paint it or leave it raw wood? (It’s beautiful either way). xx- Elsie
P.S. Please tag us on IG if you make this project. We LOVE to see the projects you create using our DIYs.
You should check out chelseamakes.com! Her dollhouse kits are super modern and she has an A-Frame kit, too! https://www.chelseamakes.com/shop?category=Modern%20Miniatures
All I see when I see A Frames with a round window now is the yellow building from Midsommar.?
I love this simple A frame design and am going to have my husband build one. It will be a birthday gift for our 2y/o grandson. Do you have a source for the little woodland animals and toad stools shown in the photos. Thank you for the great idea.
The animals are Calico Critters! (used to be called Sylvanian families, haha)