
Create this adorable Bleach Tie Dye Jack-O-Lantern Shirt that you will want to wear year after year for Halloween!
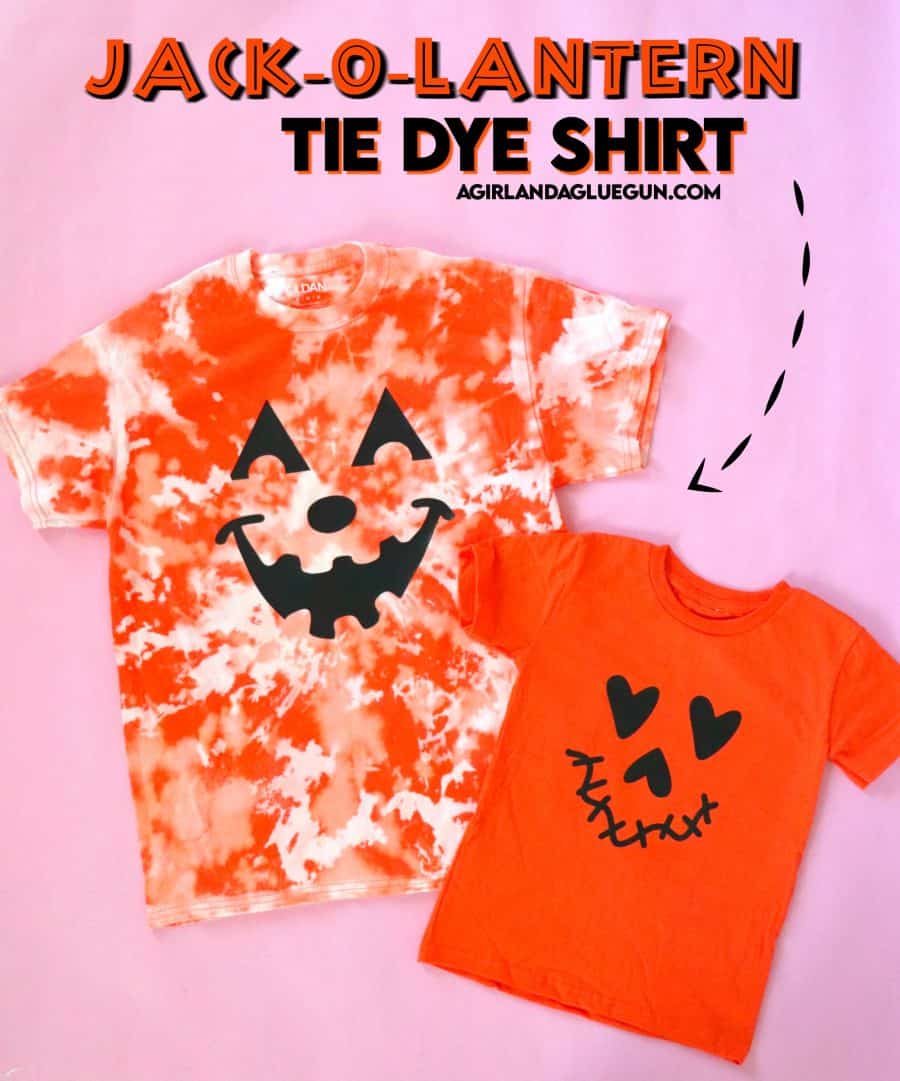
This shirt is so much fun to make! And when you do the Bleach tie dye method- you never know what you are going to get!
Here is what you need to make a bleach tie dye Jack-O-Lantern Shirt
- Orange shirt
- Bleach
- Black Heat Transfer Vinyl
- Jack-O-lantern Cut files
- Silhouette cameo or Cricut to cut out faces (You can freehand though)
You can get orange tie dye and white shirt and do a real tie dye technique if you don’t want to do bleach!
First- Let’s talk about Bleach Tie Dye!
BLEACH TIE DYE
I wrote up a whole blog post all about Bleach tie Dye. (click here to see it all) But Bleach Tie Dye is taking a shirt that has color and splashing it with some watered down bleach to create a reverse effect. It’s reallllllly fun. Some fabric doesn’t change colors so I do recommend putting a little bleach on the underside of the hem to see if it reacts.
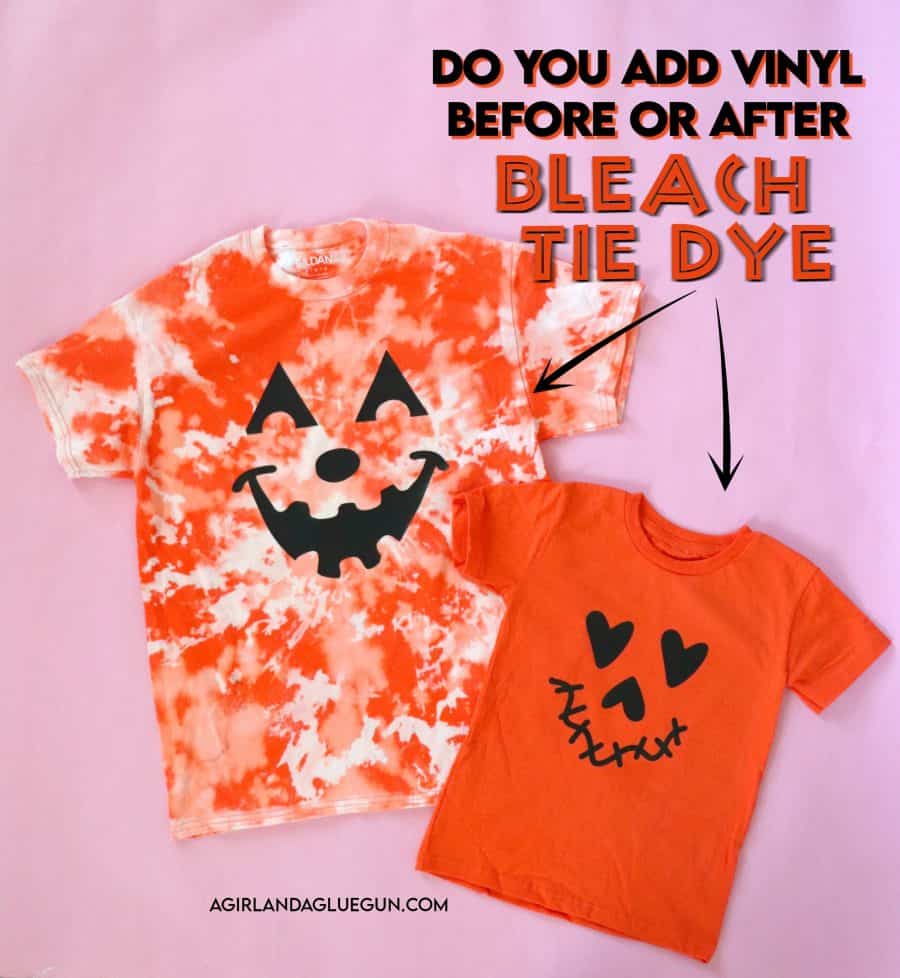
BUT the question I get asked if you could put the vinyl on before you do the tie dye! I did one shirt bleach tie dye then jack-o-lantern vinyl. Then I did the Jack-O-Lantern face with vinyl then bleached it.
They both turned out the same! I do think that putting the bleach on the shirt with the vinyl already attached might mess with the adhesive and cause it to peel up faster as you wash it repeatable. So if you can, I would bleach first then add Heat transfer vinyl. But if you already have a shirt with vinyl on it- you can probably try the bleach method!
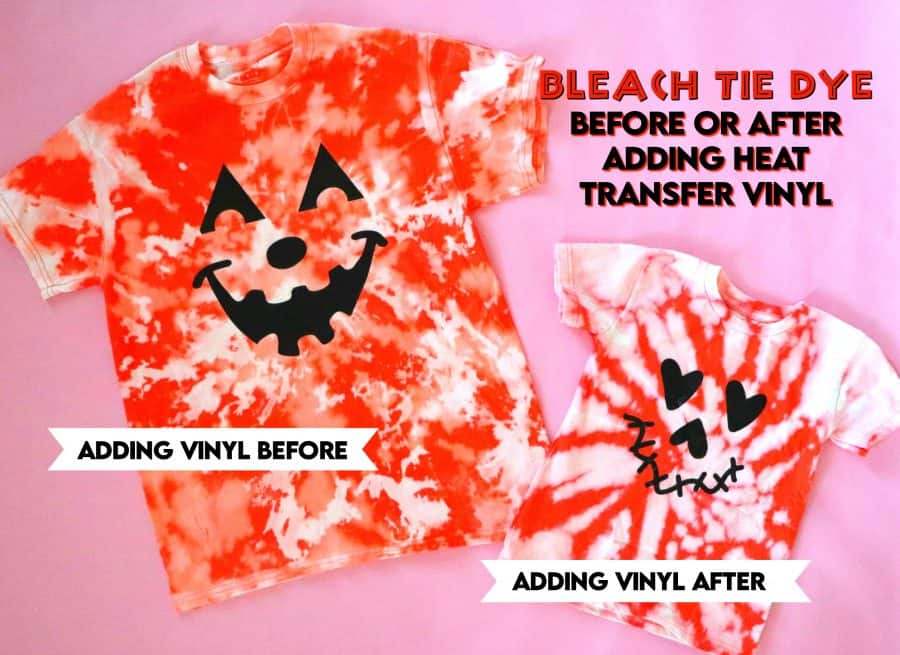
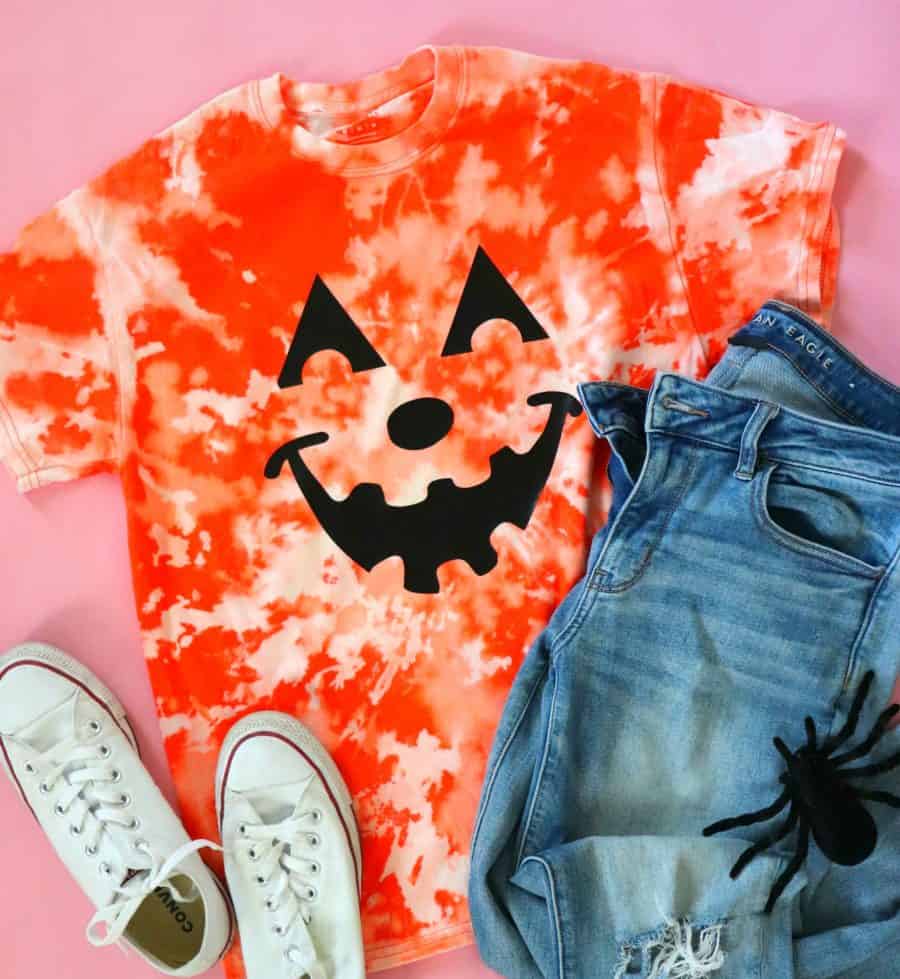
Also notice in the picture the different versions of how it looks with bleach tie dye. The crumbled on the left and the swirled technique on the right.
Okay. Let’s turn this into a Halloween shirt!
Jack-O-Lantern Shirt
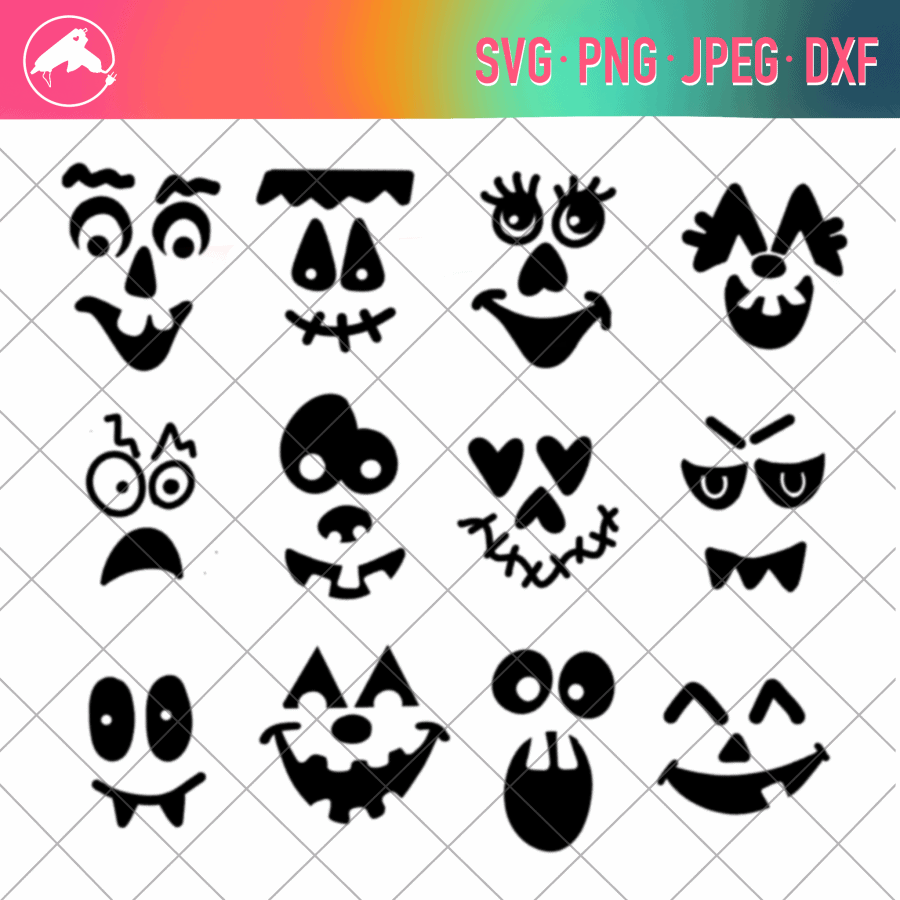
I have a bunch of Jack-O-Lantern faces-you can mix and match and create your own! They are here in my shop!
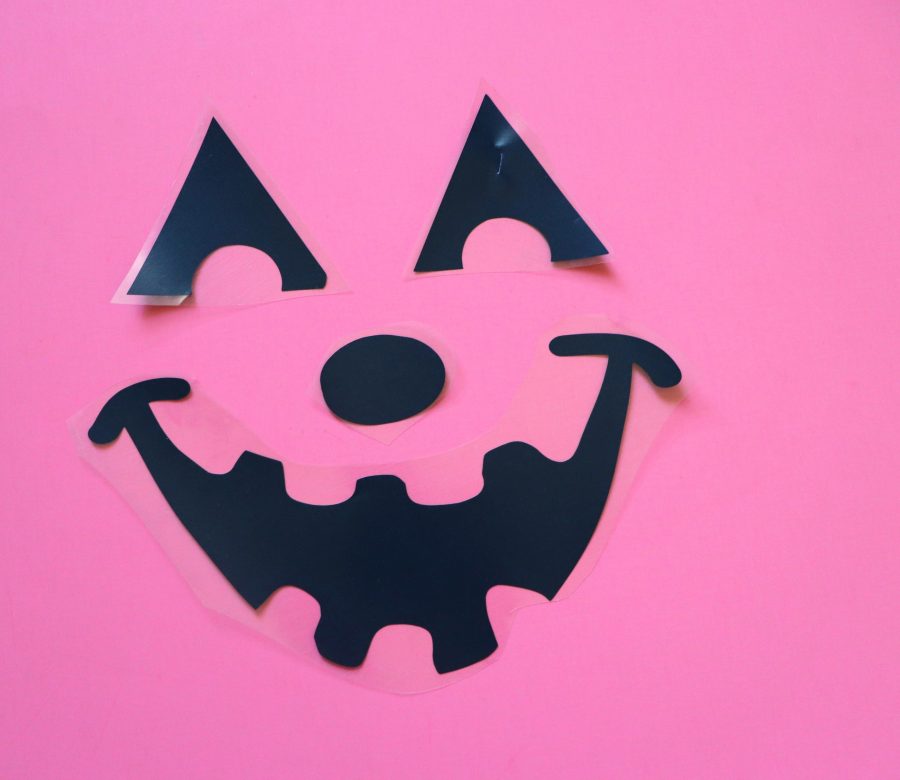
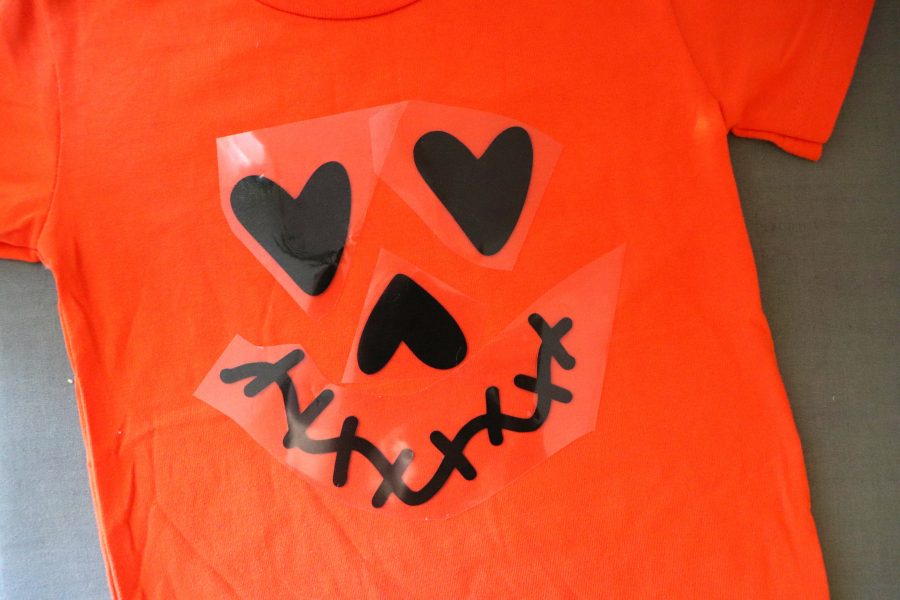
Just pick whatever face you like and size them appropriately. I made two shirts and didn’t want to waste any fabric so my HTV shirt looked like this:
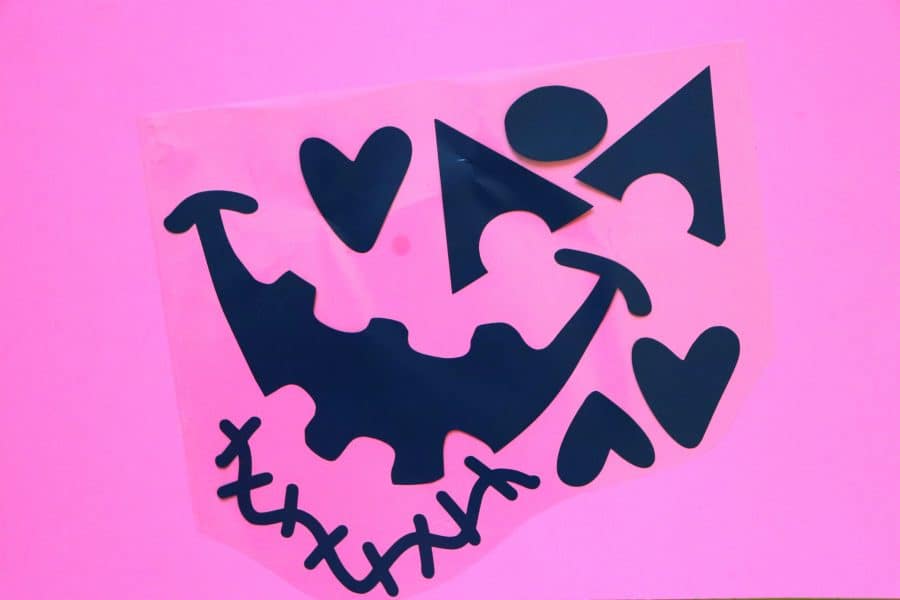
I cut apart the face and laid them on the shirt. I trimmed them pretty well so no carrier sheet (the clear plastic part) would get underneath any other part of the pumpkin face.
Just a quick reminder about placement. You will want to be careful about placing the eyes. You don’t want them to be right on the chest. (or maybe you do! Just be mindful!)
Press. This particular HTV settings are: Apply medium pressure at 305 °F for 10-15 seconds
I used my Cricut Easypress- but you can totally use an iron!

TA DA! Enjoy your cute little Pumpkin shirt! You can rock it Halloween after Halloween!
If you like the blog post! I would love for you pin it so someone else can find it!
And if you are looking for another awesome Halloween shirt- Check out this skeleton one!
Leave a Reply