Last week, we shared our Ultimate Guide to the new Cricut Mug Press . We answered questions like ‘How does it work?’, ‘How does it differ from other ways of making mugs?’, ‘Where can I get a Cricut Mug Press?’ and more. So now it’s time for the fun part…putting the Cricut Mug Press to use to make a pair of mugs that are perfect any awesome sisters!
This is a sponsored conversation written by us on behalf of Cricut. The opinions and text are all our own.


How to Use the Cricut Mug Press
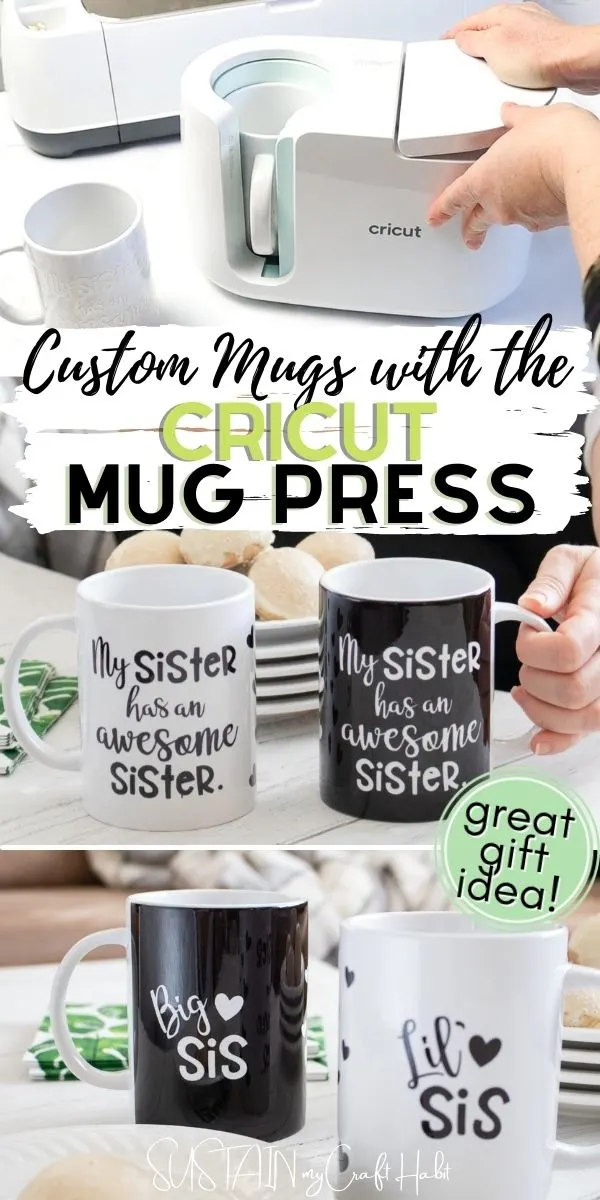
Today we’re sharing a simple tutorial for making this pair of matching mugs for my sister and I to enjoy coffees together over our video chats. It’s super quick and easy to make: simply cut the design, wrap it around the mug and place it inside the Cricut Mug Press to do the rest!
With a single button, the Cricut Mug Press does it all. It figures out the time, the pressure and heat needed to apply the design to the mug all on its own.
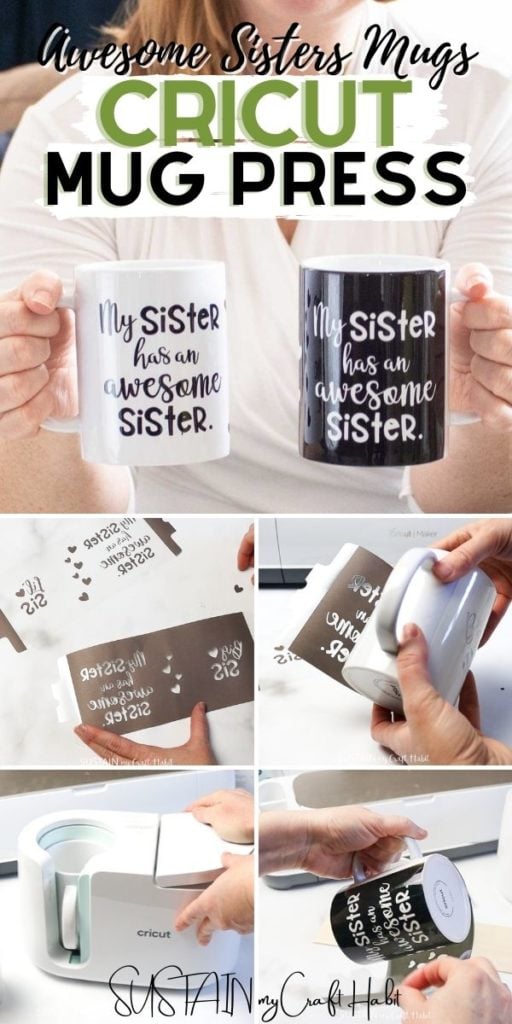
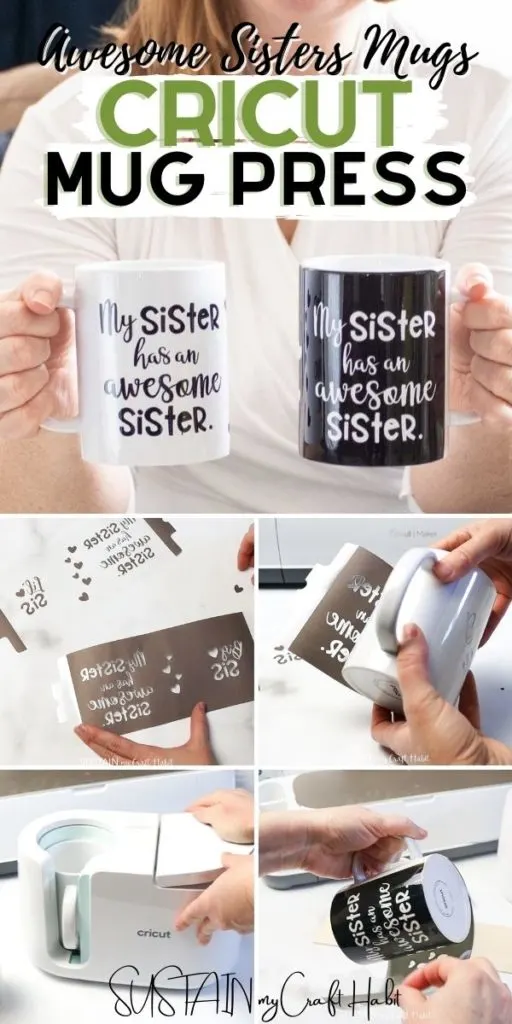
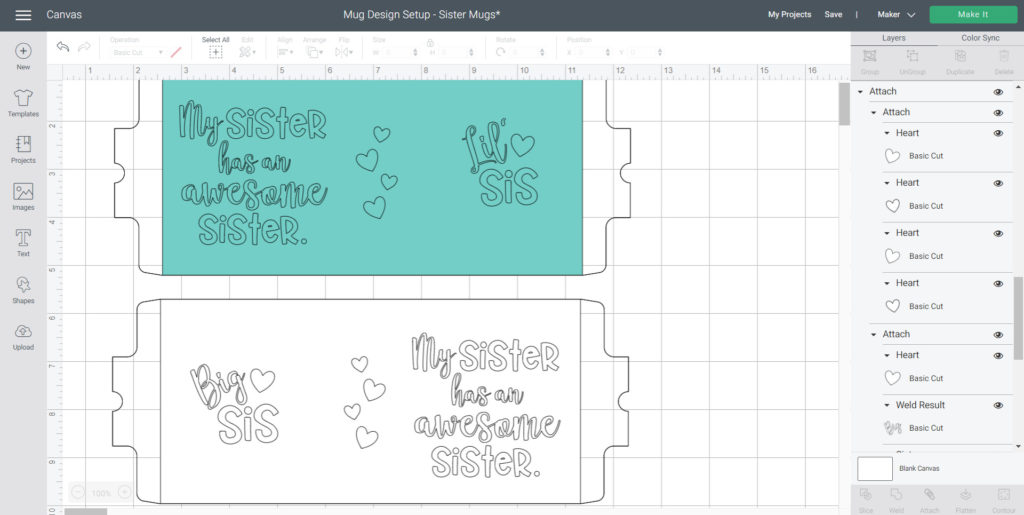
And I love how these mugs turned out: one side has matching “My sister has an awesome sister” design, and the other side says “Big sis” and “Little sis”. I can’t wait to give one to her.


Making personalized mugs is perfect for any occasion, from birthdays to anniversaries and holidays or simply to have matching mugs for coffee time zoom calls ;).
I also love that the 15oz Cricut blank mugs are packaged in simple white boxes that can be reused to gift wrap the finished mug.


Wouldn’t this make such a thoughtful gift for someone? And knowing these mugs are permanent, dishwasher-safe means I can feel good about the quality of the gift I’m giving.


We chose these large sized 15oz mugs since the larger the cup of coffee, the longer the coffee break can last. But the Cricut Mug Press also works with a range of mug sizes from 11oz to 16oz without any adjustment needed.
Materials Needed To Make a Pair of “Awesome Sisters” Mugs:
Disclosure: This post continues affiliate links for your shopping convenience. You can find our full disclosure policy here.
- Cricut Mug Press
- Cricut Maker or other Cricut cutting machine
- Infusible Ink Transfer Sheets for the Cricut Mug Press (we used solid black)
- Light Grip Mat
- Lint roller
- Heat resistant tape (optional)
- A heat resistant surface such as the Easy Press mat
Using the Cricut Mug Press:
Cricut has really made it easy for us to create professional, quality mugs at home with just a few simple steps.
1. Choosing the Design
First and most importantly, decide on the design you plan to use for your mug! There are a couple of different ways to do this:
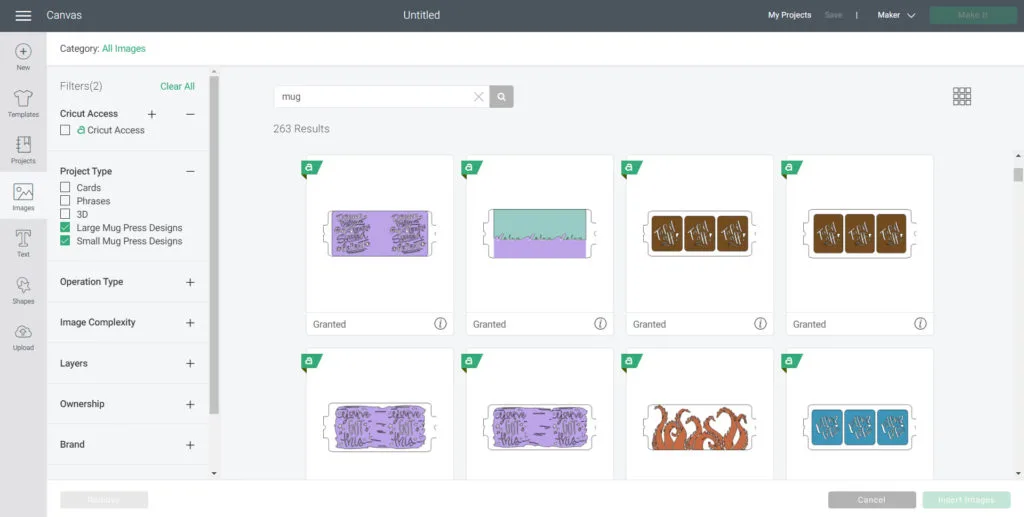
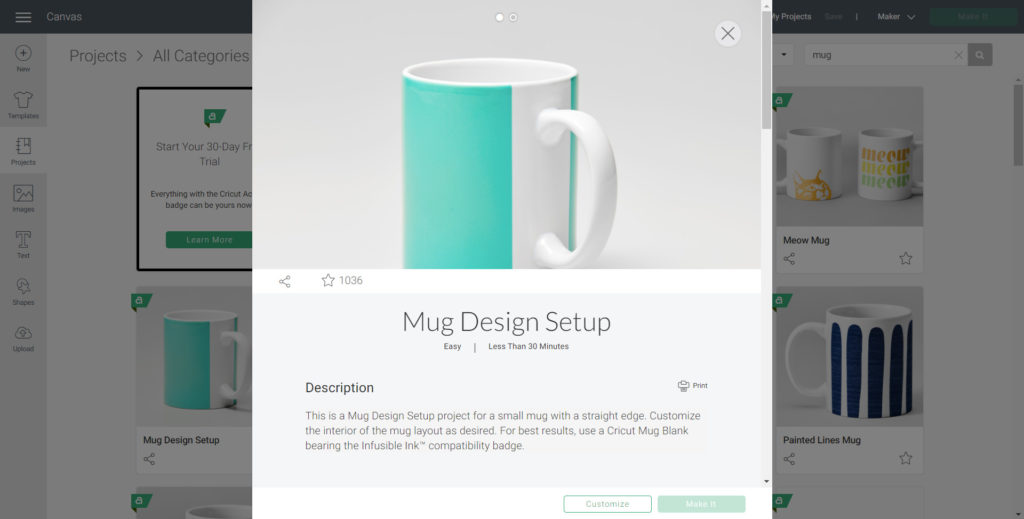
- Choose from one of the designs Cricut offers in the Design Space library by searching “mug” under the images tab, with the project type selected for Large and Small Mug Press Designs. There is something for everyone here from fun coffee phrases to motivational quotes to trendy patterns and more.

- Alternatively, you can design your own mug like we have with our matching sisters mugs. We’ll take you through the step by step instructions on how to do just this below.


- And lastly, you can upload your own SVG file either one that you made yourself or purchased somewhere. We think this is such a perfect option for all entrepreneurs or even those savy DIYers.
2. Preparing the Design
If you’re using one of the Design Space ready to make mug templates simply insert it onto the canvas click on “Make It”. Follow the prompts on the screen to cut out the design on an Infusible ink Transfer Sheet. Remember to select MIRROR ON so the image is reflected.
Note: If you’re ready to hit “Make” on these sisters mugs, you can access our project file in Design Space here.
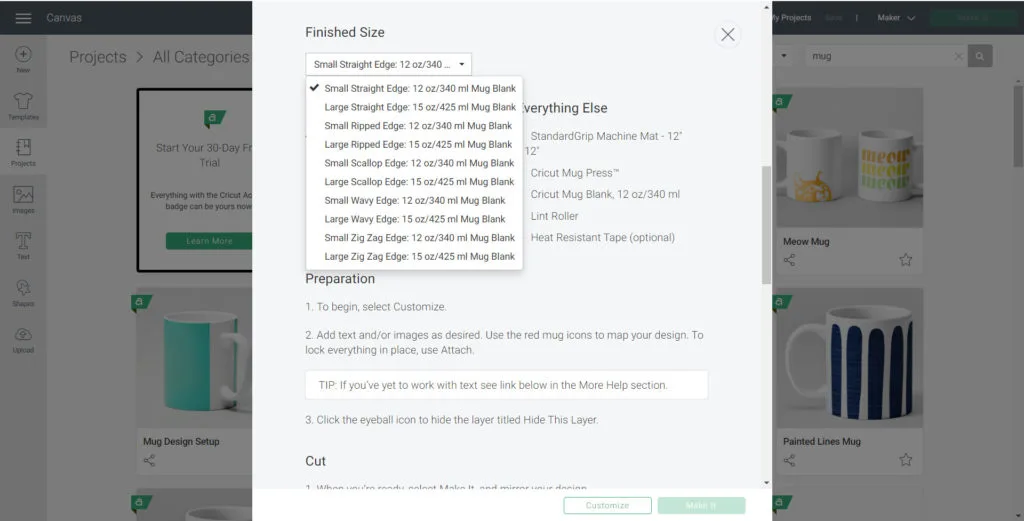
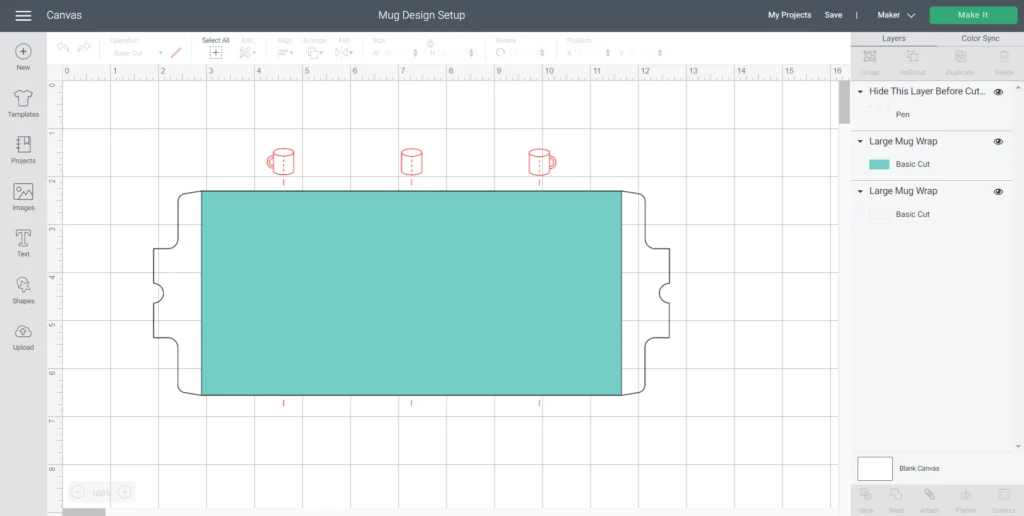
However, to customize the design of your mugs (or create from scratch), start by searching “MUG SETUP” in the project tab. Choose the mug size (either SMALL or LARGE) along with the type of edge (STRAIGHT, SCALLOPED, RIPPED, etc) and then insert it on to the blank canvas.


Now you can start designing!

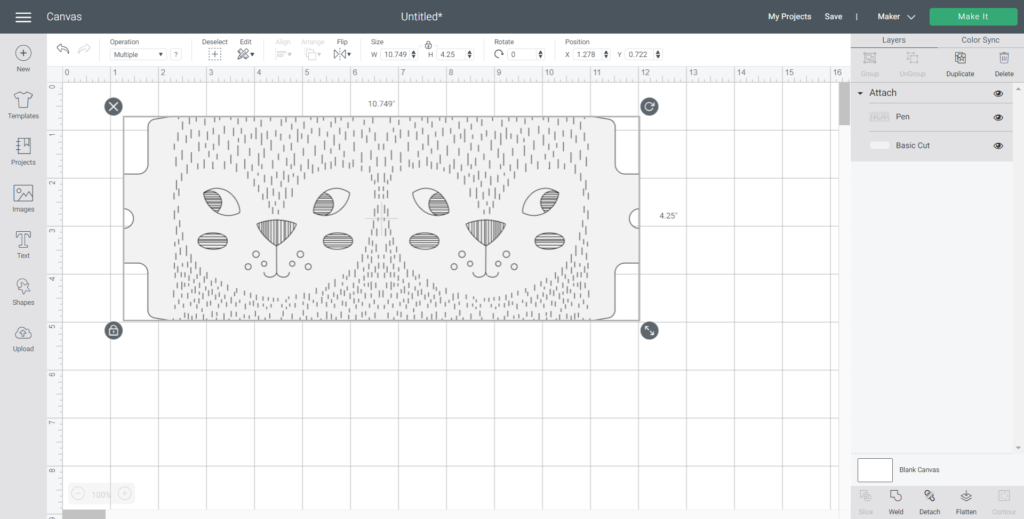
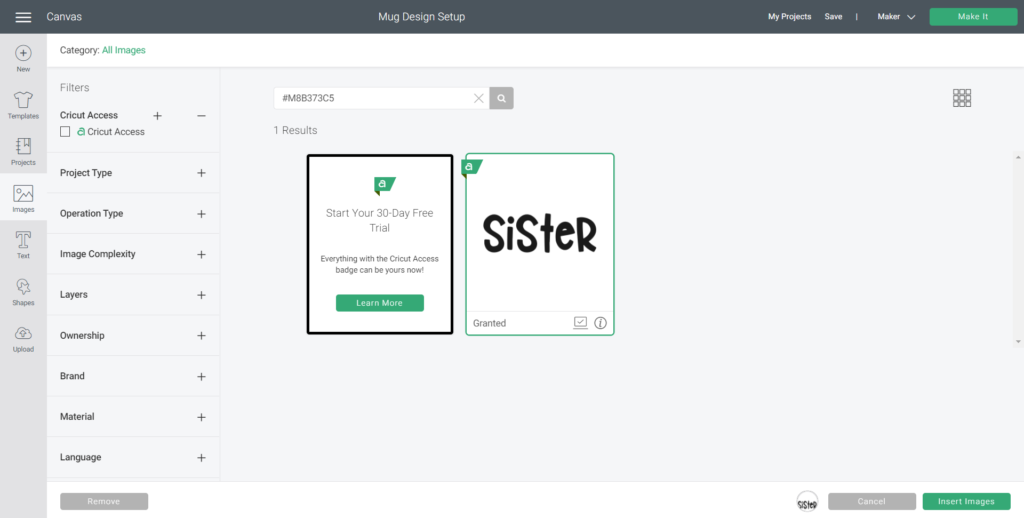
We began with inserting the SISTER (#M8B373C5) image and added the other text in the Babette font.


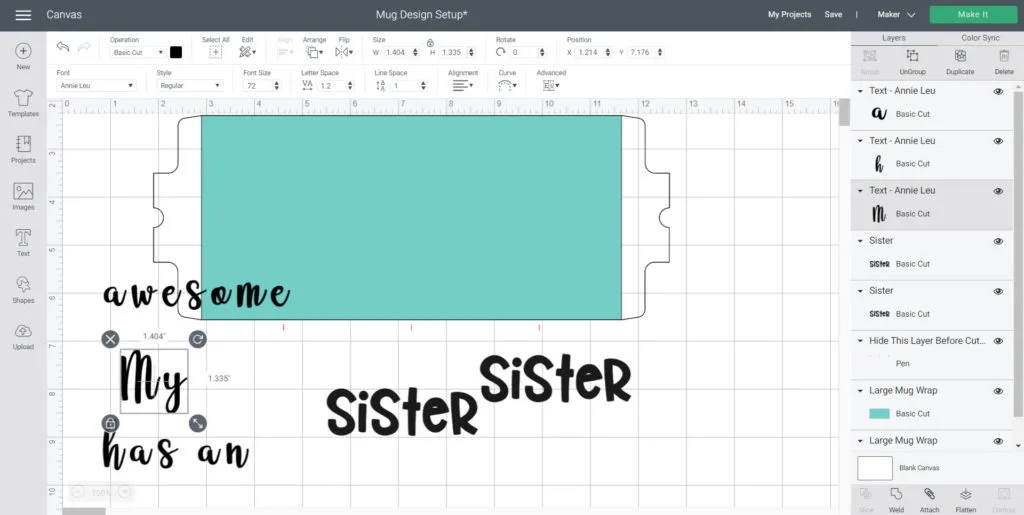
After formatting the lettering and adding some heart shapes, we sized it to fit on to the mug.
For a personalized touch, we added “big sis” and “lil sis” to the reverse sides of the mug.
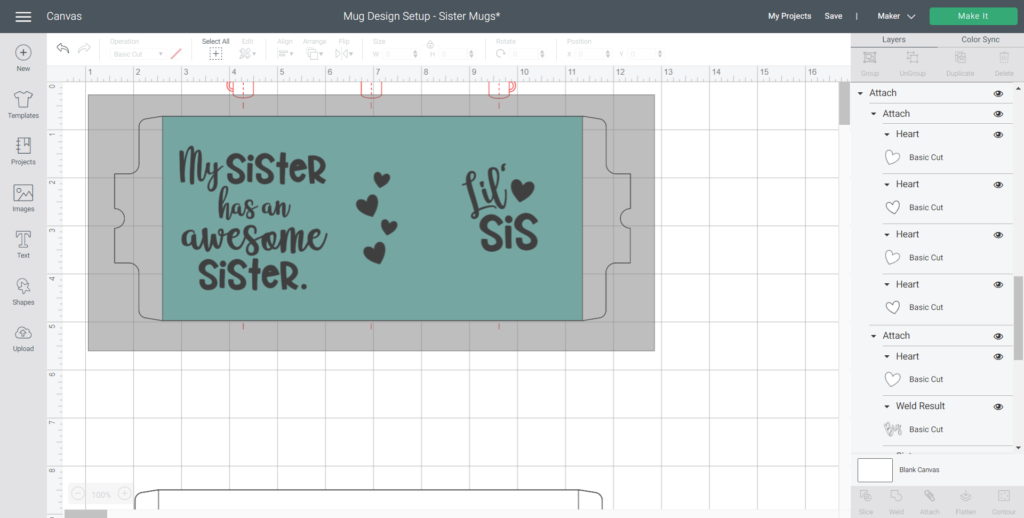
Next, we positioned the images on the mug template using the placement layer as a guide. Be sure to hide that layer before cutting.


Highlight the entire mug template along with the images together and select “attach” to join all the pieces for cutting.


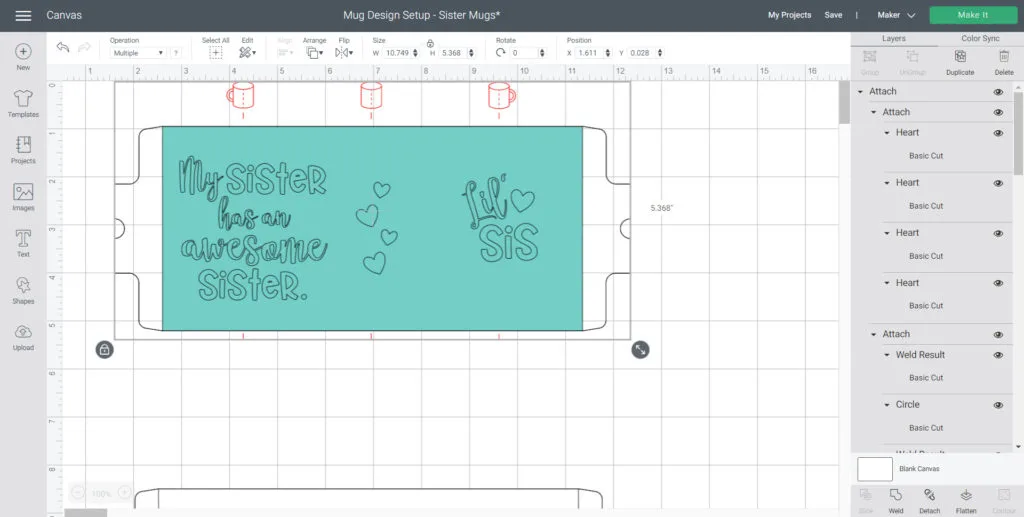
With the machine set to Maker, click on Make It.

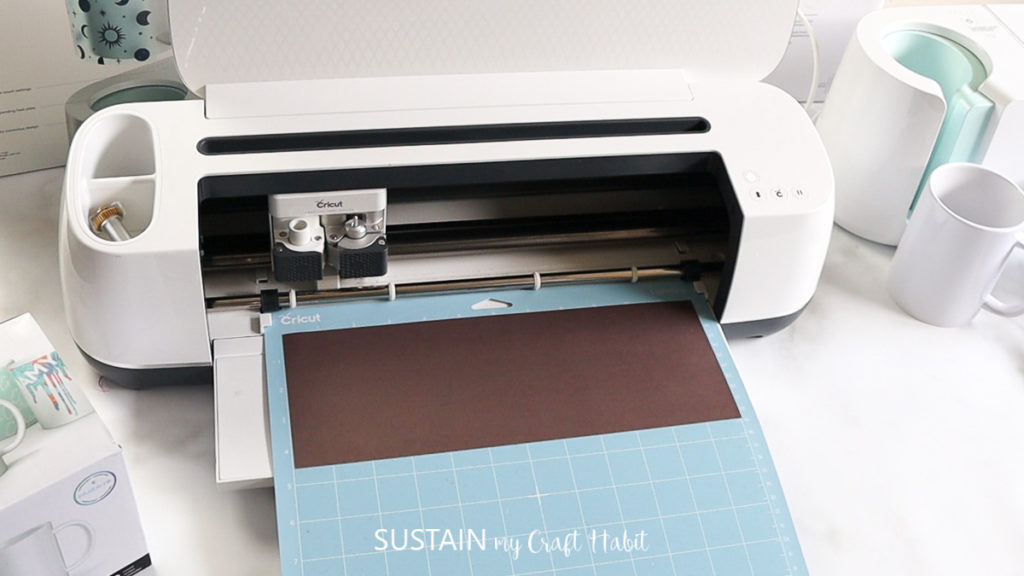
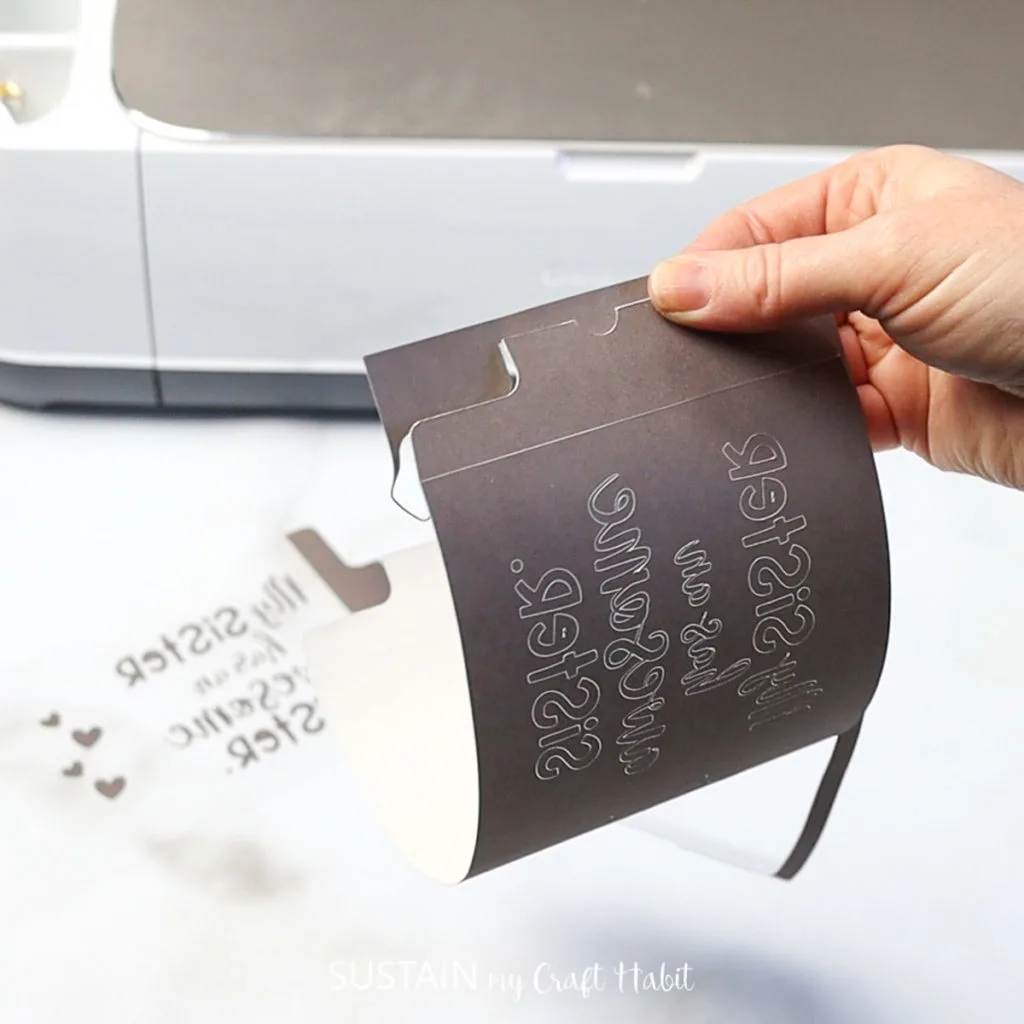
3. Cutting the Infusible Ink Transfer Sheets
We previously shared tutorials for using Infusible ink transfer sheets, so for more info you can check out our DIY cosmetic bag with Cricut and our personalized halloween tote bag project.
Ensure the toggle is set to “MIRROR ON”. This is necessary for all infusible ink (and Iron On Vinyl) cuts. Also, we set our pressure to “More” to ensure it cut completely through the Infusible Ink Sheet.
Place the Infusible Ink Transfer Sheet on the cutting mat and choose Infusible Ink Transfer Sheet from the drop down menu to proceed with the cutting. You can use a full-size sheet (12″x12″) – however the sheets already cut down to size for the mugs are really convenient!

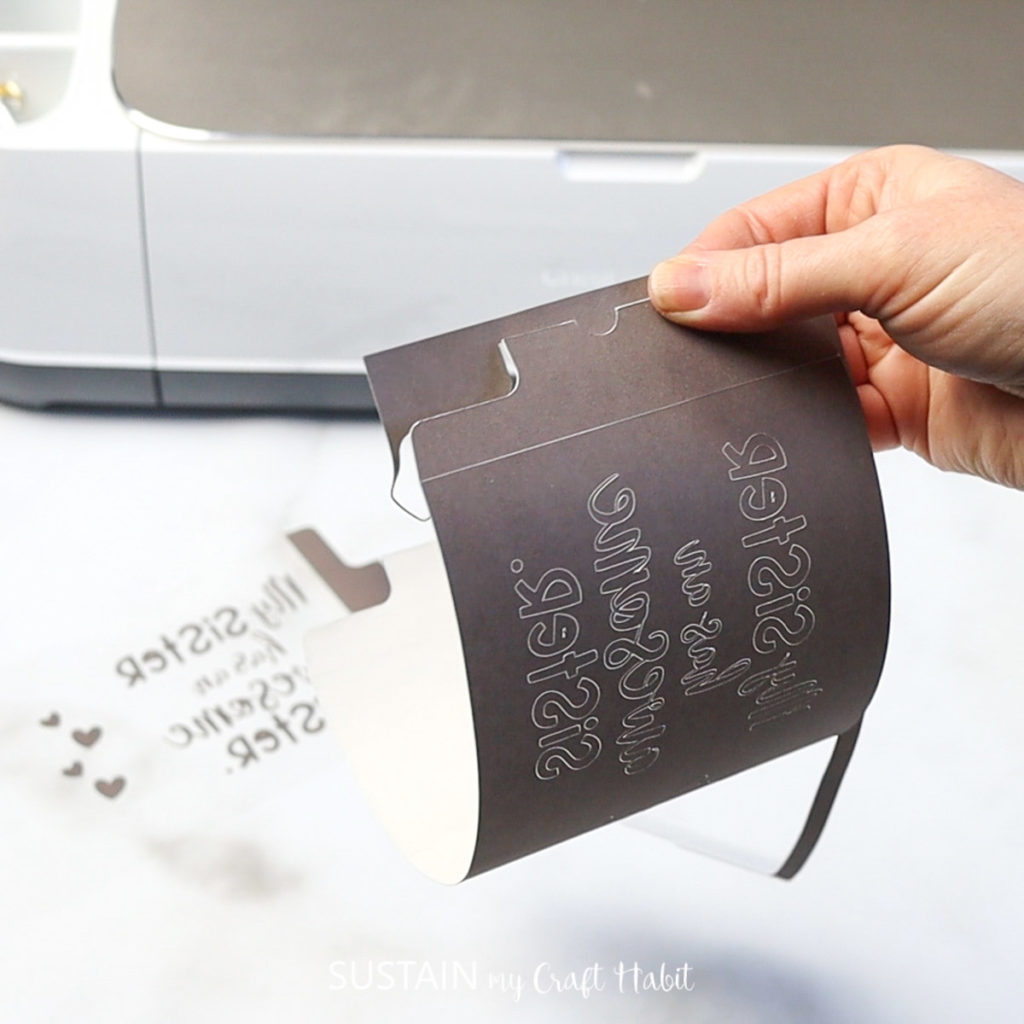
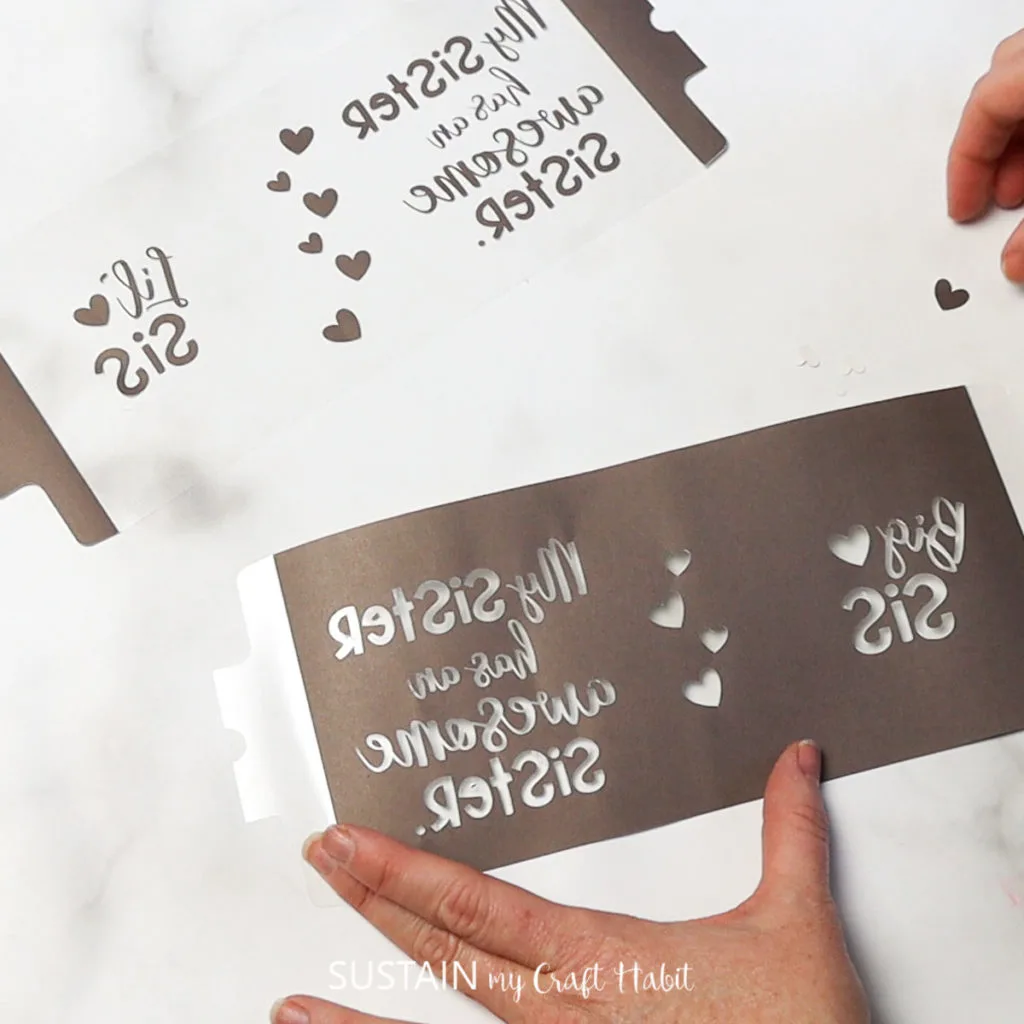
When the cut is complete, unload from the machine and peel away the unwanted portions.
To show you the versatility, we did one mug as a knock out of the other mug just by peeling away a different part of the transfer sheet. How cool is that?! It’s so easy to personalize any design for just about anybody! I even took added some of the hearts that were weeded from the black mug design to the white one!

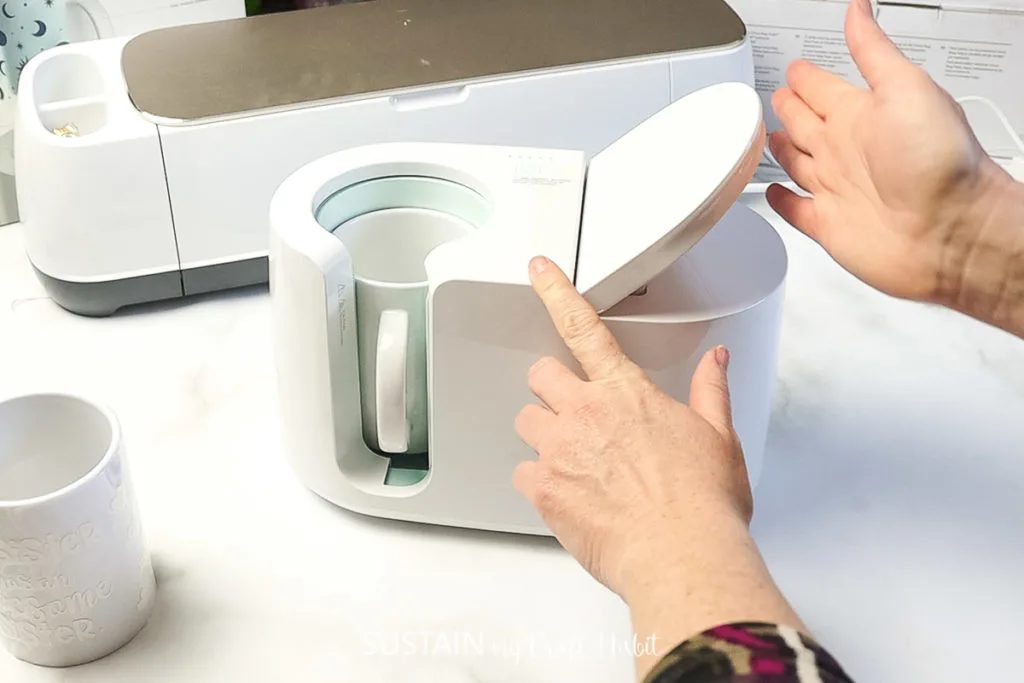
4. Applying the Design Using the Mug Press
Preheat the Mug Press. It will beep when it reaches the required temperature.
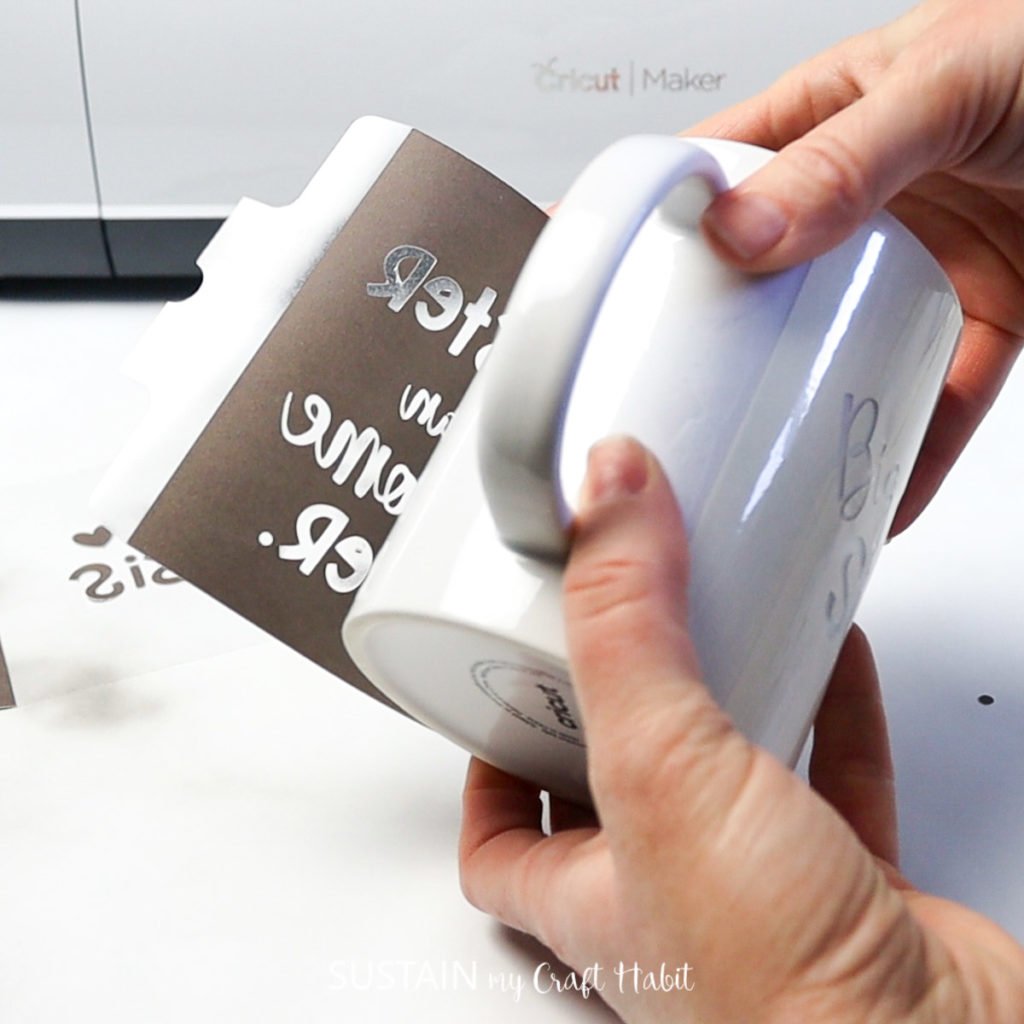
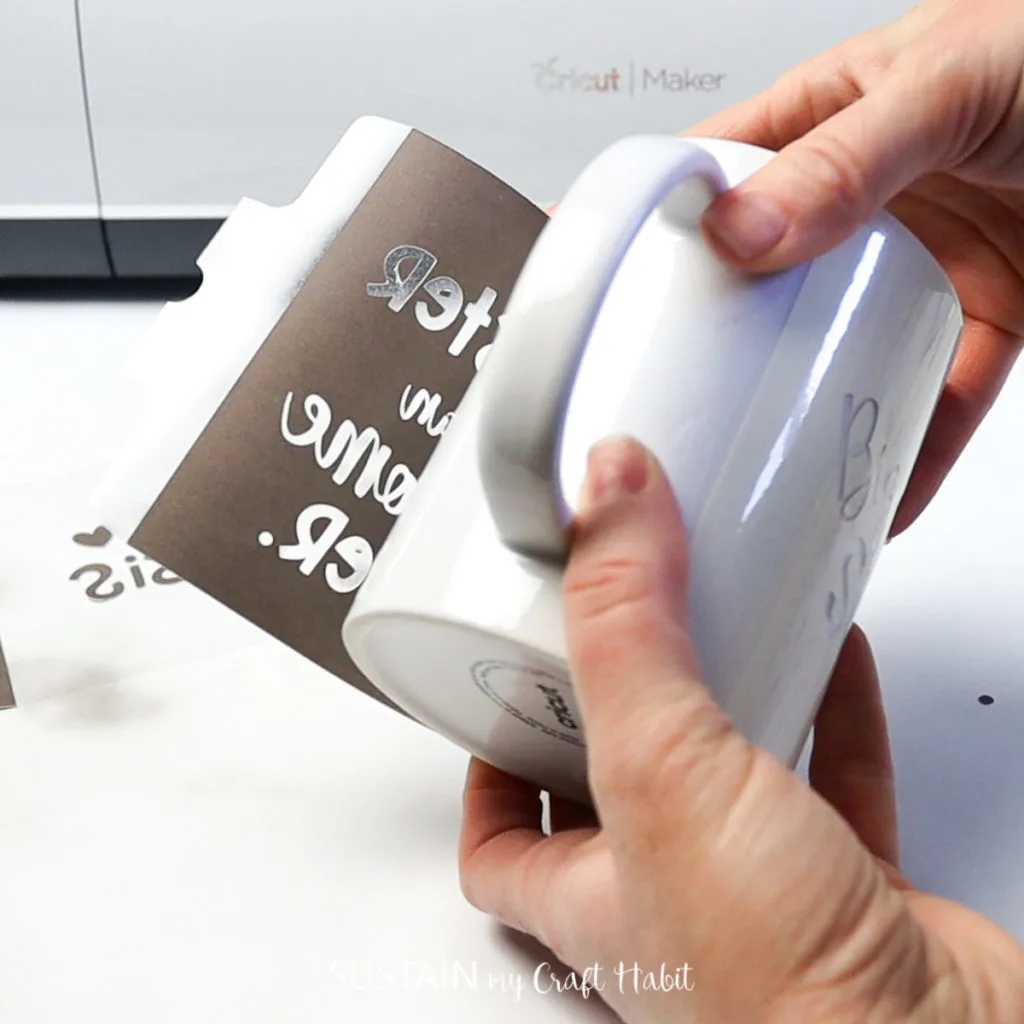
Always remember to use a lint roller on your mug before wrapping it with the Infusible Ink transfer sheet. This will get rid of any loose particles that may show up after pressing.

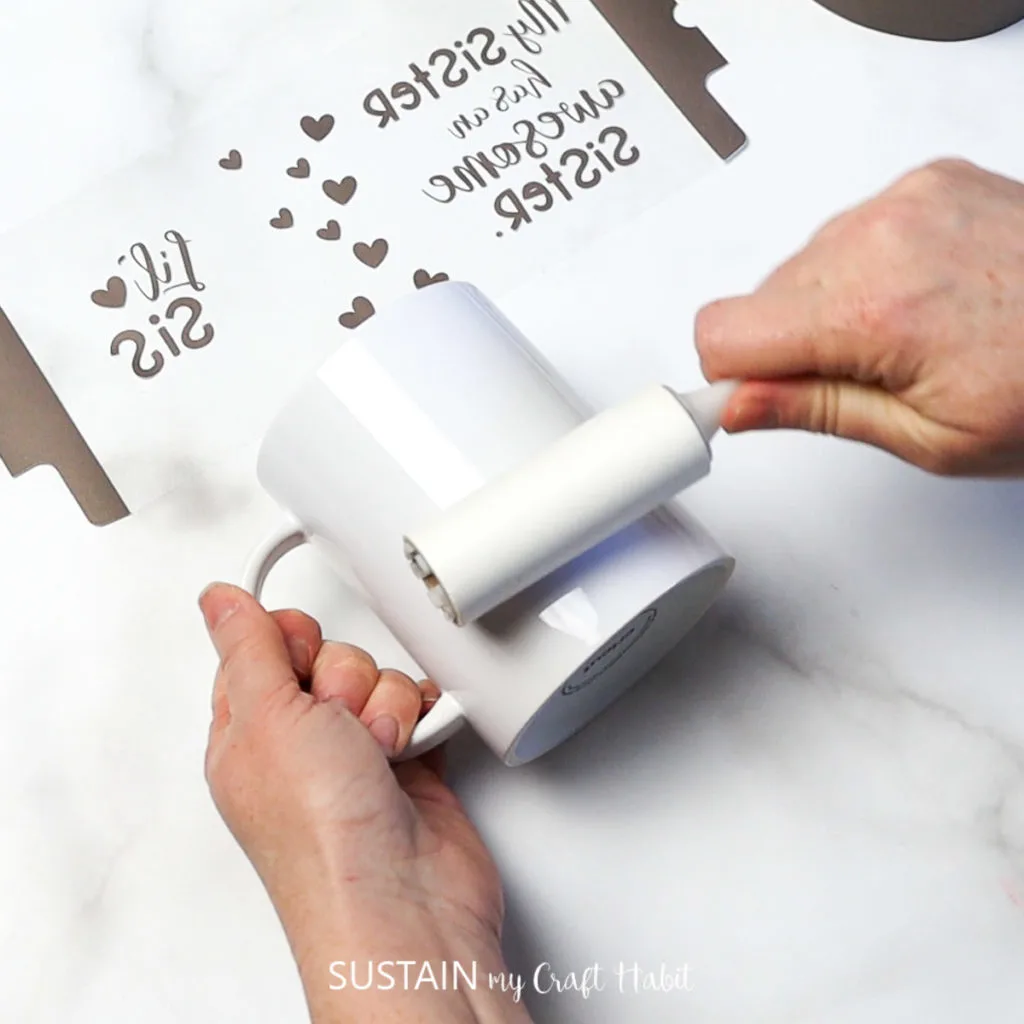
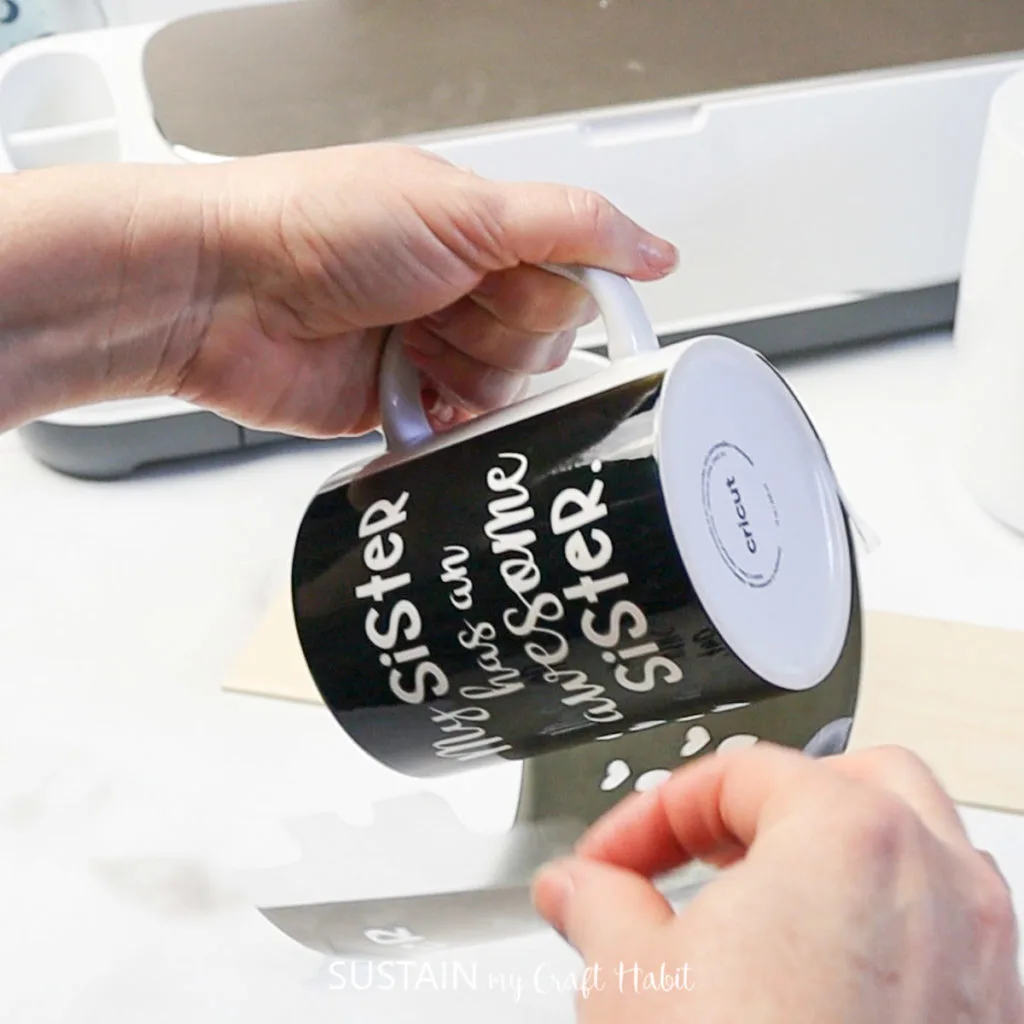
Wrap the infusible ink around the mug aligning the top and bottom edges with the top and bottom edges of the mug. Have the liner meet under the mug handle and gently press the transfer sheet so it’s snug against the mug.

Lift the Mug Press lever and insert the mug inside. Push the lever down to lock the mug securely inside. Then just push the button and wait to the magic to happen! This process takes about 6 minutes.
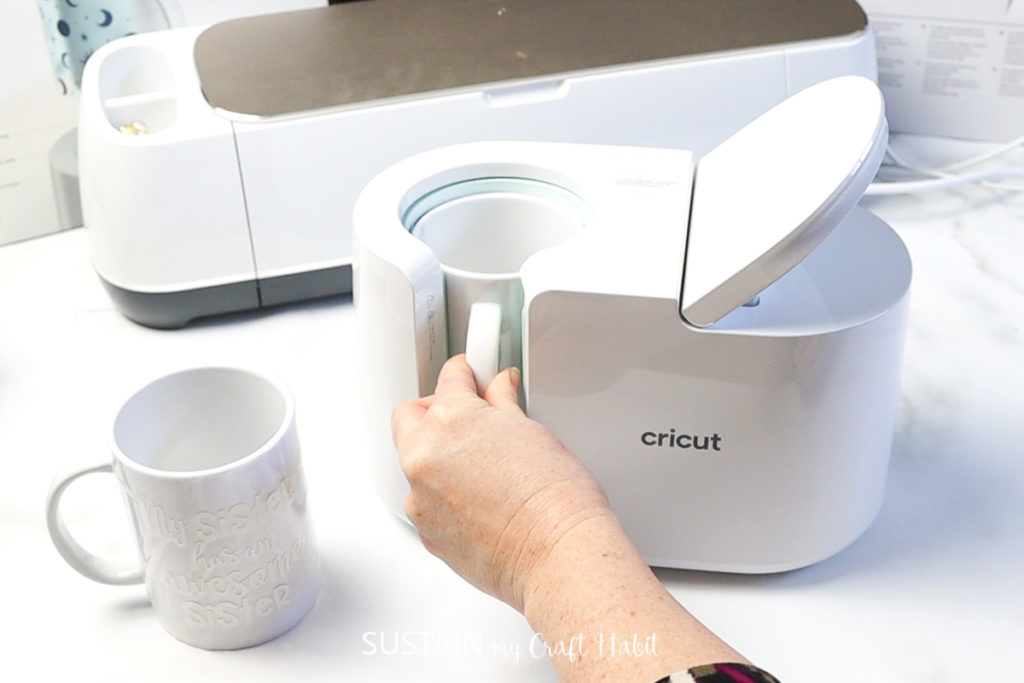

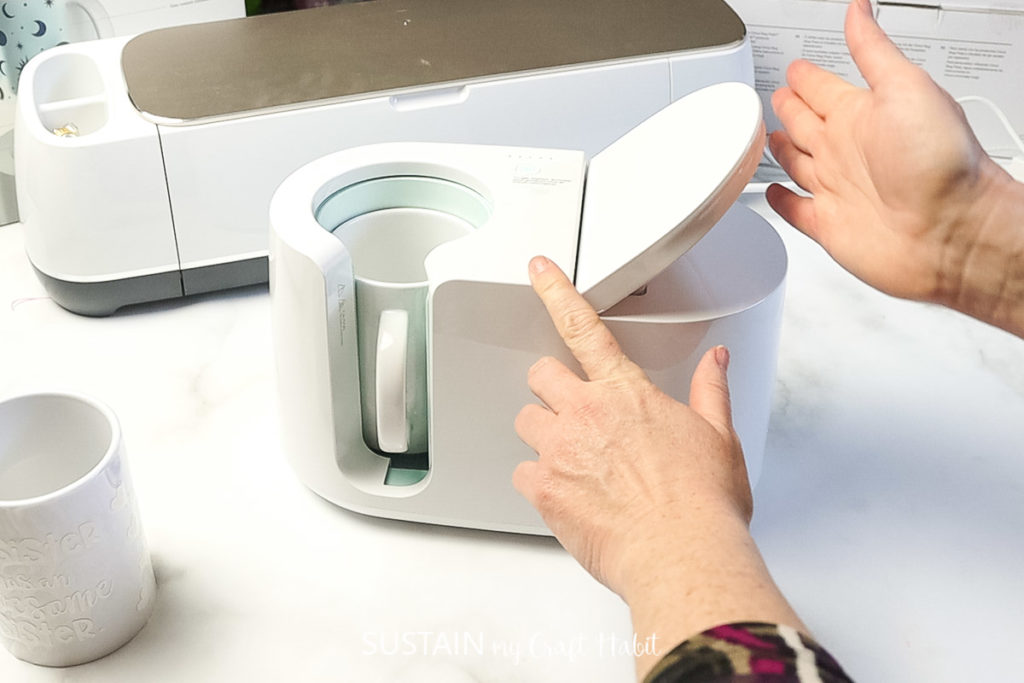
Once it’s done, the Mug press will beep again.
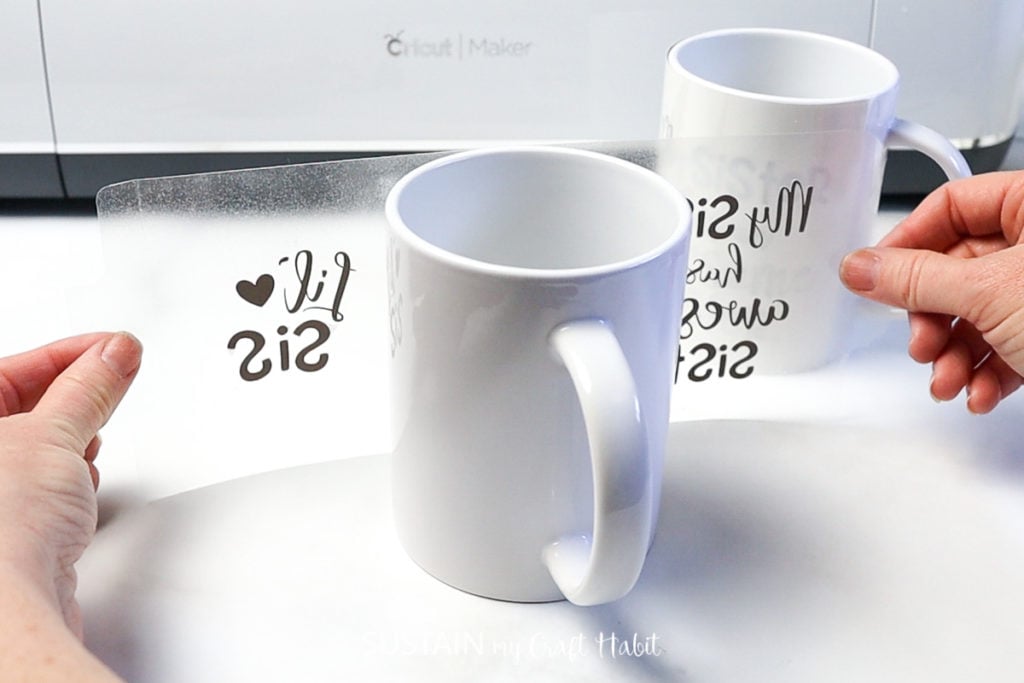
Lift the lever and remove the mug by lifting it by its handle. Place the mug on a heat resistant surface such as the EasyPress mat and allow it to cool completely (about 30 minutes) before peeling off the transfer sheet.
If you forget to turn the Mug Press off with the one-touch button, don’t worry, it has a safety feature built in to automatically turn itself off after sitting idle.
The exciting part is removing the transfer sheet and revealing the design underneath! It’s so vibrant and seamless.

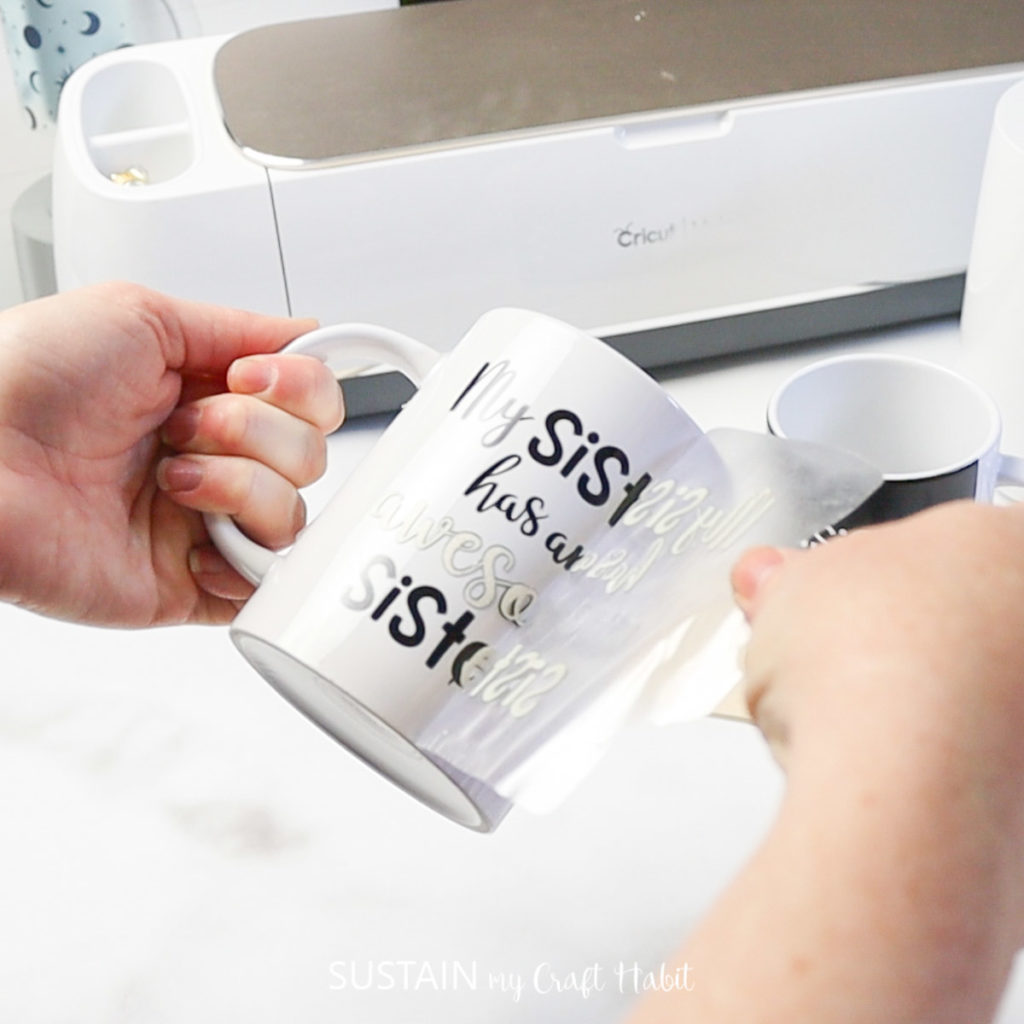
The mugs are so smooth and the designs so crisp and vibrant! It’s a noticeable difference from the premium vinyl cut images we’ve done previously on mugs.


There was a little bit of Infusible Ink material that I didn’t notice under the “e” on the white mug. Don’t make my mistake: I skipped the lint roller step on this mug!
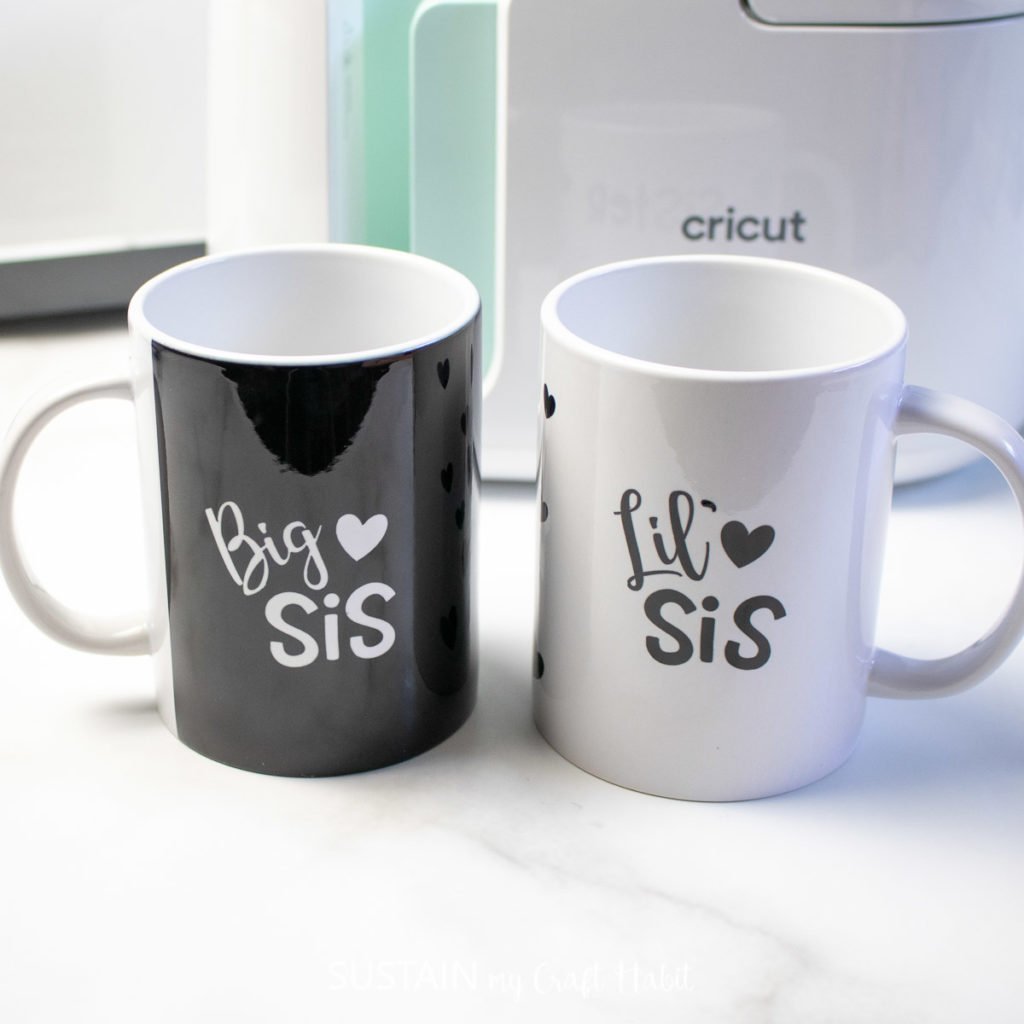

I love the Big sis and Lil sis on the back. You could also put initialls if there are more sisters in the family!
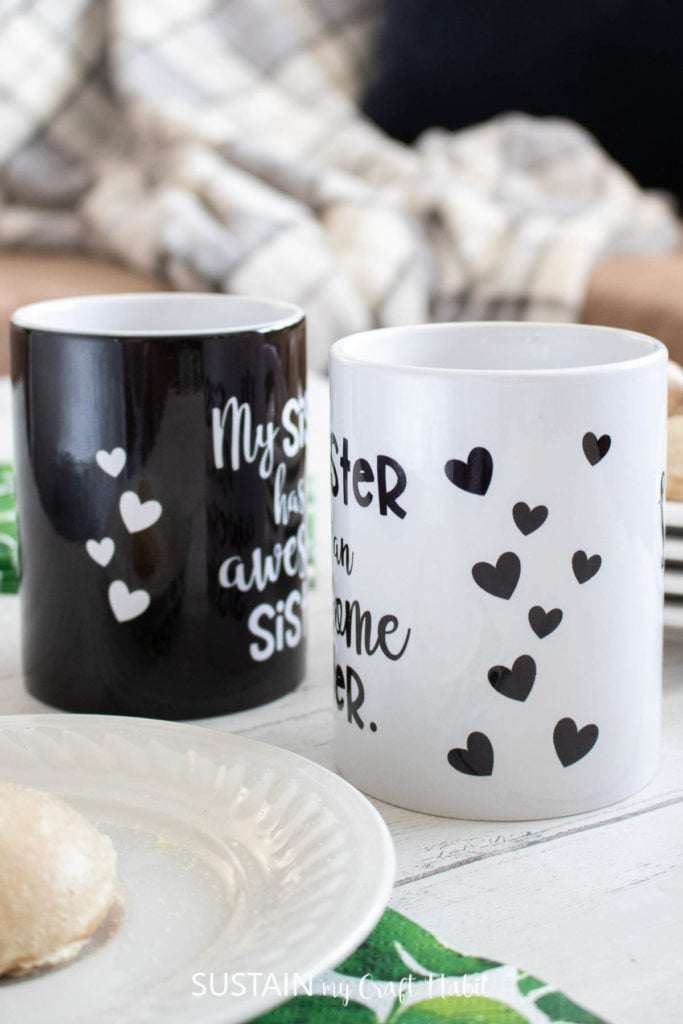

And the hearts are a nice touch for the sides of the mugs which would otherwise be just solid colors.
I hope you’re able to see how simple the new Cricut Mug Press is to use. We’ve added a few of the questions we’ve received so far about using it – be sure to drop yours in the comments below!


Troubleshooting – Answers to Your Q&A’s
Although trying a new product is exciting, it can also be a little nerve wracking so here are a few Q&A’s to help ease the learning process.
How to set up the EasyPress Mug?
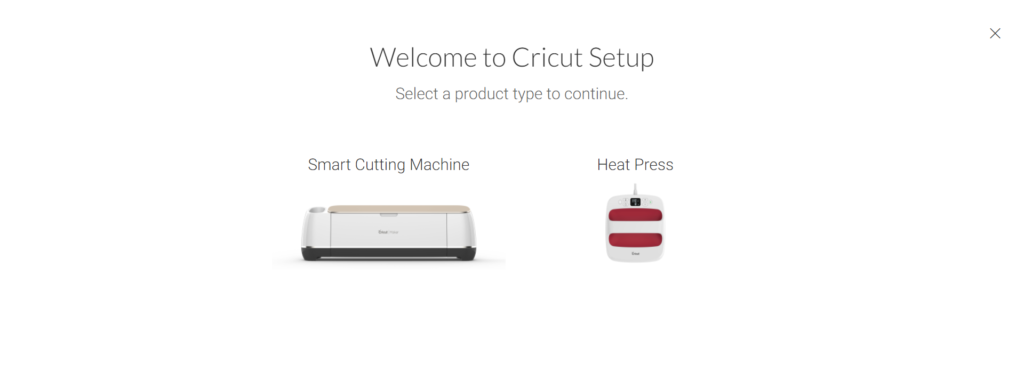
- Click on the 3 horizontal lines in the upper left corner of Design Space and select new machine setup. The Mug Press will be under the Heat Press product type.

Why doesn’t the Maker cut all the way through the liner?
- Adjust the pressure when cutting to “more” instead of the default setting.
How do I avoid unwanted transfers on my mug like blue dots, stray ink and grid lines?
- Most importantly, always use a lint roller on your mug before wrapping the transfer sheet around the mug. This will get rid of any loose particles (not visible to the eye) from getting trapped inside leaving unwanted markings. Additionally, ensure the design is flat against the Cricut blank mug.
What if I want to use my Cricut Infusible ink Pens for the Design?
- Refer to the Cricut Heat Guide for the instructions as there are some important differences in the steps required. We’ll be sharing a tutorial for this soon!
Like it? Pin it for later!